How to Give Devices Access to Your Wi-Fi Network Without Sharing the Password
It’s always annoying when someone asks you for your WiFi password, you might have a private password set up on your WiFi, maybe it’s a complex password and you don’t want to share it with anyone. Maybe you can’t give your password because you don’t want your password to be known by everyone in your street.
Almost everyone secures their WiFi networks with standard WPA2 Passwords these days. After all, you don’t have to worry about who’s connected to your WiFi if it’s password-protected. You will have control over which devices can connect to your WiFi.
However, sometimes your guest visits and they really need the WiFi but you don’t want to give them the actual password of WiFi because it might be something personal or you have that password setup somewhere else as well. In that case, you must be thinking that there has to be a better way. Fear not! we have collected some methods that we personally use to avoid this awkward problem. Simply find out which one suits you the best and try to implement it for your own WiFi.
Method 1: Create a QR Code That Grants Access to Your Wi-Fi Network
A QR code is a matrix barcode capable of housing an impressive amount of information. Creating QR codes is immeasurably easy, and these codes can be used for a plethora of different purposes – encoding and storing the credentials required to connect to your Wi-Fi network included. You can create a QR code that has your Wi-Fi network’s SSID (Service Set Identifier) and password embedded into it, and devices can then connect to your Wi-Fi network by simply scanning the QR code.
Note: Not every device is capable of scanning and reading QR codes out of the box. The stock Camera app on all iOS devices can scan and interpret QR codes on its own. However, Android devices will need to have a barcode scanner app (Barcode Scanner by the ZXing Team or something similar should work fine) installed to read the QR code and connect to your Wi-Fi network.
To create a QR code that grants access to your Wi-Fi network, you need to:
- On an internet browser of your choice, make your way to this QR code generator designed specifically to create QR codes for Wi-Fi networks.
- In the SSID field, type in the display name of your wireless network. This is the same name your Wi-Fi network appears under when a nearby device searches for available Wi-Fi networks. Please make sure you type in your network’s display name exactly as it is, taking special care of uppercase/lowercase characters.
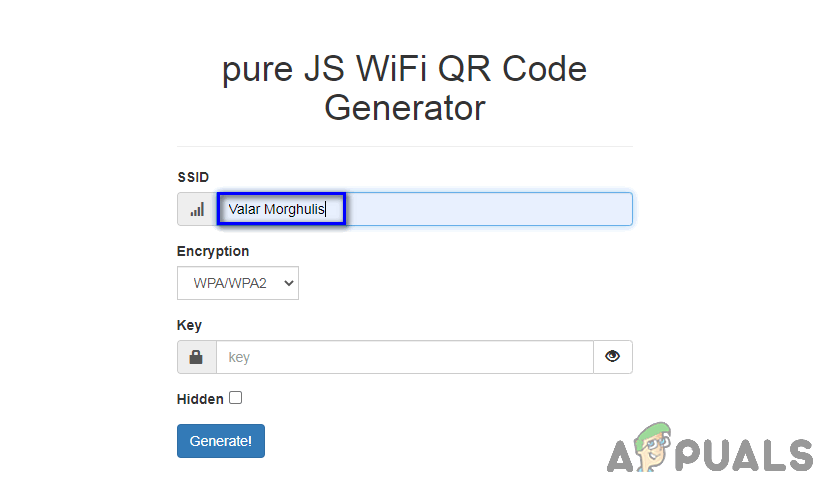
Type your Wi-Fi network’s display name into the SSID field - Open the dropdown menu under the Encryption option and click on the type of encryption your Wi-Fi network uses to select it. Most wireless networks use the WPA/WPA2 encryption type.
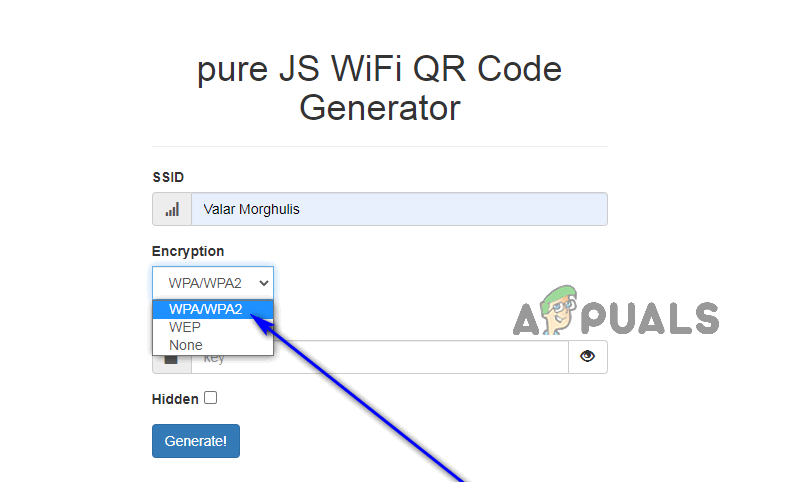
Select your Wi-Fi network’s encryption type - Type your Wi-Fi network’s password into the Key field.
- If you have configured your Wi-Fi router to not broadcast your network’s SSID, check the checkbox next to the Hidden option. If you have not hidden your Wi-Fi network’s SSID, skip this step.
- Click on Generate. The utility will create a QR code with all of the details required to connect to your Wi-Fi network embedded into it, and then display the QR code to you.
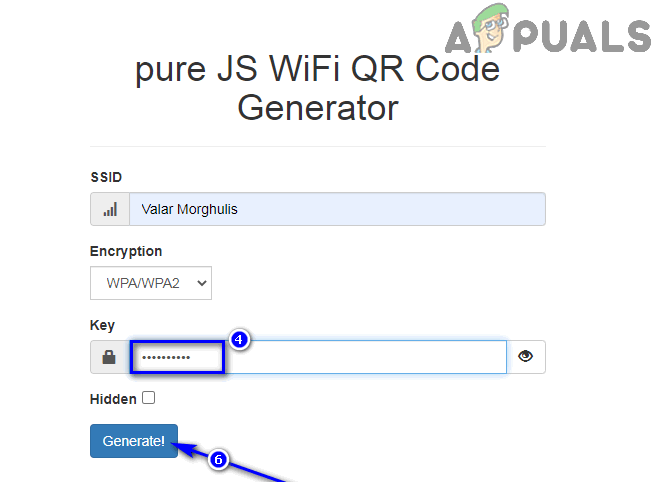
Type your Wi-Fi password into the Key field and click on Generate - Click on Export. The generated QR code will be downloaded to your device in PNG format.
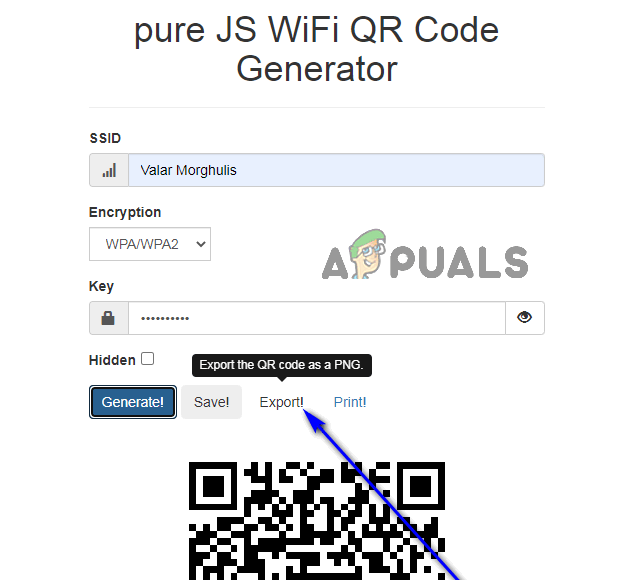
Click on Export to download the QR code in PNG format
Once you have the QR code on your device, you can simply pull it up for your guests to scan when the need arises, or print it out and place it somewhere in your house where guests can easily get to it. Scanning the QR code will result in a device giving its user the option to immediately connect to your Wi-Fi network.

There is no way for your actual Wi-Fi password to be extrapolated from the QR code, so you do not risk unwittingly revealing the password to anyone by using this method. That being the case, this is a completely secure way to share access to your Wi-Fi network.
Method 2: Use the Share Your Wi-Fi Feature on iOS and macOS Devices
Everyone’s favorite device manufacturer Apple saw exactly how tedious sharing access to your Wi-Fi network can be, and realized that a throbbing need to simplify this process exists. And with the release of iOS 11 and macOS High Sierra, that is exactly what Apple did by introducing the Share Your Wi-Fi feature. This handy feature allows you to grant any iOS/macOS device access to your Wi-Fi network with one tap on your own iOS device or one click on your Mac – no clunky passwords or loud dictation involved. Here’s how you can use the Share Your Wi-Fi feature:
Note: Both your device and the device that you want to connect to your Wi-Fi network must be running on iOS 11 (or later) or macOS High Sierra (or later). Furthermore, the other device must be in your Contacts for this to work.
- Make sure that your iPhone, iPad, iPod, or Mac is unlocked and connected to the Wi-Fi network you want to share access to.
- On the other device, navigate to Settings > Wi-Fi, and tap on your Wi-Fi network under Choose a Network…. If the other device is a Mac, open the Wi-Fi popup menu in Mac’s Menu bar, and click on the name of your Wi-Fi network. Also, make sure that the other device is physically near the device you’re using to share access to your Wi-Fi network.
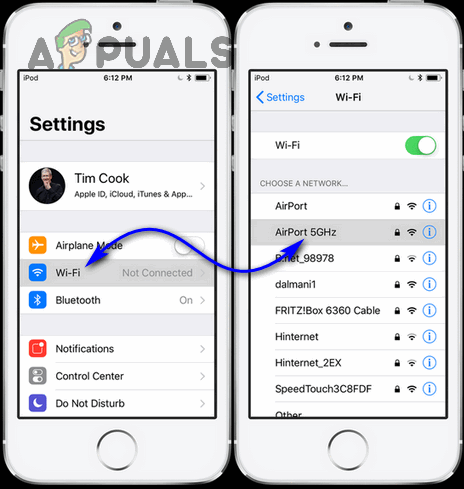
Navigate to Settings > Wi-Fi and tap on your Wi-Fi network - On the other device, you will see the standard prompt asking for your Wi-Fi network’s password. On your device, however, you will see a Share Your Wi-Fi or Wi-Fi Password popup (or a Wi-Fi Password notification if you’re using a Mac), asking you if you’d like to share the password to your Wi-Fi network with the other device.
- Tap on Share Password or Send Password (or click on Share if you’re using a Mac).
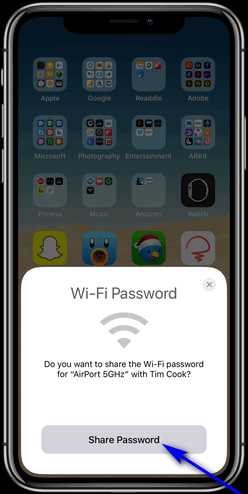
Tap on Share Password or Send Password on your iPhone, iPod, or iPad 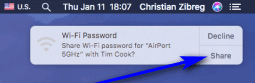
Click on Share on your Mac - Your Wi-Fi password will be shared with the other device and it will be connected to your network. Tap on Done to dismiss the popup.
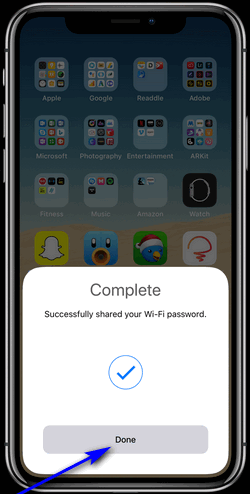
Tap on Done to dismiss the popup
When you use the Share Your Wi-Fi feature, your device uses 256-bit AES encryption to encrypt your Wi-Fi password and sends it securely over the air to the other device, where it is decrypted and used to connect to your network without the actual password having to be typed in anywhere. If you’re wondering how secure the entire procedure actually is, rest assured – it’s air-tight and fool-proof. Even if the connecting device has an iCloud keychain enabled, requesting the password in the iCloud Keychain app on a Mac will reveal an alphanumeric string of characters that is absolutely meaningless. You see, it is a hashed version of your Wi-Fi password that’s stored on connecting devices, which cannot be translated into the actual password in any way.


The WiFi password is readable if you use a QR code scanner which shows the raw data. It’s not encrypted in the QR code, so can be read.