6 Easy Ways to Fix Fortnite Stuck on Loading Screen [Ch5 S3]
- Verify the status of Fortnite servers via the Epic Games server status website to ensure there are no outages causing the loading screen issue.
- Restart the game to potentially connect to a less crowded server, which often resolves the loading screen problem.
- Run Fortnite as an administrator to bypass permission conflicts and update your graphics card drivers using GeForce Experience or AMD Software to fix any driver-related issues.
If you’ve been playing Fortnite for a while, you’ve likely encountered the frustrating issue of getting stuck on the loading screen. This issue typically occurs after an update, especially during new seasons when many players are trying to log in simultaneously, causing server response issues. In this article, we’ll explore six easy ways to help you fix the Fortnite loading screen stuck issue.
Table of Contents
How To Fix Fortnite Loading Screen Stuck
There are several ways to fix the Fortnite loading screen issue and to keep things simple, we’ll start with the solutions that won’t have you scratching your head.
1. Check For Server Issues
Start by checking the Fortnite servers to see if any outages or maintenance updates could be causing the issue. You can get updates on server-related issues by visiting the official Epic Games server status website. Here, you will find the status for various services like Game Services, Matchmaking, Login, and more. Each of these should have a green “Operational” status next to them.
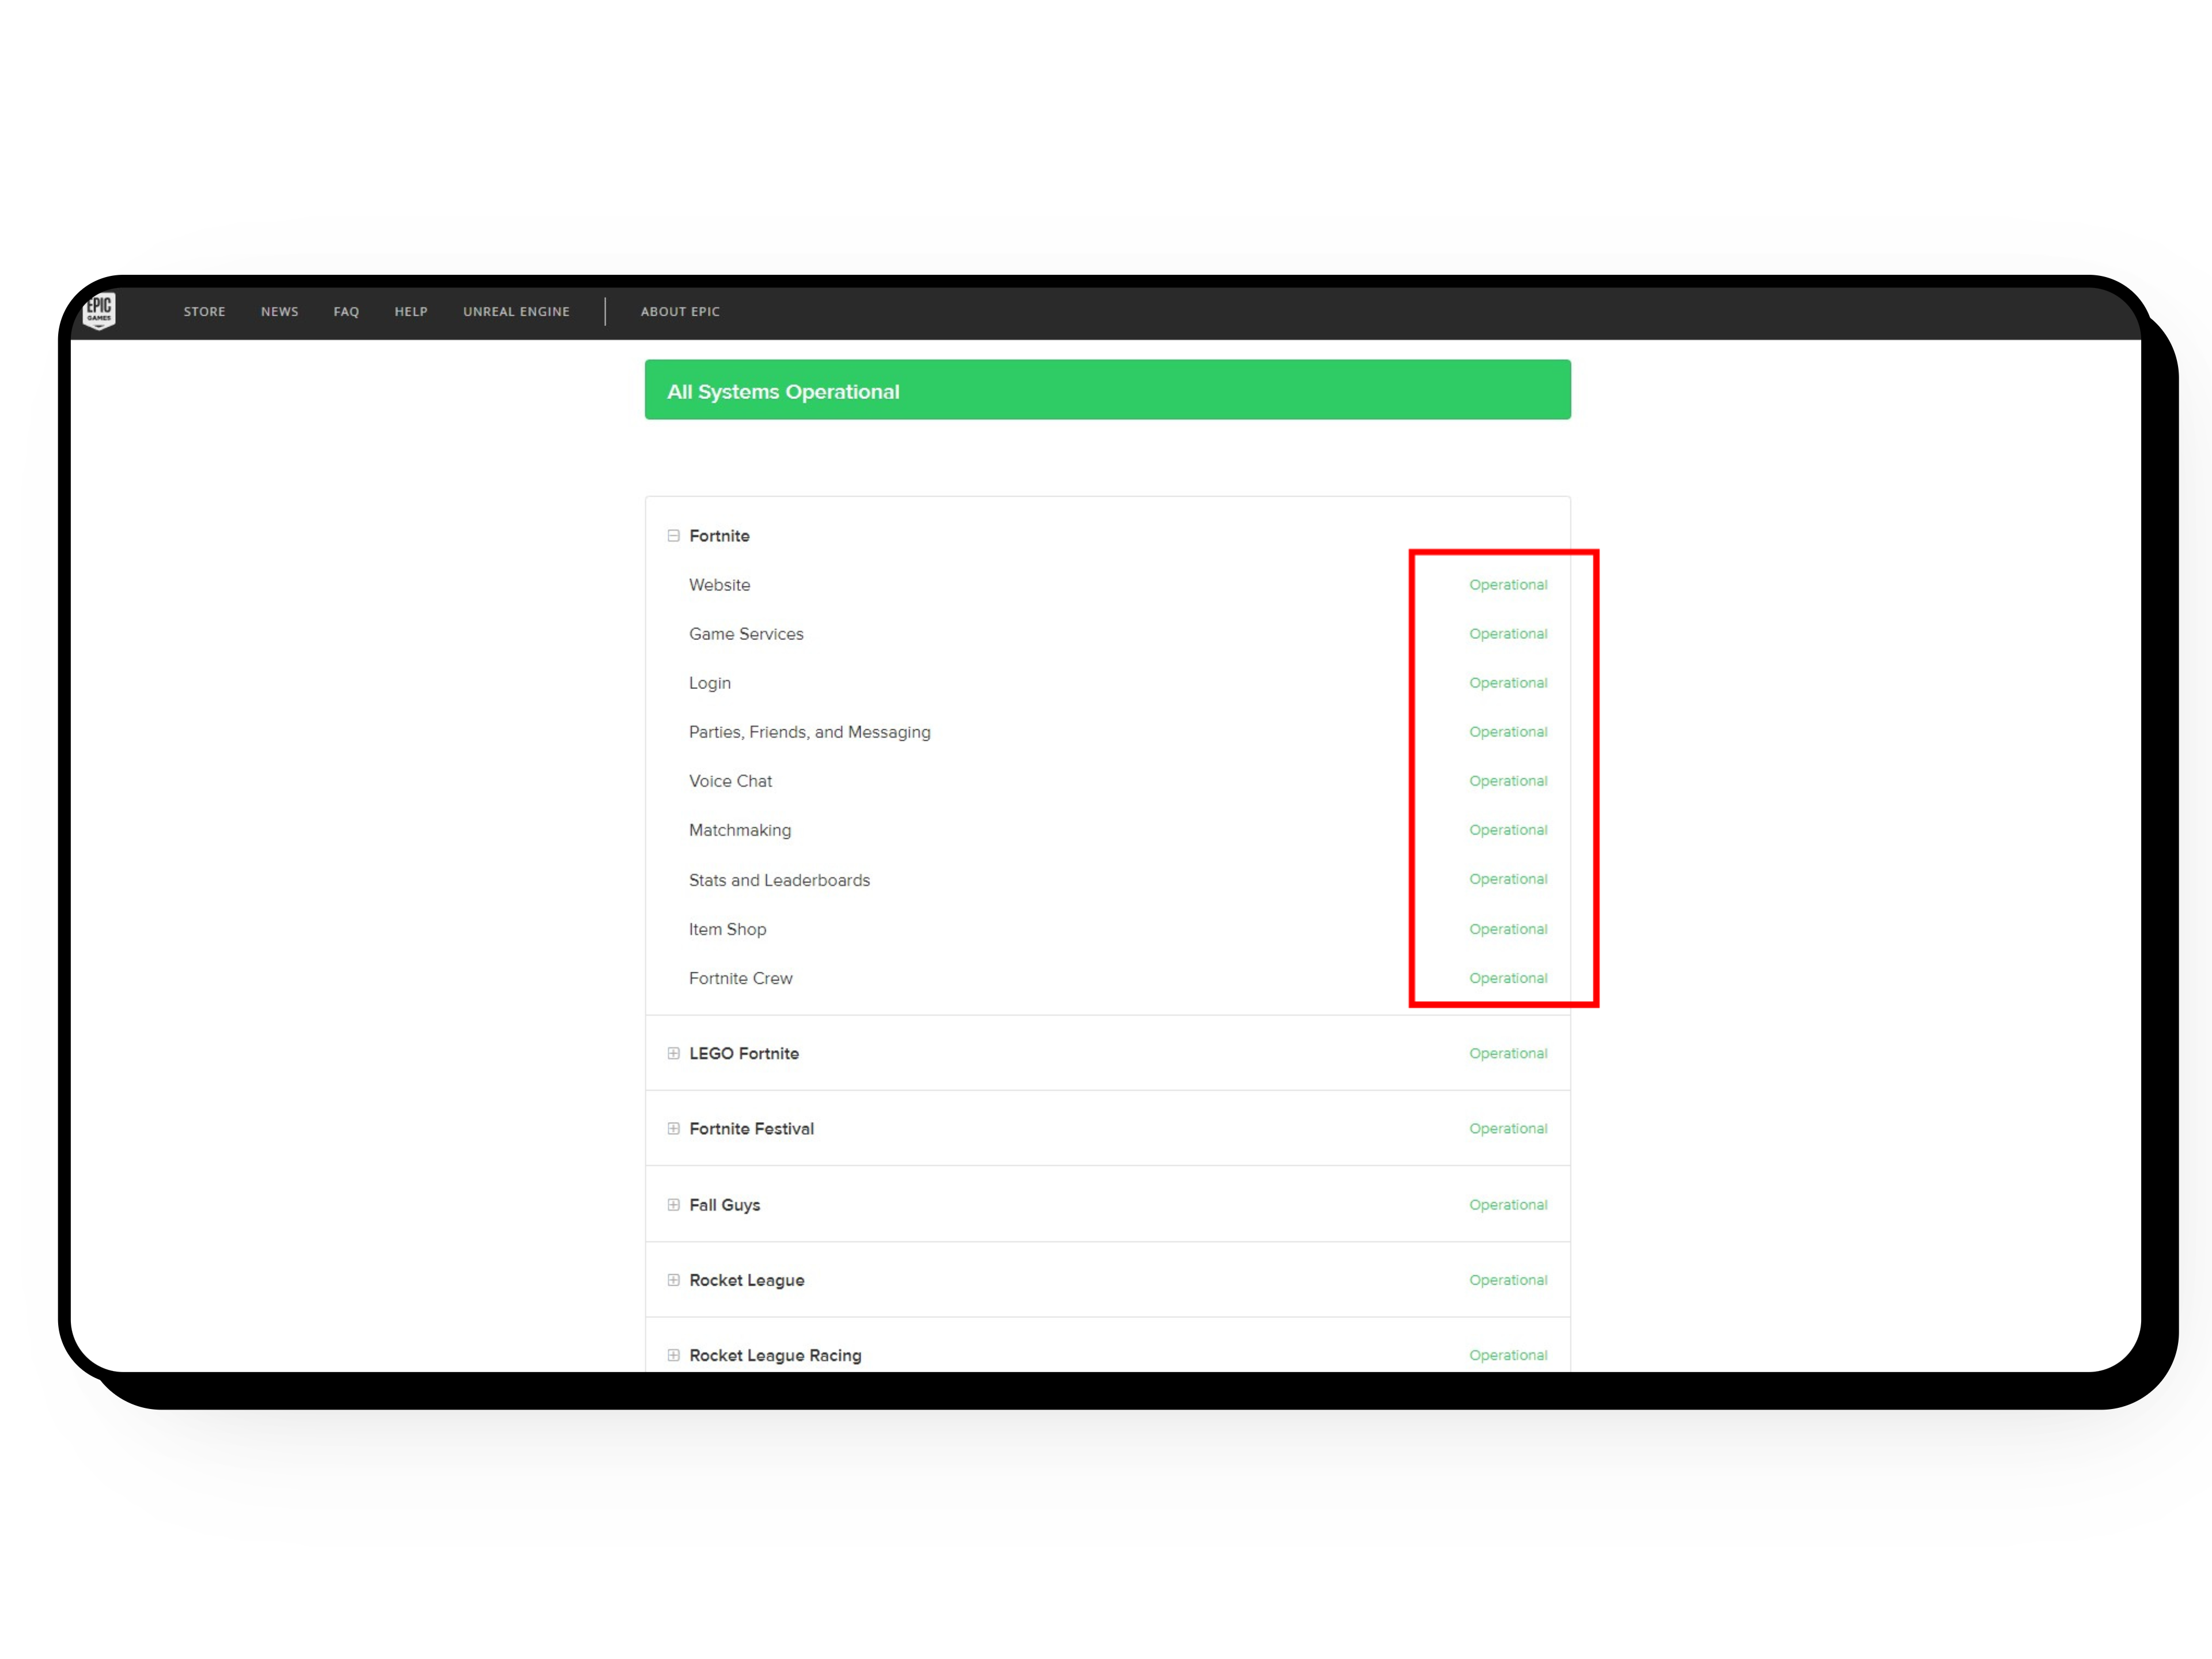
If not, it means the servers are down, and there’s not much you can do apart from waiting for Epic Games to fix their servers. 9 out of 10 times, when Fortnite is stuck on the loading screen, it’s due to a server backend issue, and the best thing you can do is wait patiently for Epic Games to resolve it.
READ MORE: 10 Ways to Fix Fortnite Stuck on “Checking for Updates” [2024] ➜
2. Restart Fortnite
If the servers seem to be working fine, the issue might be on your end. In that case, the first thing to do is restart Fortnite. It might sound simple, but the classic “turn it off and back on again” method is often effective and can resolve many issues. Since an overloaded server is a common cause, restarting your game can help log you into a less crowded server with more available space.
3. Run the Game as an Administrator
If the issue persists even after restarting Fortnite, the next step is to run the game as an administrator. Running the game with administrative privileges can help bypass certain restrictions or permission conflicts, ensuring that Fortnite has full access to all the necessary files and resources it needs to function properly. Here’s how you can run the game as an administrator:
- From the desktop screen, right-click on the Epic Games launcher shortcut and select Properties.
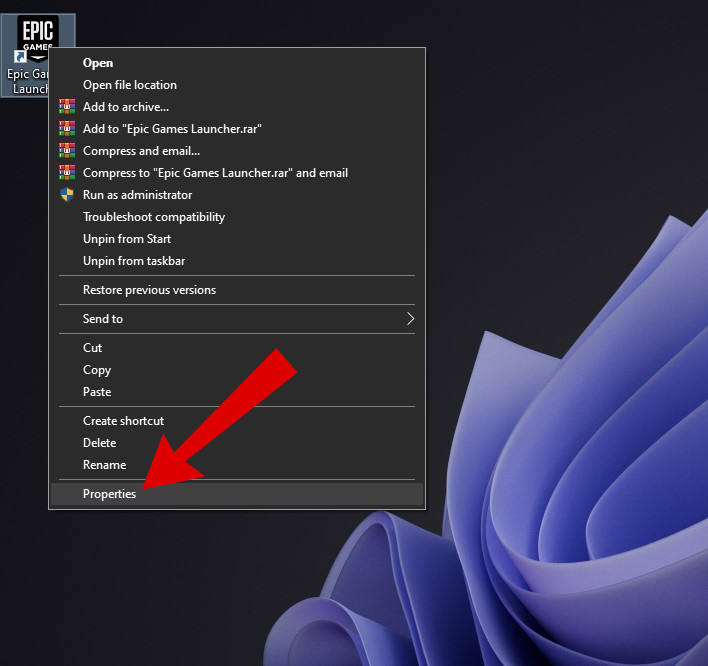
Select Properties - Once the pop-up menu opens, head to the Compatibility tab. Under the Settings section, check the box next to the “Run this program as an administrator” option.
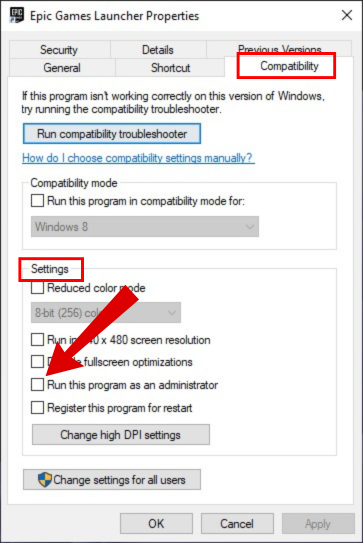
Check this box - Finally, click on the OK button and press Apply to confirm your changes.
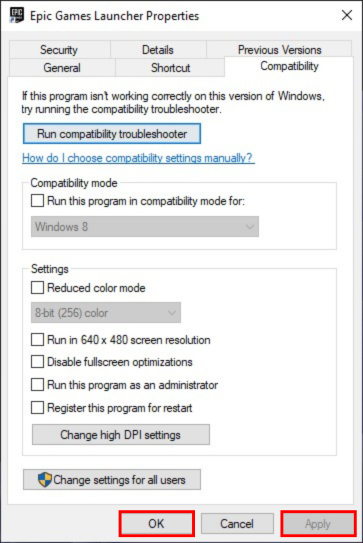
Confirm your changes
Now launch your game through the Epic Games launcher as you normally would, and this time the game will run with administrative privileges, potentially fixing the loading screen issue.
4. Update Your Graphics Card Drivers
If your game is still stuck on the loading screen, the next possible fix is updating your graphics card drivers. Despite sounding complicated, updating your graphics card isn’t difficult and can resolve issues caused by outdated or corrupted drivers.
To update your graphics card driver, simply open your card’s respective software. For NVIDIA GPUs, use the GeForce Experience software, and for AMD GPUs, use the AMD Software. Here’s how to update your graphics card driver on both AMD and NVIDIA:
↪ Updating NVIDIA Graphics Card
Before you begin updating Nvidia graphics card drivers, ensure that you have the dedicated GeForce Experience software installed on your computer. If you don’t have it, visit the GeForce Experience section on the Nvidia website, click the download button, follow the prompts, and install it. Once the software is installed, you can move to updating your graphics card by following these steps:
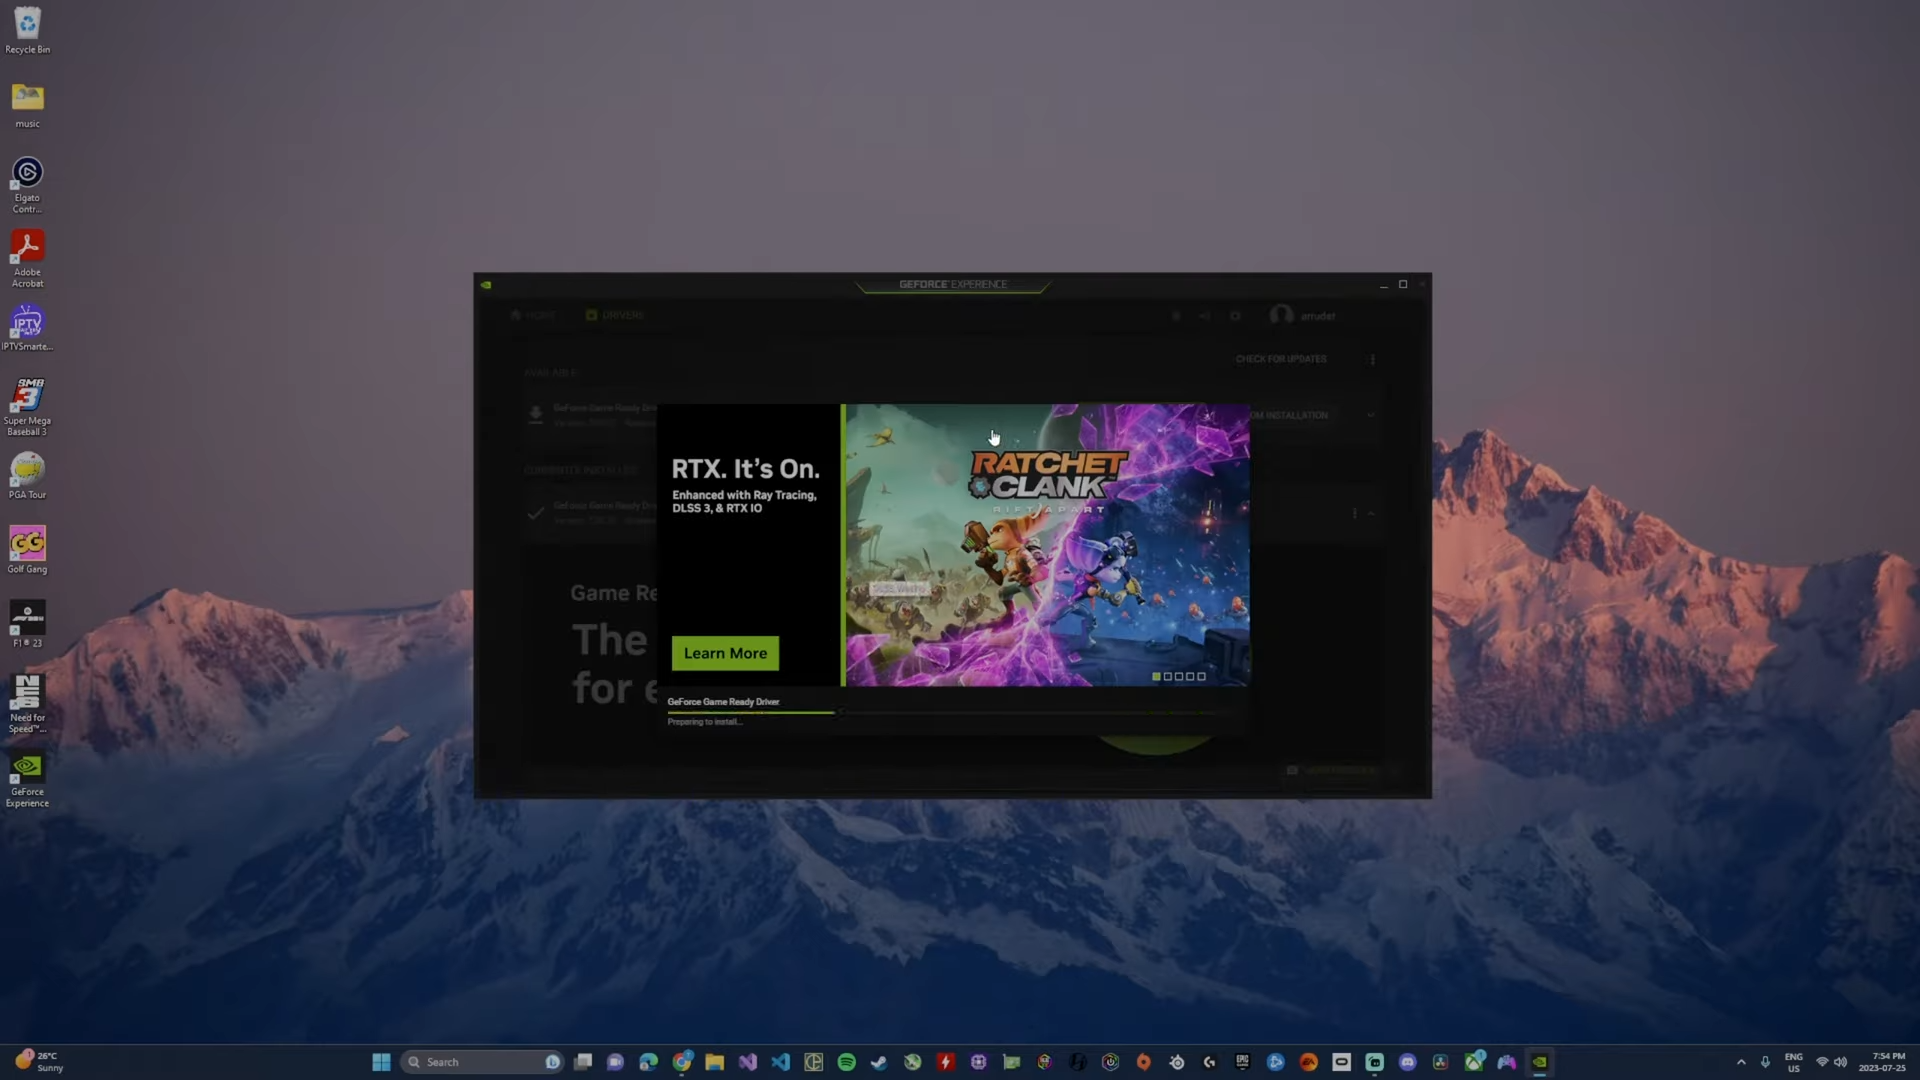
- Open up the GeForce experience software and head to the Drivers tab in the top right corner.
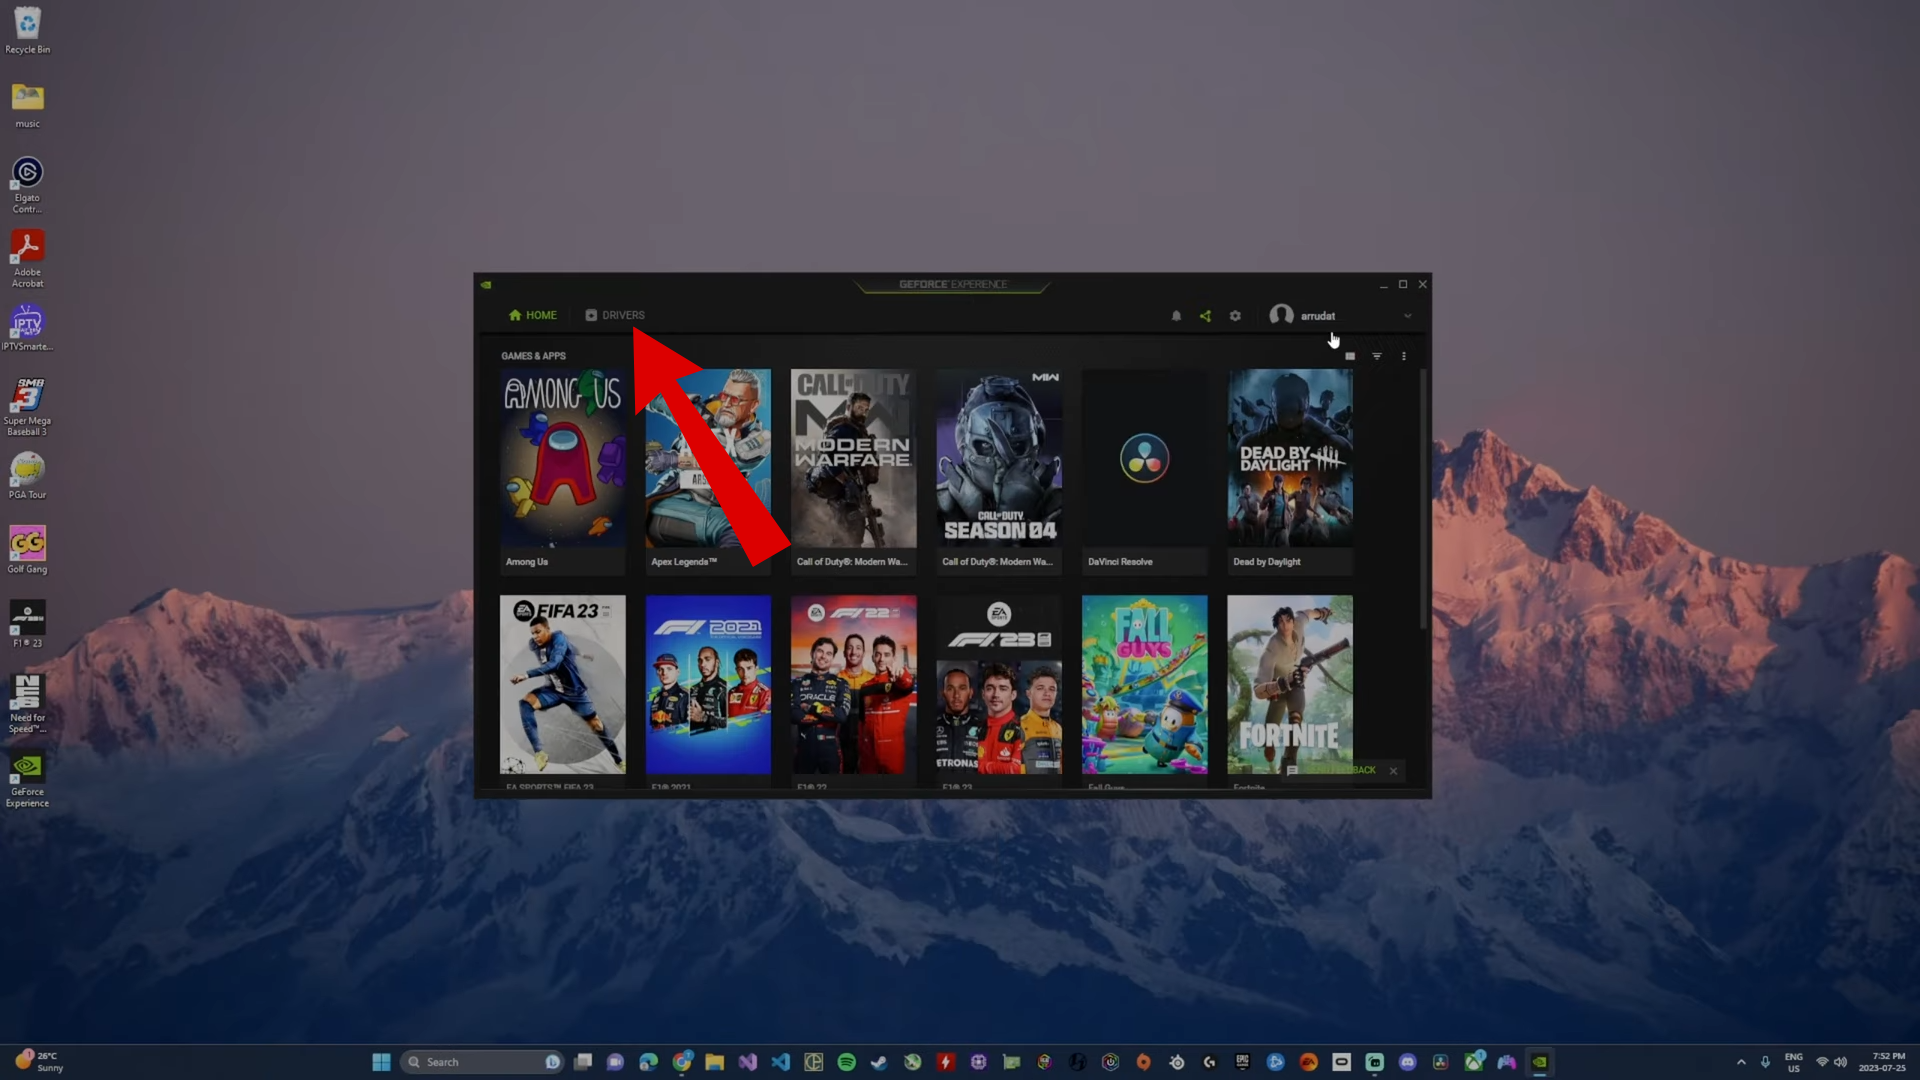
Head to the drivers tab - From here, click on the “Check For Updates” button. If there’s a pending update available, you can skip this step.
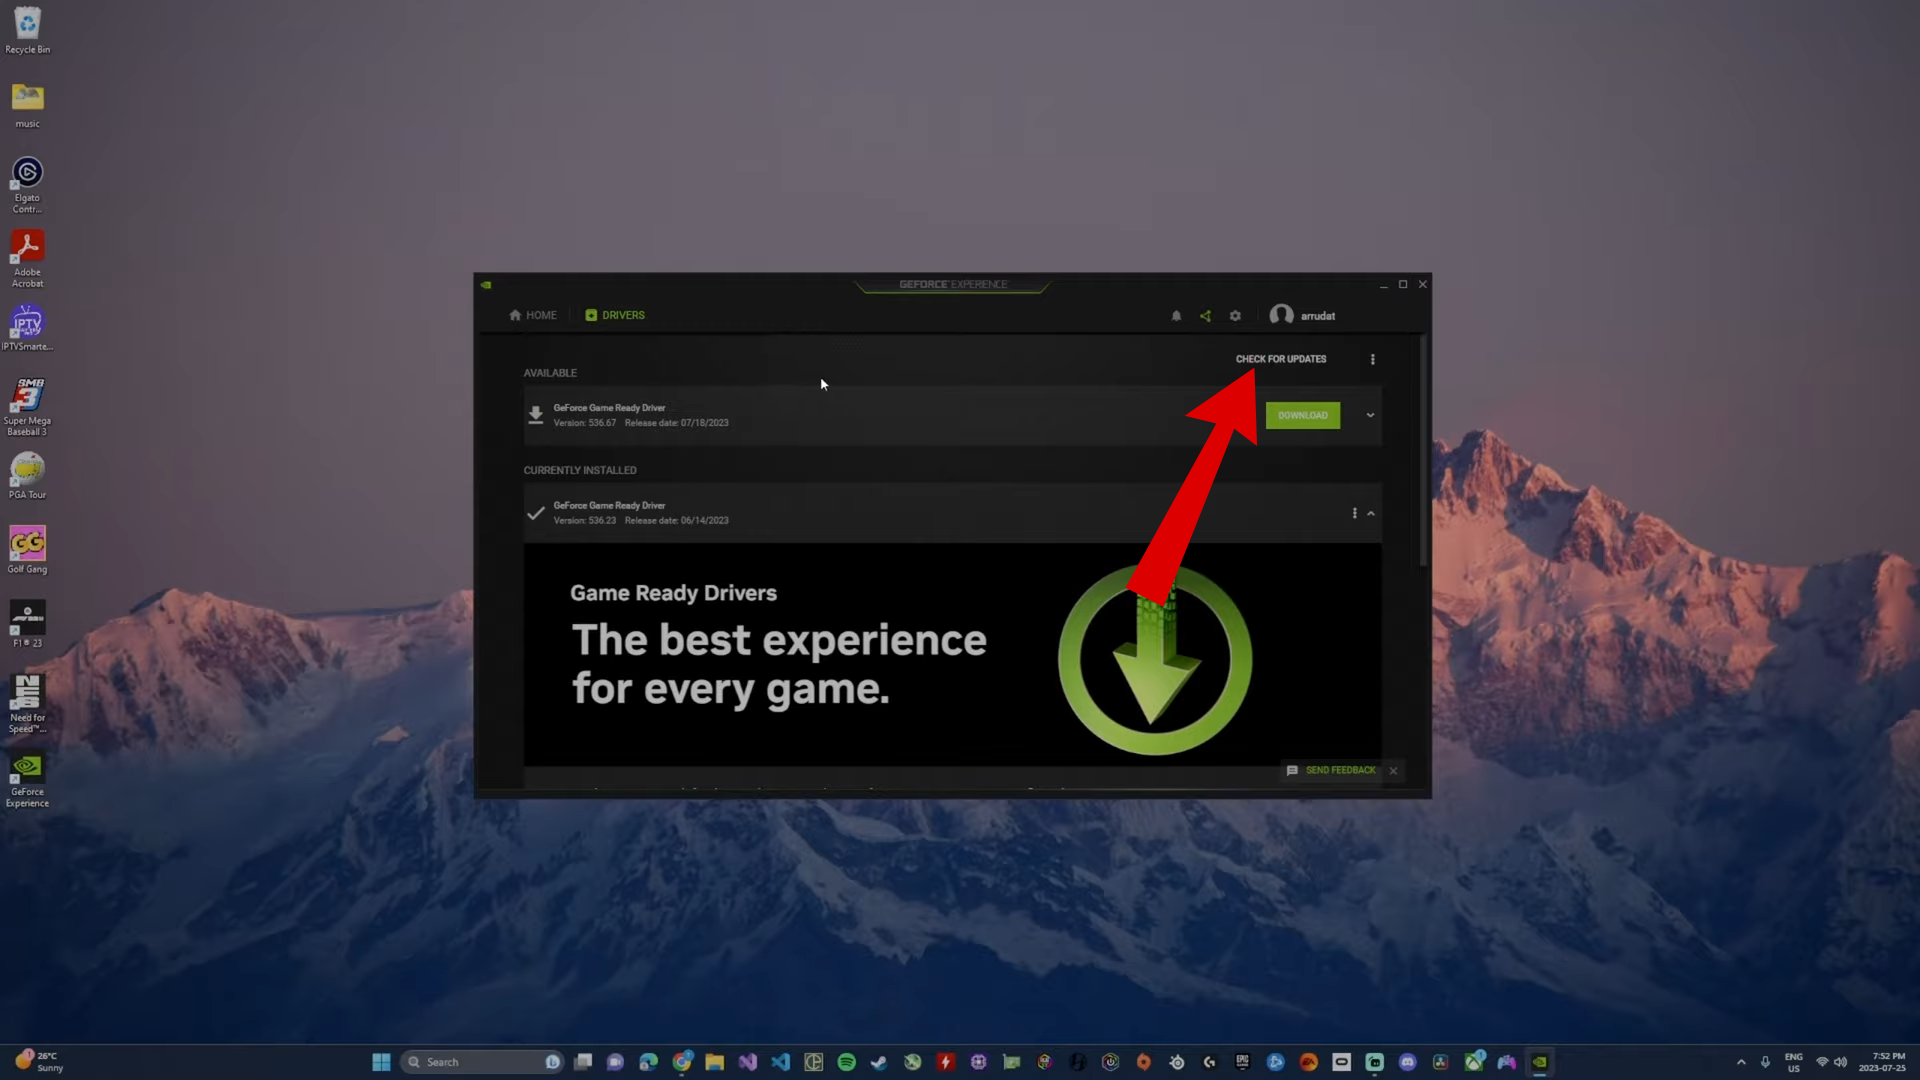
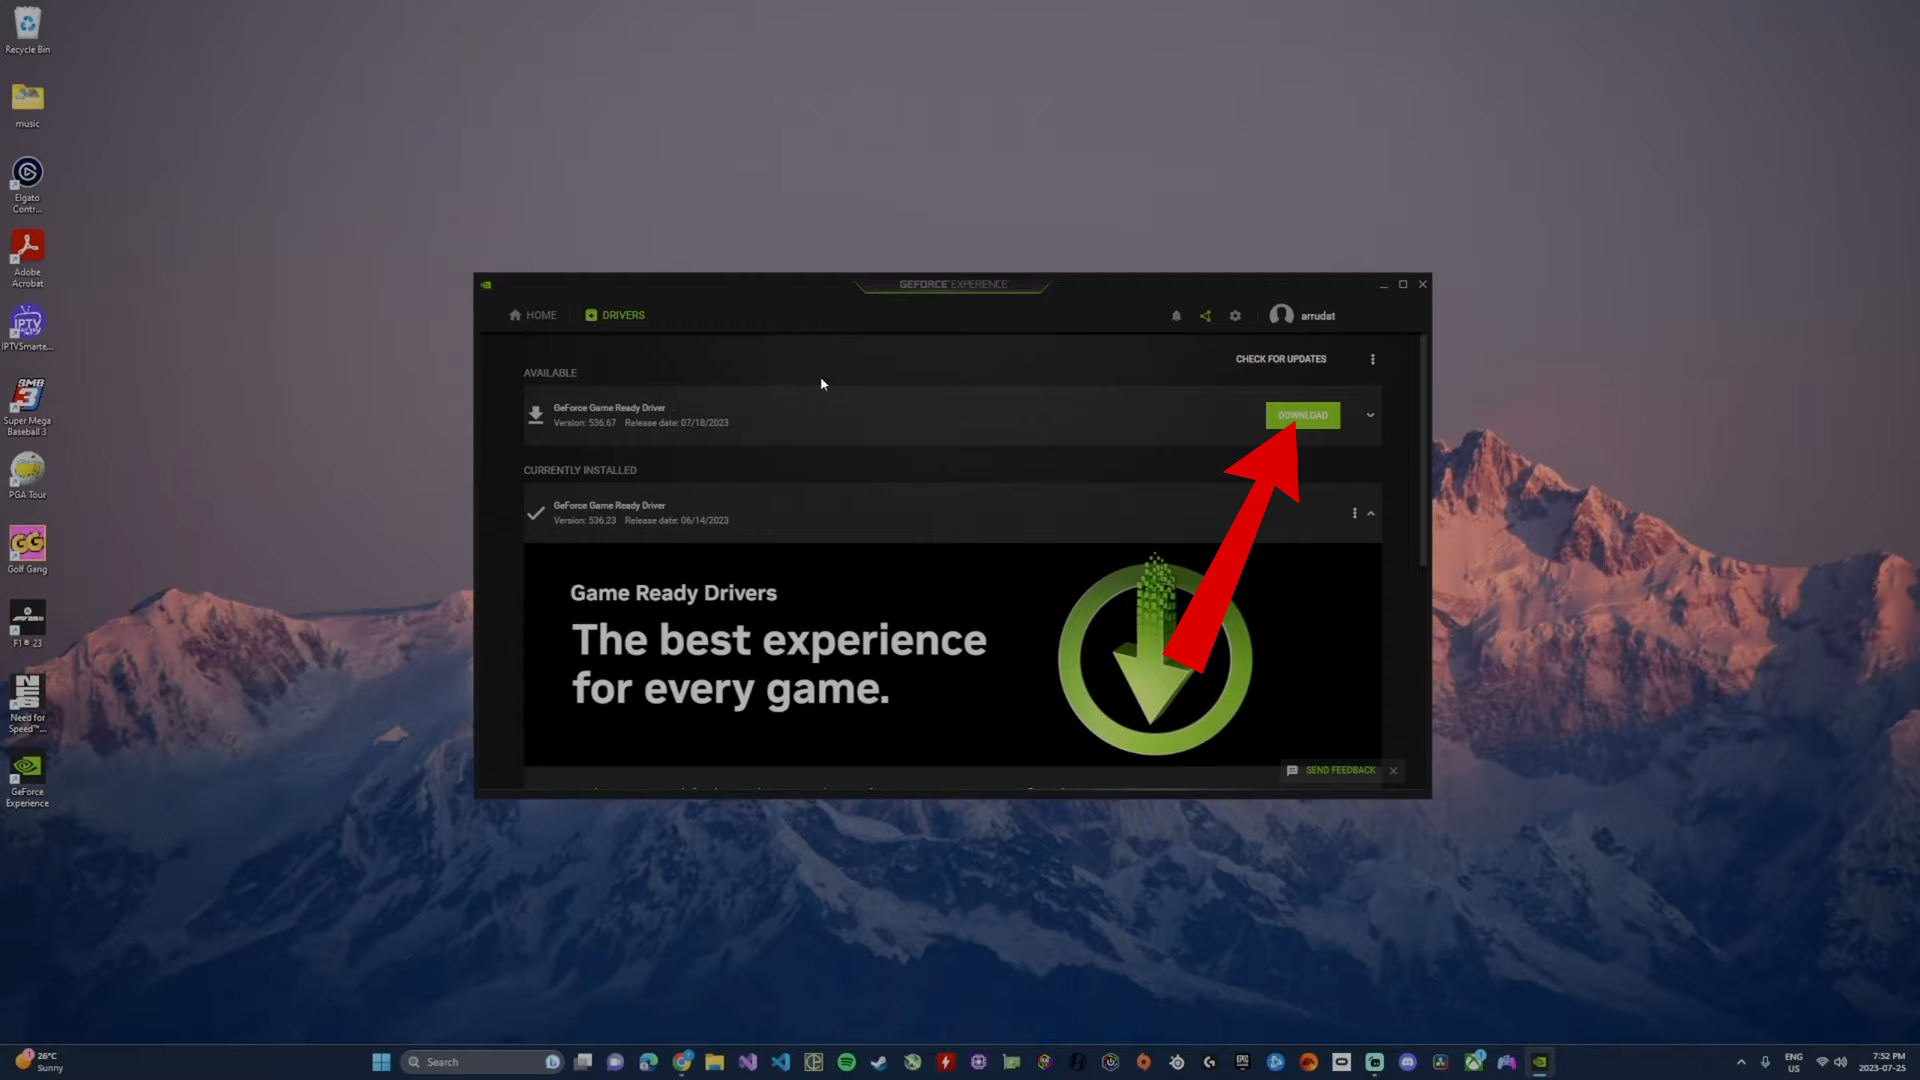
Check for updates - Once you have an update ready to be installed, click the “Download” button next to it.
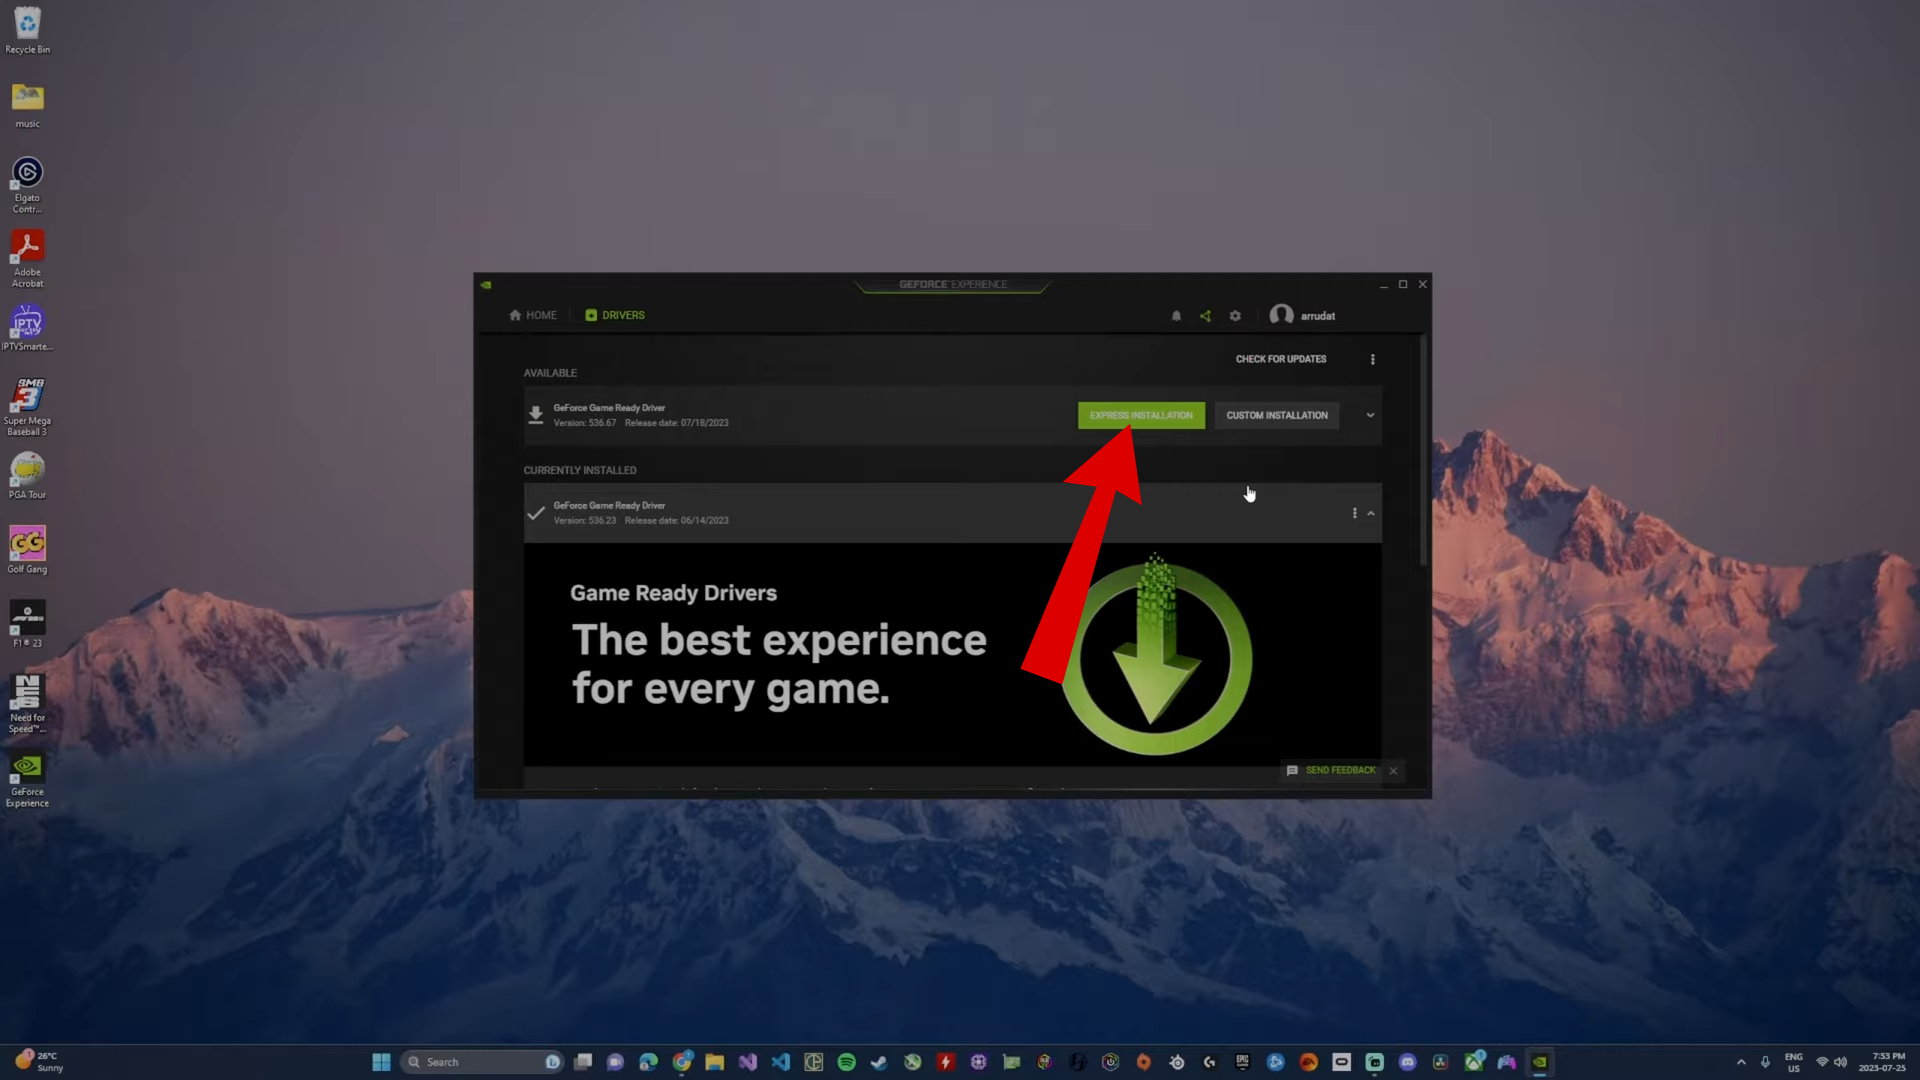
Click on Download - Once it’s downloaded, you’ll have to choose your installation type. The most preferred option is “Express Installation.” However, if you want to customize and possibly remove certain, you can select “Custom installation.”Once you have selected your preferred installation option, click the “Install” button.
Stick with Express Installation - The driver will start updating which shouldn’t take more than a few minutes.
Wait for a few minutes - Once the driver is done updating, restart your PC.
Screenshots taken from Tech With Tyler
↪ Updating AMD Graphics Card
Similar to Nvidia, AMD also has its driver management software called “AMD Software: Adrenaline Edition.” The software will come preinstalled when you download your graphics card drivers for the first time. Here’s how to update your graphic card drivers using the AMD software:
- Open up the AMD software and head to the Driver & Software section on the left side. Here, click on the “Check for Updates” button. If you already have an update lined up, this option will not be available.
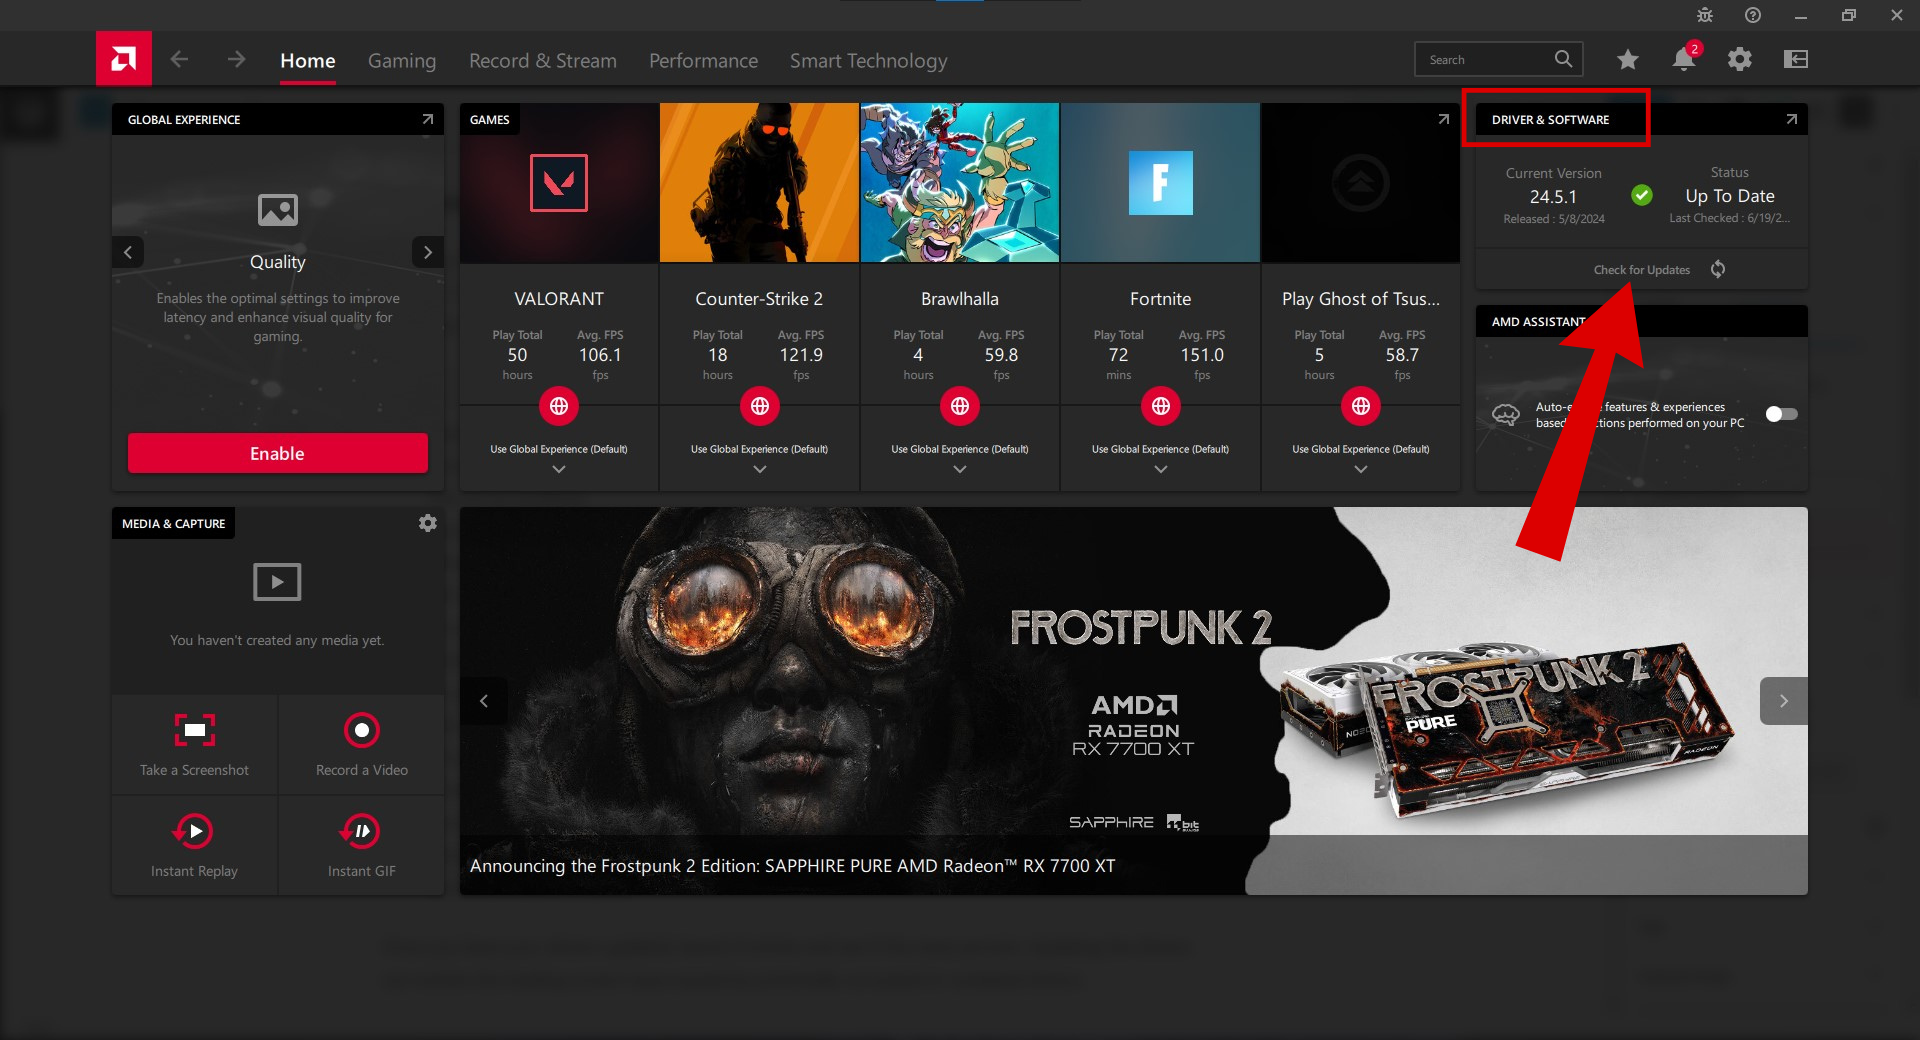
Check for updates - Next, press the Download button to begin updating your drivers.
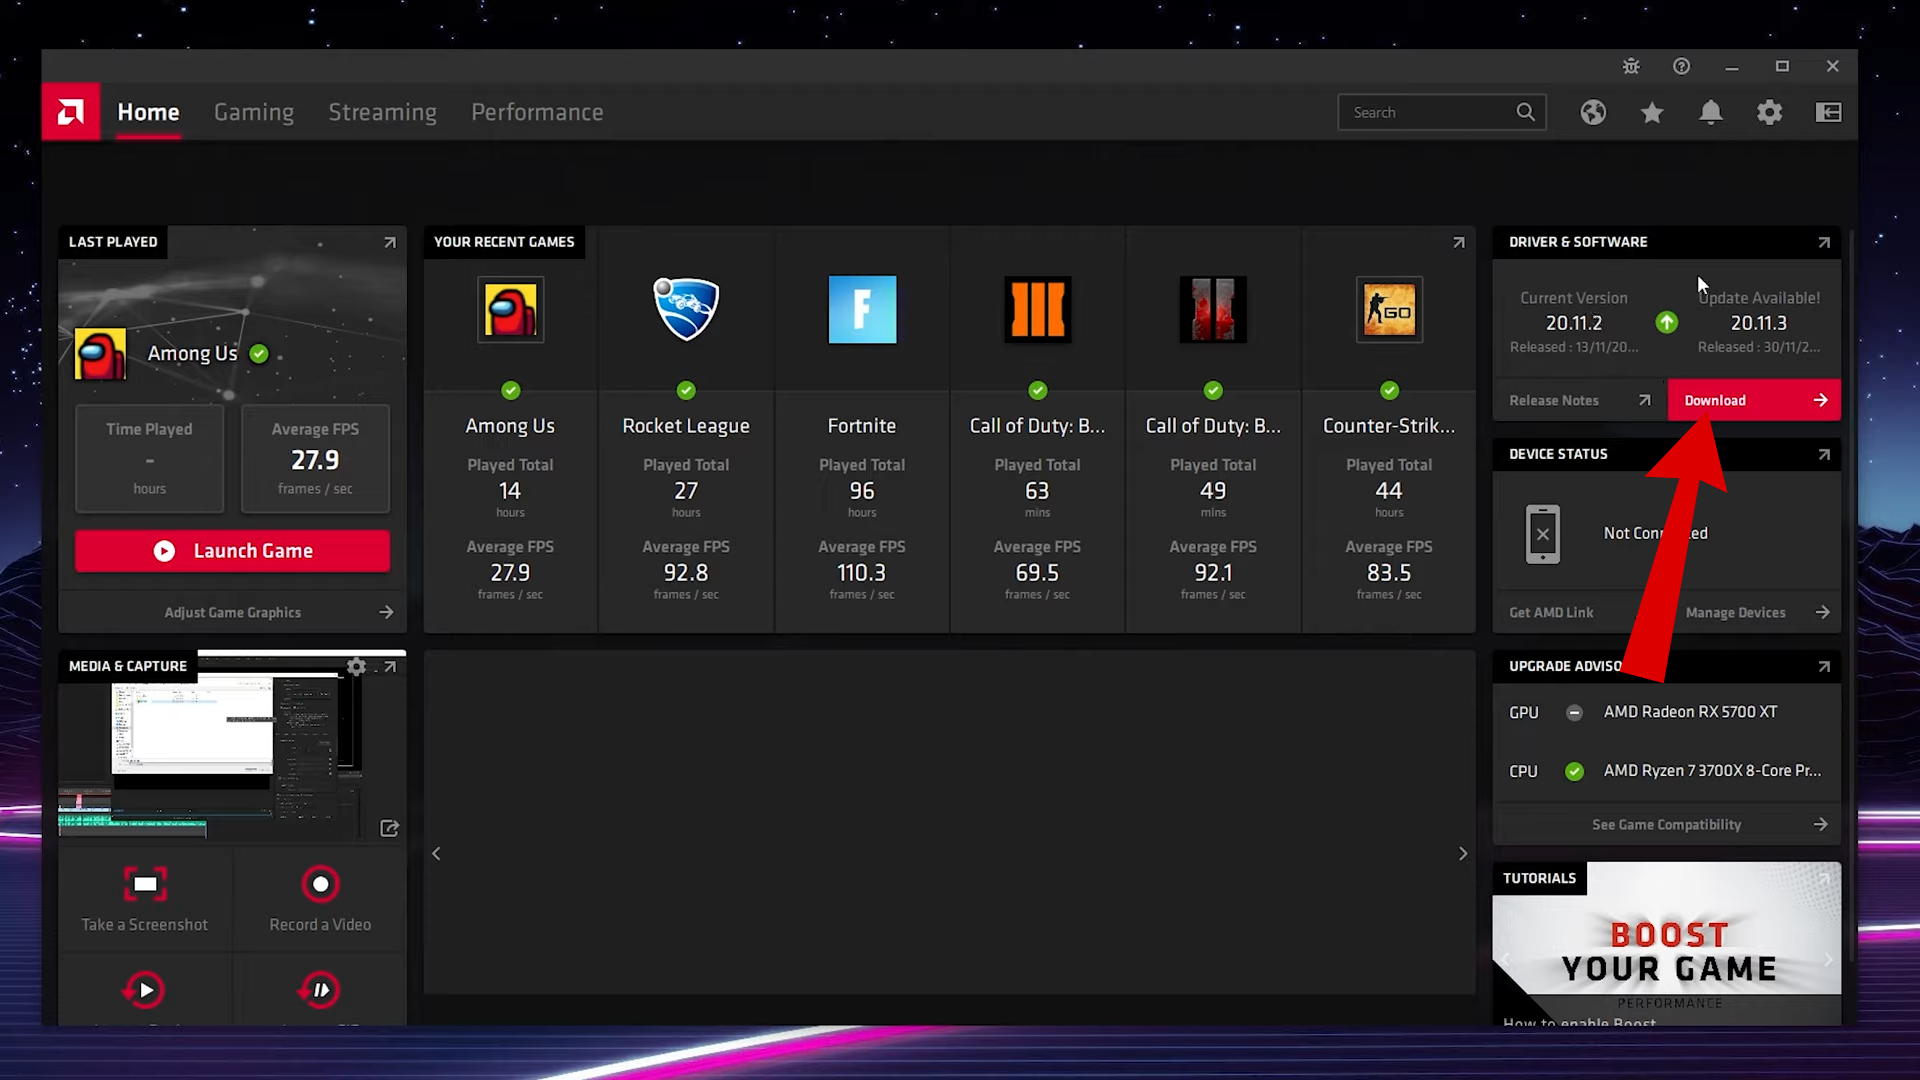
Press Download - When you hit the Download button, a progress bar should appear along with the remaining time it will take.
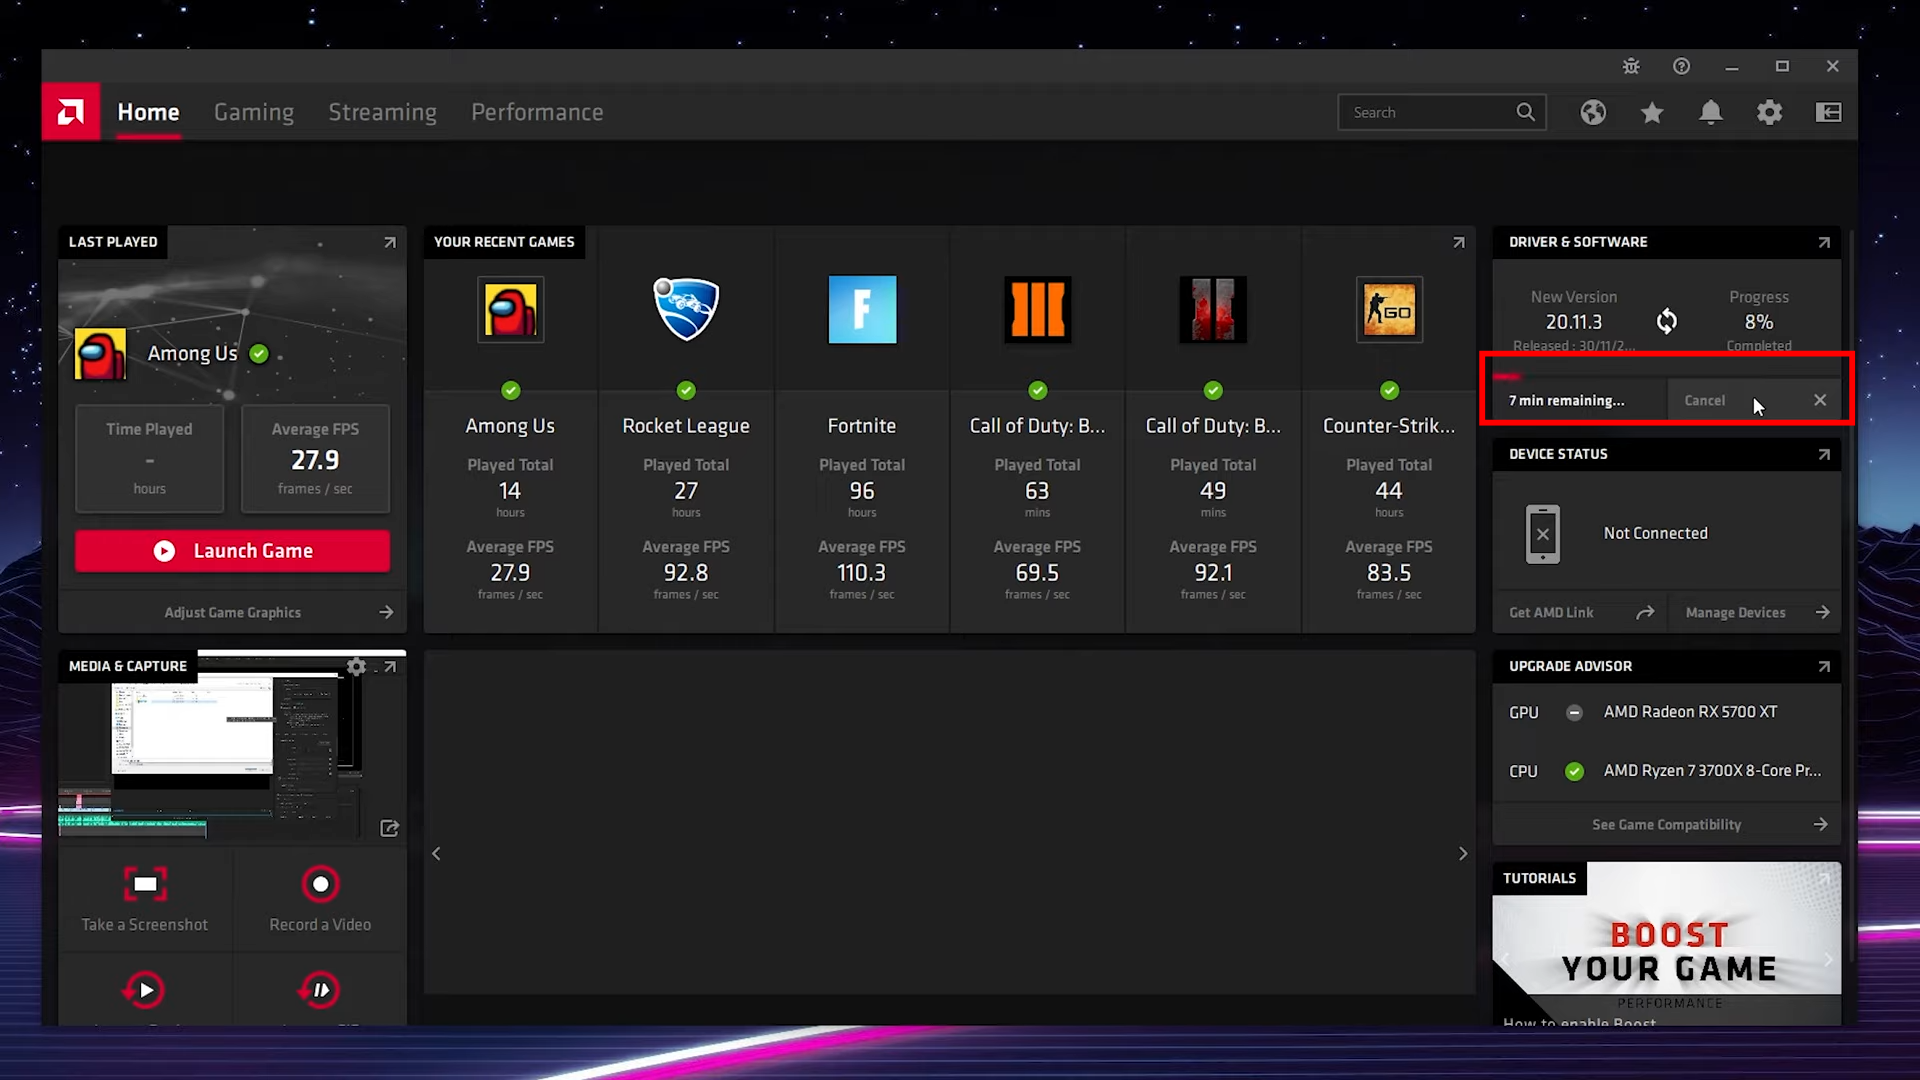
Wait it out - Once that’s finished, the Download button will now change to an Install button. Simply click on it to install updated drivers.

Click Download - An installation menu should open up. Ignore things like Additional Options and Factory reset as that will only complicate things for you. Simply press Install.
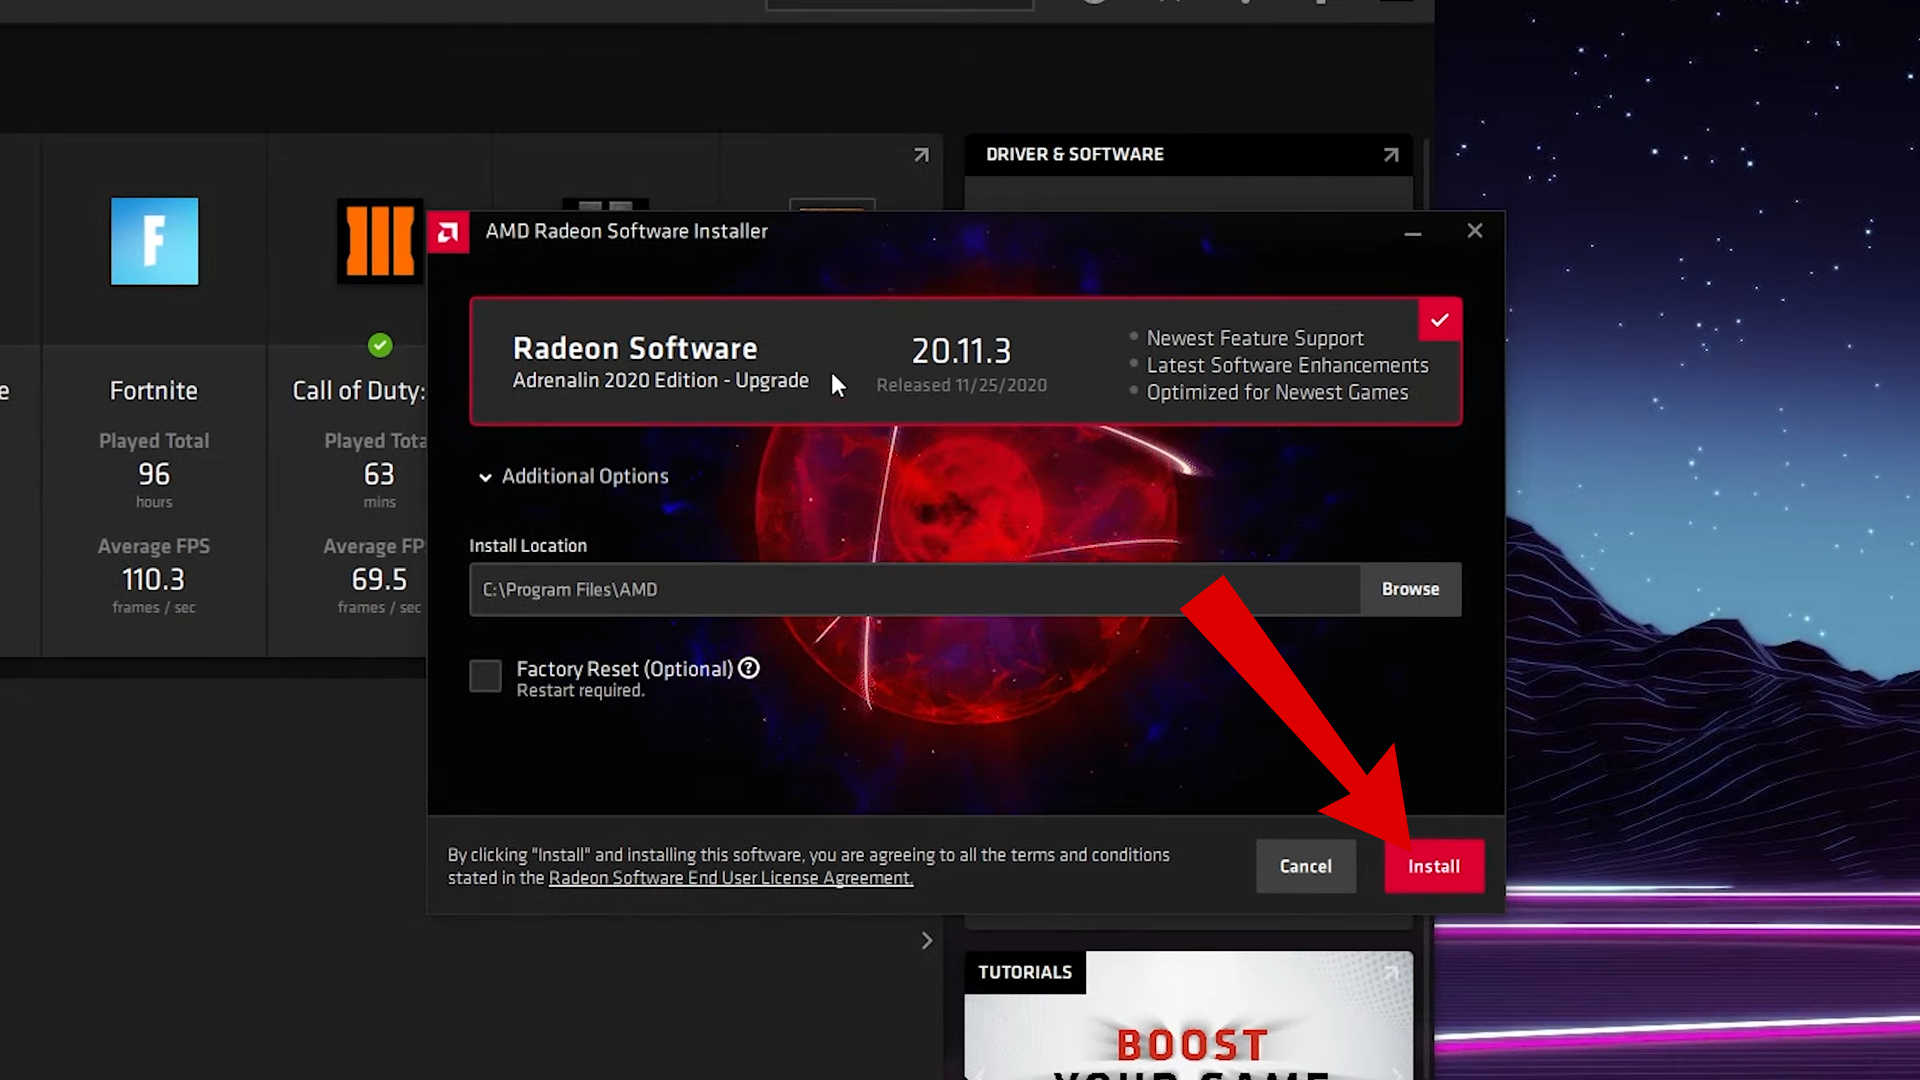
Press Install - The update should start installing which will take only a couple of minutes. During the process, your screen might flicker or go black a few times, which is completely normal and there’s nothing to worry about.
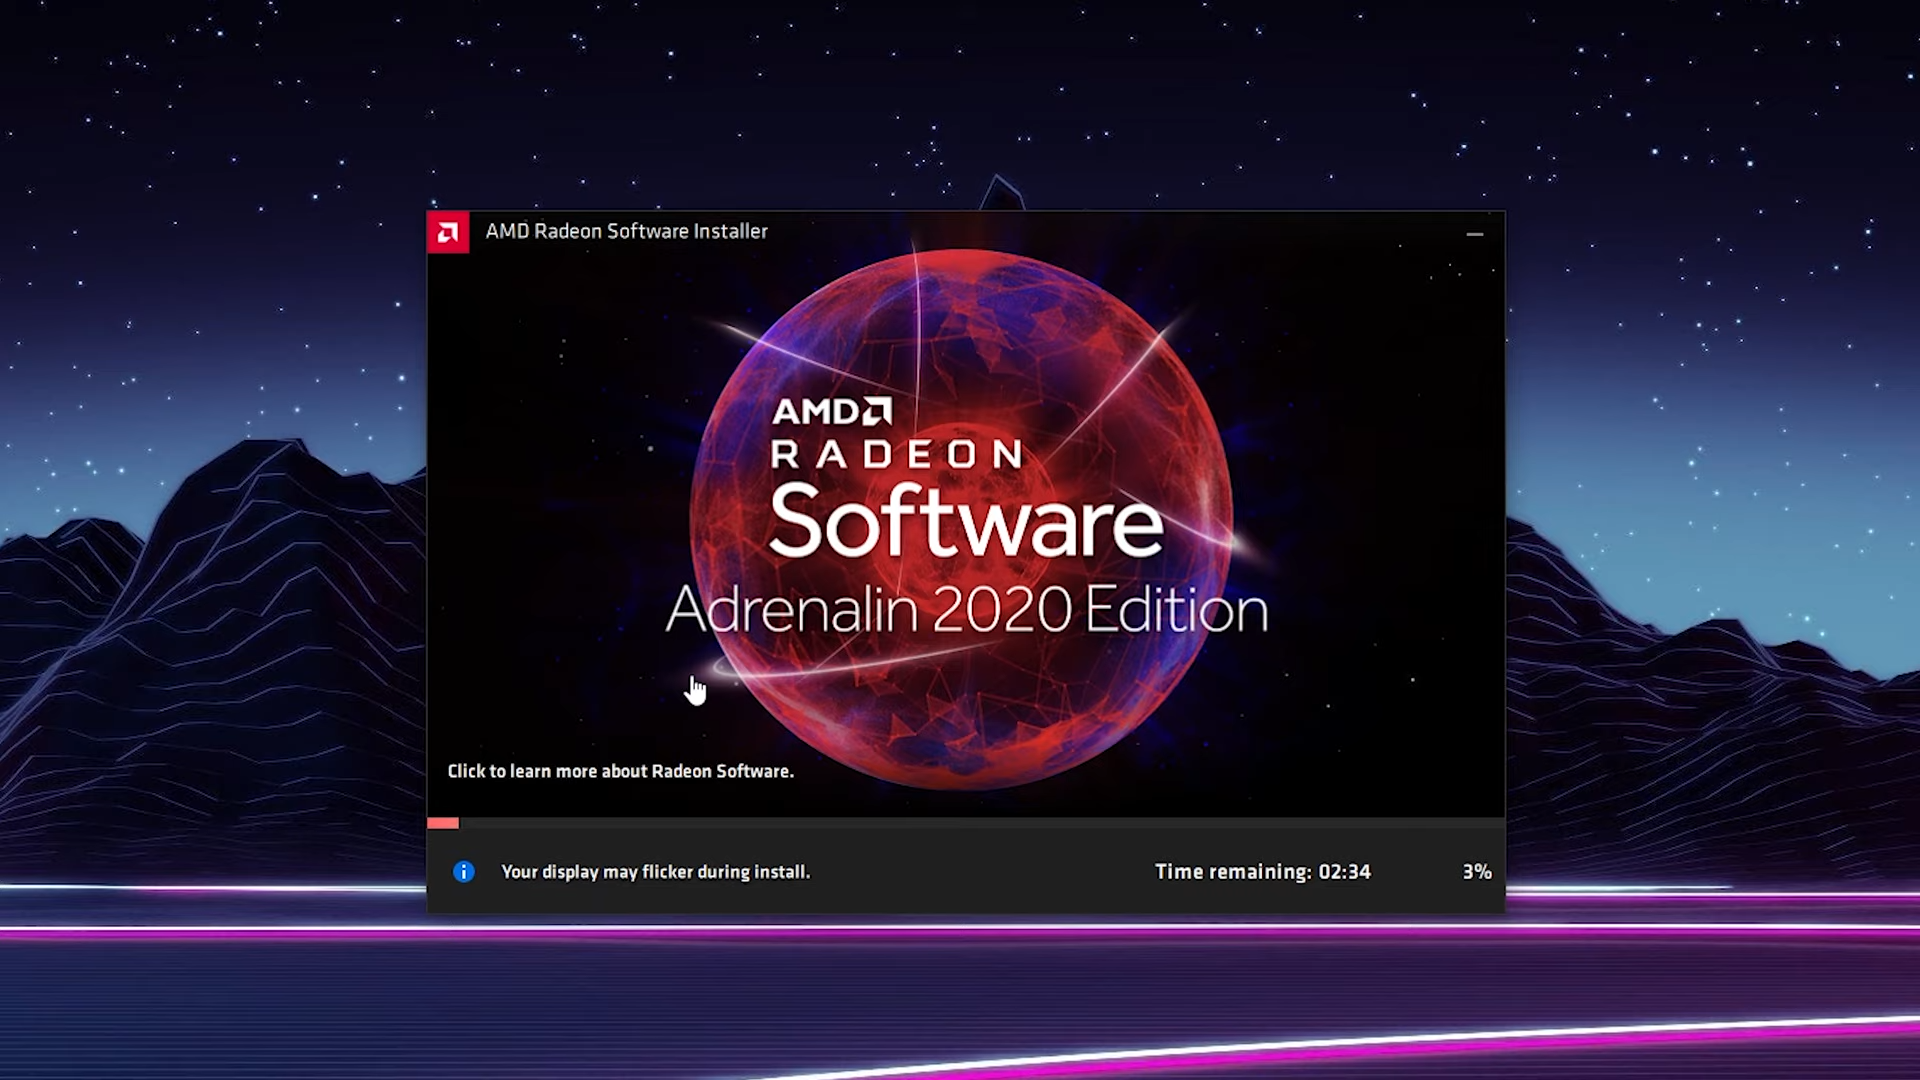
Wait for the drivers to update - Once your drivers have been installed, it’s recommended to restart your PC so that everything can come into effect properly.
Screenshots taken from Scoby Tech
Once the process is complete, launch Fortnite and see if the issue persists. Updating the drivers can resolve the loading screen issue caused by potentially corrupted or outdated drivers.
READ MORE: How to update graphics driver in Windows? (AMD, Nvidia, Intel) ➜
5. Switch From DirectX 12 to DirectX 11
If updating your graphics card drivers didn’t resolve the issue, another fix to try is switching from DirectX 12 to DirectX 11. Switching to DirectX 11 can sometimes resolve issues related to performance and stability, especially if your system is encountering compatibility issues with DirectX 12. Here’s how you can switch from DirectX 12 to DirectX 11 in Fortnite:
- Launch the Epic Games launcher and click on your Account name in the top left corner.
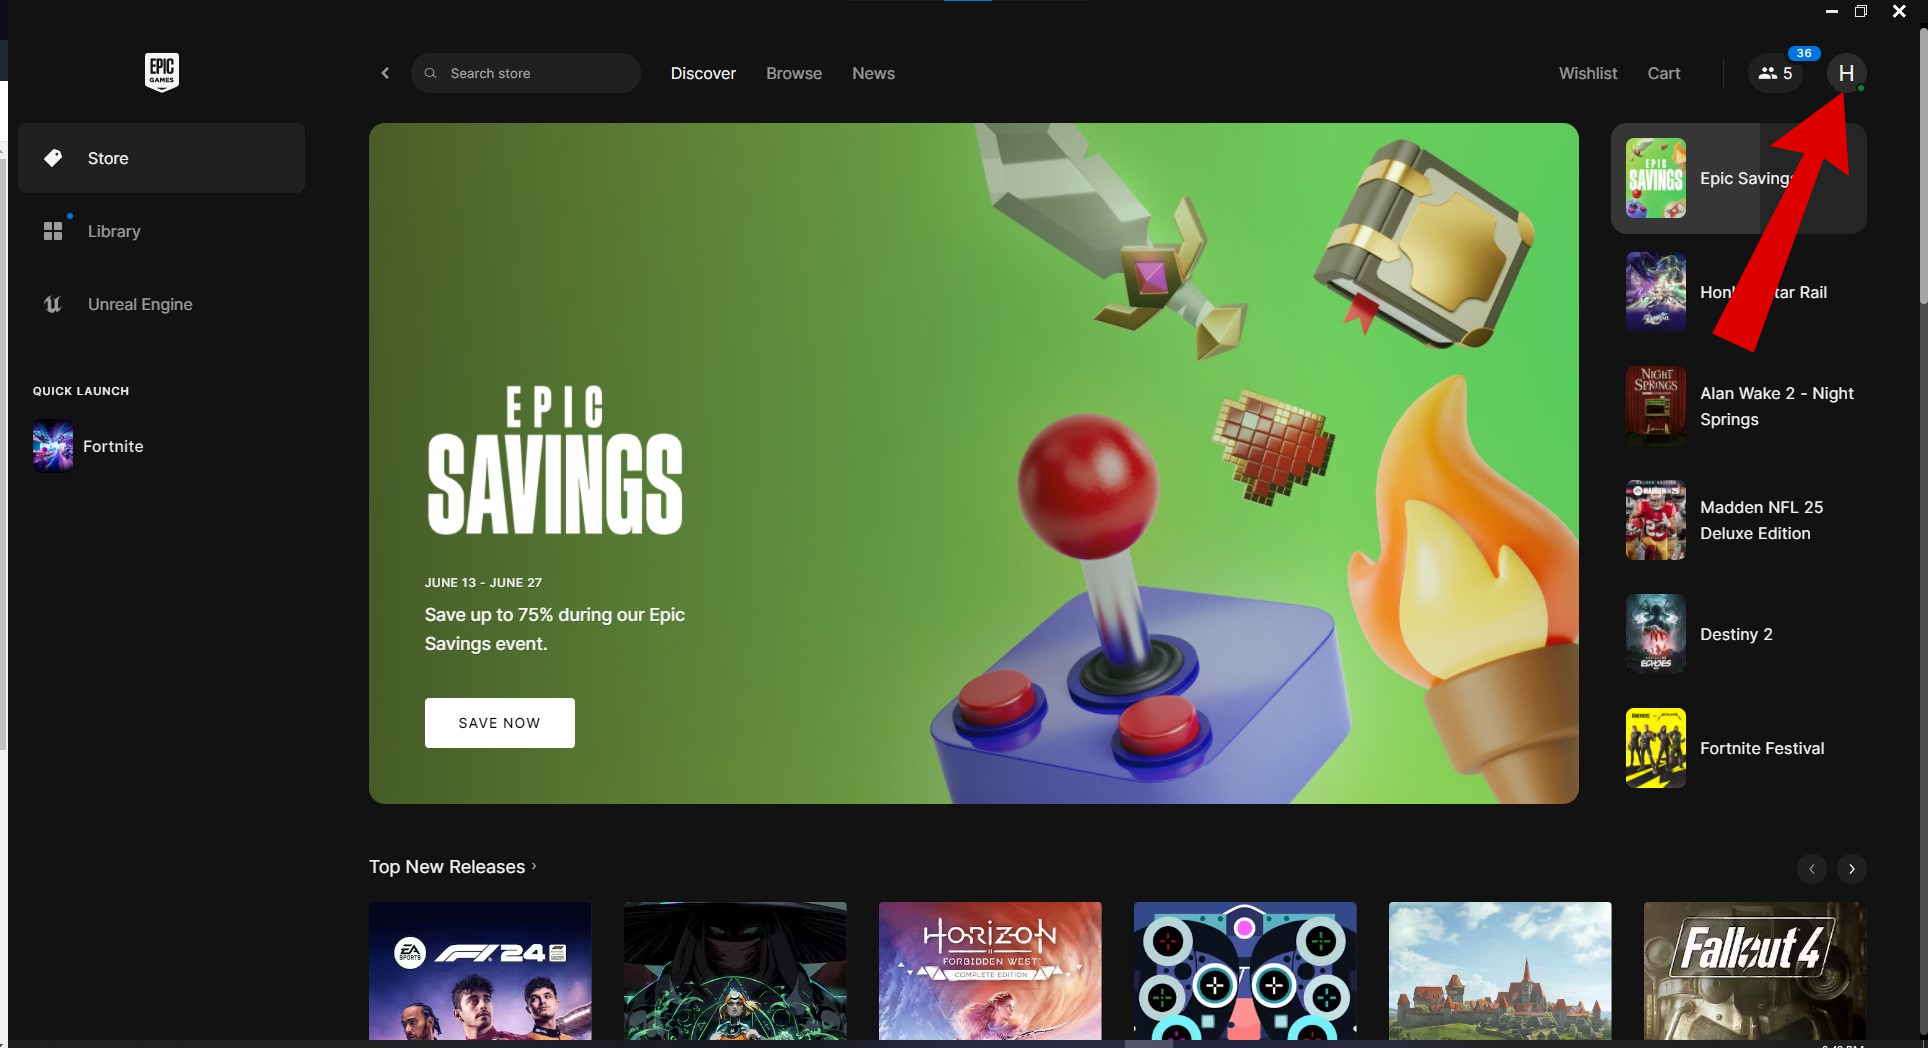
Click on your Account name - From here, click on the Settings option.

Head to Settings - In the Settings menu, scroll down until you see the Fortnite tab. Expand it and check the box next to “Additional Command Line Arguments“.
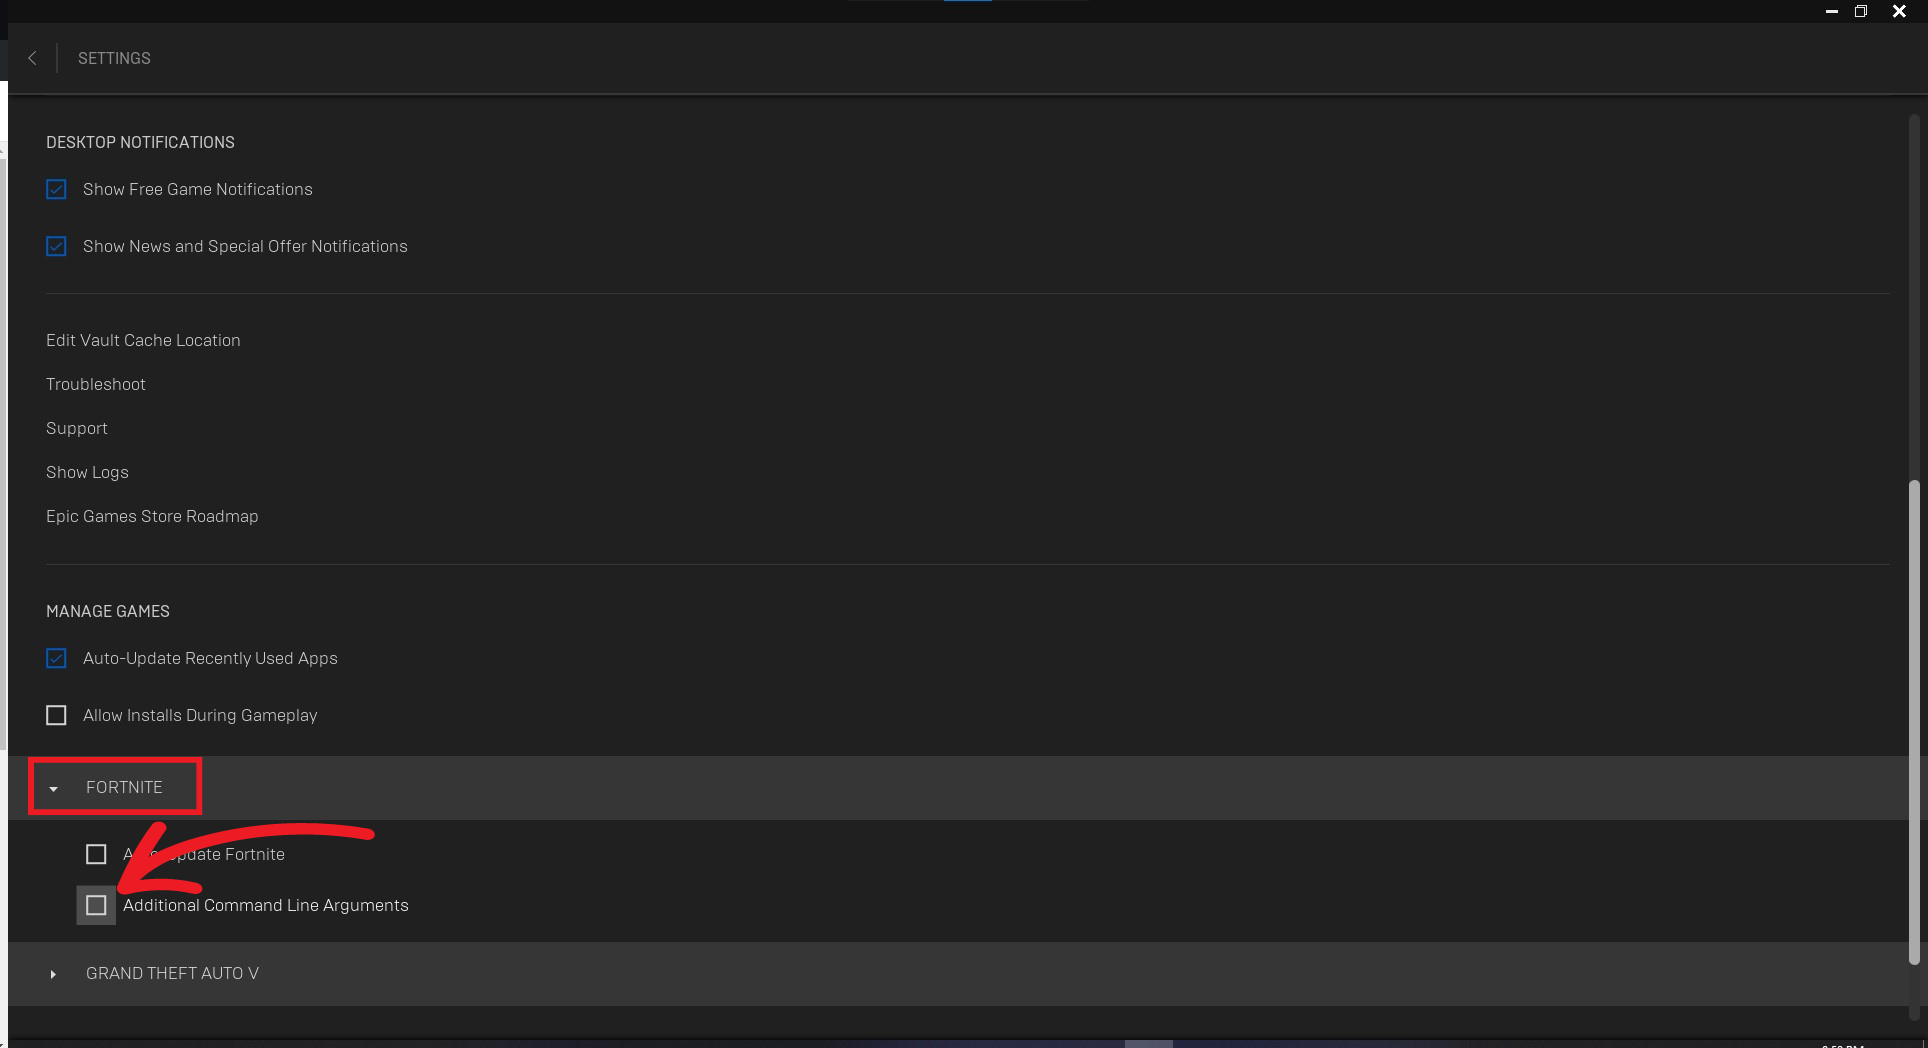
Expand Fortnite and check this box - Here, enter “d3d11” and you should be good to go.
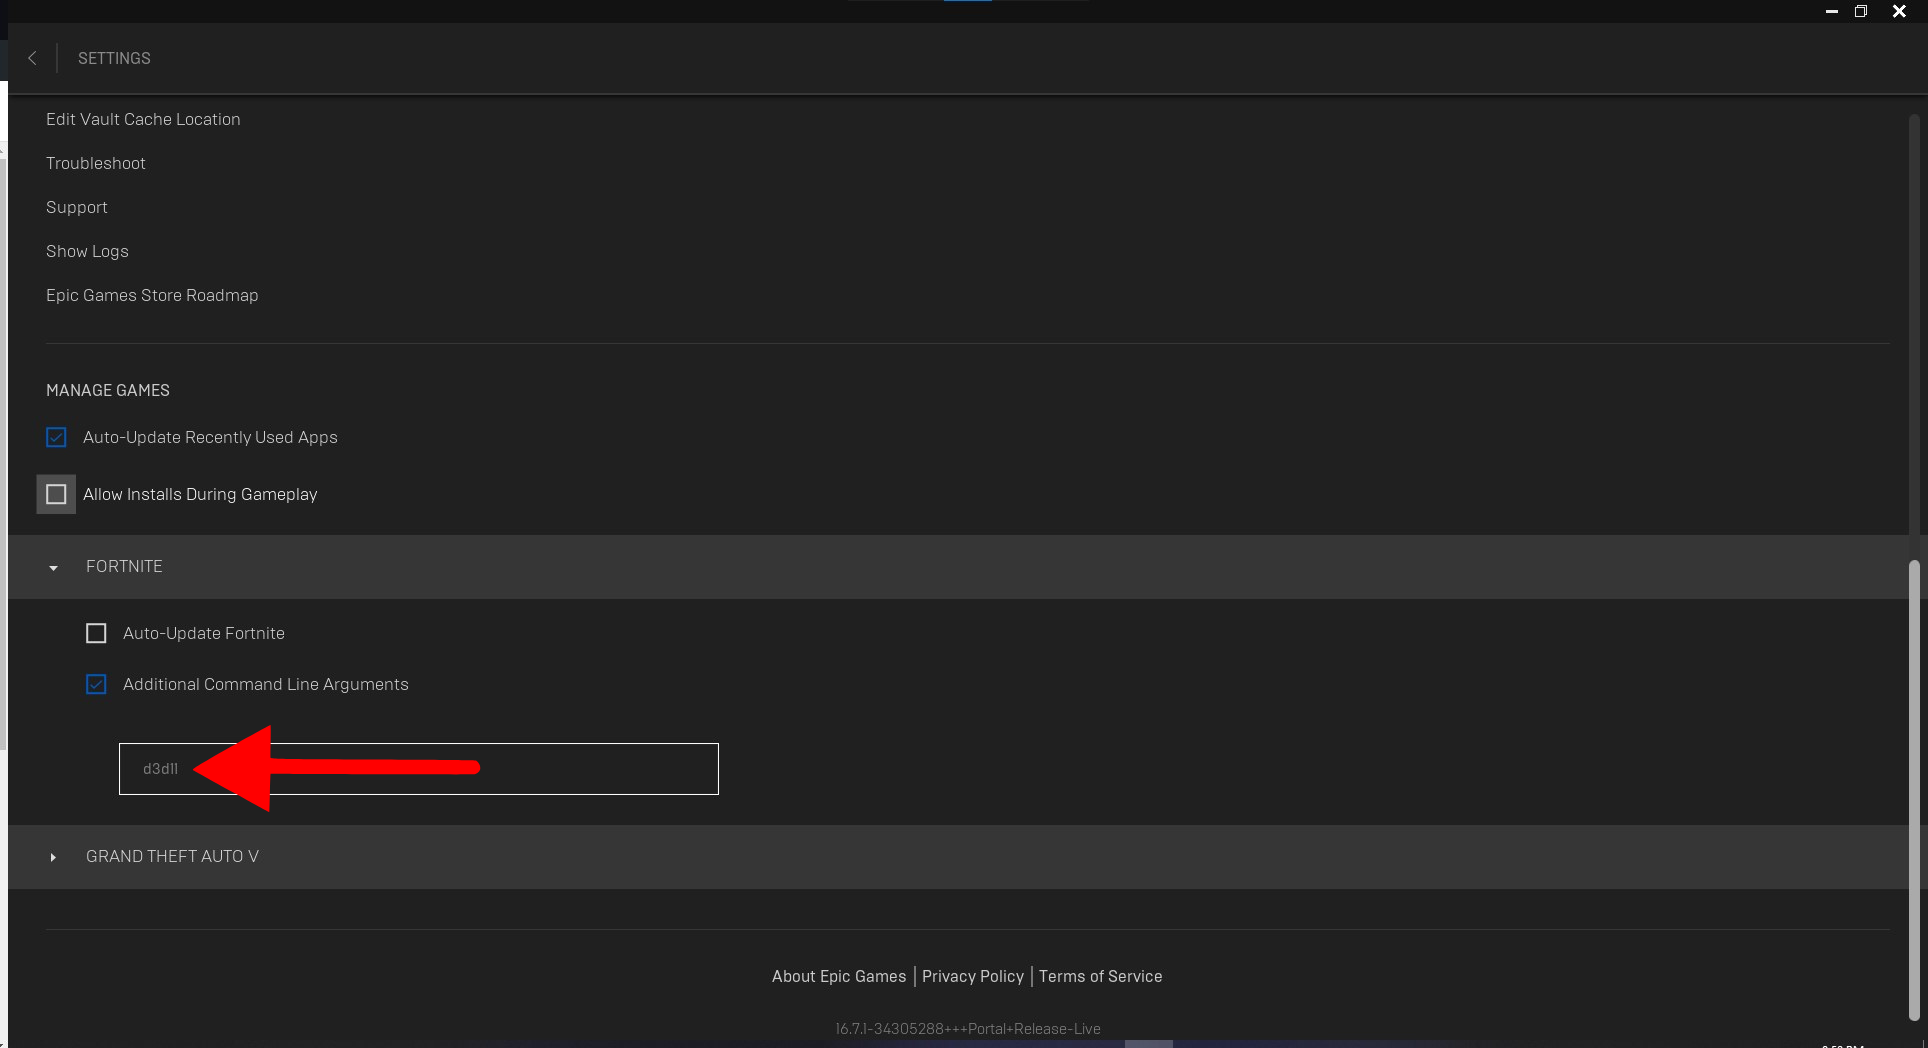
Enter d3d11
If you have an older graphics card, using DirectX 12 may not be beneficial, so it’s best to remove it from the game files entirely to ensure it’s not being used. Here’s how to do that:
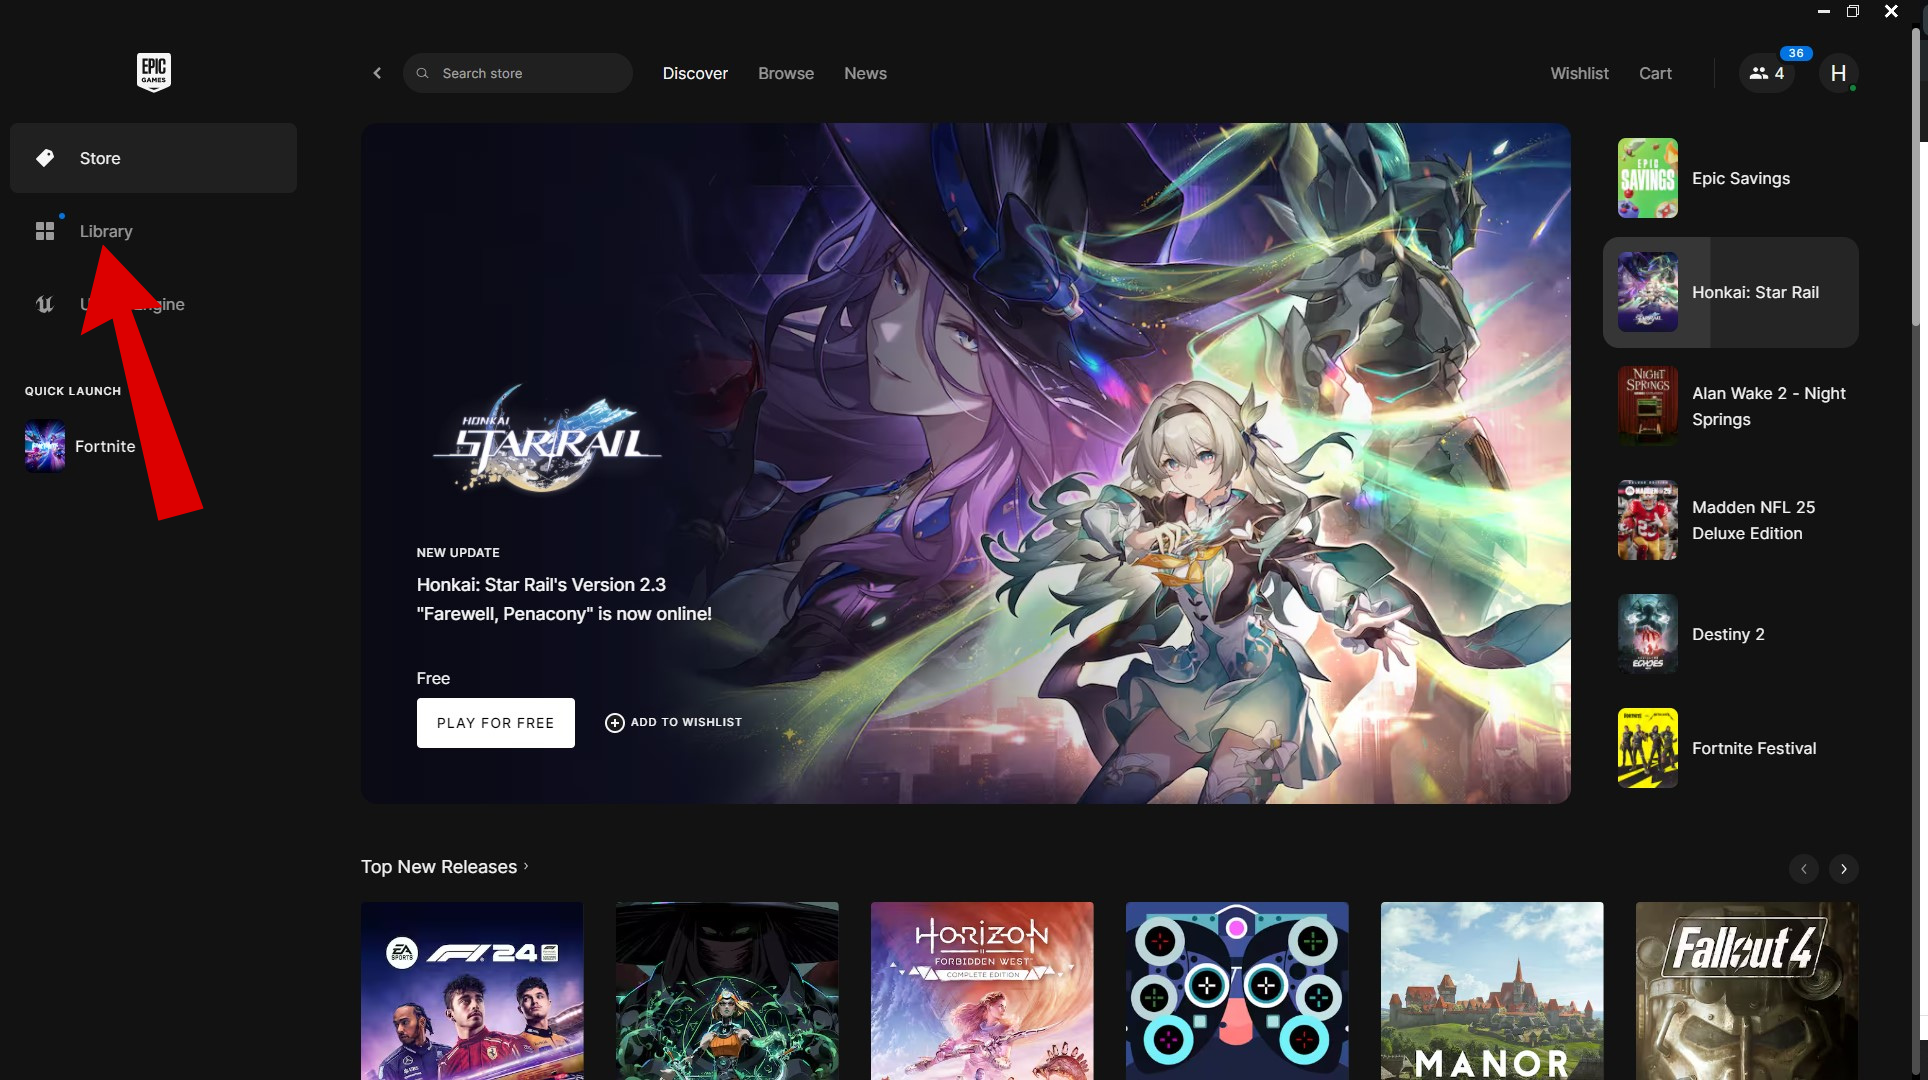
- Launch the Epic Games Launcher and head to the Library tab.
Head to your Library - From the Library panel, click on the three vertical dots next to Fortnite. This should open a pop-up menu. Here, select Options.
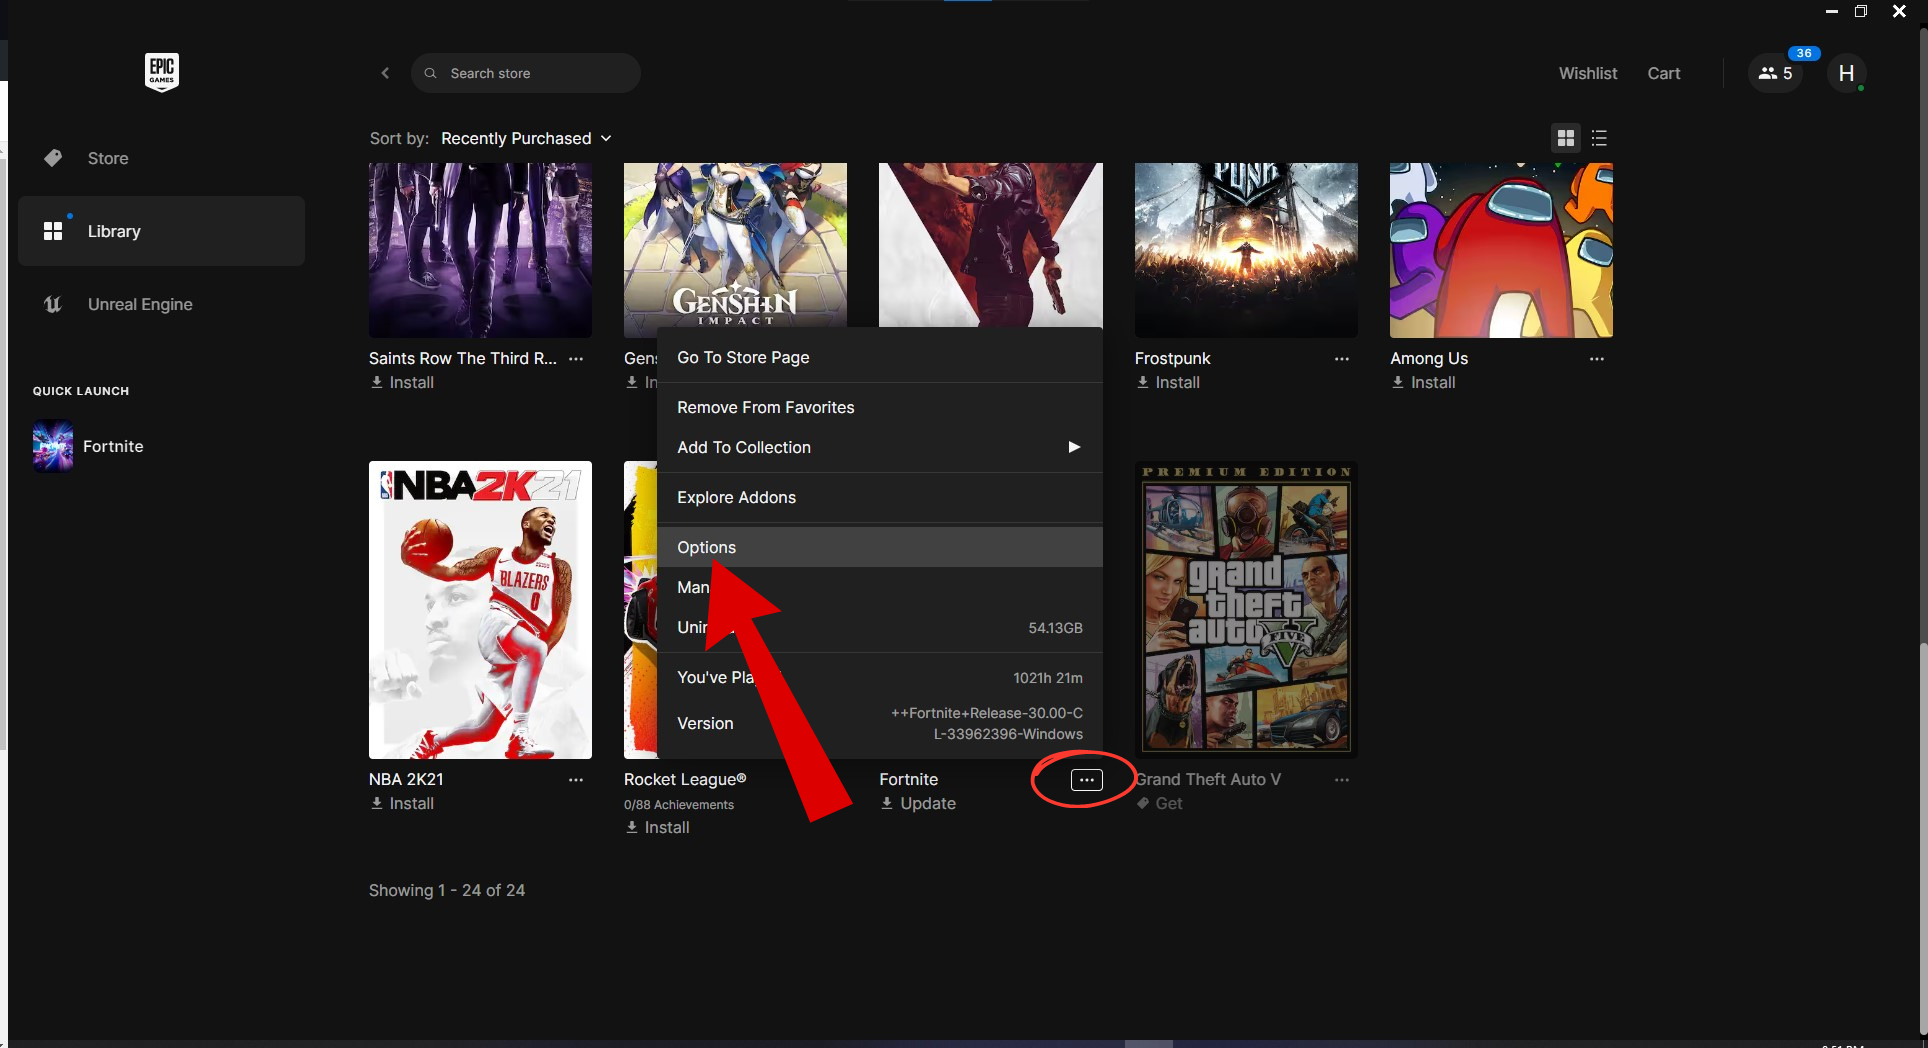
Select Options - Next, uncheck the box next to the “DirectX 12 Shaders” option. When you are done, click on the Apply button to confirm changes.
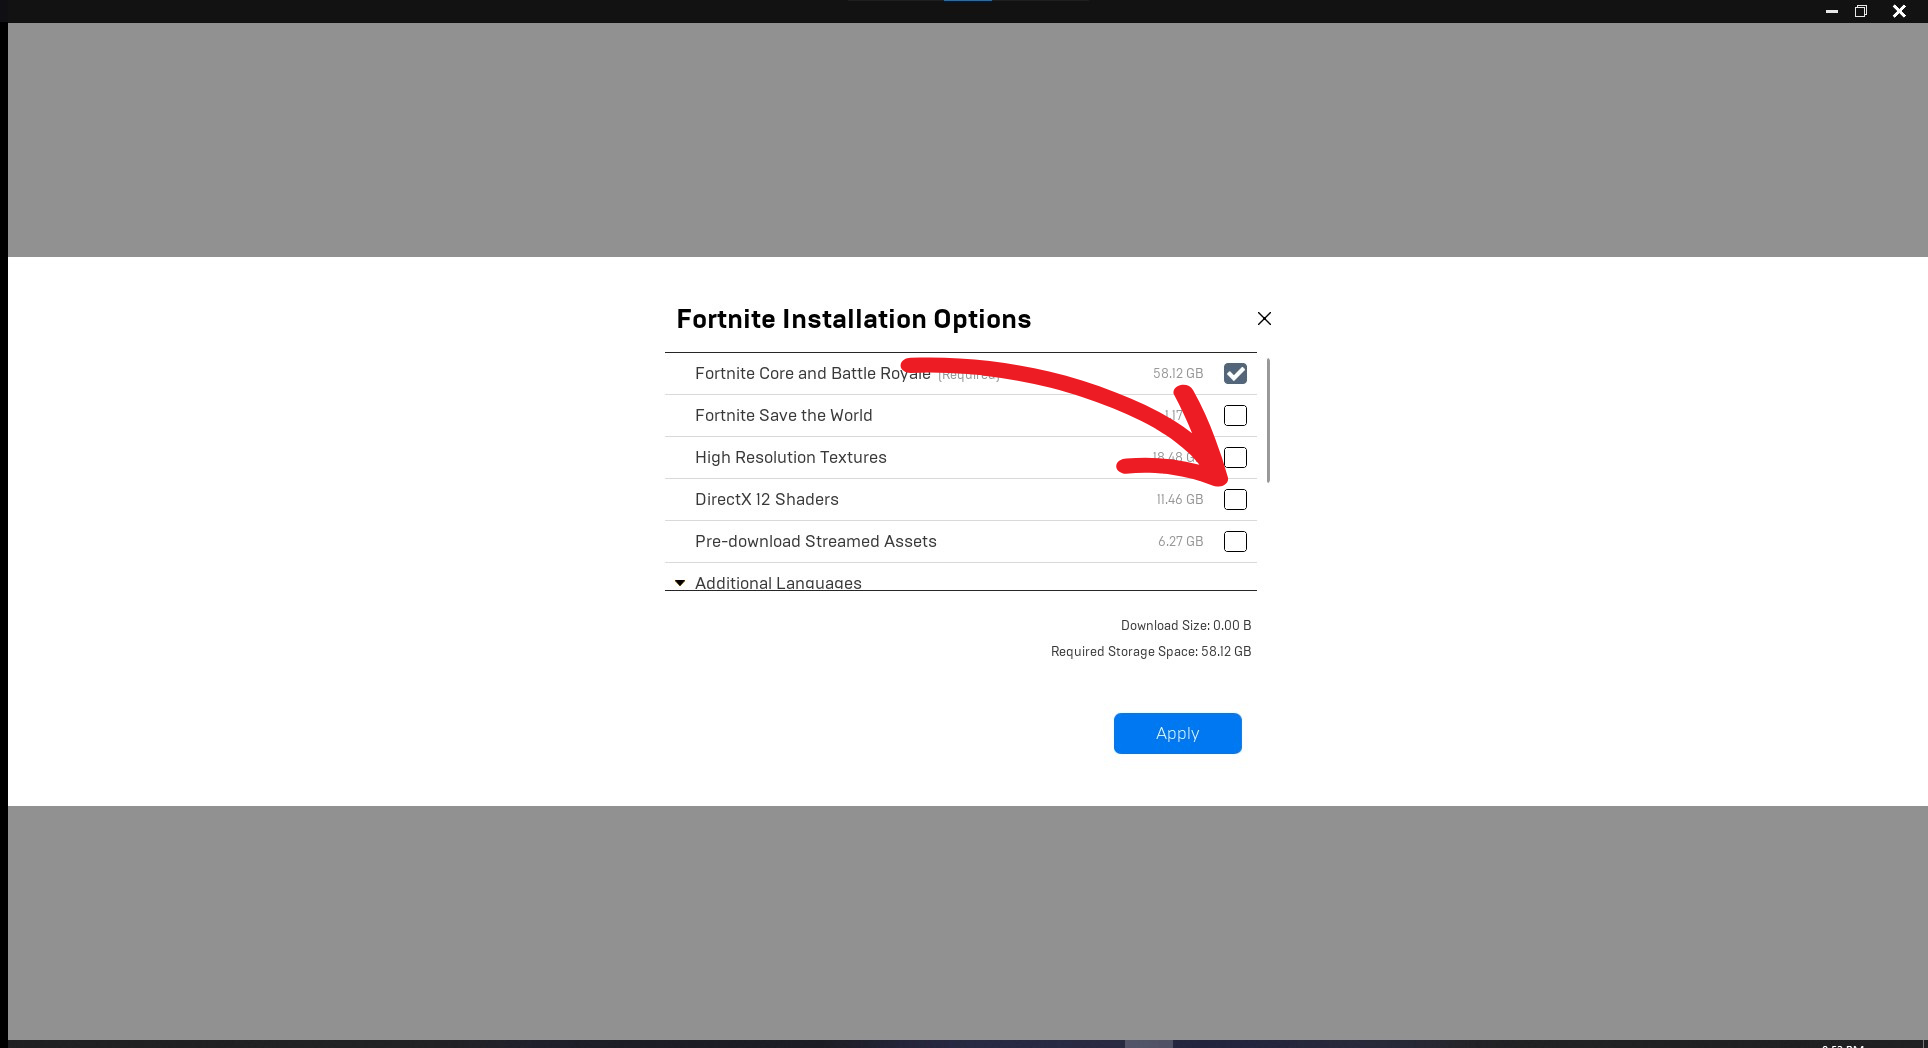
Uncheck this box
READ MORE: Path of Exile: DirectX 11 vs 12 vs Vulkan — Which is the Best? ➜
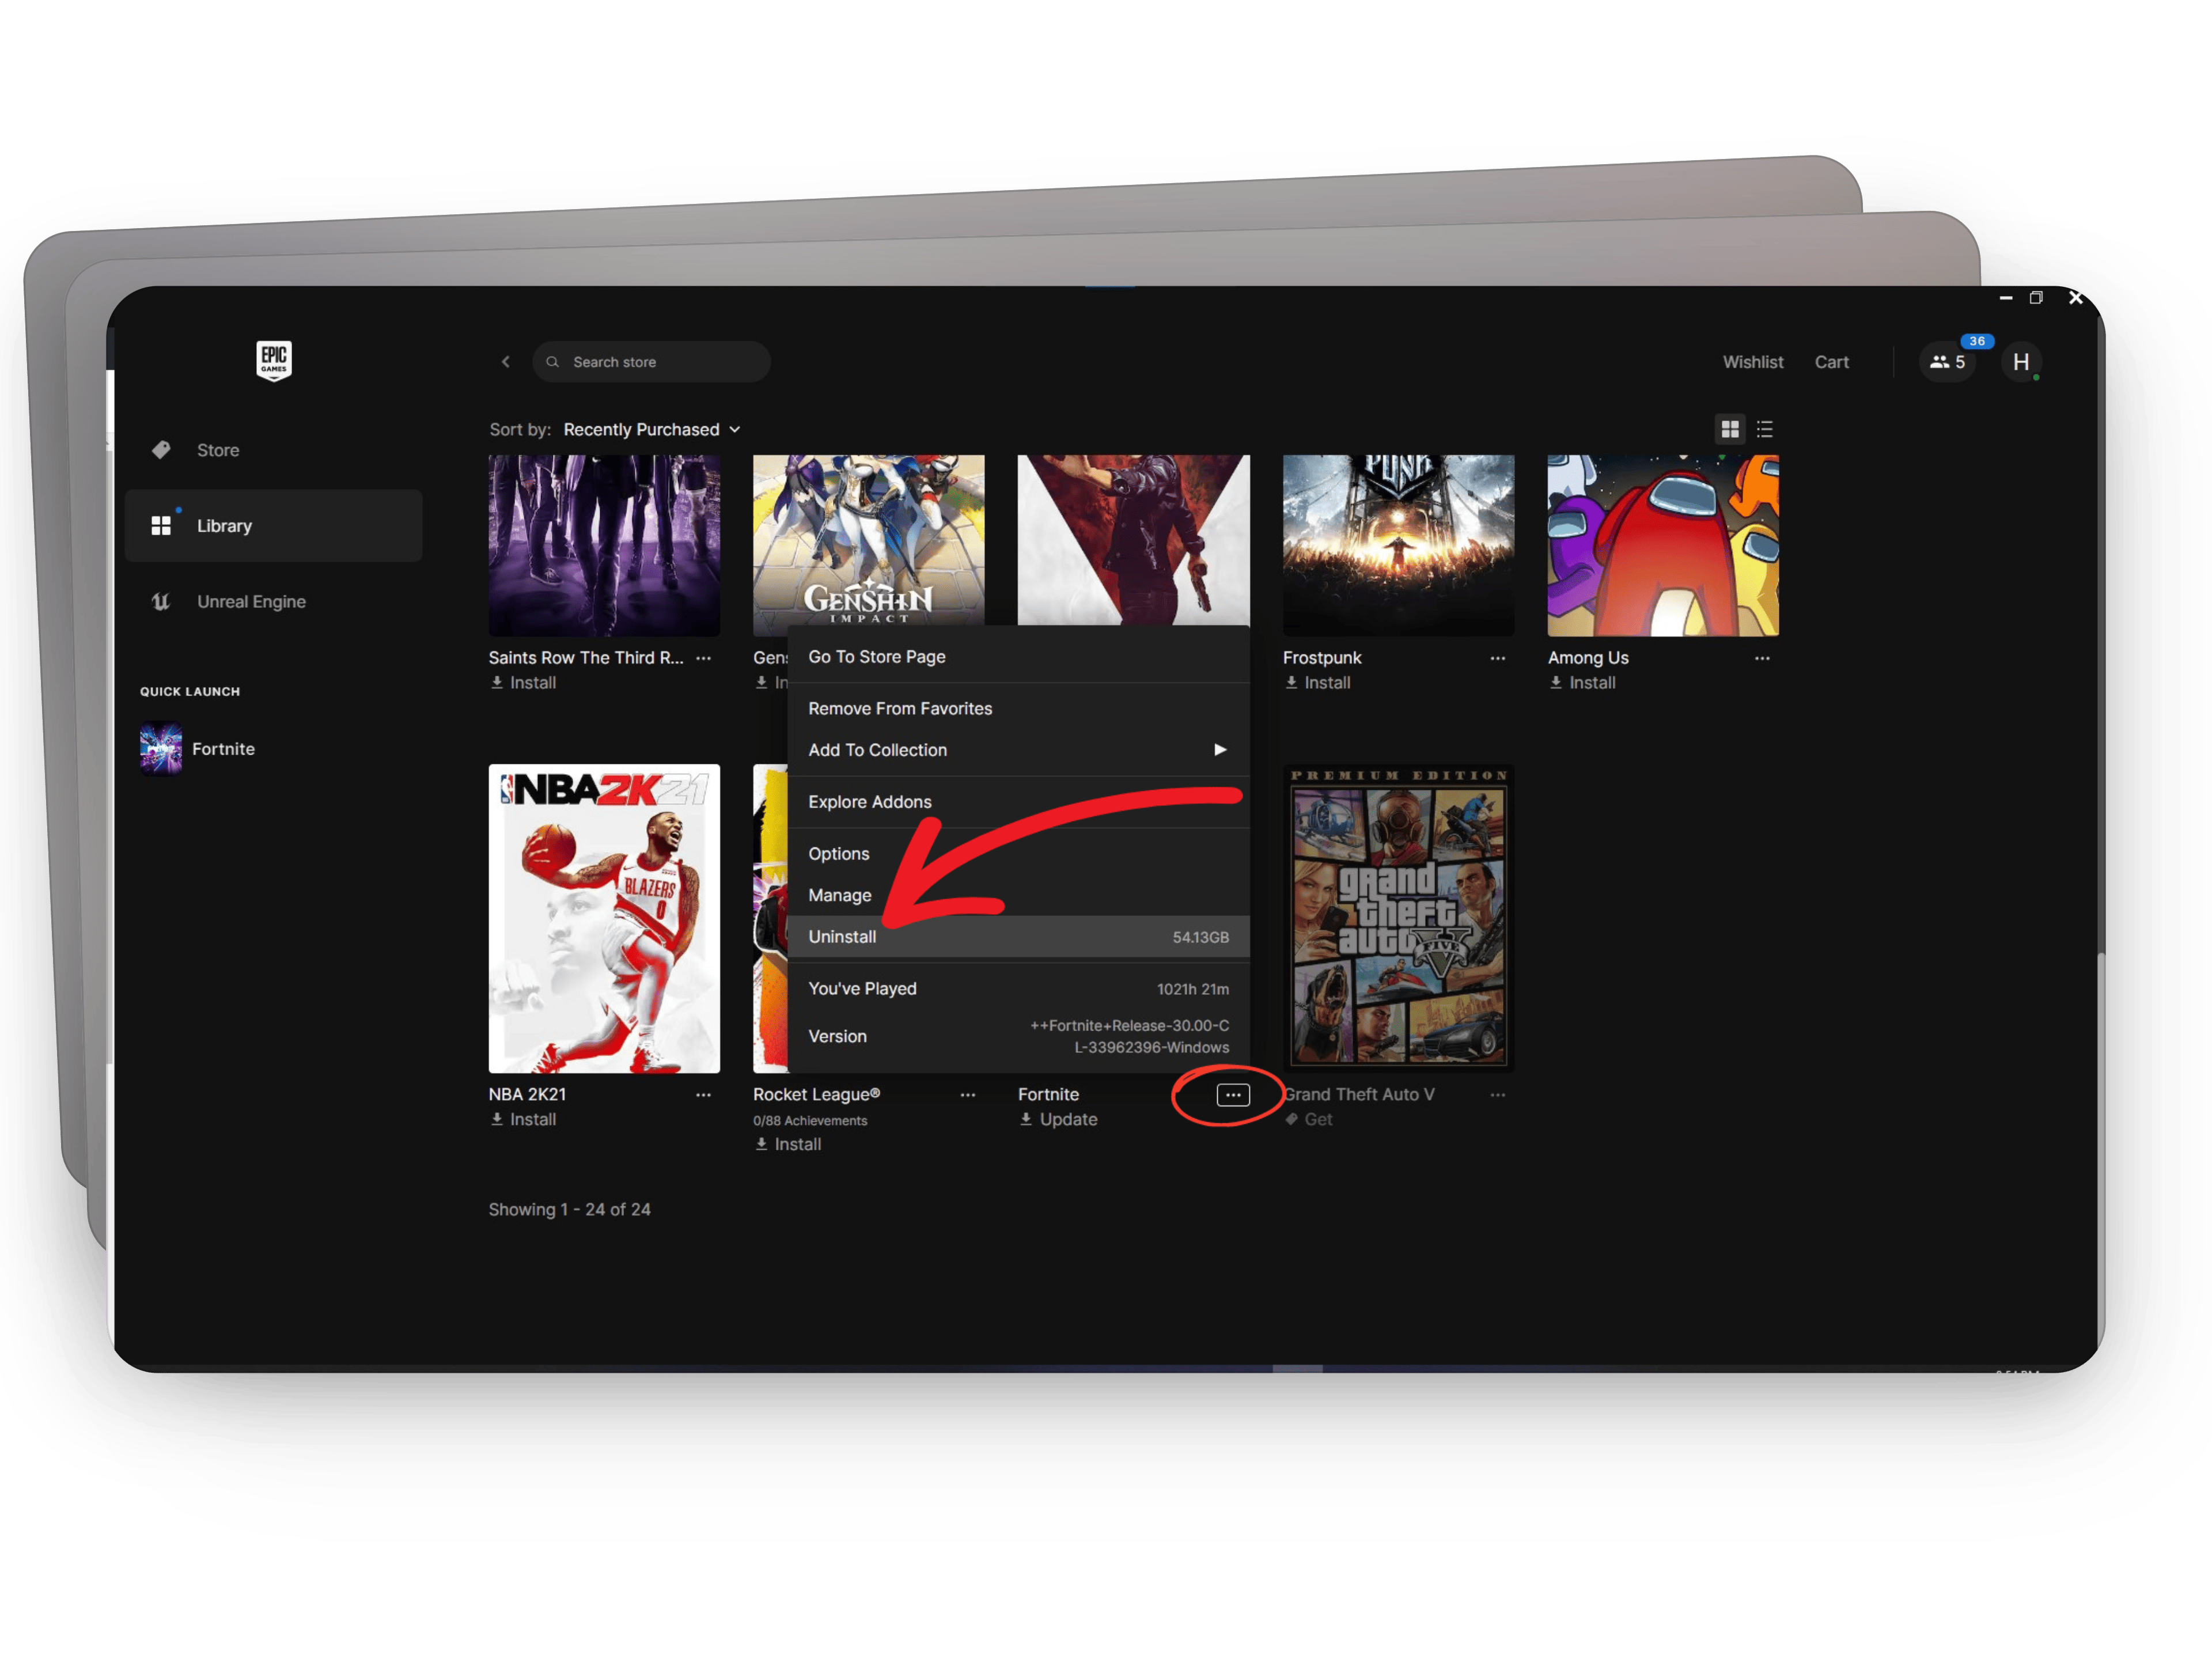
6. Reinstall Fortnite
If none of the previous steps fixed the issue, your last resort is to reinstall Fortnite to eliminate any corrupted game files. While reinstalling the game can be a hassle, it’s worth trying as it will install a fresh version on your PC, free from bugs and errors.
To uninstall Fortnite, open your Library in the Epic Games Launcher. Click on the three vertical dots next to Fortnite, and then select the “Uninstall” option. Epic Games will provide a confirmation prompt; click “Uninstall” to completely remove the game from your system.
Once you have completed that, reinstall Fortnite on your PC. This should allow you to go through the loading screen smoothly and without any errors.
READ MORE: How to Play Fortnite on a School Chromebook in 2024 ➜
What to Do If You’re Playing on a Console or Mobile Device
While some of the steps discussed above, like checking server status or restarting Fortnite, are universal and work on consoles and mobile devices, the rest are primarily focused on PC players. However, the loading screen issue can also occur on consoles and mobile devices. To help with that, here are a few solutions specifically for those platforms.
1. Make Sure Your Device isn’t Overheating
One of the most common issues with consoles and mobile devices is overheating, especially when they are under heavy load. Overheating can lead to your device slowing down, resulting in poor performance, especially when gaming. This can cause Fortnite to get stuck on the loading screen.
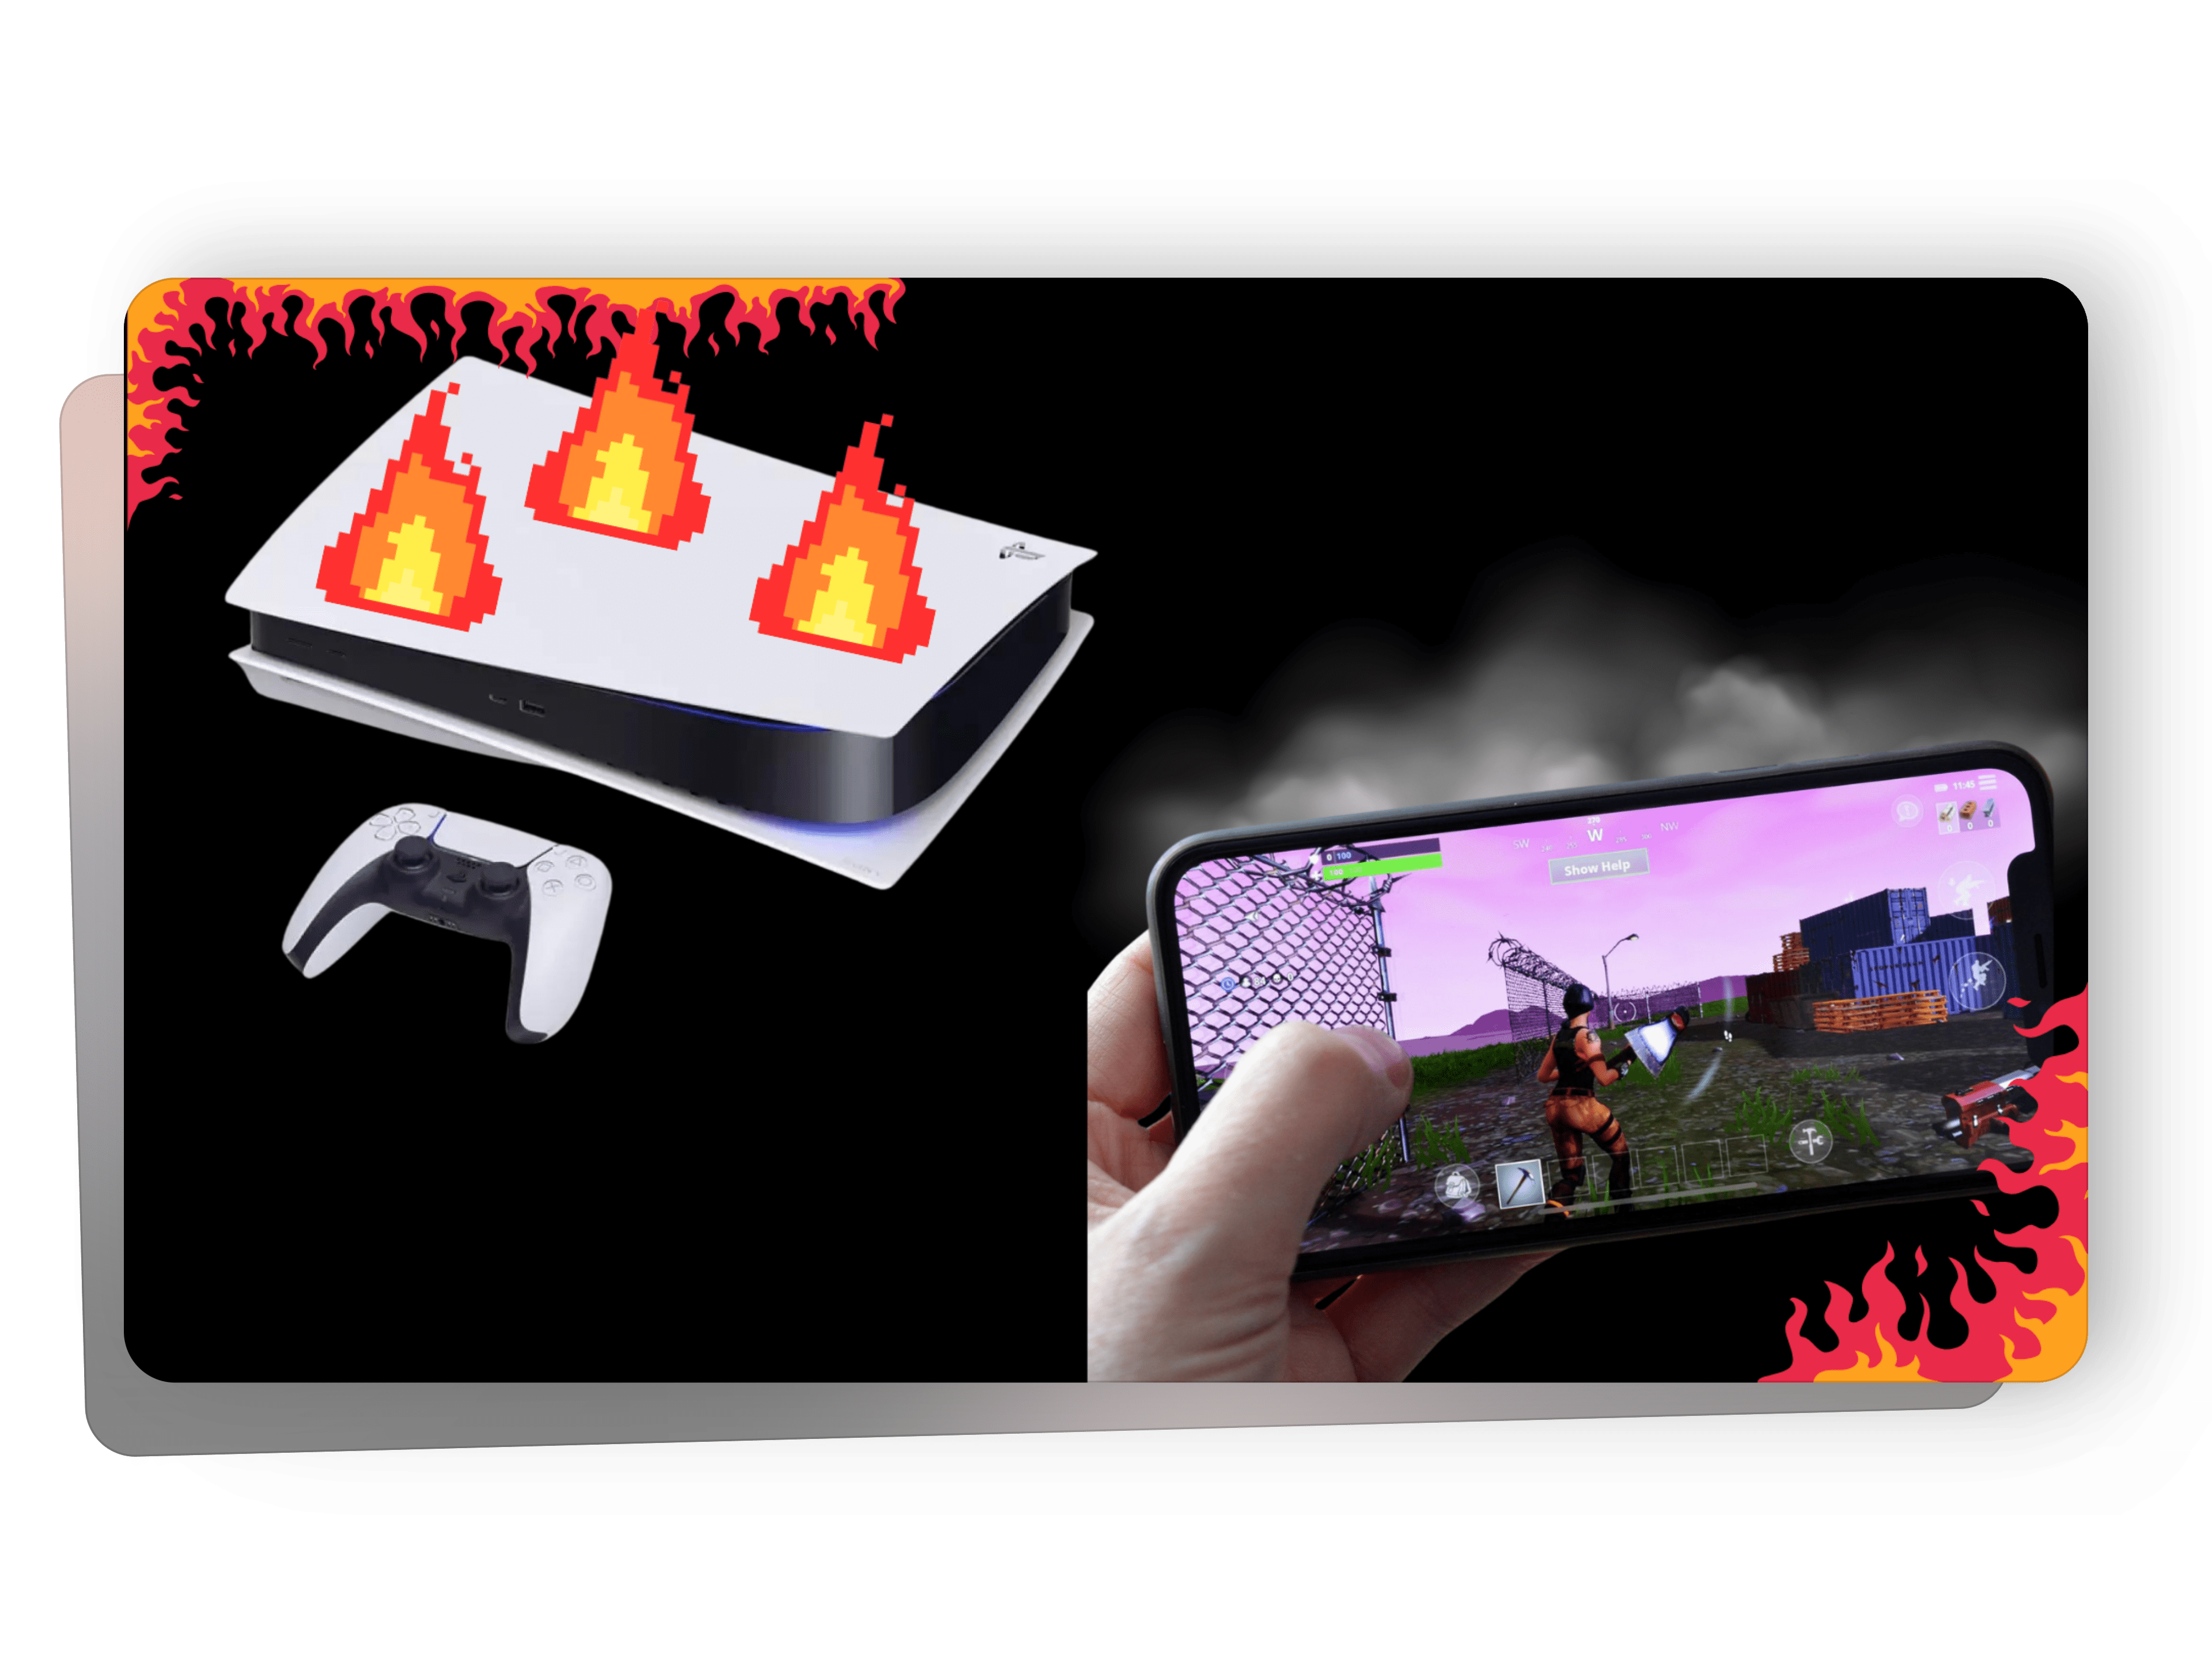
To prevent this, ensure your device hasn’t been running for an extended period, take breaks, and check for signs of overheating, such as excessive heat or a hot-to-the-touch surface.
READ MORE: Is your iPhone Overheating? Try these 11 Fixes to Cool it Down ➜
2. Ensure You Have Enough Storage Space
With newer and larger content updates coming to Fortnite, it’s no surprise that the game will take up a significant amount of storage space. If your device is nearly full, it can prevent Fortnite from properly uploading and downloading necessary files. To ensure optimal performance, ensure your device’s storage is not full and there’s enough space for essential files and updates.
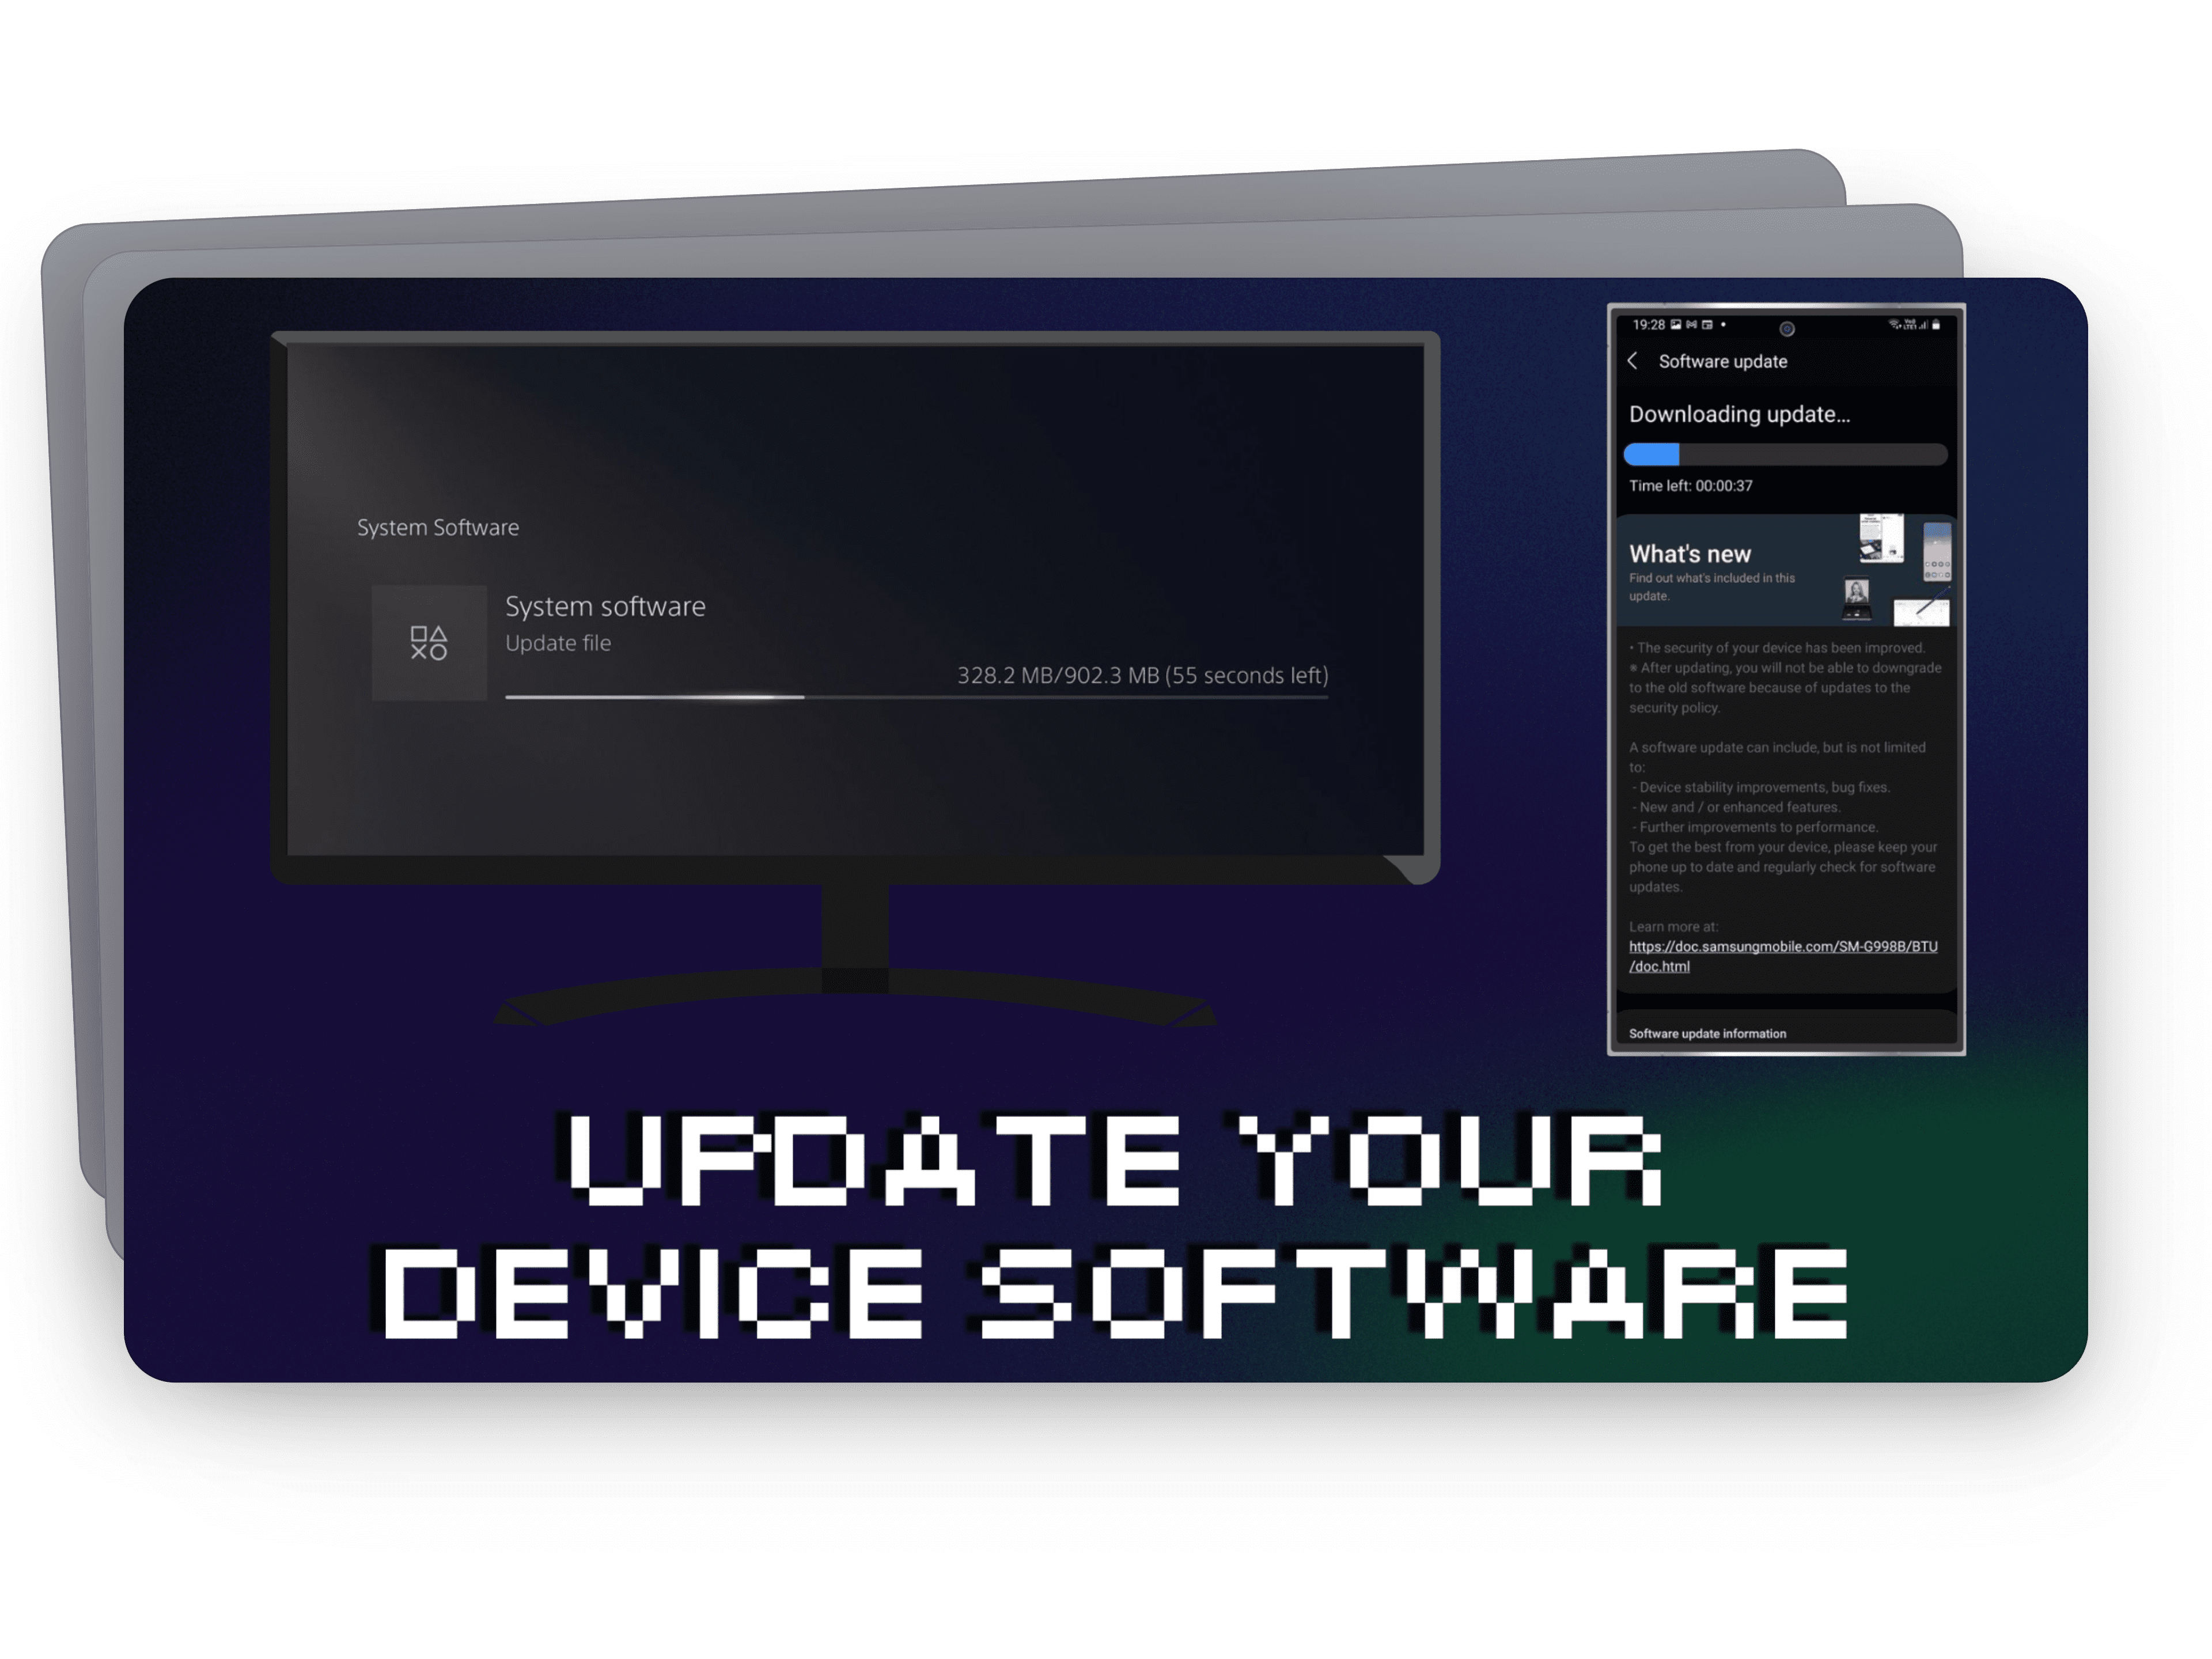
3. Check For Software Updates
Software updates can help you get rid of bugs and errors that can cause random issues and glitches on your console and mobile devices. Regularly updating your console and mobile software ensures they receive the latest improvements and fixes, which can resolve performance issues, including the Fortnite loading screen getting stuck.
Wrapping Up
The Fortnite loading screen issue can be a mood wrecker since it can pretty much stop you from playing the game. Before trying out anything complex make sure to reboot your device once. No matter what device you are on rebooting it can be a lifesaver and can resolve your loading screen issue. Apart from that make sure to try out every method to ensure no fix is left behind.
FAQs
DirectX is a collection of application programming interfaces (APIs) developed by Microsoft, designed primarily for multimedia tasks such as gaming and video. It provides software components for handling tasks related to graphics, sound, input, and networking in Windows-based systems, enabling developers to create immersive and high-performance applications.
DirectX 12 improves performance on newer hardware by using the computer’s resources more efficiently. It can make games run faster and look better, especially on computers with powerful processors. DirectX 11 works well on a wider range of computers but may not take full advantage of newer hardware features like DirectX 12 does.
Fortnite’s base installation requires approximately 58 GB of storage space. However, if you opt to install additional components such as Save the World, high-resolution textures, DirectX 12 shaders, pre-downloaded streamed assets, and additional languages, the total size can increase to nearly 100 GB.


