Fix: Your connection to matchmaking server is not reliable
Steam is known for its excellent platform where you can play competitive games online using the multiplayer mode. There are hundreds of games present where millions of players play their games every day.
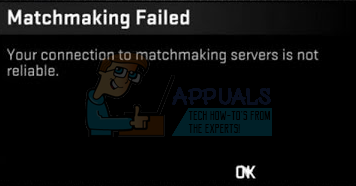
There is a common problem where you get an error prompting “Your connection to matchmaking server is not reliable”. This prevents you from playing online multiplayer games. Sometimes this issue traced back to Steam and there is a problem with their servers. You can always check the status of the servers online. If everything seems fine, it means there is some problem on your end.
We have listed down a number of remedies which are known to work in solving this error. Follow them starting with the first one.
Solution 1: Using Ipconfig
IPconfig (internet protocol configuration) is a console application which displays all the current IP/TCP configurations on your screen. You can also modify DHCP (Dynamic Host Configuration Protocol) and DNS (Domain Name System) settings using it.
Another feature that ipconfig does is forcefully refresh the DHCP IP address of the host computer to request a different IP address. This is done in three stages. Follow the steps listed below.
- Press Windows + R button to launch the Run application. In the dialogue box type “cmd”. This will bring up the command prompt.
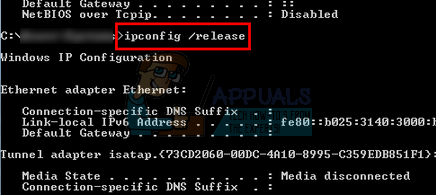
- Once the command prompt is up and running, type “ipconfig /release”. This forces your computer to give up its lease and it sends a notification to the server. This notification is a DHCP release notification which updates the server’s status information so it can mark the client’s IP address as available.
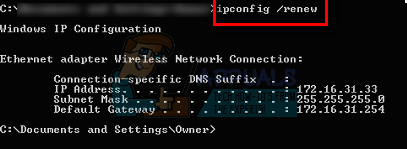
- Once this is done, type “ipconfig /renew”. This command requests a new IP address from the server. If the computer is connected to a DSL modem or a cable, it may have to be connected directly to the modem network to bypass the router before using “ipconfig /release” and turning off the power for a couple of minutes. This ensures that the old IP gets taken by another computer.
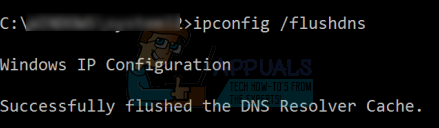
- After this, type “ipconfig /flushdns”. This is used to clear the DNS cache and is to ensure that any future requests have to be resolved by scratch because they have to use the fresh DNS information.
- Restart your computer, launch Steam again by right clicking the client and selecting “Run as administrator”. Try matchmaking again.
Solution 2: Granting Steam administrator access
Steam is a platform which requires read and write permission on disks and its folders. Sometimes it also needs to change the system files so it can run in the most optimized way possible. If Steam doesn’t have administrator access, it can act bizarre and produce unexpected errors. By default, Steam doesn’t have administrative rights when it is installed. You can grant it the privileges by following the steps mentioned below.
- Browse to the directory where Steam is installed. The default location of it is C:\Program Files (x86)\Steam. If you have Steam installed somewhere else, you can browse to that location and follow the steps listed below.
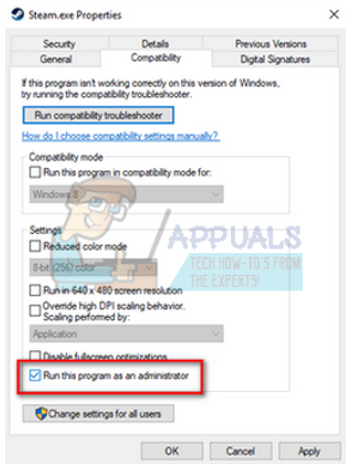
- Once in the directory, browse for an exe file named as “Steam.exe”. This is the main Steam launcher. You should right click on it and select Properties from the list of options. Select the Compatibility tab from the top of the screen. At the bottom of the small window, you will see a checkbox which says “Run this program as administrator”. Make sure it is checked. Save changes and exit.
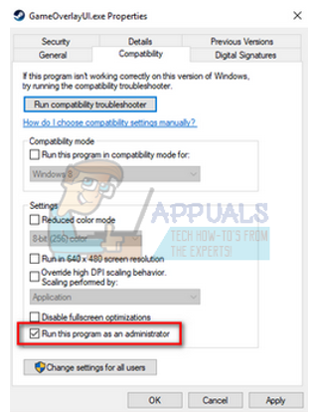
- Now browse for an exe file named as “GameOverlayUI.exe”. You should right click on it and select Properties from the list of options. Select the Compatibility tab from the top of the screen. At the bottom of the small window, you will see a checkbox which says “Run this program as administrator”. Make sure it is checked. Save changes and exit.
- Now, we will grant full control to all of the Steam folders. Please note that we have granted administrator access to the two main exe files in Steam. Now we will proceed with the whole folder.
- Open your Steam directory. The default location for Steam is (C:\Program Files\Steam). If you installed Steam another directory, you can also browse to that.
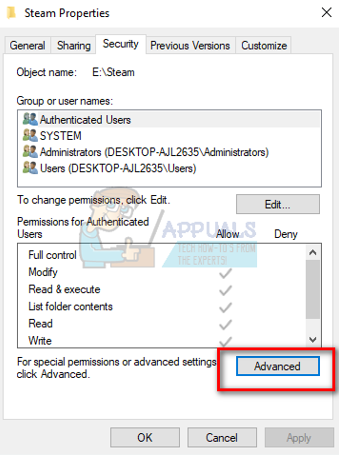
- Once you have located your Steam folder, right click it and select Properties. Browse to the Security tab and click on Advanced found at the bottom of the screen.
- Now you will be presented with a table like this. The first 4 rows are editable while the last two or not. Here you can see we have granted the folder full control. If your settings may differ, you can change the settings through the method listed below.
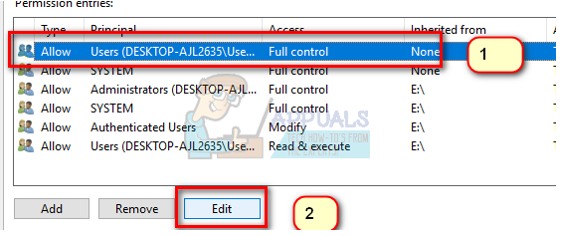
- Click on the row and click the button Edit. A window will come forward consisting of all the options in form of check boxes. Check all of them including Full Control. Click Apply, save changes, and exit. Do this for the first 4 rows and exit after changing.

- Now restart your computer to ensure that all the changes have taken place and launch Steam. Hopefully, you will not be given an error while matchmaking.
Solution 3: Verifying integrity of game cache
It may be the case that your game files may be corrupted or may have some missing game files. Because of this Steam may not be able to perform matchmaking correctly. Your library files can also be in the incorrect configuration which may lead to a bugged Steam overlay.
- Open your Steam client and click Library present on the top. Here all your installed games will be listed. Select the game in which Steam overlay fails to open.
- Right click on the game which is giving you the error and select Properties.
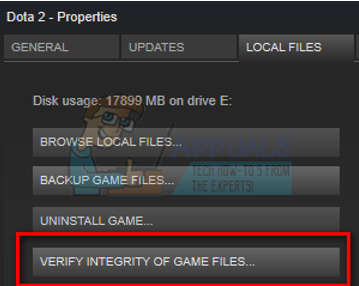
- Once in the properties, browse to the Local Files tab and click on the option which says Verify Integrity of Game Files. Steam will then start verifying all the files present according to the main manifest it has. If there is any file missing/corrupted, it will download that files again and replace it accordingly.
- Now navigate to your Settings by pressing the Settings option after clicking Steam present in the bottom left corner of the screen. Once in the Settings, open the Downloads tab present at the left side of the interface.
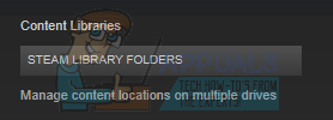
- Here you will see a box in which it is written “Steam Library Folders”. Click it
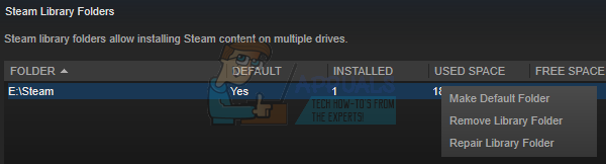
- All your steam content information will be listed. Right click on it and select “Repair Library Files”.
- Restart Steam and check if the matchmaking proceeds as expected.
Solution 4: Ending all Steam processes
It may be the case where Steam downloaded and installed an update. After every update, it requires that you restart the client properly.
- Press Windows + R button to launch the Run application and in the dialogue box type “taskmgr”. This will launch the task manager.
- Once in the task manager, browse for all the Steam processes. Start by closing the process “Steam Client Bootstrapper”. After ending this process, end all of the remaining ones.

- Now launch Steam using administrator privileges and check if the matchmaking got fixed.
Solution 5: Running Steamservice.exe
Steamservice handles all the install-scrips (installing DirectX, Visual Studio redistributables etc). It manages how all the additional software gets installed and it also modifies your hard drive. If you by any case declined it from running, this may be the problem.We can try running it from the Steam directory and check if this solves our problem.
- Navigate to your Steam directory. The default location is C:\Program Files (x86)\Steam. If you have installed Steam on another directory, you can navigate there.
- Now locate a folder named “bin”. Open it. Now browse for an exe file named as “steamservice.exe”.

- Run the exe file. If it requires administrator access to launch, grant it by pressing yes.
- Launch Steam again and check if the matchmaking problem gets fixed.
Solution 6: Changing user/ logging in again
There a bug where only a certain account can’t play multiplayer games. We can try relogging/logging in with a different account to check if this is the case.
Do note that in this solution, you will be required to know your Steam credentials. Don’t follow it if you don’t have the account details at hand.
- Launch your Steam client using Steam.exe
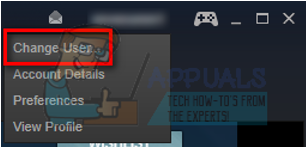
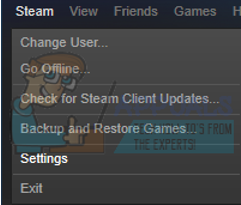
- Log out of Steam by clicking on the option of “Change User” present if you click your account title on the top right corner of the Steam client.
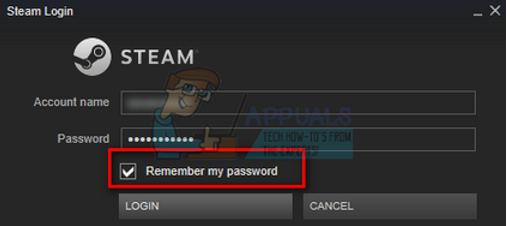
- After clicking the option, you will be given a login screen where you have to enter your credentials. After inputting your credentials, check the box which says Remember my password. Click the button Login.
- Once logged in, launch the game you were playing and check if the matchmaking got fixed.
Solution 7: Opting out of beta
There is a case where your beta participations may cause Steam to act unusual/out of order. Using the beta participations, you gain game content before they are released. The content is rather unstable and the developer launches frequent updates time to time addressing the bugs. There is no harm in disabling beta participations. The beta content will be gone along with the content that was stored about your progress according to it. Follow the steps listed below:
- Press Windows + R button to open the Run application. In the dialogue box type “taskmgr”. This is a command to bring up the Task Manager irrespective of the version of windows you are using.
- Search for different Steam processes which are running and close them one by one. Don’t leave any behind. This ensures that the changes we make stay concrete and get saved so when we launch the client again, it doesn’t display any errors.
- Also, close all third party applications, refresh your screen, and proceed with the next step to opt out of Steam beta.
- What opting out of beta actually means is opting out of updates until they are officially launched. There are both pros and cons of the beta phase. You get to try the new changes before they are released a few months later; on the other hand, the updates may still be buggy and cause you unexpected problems. In this case, Steam is misbehaving and not connecting to the internet. Open your Steam client and in the upper left corner you will see an option named “Steam”. Click it and navigate to settings.
- When you are in the settings, click the very tab named “Account”. Here you will see an option named “Beta participation”. We have to make sure that your client isn’t part of any beta phases. Click the option and you will see a drop down window allowing you to select your option.
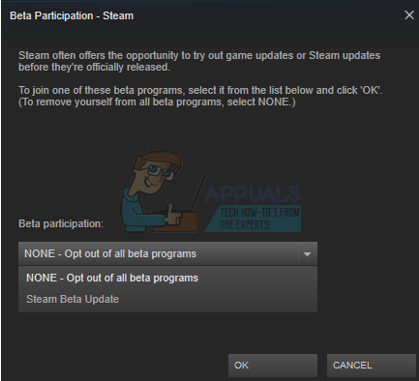
- Select the option which says “NONE- Opt out of all beta programs”. Close Steam and open task manager to end all the Steam processes. Restart your computer and open Steam again. If your client was part of a beta program, it will install some updates before you can play your games again.
- If you face any problem while opting out of beta you can browse to your directory and delete the beta files from there. The default location for your steam folder should be “C:\Program Files (x86)\Steam”. Or if you installed Steam in another directory, you can browse to that directory and you can proceed with steps mentioned below.
- Browse to a folder named “Packages” and delete all the files that start with beta. Close the window and after starting the client again, follow the method on how to opt out beta mentioned in step number 4.
- Restart Steam and check if you can successfully play multiplayer games.
Solution 8: Disabling third-party programs
If you are using a proxy tunnel or VPN services, you should disable them and try again. Steam has anti-Ddos guard active in all of their servers. When you use VPN or tunneling, the guard may flag you as a potential threat and deny you downloading items for your Steam game client. It is a common procedure the guard flags all the IP’s and addresses which are new/suspicious and deny them access.
- You can either close those applications yourself from their respective options or you can press Windows + R to bring up the Run application.
- In the dialogue box type “taskmgr” to bring up the task manager.
- Now from the list of processes, delete all third party applications running and close it. Launch Steam again and check if the error still persists.
Solution 9: Disabling firewall/antivirus
It is a well-known fact that Steam conflicts a lot with many Antivirus software. Steam has a lot of processes going on at once at the same time. This consumes a lot of memory and CPU usage. Because of this, many antivirus software adds Steam as a potential threat and doesn’t let it run as expected.
We have put together a guide on how to put steam as an exception in antivirus. Follow the steps here.
For disabling the Windows Firewall, follow the steps listed below.
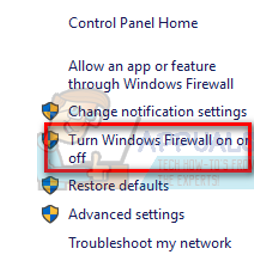
- Press Windows + R button to bring up the Run application. In the dialogue box type “control”. This will open your computer’s control panel in front of you.
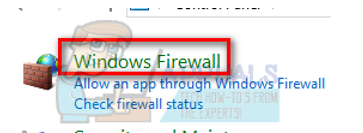
- On the top right there will be a dialogue box to search. Write Firewall and click on the first option that comes as a result.
- Now at the left side, click the option which says “Turn Windows Firewall on or off”. Through this, you can turn your firewall off easily.
- Select the option of “Turn off Windows Firewall” on both the tabs, Public and Private Networks. Save changes and exit. Restart Steam and launch it using the option Run as administrator.
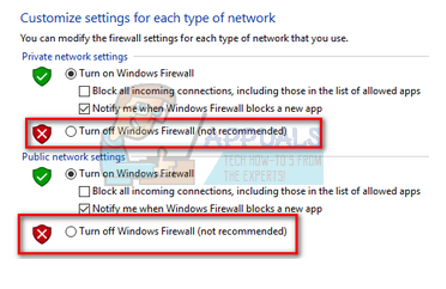
- If Steam launches and doesn’t crash, it means there was a problem with the antivirus/firewall conflicting with your client. If not, keep following the solutions listed below.
Final Solution
Now there is nothing left except to reinstall Steam and see if that does the trick. You can follow how to refresh/reinstall your Steam files through this guide.
Note: If you are having a connection error where your entire Steam client refuses to connect to the internet, refer to this guide.
Note: Even after following all the methods listed above, your Steam client doesn’t let you matchmake online, it means there is a problem on Steam’s end. Normally, these issues get fixed in around 2-3 days. Steam will roll out an update and within that update, there will be a fix present.