Fix: Steam Content Still Encrypted
Steam is a giant when it comes to digital platforms distributing games and running servers across the world. It started around 2003 and since then, it has been growing and gaining the support of hundreds of developers. Steam also has other features in its client such as the marketplace, the community etc.
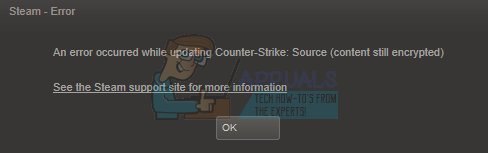
Like all other software, Steam also bumps into unexpected errors. One of them stating that the Steam Content is encrypted when you try to install or update a game file. This error is traced back to a number of reasons; there no specific “one” cause why it may be happening. We compiled a list of all the solutions which seemed to work for the Steam users. Take a look.
Solution 1: Deleting appmanifest
Appmanifest is a type of file which contains a list of all the files and folders present in one game. Unlike other gaming clients, Steam keeps a record of all the components of a game by making an appmanifest. When it needs to update a game, it compares the old manifest (in the computer) with the new manifest present in the Steam servers. Then it downloads and removes the files needed.
It can be the case that your appmanifest has been corrupted. No need to worry. We can delete the appmanifest and restart Steam. When we will restart Steam, it will notice that there is no appmanifest present in its directory; it will then download a fresh appmanifest and compare it with the files present in the game folder.
- Navigate to your Steam directory. The default path for Steam’s installation is “C:\Program Files (x86)\Steam”. If you have installed Steam to another file location, you can also browse to that directory and follow these steps.
You can either navigate to the directory using the file explorer or reach the location by entering the file path in the Run application (press Windows + R key to bring up Run).
- Once in the main Steam directory, navigate to “steamapps” folder.
- Here you will one or more appmanifest files. You can easily identify them as they all start with the text word “appmanifest—“.
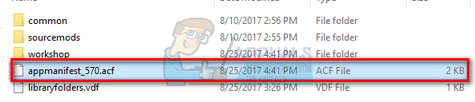
- Cut and paste all the appmanifest to your desktop. After ending all Steam processes from your task manager, launch Steam again using the option “Run as administrator”.
- Now Steam will detect these files missing and download fresh copies from the servers. After the downloading is complete, launch your game through the Library.
Solution 2: Verify integrity of Game Files and repairing Steam Library
Most of the games available on Steam are huge files consisting of several GB’s. It is possible that during the download/update, some of the data may have been corrupted. Steam has a feature within the client itself where you can verify the integrity of game files quite easily.
This feature compares your downloaded game with that of the latest version present in the Steam servers. Once it is done cross-checking, it removes any unwanted files or updates them if needed. There are manifests present in each computer where a game is installed. Instead of checking the files one by one (which take hours), Steam compares the manifest present on your PC with the one in the servers. This way the process takes place much more quickly and efficiently.
We can also try repairing Steam Library files. Steam Library is the place where all your games are present and you can only access them through it. It is possible that your Steam library isn’t in the correct configuration. There may also be a case where you have installed Steam on one drive and your games are on another one. In that case, you have to repair both the libraries before launching your game again.
Do note that this process takes some times as a lot of computation is going on. Don’t cancel the process in between to avoid any further errors. Furthermore, Steam may ask you to enter your credentials once it is done with the process. Don’t follow this solution if you don’t have your account information at hand.
You can check our detailed guide on how to verify integrity of games and repair your Steam library from here.
Solution 3: Disabling Beta participation
Steam, like many other giants in the gaming industry, also constantly improve their client. This improvement includes new added features and bug fixes etc. Valve has an option in Steam where you can get your hands on the latest developments by participating in the Beta program.
In the Beta program, you get all the features first hand before the official release, but, you may experience a lot of bugs and even crashes. As we all know, a beta version isn’t the official version and the developers are constantly tweaking and making changes by gathering data through your usage.
Whenever you experience a problem, it gets reported to Steam who in turn releases an update to the beta version to fix it. Normally the updates come within two to three days but it can also be longer. We can try disabling your beta participation and check if the problem gets fixed.
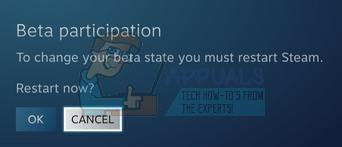
Note: If you are using a feature which is only available in the beta version, it may be deactivated as we will be shifting to the stable version. Don’t follow this method if you don’t want to lose access to those functions.
Solution 4: Changing your PC’s date
It may be possible that the game you are playing might have its release counter badly configured. It may be set to release after some time or its expiry may be set too soon. You can easily change the date of your PC and launch the game. If it launches, it means there is a bad configuration file within your game which is forcing it to lock itself because the current date doesn’t meet its requirements.
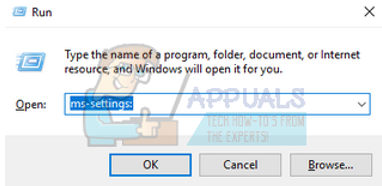
- Press Windows + R button to launch the Run application. In the dialogue box type “ms-settings:”. This will launch the Settings applications.
- Once in the Settings application, look for the option named “Time & Language”. It should be somewhere in the middle.

- After clicking the option, you will be taken to the Date and Time menu. By default, your pc will have “Set time automatically” and “Set time zone automatically” checked. Uncheck them and click on the option which says “Change date and time”.
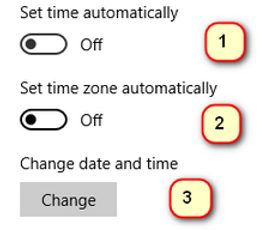
- After you click Change, a new window will pop up where you can change the date as well as time. Change the date to a year before. If it doesn’t work, change it a year or two later.

- Launch your Task Manager by pressing ⊞ Win + R button. This should launch the Run application.
In the dialogue box write “taskmgr”. This should open up the task manager.
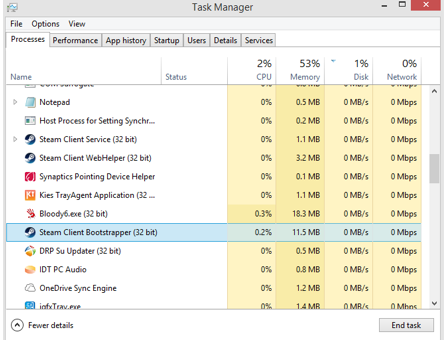
- End all Steam related processes starting from the process ‘Steam Client BootStrapper’. If there are no Steam processes active already, proceed to the next step.
- Re-launch Steam. Open your game. If it is able to launch we have diagnosed the problem, if not, keep looking at the solutions down below.
Solution 5: Rebooting your PC
Steam’s client updates itself very frequently. Some updates are configured the core of the Steam client. Because of this, a restart is required. A restart starts Steam from scratch and all the updates which occurred would be implemented.
It is also possible that the error you might be facing is caused by another third party application. There can be many conflicts possible; therefore it is advised that you disable all third party programs. Especially programs who claim to speed up your PC or clean your hard drive. Reboot your PC and play the game to check if the error at hand got fixed or not.
Don’t forget to save all your work before restarting your PC
Solution 6: Disabling Firewall and adding an exception to antivirus
It is a well-known fact that Steam conflicts with the Windows Firewall. As we all know, Steam tends to download updates and games over the background while you are using Windows for something else. It tends to do so you don’t have to wait for the download to finish when you want to play your game or use the Steam client. Steam also has access to a number of system configurations and it alters it so you can get the best experience available for your gaming. Windows Firewall sometimes marks some of these processes as malicious and tends to block Steam. There may even be a conflict going where the Firewall is blocking Steam’s actions in the background. This way you won’t even know it’s happening so it’ll be hard to pinpoint it out. We can try disabling your Firewall temporarily and checking if the error dialogue goes away or not.
You can check our guide on how to disable the firewall from here.

Like in the case of Firewall, sometimes your antivirus can also quarantine some of Steam’s actions as potential threats. The obvious solution would be to uninstall your antivirus but it isn’t wise to do so. If you uninstall your antivirus, you will be exposing your computer to a number of different threats. The best way is to add steam to the list of applications which are exempted from scanning. The antivirus will treat Steam as if it wasn’t even there.
You can read our guide on how to add Steam as an exception to your antivirus from here.
Solution 7: Running chkdsk
Chkdsk is short for Check Disk. It checks for any errors present on your drive and tries to correct them using the resources available. It is very useful in troubleshooting for errors that we can’t pinpoint, in this case, the content is encrypted. There are two main ways you can run the chkdsk command. Refer below to the solutions below.
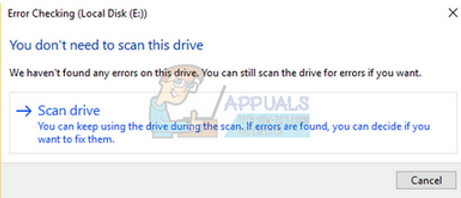
Using File Explorer.
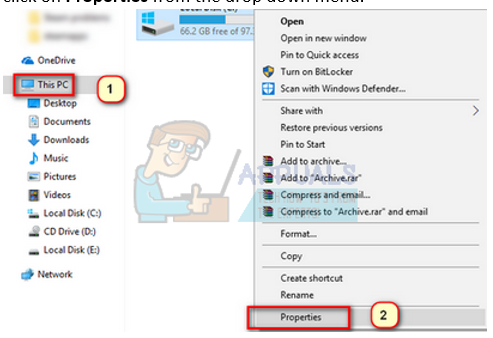
- Open your file explorer and navigate to This PC (My computer) present on the left side of the screen.
- Here all the connected hard drives will be shown. Right click on the hard drive you wish to check and click on Properties from the drop down menu.
- Click on Tools tab present on the top of the new windows that comes after clicking properties. Here you will see a button named Check under the column of Error checking. Press the button and let chkdsk run completely. Don’t interrupt the process.
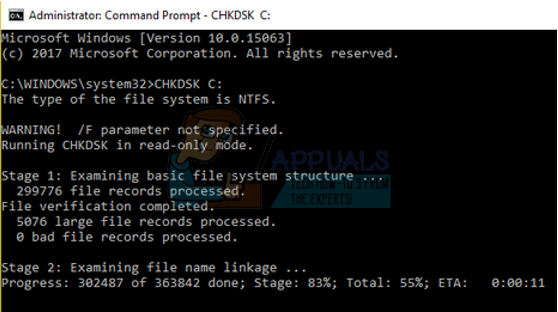
Using command prompt
- Press Windows + R to launch the Run application. In the dialogue box, type cmd. This will launch the command prompt.
- In the command prompt, write “CHKDSK C:”. Here we are checking the disk drive C. If you want to check any other drive, replace the C with that drives name.
For example, if I am checking drive D, I will write “CHKDSK D:”.
Final Solution: Refreshing Steam files
Now there is nothing left except to reinstall Steam and see if that does the trick. When we refresh your Steam files, we will preserve your downloaded games so you won’t have to download them again. Furthermore, your user data will also be preserved. What refreshing Steam files actually do is delete all the configuration files of the Steam client and then forces it to install them again. So if there were any bad files/corrupt files, they will get replaced accordingly. Do note that after this method, you would need to log in again using your credentials. Don’t follow this solution if you don’t have that information at hand. The process may take a while so avoid canceling once you start the installing process.
You can follow how to refresh/reinstall your Steam files through this guide.
Note: If you are having a connection error where your entire Steam client refuses to connect to the internet, refer to this guide.
UR THE BEST THX VERY MUCH!!! The first fix was the issue for me thx very much.