Fix COD Cold War Error Code 3 (Failed to Join Party)
Some Call of Duty: Cold War users are unable to join crossplay parties. The error that comes up is ‘Failed to Join Party (Error Code 3)’. This problem is reported to occur on a variety of devices including PC, Xbox One, Xbox Series X, Playstation 4, and Playstation 5.
After investigating this particular issue thoroughly, it turns out that there are several different underlying causes that might end up triggering this error code when attempting to play the game with people on different platforms. Here’s a shortlist of potential culprits:
- Lobby Glitch – As it turns out, there is one pretty common glitch popularly named ‘lobby clitch’ among players that might ultimately lead to the apparition of this error. If this scenario is applicable, you should be able to fix the issue with a simple platform restart.
- Network inconsistency – According to some affected users, this error code can also be associated with a network inconsistency facilitated by a bad DNS range or other kinds of temporary data that might inhibit your PC (or console) ability to connect with the game server. TO fix this issue, you should go for a network restart or reset.
- UPnP is disabled – If you’re using a router that supports UPnP, you need to ensure that the universal plug and play feature is enabled in order for the port that is used for crossplay parties to be opened automatically. Several affected users have confirmed that the problem was fixed once UPnP was enabled from their router settings.
- Crossplay port is not forwarded – If you are using an older router that doesn’t support UPnP, you will need to access your router settings and forward the TCP and UDP crossplay port manually. Several affected users have confirmed that this method was the only thing that allowed them to fix the issue.
- Crossplay connection glitch – If you don’t really need to use crossplay, you can simply disable it from the in-game menus. As of now, crossplay is still a gimmicky feature that tends to cause a wide array of issues for cross-platform players.
- The friend is logged in from two platforms – In case you encounter this error only when a friend from PC attempts to join, chances are he is currently logged in from both PC platforms (like Blizzard and Activision), In this case, you can fix the issue by temporarily deleting him from your Social tab before adding him again.
Now that you are familiar with every potential fix that might be responsible for this COD Cold War code, here’s a list of methods that other affected users have successfully used to get to fix the issue and join crossplay parties once again:
Restart your console / PC
Before you try any of the other fixes featured below, you should start with the simple act of restarting your PC or console. When you do this, ask the other party members involved to do the same.
If the problem is triggered by some type of network inconsistency or a temporary server issue, a simple restart of the machine that is rendering the game will resolve the problem in most cases.
In case you already tried this and the same problem is still occurring, move down to the next potential fix below.
Restarting or Resetting the Router
If a system restart didn’t resolve the inconsistency that was triggering the ‘Failed to Join Party (Error Code 3)’, the next thing you should do is refresh every network element to ensure that no temporary file is interfering with your NAT.
In this case, you have 2 different ways of fixing this problem:
- Restart your router/power cycle – This will refresh your current IP and TCP data that your router is using without making any persisting changes that might affect your network interaction. But if the problem is not related to TCP and IP cached data, this method will not do much to fix the issue in your case.
- Resetting your router – Resetting your currently saved router settings will revert the device to the factory state in addition to clearing the cached data. But if your ISP is using PPPoE, this operation will also reset the currently saved credentials.
A. Restarting your router
If you want to start with something that doesn’t run the risk of affecting your immediate access to the Internet, start with a simple router reboot. This will clear the currently saved Internet Protocol data and Transmission Control Protocol data.
In order to perform a reset on your network device, start by identifying the power/switch button (typically located on the back of the device) and press it once to cut off the power.
After you do this, disconnect the power cable from the power outlet and wait for 1 full minute or more.
Note: Disconnecting the power after you turn your router off and waiting for a full minute is essential since it allows the power capacitors enough time to drain and clear any temp data that they currently might be maintaining in between restarts.
If restarting didn’t fix the problem, move down to resetting your network restart.
B. Resetting your router
If the restart didn’t fix the Error Code 3 in COD Cold War for you, the next step is to go for a complete router reset to ensure that no setting or network-related cached data is currently causing the problem.
But before you do this, it’s important to understand what this operation will do to your current network setup. Understand that this will reset your router back to its factory resets, which means that any forwarded ports, blocked items, and any other custom settings.
IMPORTANT: If your ISP is using PPPoE, a router reset will mean that the currently saved credentials will be ‘forgotten‘. So once you go through with the reset procedure, you’ll need to recreate the PPPoE connection.
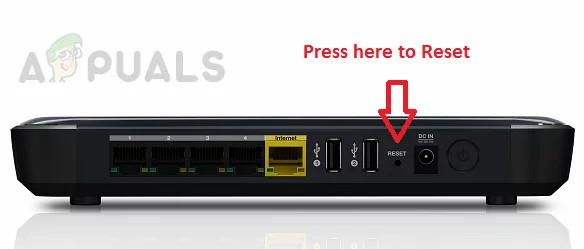
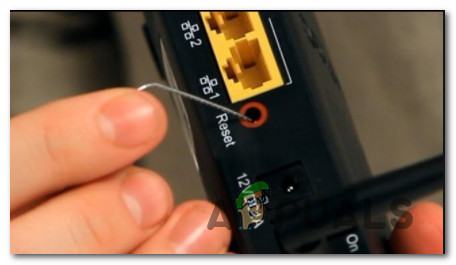
Now that you understand the repercussions of this fix you can initiate a router reset by finding the reset button (typically located on the rear of your router).
Once you see it press it and hold on to it until you see all the front LEDs flashing at the same time.
Once your router is reset, re-establish the internet connection by reinserting the PPPoE credentials supplied by your ISP (if necessary) and see if you are able to join crossplay-parties without seeing the same error again.
If you’re still dealing with the same error code 3 error, move down to the next potential fix below.
Enabling UPnP
The most common signaled issue that will produce this error when attempting to join a crossplay party is a case where the crossparty port used by the game is not forwarded – In this case, the connection with the game server cannot be established by your computer.
The vast majority of routers nowadays are capable of forwarding the ports used by the games we play automatically with a feature called UPnP (Universal Plug and Play).
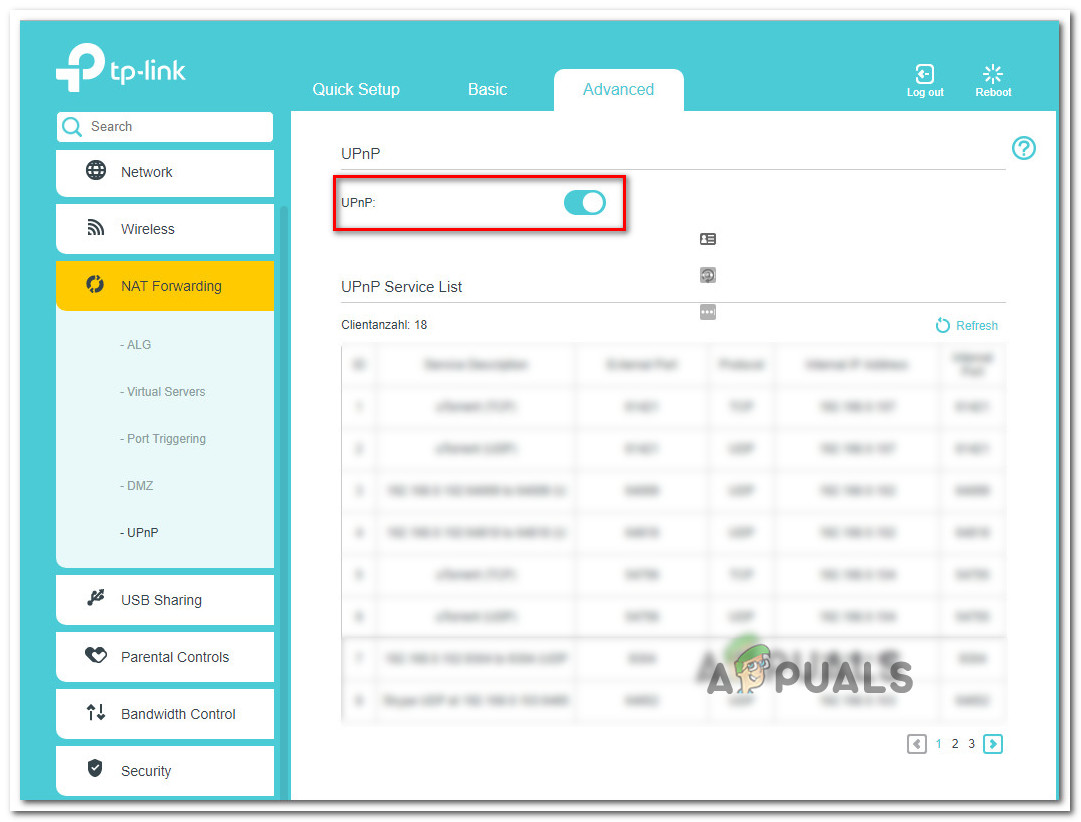
If your router supports Universal Plug and Play, the solution is extremely easy – Access your router settings and enable UPnP to allow your router to automatically forward the crossplay port used by Call of Duty Cold War.
Even though the instructions on how to do this are different from router to router, you need to follow a series of generic instructions to enable UPnP on your router.

After you ensured that UPnP is enabled, reboot both your router and the PC you play the game on and see if the issue is now fixed.
In case the router that you’re using does not support Universal Plug and Play, move down to the next potential fix below.
Forwarding the COD: Cold War crossplay port
In case you’re using an older router model that doesn’t support UPnP, you’ll need to take some additional steps to forward the ports used by the game manually (depending on the platform you’re playing Starbound on).
Several affected users that we’re dealing with the same kind of issue have reported that the problem was finally fixed after they accessed their router settings manually and forwarded the crossplay port used by COD: Cold War.
Note: Depending on your router manufacturer, the instructions of doing this will be slightly different. To tackle this, we’ve created a series of generic steps that should walk you through the entire process.
Follow the instructions below to forward the required StarBound ports manually from your router settings:
- Access a PC that is connected to the same network you use when playing Call of Duty Cold War.
- Next, open your default browser, type one of the following addresses and press Enter to open your router settings:
192.168.0.1
192.168.1.1
- Once you see the initial login screen, enter the login credentials to access your router settings.
Accessing the router settings - On most routers, you’ll be able to get in with the default login credentials. In most cases, you’ll be fine with using admin as username and 1234 as password.
Note: If these generic credentials don’t work, look on the back of your router or search online for the default login credentials according to your router model. - Once you successfully arrived inside your router settings, expand the Advanced / Expert menu, and look for an option named Port Forwarding / NAT Forwarding.
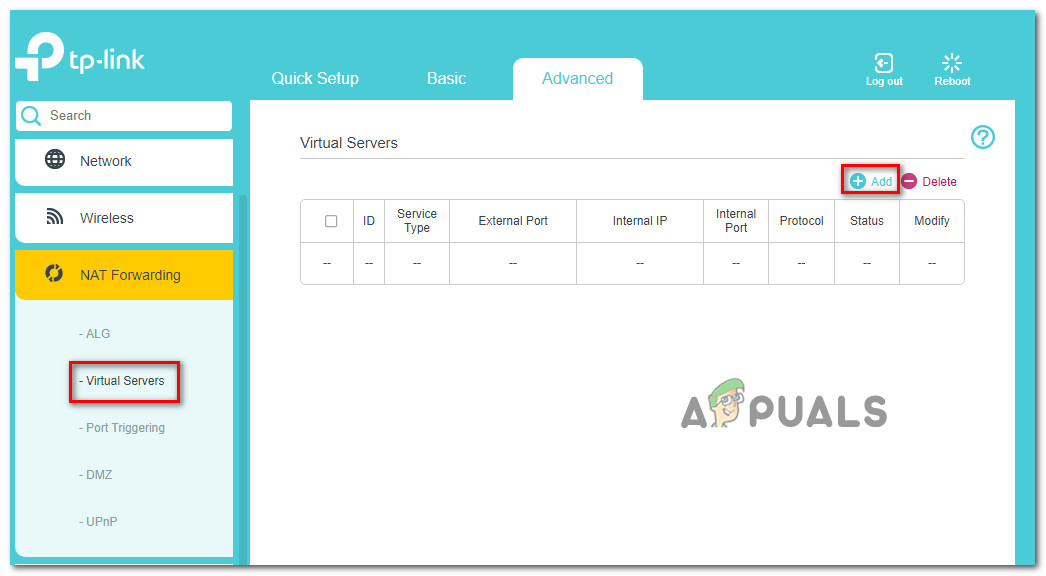
Forwarding the required ports - Next, go ahead and manually open the ports below to ensure that your network will accept incoming crossplay connections for Call of Duty Cold War:
TCP: 3074
UDP: 27014-27050
- After the port is successfully forwarded, restart your computer, launch the game again, and see if the problem is now fixed when trying to create or join a crossplay party.
If the same kind of issue is still occurring even after you forwarded the required ports manually, move down to the next potential fix below.
Disable Cross-Play
If you don’t care for cross-play because you play by yourself or all your friends play on the same platform as you, you should probably be able to prevent the ‘Failed to Join Party (Error Code 3)’ from appearing again by disabling cross-play connections altogether from the in-game menu.
As of now, we were only able to confirm the effectiveness of this method on PC.
If you can afford to disable cross-play, follow the instructions below to disable cross-play:
- Start by loading opening COD: Cold War and wait until you get past the initial loading screen.
- Once you get to the welcome screen, click on the Settings menu in the top-right corner of the screen.
- Inside the Settings screen, go ahead and select the Account & Network tab from the ribbon menu at the top.
- After you’re inside the Account & Network menu, go under Activision Account and set the toggle associated with Crossplay to Disabled.
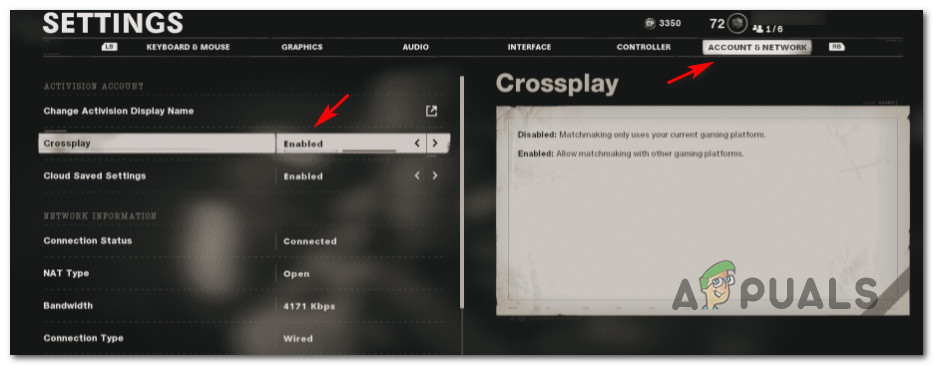
Disabling Cross-Play inside Call of Duty Cold War - After cross-play has been successfully disabled, go ahead and initiate a party once again (or join on) and see if the error is now fixed.
If you’re still seeing the same ‘Failed to Join Party (Error Code 3)’, move down to the next potential fix below.
Deleting the friend from the Friend List
May affected players that are part of the COD community have confirmed that they managed to fix the issue by deleting the friends they were unable to play online with before adding them back.
Most often than not, this particular issue is caused by players that are logged into two platforms at one time. For example, you see the Failed to Join Party error when an attempt to join a crossplay party with a friend that’s currently logged into both their Blizzard and Activision accounts – In this case, you can resolve the issue by going to the players list on Social and deleting the friend before adding him back.

If you’re looking for specific instructions on how to enforce this fix, here’s what you need to do:
- Navigate to the Social menu of your Call of Duty: Cold War account.
- Go ahead and select the friends that you are trying to play with.
- Choose the profile before hitting Delete.
- Add them afterward once again using their Activision account IDs.
- Restart your game or the Activision client and you should see them online and join them without seeing the same error once again.


