How to Fix AMD Radeon Software Won’t Open?
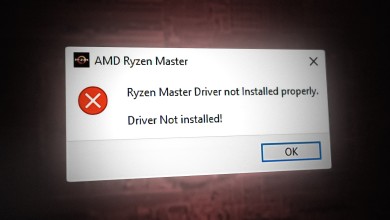
When trying to open AMD Radeon Software, users might find that the application doesn’t launch and no error message appears. This usually means there’s a mismatch between the installed driver and the Radeon Software, causing compatibility issues. The main cause is often an incomplete or corrupted driver installation.
Other possible reasons include leftover files from earlier installations, corrupted system files, or conflicts with other programs.
Now that you know the causes, let’s discuss the solutions.
1. Delete the AMD Radeon Profile
The `gmdb.blb` file houses the AMD Radeon software profile with all configurations. If corrupted, it may stop the software from opening. Deleting the CN folder will clear this profile, allowing it to regenerate with fresh settings when the software is launched again. This process resets configurations, removing any outdated or corrupted data that might prevent the software from starting.
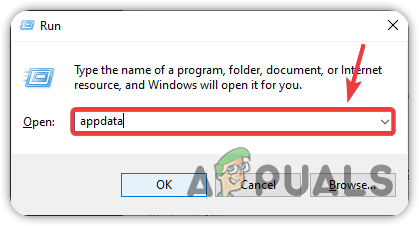
- Press Win + R to open the Run window.
- Type AppData and press Enter to access the AppData folder.
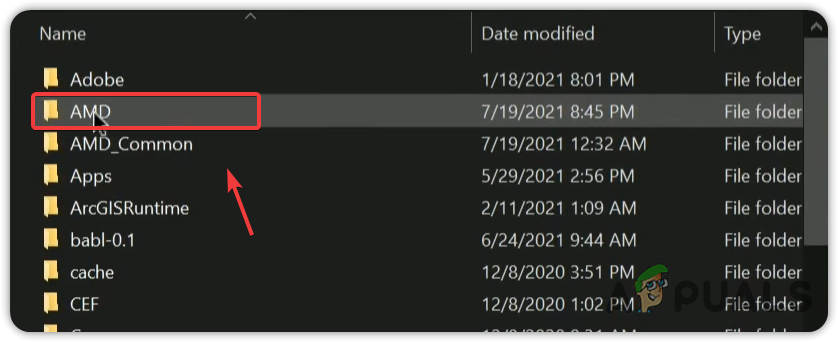
Navigating to the Appdata folder - Open the Local folder, then AMD.
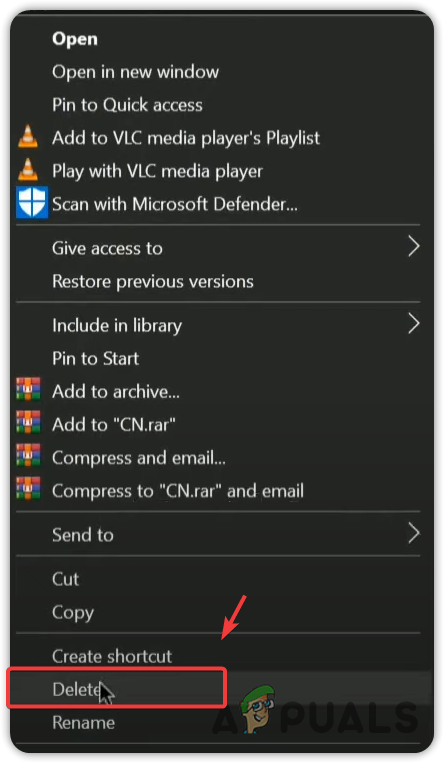
Navigating to the AMD folder - Right-click the CN folder and select Delete.
Deleting AMD Radeon Profile - Try launching the AMD Radeon software.
2. Disable Integrated GPU
An integrated GPU is built into the processor and may conflict with AMD Radeon Software if not disabled. Disable it in Device Manager to prevent interference with the dedicated AMD GPU. This ensures the system prioritizes the AMD card, allowing the software to function correctly.
- Right-click the Start Menu and select Device Manager.
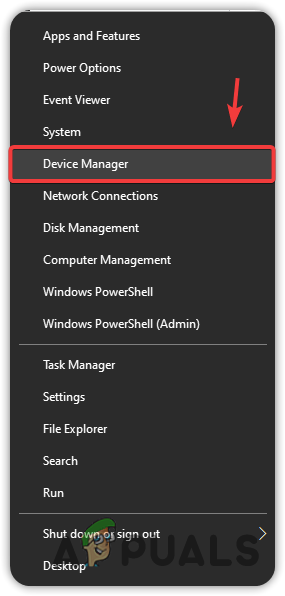
Navigating to Device Manager - In Device Manager, right-click the integrated graphics driver and select Disable device.
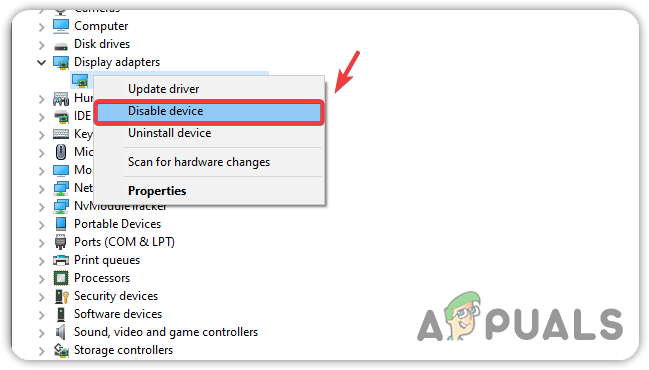
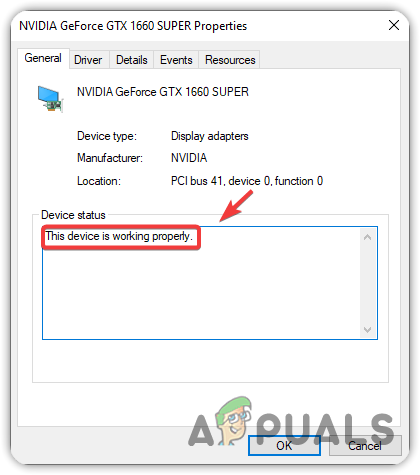
Disabling the Integrated Graphics driver - Verify that the AMD graphics driver is enabled. Right-click it, select Properties, and ensure the status reads This device is working properly. If there’s an error code, other issues might be present.
Checking Graphics driver status - Try to launch the AMD Radeon software.
3. Roll Back to the Older Version of Your Graphics Driver
New driver updates can cause compatibility issues with Radeon Software. Rolling back to an older version can resolve these conflicts. If problems started after an update, roll back or perform a clean installation of the driver and software. If rolling back doesn’t help, try reinstalling.
- Right-click the Start Menu and select Device Manager.

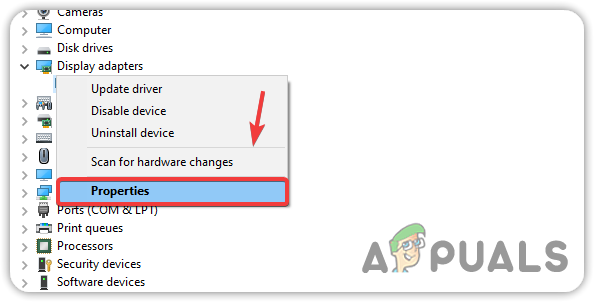
Opening Device Manager - Expand Display Adapters.
- Right-click the graphics driver and select Properties.
Navigating to graphics driver properties - Go to the Driver tab and click Roll Back Driver. If unavailable, consider a clean installation.
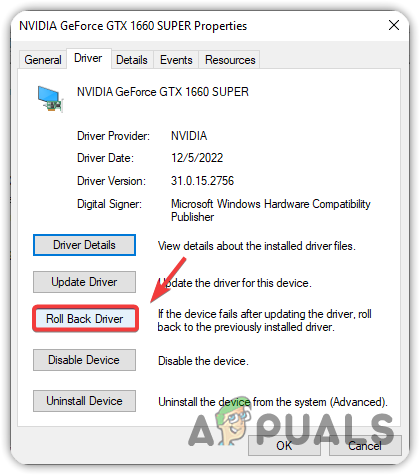
Roll backing the Graphics driver - Select a reason and click Yes to confirm.
4. Match the Driver Version to the Registry Editor
An outdated driver version in the Registry Editor can cause issues, even with the latest driver installed. Aligning the Registry Editor’s driver version with the installed Radeon Software resolves these mismatches and reduces conflicts.
- Press Windows + R, type regedit, and press Enter.

Opening Registry Editor - Click Yes if prompted by UAC.
- Navigate to:
Computer\HKEY_LOCAL_MACHINE\SOFTWARE\AMD\CN
- Find and double-click DriverVersion if available.
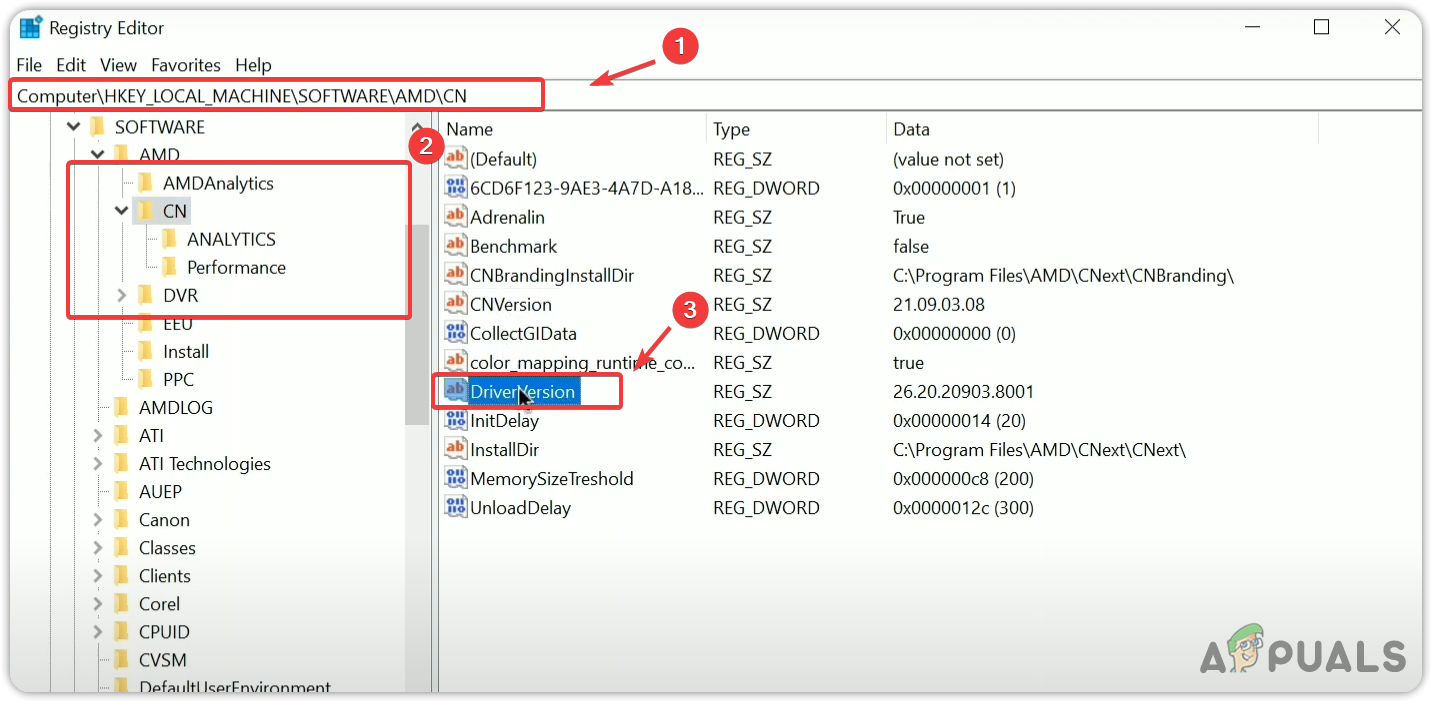
Opening AMD DriverVersion Registry entry - Minimize the Registry Editor, open Device Manager from the Start Menu, and expand Display adapters.
- Right-click your driver, select Properties, and go to the Driver tab.
- Copy the driver version.
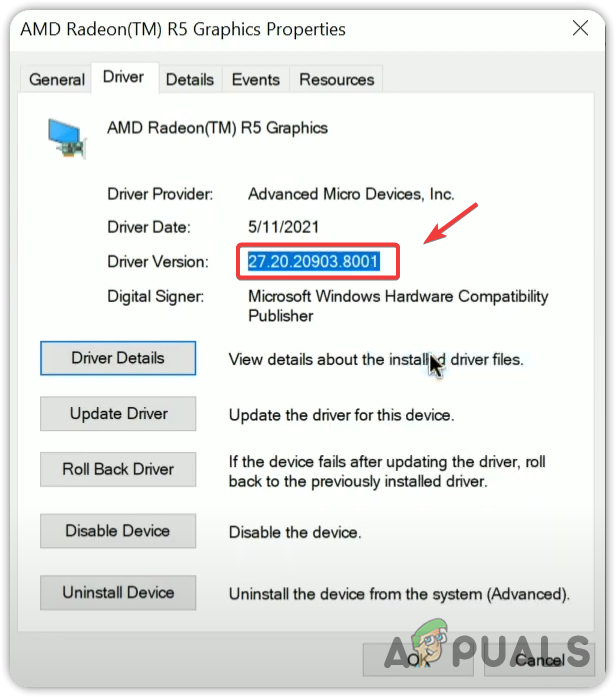
Copying AMD driver version - Return to the Registry Editor, paste the driver version, and click OK.
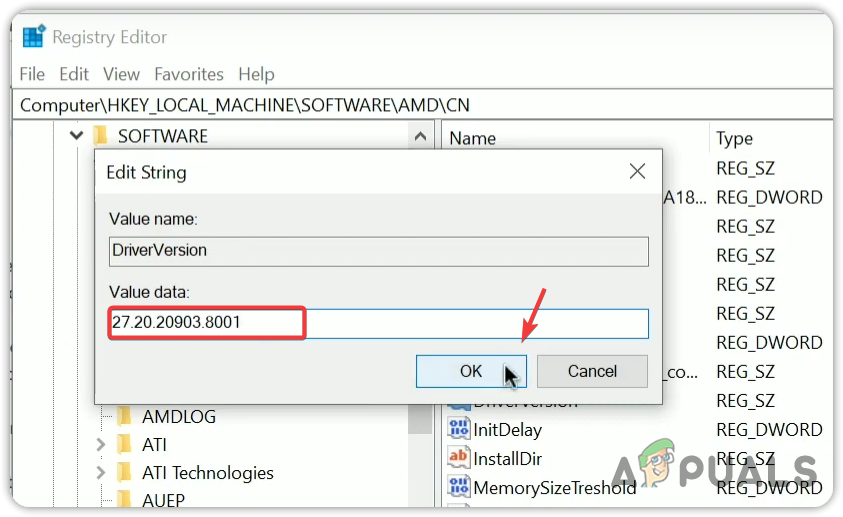
Pasting driver version - Restart your computer and check if the Radeon software opens.
5. Clean Reinstall of GPU Drivers
If the issue persists, perform a clean reinstallation of the graphics driver using Display Driver Uninstaller (DDU) to remove drivers and registry files. This clears lingering files or corrupted data, ensuring only the most recent stable drivers are installed, eliminating compatibility issues and resolving software launch errors.
- Download Display Driver Uninstaller.
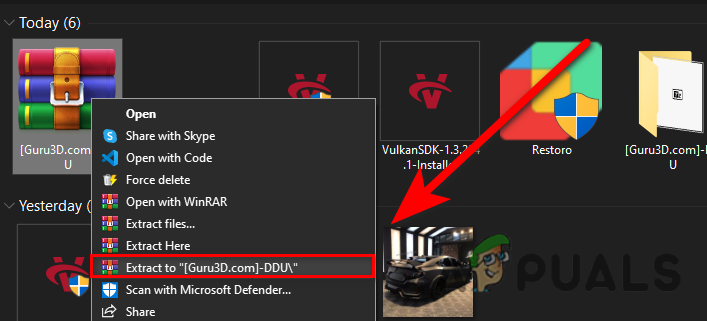
- Right-click the downloaded folder and select Extract to “[Guru3D.com]-DDU\”.
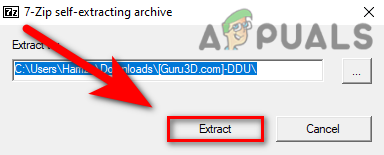
Extracting DDU Zip folder with WinRar - Open the extracted folder and run DDU v [Version Name].
- Click Extract.
Extracting DDU Application - Run Display Driver Uninstaller. For best results, start Windows in safe mode.
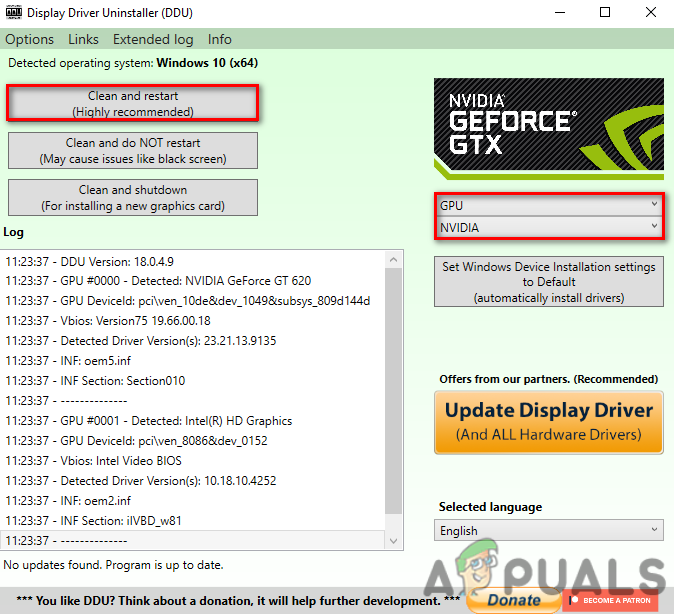
- Select your GPU and vendor.
- Click Clean and Restart.
Selecting Graphics Card driver for the Uninstallation Process - After the restart, go to your graphics card manufacturer’s website to download the latest driver.
- Follow on-screen instructions to install the driver, then restart your computer.
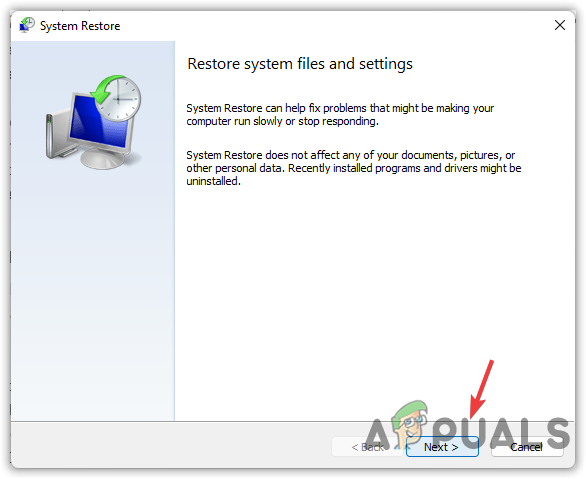
6. Use the System Restore Utility
If reinstalling the graphics driver doesn’t fix the issue, use System Restore to revert to a state where AMD Radeon Software worked. This can undo changes causing conflicts without affecting personal files. If no restore point exists, reset or reinstall Windows.
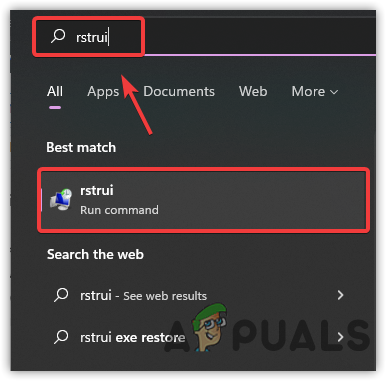
- Press Windows key + R, type rstrui, and press Enter to access System Restore.
Navigating to a System Restore with a command - Select Next to proceed.
Clicking Next to proceed - Choose a restore point and click Next.
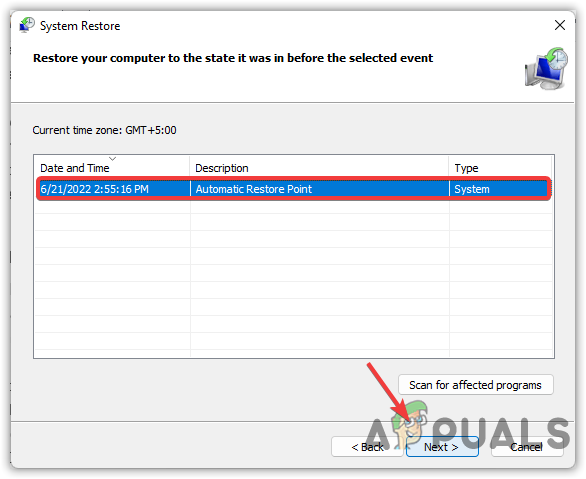
Selecting a Restore Point - Click Finish to restore your system.
- After restarting, check if the AMD Radeon software opens.


To hell with AMD Radeon. I downloaded a third party program (ClickMonitorDDC 7.0) that allows me to tweak the monitor how I want to.