Fix FAT FILE SYSTEM ‘fastfat.sys’ Error Windows 10
FAT File System Error on windows 10 happens because of outdated Windows, outdated device drivers, corrupted system files, corrupted drives, conflicting folder protecting / encryption applications, false positive by Anti-virus and corrupted Windows.
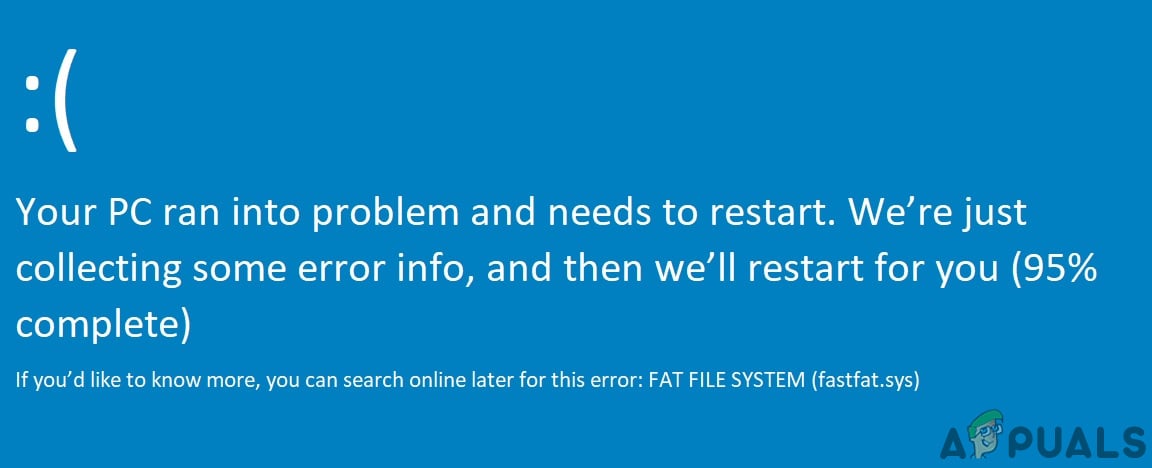
FAT FILE SYSTEM error restarts your system to avoid damage to the system just like any other Blue Screen of Death (BSOD) error.
What Causes FAT File System Error on windows 10?
Our team of experts, after careful analysis of the different case scenarios, were able to identify the following causes of the FAT File System Error on windows 10.
- Outdated Windows: If the OS of your system is not updated, then there are different loopholes left in your system which can result in many types of errors, including the current one.
- Corrupted System Drives: If your system’s hard drive contains bad sectors, then the system’s ability to read and write to the disk gets effected badly, which can cause the current error.
- Faulty Hardware: If any pieces of hardware have become faulty, then it can force the system to show the current error.
- Outdated Device Drivers: Outdated device drivers can lead your system to many problems including FAT File System Error on windows 10.
- Corrupted System Files: System files are essential for proper operation of the system and if files required by the system got corrupted then you will suffer from the current issue.
- Conflicting Folder Protecting Applications: These applications use encryption methods that interfere with your system drive. And if any essential system files got damaged/restricted then you can suffer from the current problem.
- False Positive by Anti-virus: Anti-virus applications are known to block access to critically required system files as detecting these files as malware and this false positive can cause the system to show the current error.
- Corrupted Windows Installations: Corrupted windows installation can cause the system to throw many BSOD errors including the current issue.
Steps Before Trying the Solutions:
Before moving on with troubleshooting of the system,
- Make sure you have administrator access to the system.
- If your system is part of a network or domain then network or domain policies may restrain you from performing different operations on the system, so remove the system from network or domain and try the solutions and after solving the problem, rejoin the PC to network/domain.
- Make sure to boot your system in Safe Mode. And if you cannot boot your system in Safe Mode, then use the Windows Installation Media.
- Do not forget to “backup” the essential Data, whenever you can log in to the system.
- Make sure to have a detailed look at Common BSOD Fixes. Remember that you don’t need to try every solution there, just figure out the possible reason causing this error for you and take steps accordingly.
Hardware Problem or Software Problem
BSOD is a Windows self-protection feature in which the computer shuts down itself abruptly to protect itself from data loss or damage. Any BSOD error can be caused by the failure of a hardware device, its driver, or related software. Before moving with the troubleshooting, it is essential to make sure if the problem is hardware related or software-related.
One of the main causes of this error is corruption in the file system, bad blocks or bad sectors on the system’s disk. Another possible cause is the depletion of nonpaged pool memory. To factor out, if the error is hardware-related, we should check the HDD and Memory if these are functioning properly.
Manufacturers have included HDD and memory testing in their BIOS or Setup. And using these tests we can identify if our problem is software related or hardware related. For demonstration purposes, we will use HP Startup Menu (you should follow the guidelines for your system’s manufacturer).
- Power off the system.
- Then Power on the system and immediately start pressing the Esc button to open the HP Startup Menu
- When the HP Startup Menu appears, press the F2
- On the main menu, click Component Tests.
- In the Component Tests, select Hard Drive to run Hard Disk test.
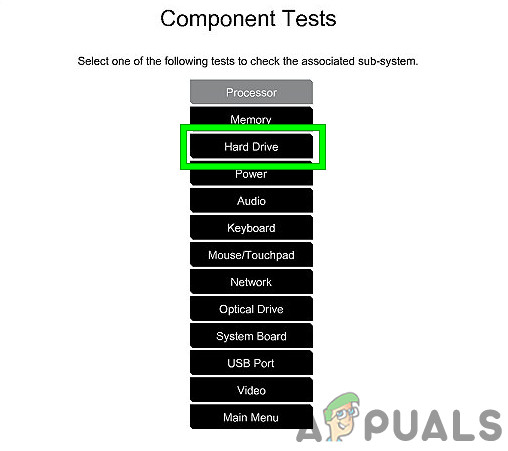
Run Hard Drive Test in Components Test - And after completion of the Hard Drive test, repeat steps 1 to 4.
- Now in Components Test, select Memory to run Memory test.
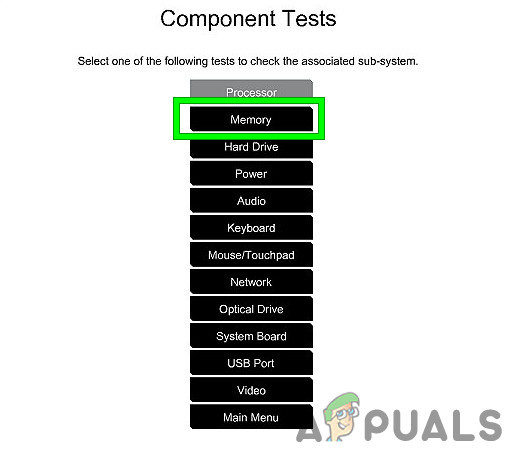
Memory Test in Components Test
If any errors were reported after the Hard Drive test and Memory tests, then FAT File System Error on windows 10 is hardware related and you should get your PC checked from an Authentic Repair Shop.
And if no errors were reported after the tests, then it is a software-related issue.
Solution 1: Remove Faulty Hardware From The System
FAT File System Error on windows 10 can be caused by faulty hardware or its driver and removing all peripherals (that could be removed) and plugging back in one after another to identify the problematic hardware (if any).
- Power off the system.
- Clear all USB ports, SD Card slots, and remove external HDD.
- Remove mouse and keyboard and plug them back in when they are required to communicate with the PC.
- Leave only one RAM in the system and remove all others, if more than one is present.
- If there is more than one storage drive either SSDs or HDDs in the system then remove all of them (simply unplug their power cables) except the one which has OS on it.
- Remove Graphics card except integrated one.
- Now restart the computer to check if it is still having the FAT File System Error on windows 10 error and if the system is clear then power off the system.
- Add any of the removed devices, and power on the system, check if the error appears. Repeat these steps until you find the faulty device.
- Once the faulty device is identified, test the faulty device on another computer to see if the device is damaged. If yes, then replace the faulty one with a new one.
Solution 2: Run ChkDsk Command
A hard disk drive with prolonged use starts to accumulate damages and errors caused by factors including unexpected system shutdowns, corrupted software, bad sectors, and metadata corruption. This factor alone can cause numerous system errors including FAT File System Error on windows 10. Microsoft has included a utility CHKDSK in Windows to check and repair the HDD for any corruption or damage. So, running CHKDSK may solve the problem.
- If you can boot your system in Safe Mode, then move to step 10.
- If you cannot boot into Safe Mode, try to use Advanced Repair Options and go to command prompt (proceed further from step 10).
- If you cannot boot in safe mode and cannot use Advanced Repair Options then create Windows Installation Media.
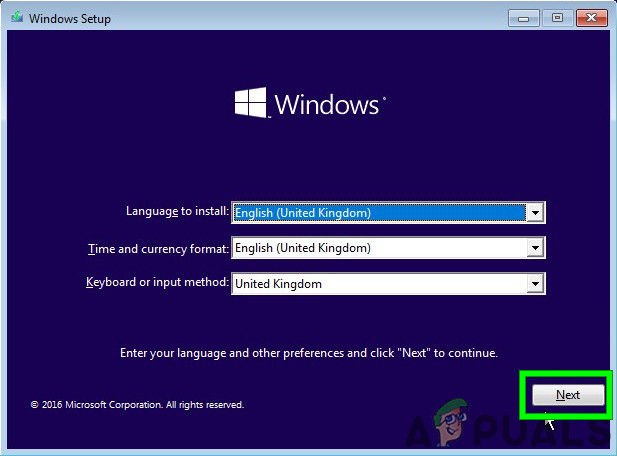
- Plug the Windows Installation Media, start your system and boot from Windows Installation Media (Do not forget to change BIOS to Boot from Windows Installation Media).
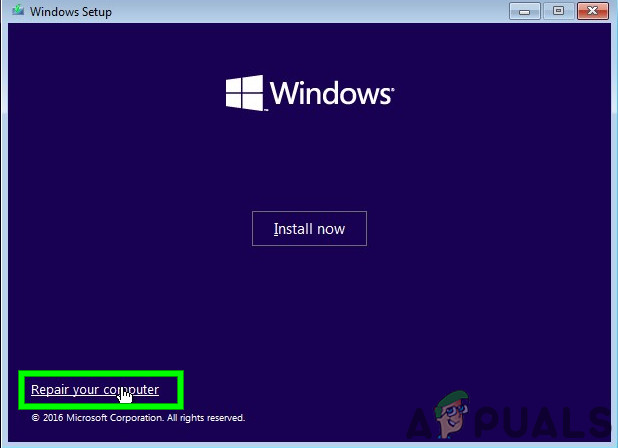
- In the Windows Setup screen, click on Next.
Click Next on Windows Setup screen - Click on Repair your computer link in the next screen of the same window.
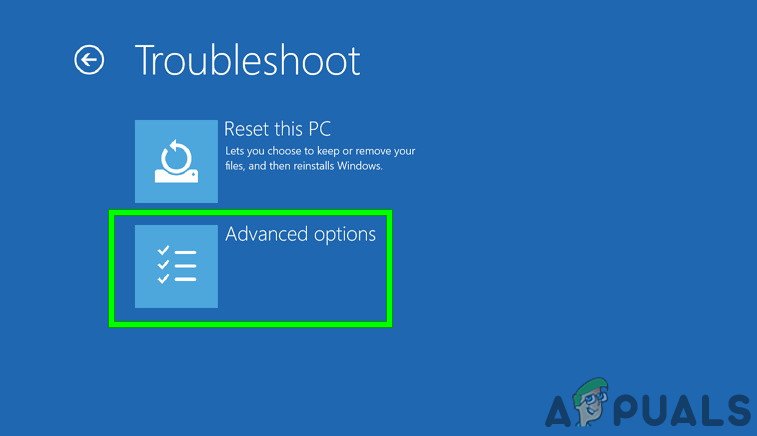
Click Repair your computer on Windows Screen - Now click Troubleshoot on the next screen.

Troubleshoot in Windows RE - Then press Advanced options in the Troubleshoot window:
Advanced options in Troubleshoot screen - Now in Advanced Recovery Options, click on the Command Prompt
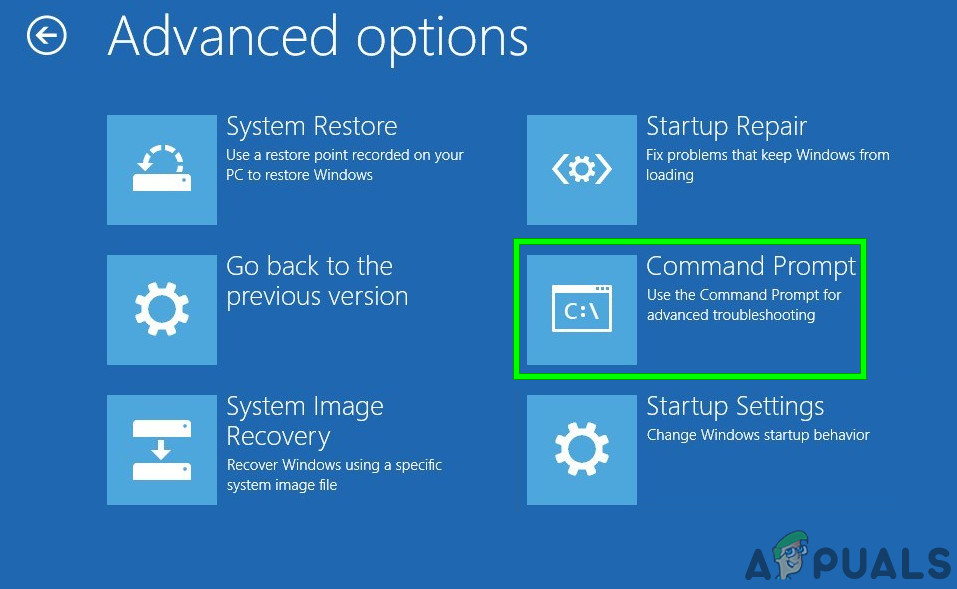
Click Command Prompt - In Command Prompt, type
chkdsk /f /r
and press Enter.
- Then, if asked for, press Y on your keyboard to enable this volume to be checked next time when your computer restarts.
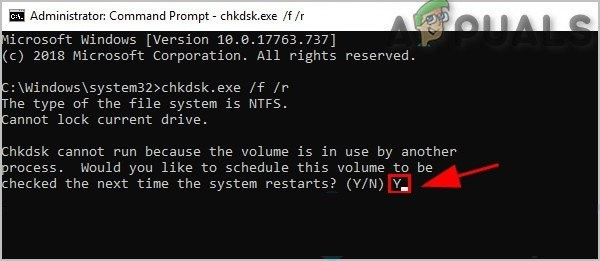
Confirm to Run CHKDSK at next system restart
Remember that you can also run CHKDSK by connecting the problematic’s system HDD to another working PC.
After running ChkDsk by any method, restart your system in normal mode and check if your system is clear of FAT File System Error on windows 10.
Solution 3: Run Driver Verifier To Identify The Problematic Driver
Device Drivers communicate between the operating system and the hardware. If any of these drivers is configured wrongly, corrupted or outdated you will experience numerous errors including FAT File System Error on windows 10. Windows has a built-in utility Driver Verifier to check if any of the drivers are not functioning properly and any errors are detected by Driver Verifier, then we can fix it by updating it to the latest build.
- Press the Windows button and type “command prompt”, and in the list displayed, right-click on the “Command Prompt” and click on Run as administrator.
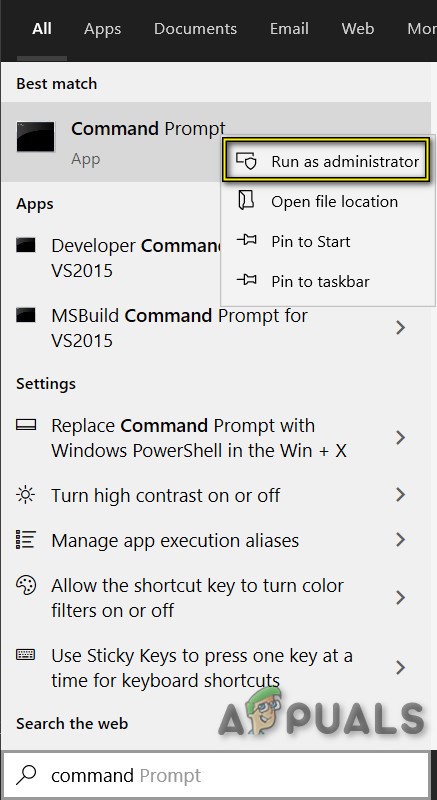
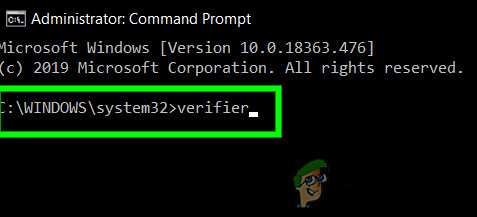
Run Command Prompt as Administrator - Now in the elevated command prompt, type the following command:
verifier
And press Enter.
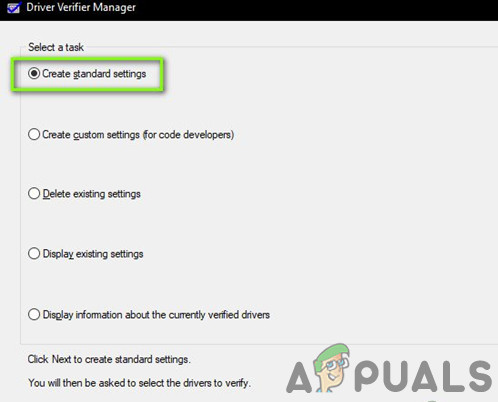
Run Driver Verifier in Administrator Command Prompt - Now in the Driver Verifier Manager, select “Create standard settings” and press “Next” to proceed.
Create Standard Settings in Driver Verifier Manager - Select the option “Automatically select all drivers installed on this computer” and then click on the “Finish”.
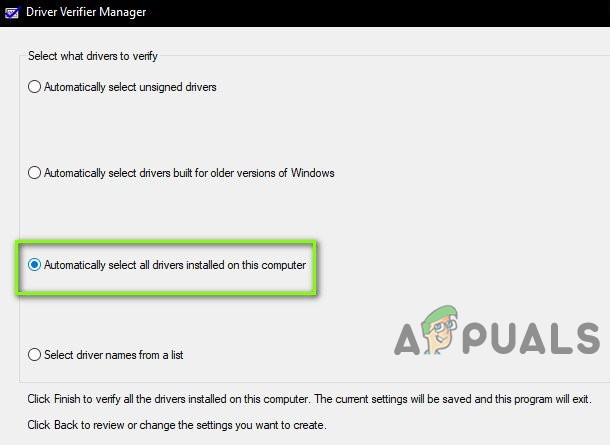
Automatically select all drivers installed on this computer - Now Windows will scan for errors. After you are prompted to restart your computer, do so.
- When Windows restarts the next time, it will analyze all the drivers installed on your computer for issues. If it finds some issues, it will notify you accordingly. This may take time so be patient and let the process finish.
If any broken drivers are found, then update them.
After updating drivers, see if you can boot the system without FAT File System Error on windows 10 error.
Solution 4: Uninstall Folder Protection/Encryption Applications
Certain folder protection and encryption software can cause FAT_FILE_SYSTEM to appear. These applications can cause BSOD error since their encryption method interferes with your hard drive. If you are using any of these tools, then uninstalling them may solve the problem.
- Boot your system in Safe Mode.
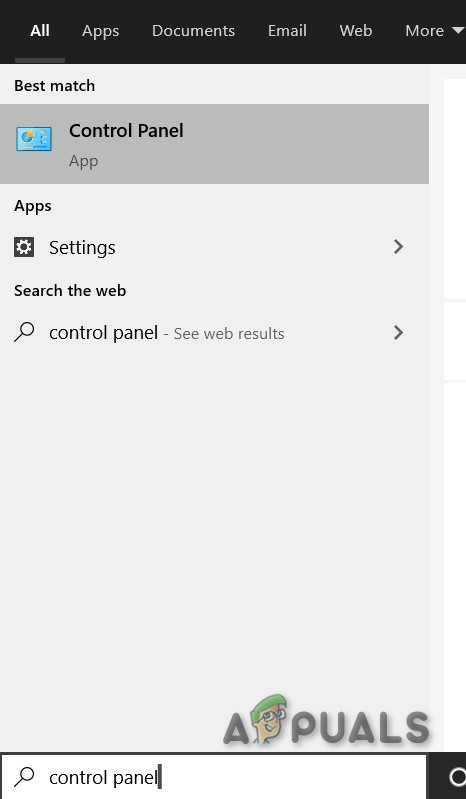
- Press the Windows button and type “control panel” and in the list displayed, click on the “control panel“.
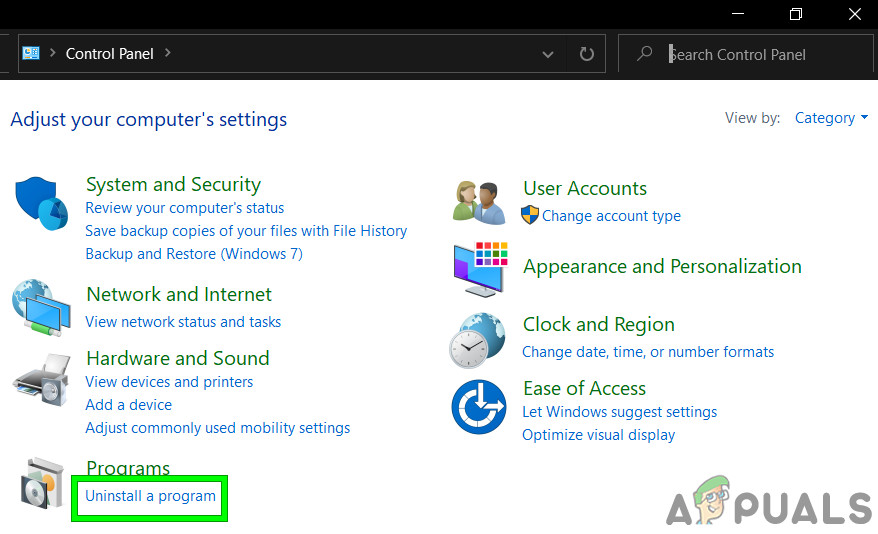
Control Panel in Windows Search Box - In Control Panel, click on “Uninstall a Program“.
Click on Unistall a Program in Control Panel - In Program and Features window, find and right-click on the Protection/Encryption software and then click on “Uninstall”.
- Follow the instructions displayed on the screen to complete the uninstallation.
After uninstallation of Protection/Encryption software, boot the system in normal mode and check if the system is clear of FAT File System Error on windows 10.
Solution 5: Reset Windows 10 To Default
If nothing has helped you so far, then it is time to use the built-in Windows feature that lets you reset the Windows to its default/factory settings. For resetting the Windows, please follow our article on Reset Windows 10.
Hopefully, you can now use your system without any problem, so keep enjoying and do not forget to visit us later for the latest tips and tricks.


