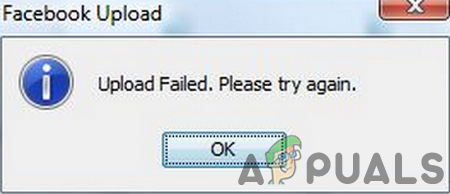
Fix: Facebook Upload Failed
You may fail to upload to Facebook due to the conflicting browser extensions. Moreover, outdated or corrupt installation of the Facebook app may also cause the error under discussion.
The user encounters the issue when he tries to upload the content to Facebook. The issue is reported on the web and Android versions (nearly all make and models of Android were affected) of Facebook. In some rare cases, the user faced the prompt even when he was not uploading to Facebook.
You can follow the solutions below to fix the upload failed on Facebook issue:
For Web Version
Solution 1: Clear the Cache of Your Browser
Like many other applications, your browser uses the cache to boost up performance and improve the user experience. You may encounter the error at hand if the cache of your browser is corrupt. In this context, clearing the cache may solve the problem. For elucidation, we will discuss the process for the Chrome browser.
- Launch Chrome and log out of Facebook.
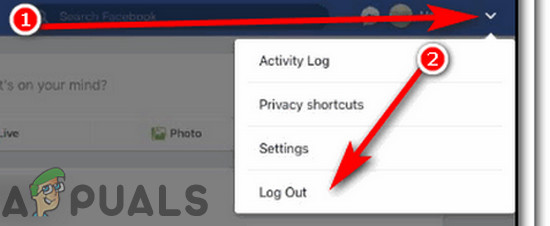
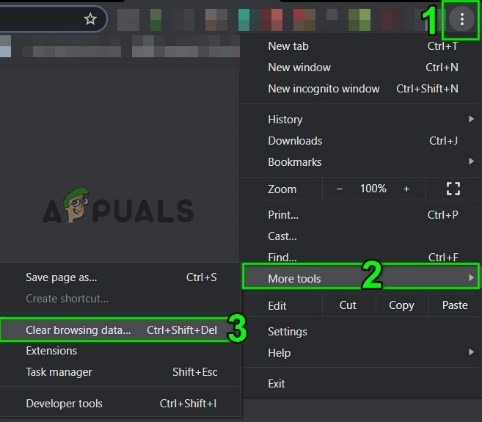
Logout of Facebook - Now click on vertical ellipses near the top right corner of the Chrome window. Then in the menu shown, hover over More Tools, and in the sub-menu, click on Clear Browsing Data.
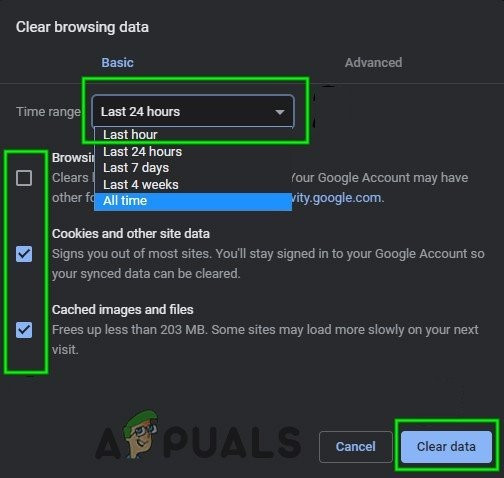
Open Clear Browsing Data in Chrome - Now select the Time-Range of All Time and select the categories you want to delete (select all the categories if feasible). Then click on the Clear Data button.
Clear Browsing Data in Chrome - Then re-launch Chrome and login Facebook to check if the upload issue is resolved.
Solution 2: Disable the Browser Extensions
Extensions are used to add extra functionality to a browser. You may encounter the error at hand if an extension is interfering in the operation of Facebook. In this scenario, disabling the problematic extensions may solve the problem. Extensions especially adblocking extensions are known to create the issue. For illustration, we will discuss the process for the Chrome browser.
- Open Chrome and click on the Extension icon (near the right side of the address bar).
- Then click on Manage Extensions.

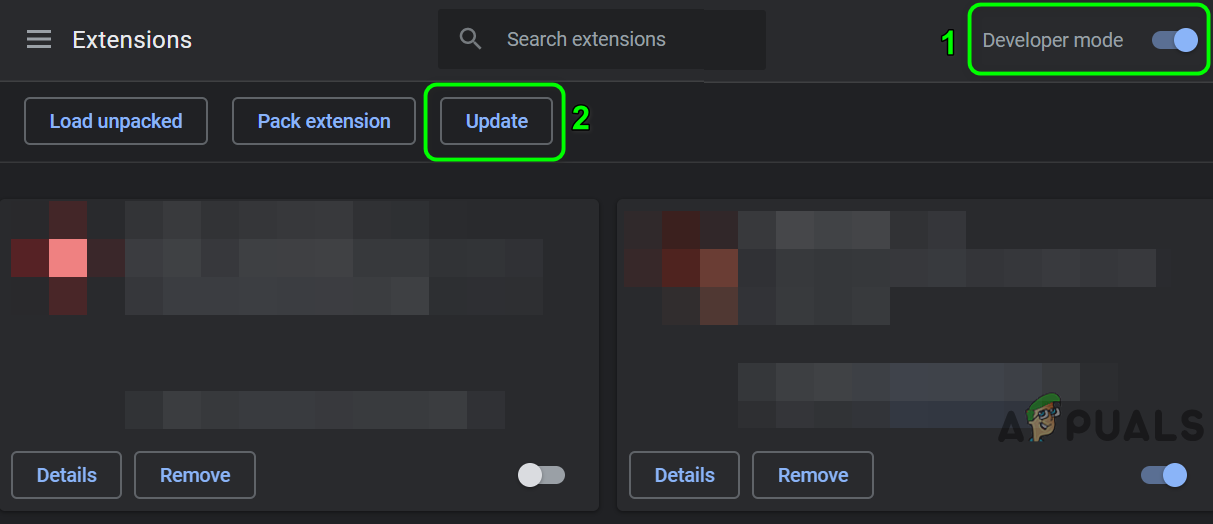
Open Manage Extensions in Chrome - Now near the top right corner of the window, enable the Developer Mode by toggling the switch to on.
- Then click on the Update button to update all the extensions.
Update Chrome Extensions - Now check if the Facebook upload error is solved.
- If not, then try to update the filter list (e.g. EasyPrivacy list.) of your adblocking extension. You can also add the following in the custom filter list of your adblocking extension:
@@||upload.facebook.com^
- Then check if the upload issue is resolved.
- If not, then open the Extensions menu by following steps 1 and 2.
- Now disable every extension there and check if the problem is solved.
Solution 3: Use a Different browser
The issue could be a result of a temporary bug in the browser you are using. In this case, using another browser to upload the content to Facebook may solve the problem.
- Download and install another browser. For example, if you are having issues with Chrome, then try to use Firefox, Edge, or Safari.
- Now launch the other browser and log in to Facebook.
- Then check if the upload issue is solved.
Solution 4: Remove the Facebook Entry from the Hosts File
The Host file is used to map the IP addresses of a domain. If a domain is mapped in the Hosts file, then your system will not query the DNS server for that site. You may encounter the error at hand if the entry related to Facebook in the Hosts file is misconfigured. In this scenario, removing the Facebook entry from the Hosts file of your system may solve the problem.
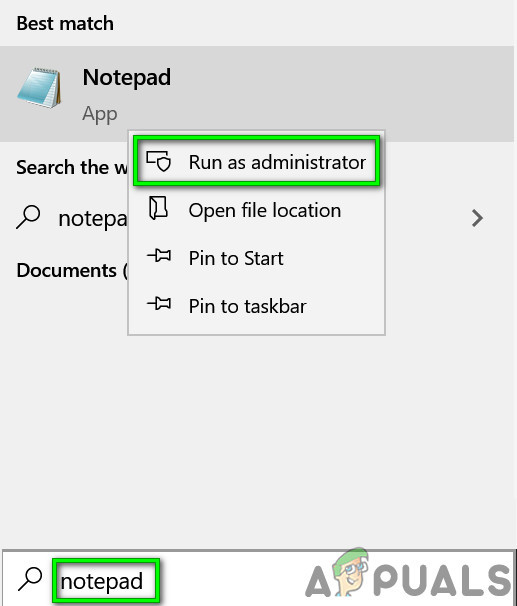
- Type Notepad in the Windows Search box and on the list of results, right-click on Notepad, and then click on Run as Administrator.
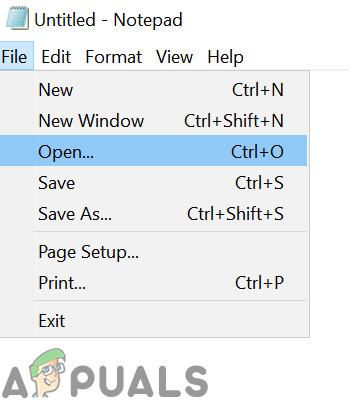
Open Notepad As Administrator - Now open the File menu and then click on Open.
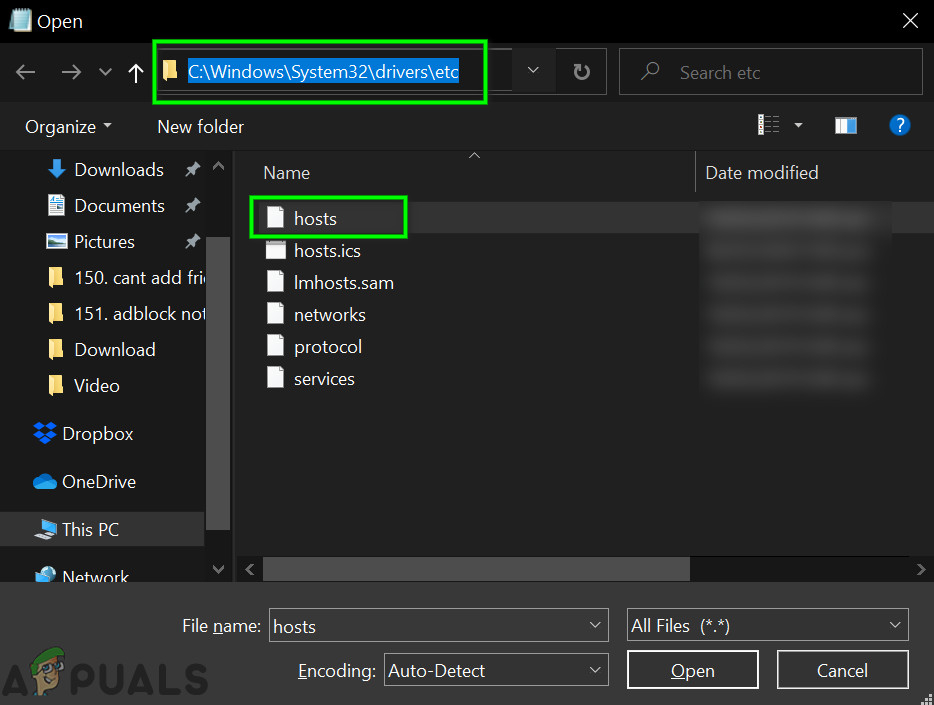
Open File in Notepad - Now navigate to the following path (where C is your system drive. ):
C:\Windows\System32\drivers\etc
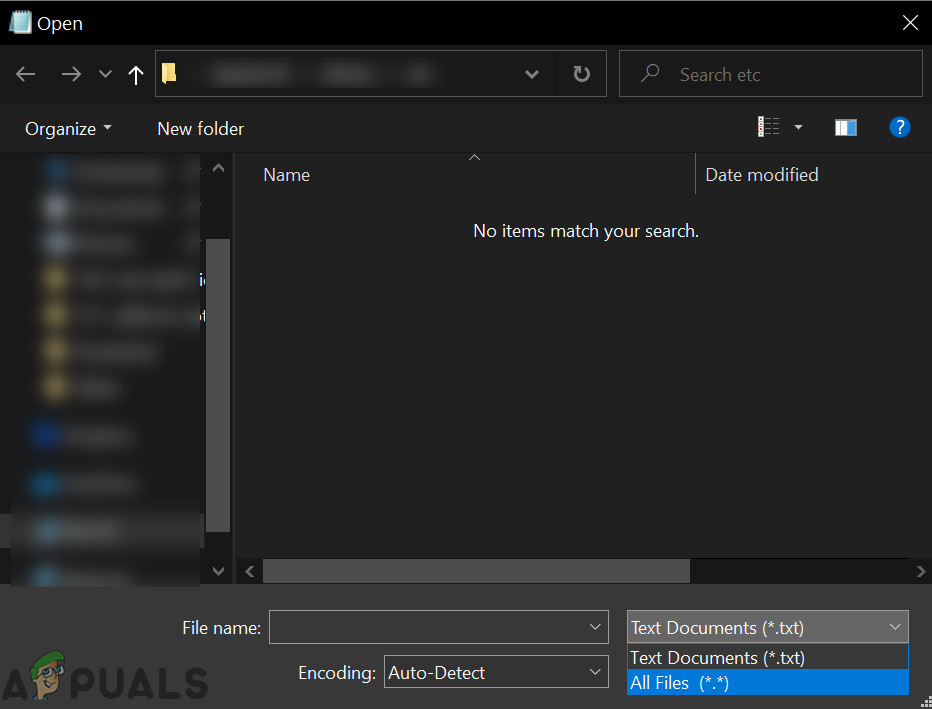
- Now open the dropdown of the file type and change it from Text Document to All Files.
Change From Text Document to All Files - Then select Hosts file and click on Open.
Open Hosts File - Now press Ctrl + F keys to open search of Notepad and then search for:
upload.facebook.com
- Then add # at the start of the Facebook entry.
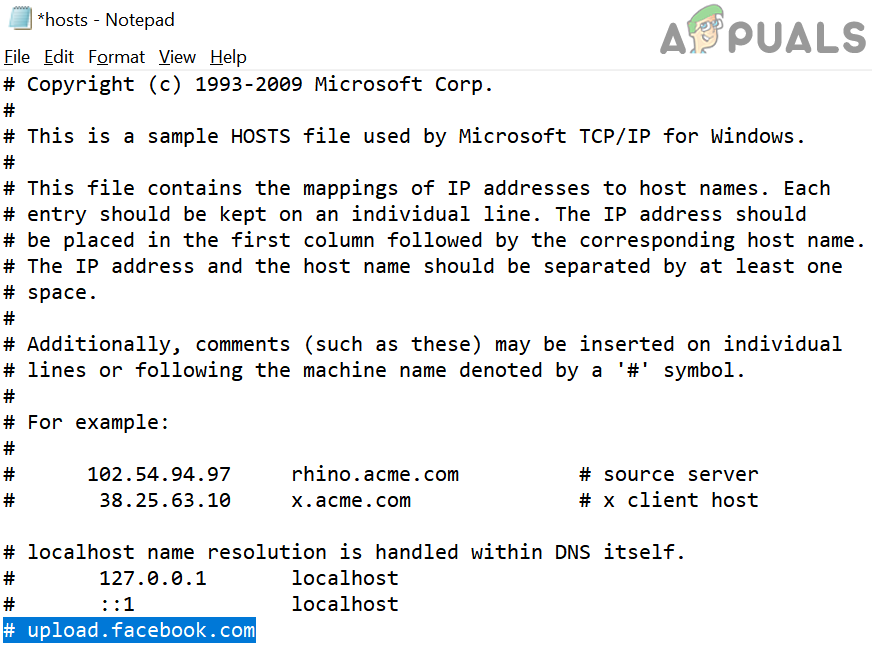
Add the Hash Sign for Facebook in the Hosts File - Now save and close the Hosts file.
- Then check if the upload issue of Facebook is resolved.
Solution 5: Use Another Platform
The upload issue could be a result of a platform-specific bug and using another platform may solve the problem i.e., if you are having issues on the Android phone, then using the iPhone app may solve the problem.
- If the issue is happening on an Android phone, then open Facebook in a web browser (either on the browser of your PC or your phone).
- Then check if you can upload the content to Facebook. If the other platform works, it probably means that this is a temporary bug and will be fixed soon.
For Android Version:
Solution 1: Update the Facebook App
The Facebook application is updated regularly to patch known bugs and satiate the new technological advancements. You may encounter the error under discussion if you are using an outdated version of the Facebook app.
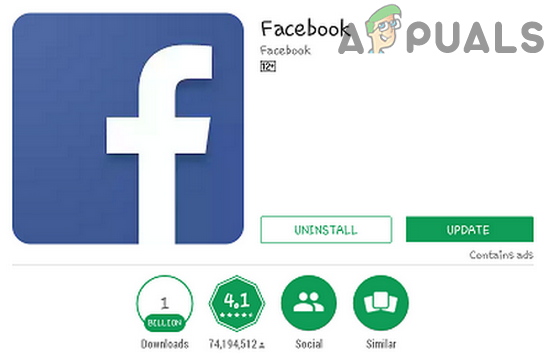
- Open Play Store and search for Facebook.
- Now tap on the update button to update the Facebook app (if an update is available).
Update the Facebook App - Then launch the Facebook app to check if it is clear of the error.
Solution 2: Update the OS of Your Phone
The OS of your Android device is updated regularly to improve performance and cater to new features. You may also encounter the error at hand if the OS of your phone is not updated to the latest build. In this case, updating the OS of your system to the latest build may solve the problem.
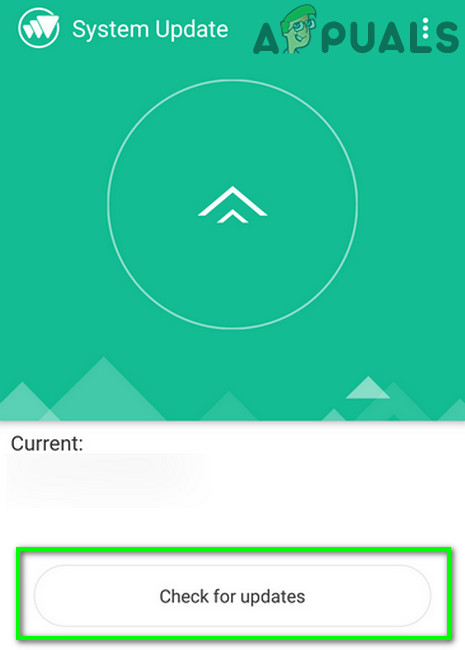
- Launch Settings of your phone and then open About Phone.
- Now tap on Check for Updates and if an update is available, then update the OS of your phone. You may have to upgrade the Android version of your device e.g. you may have to switch to Android 10.
Check for Updates - After updating the OS, check if the Facebook app is clear of the error.
Solution 3: Use the Facebook Lite App
This issue might occur due to a bug in the Facebook app. Facebook has a lite version of Facebook available for people with limited data and storage. Using Facebook Lite to upload the content may solve the problem.
- Download and install Facebook Lite.
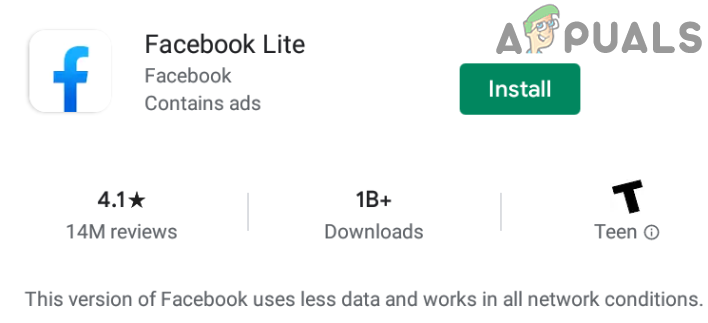
Install Facebook Lite - Now log in using your Facebook credentials.
- Then try to upload the content to Facebook to check if the problem is solved.
Solution 4: Downgrade the Version of Facebook App
The developers can sometimes release a buggy update which may break the operation of Facebook and thus cause the issue. In this context, uninstalling the Facebook updates (may not be supported by all versions of Android) or installing an older version of the app may solve the problem.
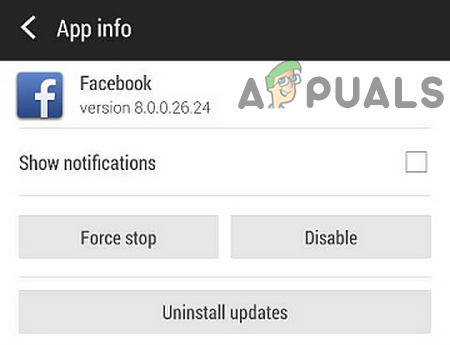
- Launch Settings of your phone and then open the Application Manager.

Open Application Manager of Android - Now find and open Facebook.
- Then tap on the More button and uncheck the option of Auto-Update.
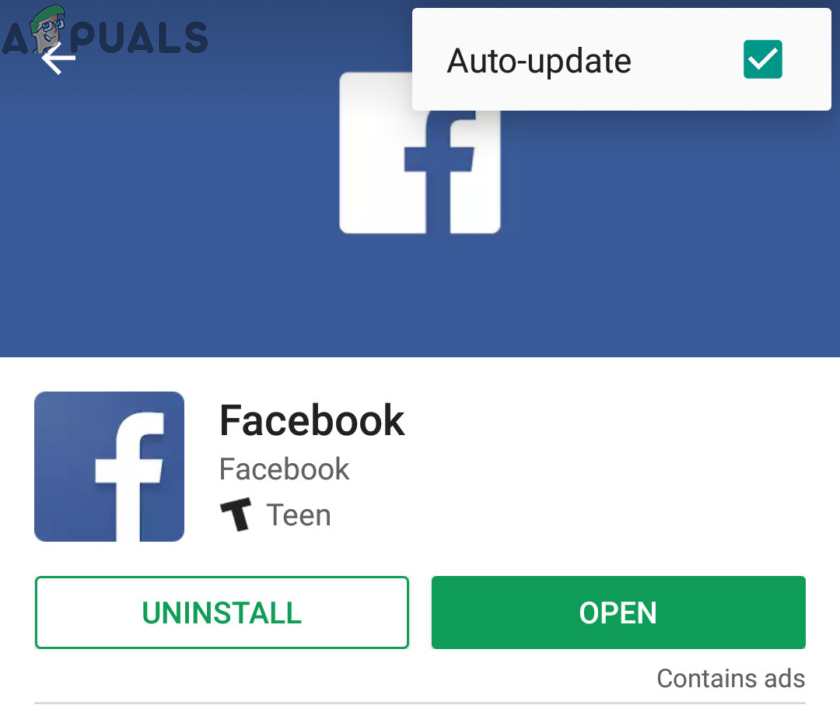
Disable Auto Update of Facebook - Now, tap on the Uninstall Updates button.
Uninstall Updates of Facebook - After uninstalling updates, launch the Facebook app to check if it is operating fine.
- If no option of Uninstall Updates was available at step 4, then you may have to use the APK file to install the older version (strongly not recommended as using the APK file from 3rd party source may expose your device and data to threats).
Solution 5: Reinstall the Facebook App
If nothing has helped you so far, then the issue is the result of a corrupt installation of the Facebook app. In this case, you may have to reinstall the Facebook app.
- Launch Settings of your Phone and open the Application Manager.
- Then find and open Facebook.
- Now tap on Force Stop and then confirm to stop the app forcefully.
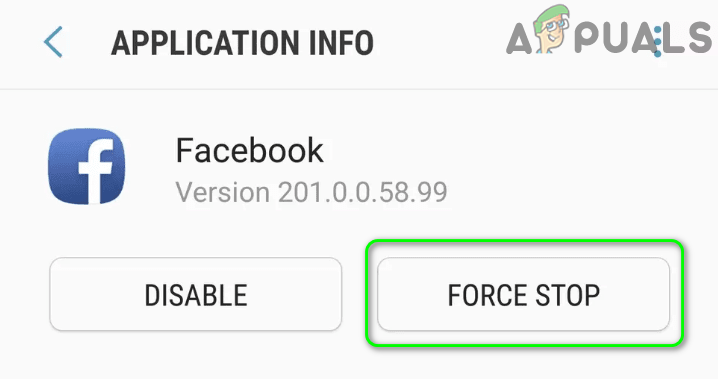
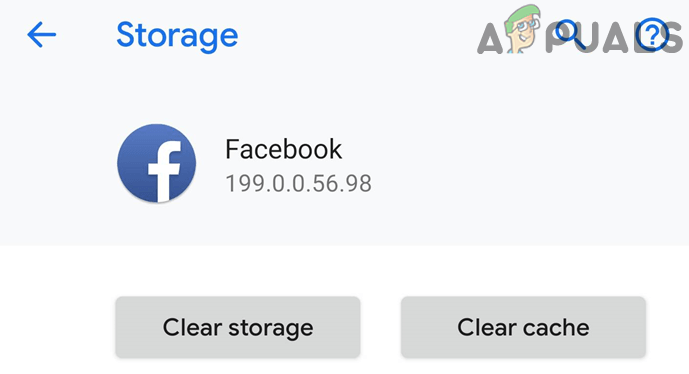
Force Stop the Facebook App - Then open Storage and tap on Clear Cache.
- Then launch the Facebook app and check if it is operating fine.
- If not, then open Facebook in Apps (as discussed in steps 1 and 2).
- Now tap on the Uninstall button and then confirm to Uninstall the Facebook app.
- Restart your device.
- Upon restart, install Facebook and hopefully, the problem is solved.
- If there is no uninstall option for the Facebook app, then follow steps 1 to 4 to open Storage settings of the app.
- Now tap on the Clear Cache and then Clear Data or Clear Storage.
Clear Cache and Storage of the Facebook App - Then restart your device.
- Upon restart, login to the Facebook app, and hopefully, the problem is solved.