Export Virtual Machine to OVA File in Oracle VM VirtualBox
In this article, we will explain how to export the virtual machine from Oracle VM VirtualBox into the OVA file and then use it on other virtualization operating systems such as Vmware, Hyper-V and XenServer.
- Login into Windows 10
- Open Oracle VM VirtualBox
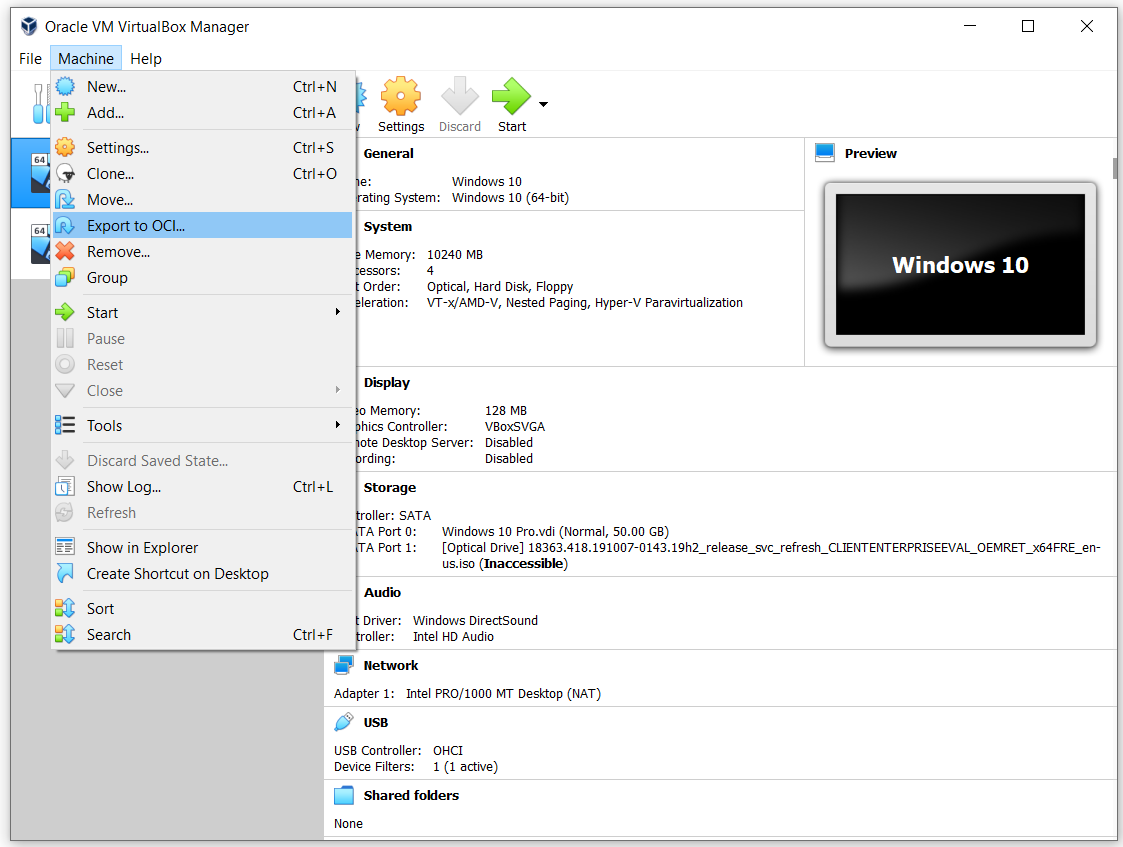
- Click on Machine and then click on Export to OCI…
- Under Appliance settings choose the format of the virtual appliance and path and then click Next. The Open Virtualization Format supports only OVF or OVA If you use the OVF extension, several files will be written separately. If you use the OVA extension, all the files will be combined into one Open Virtualization Format archive. The Oracle Cloud Infrastructure format supports exporting to a remote cloud server only. Main virtual disk of each selected machine will be uploaded to the remote server.
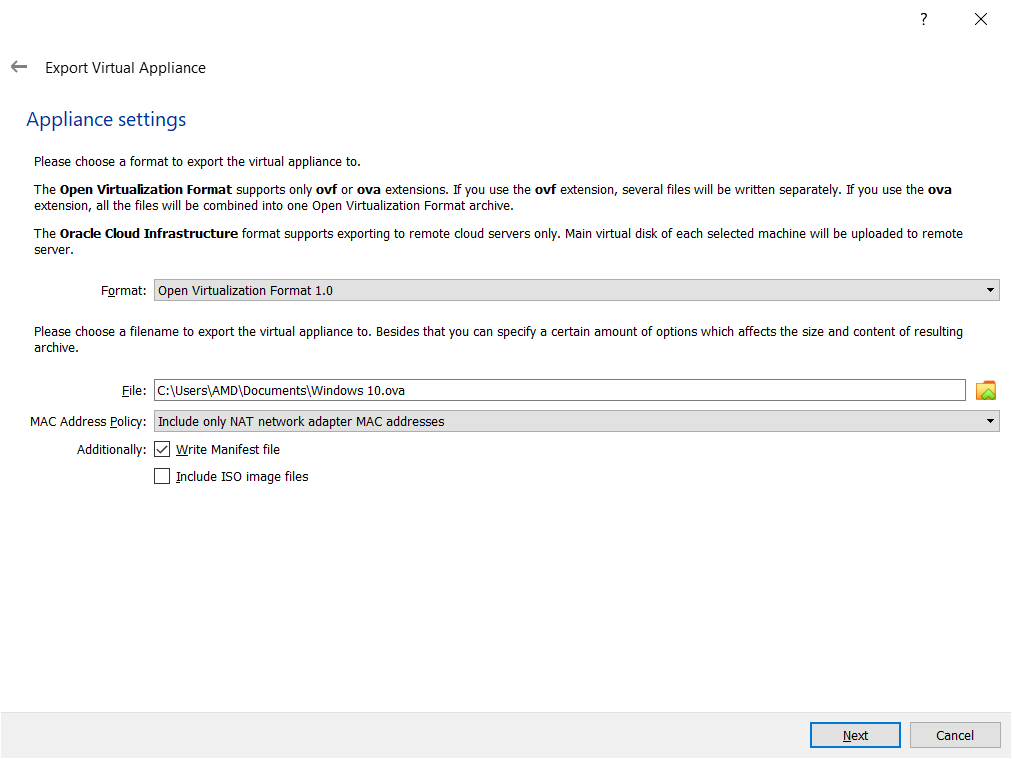
As you can see there are three different OVF formats including 0.9, 1.0 and 2.0. The 0.9 is an older format with fewer support options, 1.0 is the default one and can be used in this scenario. The main difference between 1.0 and 2.0 is in functionalities. Version 2.0 is the latest one that brings an enhanced set of capabilities to the packaging of the virtual machine.
Under File choose the location and filename for the exported virtual machine. By default, Oracle VM VirtualBox will save virtual machines in the Documents of the currently logged user accounts.
Under MAC Address Policy specify how do you want to retain network card MAC address when exporting the virtual machine. There are three options available
- Strip all network adapter MAC addresses – remove all assigned MAC addresses on network cards on the virtual machine
- Include only NAT network adapter MAC addresses – keep the MAC address assigned to NAT network adapter
- Include all network adapter MAC addresses – keep all MAC addresses assigned on network cards on the virtual machine
Write Manifest File – this file will automatically check the data integrity and prevent the deployment of damaged appliance.
Include ISO Images File – include the ISO image file in the OVA file
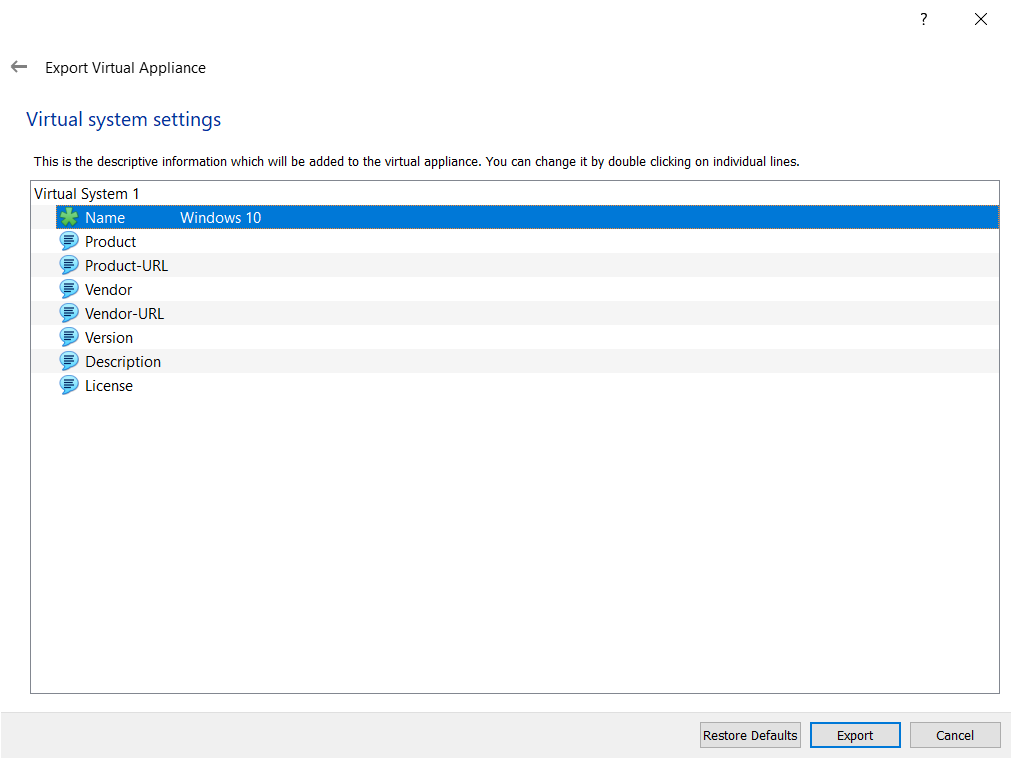
- Under Virtual system settings type the descriptive information which will be added to the virtual appliance and then click Export. You can change it by double clicking on individual lines. We will keep the default settings here and in case we need to change them, we will do it later.
- Wait until Oracle VM VirtualBox finishes exporting the virtual machine to the OVA file.
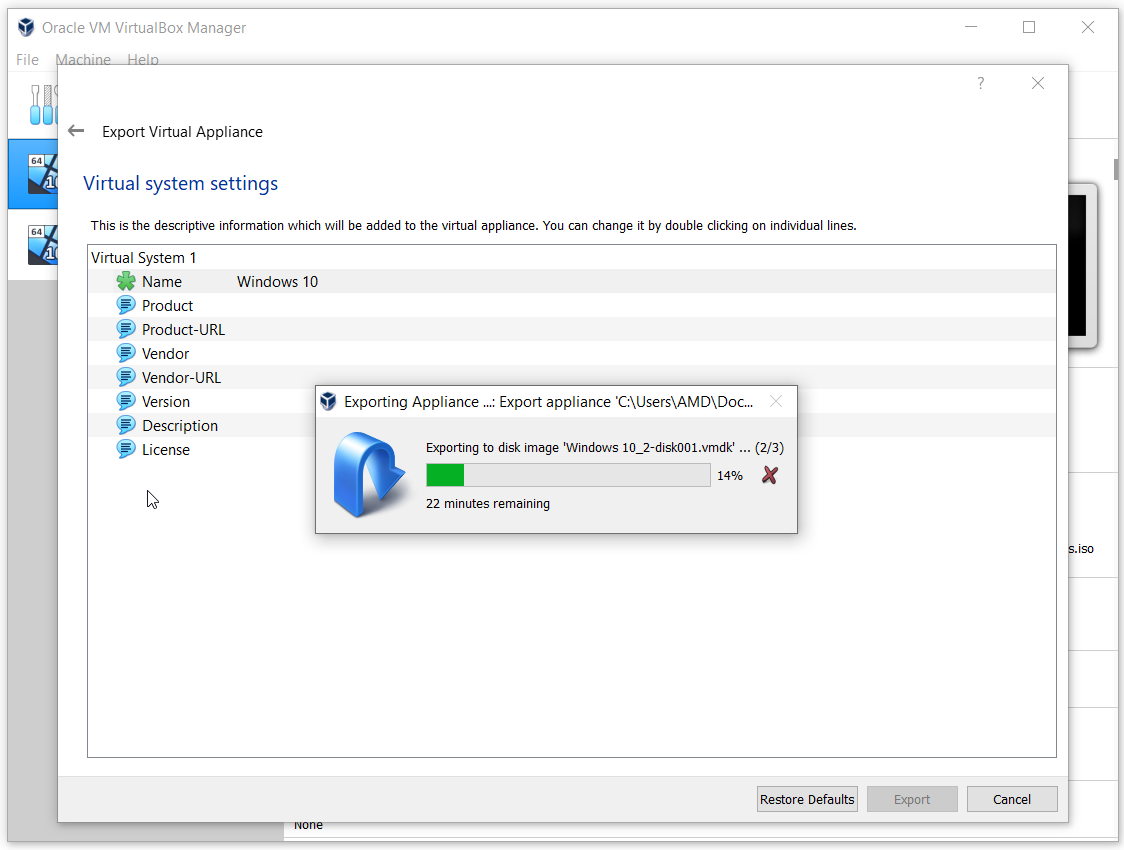
- Congratulation. You can successfully export the virtual machine to the OVA file. You can import the same file to VMWare, VMWare or XenServer.


Hey Jasmine , so finally is the file exported as OVF or OVA. My goal is to export the file as OVA. Following the steps I do not see where to select OVA . I only see OVF format