Fix: Error Applying Hyper-V Virtual Switch Properties in Windows 10
We already talked about IP networking in Hyper-V and the procedure used to configure virtual network switches. Sometimes, it does not work due to the issues with the network adapter and host. One of the challenges end-users are facing is with the creation of external switch in Hyper-V client hosted on Windows 10. The error is:
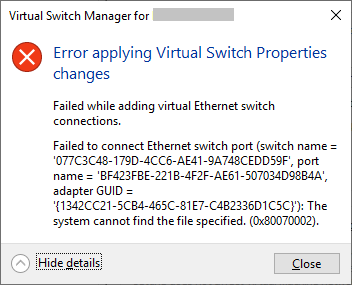
These solutions are usable in all versions of Windows alike. Make sure that you save your configurations in a separate backup folder before proceeding.
Solution 1: Try to Create an External Switch by using PowerShell
As this issue occurs when using GUI, some end users had successfully created an external switch by using PowerShell.
- Click on Start Menu and type PowerShell, right-click on it and then click Run as administrator
- Type the following command. This will create a new external virtual switch.
New-VMSwitch -name ExternalSwitch -NetAdapterName Ethernet -AllowManagementOS $true
-name is how the network adapter appears in Hyper-V Manager
-NetAdapterName is the name of the command
-AllowManagementOS is $true for the host and VM to both have Internet

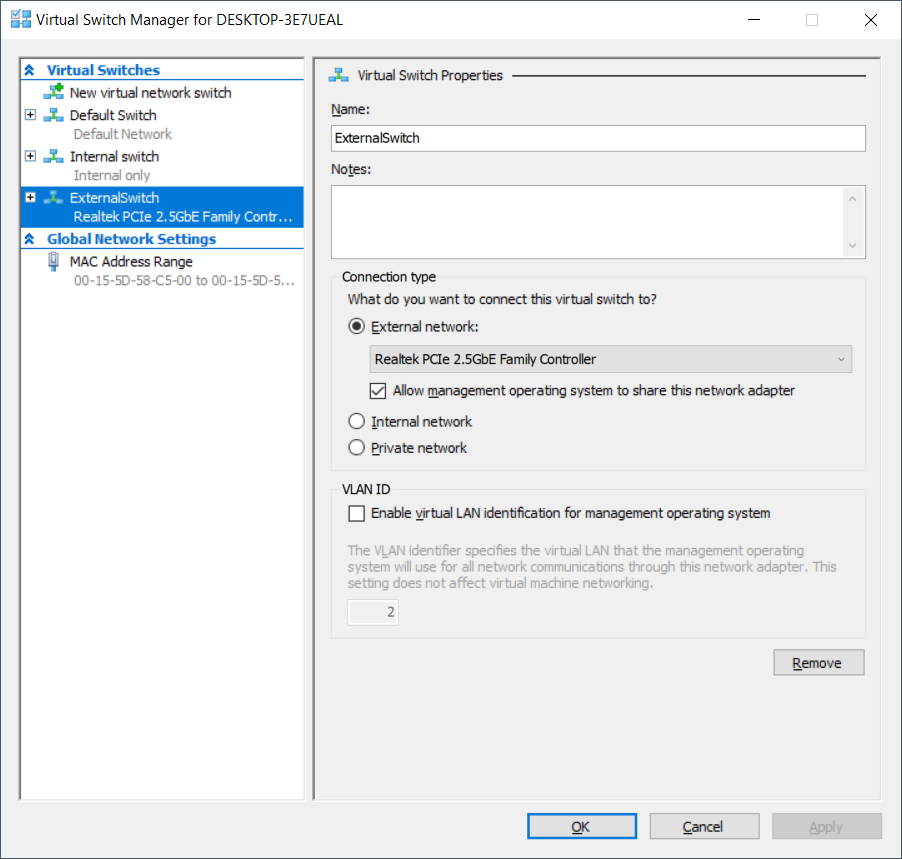
- Open Virtual Switch Manager in Hyper-V Manager and check if an external switch is visible in the list. In our case it is.
Solution 2: Reset network connections by using ‘netcfg’
Netcfg is a command utility used to manage network configurations. If you prefer to use the GUI interface, please download the tool from this link. In our case, we will execute this command by using PowerShell.
netcfg -d will remove all your existing connections so we recommend creating a system restore point before executing this command.
- Click on Start Menu and type PowerShell, right-click on it and then click Run as administrator.
- Type the following command and press enter. This will restart all network adapters and remove MUX objects.
netcfg -d
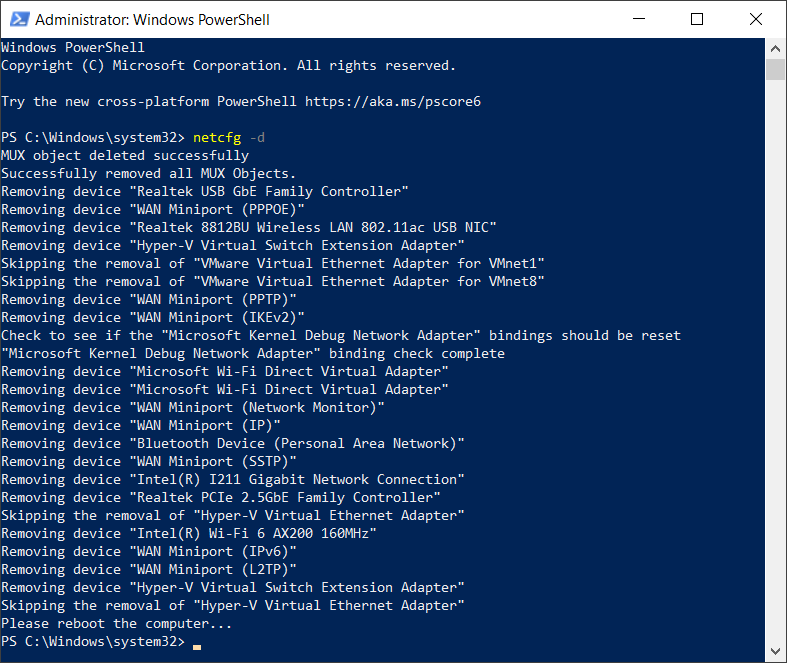
- Open Virtual Switch Manager in Hyper-V Manager and try to create an external switch and see if the problem is solved.
Solution 3: Update Network Adapter Driver
Using the latest driver is recommended by all vendors and it should be done even if we have fixed the problem by using the previous solutions. You can use the default Microsoft driver or download the latest driver from the manufacturer´s website.
Solution 4: Re-install the network adapter
In this solution, we will uninstall the network adapter from Device Manager and try to create an external switch again. This will refresh your adapter by installing the default drivers.
- Click on the Start menu and search for Device Manager, and launch it.
- Expand Network Adapters and then select the network adapter you want to uninstall
- Right-click on the network adapter and then choose Uninstall device.
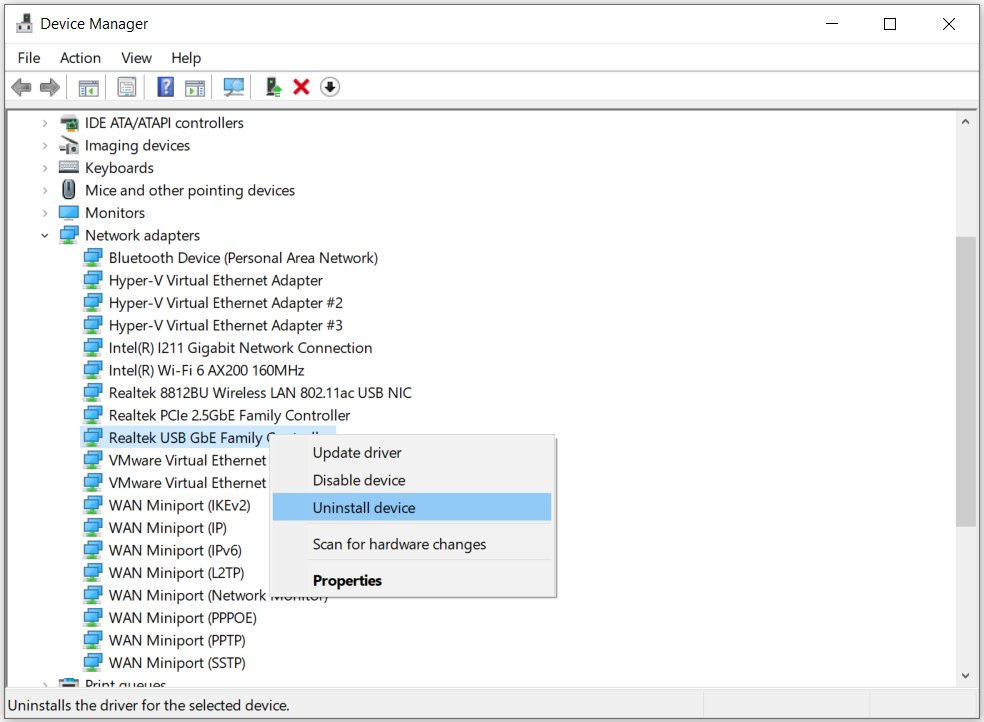
- Select Delete the driver software for this device and then click Uninstall
- Reboot your Windows before opening Virtual Switch Manager in Hyper-V Manager and trying to create an external switch
Solution 5: Re-install Hyper-V role
In this solution, we will re-enable Hyper-V in Windows 10. During the disable/enable procedure, your virtual machines will be kept in Hyper-V Manager. After creating a Virtual Machine With Hyper-V, restart your computer and see if the problem is resolved.
Solution 6: Trick your network switch
Another popular workaround that worked for numerous people was tricking the network switch on your computer. This was able to bypass the error message without any additional changes to your computer.
- Open Virtual Switch Manager in Hyper-V Manager. Create an Internal switch.
- Now, hold the Windows logo and then press R. Type inetcpl.cpl and then press Enter to open Network Adapters.
- Right-click on your network adapter (wired or wifi) and then click Properties
- Click on Sharing tab and select Allow other network users to connect through this computer’s Internet connection
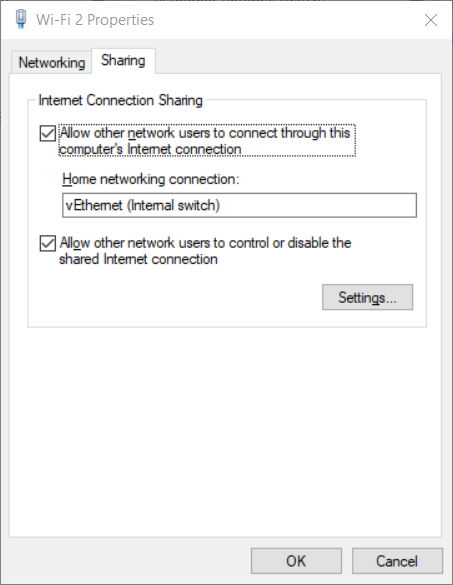
- Select the adapter from the list and then click OK. Right-click on your virtual machine and then click on Settings.
- Click on Network Adapter and then select newly created Internal switch
- Access the guest operating system and if necessary, configure the network settings


