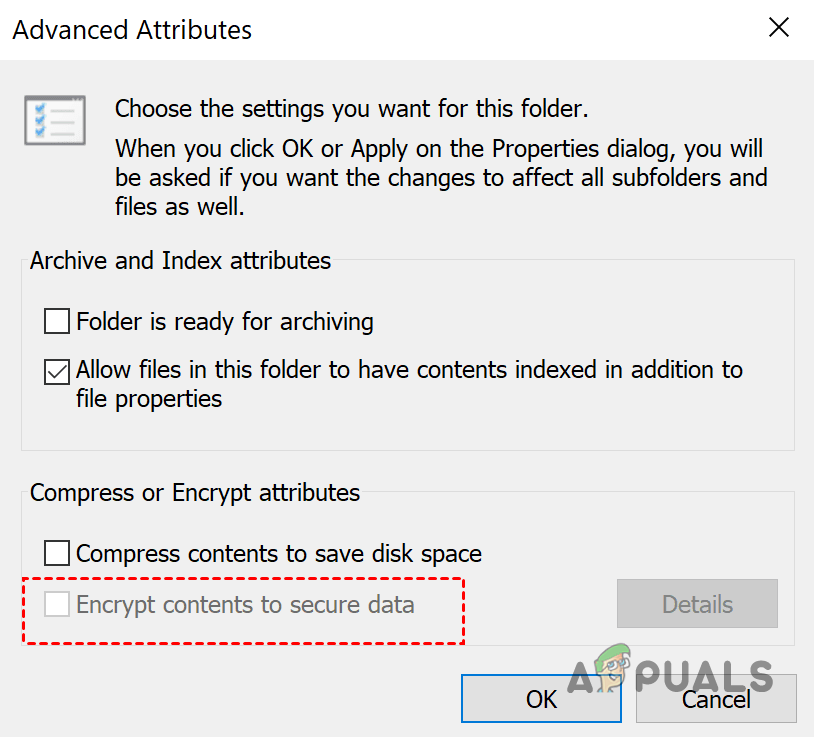
Fix: ‘Encrypt Contents to Secure Data’ Option Greyed Out
The grayed-out encryption option can often be the cause of the EFS feature being disabled on your computer, or the respective Windows service encountering an issue. If you are using Windows 11 Home Edition on your computer, you will not be able to encrypt your files with this feature, as it is not supported at all.
In such a scenario, there are other alternatives that you can follow to mitigate the problem. In some scenarios, viruses, trojans, or malware can interfere with Windows’ EFS functionality, preventing you from accessing it.
In addition, if you have not updated your Windows for a long time, that can also trigger the issue due to a known security bug within the operating system, which was later resolved by Microsoft.
The Encrypted File System (EFS) is a Windows service that allows you to perform data-at-rest encryption on your files and data through the use of cryptography on the NTFS file system, thus providing an additional layer of security to your valuable data and files.
In this article, we will guide you through several methods that demonstrate how to resolve the greyed-out EFS Encryption option in supported editions of the Windows operating system. Additionally, we will inform you about alternatives to using EFS-like features in Windows 11 Home. In Windows 11 Home, you must use device encryption to protect your data.
1. Enable the EFS feature.
In some scenarios, the EFS feature is grayed out in supported Windows editions such as Professional, Enterprise, or Education. In such a case, the problem is often caused by the EFS feature being disabled on your computer.
If this case is applicable, you will need to enable the EFS feature to resolve the issue. There are various ways to enable the EFS feature on your computer, from the Windows Registry to the Command Prompt window. We will guide you through both of these methods, so you can follow whichever suits you more.
Using the Windows Registry.
Windows Registry controls the behavior of your computer and if you are not tech-savvy, we would recommend skipping it since any unwanted change can cause various issues with the PC. In addition, we also recommend backing up the Windows Registry before proceeding in case of any unfortunate event.
Follow the instructions below to enable EFS through the Windows Registry:
- Press Windows + R to open the Run dialog box, and type in ‘regedit‘. Press Enter.
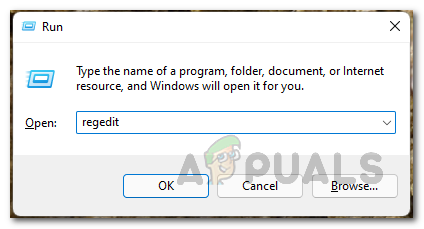
Opening Windows Registry - This will open up the Windows Registry window.
- In the search bar, copy and paste the following address:
HKEY_LOCAL_MACHINE\SYSTEM\CurrentControlSet\Control\FileSystem

Navigating to the File System Directory - Once you do that, you will see a list of keys. Double-click on the NtfsDisableEncryption key and set its value to 0. Finally, click OK.
Encrypting File Service - After this, restart your computer to complete the changes and see if you can now use the EFS feature.
Using the Command Prompt.
Alternatively, you can also use the command prompt window to enable EFS. This is a comparatively easier approach, as you only need to copy and paste a command. Follow the instructions below:
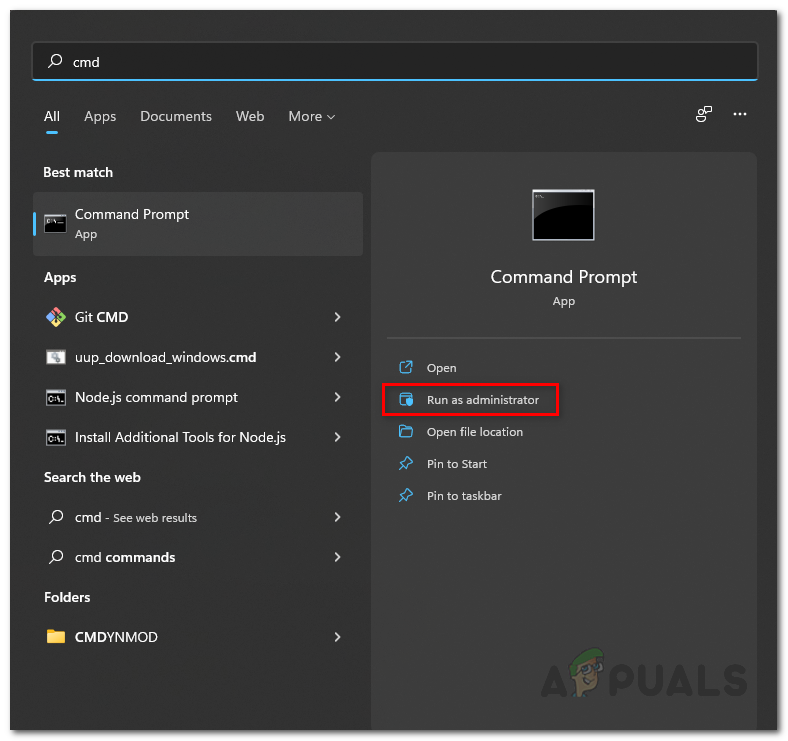
- First, open the Start Menu and type in “cmd“. Right-click on the Command Prompt and click on “Run as Administrator.” Alternatively, click on the “Run as administrator” option on the right-hand side.
Running Command Prompt as Admin - Once the command prompt window opens, type in the following command:
fsutil behavior set disableencryption 0
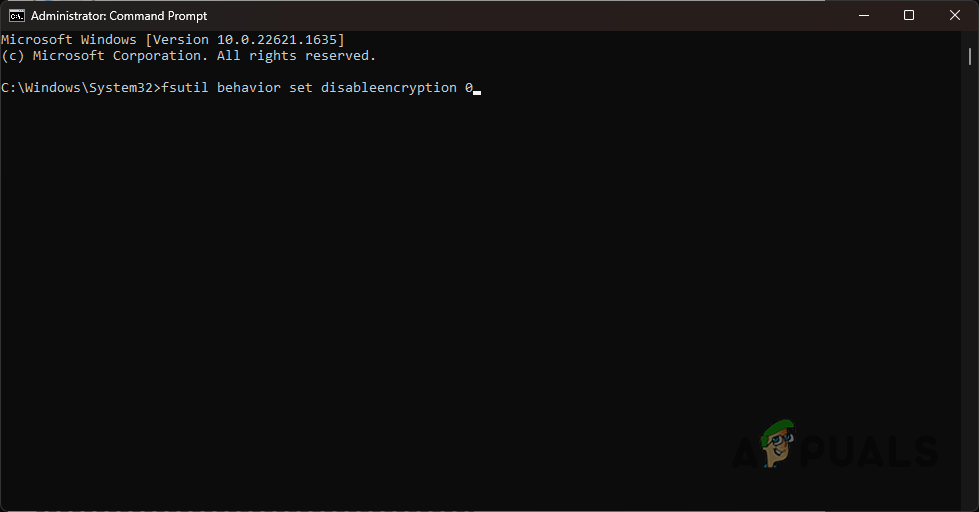
Enabling EFS via Command Prompt - Once you have entered this command, press Enter. Then, restart your computer to complete the changes.
2. Check EFS service.
Another reason why you might not be able to encrypt your data using the EFS feature could be that the EFS service is not running in the Windows environment. If that is the case, you will need to start the EFS service, and then you should be able to resolve the issue and encrypt your precious data.
To do this, follow the instructions below:
- Press Windows + R to open the Run dialog box.
- Type “services.msc” in the Run dialog box and press Enter.
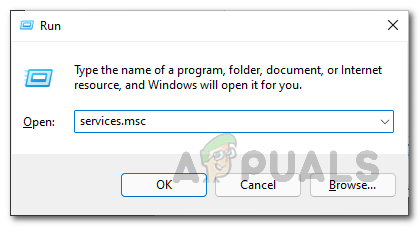
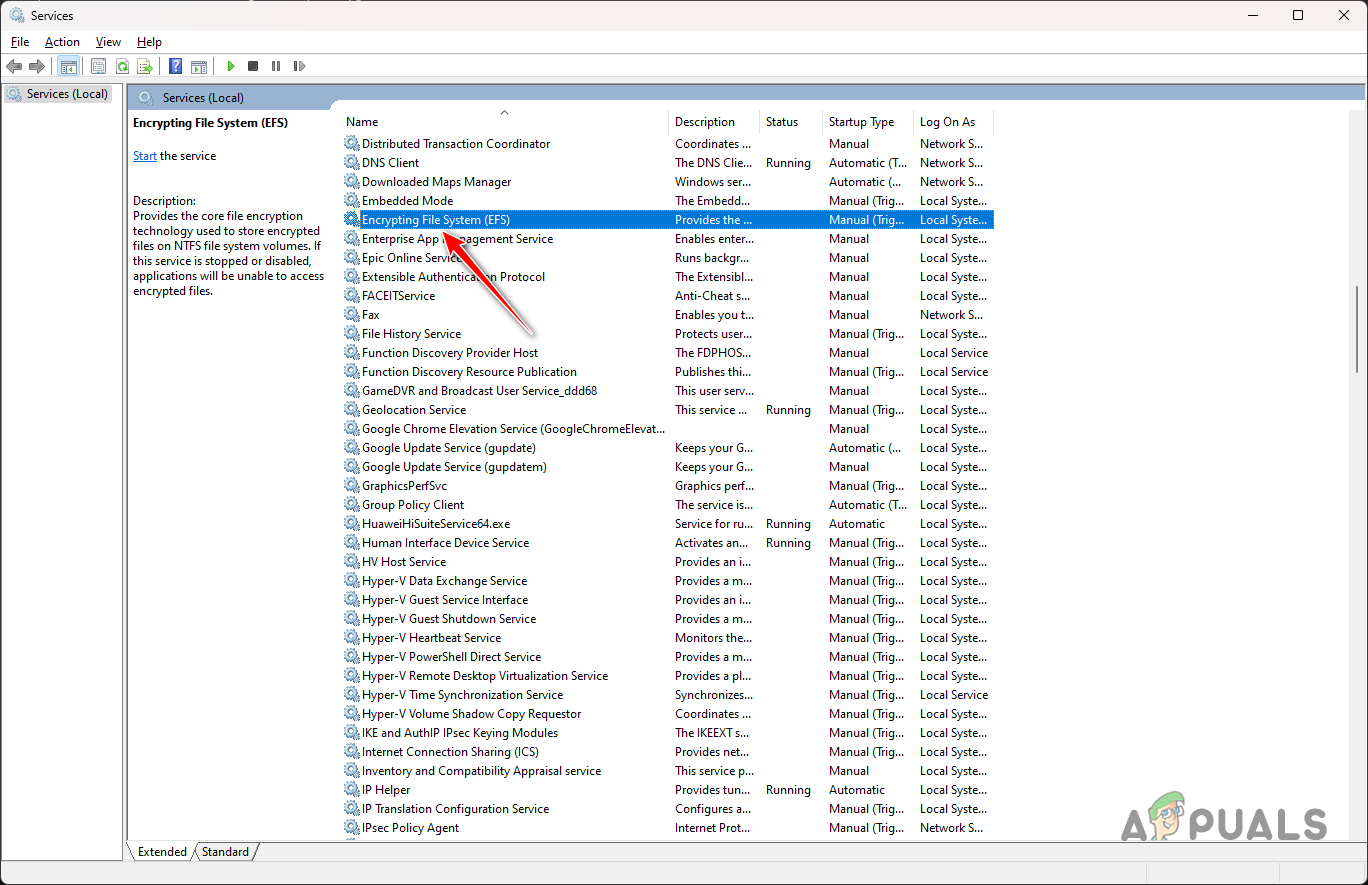
Opening Windows Services - This will open the Services window.
- There, locate the Encrypting File System (EFS) service.
Encrypting File Service - Double-click on it to open the Properties window.
- Set the Startup type to Automatic.
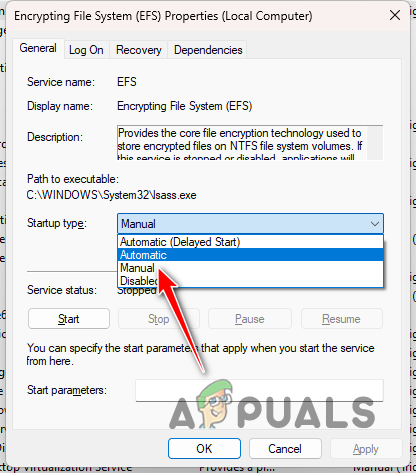
Changing EFS Service Startup Type - After that, restart your computer to complete the changes, and you should be able to encrypt your data now.
3. Update your Windows.
Another potential cause of the problem in question could be an obsolete version of the Windows operating system. This is due to a security bug in August of last year disabling EFS on some Windows computers.
Therefore, you will need to update your Windows 11 so that this bug does not affect you. Keeping your Windows up to date is a good way to eliminate many of the security issues that occur in the Windows operating system.
In order to update Windows 11, please do the following:
- Click on the Start Menu and type Settings. Open up the Settings window.
- After that, navigate to the Windows Update section.

Navigating to Windows Update - Once you click on Windows Update, Windows will search for updates from its servers. If updates are available, it will provide you the option to download and install them.
- Click on the “Download and Install” or “Install All” option. Wait for the update process to complete.
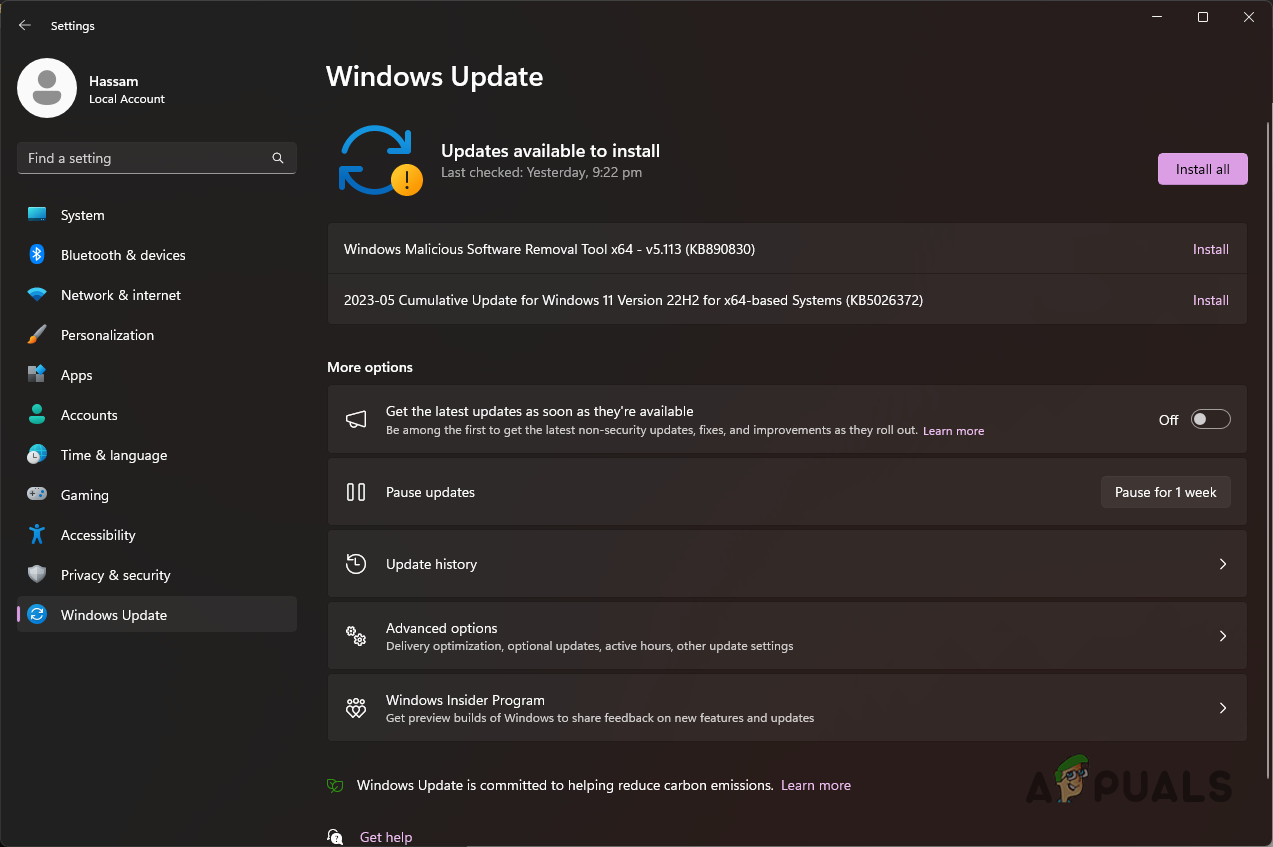
Installing Windows Updates - If a restart is required for the update process to complete, you will be prompted to do so. Restart your computer to complete the update process.
- See if that fixes the issue.
4. Scan your computer.
Finally, if your computer is affected by viruses or malware, that can also prevent you from using encryption features. In such a scenario, encryption options will be greyed out, and you will have to remove the viruses from your computer to resolve the issue.
To accomplish this, you will need to run extensive antivirus scans on your computer. If you have disabled Windows Defender, now would be a good time to enable it and let it scan your computer. This should serve as a starting point before running third-party antivirus programs on your computer.
While Windows Defender may not always be the best option for cleaning or detecting viruses, you will have to rely on third-party programs. To do this, you can use programs like Avast Antivirus or Malwarebytes to scan your computer. This is rather simple to do; download and install the programs on your computer and run the scans. You can follow our linked article for a step-by-step procedure on using Malwarebytes above.
How can you encrypt data on Windows 11 Home Edition?
The Home edition of Windows 11 does not support EFS. Thus, you will not be able to use it on a Windows 11 Home machine. In such a scenario, you can use the device encryption feature instead of the file encryption feature (EFS) to encrypt your data.
Device encryption differs from EFS in that it encrypts the entire drive on your computer, rather than allowing you to encrypt specific files like EFS. The prerequisites for this feature include having the necessary hardware requirements, such as a TPM 2.0 chip, as well as a Microsoft Account.
If you don’t have any of those on your computer, you will not be able to use the device encryption feature on your Windows 11 Home version. Follow the instructions below to use device encryption:
- Press the Windows Key + I to open Settings.
- In the Settings window, navigate to System > About.
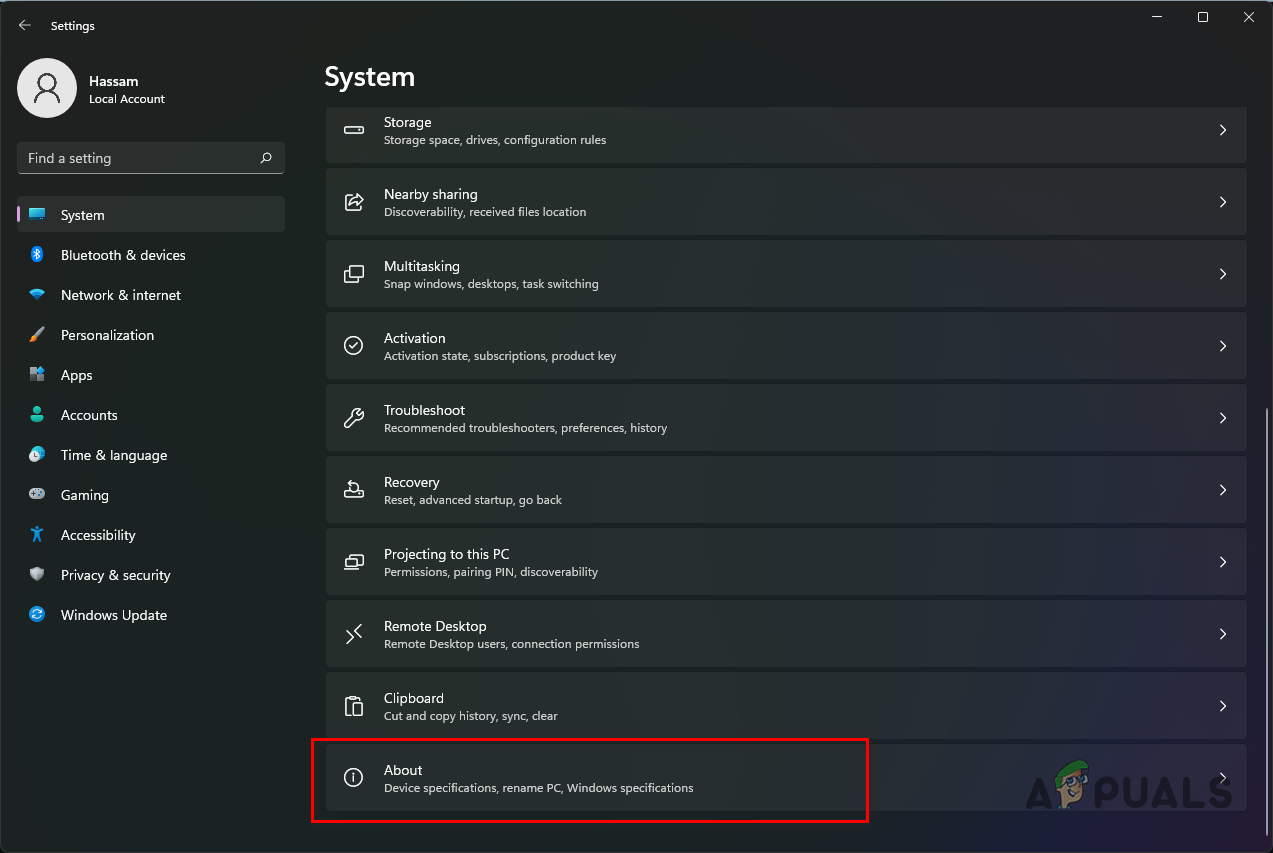
Navigating to About Settings - Now go down to Device Specifications and look for the BitLocker option. Click on it.
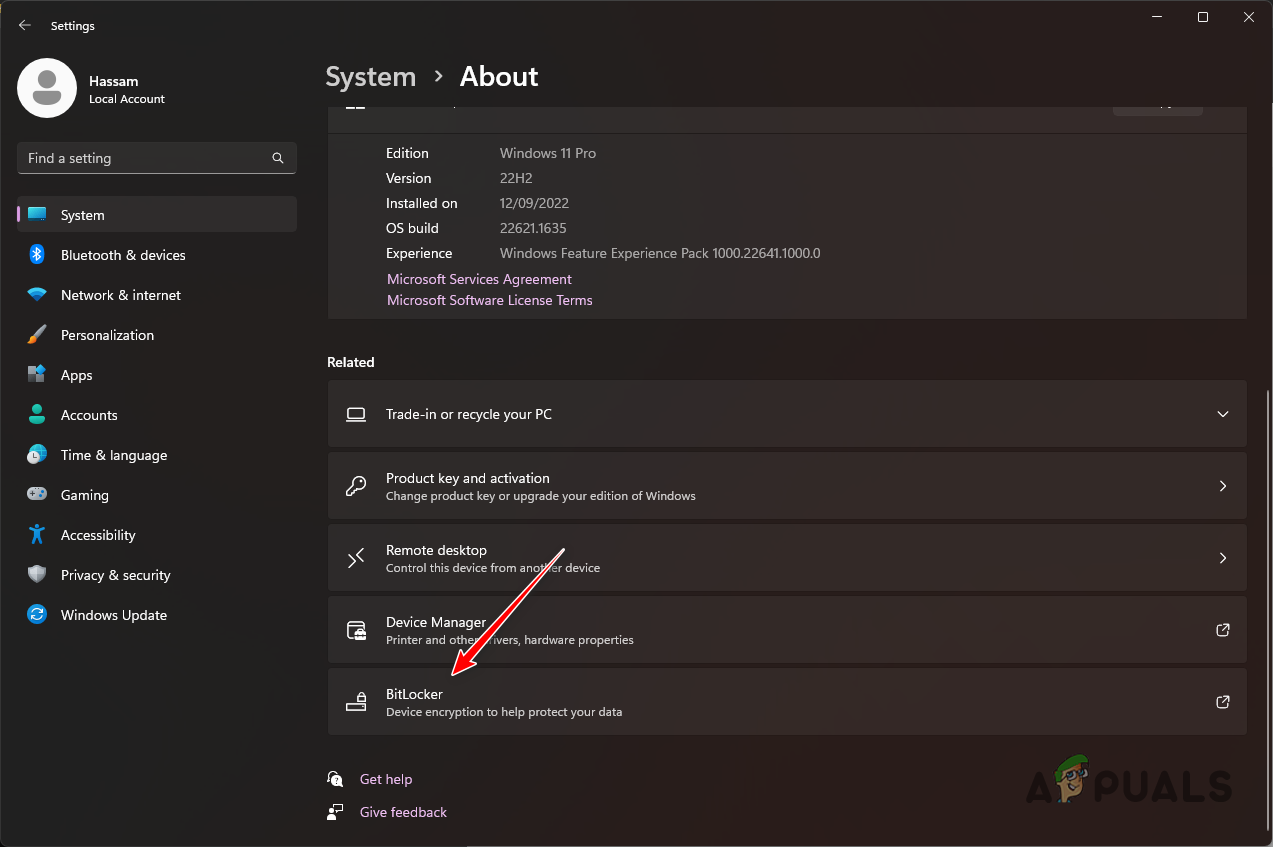
Navigating to BitLocker Settings - If BitLocker is not available, it means your computer does not support the capability to use the device encryption feature due to the lack of the TPM 2.0 chip.
- Otherwise, in the BitLocker Device Encryption window, click on the ‘Turn on BitLocker‘ option.
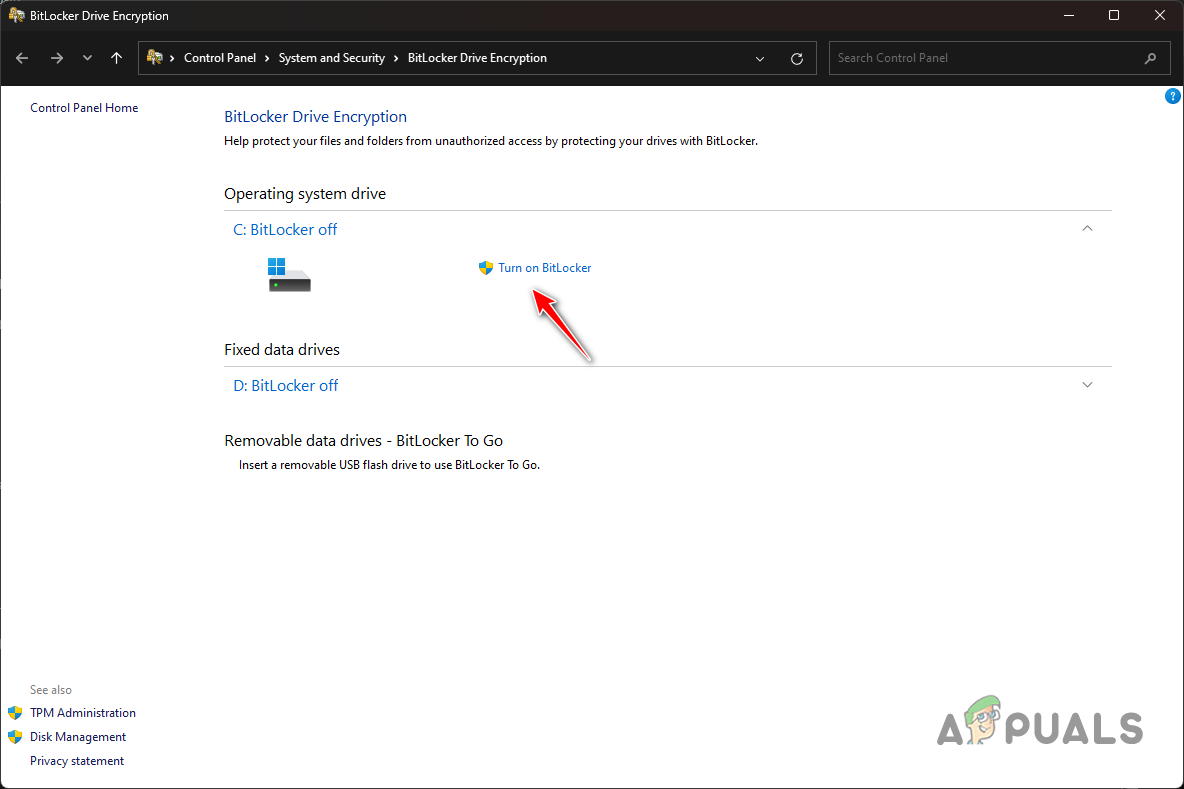
Enabling BitLocker - Once you do that, you will be able to encrypt drives on your computer without any issues.


