Disney+ Error Code 73 (Fix)
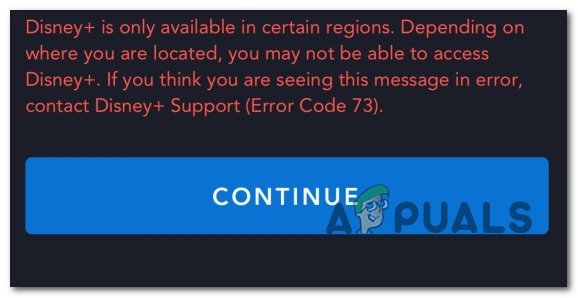
Some users have been encountering the Error Code 73 when trying to watch media on Disney+. The error is reporting location availability issues. However, it seems to be impacting some Disney Plus users that live in countries where this service is already available.
Keep in mind that Disney+ is rolling out worldwide via a staggered rollout plan that has been widely criticized. At the beginning of 2020, there were only a handful of countries where this service was available in:
- Canada
- Netherlands
- United States
- Australia
- New Zealand
- Puerto Rico
A select list of European lists will be added next.
If your country of residence is not yet supported by Disney+, that’s most likely the reason why you’re encountering the Error Code 73. Fortunately, there are a couple of ways that will allow you to watch content on Disney+ even if your country is not yet supported (via a VPN service or Proxy server).
But keep in mind that not every VPN and Proxy server will work with Disney+. As a lot of affected users have reported, Disney+ is capable of detecting certain VPN solutions and prevent you from accessing the service until you access the service without any anonymity solution.
Method 1: Removing the VPN client or Proxy server (if applicable)
Keep in mind that there are only a select number of VPN clients and Proxy service that Disney+ is not smart enough to detect. The internet is filled with reports from users living in countries where the service already launched that are still getting Error Code 73.
The reason? They have previously installed a VPN client or they’re filtering their Internet connection through a proxy server. Keep in mind that Disney+ (similar to Netflix) will detect your VPN even if it’s not active (it can identify it by looking at your configuration).
So if you’re encountering the issue in a country that already supports Disney+, see if you have ExpressVPN (or other equivalents) or if your internet connection goes through a proxy server.
To help you with this investigation, we’ve created two separate guides that will allow you to remove your VPN or proxy server from your computer.
Removing the VPN client
Note: Keep in mind that when it comes to a VPN client, it does not have to actively hide your identity in order for Disney+ to detect it. The streaming service will detect some VPN clients simply by analyzing the network configuration.
- Press Windows key + R to open up a Run dialog box. Next, type ‘appwiz.cpl’ and press Enter to open up the Programs and Features screen.

Type appwiz.cpl and Press Enter to Open Installed Programs List - Once you’re inside the Programs and Features screen, scroll down through the list of applications and locate the VPN client that you’re currently using.
- Right-click on the VPN client that you wish to uninstall and click on Uninstall from the newly appeared context menu. Next, follow the on-screen prompts and complete the uninstallation.
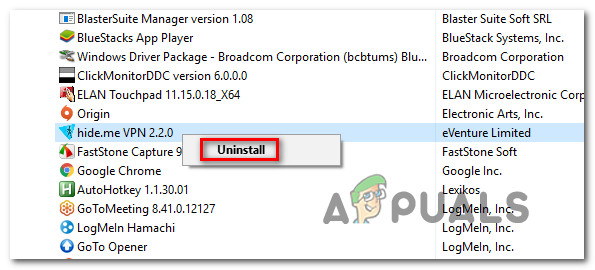
Uninstalling the VPN client - After the operation is complete, restart your computer and attempt to access Disney+ once the next startup sequence is complete.
Removing Proxy server
- Open up a Run dialog box by pressing Windows key + R. Next, type ”ms-settings:network-proxy’ inside the text box and press Enter to open up the Proxy tab of the Settings app.
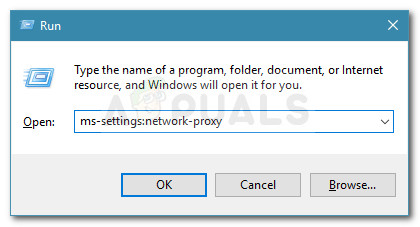
Run dialog: ms-settings:network-proxy - Once you find your way inside the Proxy tab, move over to the right section and scroll all the way down to the Manual Proxy setup section. When you get there, disable the toggle associated with ‘Use a proxy server‘.
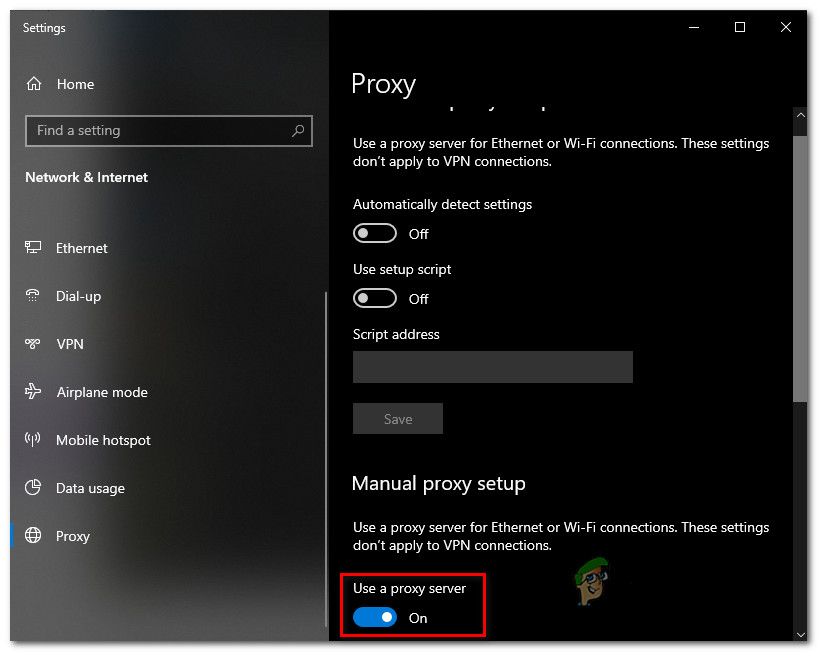
Disabling the use of a proxy server - Once your proxy server is disabled, close the Settings menu and restart your computer.
- After the next startup sequence is complete, access Disney+ again and see if the issue is resolved at the next system startup.
Method 2: Using a Safe VPN client
If you are not living in a country that supports Disney+, the only way you are going to play it is by using a VPN client in order to make it seem like you’re accessing the streaming service from a supported location.
As of now, there are only a handful of VPN services that work fine with Disney+. Here’s a list of user-verified VPN clients that play Disney+ without issues:
- Hide.me (All Platforms)
- HMA VPN (All Platforms)
- Surfshark (PC)
- Super Unlimited Proxy (iOS)
- Unlocator (All Platforms)
- Cloudflare (Android)
Keep in mind that this list is subjected to change. Disney+ bans VPN clients all the time, and new VPN clients manage to get around the VPN detection feature that the streaming service has.
IMPORTANT: Most of these VPN solutions will not work on a Smart TV. As of now, there are few options that will allow you to play Disney+ on a Smart TV OS. Before investing in a VPN for something like this, do your research right and see if other users have been able to set it up without issues.
If you are not certain about how to set up a VPN client, we’ve got you covered. We’ve created a step-by-step guide that will show you how to set up Hide.me VPN and configure it for a Windows PC:
Note: Hide.me VPN will install at a system level, which will bypass the VPN verifications that Disney+ is currently doing. Also, you can use any browser you want when watching the streaming service.
- Open your default browser and visit this link (here) and click on the Download Now button to initiate the download.
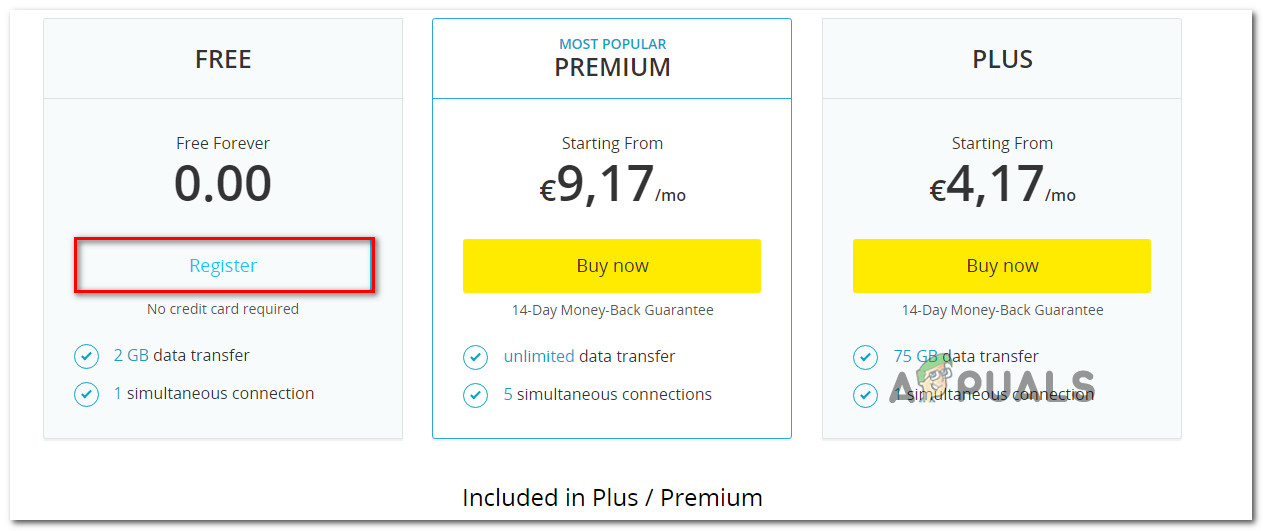
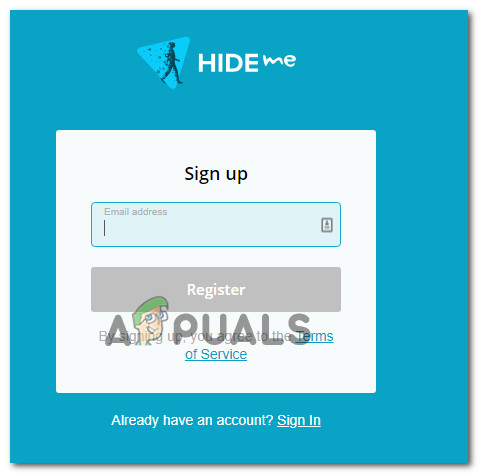
- At the next screen, click on the Register button once (the one associated with the free account), then download the free version of Hide.me for Windows PC.
Downloading the VPN solution - Once you get to the next screen, type your email address and hit Enter to complete the registration.
Registering for the service Note: At this point, you will need to insert a valid email address that you have access to – You will need to validate it during the next steps.
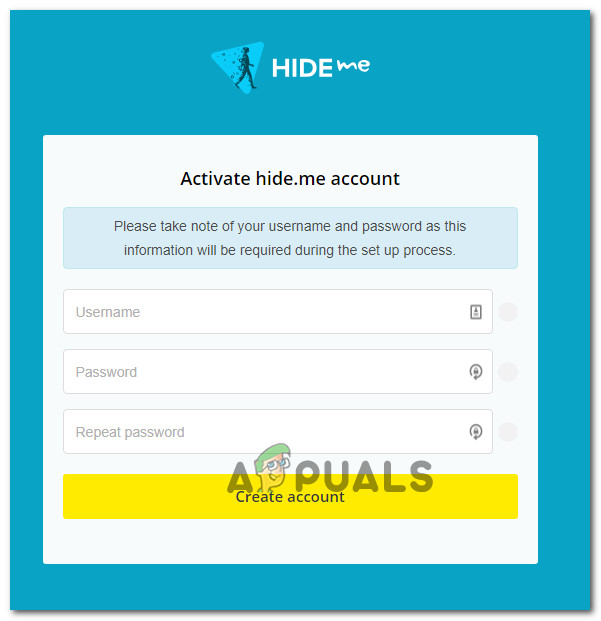
- Once you manage to complete the registration, access your email box and look for the verification email you received from Hide.me – in our case, it took more than 5 minutes.
- Click on the verification link, then insert an appropriate user and password that you want to use for Hide.me. After everything is set up, click on Create Account.
Creating an account with Hide.me - After you manage to successfully sign in to the account that you have just set up, make your way through Pricing > Free and click on the Apply Now button to activate the free plan.
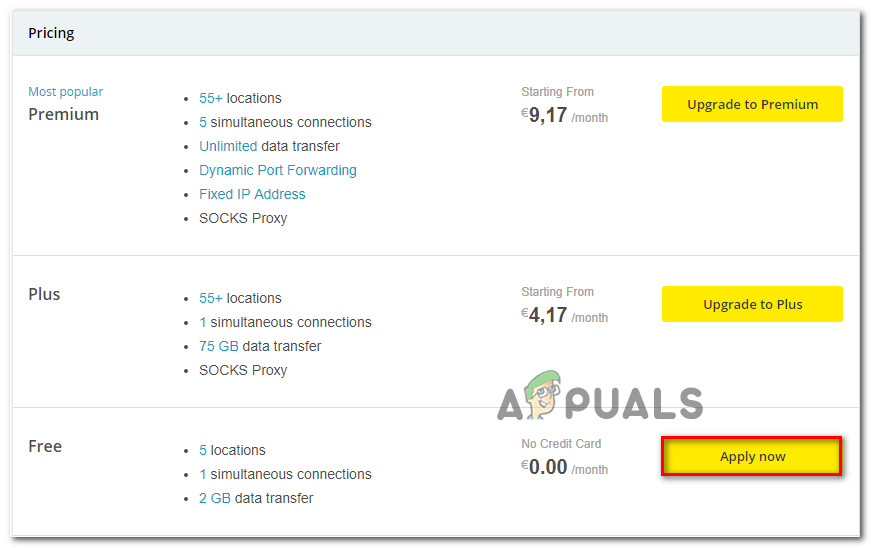
Apply for the free account Note: We recommend starting with a free plan and only go for the Premium plan after you confirm that the VPN service works for you when playing Disney+.
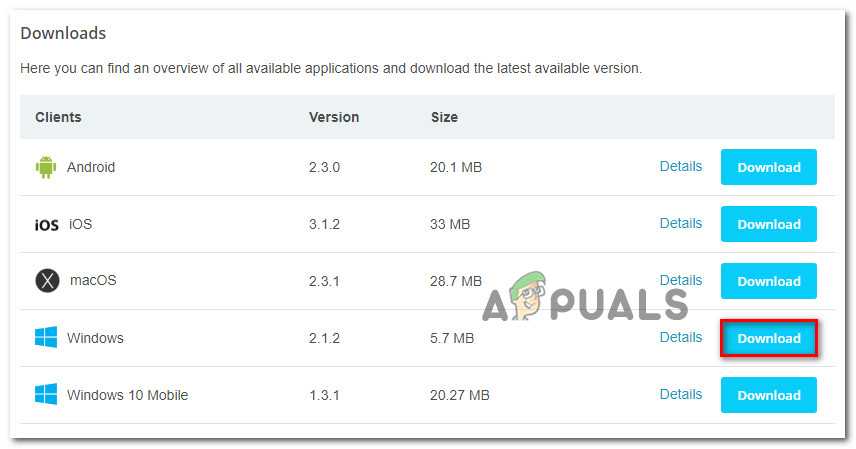
- Once you get this far, the free plan is successfully enabled. All that’s left to do now is to access the Download clients tab and click on the Download Now button corresponding with your operating system version in order to initiate the download.
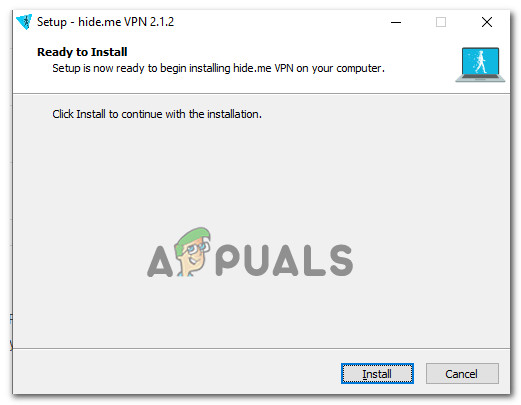
Downloading the Windows client of Hide.me - After the operation is complete, double-click on the newly-downloaded executable, then follow the on-screen prompts to complete the installation.
Installing the Hide.Me VPN application - Once Hide.me is installed on your computer, use the credentials you previously validated at step 4 and click on Log in. Finally, click on Start your free trial, then select a location supported by Disney+. Here’s a list of supported countries: Canada, Netherlands, United States, Australia, New Zealand, and Puerto Rico.
- After you activate the Hide.me VPN, launch Disney+ and see if you’re still encountering the same issue.