How to Disable VBS to Increase Performance in Windows 11?
Increase your Performance in games by Disabling VBS on Windows 11
With the launch of Windows 11, many users have upgraded to the new operating system while others had to buy a new setup because of the stellar Windows 11 requirements. The enhanced security features that Windows 11 comes with is no stranger to any longer due to all the fuss about the installation requirements and the confusion around the TPM module. Despite all of that, Windows 11 is far from perfect and that is becoming apparent as more users upgrade to the operating system. As per Microsoft, Windows 11 is the best operating system for gaming so far, however, that statement doesn’t hold too true as a report by PCGamer found that certain security features can give gaming performance a hit of 25% which is significant.
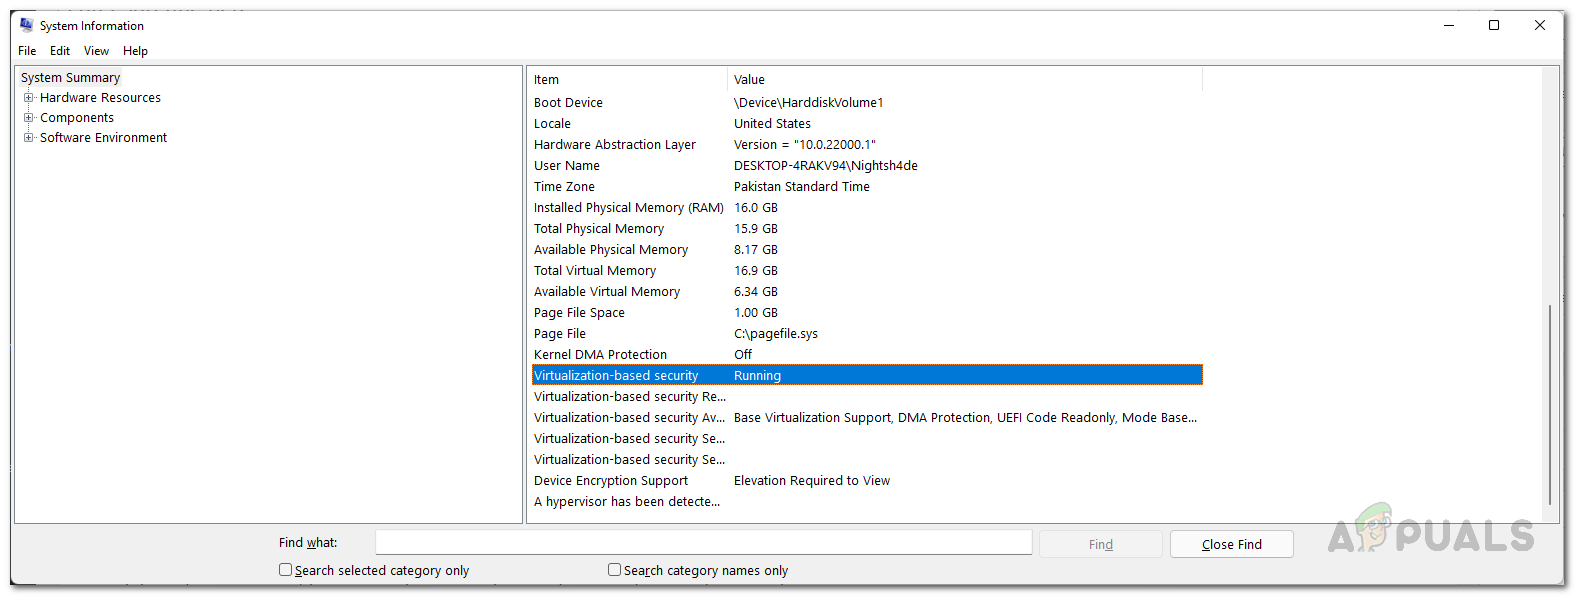
This said feature is called Virtualization Based Security or VBS in short. VBS is not a new feature and it has been around in Windows 10 as well. Virtualization Based Security is basically a security feature that uses the Windows hypervisor to create isolated regions of memory from the normal operating system. In essence, it uses software and hardware virtualization to improve the security of your system. While security is an important thing, coming at the cost of 25% gaming performance on certain games may not be appreciated by everyone. If you are simply upgrading to Windows 11 from 10, you do not really have to worry about VBS being enabled on your computer.
The problem is mainly for those who received a new system with Windows 11 preinstalled which in most cases is an OEM build. If this case is applicable, your gaming performance will take a significant hit and in such a scenario, you will have to simply disable VBS on your operating system. If you are experiencing degraded performance after upgrading to Windows 11, you can also give disabling VBS a try but it may not really work for you. With that said, let us get started and show you how to disable VBS in Windows 11.
Disable VBS from Windows Settings
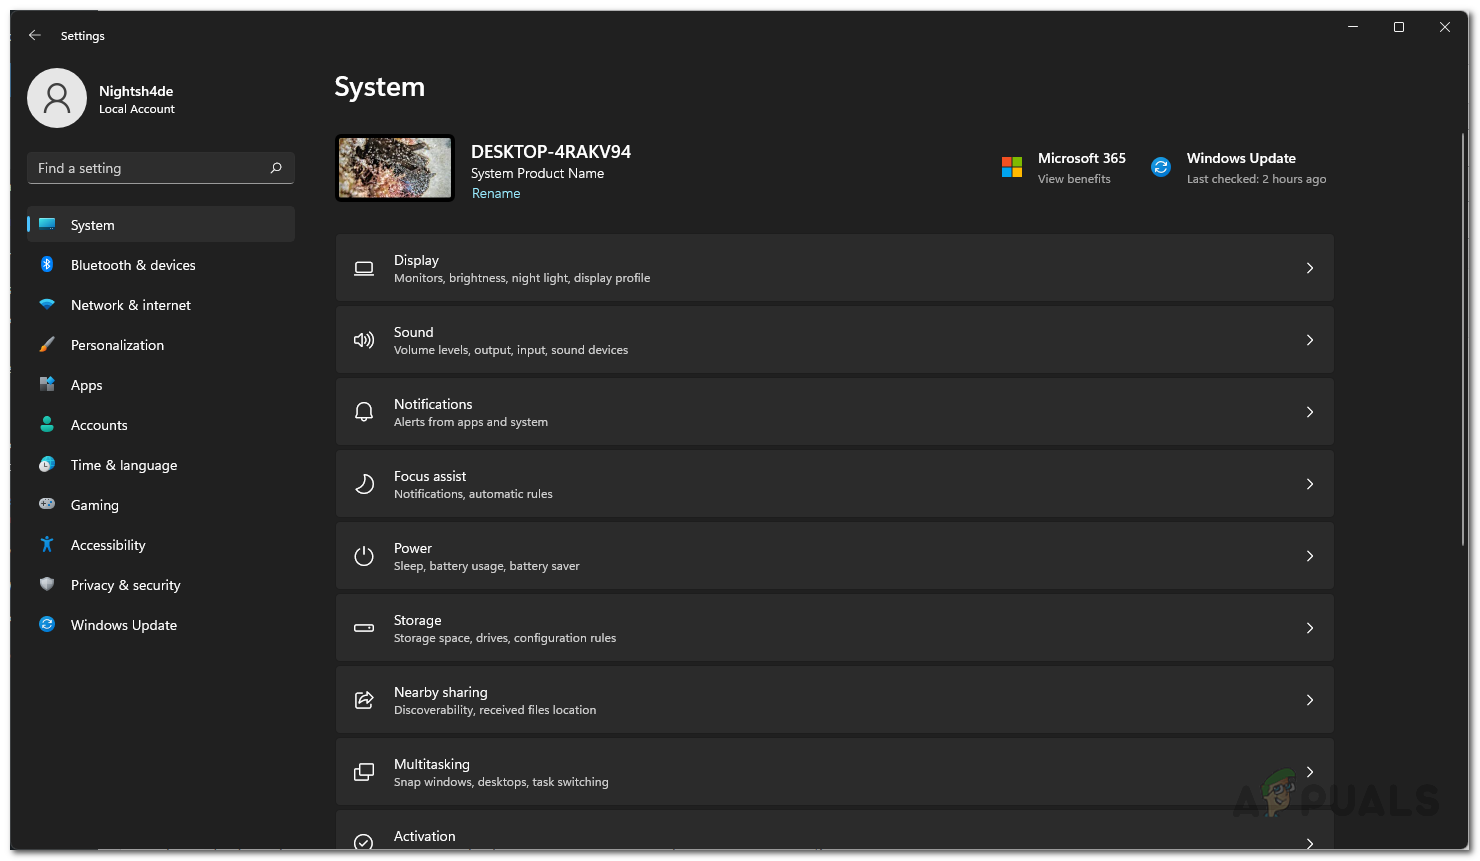
The Windows Settings app has received a revamp in the new version of the operating system. The standard home page layout is no longer there and instead you see the different options and tabs available on the left-hand side. One way of disabling Virtualization based Security would be through the Windows Settings app. Follow the instructions given down below to do this:
- First of all, open up the Windows Settings app by pressing Windows key + I on your keyboard.
- On the left hand side of the Settings screen, click on the Privacy and security option.
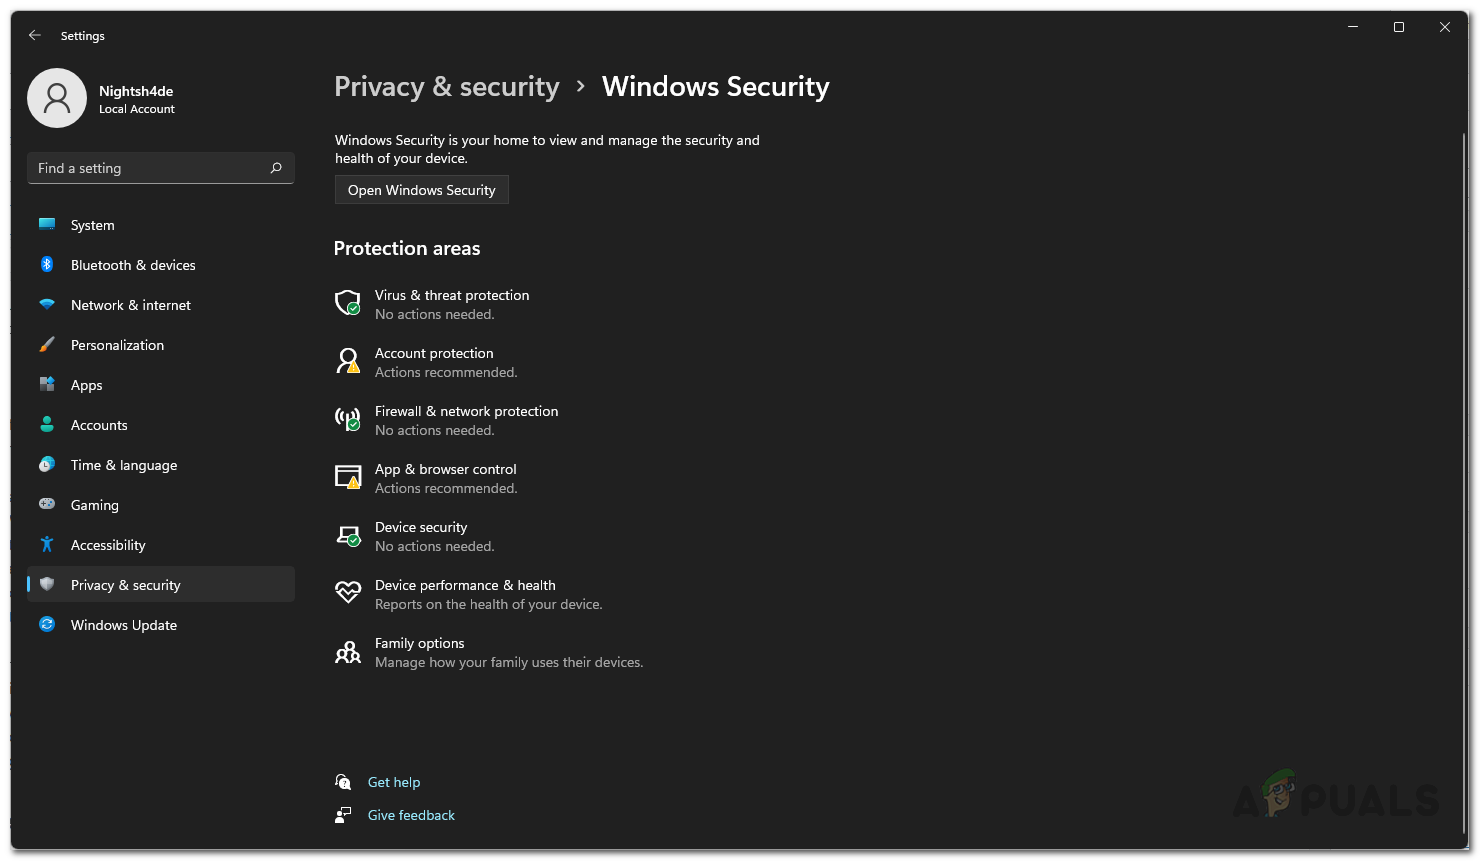
Windows Settings - Then, on the Privacy and Security screen, make your way to Windows Security by clicking the option provided.
- After that, click on the Device security option. This will open up a window.
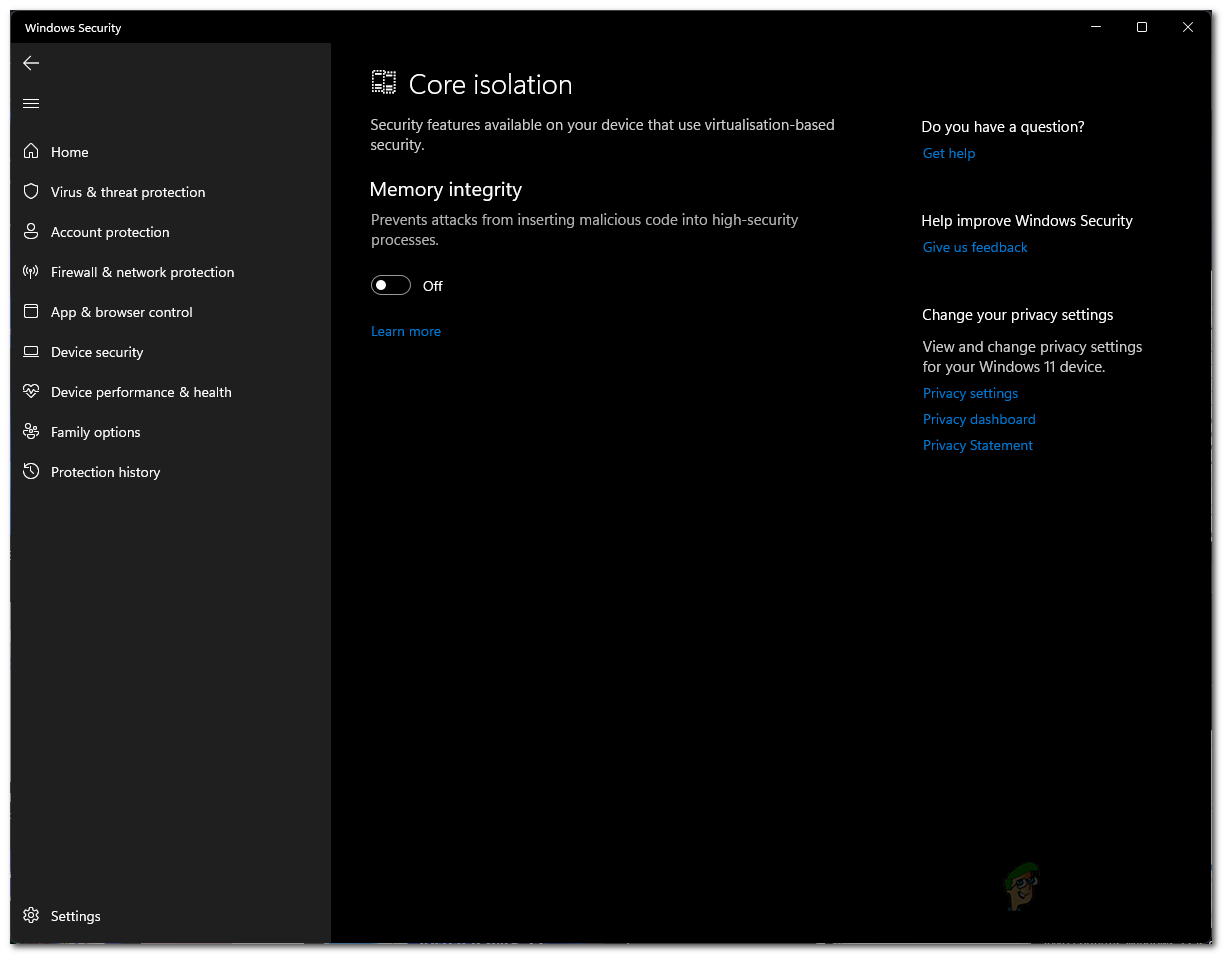
Windows Security - On the new window, click the Core isolation details option.
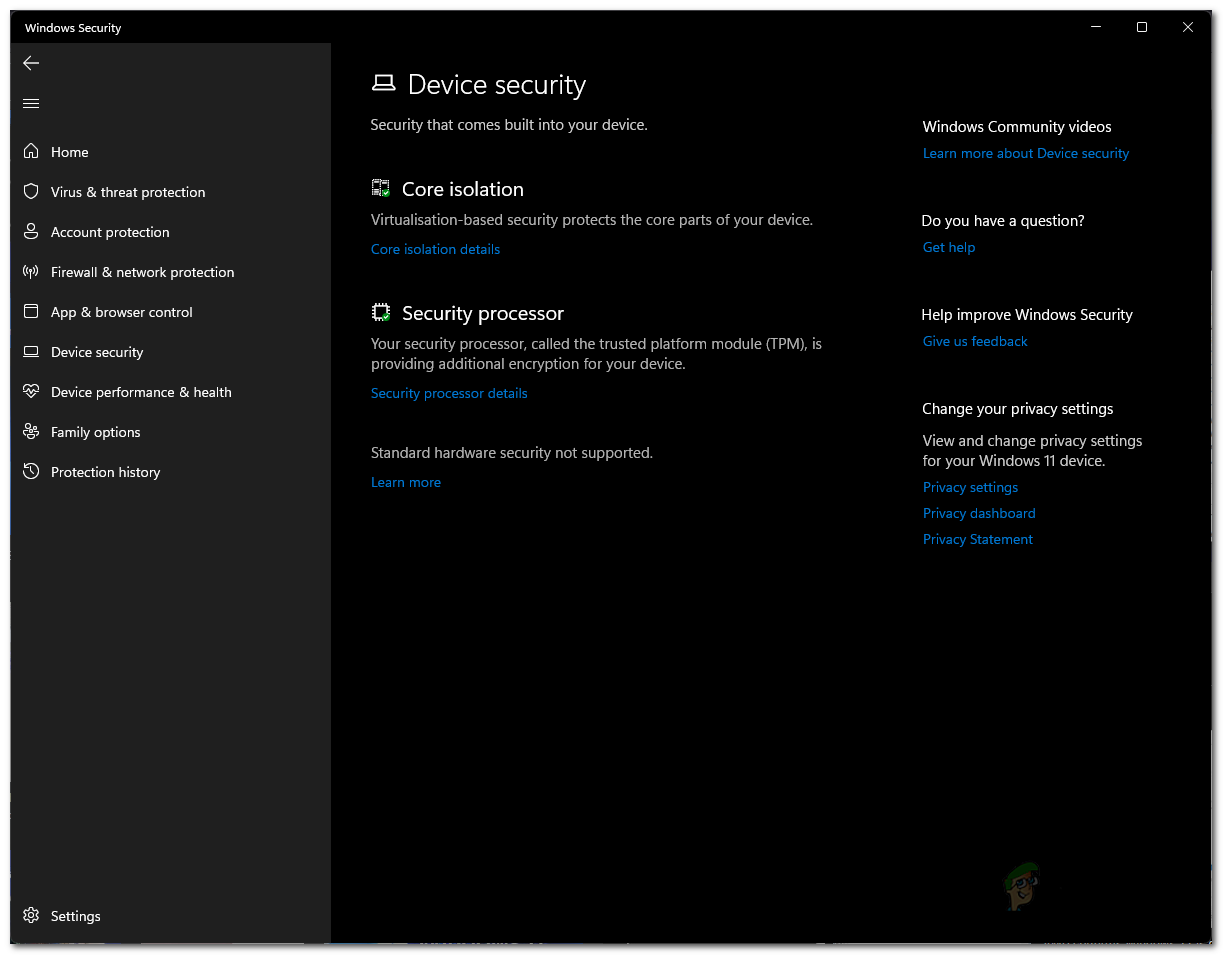
Device Security - Finally, make sure that Memory integrity is turned off by clicking the slider provided.
Disabling Virtualization Based Security via Windows Settings - Once you have done that, restart your computer for the changes to take effect.
Turn off Windows Virtualization Features
Since Virtualization based security is a feature of Windows Virtualization, you can disable it by simply turning off the Windows virtualization features from the Control Panel. To do this, follow the instructions given down below:
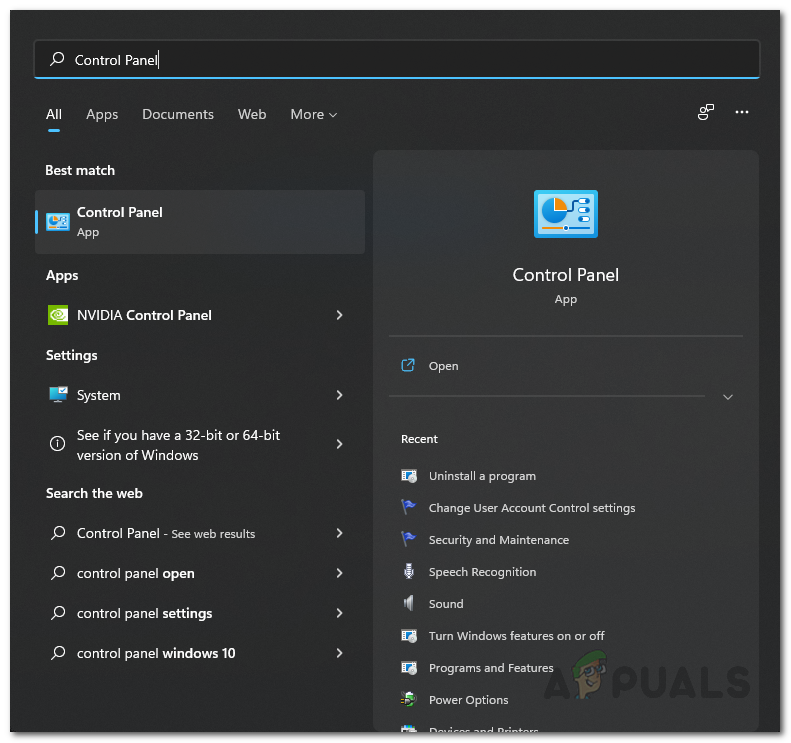
- First of all, open up the Control Panel by searching for it in the Start Menu.
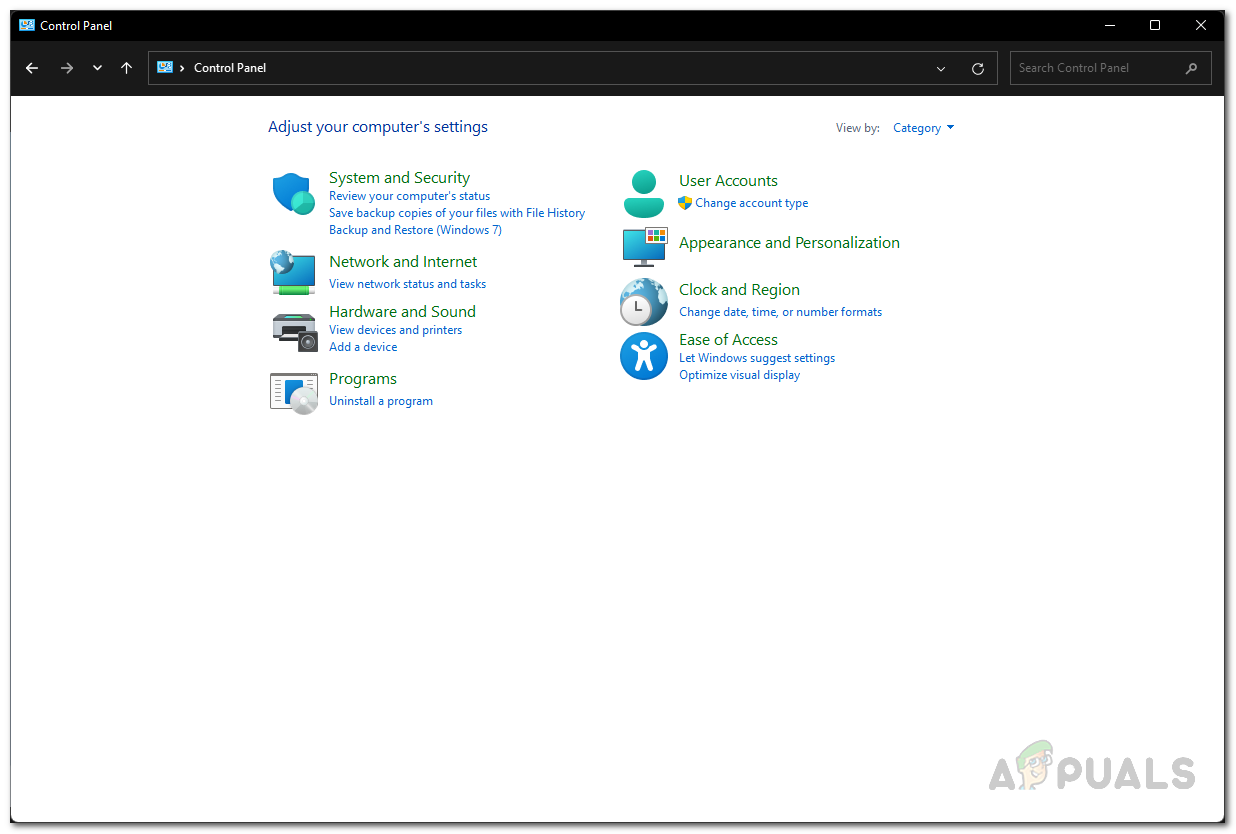
Opening up Control Panel - On the Control Panel window, click on the Programs option.
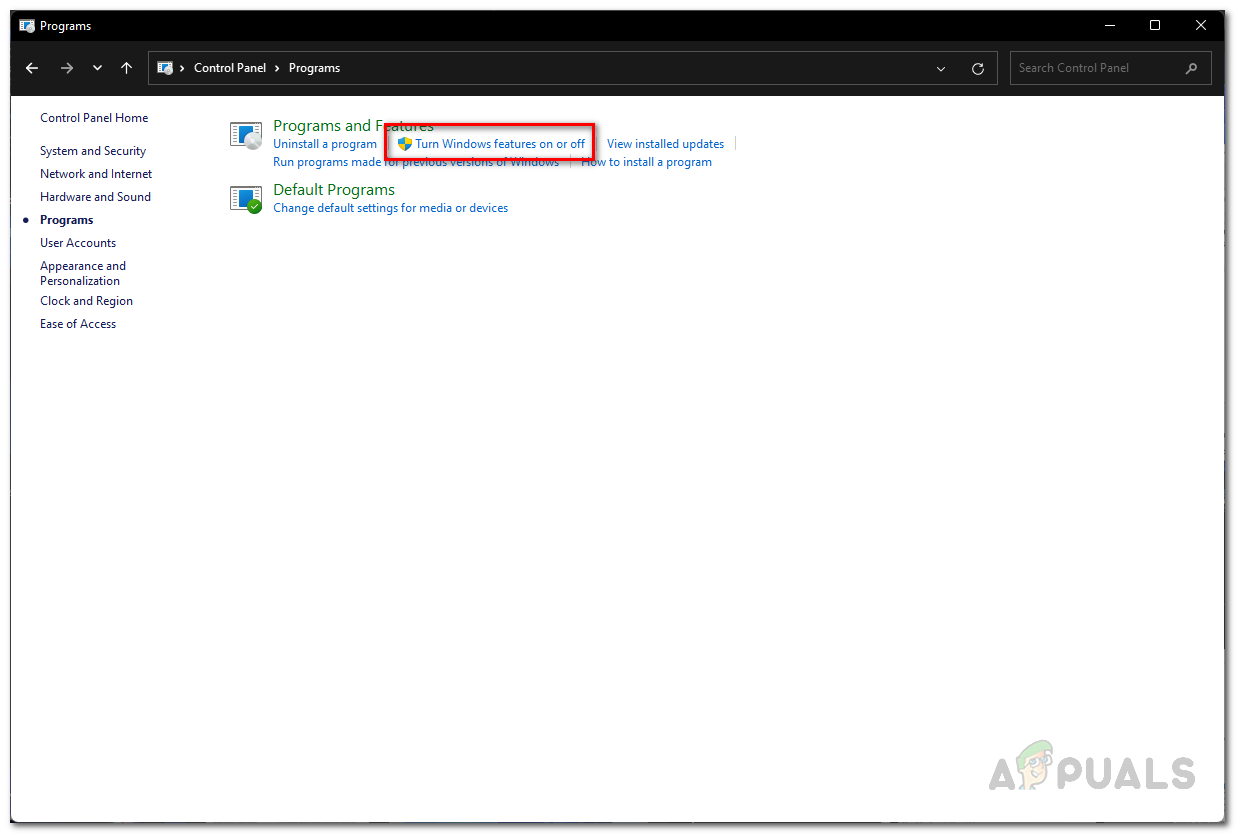
Control Panel - Then, on the Programs screen, click the Turn Windows features on or off option provided.
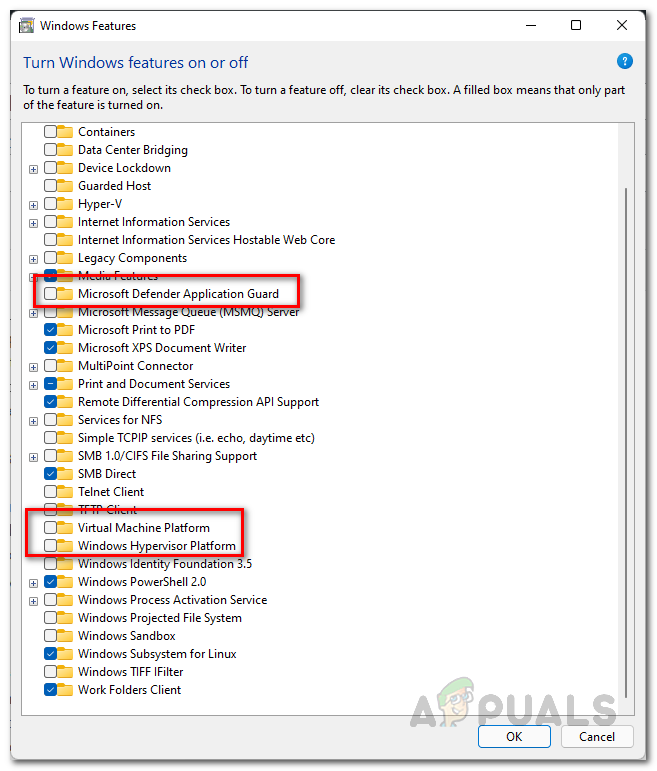
Opening Windows Features Window - Now, on the Windows Features window that comes up, make sure that Microsoft Defender Application Guard, Virtual Machine Platform and Windows Hypervisor Platform features are unchecked.
- After that, click OK to close the window.
Turning off Windows Virtualization - Finally, restart your computer for the changes to take effect.
Disable VBS with Command Prompt
Another way of disabling the Virtualization based security feature would be to do through the Windows command prompt. For this, you will need to open up an elevated command prompt so make sure that you are signed in as an administrator. After that, follow the instructions given down below to do this:
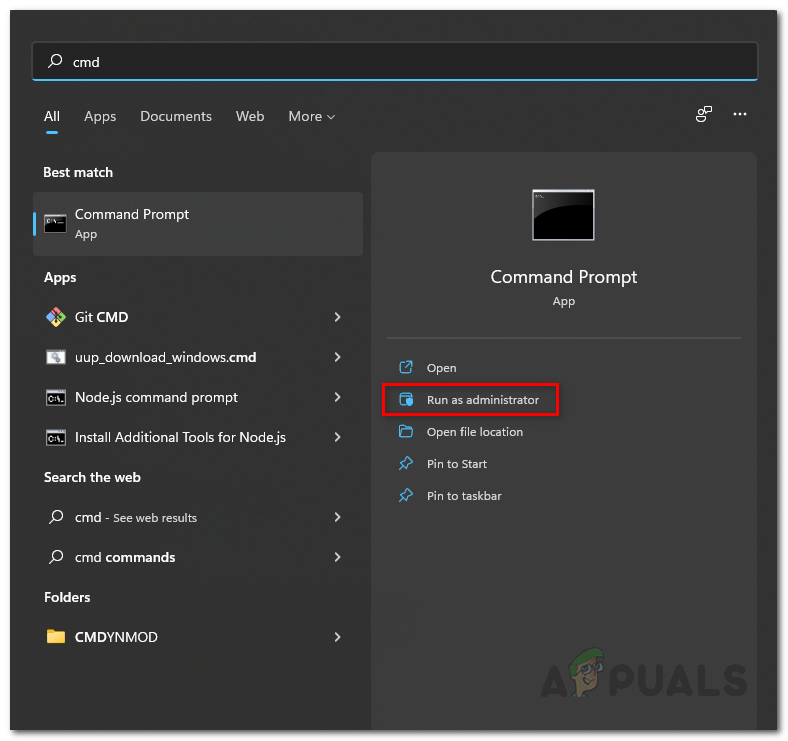
- First of all, open up the Start Menu and search for cmd.
- On the right-hand side, under the Command Prompt app, click the Run as administrator option provided. Click Yes on the UAC dialog box that appears.
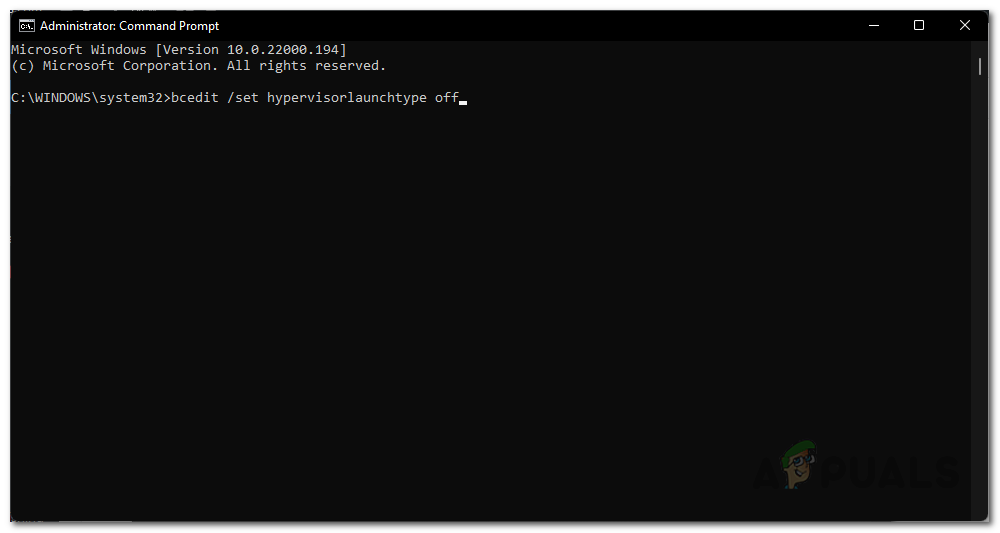
Running Command Prompt as Administrator - Once the command prompt window is up, copy and paste the following command and hit the Enter key to disable VBS:
bcdedit /set hypervisorlaunchtype off
Disabling Virtualization Based Security via Command Prompt - After doing that, go ahead and restart your computer.
Disable VBS from Local Group Policy Editor
You can also use the Local Group Policy Editor on your computer to disable Virtualization based security. To do this, follow the instructions provided down below:
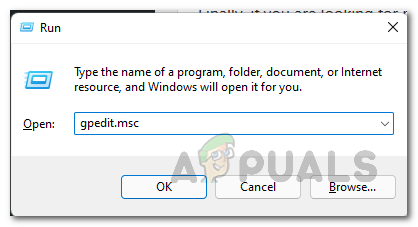
- First of all, open up the Run dialog box by pressing Windows key + R on your keyboard.
- In the Run dialog box, type in gpedit.msc and hit the Enter key. This will open up the Local Group Policy Editor.
Opening up Local Group Policy Editor - In the Local Group Policy Editor window, navigate to the following path:
Local Computer Policy > Computer Configuration > Administrative Templates > System > Device Guard
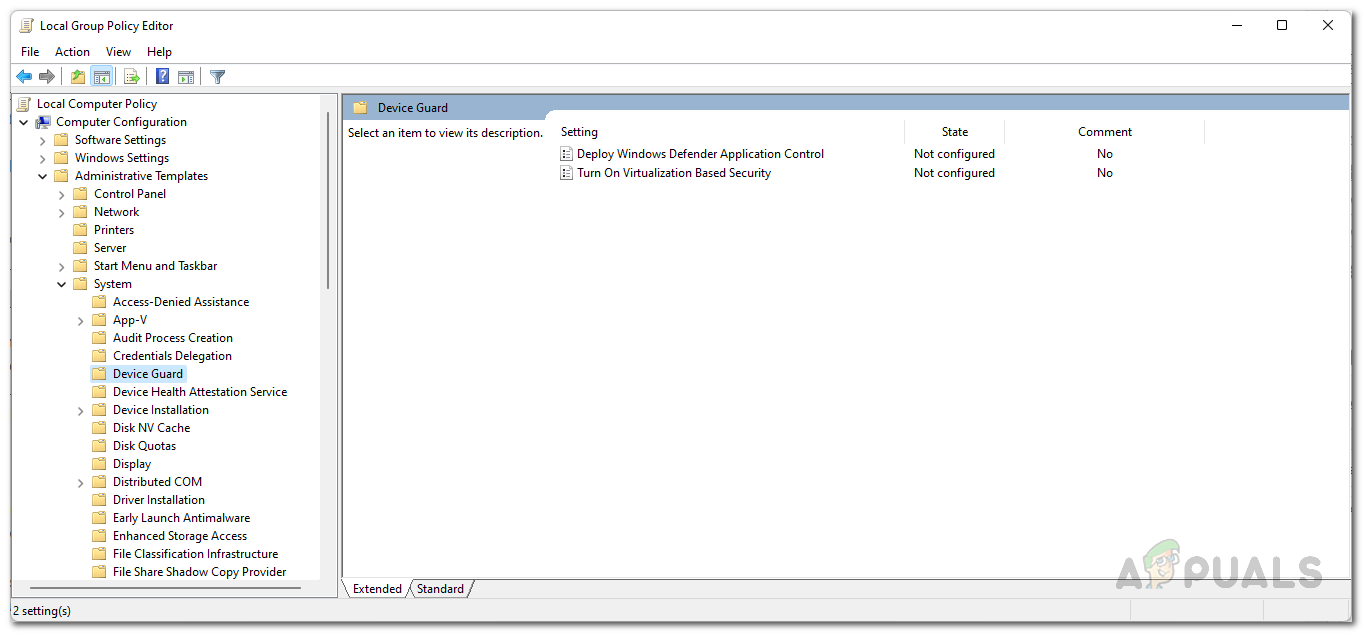
Navigating to Device Guard Policies - There, on the right-hand side, double click on the Turn On Virtualization Based Security policy.
- On the policy window, choose Disabled and then click the Apply button. Hit OK to close the window.
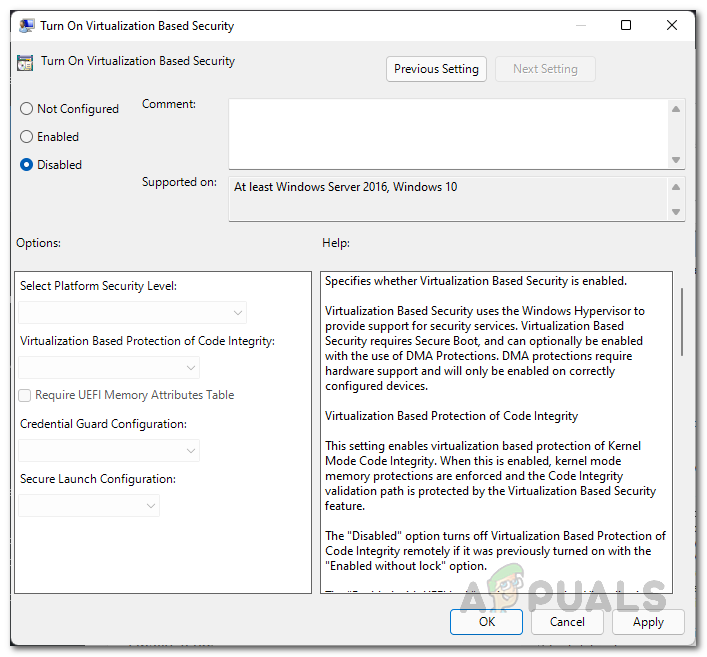
Disabling Virtualization Based Security via Policy - Once you have done that, go ahead and close the Local Group Policy Editor window and then restart your computer.
Disable Virtualization from BIOS
Finally, if you are looking for more of an advanced approach, this is the method for you. As it turns out, you can disable the virtualization technology on your computer from your BIOS. Now, depending on your manufacturer and the BIOS version that you are using, the procedure may differ a little. In addition to that, if you are using an Intel processor, you will have to look for Intel Virtualization Technology while in the case of AMD, this is called SVM or Secure Virtual Machine. In our example, we are using an ASUS motherboard with an AMD processor. The steps shouldn’t differ much for Intel and a different manufacturer on your end. Let’s get started.
- First of all, go ahead and restart your computer.
- Then, as your computer starts to boot up, press the DEL or F2 key in case of AMD motherboards to get into BIOS configuration. This shortcut key may differ for you depending on your manufacturer.
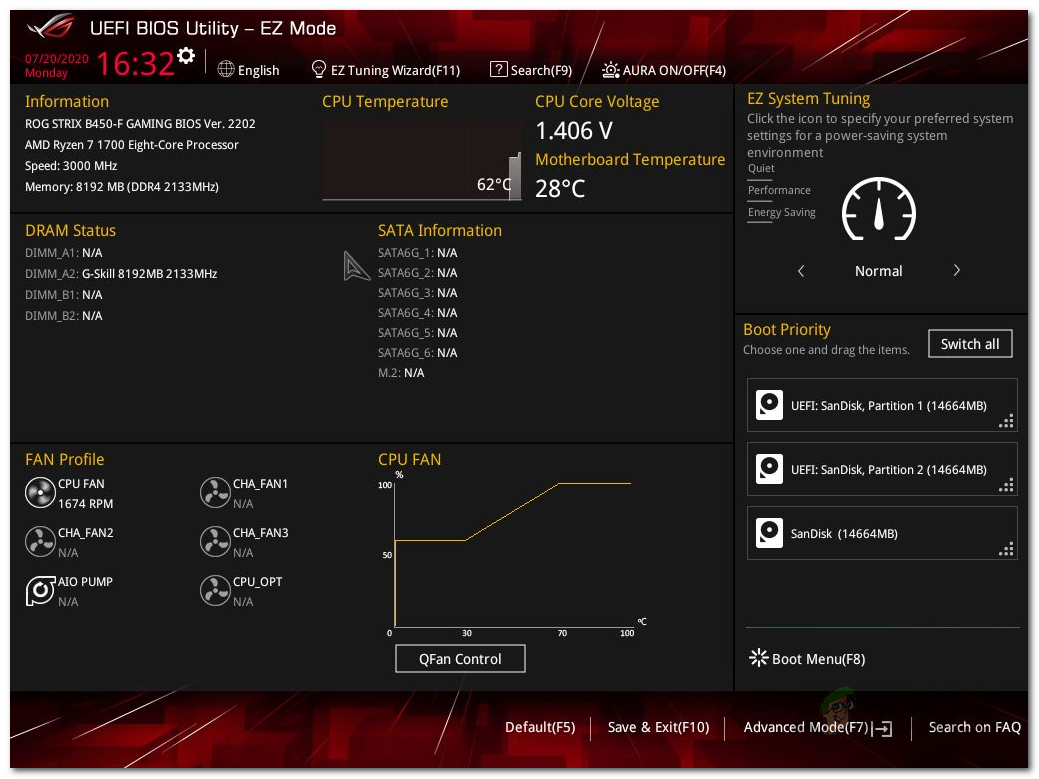
- When you get into BIOS, initially, you will be in Asus EZ Mode. Press the F7 key to switch to Advanced Mode.
ASUS EZ Mode - Now, switch to the Advanced tab at the top and then select the CPU Configuration option.
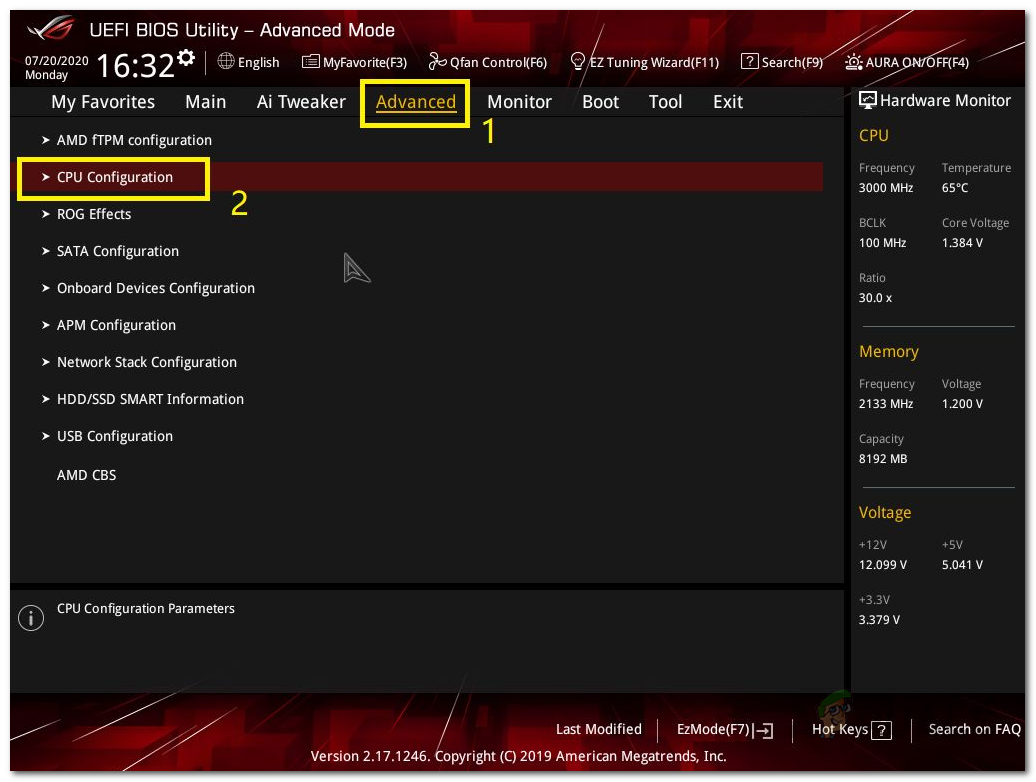
Navigating to CPU Configuration - Finally, at the bottom, go ahead and set SVM Mode to Disabled.
- Once you have done that, press the F10 key on your keyboard to save and exit.
- Let your computer restart for the changes to take effect.


