How to Upgrade to Windows 11 Stable Release Without Waiting?
The long awaited successor of Windows 10 is finally here, Windows 11 has been officially released today. The new operating system comes with a total overhaul to the user interface that has been both liked and disliked by the user base. Windows 11 introduces round corners to almost all of the windows, a new Microsoft Store that allows developers to be able to share their app on the platform, and much more. While some users might have tried it in the Insiders Preview, the majority of the users didn’t want to risk running an unstable version of the operating system on their main computer.
That said, starting today, the operating system will be made available to all the users who meet the Windows 11 installation requirements. However, it is important to mention here that you may not get the upgrade right away from Microsoft as they are periodically making it available to everyone across the world. Regardless, do not worry as you can upgrade to Windows 11 despite it being unavailable to you at the moment via the Windows 11 Installation Assistant. We will be taking you through the process in this article so just follow through and you will have Windows 11 installed in no time.
Windows 11 Requirements
Before we begin, a common question would be can I run Windows 11? As it turns out, you have to make sure that your current setup is able to handle the new operating system and meet the installation requirements or you won’t be offered the upgrade. This can be easily checked via the PC Health Check tool that is developed by Microsoft and revamped to offer better insights on whether you can run Windows 11 or not. To check your system compatibility, you can follow the guide that we have linked above to ensure that your computer is compatible. If you are all set there, let us get started with the methods down below to upgrade to Windows 11.
Upgrade to Windows 11 via Windows Settings
The most obvious place to start is the Windows Settings app. Windows updates can be accessed through the mentioned app where you can choose to download and install any required updates. In addition to that, if your system is eligible for Windows 11, you might be given the upgrade through the Windows Update menu. However, take note that some users may not get the upgrade instantly unlike others in which case you will have to go to the other method down below to upgrade to Windows 11. Performing the upgrade through the Windows Update menu is the simplest option available. To check for the upgrade, follow the instructions down below:
- First of all, press the Windows + I keys on your keyboard to open up the Windows Settings app.
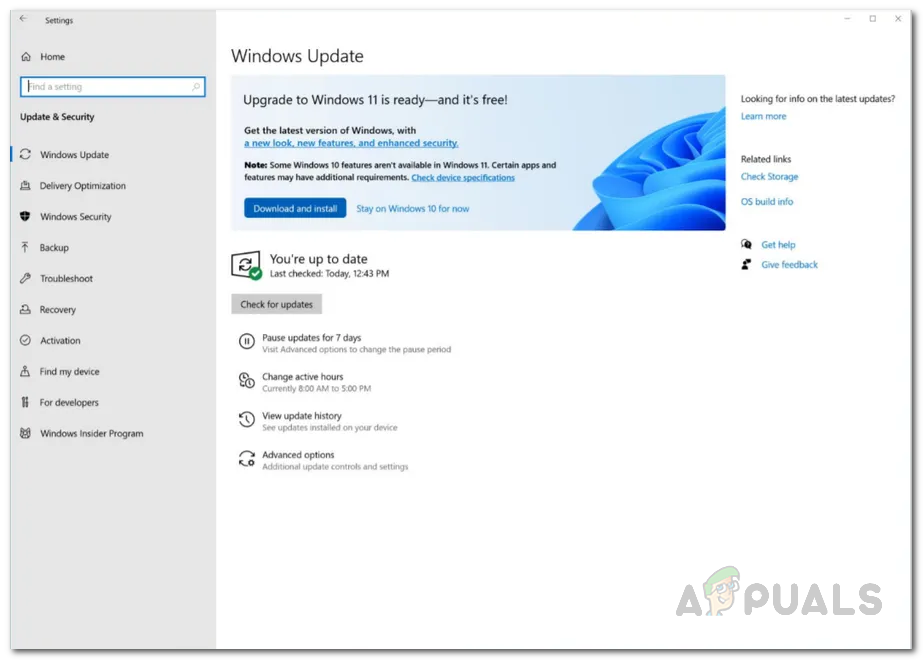
- Then, on the Settings window, make your way to Windows Update.
Windows Settings - On the Windows Update screen, you will be able to see the Upgrade to Windows 11 is ready dialog box if the upgrade is available for your system.
Windows 11 Upgrade - In some cases, you may not get the upgrade and instead you will be shown a Get ready for Windows 11 message as shown in the picture below.
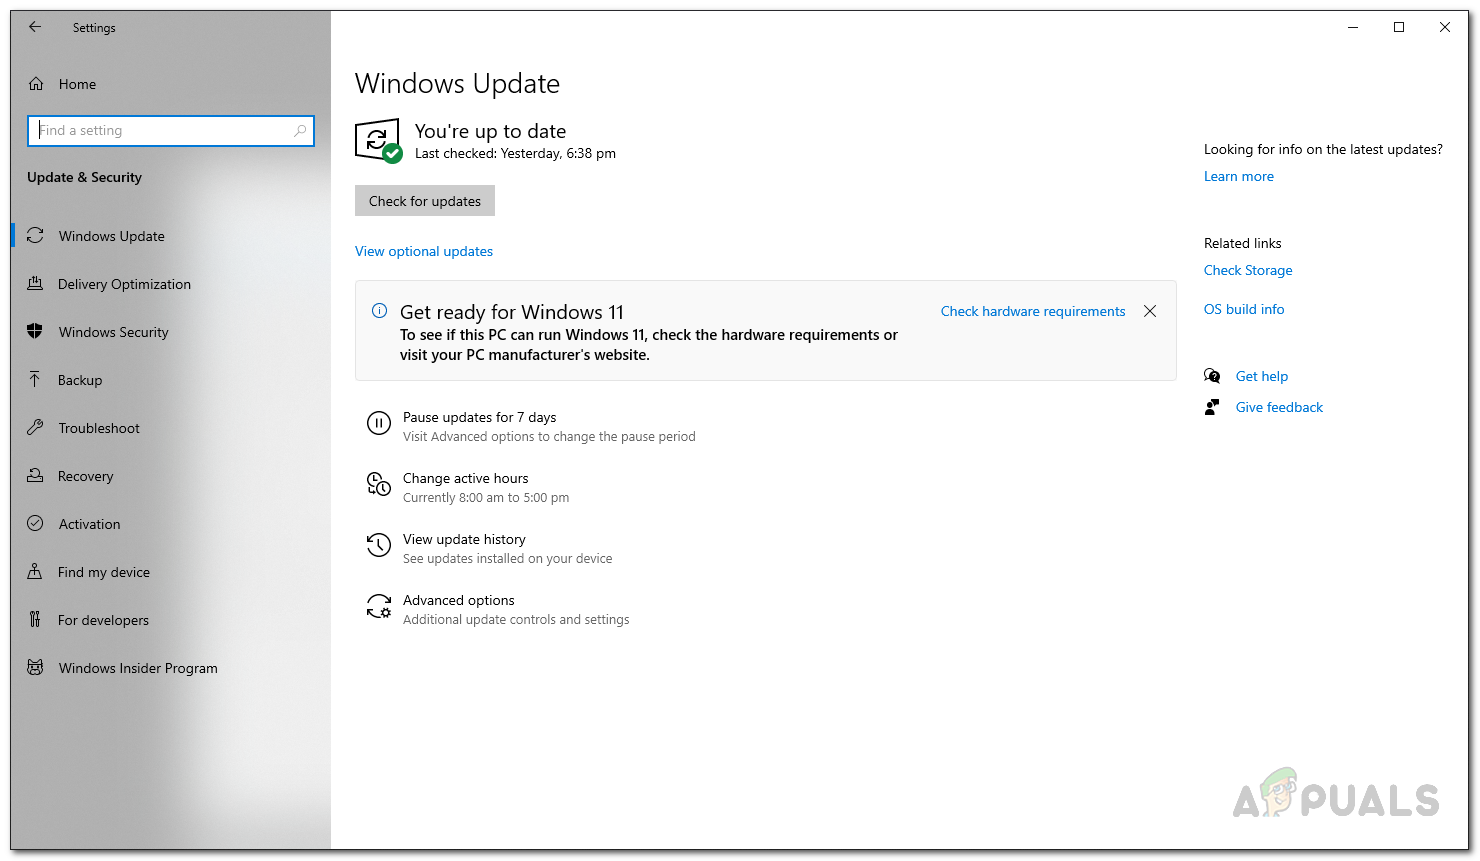
Get Ready for Windows 11 - Click the Download and Install button provided to begin the upgrade process.
- If the upgrade is not available for you, do not fret and just follow the next method mentioned down below.
Upgrade to Windows 11 via Windows 11 Installation Assistant
Another way of upgrading to Windows 11 is through the Windows 11 Installation Assistant. While a Windows 11 clean install option may also be on the table, it isn’t really recommended unless you have a backup of data with you. Instead of that, just like the Windows 10 Update Assistant which lets you download and install feature updates that are not available through the Windows Settings app, you can download and install Windows 11 using the Windows 11 Installation Assistant.
Using the installation assistant is completely safe as you won’t be losing any files that are stored on your computer. However, before going forward, make sure that you have at least 9 GB free space other than the Windows 11 installation requirement in order to download Windows 11. With that said and out of the way, follow the instructions given down below to upgrade to Windows 11:
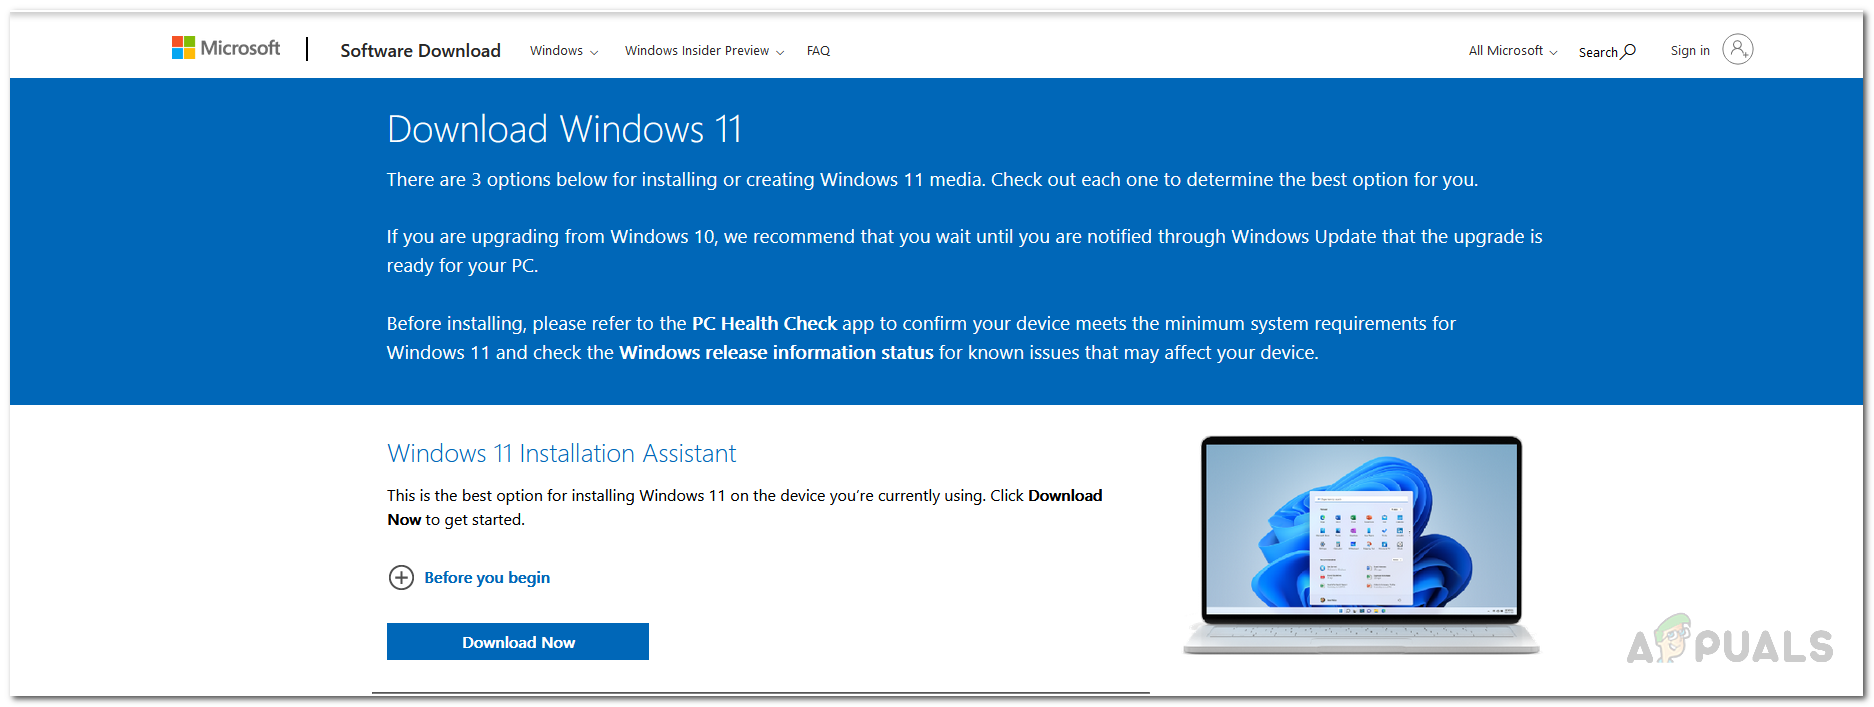
- First of all, head to the official website for downloading Windows 11 by clicking the link here.
- On the web page, click on the Download Now button under Windows 11 Installation Assistant.
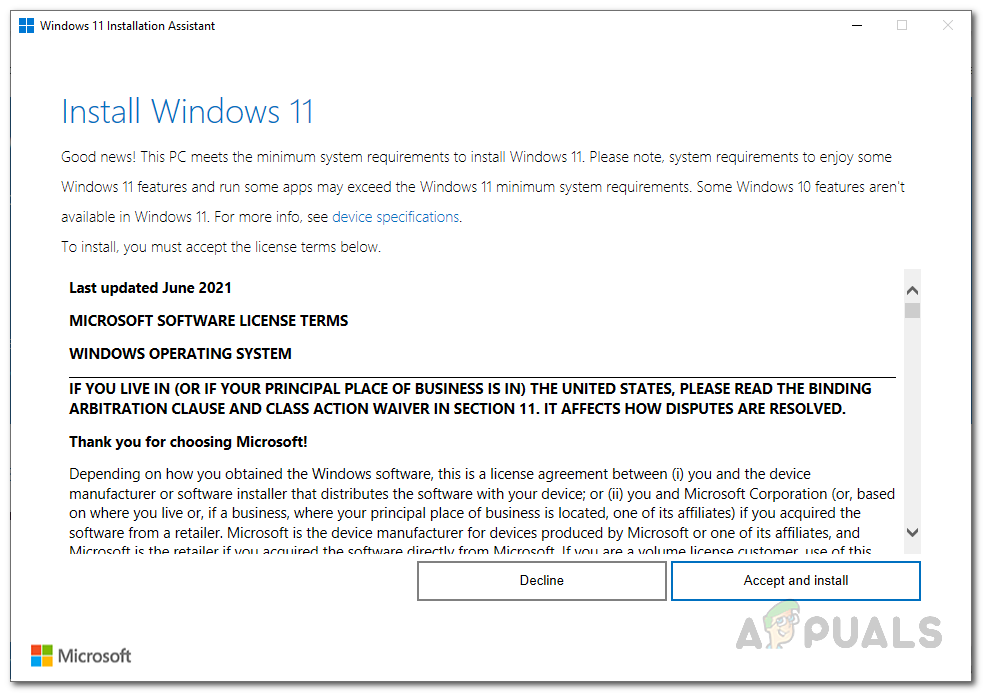
- Once you have downloaded the file, go ahead and run it.
Downloading Windows 11 Installation Assistant - As the Windows 11 Installation Assistant launches, click on the Accept and Install button to agree to the license agreement and begin the downloading.
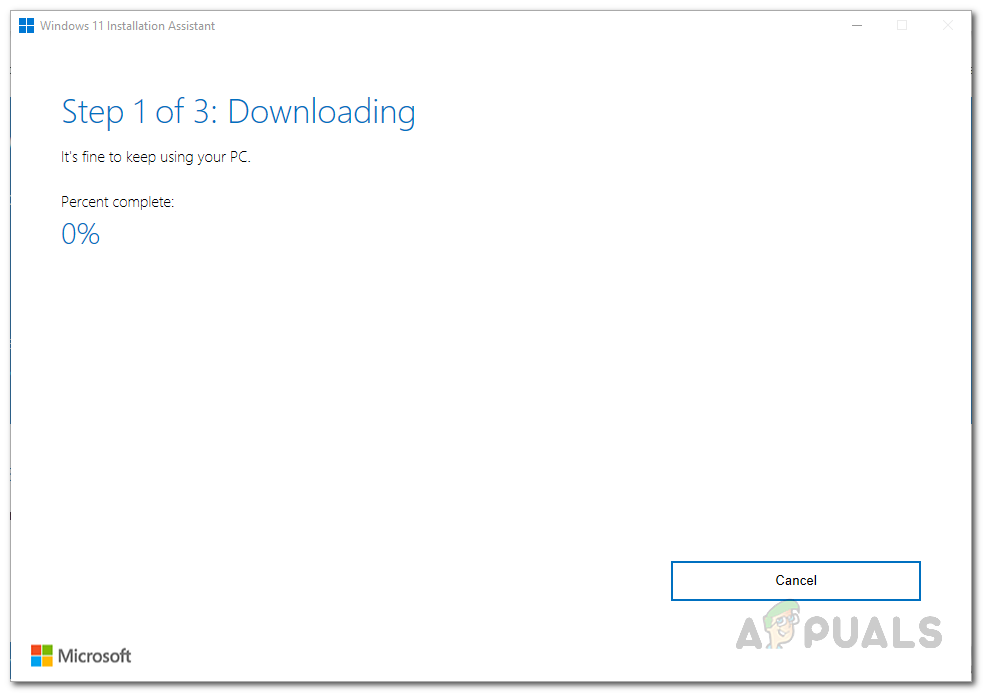
Starting Windows 11 Download - On the next screen, Windows 11 will start downloading and you will be shown the completion percentage. Wait for it to download.
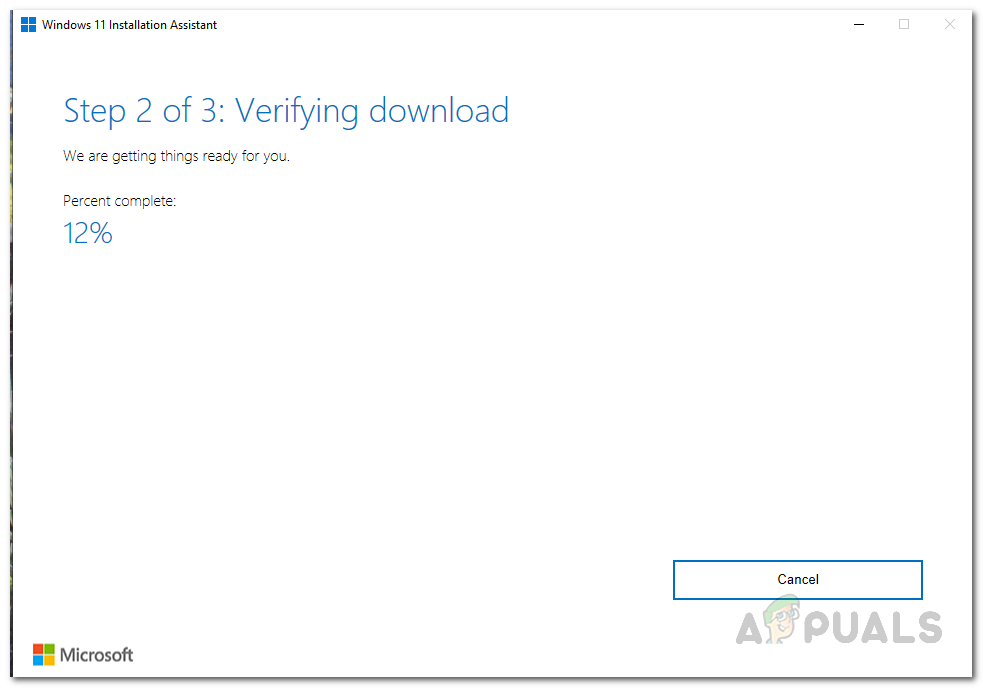
Windows 11 Downloading - Once the download has been completed, the downloaded files will be verified by the installation assistant.
Verifying Downloaded Files - After that, the Windows 11 Installation Assistant will begin installing Windows 11 on your computer. Wait for it to complete.
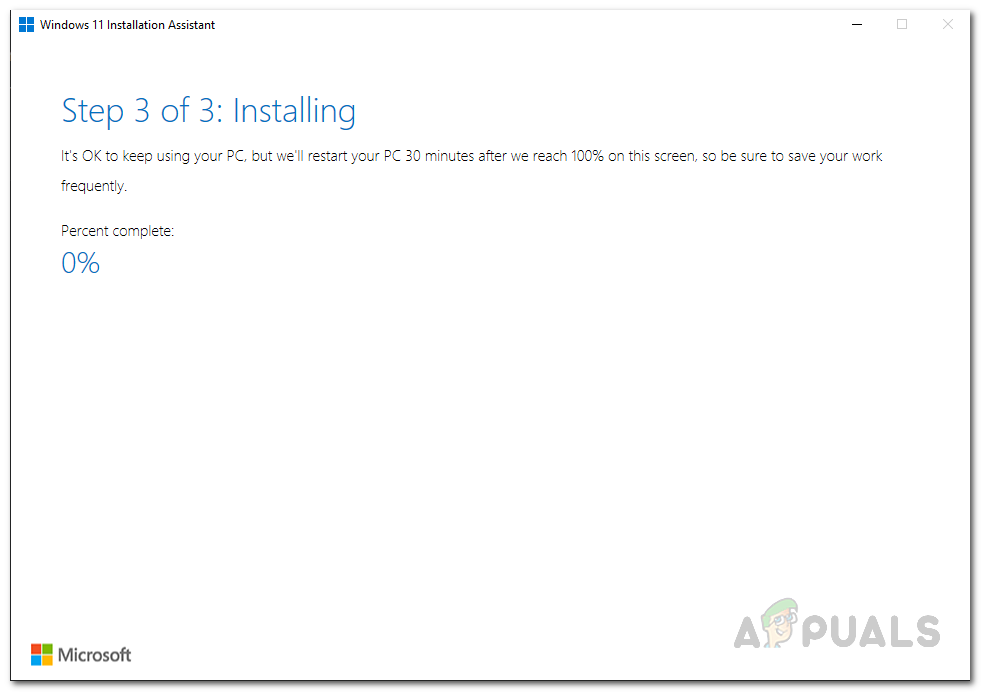
Installing Windows 11 - As the installation completes, you will be given 30 minutes before your computer is restarted. Here, you can choose to either restart now or later.
- After your computer boots up, you will be taken through basic Windows setup. Follow the on screen prompts to finish the upgrade process.
- Once you have done that, you will have successfully upgraded to Windows 11.
Perform a Clean Windows 11 Install
Finally, you can also upgrade to Windows 11 by performing a clean install. Clean installing Windows 11 means that you will have to download the official Windows 11 ISO from Microsoft’s website and then use the downloaded ISO to perform a clean install. This can be helpful if you wish to get rid of all of your data especially when you are using a single partition. This is because in order to clean install Windows 11, you will have to format your system drive. Therefore, if you have any important data on your system drive, it is essential that you back it up before performing a clean install. We already have a guide present on this which takes you through the whole process step by step which you can find linked just above.


