Fix: Bluescreen After Installing Drivers on Windows 11
When a blue screen shows up right after you install a driver on Windows 11, it usually means the computer crashes right away—often during the next restart or when the system tries to use the new driver. The error message (for example, 0x00000116 VIDEO_TDR_FAILURE or DRIVER_POWER_STATE_FAILURE) means that a device driver did not answer or took too long to start.
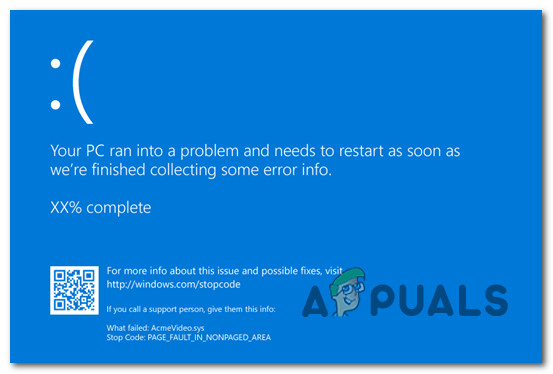
The most common cause is a bad or incompatible graphics driver. Other possible reasons include problems with the chipset drivers, broken installations, or having more than one driver version at the same time.
Now that you know the main causes, move to the next section and follow the step-by-step fixes that have helped other Windows 11 users resolve BSOD errors after installing new drivers.
1. Install Pending Windows Updates
Microsoft has released several updates specifically aimed at improving driver stability in Windows 11, especially under heavy load. If your computer crashes while running demanding tasks, install all available Windows updates before moving on to other solutions.
- Press Windows + R to open the Run dialog.
- Type “ms-settings:windowsupdate” and press Enter to open the Windows Update section in Settings.

Access the Windows Update menu - If prompted by the User Account Control (UAC), click Yes to continue.
- Click Check for Updates on the right pane.
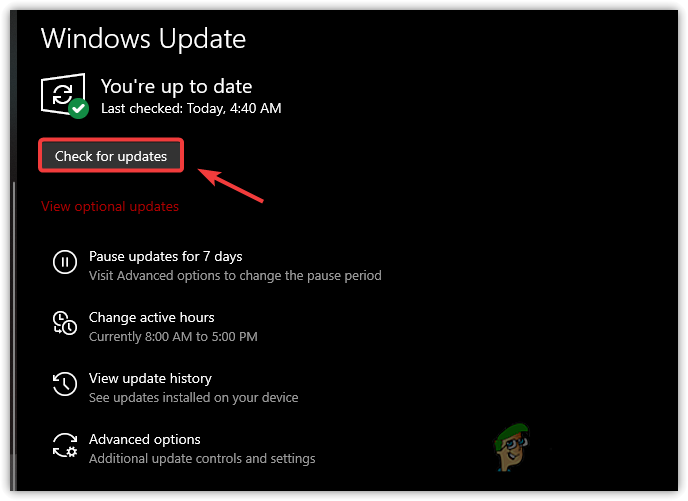
Checking for updates - If updates are found, click Install Now and wait for them to download and install.
- Restart your computer to complete the update process and check if the problem persists.
2. Revert Overclocked Frequencies
BSODs can often be caused by hardware running outside its default speeds or voltages—something called overclocking. If you’ve boosted the performance of your CPU, GPU, or RAM, try returning them to their default (stock) settings. This helps rule out unstable overclocking as the source of your crashes.
Most commonly, BSODs happen if your GPU or CPU runs too fast, or if your power supply can’t keep up. Many users have found stability returns after disabling or reducing overclocking.
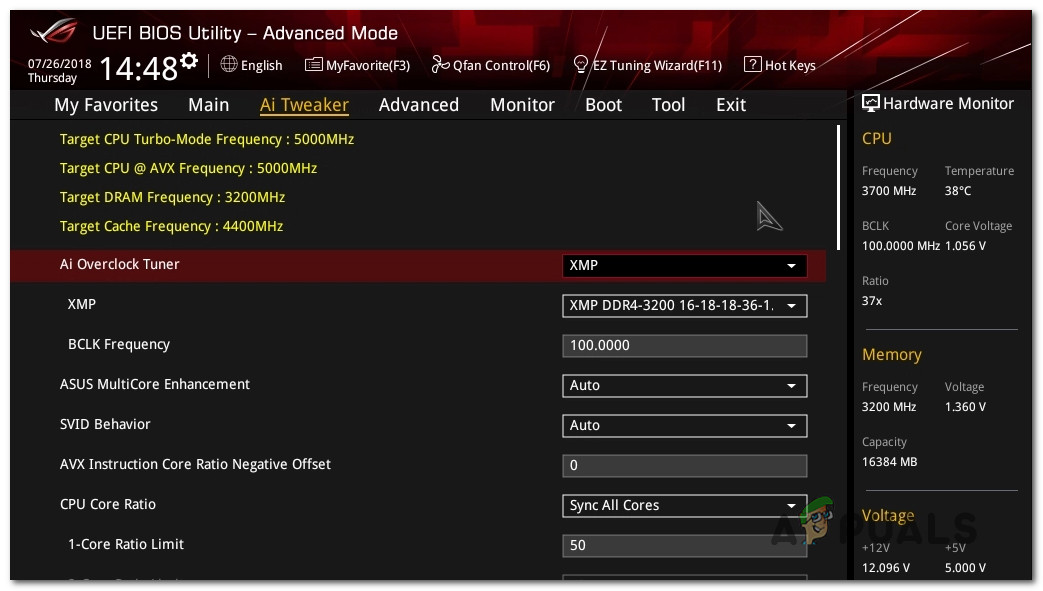
After making these changes, restart your PC.
3. Test for Faulty RAM
Defective RAM can easily lead to frequent and unpredictable BSODs. You can run memory diagnostics—like Memtest—to check your RAM for errors.
If your computer uses more than one RAM stick, try running tests with only one stick at a time to identify the faulty one.
You can also use Memtest86 for a comprehensive test.

Important: If your RAM has been overclocked in the past, remove any custom settings and monitor your system’s temperature during the test using tools like HWMonitor.
4. Uninstall the Bandwidth Control Filter Driver (If Applicable)
The Bandwidth Control Filter Driver from Qualcomm has been known to cause system instability on Windows 11. Since it’s usually not essential, you can safely remove it.
Note: This driver lets users control how much data is used by different types of network traffic—mostly useful for developers, not everyday users.
- Press Windows key + R to open Run.
- Type ‘devmgmt.msc’ and press Ctrl + Shift + Enter to open Device Manager as admin.
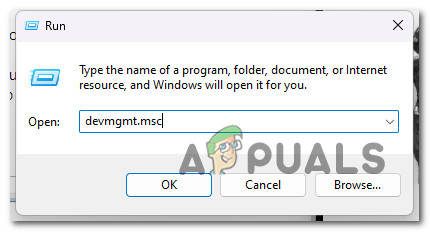
Open up Device Manager - If asked by User Account Control, click Yes.
- Expand Network Adapters.
- Find Bandwidth Control Filter Driver, right-click it, and choose Uninstall device.
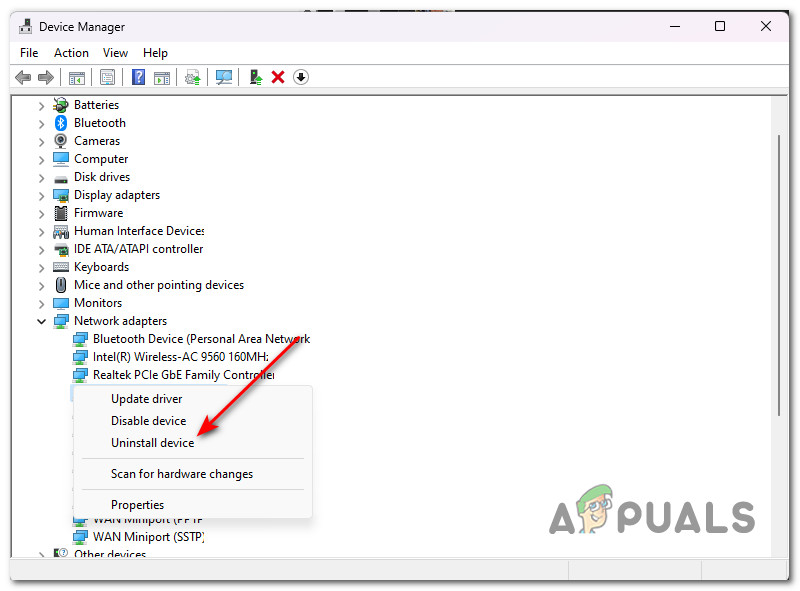
Uninstalling the device - Confirm when prompted, and restart your computer after uninstallation.
5. Disable Driver Signature Enforcement (If Applicable)
Windows uses a feature called ‘driver signature enforcement’ to prevent the use of unsigned or unverified drivers. If your BSOD always happens in the same place during startup, this feature might be blocking an older but trusted driver.
If you are confident in your drivers, you can temporarily disable this feature to see if it resolves the problem.
Note: Disabling this security check can make your system less secure, so only do this if you’re sure your drivers are safe.
- Open the Start menu, click the power button, then while holding Shift, click Restart.
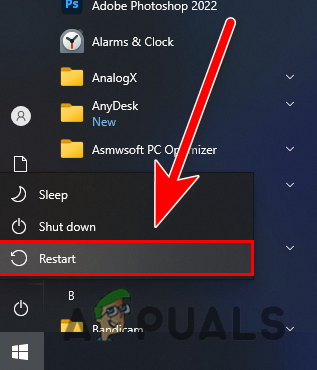
Restart with Shift Pressed - Your PC will restart into the Recovery menu.
- Click Advanced Options > Startup Settings.
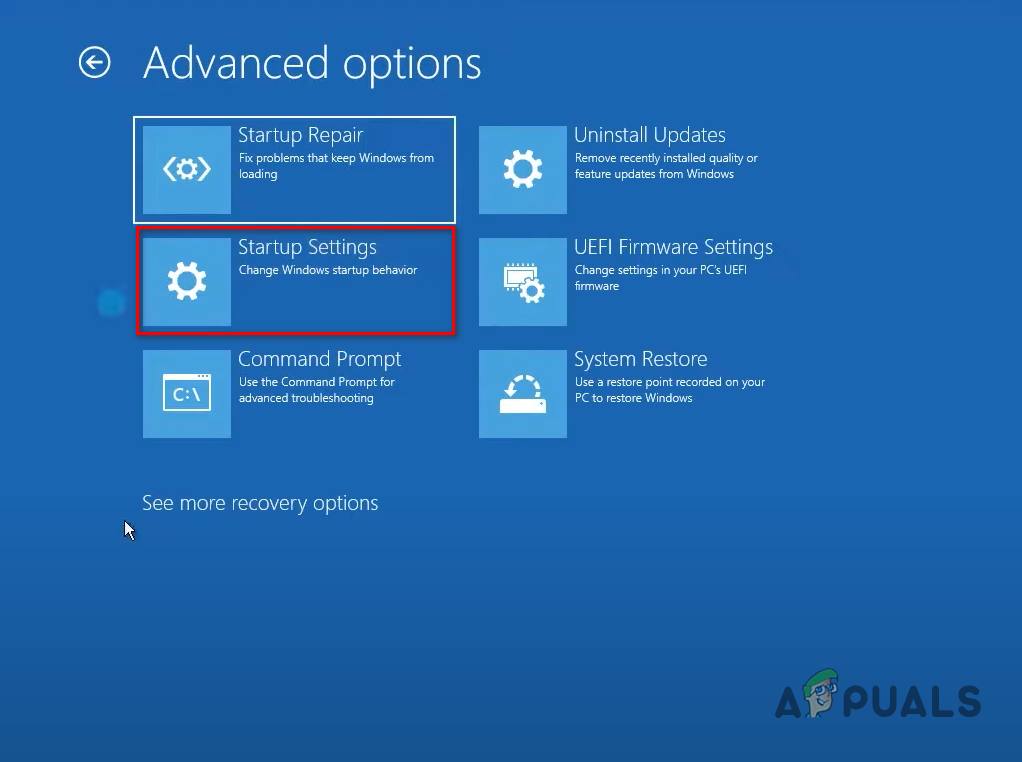
Access the Startup Settings - Click Restart again, and then press 7 or F7 to boot with driver signature enforcement disabled.
- Let the system boot and see if the BSOD still occurs.
6. Run SFC & DISM Scans
Corruption in the system files can also cause BSODs. To fix this, you can use Windows’ built-in tools: System File Checker (SFC) and Deployment Image Servicing and Management (DISM).
First, run an SFC scan.
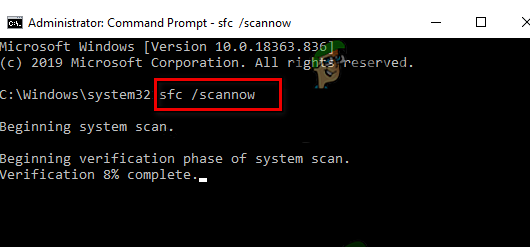
Note: SFC works offline, meaning you don’t need internet access for this. It’s important to let the scan finish without closing the command window, even if it seems stuck.
Once complete, restart your computer. If the issue persists, run a DISM scan.

Important: DISM needs an internet connection to download fresh system files.
After restarting your computer, check if the random BSODs are gone.
7. Perform an Automatic Repair
If file corruption is still present, Windows’ Startup Repair tool can fix many common problems that might be causing BSODs.
You may need to use the Recovery Menu since your computer may not boot normally.
- Turn on your computer and wait for the login page or error to appear.
- Hold Shift and click Restart from the power menu.
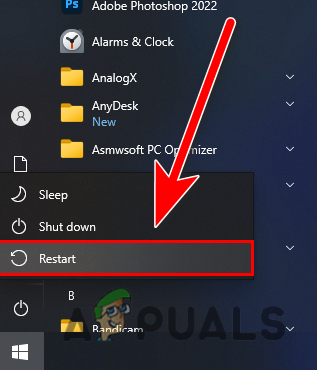
Reboot inside the recovery menu Note: Your computer must restart in recovery mode.
- From the Recovery Menu, select Troubleshoot.
- Then select Startup Repair.
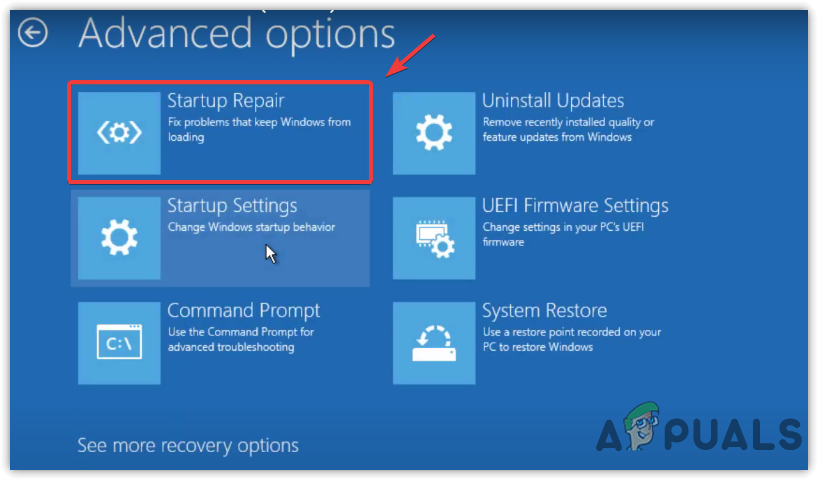
Deploy a Startup repair 5. Follow the on-screen instructions and restart your PC when prompted to see if the BSOD issue is fixed.
8. Achieve a Clean Boot State
Some system crashes can be triggered by third-party applications or services that start automatically with Windows. Booting in a clean boot state helps you figure out if one of these is responsible.
In clean boot, only essential Windows processes run. If no BSOD occurs in this mode, you can narrow down the software or service causing trouble by enabling them one at a time.
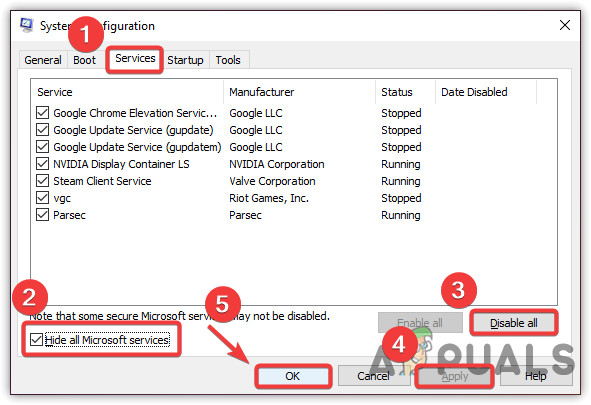
9. Use System Restore
If you haven’t been experiencing BSODs for long, you can use System Restore to go back to an earlier point before the problem started.
This process brings your whole Windows 11 system to the state it was in when the restore point was created. This can revert changes to system files, drivers, apps, and updates.
Important: System Restore may remove apps or updates installed after the restore point was created, so consider this before proceeding.
- Press Windows key + R to open the Run dialog.
- Type “rstrui” and press Enter to open System Restore.
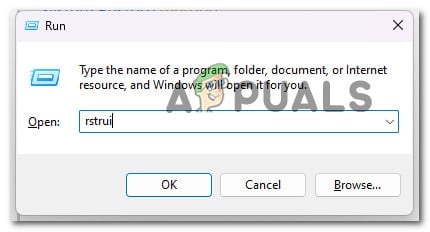
Open System Restore - Click Next to proceed.
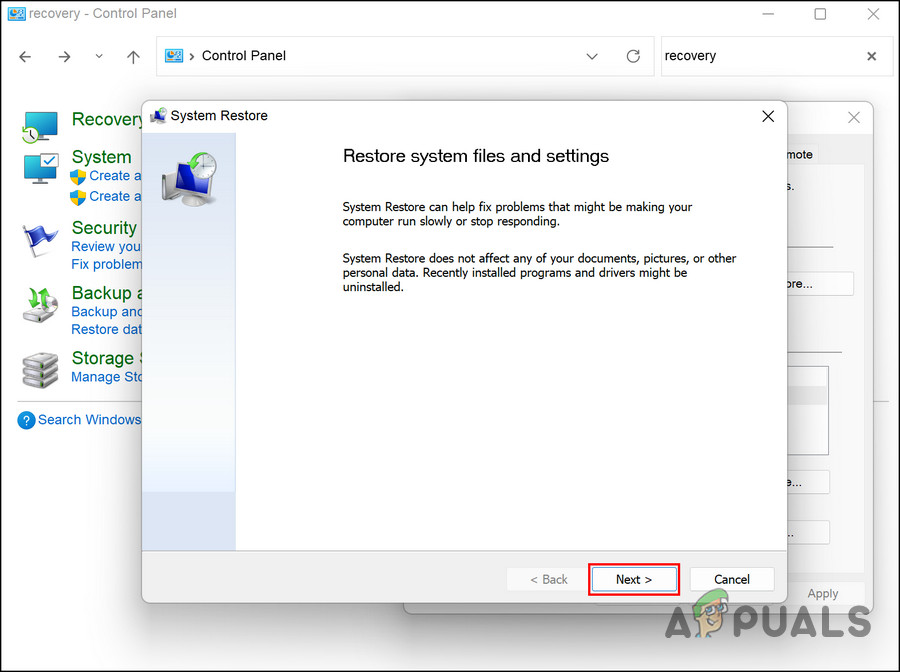
Open System Restore - Select a restore point created before the issue appeared.
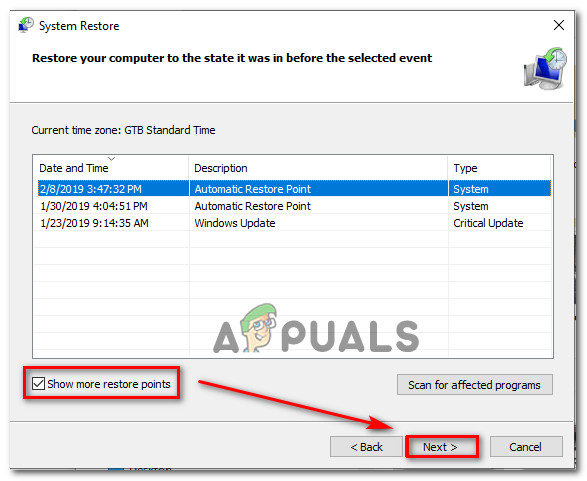
Restore points Tip: Try to choose a recent restore point to avoid losing too much data or too many changes.
- Click Next and then Finish to begin restoring.
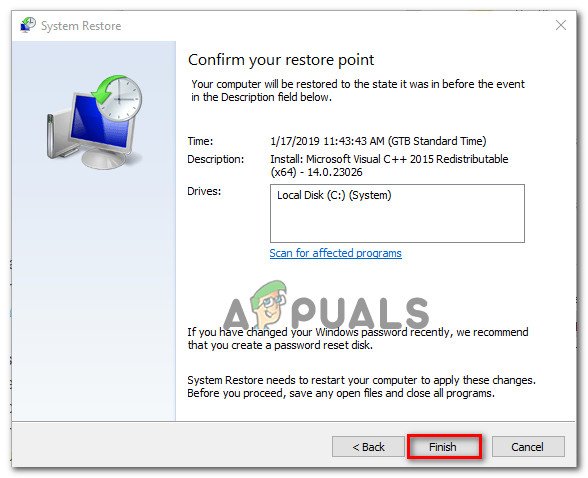
Finish the System Restore point Your computer will restart to complete the restore. After it boots back up, check if BSOD crashes no longer occur.
10. Perform a Clean Install or Repair Install
If none of the other solutions have helped, the underlying cause may be deep system corruption. The most reliable (but more time-consuming) ways to fix this are a clean install or a repair install (sometimes called an in-place upgrade).
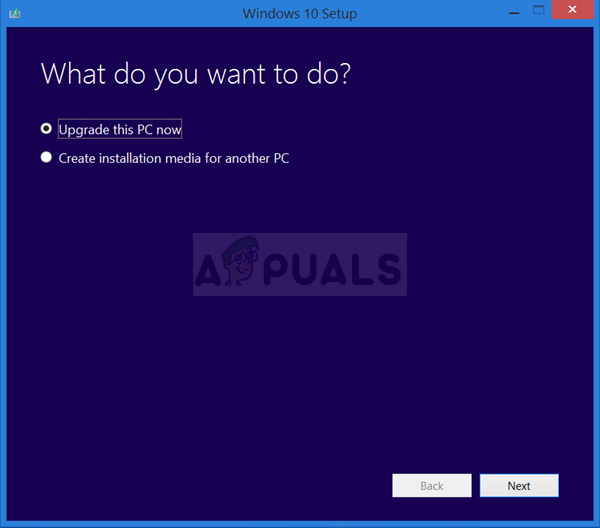
A clean install completely removes everything—including all your programs and personal files—so make sure to back up anything important first.
A repair install (in-place upgrade) keeps all your personal data, apps, and settings, but takes a bit more time.


