Fix: AppHangB1 Error
The “The game freezes and the screen goes dark with ‘Not Responding’ in the title bar”—that’s exactly when you’ll most likely see the AppHangB1 error. This usually happens while the game is loading or after playing for a long time. This error means the game has stopped working with Windows for too long, causing Windows to think it’s stuck.
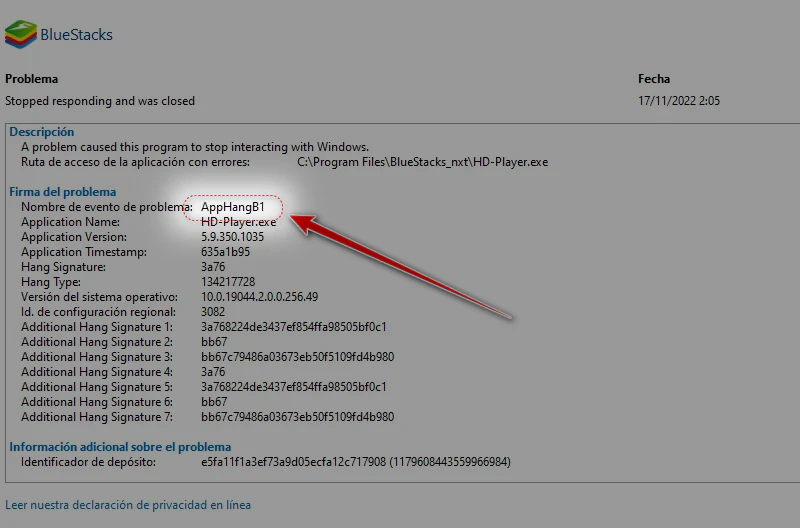
The most common reasons are damaged game files or problems with your graphics card drivers, but issues with Windows system files or extra programs running in the background can also cause this error.
1. Edit Launch Options
One potential fix is to run Steam using DirectX version 9.0. For many people, this resolves the problem right away. To do this, you need to set a launch parameter for the Steam executable file.
- Find where your Steam client is installed. By default, it’s located at C:/Program Files (x86)/Steam.
- Create a shortcut to Steam in the same folder.
- Right-click the shortcut, select ‘Properties’, and go to the ‘General’ tab.
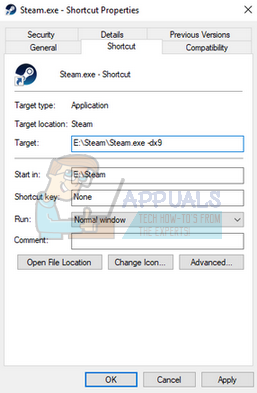
- In the ‘Target’ box, add -dx9 at the end (outside the quotes if there are any). It should look like this: “C:\Program Files (x86)\Steam\Steam.exe” -dx9
If your Steam is installed somewhere else, make sure to change the file path to match your installation directory. See the image below for reference.
- Open Task Manager and close all Steam processes, especially those named SteamClientBootstrapper.
- Relaunch Steam using your shortcut and check if the problem still occurs.
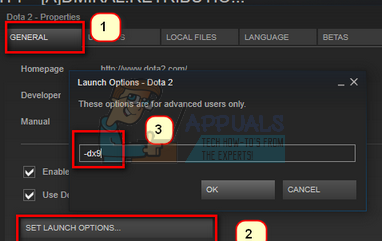
You can also set launch options for specific games:
- Go to the Library tab at the top of your Steam client to see all your installed games.
- Right-click the game and choose Properties.
- Under the General tab, look for and click the Set Launch Options button.
- Type the launch options you want to use and save them. The game will use these options every time you launch it.
- Close Steam using Task Manager and restart it by right-clicking and selecting Run as administrator. Then, try launching your game again to see if the problem is resolved.
2. Check for Malware
Malware on your computer can cause all sorts of problems, including the freezing issue we’re discussing. While you can use any reliable antivirus program, we recommend scanning your computer with Malwarebytes for a thorough check. Please note: we provide external links to help users, but we are not responsible for any risks associated with using third-party software.
Malware and viruses can change important system settings, which may prevent Steam from running correctly. Before disabling your antivirus (which we’ll suggest in the next step), make sure your computer is clean. If your PC is infected and you turn off your antivirus, the situation could get worse.
3. Add Steam as an Exception to Antivirus and Turning Off Firewall
It’s common for antivirus or firewall software to interfere with Steam. Steam runs several processes at once to provide the best gaming experience, but some security programs wrongly flag these as threats and block them. Learn how to add Steam to your antivirus exceptions by following our guide here.
- Press Windows + R to open the Run box. Type control to open the Control Panel.
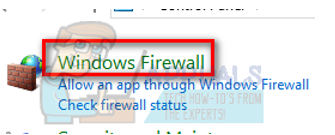
- In the search box at the top right, type Firewall and click the first result.
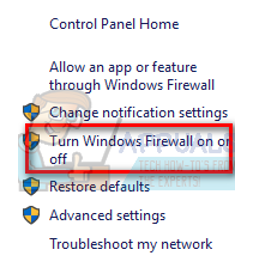
- On the left, click “Turn Windows Firewall on or off”.
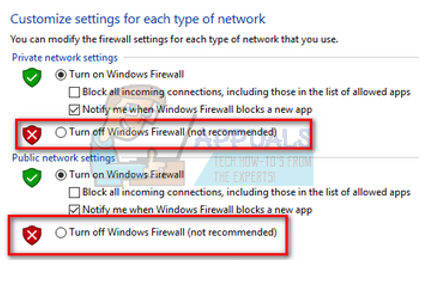
- Select “Turn off Windows Firewall” for both Public and Private network settings. Save your changes and exit. Restart Steam and launch it as administrator.
4. Start Windows in Safe Mode with Networking
Safe Mode is a special startup mode in Windows that only loads the essentials. Most extra services and programs remain turned off, making it easier to find problems.
If Steam games keep crashing, it may be due to a conflict with another program running in the background. Safe Mode will help you check if that’s the case.
Running Safe Mode is safe and widely used for troubleshooting—nothing to worry about here.
- See detailed steps on running Safe Mode here. On Windows 7, press F8 while your computer starts up, then choose “Enable Safe Mode with Networking”.
- Open Steam, connect to the internet, and log in. Then launch your game and check if the error still happens. If the issue disappears, your antivirus, firewall, or another third-party program could be causing trouble.
If the error is fixed in Safe Mode after adding antivirus exceptions and turning off Firewall, make a note of any other third-party applications running, and consider uninstalling them.
5. Verify Game Files
Sometimes missing or corrupted game files can cause Steam to crash. You can easily check and fix game files as well as your library files with these steps:
- Open Steam and navigate to your Library.

- Right-click on the game in question and select Properties.

- In the left pane, choose Local Files and then click on Verify integrity of game files.

- This process will take around 2-10 minutes depending on the speed of your drive.


6. Disable Peer-to-Peer (P2P) Programs
If you use P2P programs like BitTorrent or uTorrent, keep in mind these can open security holes and are common targets for malware. If not configured properly, they may also expose your personal information.
Uninstall any unneeded P2P programs, run a malware scan, and repair your registry if needed. Then restart Steam as administrator and check if your games launch correctly.
Note: If your computer is showing strange ads or pop-ups, it’s a sign that it could be infected. Run a scan with a reputable antivirus immediately.
7. Repair Your Steam Client
Before refreshing all Steam files, try repairing your Steam client using the built-in repair option. This checks for corrupted Steam files and replaces them as needed. You may need administrative privileges for this step.
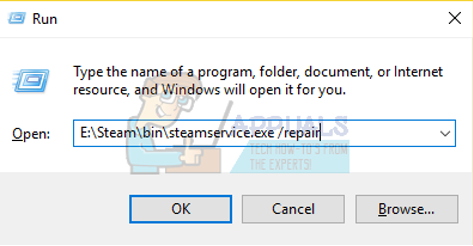
- Press Windows + R to open the Run dialog.
- Type the path to your Steam directory followed by bin, then SteamService.exe /repair. For example:
C:\Program Files (x86)\Steam\bin\SteamService.exe /repairIf Steam is installed elsewhere, change the path accordingly, for example:
E:\Steam\bin\SteamService.exe /repair
- Let the window run until it completes. The command prompt may look blank—this is normal. Don’t interrupt the process.

- When finished, start Steam and check if everything works.
8. Run CHKDSK to Check Your Drives
CHKDSK (Check Disk) is a Windows tool that searches your drives for errors and attempts to fix them. This can be helpful for identifying and repairing underlying issues like the AppHandB1 error.
8.1. Use File Explorer
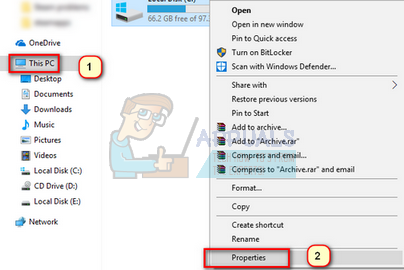
- Open File Explorer and go to This PC (or My Computer).
- Right-click the drive you want to check and select Properties.
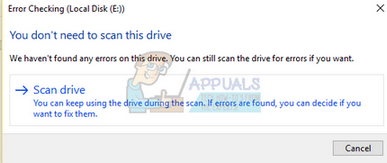
- Go to the Tools tab at the top, and under Error checking, click Check. Let the process complete—don’t interrupt it.
8.2. Use Command Prompt
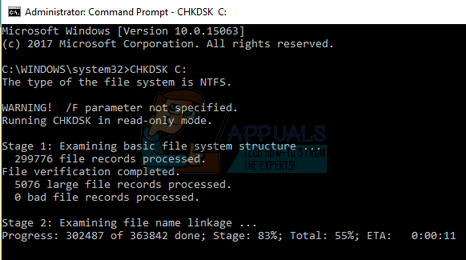
- Press Windows + R, type cmd, and press Enter to open Command Prompt.
- Type CHKDSK C: and press Enter (replace C with the letter of the drive you want to check).
For example, to check drive D, type: CHKDSK D:
9. Refresh Steam Files
If none of the above steps worked, it’s time to refresh or reinstall Steam. Don’t worry—this process will keep your downloaded games safe, so you won’t have to re-download them. Your user data will also be kept. This step deletes old configuration files and allows Steam to generate new, clean ones. Just ensure you know your login details before you start, as you’ll need to sign in again after reinstalling. Avoid cancelling the process to prevent further errors.
To refresh or reinstall your Steam files, follow the instructions in this guide.
Note: If you’re experiencing a connection error where Steam won’t connect to the internet at all, refer to this guide.