How to Check the Action History of a User Account in Active Directory?
Security isn’t just about blocking outsiders—it’s also about keeping track of what’s happening inside your own network. Even if you fix all the obvious problems, mistakes or accidental changes can still cause security issues. Since no system is perfectly safe, it’s important to lower the risks that can happen from the inside.

Watching over user accounts and groups, especially in something like Active Directory, is very important. Many data leaks actually come from inside a company, not from outside hackers.
That’s where Access Rights Management (ARM) tools come in. These tools show you who has access to what information, making it easier to spot unusual changes quickly and help you follow security rules without extra stress.
1. Download the Solarwinds Access Rights Manager
As the need for access rights management software grows, so does the number of vendors and products available on the market. This can make it challenging to choose the right tool for your needs. But finding the right solution shouldn’t be difficult, especially with trusted names in IT. Solarwinds is one of the most well-known vendors in network and system management, often recognized for their reliable and user-friendly products.
Solarwinds Access Rights Manager (download here) is a great example of their commitment to quality. Thanks to its intuitive interface, Solarwinds ARM makes managing access rights much easier. The tool presents information in clear ways, helping you quickly identify the root cause of any issues. Monitoring your Active Directory and Microsoft Exchange servers is straightforward, thanks to the range of useful functions included.
For this guide, we’ll be using the Solarwinds Access Rights Manager tool. Make sure to download and install the tool on your system. You can try out the fully functional trial version, which gives you a chance to evaluate all features for a limited time. During the installation process, you’ll be asked to choose the type of setup. If you want to use an existing SQL server, select Advanced Installation. If you prefer a quicker setup, Express Installation includes its own SQL server and all the necessary components.
2. Run the Access Rights Manager Configuration Wizard
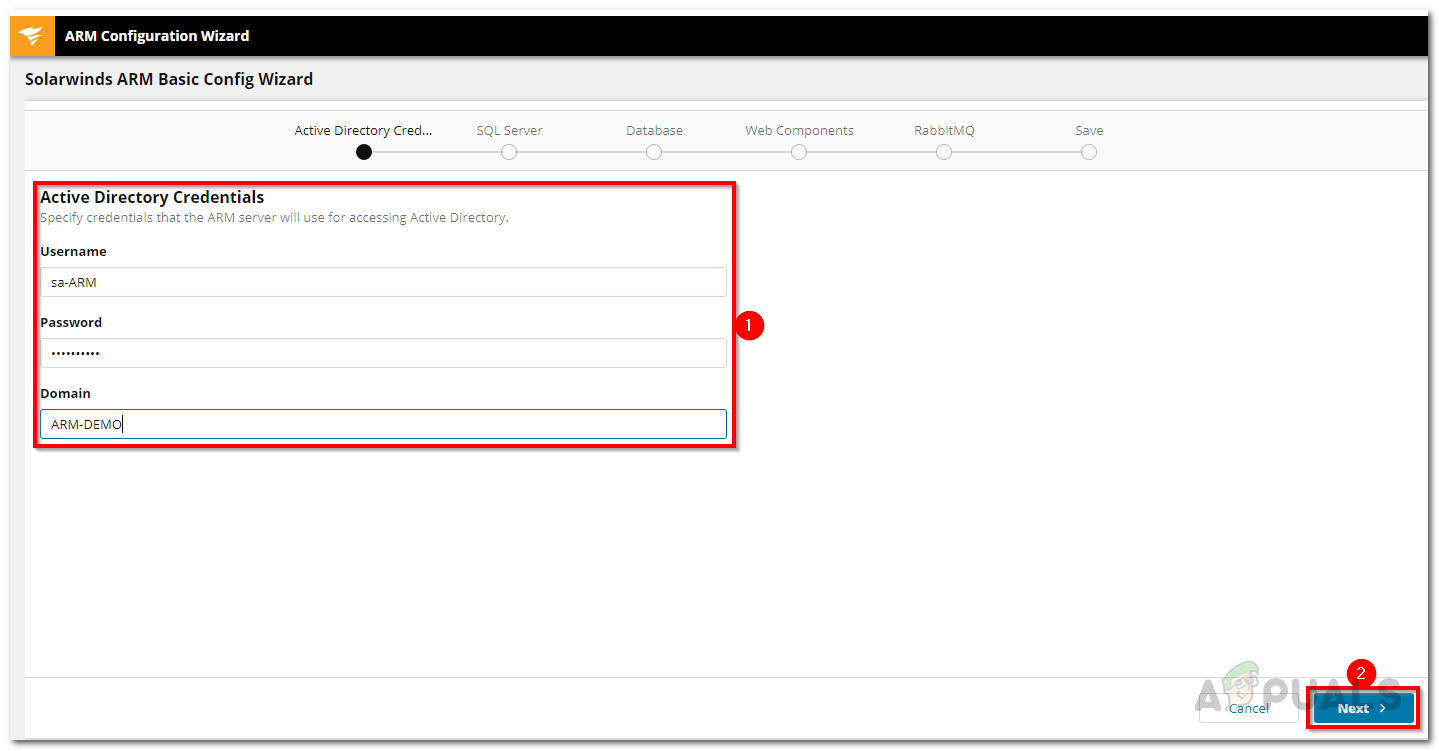
Once you’ve installed the tool, you’ll need to set it up before you can use all its features. The configuration process involves steps like providing your Active Directory credentials, setting up a database for the ARM server, and more. We’ll guide you through these steps so you don’t have to worry. When you launch the tool for the first time—or after finishing the installation—the configuration wizard should open automatically. If it doesn’t, just open Access Rights Manager from your start menu and the wizard should appear.
When prompted, log in using the credentials for the account that installed the product.
- First, enter the Active Directory credentials that Access Rights Manager will use to connect with your Active Directory.
Active Directory Credentials - Next, provide the SQL server information and select your preferred authentication method. Once done, click Next.
- On the Database page, choose whether to create a new database or use an existing one. Then, click Next.
- On the Web Components page, adjust the settings for the web components if needed. These are required to run ARM’s web client.
- The wizard will now take you to the RabbitMQ section. Here, you can update the settings if required, but it’s usually best to use the default values.
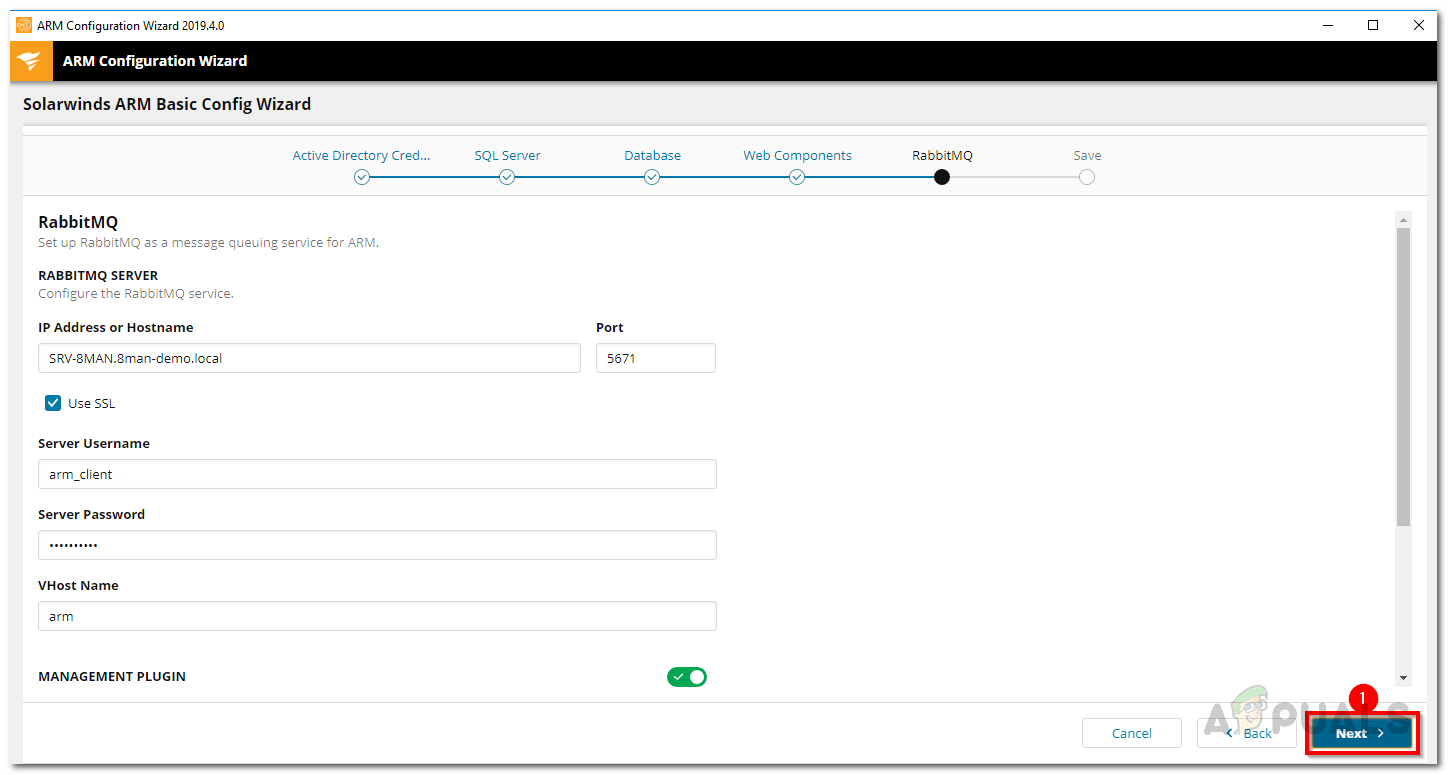
RabbitMQ Settings - Finally, you’ll see a summary of the settings you’ve chosen. Review everything and then click the Save button.
- This will restart the ARM service. Afterward, you might see a Server not connected message. This is completely normal and nothing to worry about.
- Next, the Scan Config Wizard will launch automatically.
- In the Active Directory tab, enter the credentials that will be used to scan the Active Directory.
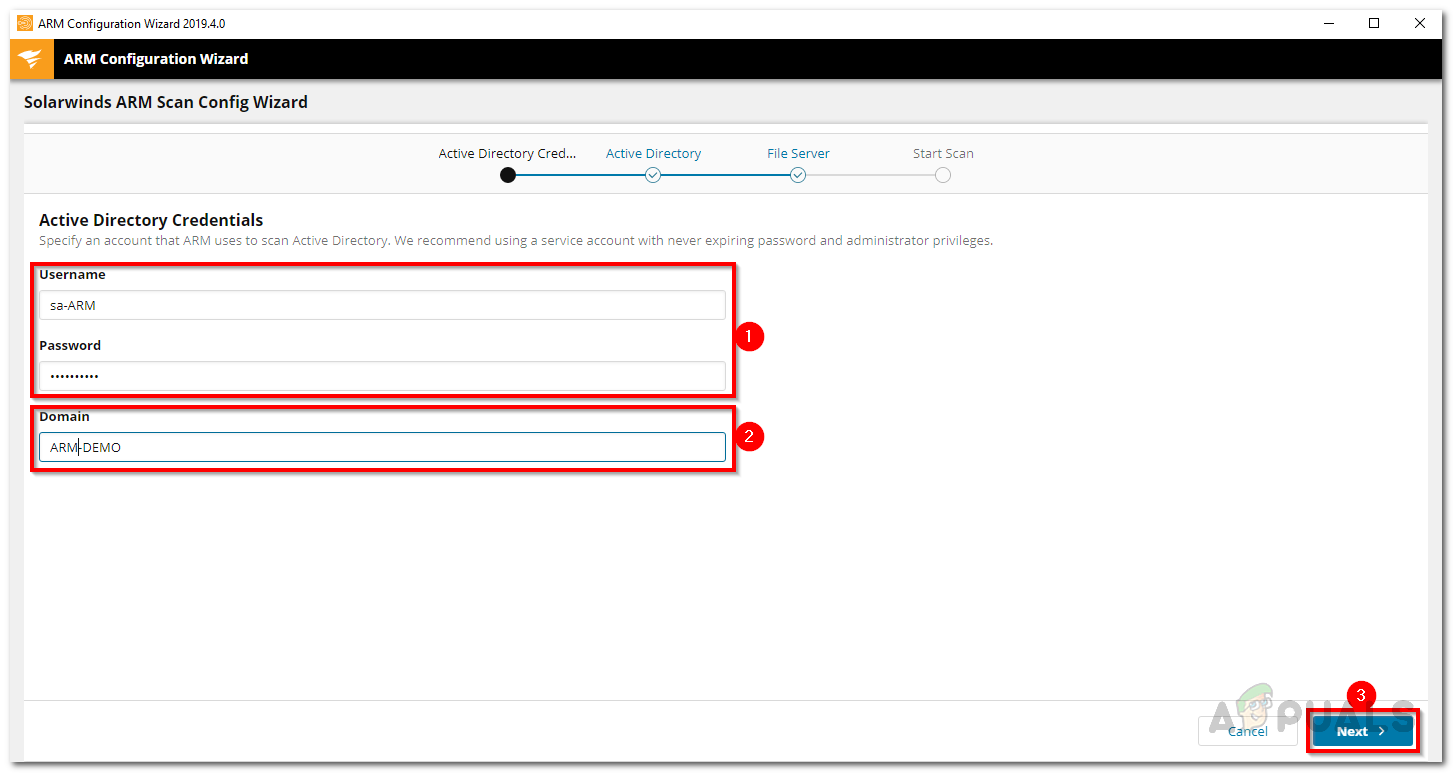
Active Directory Scan Credentials - Select the domain that the account belongs to and click Next.
- On the next page, pick which domain you want to scan.
- Then, select any file servers you want to include in the scan and click Next.
- Finally, review the scan settings you’ve provided. Once everything looks good, click Save Scan.
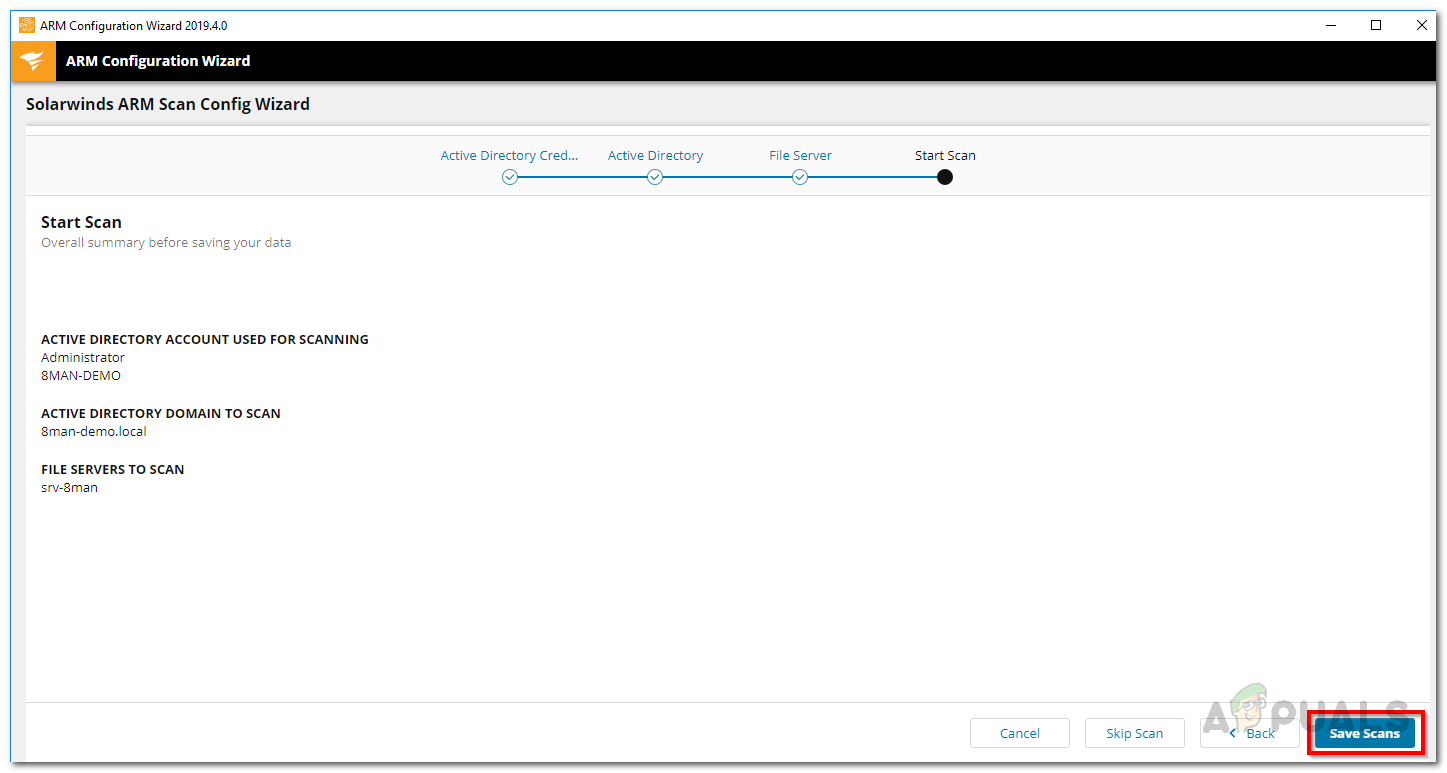
Scan Settings - This will start the scan. You can safely close the configuration wizard now—the scan will continue to run in the background.
How to Track the Action History of a User Account in Active Directory
Now that you’ve installed and set up the tool, you’re ready to track the action history of a user account in Active Directory. Each user account or group has its own activity history, which is why it’s useful to review them regularly.
- In the ARM desktop client, go to the Accounts page.
- Use the search function to find the user account or group whose history you want to review.
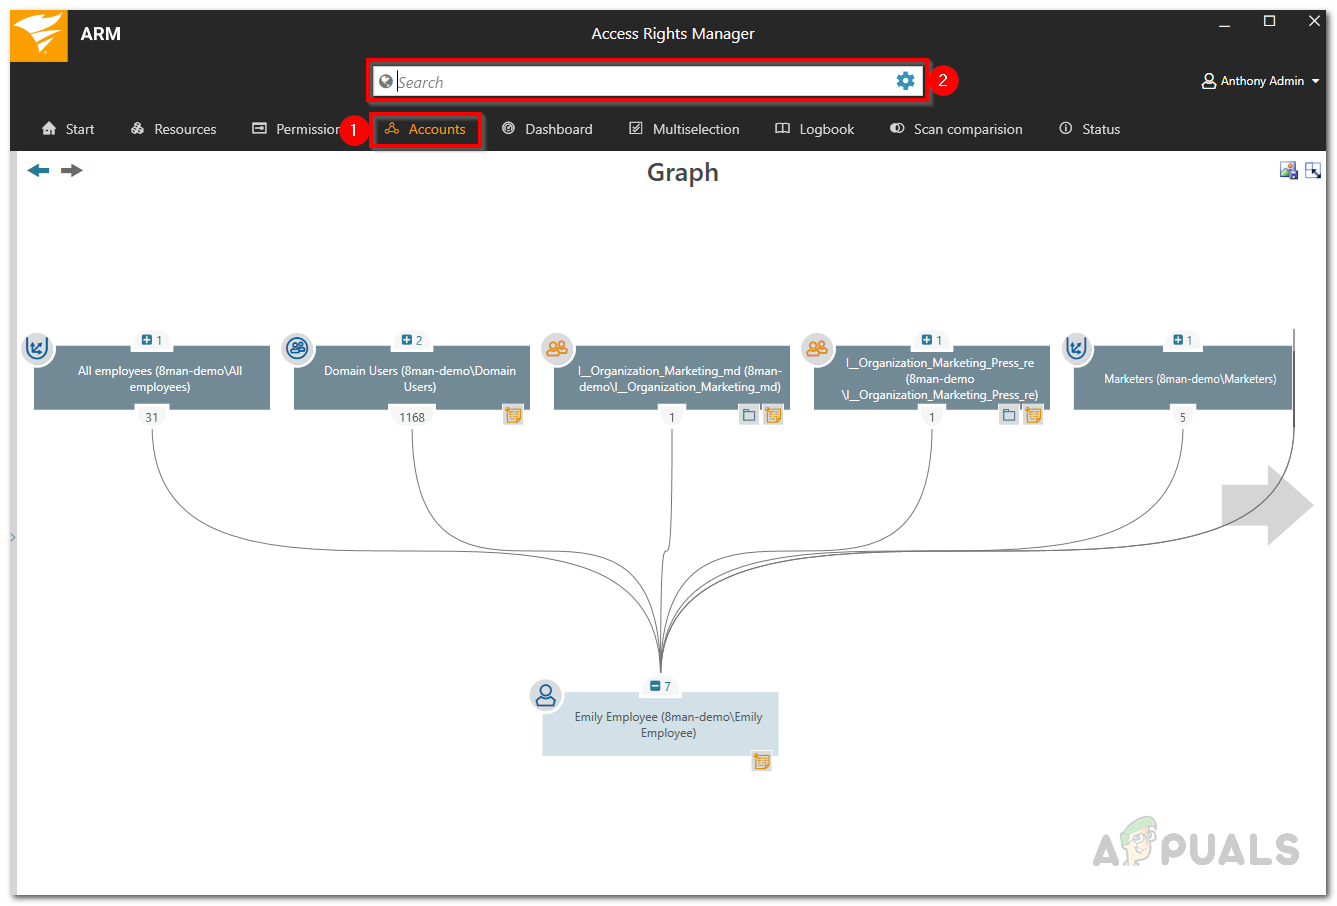
Accounts - The notebook icon next to each name shows that the activities for that user or group are being recorded in the Access Rights Manager logbook.
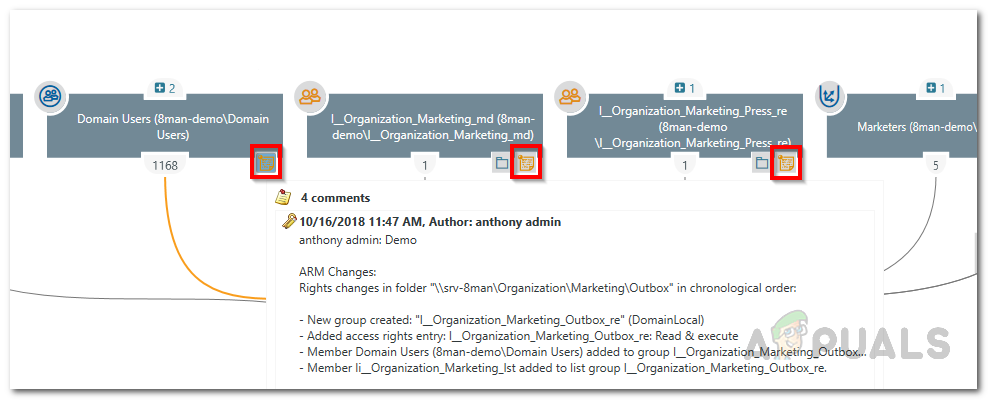
Note Icon - Right-click on your chosen user or group, then select Open Logbook from the menu that appears.
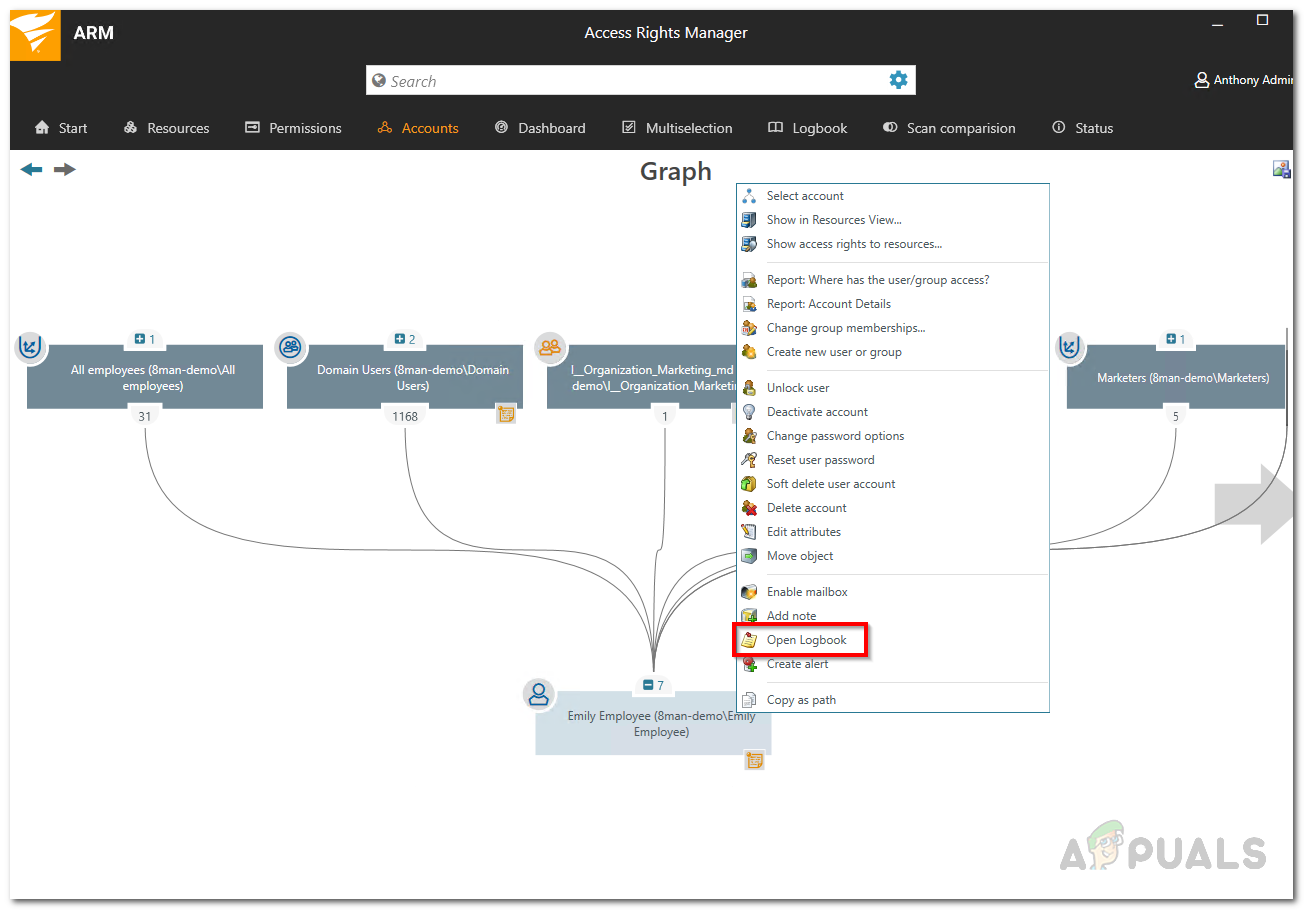
Opening Log Book - From here, you’ll be able to see and review the previous actions of that user or group.