Fix: Windows Update Error 0x800f0984 (5 Solutions)
 Reviewed by Muhammad Zubyan
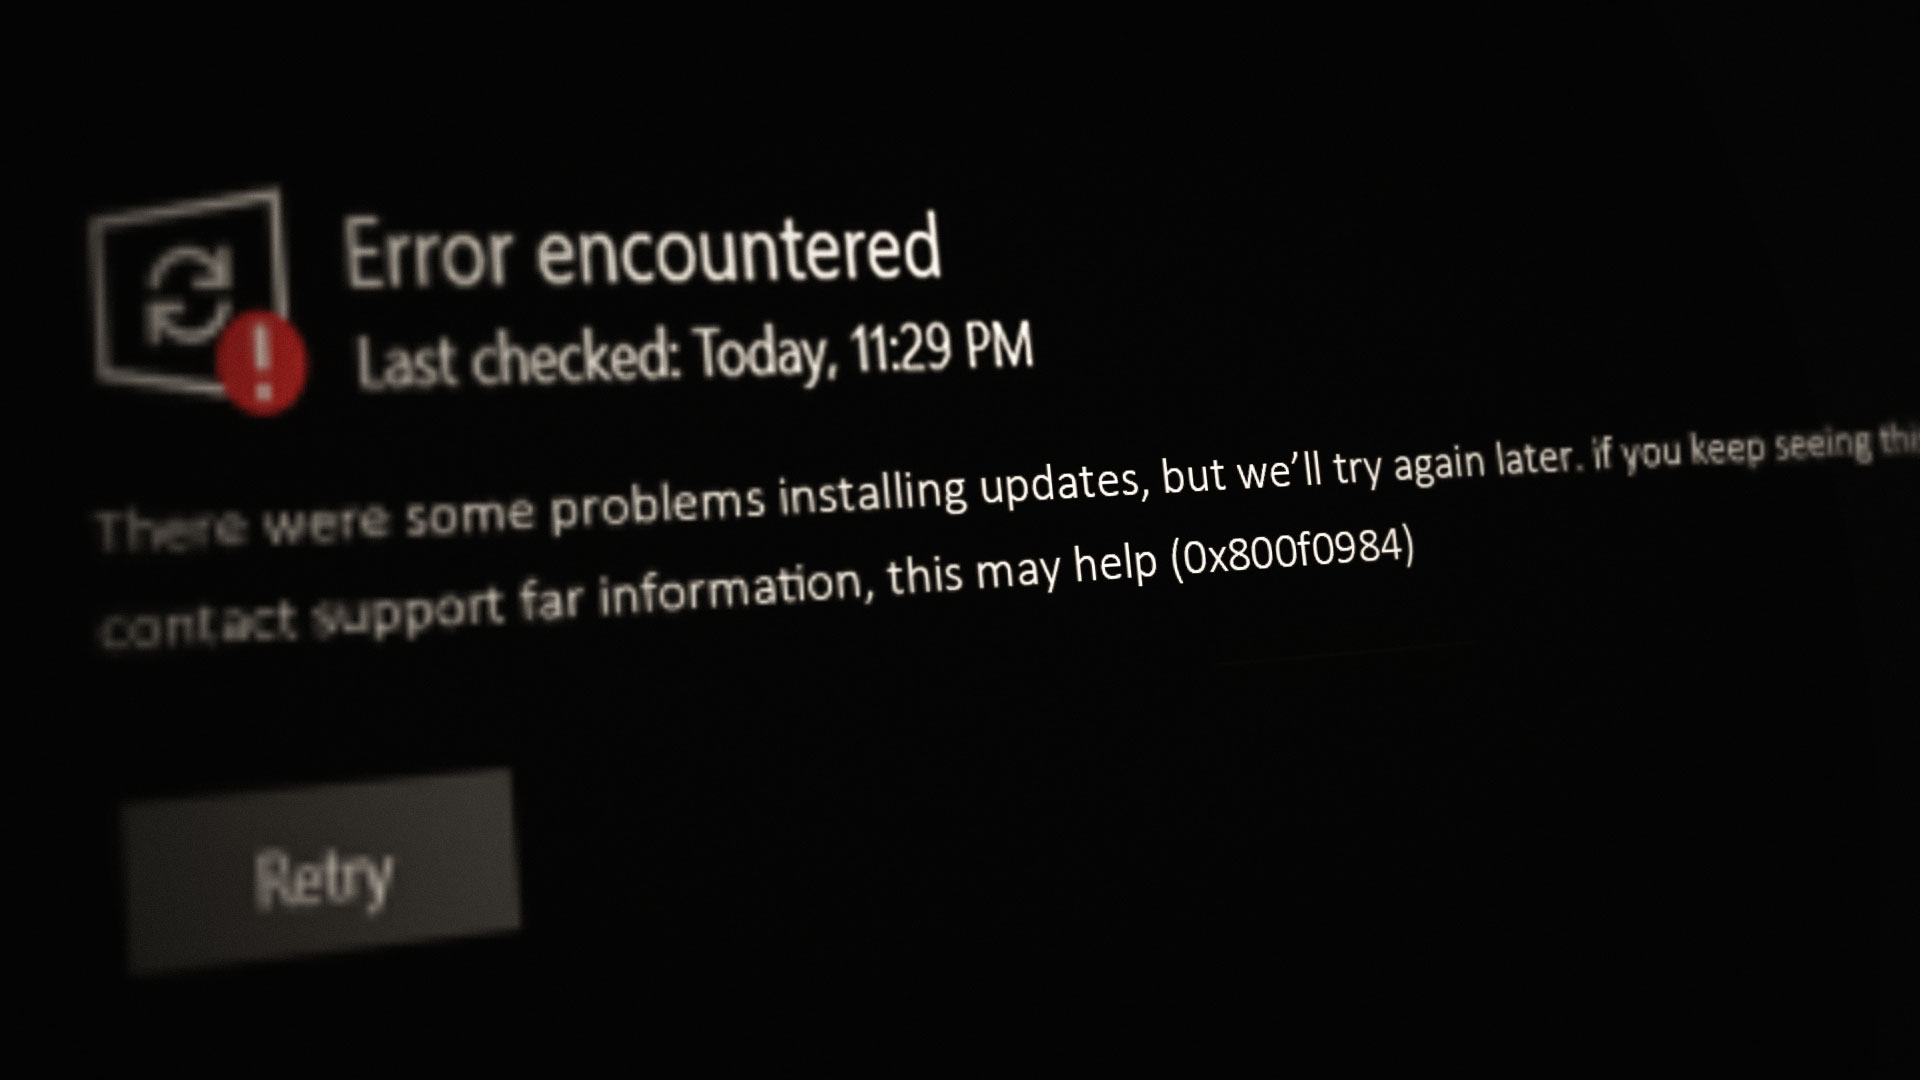
If you encounter error code 0x800f0984 when trying to install the Windows 10 update, it means that the matching component directory exists but binary is missing. This means that the update you are trying to install could not find the essential files on the older Windows 10 version installed.
This guide provides several methods to fix the error, but first, let’s explore some of the main causes:
- Power Saving Power Plan: If you prefer to put your system on a power-saving power plan to extend the timing and life of your battery, this power plan can make some system components less performing, which can result in the update error under discussion.
- Corrupt System Files: Your system’s files might have become corrupt due to a recently suffered power failure, an update was applied to it, or if the security product of your system has removed some essential system files, and these corrupt system files can cause the failed installation of the update.
- Corrupt Windows Update Components: Windows updates store their data locally on your system folders like the Software Distribution and Catroot2 folders before propagating to the relevant system directories. If any of these folders/components have become corrupt, then your system may fail to install new Windows updates.
Here are the methods you can try to fix the error:
Method 1: Manually Install the Update
If any of the essential Windows components used by the Windows Update are corrupt or missing, then installation of automatic Windows updates may fail. However, manually installing the same update as it uses different directories/services may solve the update error 0x800f0984.
- Launch a web browser and go to the Windows 10 section of Microsoft’s website.
- Under the latest update assistant, click on Update Now and then let the download complete.
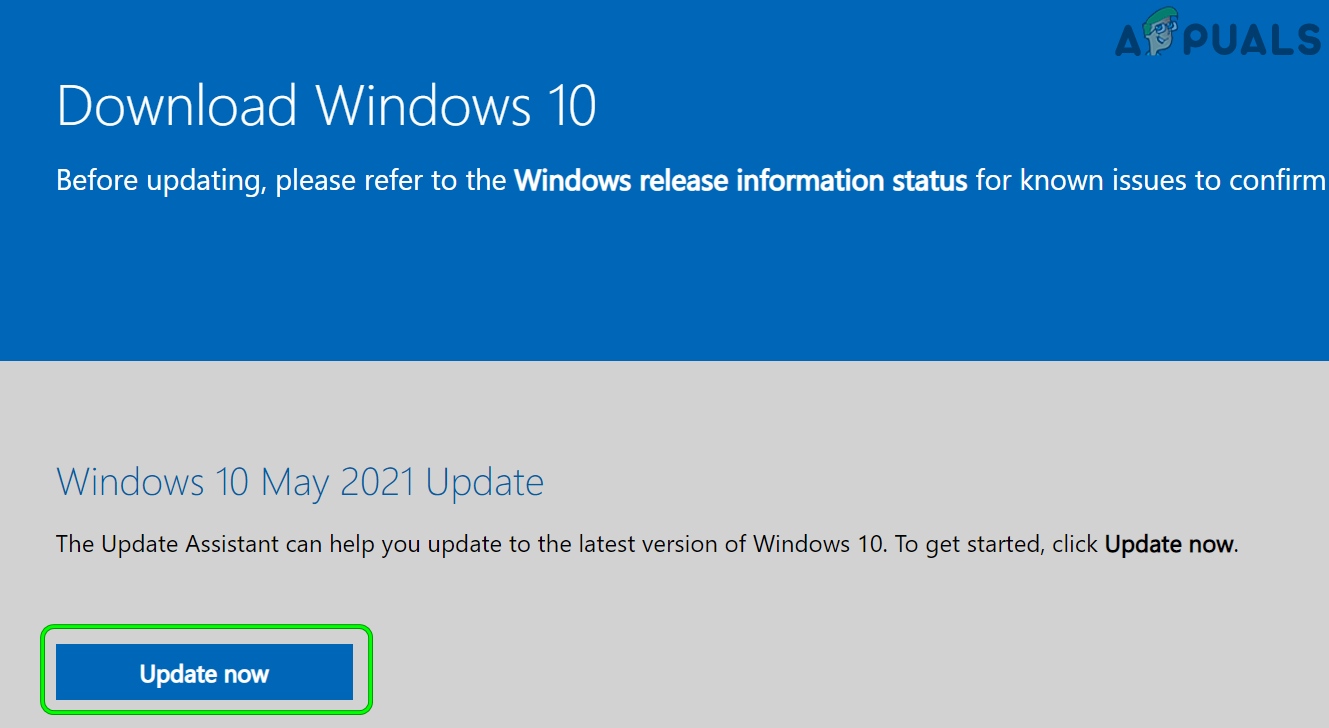
Download Latest Windows Update Assistant by Clicking on Update Now - Right-click on the downloaded file of the update assistant and select Run as Administrator.
- Follow the prompts to complete the process and once completed, check if the error 0x800f0984 is cleared.
Method 2: Change the Power Plan of your System
In the Power Saving Mode, the system may favor the battery over performance, resulting in the low performance of many essential system services/resources. This low performance of the services/resources can hamper the way Windows Update works, leading to the error at hand. The same can be rectified by changing the PC’s Power Plan to high performance.
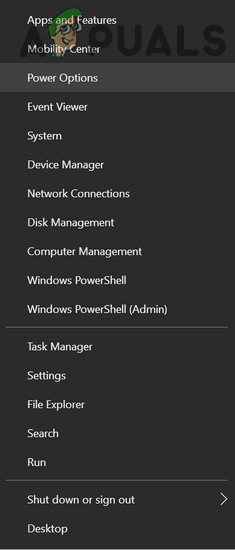
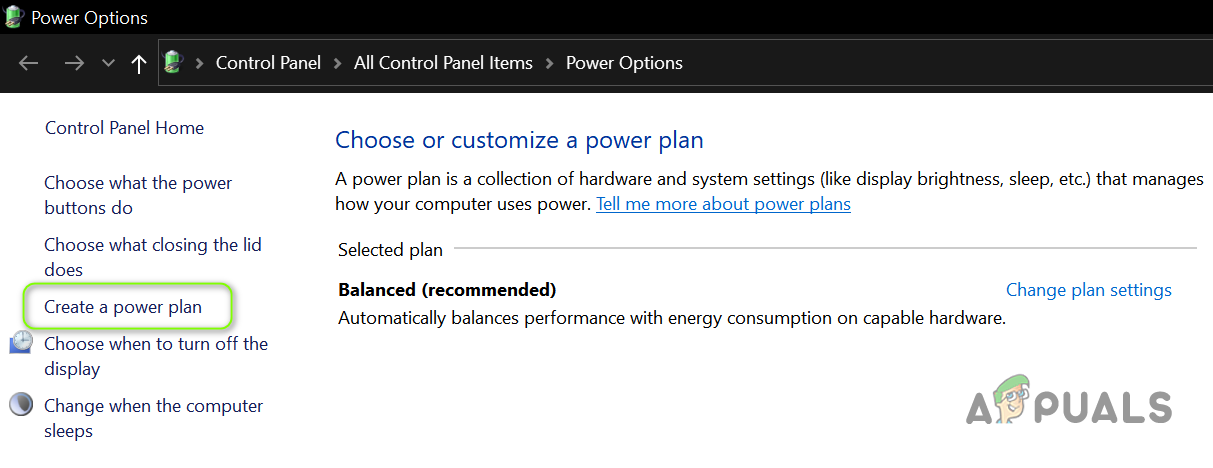
- Right-click Windows and select Power Options.
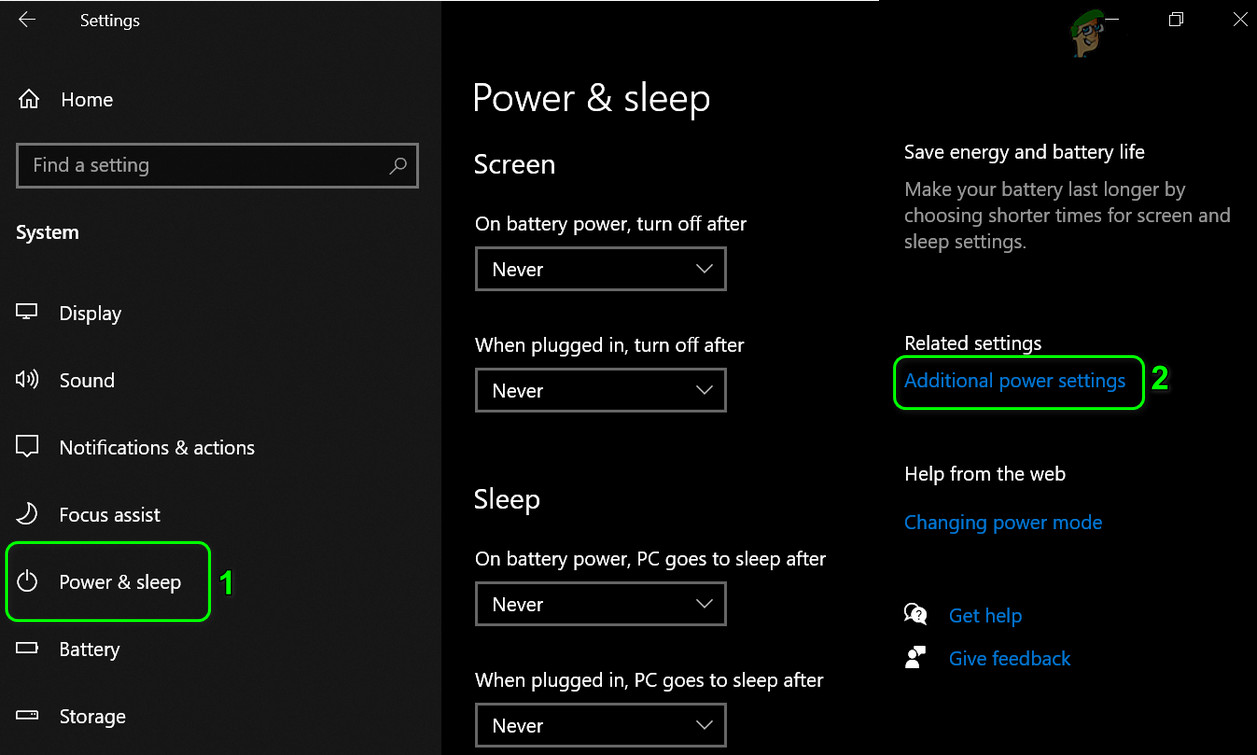
Open Power Options from the Quick Access Menu - Click the on Additional Power Options link in the right pane and in the new Power Options window shown, click on Create a Power Plan.
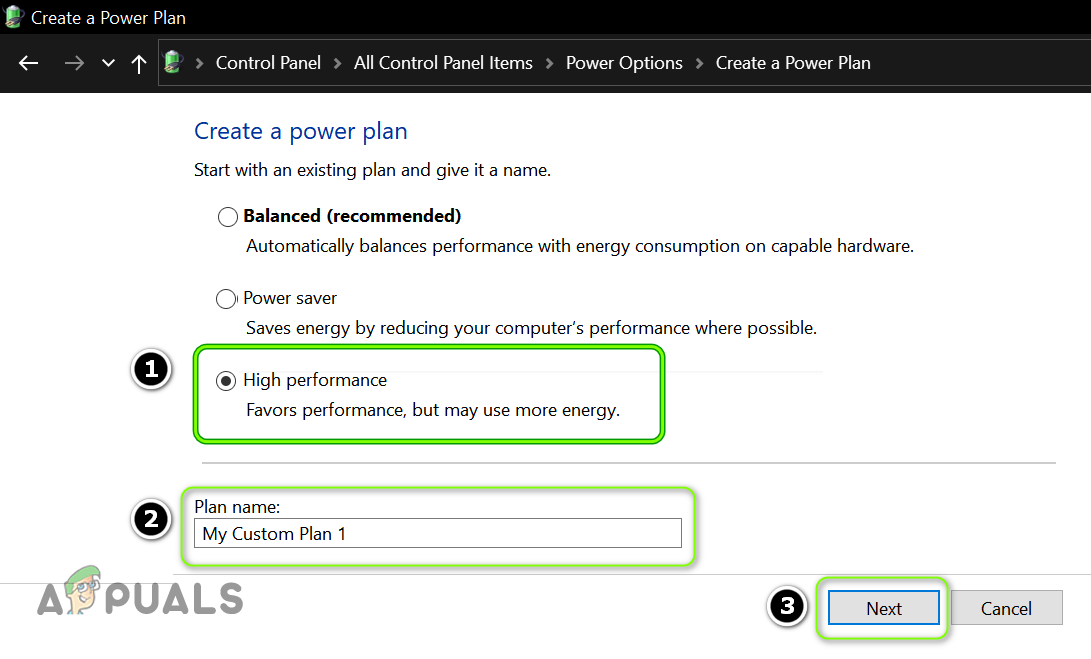
Open Additional Power Settings - Select High Performance and click on Next (you may enter the Power Plan name as per your likings).
Create a Power Plan - Click Create; once the new Power Plan is applied, retry the update to check if it can be installed without error 0x800f0984.
Create a New High-Performance Power Plan
Method 3: Run DISM and SFC Scans on Your System
If the essential system files are corrupt, it may lead to the error 0x800f0984. In this case, executing the DISM/SFC scans may clear the files’ corruption, which may solve the problem.
- Click Windows, key-in CMD, and in the results shown, right-click Command Prompt.
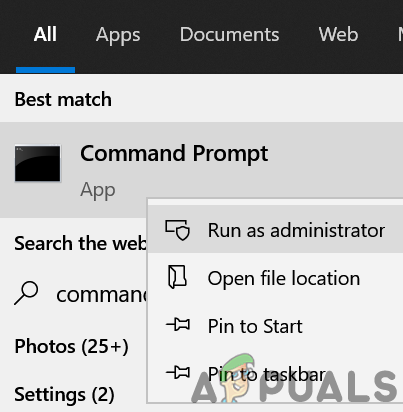
Open Command Prompt as Administrator - Select Run as Administrator and then execute the following:
Dism /Online /Cleanup-Image /RestoreHealth
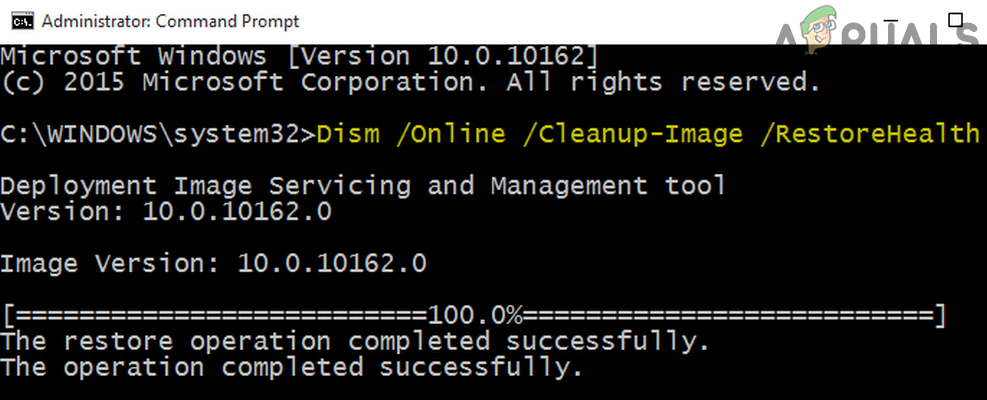
Use the DISM Command to RestoreHealth - This can take around 20-30 minutes to complete, and once completed, execute the following. This may take time to complete the execution
sfc /scannow
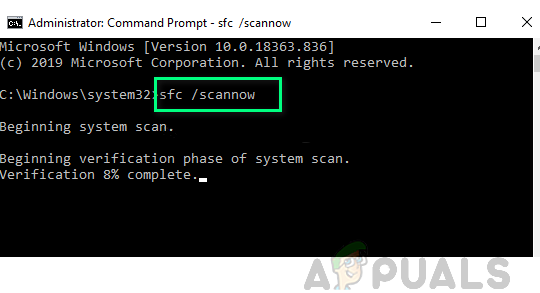
Perform an SFC Scan - Once completed, check if the update can be installed without error 0x800f0984.
Method 4: Reset the Windows Update Components
This error can occur due to corrupt Windows Update components, which are crucial for the proper installation and execution of Windows updates. To resolve this issue, resetting your system’s Windows Update components to their default settings may be necessary.
- Right-click on the Windows icon and select “Windows PowerShell (Admin)”.
- Copy and paste the following commands one by one into the PowerShell window and press Enter after each one, ignoring any error messages:
net stop bits
net stop wuauserv
net stop appidsvc
net stop cryptsvc
Del "%ALLUSERSPROFILE%\Application Data\Microsoft\Network\Downloader*.*"
rmdir %systemroot%\SoftwareDistribution /S /Q
rmdir %systemroot%\system32\catroot2 /S /Q
regsvr32.exe /s atl.dll
regsvr32.exe /s urlmon.dll
regsvr32.exe /s mshtml.dll
netsh winsock reset
netsh winsock reset proxy
net start bits
net start wuauserv
net start appidsvc
net start cryptsvc
- Once all the commands have been executed, exit the PowerShell window and restart your computer
Method 5: Perform an in-place Upgrade
In case none of the solutions mentioned above resolve the issue, you may consider performing an in-place upgrade of your Windows system. This process reinstalls the operating system on your PC and may help solve the problem with the update.
However, it is recommended that you create a system restore point and back up your essential files before proceeding with the upgrade. This will help ensure that you can easily restore your system and files in case of any unexpected issues.
- Open a web browser and go to Microsoft’s website for Windows 10.
- Scroll down and click on the “Download Tool Now” button in the “Create Windows 10 Installation Media” section.

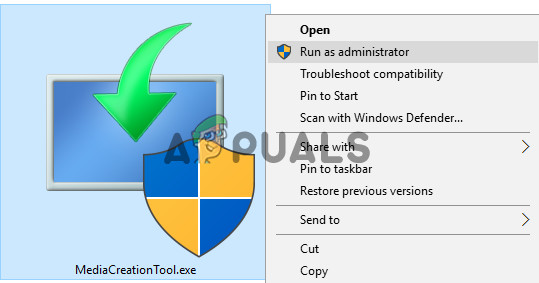
Download the Media Creation Tool from the Microsoft Website - Once the tool is downloaded, launch it as administrator and accept the license terms.
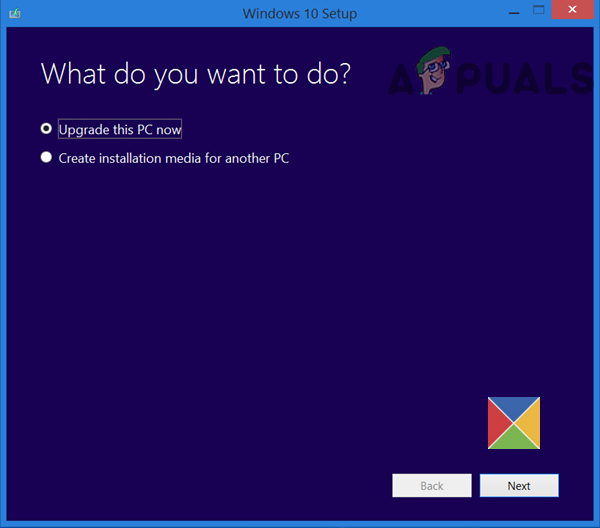
Launch the Media Creation Tool as Administrator - Select “Upgrade This PC Now” and choose “Keep Windows Settings, Personal Files, and Apps“.
Select Upgrade This PC Now - Follow the prompts to complete the upgrade process, then check if the error is cleared.

Keep Windows Settings, Personal Files, and Apps
If upgrading using the Media Creation Tool didn’t work, try creating a bootable USB with the Windows 10 ISO and using that device to upgrade the PC’s Windows.
If that fails, then you may download/ mount the ISO image of Windows 10 and use it to run the following DISM command in PowerShell (Admin):
dism /online /cleanup-image /restorehealth /source:wim:F:\sources\install.wim:5 /limitaccess
Make sure to replace “F” with the driver letter of the mounted ISO and “5” with the edition of Windows you’re using. If the ISO file was created with Microsoft’s media creation tool, replace “Install.wim” with “Install.esd”. After running the DISM command, check if the error is resolved.
If none of these solutions work, you may need to perform a clean installation of Windows. Before proceeding with any solution, create a system restore point and back up essential files to ensure that you don’t lose any data.
Reviewed by Muhammad Zubyan


