How to Fix Windows keep Installing the Same Update?
If Windows keeps installing the same update, it means that your Windows is unable to detect the particular update. As a result, Windows repeatedly offers the same update. This mainly occurs when the Windows update is interrupted during installation for some reason, such as a poor network connection, which ultimately delivers corrupted Windows Update files to the software distribution folder.
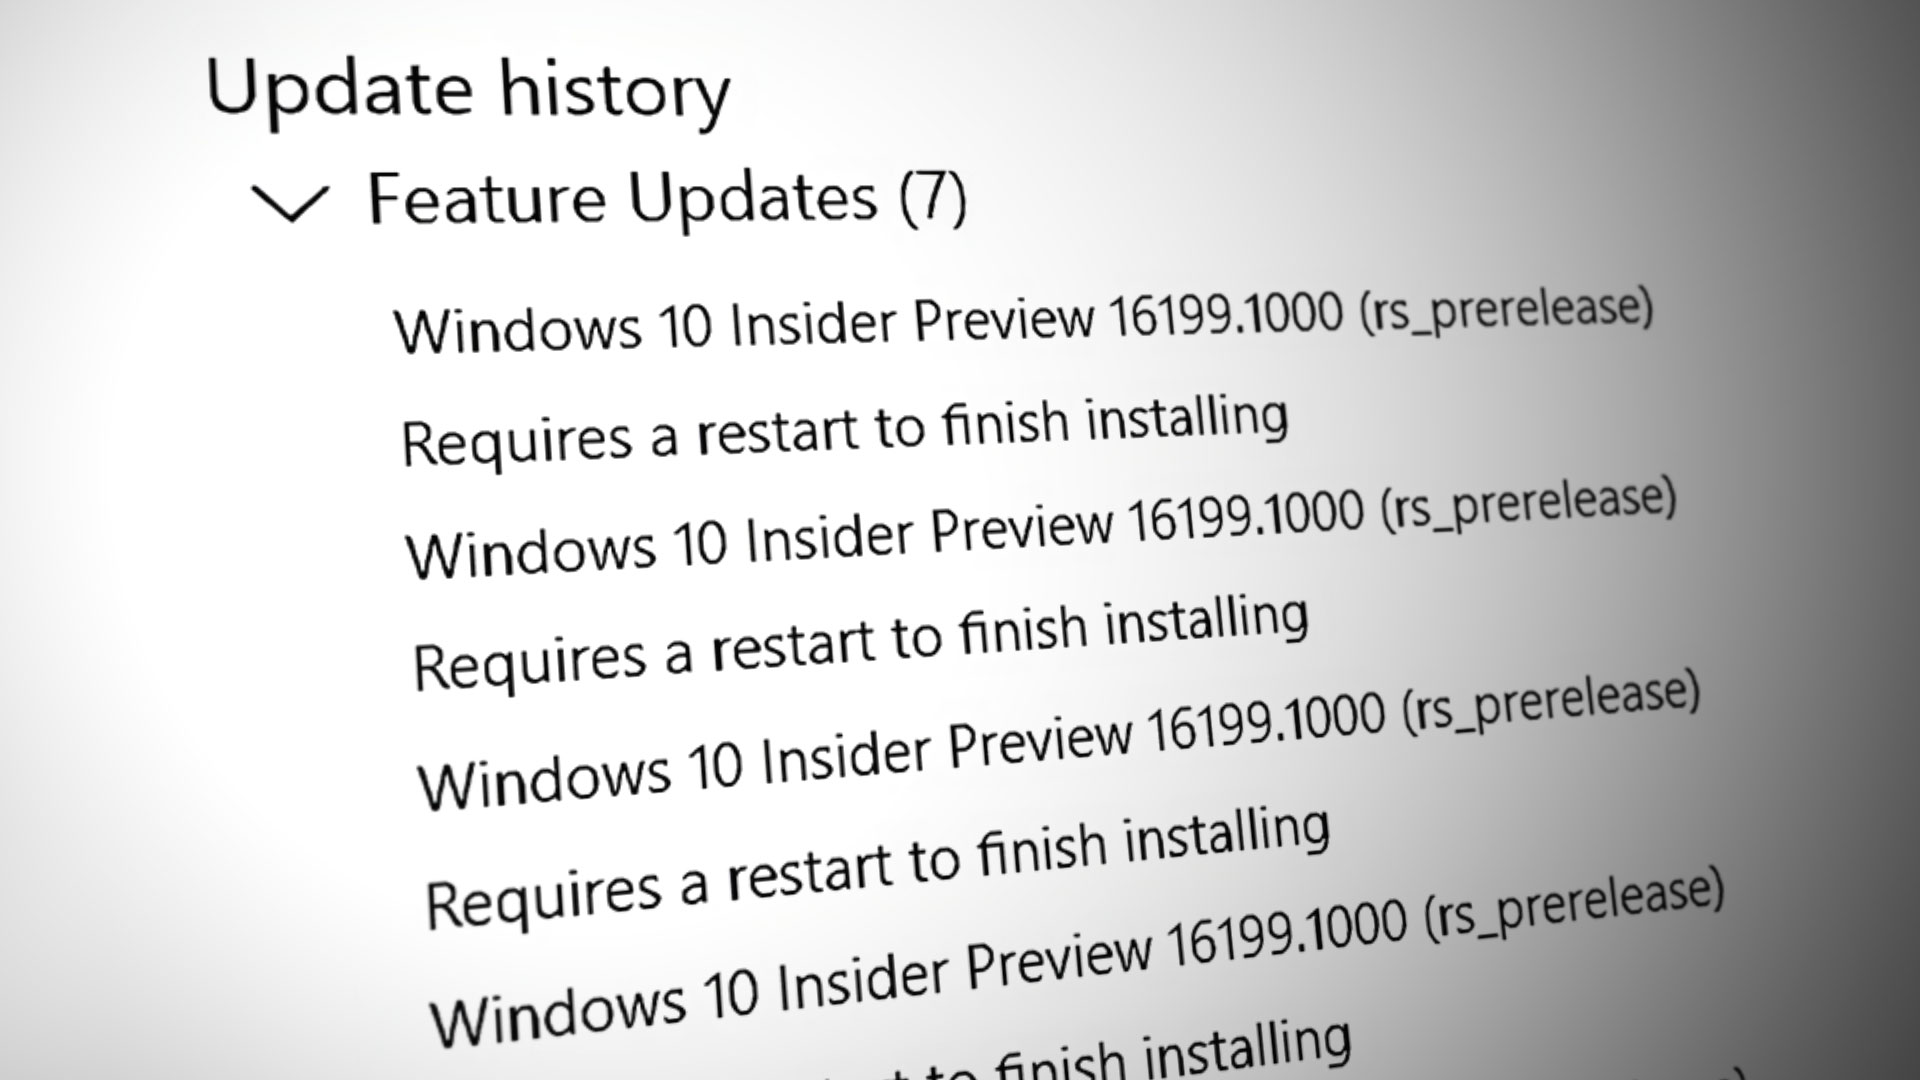
Software distribution is a temporary location for Windows update files. When you download a Windows update, the system stores all the files in the software distribution folder. It does this so that it can install the update once you restart your Windows.
However, if the files under this folder become corrupted for any reason, then the update will not install properly on your Windows, which will result in the continuous installation of the same update.
| ⚠️ Occurs When: | When trying to update Windows |
| ✅ Best Solutions: | Solutions 8 |
| ❌ Caused By: | Corrupted Software Distribution files |
| 👾 Symptoms: | Windows installs the same update |
1. Reset the Windows Update component.
Resetting the Windows update component will clear both the Software Distribution folder and the Catroot folder, restart the Windows Update services, register the Windows Update DLL files, and delete temporary files. This will remove the previous Windows Update files and allow Windows to download fresh files from the server.
To reset the Windows update component, follow the steps.
- You need to download a batch file named Windows update reset and run it as an administrator.
Resetting Windows update component - Once you have run the batch file as an administrator, press the Windows key and search for ‘Check for updates‘.
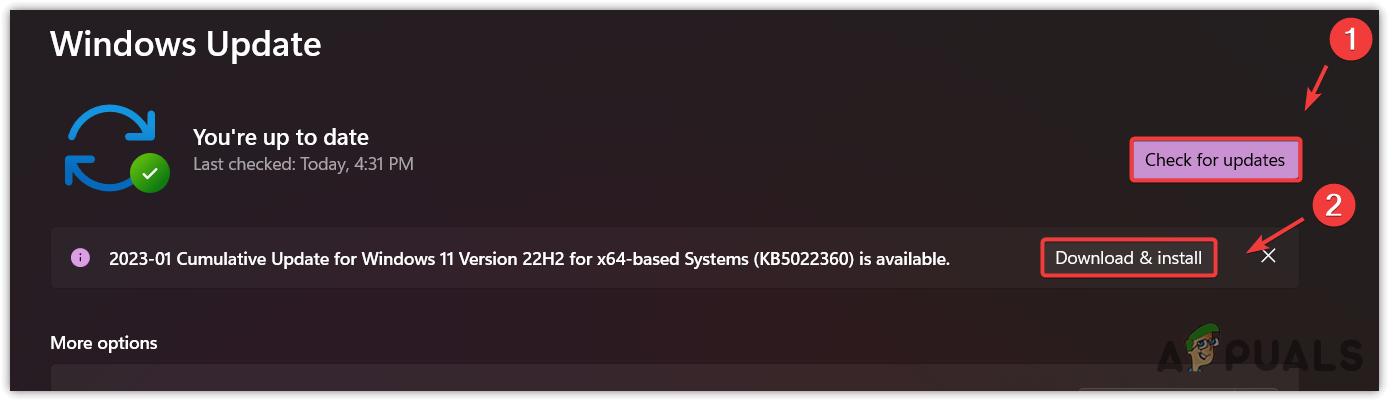
- Open the Windows update settings, and click Check for updates.
- Once the updates are found, click Download and install.
Updating Windows to the latest version - Once completed, restart your Windows to install the updates.
- Once completed, check whether your problem is resolved.
2. Download the Windows update manually.
You can also download the Windows update manually from the Microsoft Catalog to avoid this issue. The Microsoft Catalog is like a store with all the updates for all operating systems released so far.
So, if there is a problem with the Windows update that keeps downloading through the Windows Update utility, you can fix it by downloading the Windows update from the Microsoft Catalog.
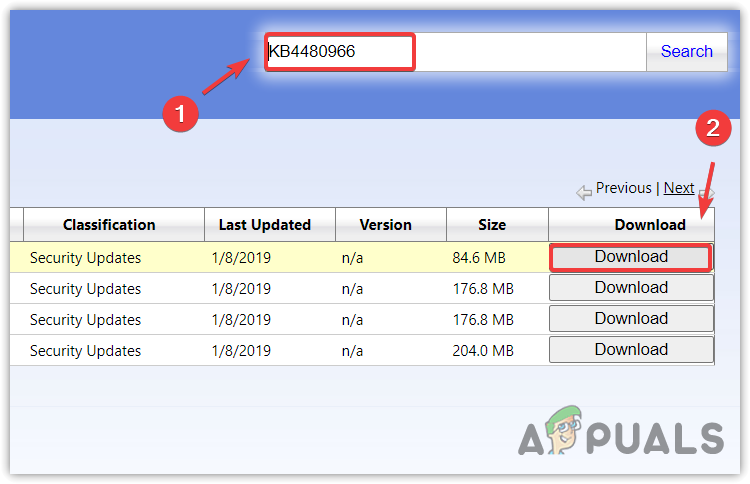
- To download the Windows update manually, go to Microsoft Catalog and search for the update.
- Download the update according to your operating system architecture.
Downloading Windows update from Microsoft Catalog - Once the update is downloaded, double-click the update file to install the update.
- Once completed, check if the problem has been fixed.
3. Run the System File Checker.
If the same Windows update keeps installing due to corrupted Windows update files in the software distribution folder, you can try running the System File Checker to fix this issue. SFC is a built-in command-line utility used to repair system files, including Windows update files. Hence, try running the SFC command by following these steps:
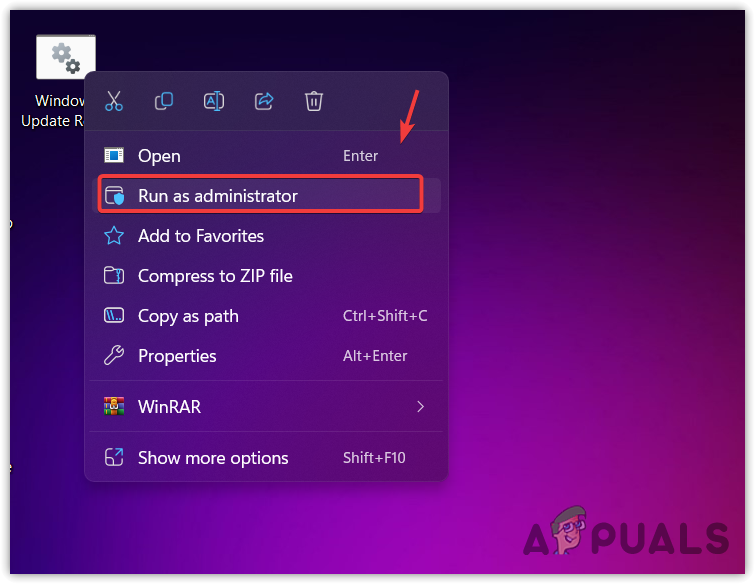
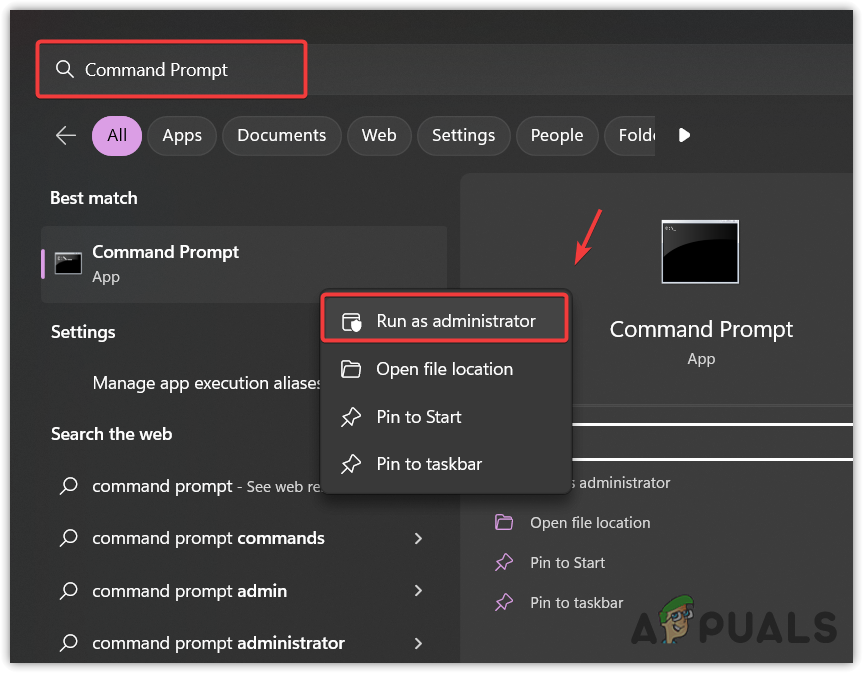
- To run the SFC command, press the Windows key and search for Command Prompt.
- Right-click the command prompt and select Run as administrator.
Opening Command Prompt as an administrator - Once opened, type the following command to verify the integrated system files.
sfc /scannow
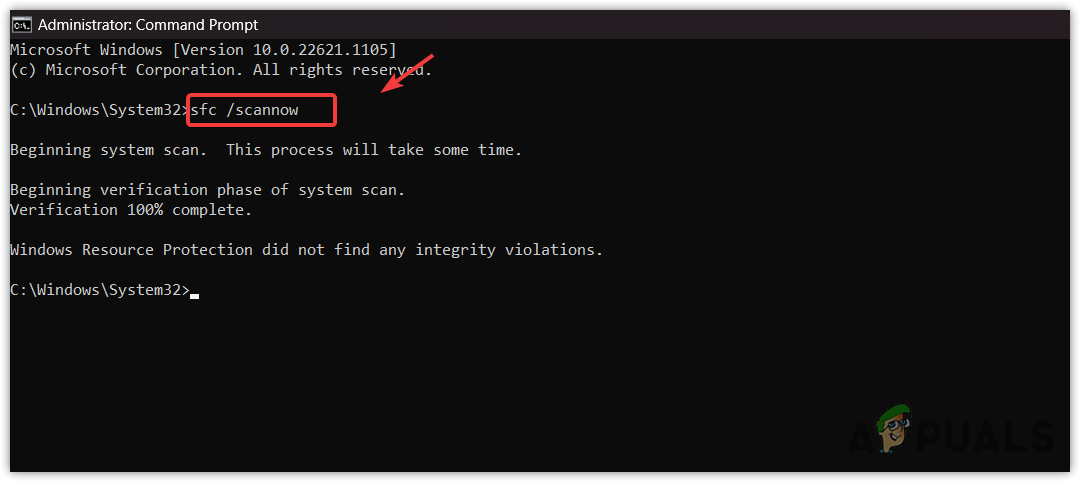
Running system file checker to repair Windows update files - Once completed, now check if your problem has been resolved.
4. Run the Windows Update Troubleshooter.
The Windows Update Troubleshooter is an easy way to automatically fix problems related to Windows Update components. Running the Windows Update utility restarts the Windows Update services, checks for pending restarts, and applies the necessary changes.
To run the Windows update troubleshooter:
- Click the Start Menu and search for Troubleshooting Settings.
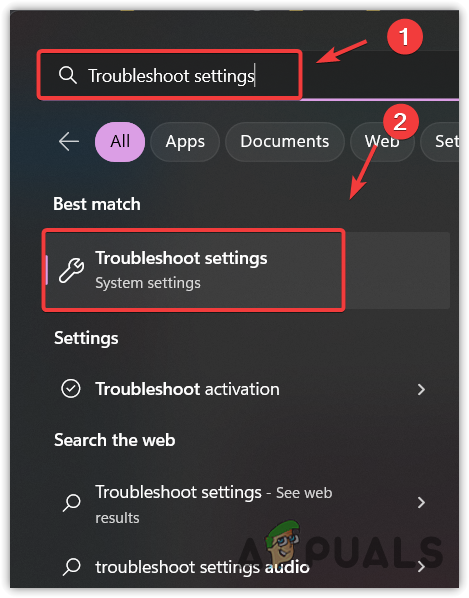
Opening Troubleshooting Settings - Open the troubleshooting settings, and then click on “Other Troubleshooters.
- Run the Windows update troubleshooter and wait for it to detect the problems.
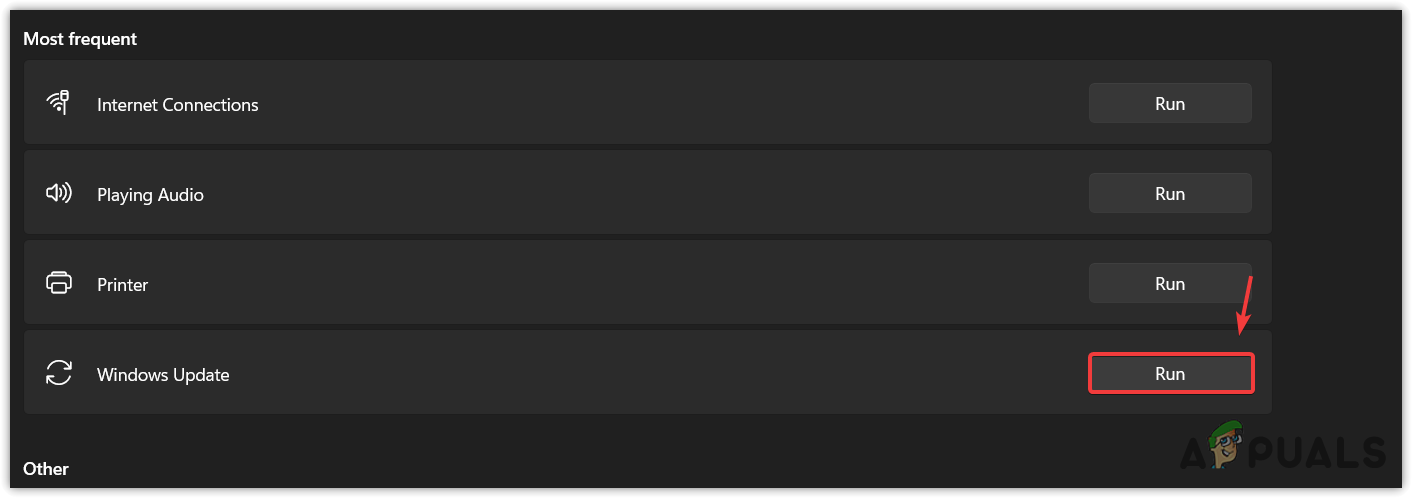
Running Windows update troubleshooter - Once it detects the problems, it will display the “Fix” button. Simply click on it to resolve the issue.
- Once finished, check if the issue has been resolved.
5. Hide the Windows Update.
If Windows continues to install the same update repeatedly, you can force your Windows not to install the update. To do this, you need to download the ‘Show or Hide Updates’ troubleshooter, which will allow you to ignore the update causing this issue.
To ignore the Windows update using the troubleshooter, follow these steps:
- Download the Show or hide updates troubleshooter.
- Once done, run the troubleshooter, and click Next.

Running Show or hide updates troubleshooter - Then, click Hide updates and tick the update that keeps installing repeatedly.
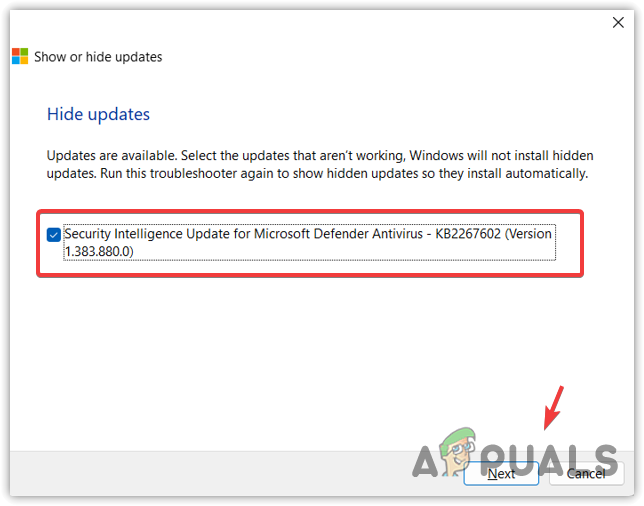
Hiding Windows Update - Once completed, click “Next” to hide the update.
- Once done, your problem is now resolved.
6. Temporarily disable Automatic Windows Update.
If Windows keeps installing the same update through the Windows Update utility, you can temporarily disable the automatic Windows Update, which will automatically fix this issue. Even though disabling the automatic Windows Update is not a solution, it will prevent the Windows Update from installing the same update. After disabling the update, you will be able to download the update through the Windows Update utility.
To temporarily disable the automatic Windows update, follow these steps:”.
- Hold the Windows key, and then press R on the keyboard.
- Once the Run window is open, type “gpedit.msc” in the search box and press Enter.
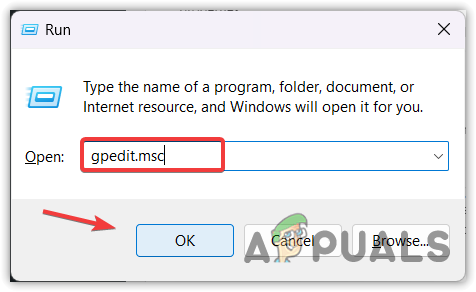
Opening Group Policy Editor using Run Command - Navigate to the following path.
Computer Configuration > Administrative Templates > Windows Components > Windows Update > Manage updates offered from Windows server update service - Now click Automatic updates detection frequency or Configure Automatic Updates to open the properties.

Opening properties of automatic updates detection frequency - Select Disabled to disable automatic Windows updates.
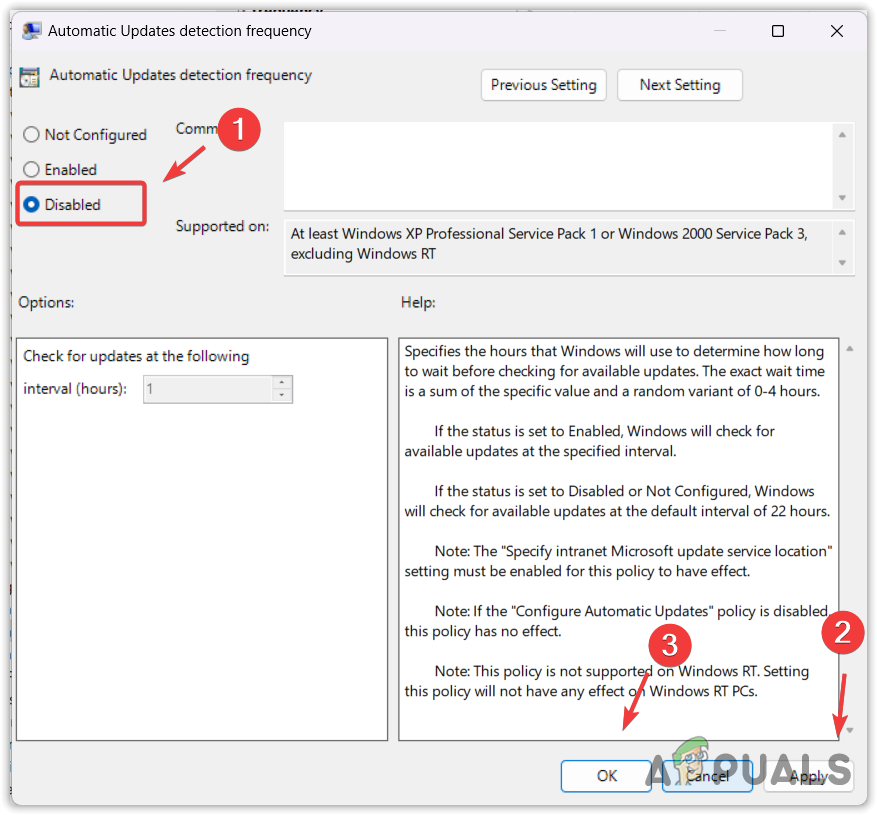
Disabling Windows updates from Group Policy Editor - Once done, click Apply and click OK to save the changes.
7. Use a system restore utility.
System Restore is a utility that stores system files, drivers, and registry files into a restore point and allows users to return to the previous state of Windows.
If you have a restore point created, you can restore your Windows to a previous state and then try updating Windows. This will revert all the Windows updates, system files, and drivers to the previous state when you created a restore point. However, if you don’t have a restore point created, you can try resetting your Windows by following the next method.
- To use a restore point, click Start Menu and search for rstrui.
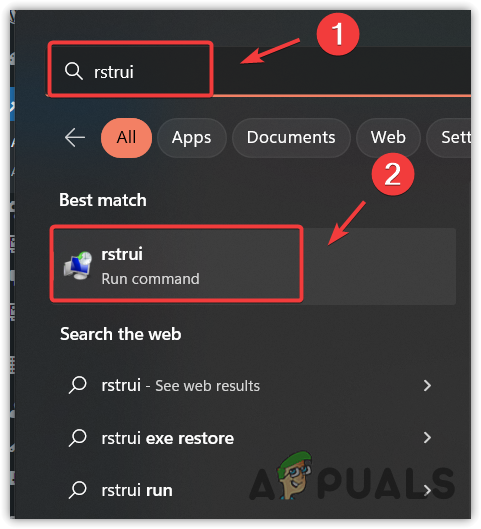
Navigating to the System Restore utility - Open the system restore command and click Next.

Starting System Restore utility - Then, select a restore point and click Next.
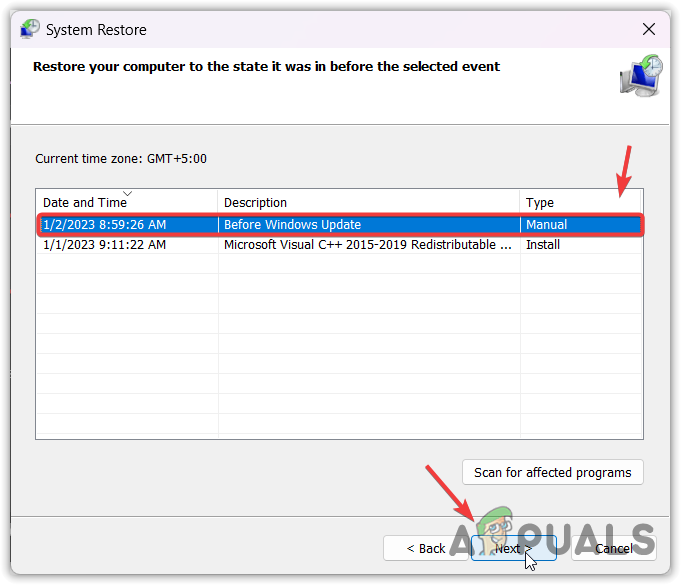
Selecting a restore point - Finally, click Finish to start the restore process.
8. Reset your Windows.
The final solution is to reset your Windows. Resetting Windows will restore all the settings to their defaults, remove corrupted Windows updates or system files, and uninstall all the drivers along with applications on the system disk.
To reset your Windows, follow the steps:
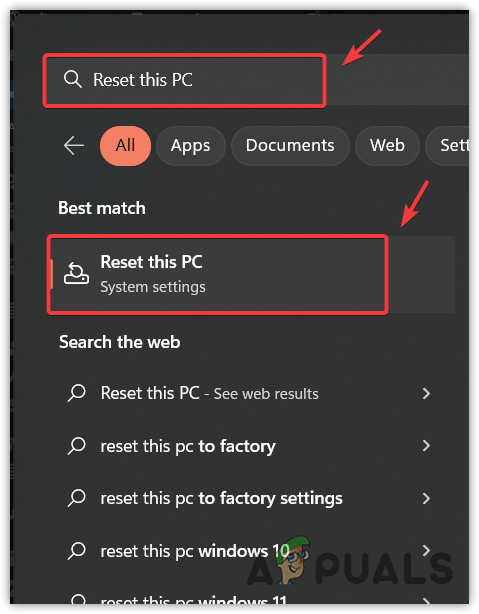
- Click Start Menu and type Reset this PC.
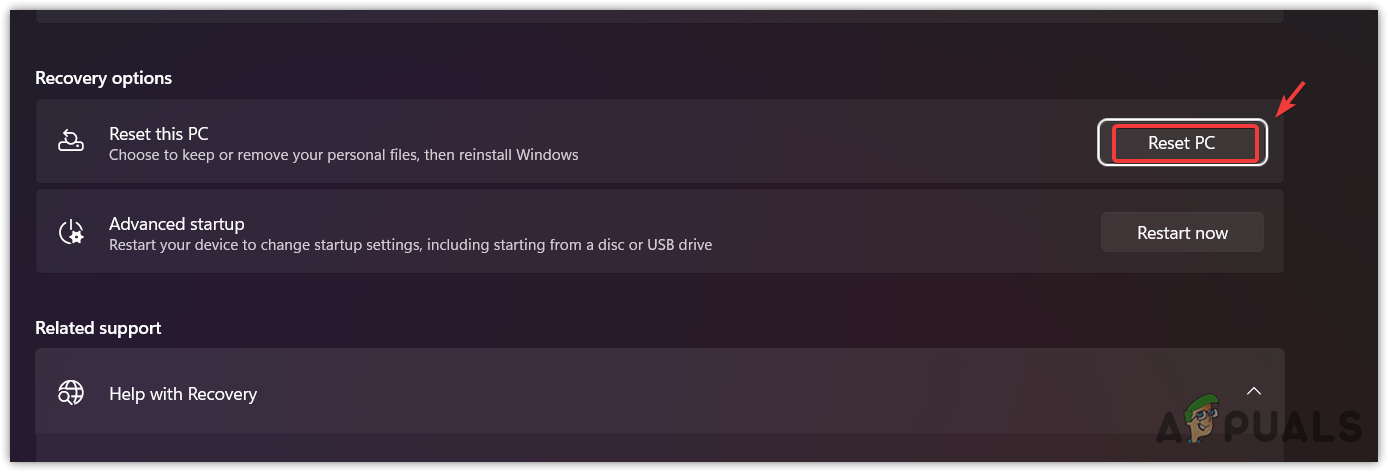
Navigating to System Reset settings - Open the settings and click Reset PC.
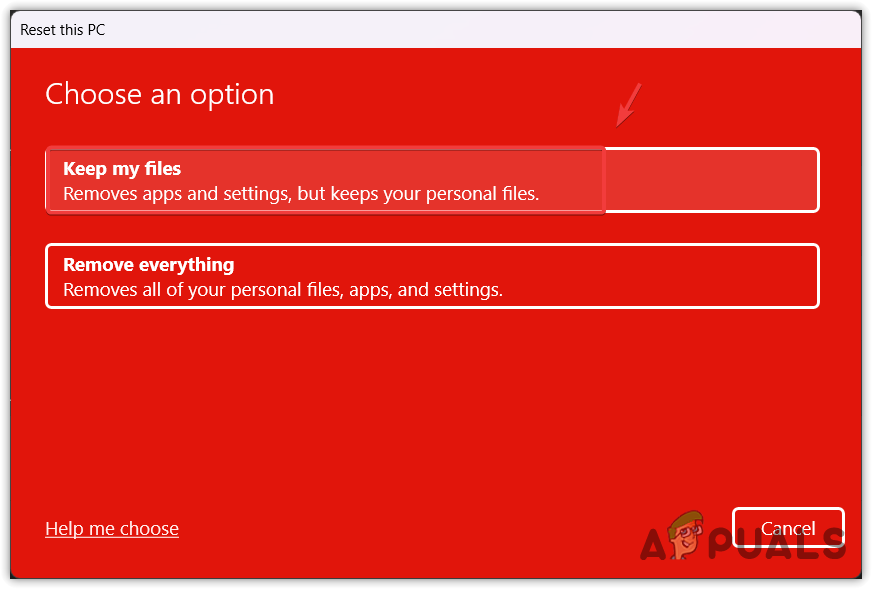
Opening system reset settings - Select Keep my files from the listed options, then click Local Reinstall.
Selecting keep my files - Finally, click Next and click Reset to reset your Windows.
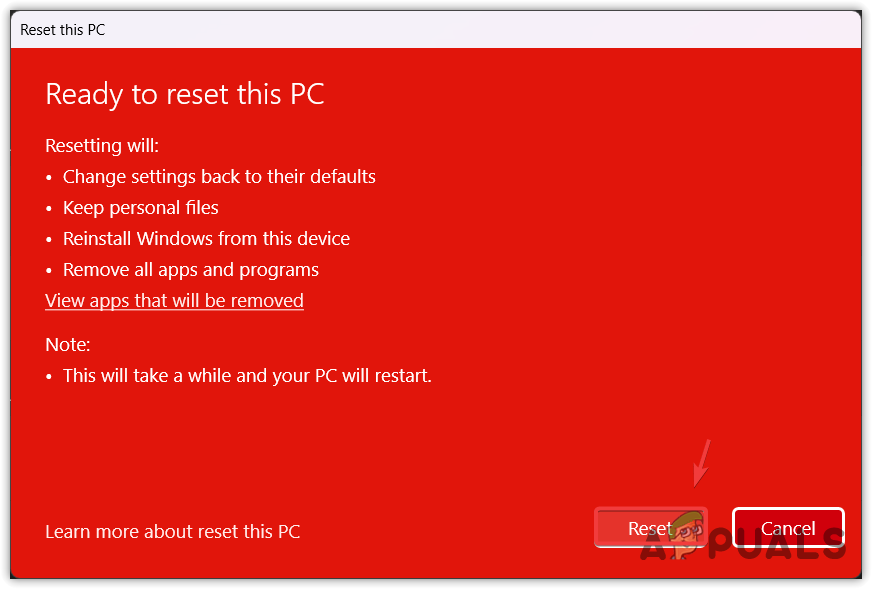
Resetting Windows - Once done, the problem should now be fixed.
Windows keep Installing the same update- FAQs
To stop Windows from keep installing the same update, open File Explorer and go to C:\Windows\SoftwareDistribution and delete all the files. Once done, try updating your Windows to install the update successfully.
Your Windows keeps installing the same update due to corrupted files downloaded through the Windows update utility saved in the software distribution folder. You need to clear the software distribution folder to fix this is


