How to Disable Automatic Windows Store Updates?
Automatic update is a feature that allows users to keep their applications updated without having to check and install them manually. The software will check for updates automatically and if found, the updates will be downloaded and installed without user intervention. However, this feature isn’t suitable for users that don’t have unlimited internet or unlimited data plan. Therefore, users would want to avoid the updates of unnecessary applications from the Microsoft Store. In this article, we will show you methods through which you can easily disable the automatic updates of the Microsoft Store.
Disabling Automatic Updates through Store Settings
Most of the settings can be found in the settings menu of the application. When it comes to Microsoft Store automatic updates, it can be simply turn off in the settings of the application. This is the default and common method to turn off the automatic updates for Microsoft Store on your system. Follow the below steps to check it out:
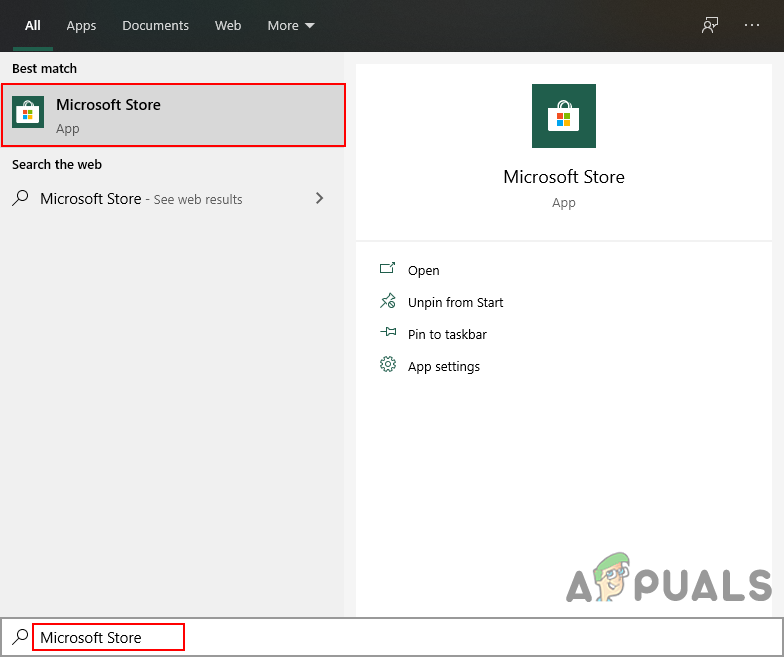
- Hold the Windows key and press S to open the Windows search feature. Now type “Windows Store” in the search to open it. You can also open it from the taskbar if it is pin there.
Opening the Windows Store - Click on the Menu (three dots) at the top right corner and choose the Settings option.

Opening Windows Store Settings - At the Home tab, the first option will be for automatic updates. Click on the toggle to turn it off.
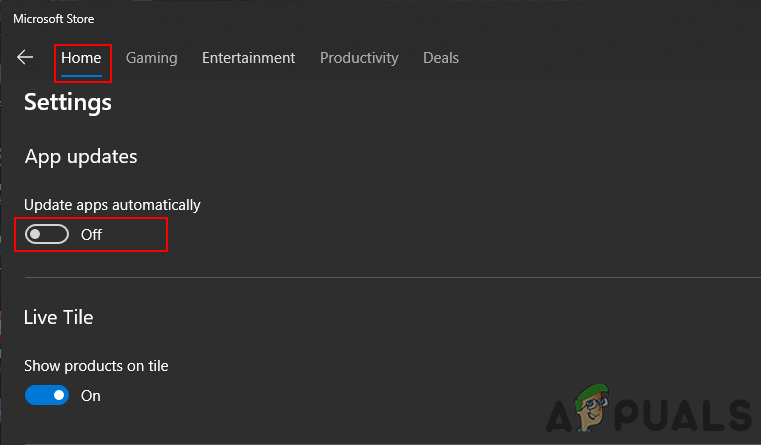
Turning Off Automatic Updates - This will stop the Store from automatically updating apps without the permission of the user.
- You can enable it back by simply clicking on the toggle option again.
Disabling Automatic Updates through the Local Group Policy Editor
Group Policy allows users to manage and configure the operating system. The Local Group Policy Editor consists of two major categories; Computer and User. They are located in the left pane of the Local Group Policy Editor window. The setting that we are using in this method can only be found in the Computer category of group policy. Follow the below guide to disable automatic windows store updates:
Note: The local group policy editor isn’t available in the Windows Home operating system. If you are using Windows Home operating system, then skip this method and try using other methods.
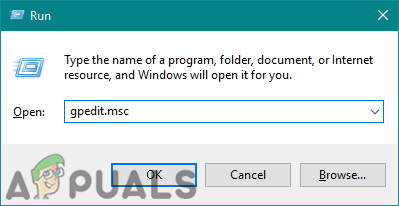
- Hold the Windows key and press R on your keyboard to open a Run dialog. Type “gpedit.msc” in the dialog and press the Enter key to open the Local Group Policy Editor.
Opening Local Group Policy Editor - Navigate to the setting by following this path:
Computer Configuration\ Administrative Templates\ Windows Components\ Store\
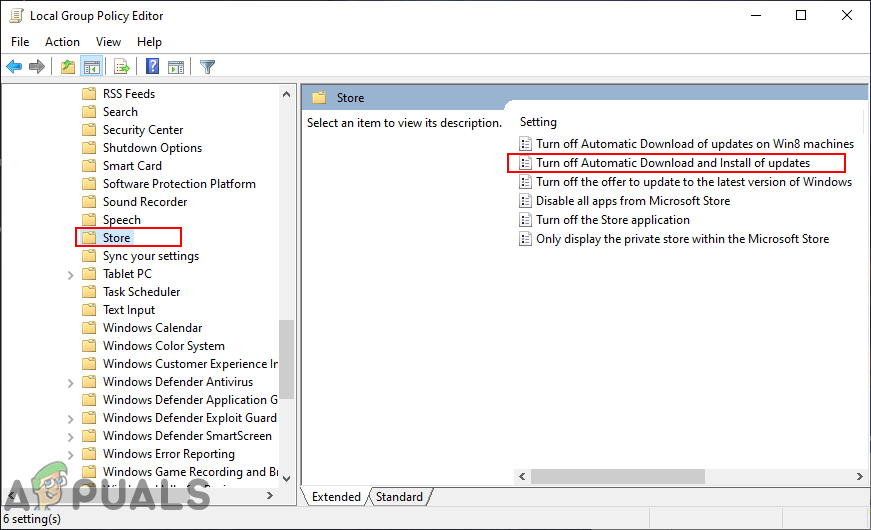
Navigating to the setting - Double-click on the setting named “Turn off Automatic Download and Install of updates“. This will open in another window, now change the toggle option to Enabled and click on the Ok/Apply button to save changes.
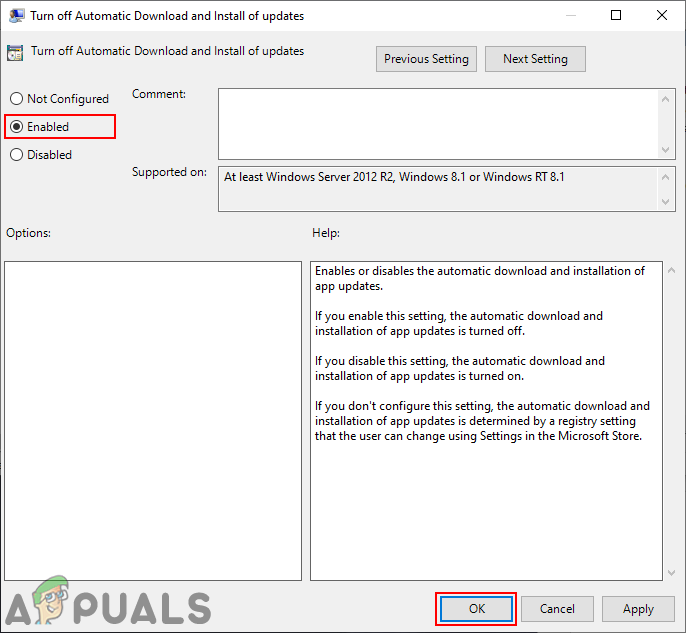
Enabling setting to disable automatic updates on Microsoft Store - This will disable automatic updates for Microsoft Store and it will grey out the option, so users will not be able to enable it in the Settings of Store.
- To enable it back, you need to change the toggle option in step 3 back to the Not Configured or Disabled option.
Disabling Automatic Updates through the Registry Editor
The registry is a database of low-level settings provided by Microsoft Windows. It has different hives for different keys and values. The one we will be using for this setting is the Local Machine hive. We also recommend users to create a backup before making any changes in the Registry of their system. However, if you follow the below steps as it is, you will be able to configure it without any mistakes.
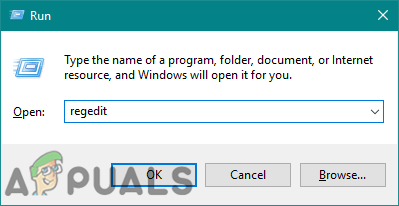
- Hold the Windows key and press R on your keyboard to open the Run dialog. Now type “regedit” and press the Enter key. This will open up Registry Editor and if you get UAC prompt, choose the Yes option.
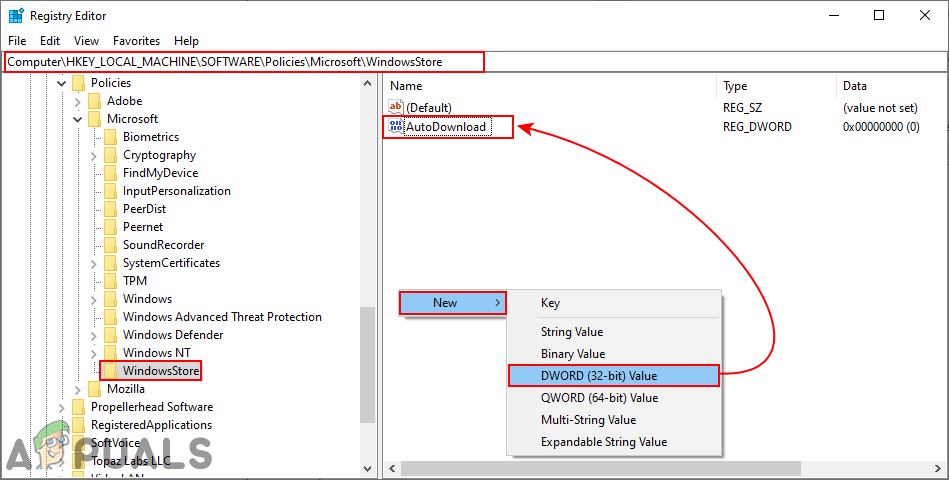
Opening the Registry Editor - In the Registry Editor window, navigate to the WindowsStore key:
HKEY_LOCAL_MACHINE\Software\Policies\Microsoft\WindowsStore
- If the WindowsStore key is missing simply create it by right-clicking on the Microsoft key and choosing New > Key. Then name the key as WindowsStore.
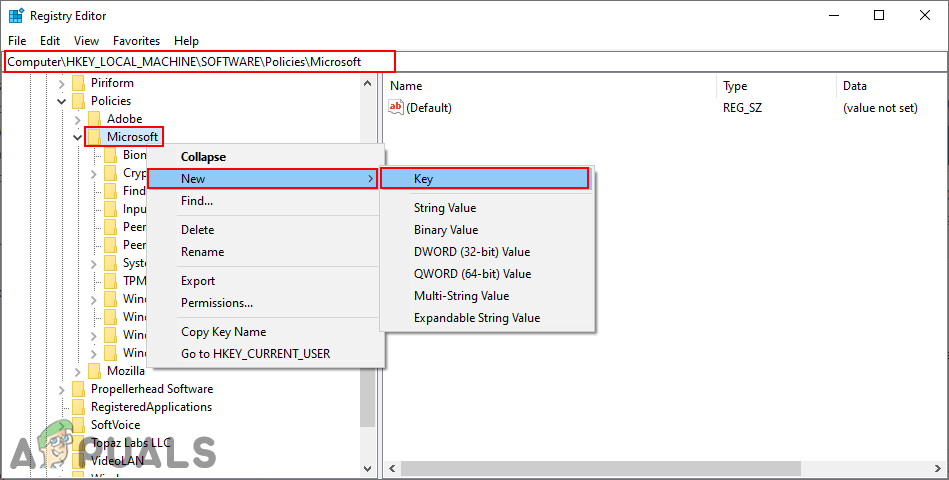
Creating the missing key - In the WIndowsStore key, right-click on the right pane and choose New > DWORD (32-bit) Value. Name this new value as “AutoDownload“.
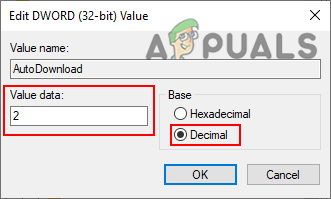
Creating a new value - Double-click on the AutoDownload value and change the value data to 2. Also, make sure to select the Base as Decimal.
Enabling the value - After all the configurations, make sure to restart the system to disable the automatic updates of the Microsoft Store.
- To enable it back on your system, you need to change the value data to 4 (as Decimal) or simply delete the value from Registry Editor.


