How to Fix Windows Stuck on “Restarting” Screen?
If your system gets stuck on the “Restarting” screen and fails to complete the restart process, it’s usually due to a background task that didn’t terminate properly or a Windows update that failed to install. This prevents the operating system from shutting down and rebooting as expected. Other common causes include outdated updates, driver conflicts, corrupted system files, or third-party software interference.
Let’s move on to the fixes that can get your system past the restart screen.
Quick Fixes:
- Wait Patiently: After updates or heavy background tasks, Windows may take longer to restart. If your PC is stuck on the “Restarting” screen, wait 15–20 minutes before taking further action. Avoid powering off too early to prevent potential data corruption.
- Force Restart the PC: If waiting doesn’t help, hold the Power button for 5–10 seconds until the system shuts down. Wait another 10 seconds, then turn it back on. Use this only when necessary, as it can lead to unsaved data loss.
- Remove External Devices: Disconnect all USB drives, printers, and other peripherals, as they can interfere with the restart process. Restart your system again, then reconnect devices one at a time to identify any problematic hardware.
1. Run Startup Repair
Startup Repair is a built-in Windows recovery tool that diagnoses and resolves issues preventing your system from booting correctly. It can automatically repair corrupted system files, fix problems with the Boot Configuration Data (BCD) or Master Boot Record (MBR), resolve faulty driver conflicts, and undo recent system updates that may be causing boot failures. This tool is especially useful for addressing startup errors and system instability.
- Power on your system after shutting it down completely.
- When you see either the Windows logo or your manufacturer’s logo appear, immediately press and hold the Power button to force another shutdown. (Timing is crucial – do this within 2-3 seconds of seeing the logo)
- Repeat this forced shutdown process exactly three times:
- Power on → See logo → Force shutdown
- The fourth attempt will trigger automatic repair
- On the fourth startup, Windows will detect the boot failures and display:
- “Preparing Automatic Repair”
- Followed by “Diagnosing your PC”
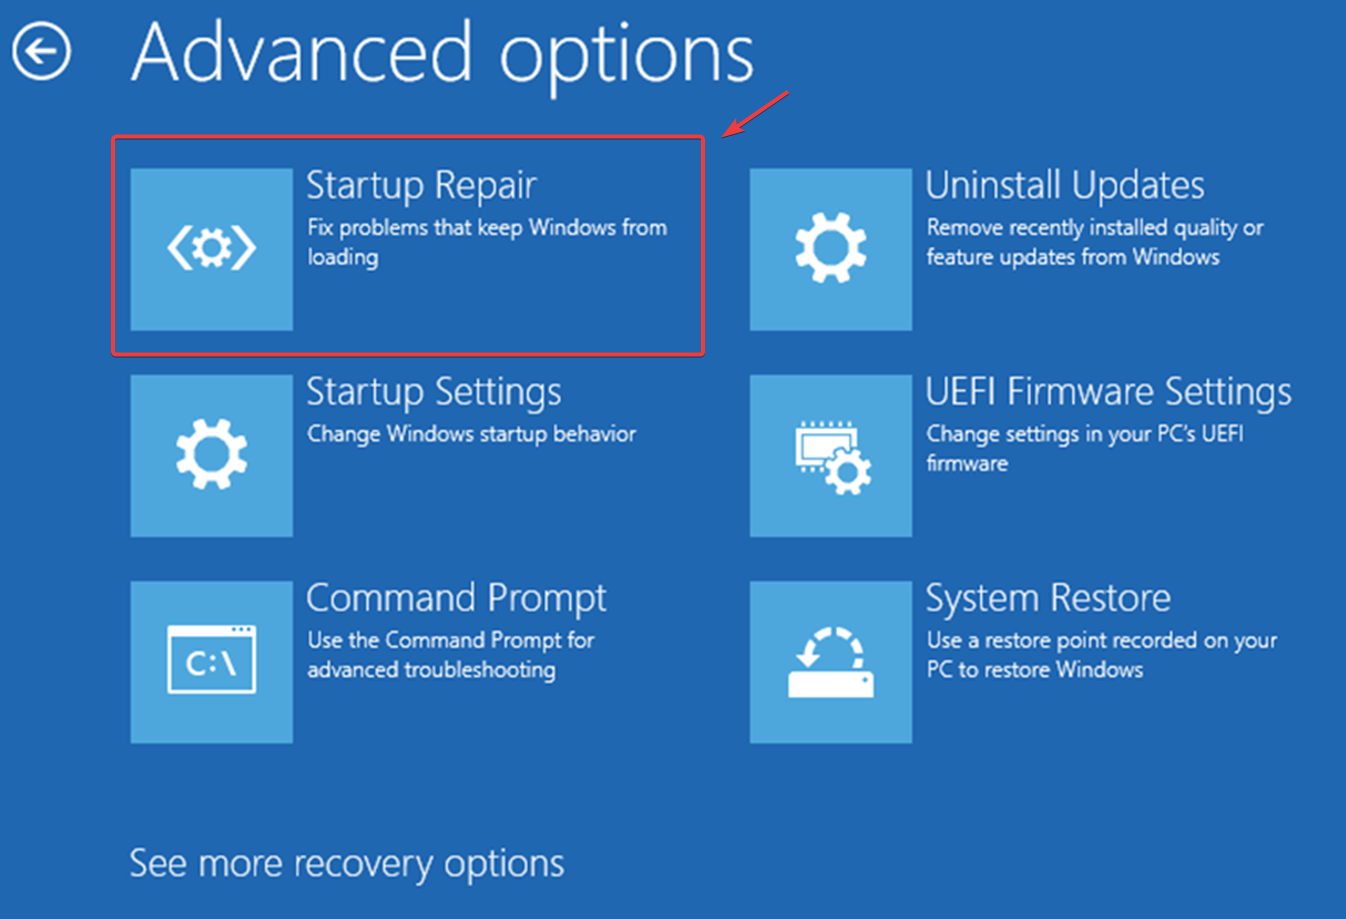
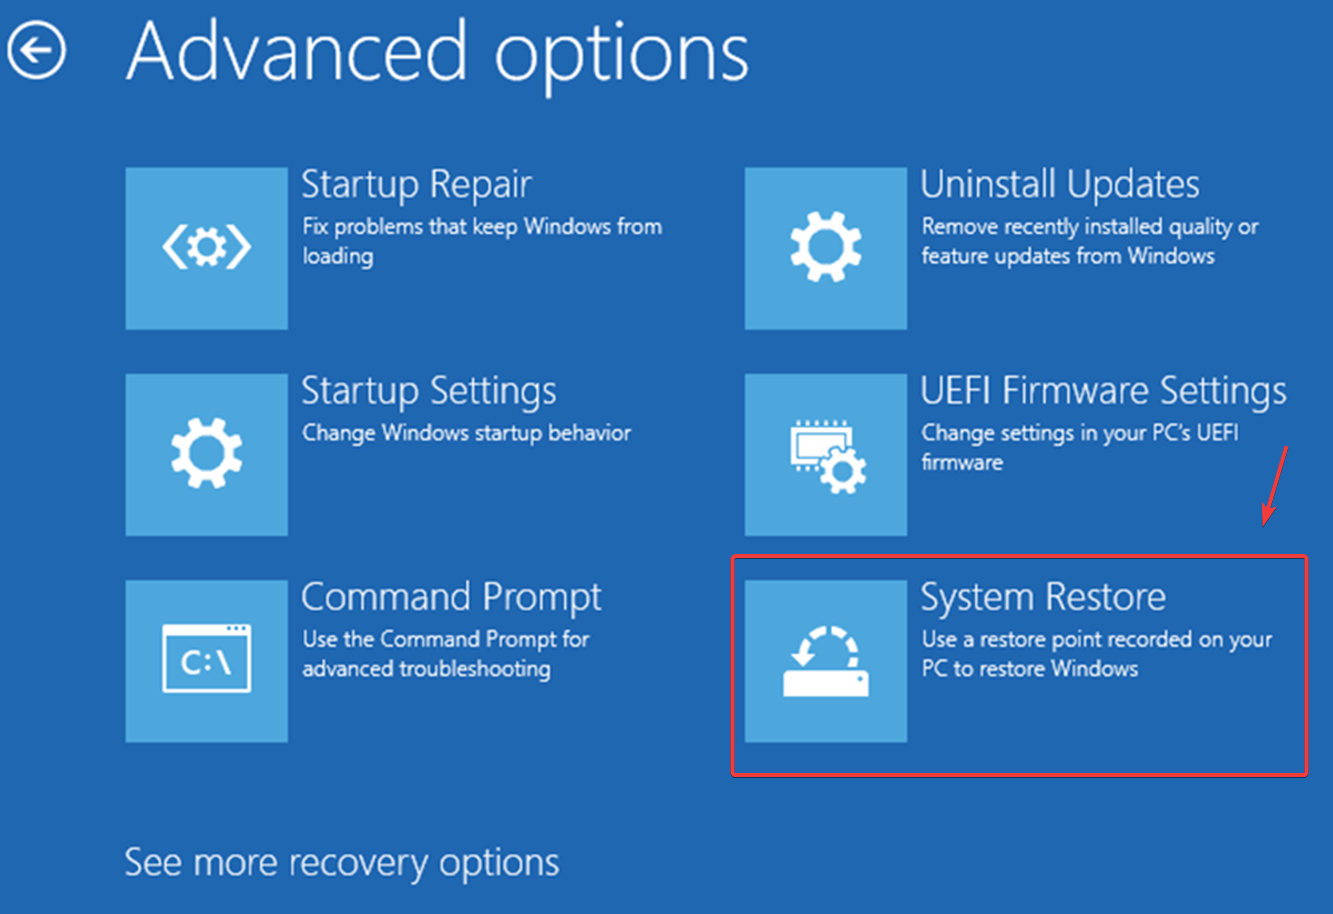
- In the Windows Recovery Environment (WinRE):
- Select Advanced Options
- Choose Troubleshoot
- Click Advanced Options again
- Select Startup Repair from the advanced options menu.
- Wait for the repair process to complete (may take 10-30 minutes), then restart your PC normally to test if the issue is fixed.
2. Disable Fast Startup
Fast Startup is a Windows feature designed to reduce boot time by saving the system state to a hibernation file during shutdown. However, it can sometimes lead to issues—especially if outdated drivers, system updates, or dual-boot configurations are present. These conflicts may prevent certain services like Easy Anti-Cheat from initializing properly after a reboot.
Disabling Fast Startup ensures that Windows performs a full initialization on every boot, reducing the chance of cached conflicts. Although this may slightly slow down startup, it improves stability and resolves launch-related errors in many cases.
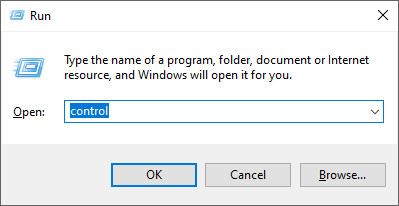
- Press Windows + R to open the Run dialog box.
- Type control and press Enter to launch the Control Panel.
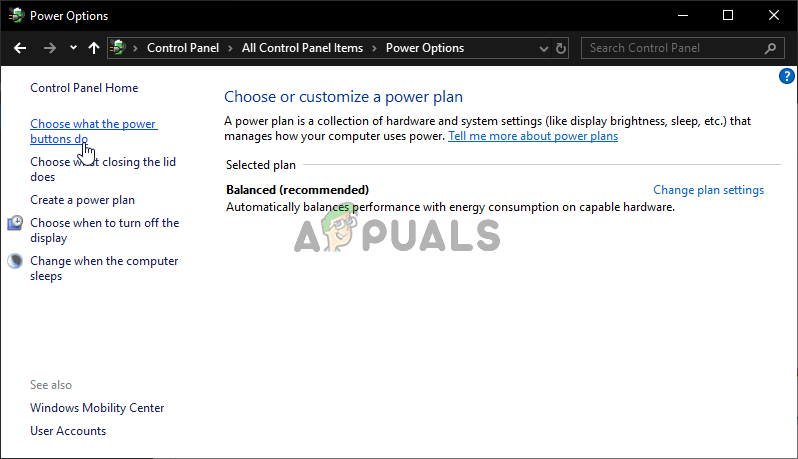
- Select Hardware and Sound in the Control Panel.
- Under Power Options, click Choose what the power buttons do.
- Click Change settings that are currently unavailable (requires admin rights).
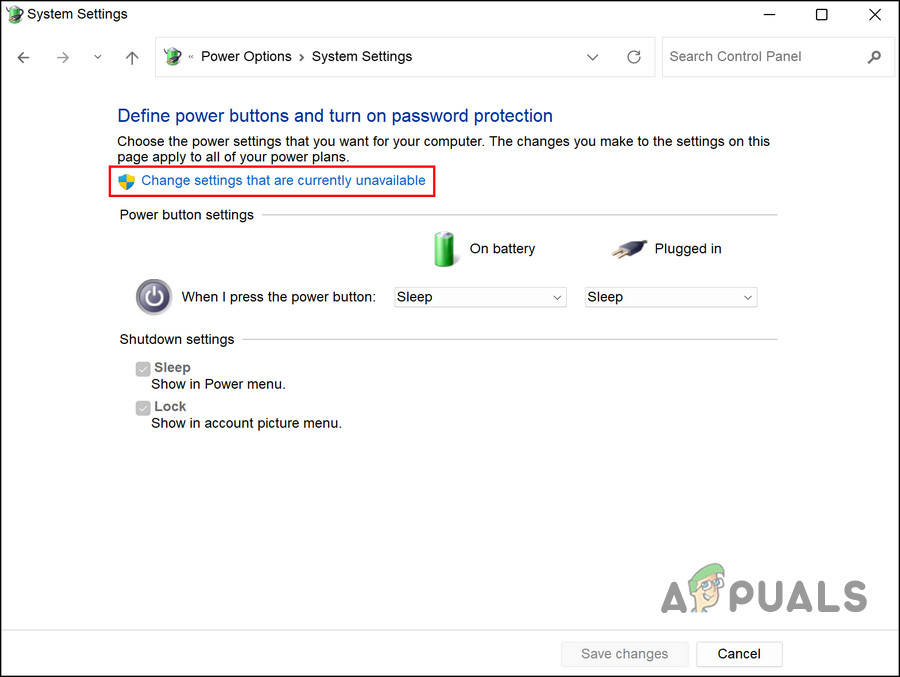
- Scroll to Shutdown settings at the bottom.
- Uncheck Turn on fast startup (recommended) to disable the feature.
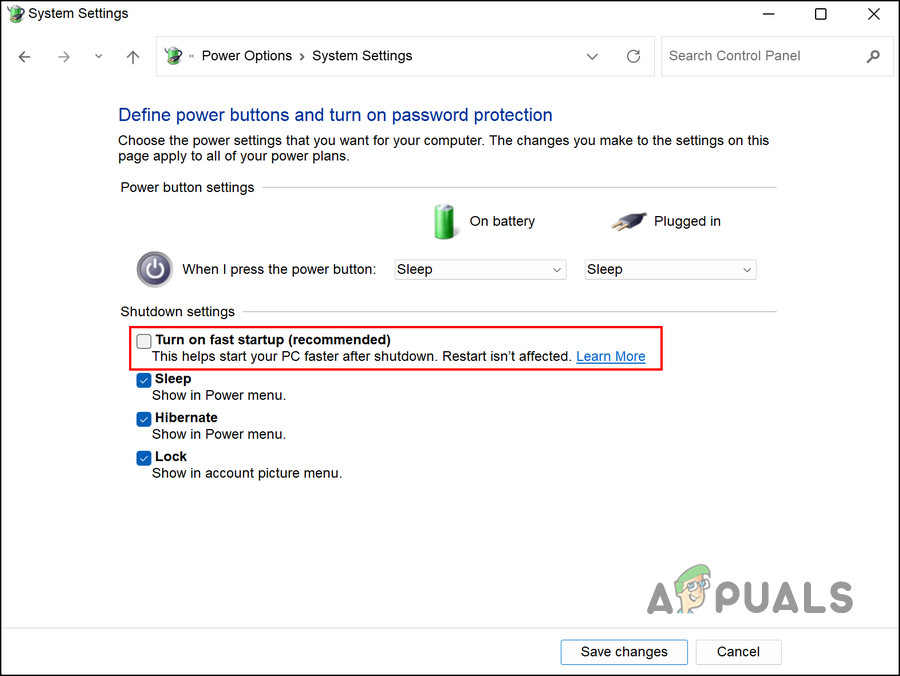
- Click Save changes to confirm.
- Restart your PC for changes to take effect.
3. Use a System Restore Point
If you created a System Restore Point before the issue began, you can roll Windows back to that stable state. System Restore works by reverting critical system files, configurations, and installed programs to a previous snapshot—without affecting your personal files like documents, photos, or videos.
This can help undo recent changes (such as driver installs, registry edits, or failed updates) that may have triggered the EAC startup failure.
- Force Advanced Startup Menu: Power on your PC and hold the power button to interrupt booting as soon as you see the Windows logo. Repeat this twice, and on the third restart, Windows will automatically open the Advanced Startup menu.
- Navigate to System Restore: In the recovery environment, go to: Advanced Options → Troubleshoot → Advanced Options → System Restore.
- Choose a Restore Point: Click Next to see available snapshots. Select one dated before your issues began.
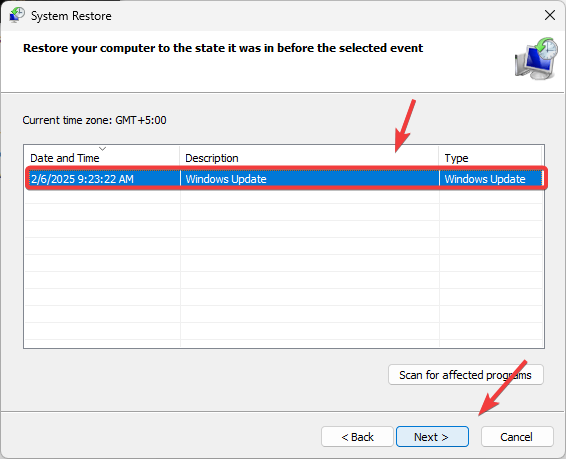 No restore points? You’ll need to reset Windows instead.
 - Confirm with Next → Finish. The process takes 10-30 minutes and will auto-restart your PC.
- Important Note: While personal files remain safe, this will remove programs/drivers installed after the restore point. Always back up critical data first.
If the issue still persists, you may need to consider resetting or reinstalling Windows. This approach is particularly effective when the root cause lies in deeper system-level problems, such as corrupted system files, damaged Boot Configuration Data (BCD), or a corrupted Master Boot Record (MBR).
Resetting or reinstalling Windows will restore your system to a clean state and eliminate any software-related conflicts that might be preventing Easy Anti-Cheat from functioning correctly. For detailed steps, follow this step-by-step tutorial.


