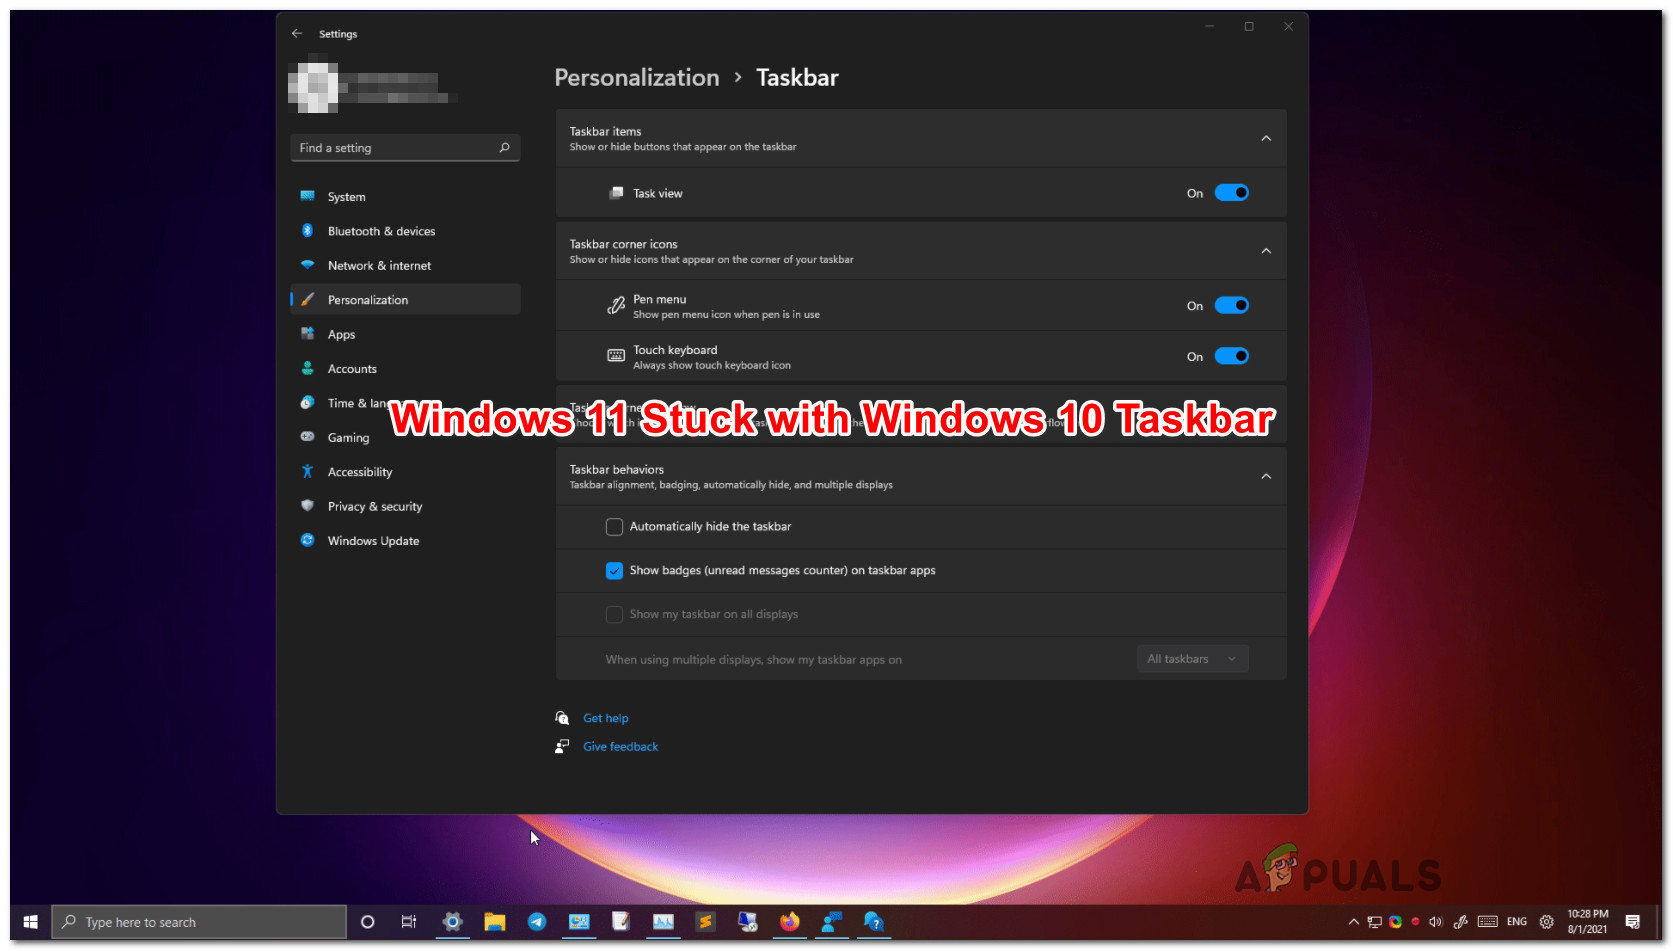
How to Fix Windows 11 Showing the Windows 10 Taskbar
Imagine upgrading to Windows 11 for the new look only to be stuck with the old Windows 10 taskbar. If you’re unlucky enough to be facing this issue, just take comfort in the fact that the problem is quite widespread. Fortunately, there are a couple of fixes that will allow you to migrate to the new Windows 11 aesthetic.
Windows 11 is still in Preview Mode, so early adopters are bound to face some issues until Microsoft manages to streamline the experience and squash the bugs that are currently all around this new operating system.
According to Microsoft engineers, they’re working on a fix that will resolve this weird behavior for good.
In the meantime, if you don’t want to wait, you can take matters into your own hands and go through a couple of fixes that other affected users have successfully used to force the new Taskbar esthetic to appear on Windows 11:
- Creating a CMD Task via Task Manager – This is the official fix recommended by Microsoft’s software engineers. If you’re stuck with the old taskbar aesthetic, one way to fix it is to use Task Manager to create a Command Prompt task that will clear the current settings maintaining the current aesthetic, and force your OS to migrate to the new taskbar look.
- Creating a Registry Task via Task Manager – If the official fix doesn’t work in your case, one additional repair avenue that you should explore is to use Task Manager to create a Registry Editor task that will clear the current values and enforce a new value that will force the new taskbar to remain in place.
- Reinstall Windows 11 with the ‘Keep Everything’ option – If every other potential fix fails, you always have the option to create a Windows 11 ISO and force the reinstallation of Windows 11 with the option to keep all your apps and files. This method will only replace system files and it’s confirmed to resolve this problem and allow your OS to finally complete the migration to the Windows 11 taskbar.
We’ve created step-by-step instructions that will help you enforce every potential fix explained above. Feel free to start following the guide you feel most comfortable with.
Important: This article assumes that you haven’t taken any steps to purposefully return to the old taskbar aesthetic. If you installed any programs meant to change the current taskbar look or you’ve performed some registry modifications, simply reverse engineer those steps.
Creating a CMD Task
Microsoft still has not fixed this issue even if they’ve confirmed that they’re working on a fix. There’s no official date announced on when we’ll get it, but at least Microsoft engineers have released an official temporary fix that you should deploy in case you’re stuck with the old Windows taskbar on Windows 11.
This method involves creating a recurring CMD (Command Prompt task) through Task Manager that is meant to get rid of the registry keys that are forcing the old taskbar on your Windows 11 installation.
Follow the instructions below to create a recurring CMD task through Task Manager that will be clear the registry instances that are currently causing this behavior:
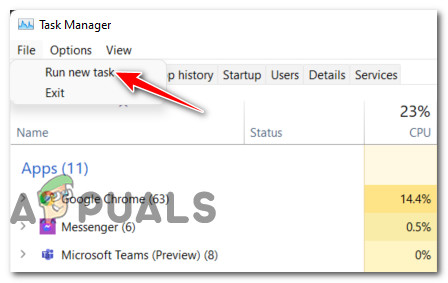
- Press Ctrl + Shift + Enter to open up Task Manager.
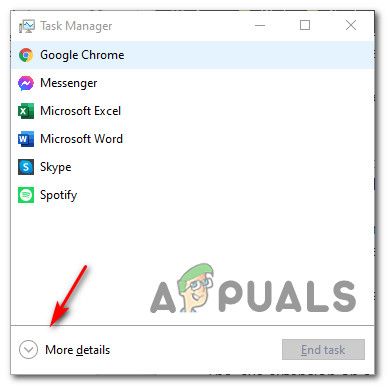
- If the minimized interface is opened by default, click on More Details at the bottom of the Task Manager screen to bring up the expert interface.

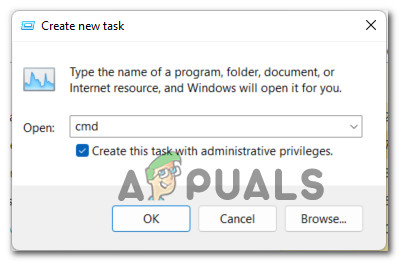
Accessing the More details screen - Once you’re inside the advanced Task Manager interface, click on File from the ribbon at the top, then click on Run a new task.
Running a new task - Onde you’re inside the Create a new task interface, type ‘cmd’ inside the Open field, then check the box associated with Create this task with administrative privileges. Click Ok once the task is properly configured.
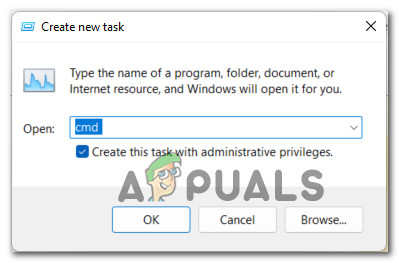
Creating a CMD task inside Task Manager - Once you’re inside the elevated CMD prompt, paste the following command and hit Enter:
reg delete HKCU\SOFTWARE\Microsoft\Windows\CurrentVersion\IrisService /f && shutdown -r -t 0
- Immediately after you press Enter, you should see your PC rebooting. Wait until the next startup is complete and you should see everything returning back to normal.
If the Windows 11 taskbar look has not returned to your screen even after following the instructions above, move down to the next potential fix below.
Create a new Regedit Task
If you’re stuck with the Windows 10 taskbar and the method above has failed, there’s one additional avenue that you can explore before you are forced to give in to a reset procedure.
Some affected users have managed to fix the issue by creating a new Regedit Task using TaskManager that will enforce a new value called UndockingDisabled. This will eliminate a bug where the issue is occurring due to a registry inconsistency.
If you’re still stuck with the Windows 10 taskbar and it’s starting to become unresponsive, follow the instructions below:
- Press Ctrl + Shift + Esc to open up the Task Manager interface.
- If Task Manager opens with the simple interface, click on More Details.
More details - Next, use the ribbon at the top to click on File at the top, then click on Run new task from the list of available options.
Running a new task - Inside the Create new task window, type ‘regedit’ inside the Open screen, then check the box associated with Create this task with administrative privileges before clicking Ok to open an elevated Command Prompt.
Creating a new task - Once you’re inside the Registry Editor utility, use the left-hand pane to navigate to the following location:
HKEY_LOCAL_MACHINE\SOFTWARE\Microsoft\Windows\CurrentVersion\Shell\Update\Packages
Note: You can either get to this location manually (by clicking on each registry key) or you can paste the full path into the nav bar at the top of the screen to get there instantly.
- Once you arrive at the correct location, select Packages from the left pane, then move over to the right-pane, right-click on an empty space and choose New > Dword (32-bit) Value.
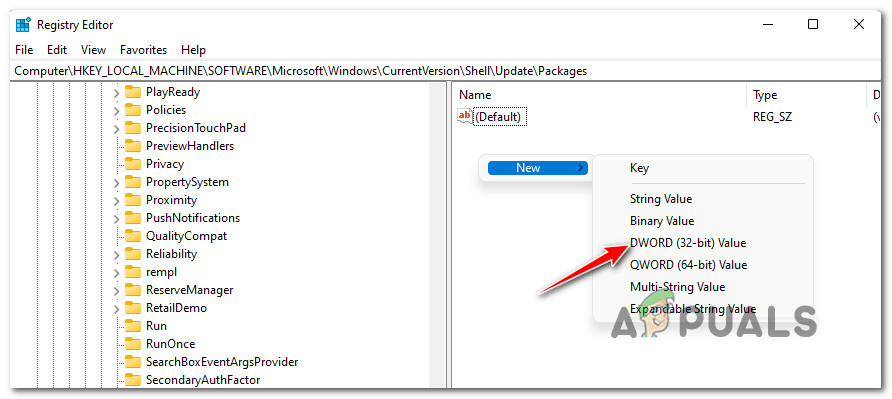
Creating a new DWORD - Once the new DWORD is generated, name it UndockingDisabled.
- Finally, double-click on it and set the Base to Hexadecimal and the Value Data to 1 before clicking Ok to save the changes.
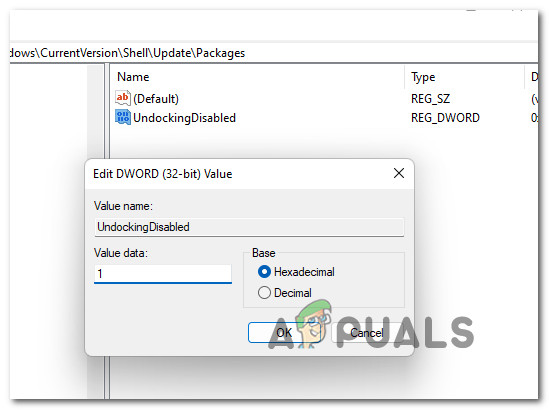
Creating the UndockingDisabled value - Once this modification has been enforced, reboot your PC to allow the changes to take effect
Note: If you want to revert this change at some point, simply delete the UndockingDisabled value from the same location.
If the problem is still you’re resolved as you’re still stuck with the Windows 10 aesthetic, move down to the next method below.
Reinstall Windows 11 with Keep files
If none of the methods above have been effective in your case, one last thing you can do that will most likely fix the problem and restore the Windows 11 taskbar is to reinstall Windows 11.
The good thing is, you won’t need to go for a clean install since other affected users have confirmed that it’s enough to mount a Windows 11 ISO and launch the setup.exe in order to force a Windows 11 Keep Everything Reset – this operation will only touch the system files while leaving everything else (apps and files) intact.
Once this particular procedure is finished, you should notice the new Windows 11 taskbar finally appearing the first time you boot after resetting.
Follow the guide below for step by step instructions on how to reinstall the Windows 11 system files only (using the Keep Everything procedure) and fix the taskbar issue on Windows 11:
- Follow these instructions to download the official Windows 11 ISO from Microsoft’s website.
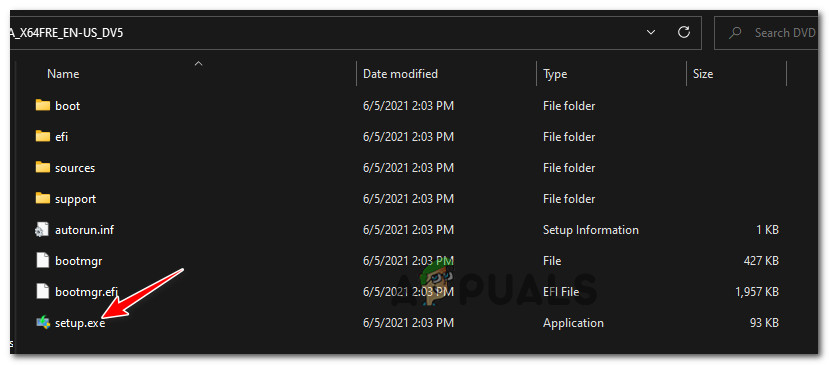
Note: If you already have a Windows 11 ISO that’s compatible with your installed version, skip this step and move directly to step 2. - Once you have your compatible Windows 11 ISO, mount it by double-clicking, then double-click on setup.exe from the root folder of the installation media.
Accessing the Setup screen - Once you’re prompted by the User Account Control (UAC), click Yes to grant admin access.
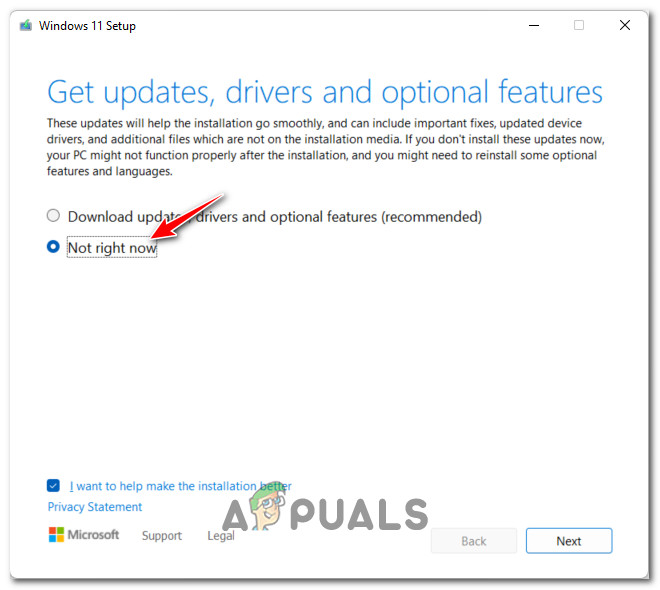
- At the first Windows 11 ISO prompt, select the Not right now toggle and hit Next to advance to the next screen.
Configuring the Windows 11 setup for a reset - At the next screen, click on Accept to agree with the EULA.
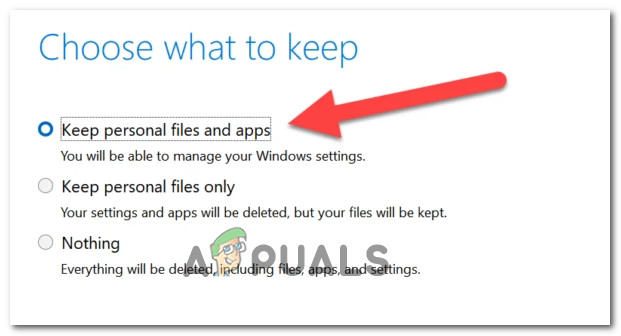
- Once you get to the next screen, choose the Keep personal files and apps toggle and hit Next to begin the process of resetting your Windows 11 files.
Keep personal files and apps - At the final confirmation prompt, click Yes to begin the process, then wait patiently (and don’t interrupt it) until the operation is complete.
- After the operation is finally finished, reboot your computer if you’re not instructed to do so and see if the problem is now fixed.


