Fix: Windows 11 Won’t Boot After Enabling Secure Boot
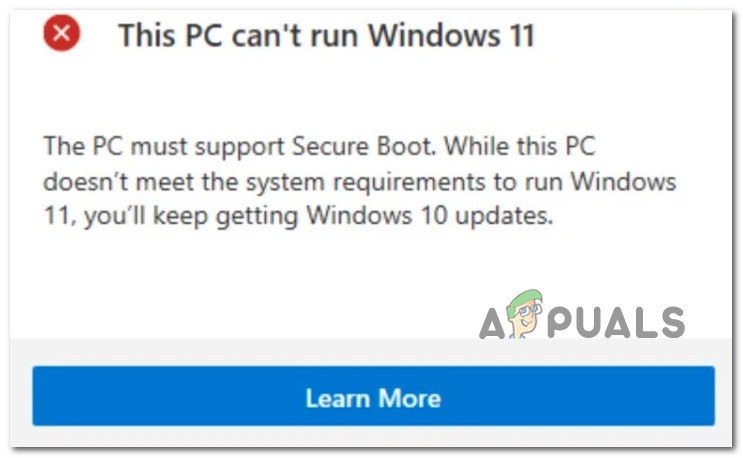
As it turns out, there’s an entire category of Windows 11 that are finding their PC unable to boot after they enabled secure boot. Most users are reporting that whenever they face this problem, they see their computer going back to the UEFI or BIOS screen with no error messages or logs. On the other hand, if Secure Boot is kept disabled, they get an error message saying that ‘This PC can’t run Windows 11‘.
After investigating this particular issue, it turns out that there are several different underlying causes why you might expect to deal with this issue on Windows 11. Here’s a shortlist of potential culprits that you should be aware of:
- Remnant boot data is perpetuated by motherboard battery – As it turns out, one of the most common causes that will prevent your PC from booting Windows 11 even after enabling Secure Boot is a scenario in which your motherboard battery (CMOS) is actually perpetuating a state in which your computer thinks that secure boot is not enabled (despite being enabled). In this case, you can fix the issue by taking out the motherboard battery and leaving it out for 10 minutes or so in order to clear the power capacitors. Some motherboards might have a dedicated switch to do this.
- Outdated BIOS version – There are documented scenarios where the main reason that was causing this type of issue was an outdated BIOS version that was not fully compatible with the new security protocols on Windows 11. To ensure that this is not the cause of the issue, you should be able to fix the problem by flashing your BIOS with the latest version available.
- Failing GPU – According to several affected users, this type of behavior can also be indicative of a dedicated GPU that is beginning to fail. In order to eliminate this scenario of your culprit’s list, simply disconnect your dedicated GPU and see if your PC boots successfully from the integrated GPU alternative.
- Outdated SSD drivers – If you’re experiencing this issue only when secure boot is enabled but you can boot normally when it’s not, one potential culprit is your SSD drivers fleet. In order to fix it, simply boot your computer and update your SSD driver fleet to the latest.
- Hotfix for boot glitch is not installed – Microsoft recently patched a booting defect caused by a bad Windows update that ended up corrupting the BMR data on certain computers running Windows 11. In order to fix this issue, you’ll need to install every pending Windows Update in order to apply the hotfix that resolves this issue.
- The partition style is incompatible – Windows can use the GUID Partition Table (GPT) partition style with Secure Boot. The drive is still in an unbootable MBR partition table when Secure Boot is enabled. The system boots up without any issues if Secure Boot is disabled. You must change your data or disks from MBR to GPT in order to support Secure Boot and make your computer bootable with that feature activated.
- Boot data inconsistency – Some claim that the issue was fixed by manually booting their computer from the bootx64.efi file. The files with the EFI extension are boot loaders. This system partition is typically hidden and lacks a drive letter. However, by following a set of instructions, you can usually boot from it.
- MBR data is mismanaged due to an external drive – As it turns out, you might experience this type of behavior if you have an external HDD (slave) connected to your Windows 11 PC via a USB port. In this case, you can get the issue resolved by temporarily disconnecting it (until after the booting procedure is complete).
- System file corruption – According to some affected users, this problem can also be caused by some kind of inconsistency produced by some type of system file corruption. In order to rectify this problem, you should consider performing SFC and DISM scans, and even going for a repair install or a clean install procedure if the issue persists.
1. Reset BIOS by removing the CMOS Battery
It turns out that one of the most frequent reasons why Windows 11 won’t start on your PC even after Secure Boot is enabled is a situation where your motherboard battery (CMOS) is actually maintaining a condition in which your computer believes that secure boot isn’t enabled (despite being enabled).
In this situation, you can resolve the problem by removing the motherboard battery and letting it sit outside for around 10 minutes to clean the power capacitors. There may be a switch specifically for this purpose on some motherboards.
Note: The CMOS (Complementary Metal Oxide Semiconductor) battery, also referred to as the RTC or the NVRAM, is in charge of storing data ranging from the time and date to the hardware configurations of the system. The computer’s inability to maintain the date and time between startup typically indicates an issue with this component.
If you are dealing with a replaceable CMOS battery, you should be able to resolve the problem by clearing the CMOS battery or replacing it entirely in case the problem reappears if this scenario applies to your current situation and you suspect that you’re dealing with a malfunctioning CMOS battery.
Here is a little guide on how to accomplish it:
Important: No matter what version of Windows you are using or how your computer is set up, the procedures below should work.
- Make sure your PC is totally unplugged from any power sources and turned off.
- Next, take off the side cover and put a static wristband on your dominant hand (if you have one).
Note: This grounds you to the computer’s frame and balances the electrical energy, ensuring that you don’t cause any harm to the PC’s internal parts. - Locate the CMOS battery on your motherboard by taking a look at it. It shouldn’t be challenging to find. Once you spot it, pry it out of the slot with your fingernail or a non-conductive screwdriver.
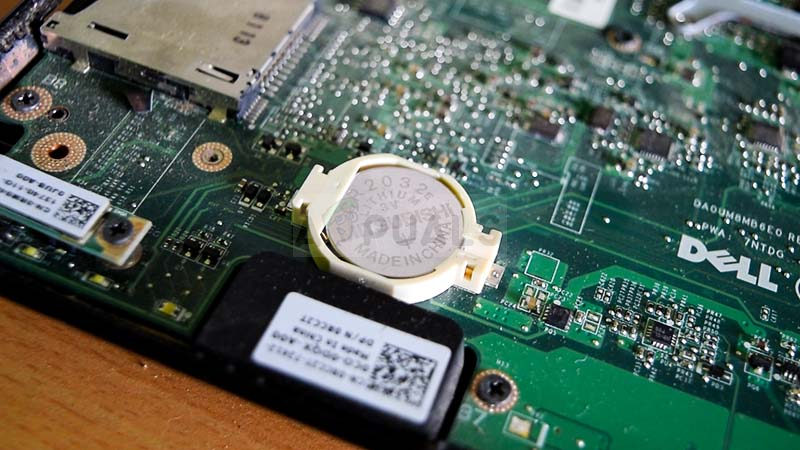
Removing the CMOS Battery Note: To be sure you’re not working with a bad battery, replace the present one with a spare CMOS battery if you have one available. If you don’t, make sure to properly clean it to make sure no debris is preventing connectivity with the motherboard.
- Before putting everything back together and turning on your computer again, wait a few minutes to give the power capacitors enough time to clear themselves.
- Boot your PC up once again and see if the issue is now fixed.
If the same kind of issue is still occurring, move down to the next potential fix below.
2. Disconnect external hard disks
It turns out that if you have an external HDD (slave) linked to your Windows 11 PC through a USB port, you might encounter this kind of behavior. In this situation, momentarily disconnecting it will solve the problem (until after the booting procedure is complete).
As strange as it may sound, this kind of error might be caused by an external hard disk.
Although we are unable to provide you with a comprehensive list of circumstances in which this issue can arise, you can try disconnecting all auxiliary devices in order to isolate the issue’s root cause. It turns out that a power draw issue can also cause this specific problem.
You may encounter this secure boot-related inconsistency if your power supply unit (PSU) is insufficient to support all of your USB-connected devices because your system is unable to supply the necessary power.
Specific configurations with external hard drives connected through USB have been observed to experience this.
If this scenario describes your current circumstance, try taking off the external hard drive (if necessary), and observe if you still get erratic disconnections.
You have two options moving forward if the error stops happening after you disconnect external devices and you want to solve it without sacrificing any functionality at all:
- Purchase a higher PSU that can supply your USB-connected devices with additional power. Naturally, desktop arrangements are the only ones where this is applicable.
- Purchase a USB hub that has an external power source. If you’re having trouble with a laptop or ultrabook, this should be the solution. The demand on your PSU will be reduced by USB hubs with built-in power adapters.
If the investigations you’ve just performed aren’t pointing towards a PSU-related issue, continue to the next way below if this one isn’t appropriate for your situation or didn’t change anything.
3. Update your BIOS version
There are cases when this type of problem was primarily brought on by an out-of-date BIOS version that was insufficiently compliant with Windows 11’s new security procedures. You should be able to resolve the issue by flashing your BIOS with the most recent version available to be sure that this isn’t the root of the problem.
You should also investigate your BIOS as another potential offender. Several affected customers claim that after updating their BIOS firmware to the most recent version, the issue was completely fixed. This method has largely been shown to work well with ASUS PCs.
Particularly on older motherboards, it’s uncommon for an outdated BIOS version to result in system instability.
Remember that updating your motherboard’s BIOS isn’t as challenging as it once was because all of the main motherboard manufacturers now offer flashing software that enables you to do so without needing to be particularly tech-savvy.
The best course of action is to visit the website of the company that makes your motherboard and browses the Drivers Download section for a BIOS upgrading program. ASUS has E-Z Flash, MSI has MFlash, Gigabyte has @BIOS Live Update, and so on.
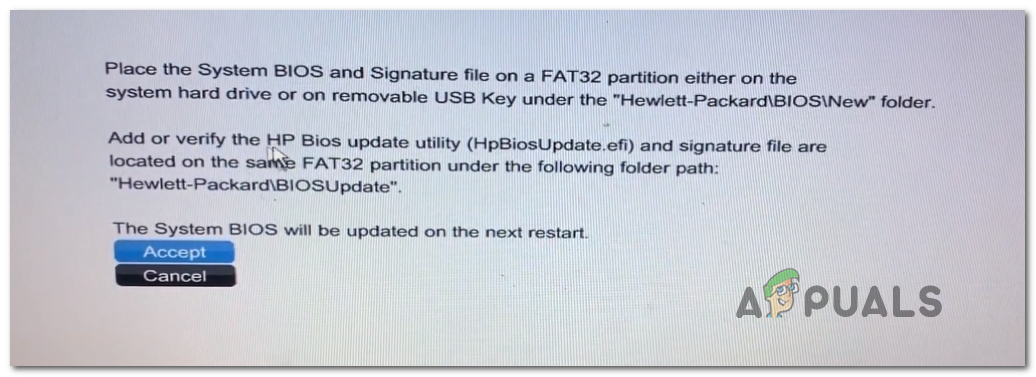
Note: Regardless of the manufacturer of your BIOS, read the official documentation in its entirety before starting the update process. If you carry out this process incorrectly, you run the risk of bricking the hardware, which calls for the help of a trained professional.
Upgrade your BIOS to the most recent version by following the on-screen instructions, and then restart your machine to see if you are able to boot while the secure boot feature is enabled.
Try the next technique below if you don’t already have the most recent BIOS for your motherboard or if the previous one didn’t work for you.
4. Booting with the integrated GPU
This kind of behavior, according to multiple impacted customers, may also be a sign that a dedicated GPU is starting to malfunction. Simply unplug your dedicated GPU and check to see whether your computer boots correctly using the integrated GPU alternative to exclude this possibility from your list of possible culprits.
There is no universal way of forcing your PC to boot directly from the integrated component, but you can do this easily by physically taking out your dedicated GPU and booting without it.
Although replacing a GPU is a straightforward process, it is crucial to use caution before handling your computer to prevent any harm.
IMPORTANT: When using a computer, it is advised to wear an anti-static band around your wrist or ankle. Usually, an alligator clip is on the other end of the anti-static band. Make sure the alligator clip is attached to something, perhaps an unpainted area of your computer case. Using one of these bands is an easy method to assure that you won’t damage anything while working on your PC because static electricity can harm or even destroy computer components.
To force your computer to boot using the integrated GPU component, follow these steps to remove your dedicated GPU:
- Ensure that your computer is completely off and disconnected.
- To access the internal components of your desktop, remove the side panel.
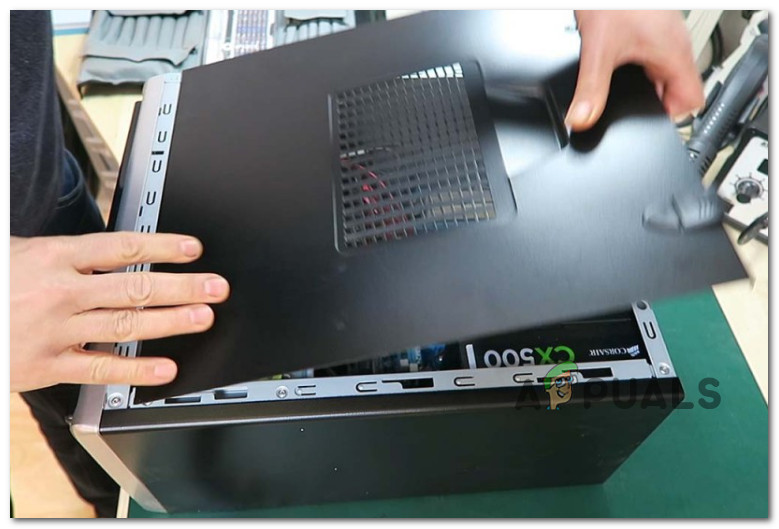
Remove the side panel Note: Typically, you may do this by using a screwdriver or your hands to loosen the screws holding the side panel in place.
- A six- or eight-pin PCIe cable is generally used to connect graphics cards to power supplies, providing the necessary electricity for the graphics card to function.
- To disconnect the PCIe cable from the graphics card, push the cable’s clip down and carefully pull the cable away.
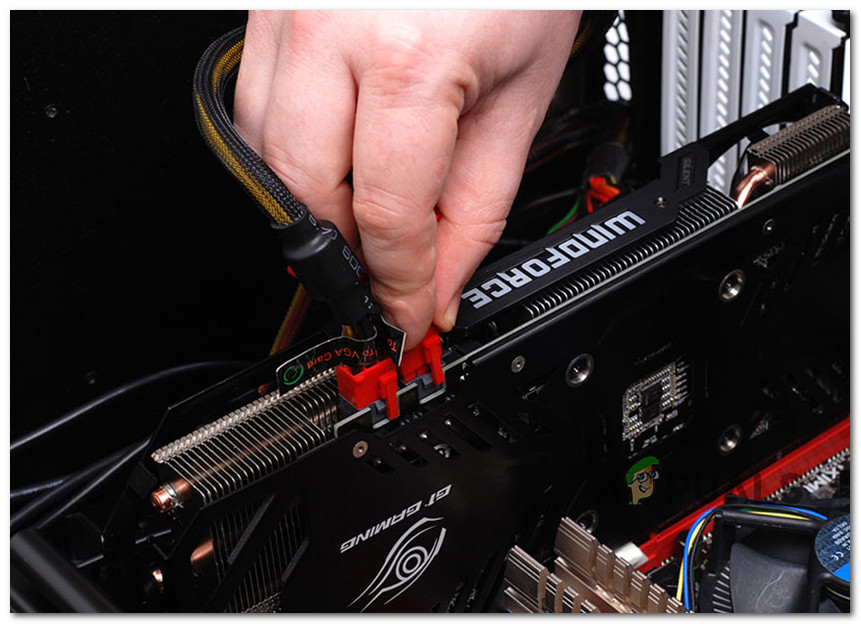
Disconnect the power cable - In addition to being held in place by the motherboard, the graphics card will also be kept firmly in place in the computer since it will be bolted into the case’s rear.
- Remove the screws holding the GPU to the case’s back.
- The graphics card will still be inserted into a PCIe slot after being unplugged from the enclosure. You can see a tiny clip holding the card to the motherboard if you look down at the area where the card is inserted into the motherboard.
- To release the card, depress the clip.
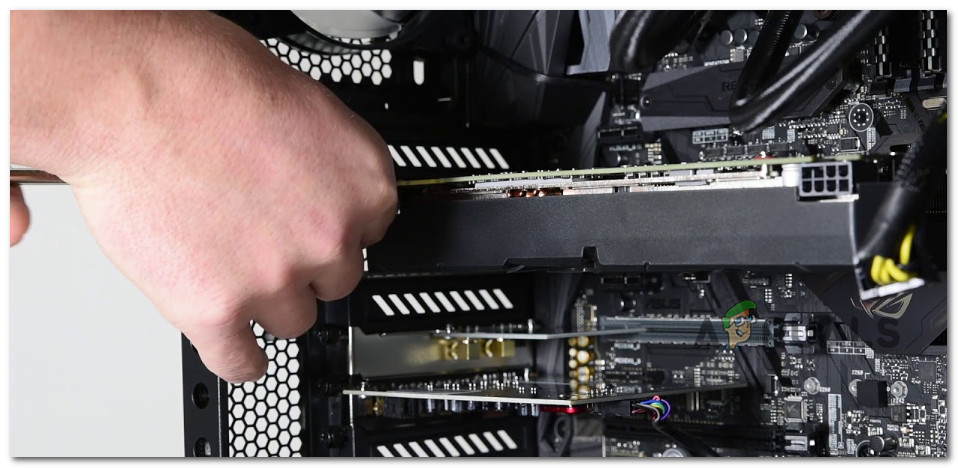
Remove the GPU - Gently remove the graphics card from the slot after depressing the clip.
- Put your PC case back on and boot it normally. At this point, your PC will be forced to boot from the integrated GPU component.
If this method was not applicable or you’re looking for a different fix, move down to the next method below.
5. Update SSD Drivers
Your SSD driver’s fleet may be the root of the problem if you only encounter it when secure boot is enabled but can boot normally otherwise. Simply reboot your computer to fix it, then install the most recent SSD drivers.
Check to see if there is an updated driver available if you are using a more recent SSD model. Go to Device Manager and take note of the SSD model number. As soon as you have that, check the internet to see if there is a new firmware update that you can install.
Important: Be cautious to back up your data before updating the firmware on your SSD. All data on your disk will be deleted if the firmware is updated.
Many users reporting this kind of error have confirmed that after following the methods below to determine their SSD model number and using it to find a newer driver version, they were eventually able to boot with secure boot enabled.
Note: You can also try updating the SSD firmware through Device Manager, but don’t get your hopes up as there is very little chance you’ll discover a newer version.
To update the SSD firmware to the most recent version, follow these steps:
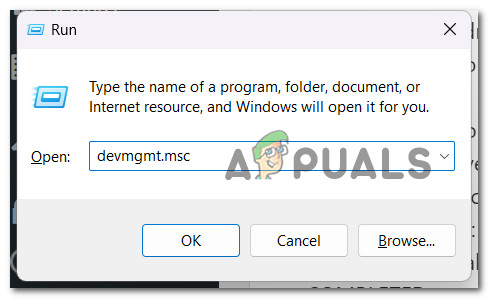
- To bring up the Run dialog box, press the Windows key + R. Then, to launch Device Manager, type “devmgmt.msc” into the text box and click Ctrl + Shift + Enter.
Accessing Device Manager - Select Yes to give admin access at the User Account Control.
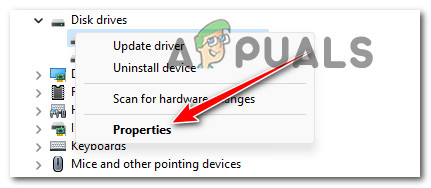
- After entering Device Manager, expand the Disk Drives drop-down box.
- After that, from the context menu, right-click the SSD disk in the Disk Drives section and select Properties.
Accessing the Properties screen of your SSD entry - Click on the Details tab at the top of the Properties screen after you’ve arrived there.
- Select Hardware IDs from the Property menu on the Details tab.
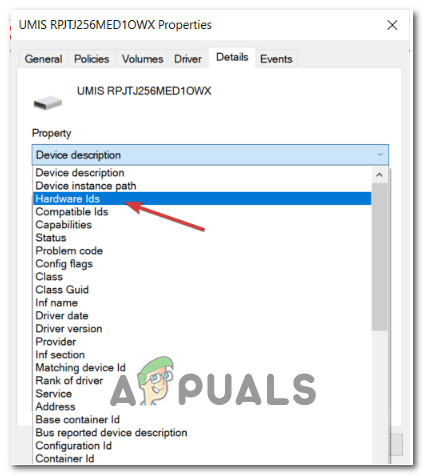
Accessing the Hardware ID property - The model number of the drive you’re now using and the firmware version displayed beneath its name can both be found in the upper part of the drive.

Take note of the model and firmware model - Check to see if there is a new firmware version available for your SSD by searching online (or on the SSD manufacturer’s or PC manufacturer’s website).
- Download the new version if it’s available, then install it by following the on-screen directions.
- Restart your computer after installing the latest SSD firmware to determine if the problem has been resolved.
- Make sure that Secure Boot is turned on, then boot your PC once again and see if the procedure completes successfully.
If the same kind of issue is still occurring, move down to the next method below.
6. Install Pending Windows Updates
Microsoft recently fixed a booting issue brought on by a problematic Windows update that resulted in the BMR data being corrupted on some Windows 11-powered devices. You’ll need to install every pending Windows Update before you can apply the patch that fixes this problem.
If you own a high-end PC, you should ensure that you have the most recent Windows infrastructure updates installed. If you frequently see this problem when using your PC for resource-intensive tasks, you should take this action.
Bringing Windows 11 up to date may allow you to finally boot in secure mode if your Windows installation is missing any crucial infrastructure updates.
Read on for detailed instructions on how to accomplish this on Windows 10 or Windows 11:
- Using the Run dialog box is one approach to launching Windows Update. To do this, press the Windows key + R on your keyboard. The Run dialog box will appear as a result.
- Next, type “ms-settings:windowsupdate” in the text field and hit Enter. This will direct you to the Settings app’s Windows Update tab.
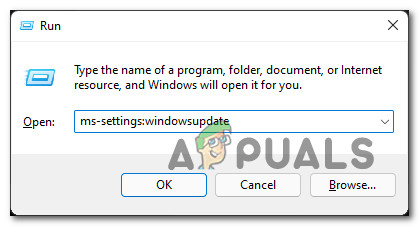
Accessing the Windows Update screen Note: You could see a prompt requesting your consent to proceed if you haven’t adjusted the UAC settings. To give your consent in this instance, click Yes.
- After opening the Windows Update tab, select Check for Updates from the menu on the right.
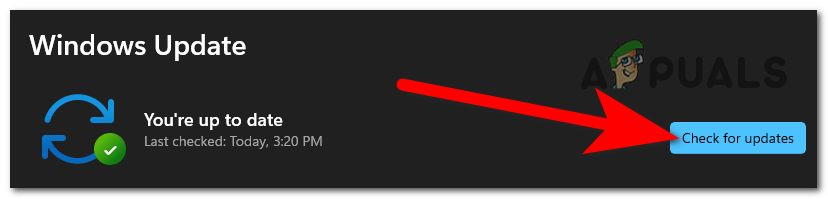
Check for Updates - After the update has finished downloading, select Install Now to begin a local installation.
- Restart your computer to see if the issue has been resolved.
If Secure Boot is still preventing you from starting your computer, continue to the method after that.
7. Convert Disk from MBR to GPT
It turns out that if you have an external HDD (slave) linked to your Windows 11 PC through a USB port, you might encounter this kind of behavior. In this situation, momentarily disconnecting it will solve the problem (until after the booting procedure is complete).
You are prepared to change your drive to the new GPT format if you have already determined that your current partition is an MBR type and your system can boot from UEFI.
But bear in mind that there is no turning back once you’ve taken this action. Without losing any of your data, you cannot convert a GPT format back to MBR.
Important: The drive has occasionally sustained damage during the conversion procedure. Even though there is a very small risk that this will happen, if you have any important files that you are concerned about losing, we encourage you to make a comprehensive system backup.
If you want to go for this conversion in order to resolve the secure boot issue, follow this article here to do it without any data loss.
If you want to go for a different approach or this method was not applicable, follow the remaining instructions below.
8. Boot from bootx64.efi file or bootia32.efi
Some claim that manually starting their PC from the bootx64.efi file resolved the problem. Boot loaders are the files having the EFI extension. Usually hidden and without a drive letter, this system partition. You can typically boot from it, though, by according to a set of instructions.
The EFI file may be found in the following place under the Windows Boot Manager if your computer is UEFI-based:
\EFI\boot\bootx64.efi
\EFI\boot\bootia32.efi
Note: The bootx64.efi file is present on your firmware if your operating system is a 64-bit version of Windows. Users of the 32-bit Windows OS, on the other hand, will discover the bootia32.efi file on their firmware.
See whether your computer will start up manually using the bootx64.efi or bootia32.efi files. You must access the BIOS boot settings in order to manually boot your machine from EFI files.
All of your computer’s boot choices are available there. For each type of computer, a distinct key is required to access the boot options menu. As a result, you must consult your user manual. Check to see if the bootx64.efi or bootia32.efi file is present. If so, use that file to start your machine.
If this method was not helpful in your particular case and you’re still unable to boot while the secure boot feature is enabled, try the next method below.
9. Deploy SFC and DISM Scans
According to some users, this issue can happen as a result of system file corruption, which is a high resource-consuming feature of Windows.
You can resolve this problem by utilizing SFC (System File Checker) and DISM (Deployment Image Servicing and Management) to identify the damaged files that are the root of the problem and swap them out with working copies.
Even while these two utilities have many things in common, they approach removing corruption in distinct ways. SFC downloads clean files using a locally stored archive, whereas DISM uses a Windows Update add-on
Start by initiating an SFC scan if you want to try this approach.
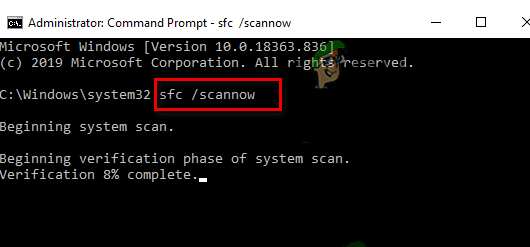
Run a DISM scan after restarting your computer when the first SFC scan is finished.

Note: Make sure your Internet connection is steady before starting the DISM operation.
If any of these tools end up identifying and resolving an underlying corrupt issue, replace corrupted files by following the on-screen instructions.
Restart your computer when the DISM scan has successfully finished checking if the issue has been resolved.
10. Clean install or repair install
If you’ve attempted every possible workaround and your computer still won’t boot up with Secure Boot enabled, there’s a good possibility that a system file dependency utilized by the backup sequence has been damaged.
The following step would be to perform a clean install or repair install in order to reset every Windows component (in-place repair).
Although a clean install is a simple option, you should be aware that it will erase all personal data from your OS drive. For this procedure, you won’t require suitable installation media.
Repair install (also known as “in-place repair”) is more time-consuming but has the advantage of updating every component that can be corrupted without wiping away the data from any apps, games, documents, or private media that are saved on your OS disk. You will require appropriate installation discs for this procedure.


