Windows 10 Store Won’t Open (Fix)
AppXManifest does not Exist
The Windows Store was included by Microsoft in Windows 8 after receiving a massive amount of requests from users. It was indeed necessary to integrate a store, as Windows’ strong competitor – namely, Apple – already had a running App Store within OSX. However, the Windows Store was not highly appreciated due to the limited number of applications available for download, as well as the presence of some bugs. Consequently, in Windows 10, Microsoft made internal changes and removed several known bugs from the Windows Store to ensure smoother operations.

However, Windows 10 users have reported that the Windows 10 Store does not open. Even after restarting the PC, the store still does not seem to open. This is quite problematic, as users do not want the store to shut down, as it restricts them from downloading games and apps available exclusively on the store. Therefore, I will be guiding you on how to get your Windows 10 Store back to working order.
The Reason Behind the Issue: ‘Windows 10 Store Won’t Open’.
The culprit behind the non-opening of the Windows 10 Store might be the local caches of the Windows Store, which are stored in a specific folder inside the C directory. The other major reason might be related to the Windows Store’s registries that can become corrupted due to some conflicts within the operating system.
Solutions for Fixing the Issue ‘Windows 10 Store Won’t Open’:
This issue can be resolved by resetting the Windows Store caches or deleting the local caches created by the Windows Store. This issue can also be resolved by re-registering the Store application using PowerShell. Follow the methods below to get it done.
But before proceeding with the solutions, ensure that you have a working internet connection, and your system’s date/time is accurate. Additionally, verify that there is sufficient free space on your system drive. Also, turn off any VPN/proxy and see if the problem is resolved.
1. Reset the Windows Store cache.
This problem can be resolved by resetting the Windows Store Cache using the Command Prompt. On the other hand, you can also delete the local caches stored within the directory.
Reset the Windows Store Caches Using the Command Prompt:
- Open an elevated Command Prompt by right-clicking on the Start menu icon and selecting Command Prompt (Admin) from the list.
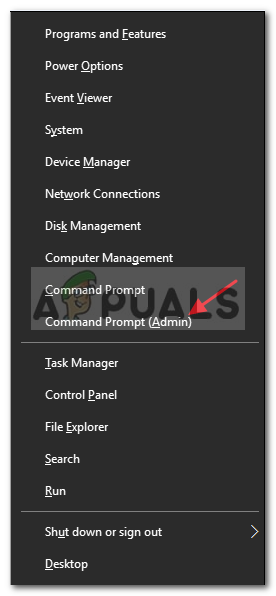
Choose Command Prompt (Admin) - Type the command “wsreset.exe” inside the Command Prompt and press the Enter key to execute. This will clear the cache of the Windows Store. After it is complete, recheck the Store application to see if it works or not.

1.1 Delete the Local Caches Manually.” This sentence is already grammatically correct.
- To delete the local caches of the Windows Store, navigate to the folder mentioned below and delete all the files present within it.
Note: Make sure that your hidden files are visible. To make them visible, open any folder and go to the View panel located at the top. Inside the View panel, check the box labeled ‘Hidden items‘, and this will unhide the files in the folder.C:\Users\user_name\AppData\Local\Packages\Microsoft.WindowsStore_8wekyb3d8bbwe\LocalCache
The user_name would be different based on your user account, so keep that in mind.
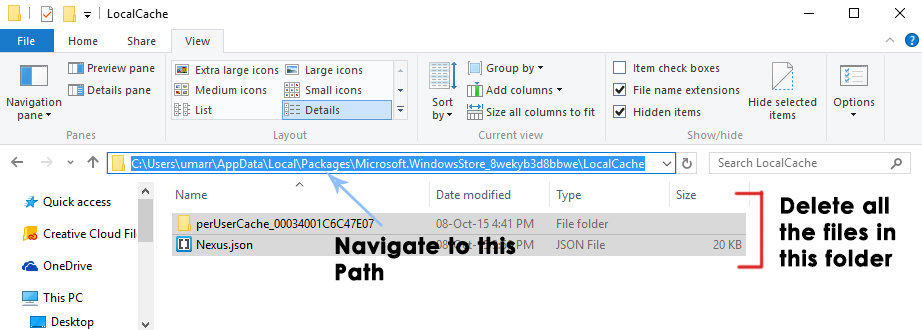
Open Cache Folder of Windows Store - After deleting the files, open the store application again to see if the problem is resolved.
2. Register with the Windows Store.
- Open the PowerShell application by searching for it using Cortana, and run it as an administrator.
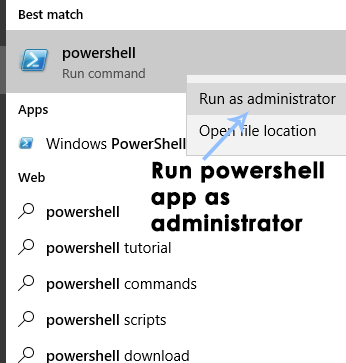
Open PowerShell as Administrator - Inside PowerShell, run the following command to re-register the Windows Store application: paste this command and press the Enter key on the keyboard to execute and re-register the store Command:
powershell -ExecutionPolicy Unrestricted Add-AppxPackage -DisableDevelopmentMode -Register $Env:SystemRoot\WinStore\AppxManifest.xml

- Reopen the store to check whether it works or not.
3. Cannot find AppxManifest.XML or AppxManifest.XML does not exist.
The “AppXManifest does not exist” issue arises if your system’s Windows installation is corrupt or outdated. Furthermore, a corrupt Windows user profile may also cause the problem. The issue occurs when a user runs a PowerShell or Command Prompt cmdlet, typically to update an application or program, but encounters the “AppXManifest missing” issue accompanied by the following message:
Cannot find the path ‘C:\AppXManifest.XML’ because it does not exist.

Before proceeding, check if performing a system restore (if a restore point exists) resolves the AppXManifest issue. Also, ensure that your system time and time zone are properly configured.
3.1 Update your system’s Windows to the latest release.
The AppXManifest missing issue may arise if the Windows on your system is outdated, as it can create incompatibility between the essential OS modules. In this context, updating the Windows on your PC to the latest release may solve the AppXManifest problem.
However, before proceeding, ensure that no firewall (such as Privatefirewall, which is known to hinder the update process and cause issues) obstructs the update process. It would be best to remove any third-party firewalls and temporarily disable the Windows Firewall until the update process is complete.
- Manually update the system’s Windows and check if that resolves the AppXManifest issue.
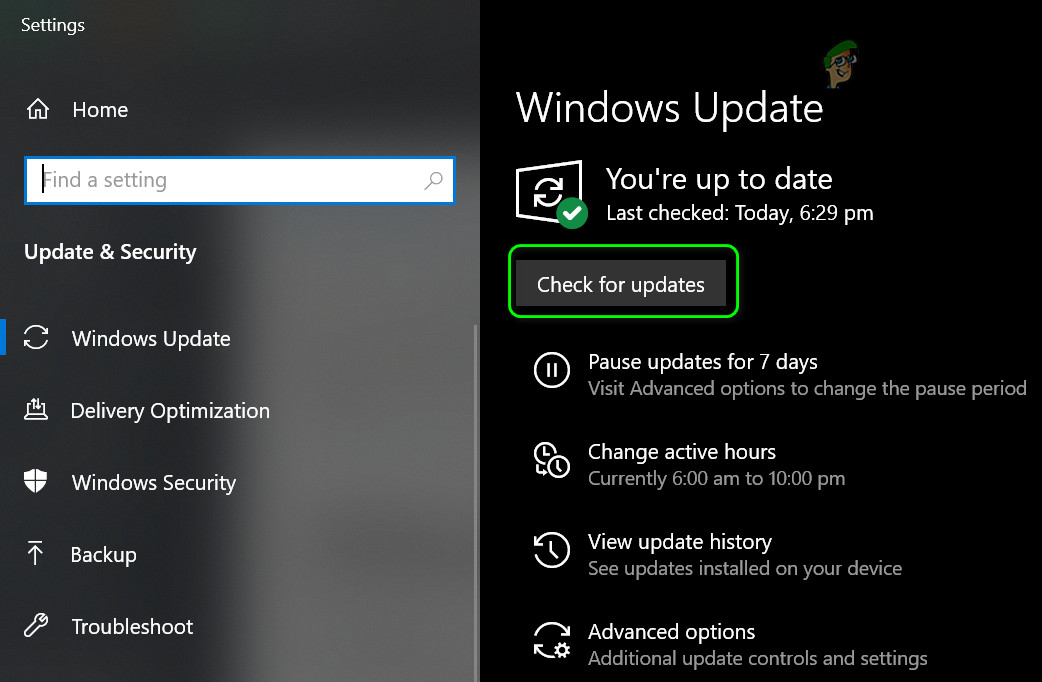
Check for Windows Updates - If not, then navigate to the Windows 10 download page using a web browser and click on the “Update Now” button to download the file.
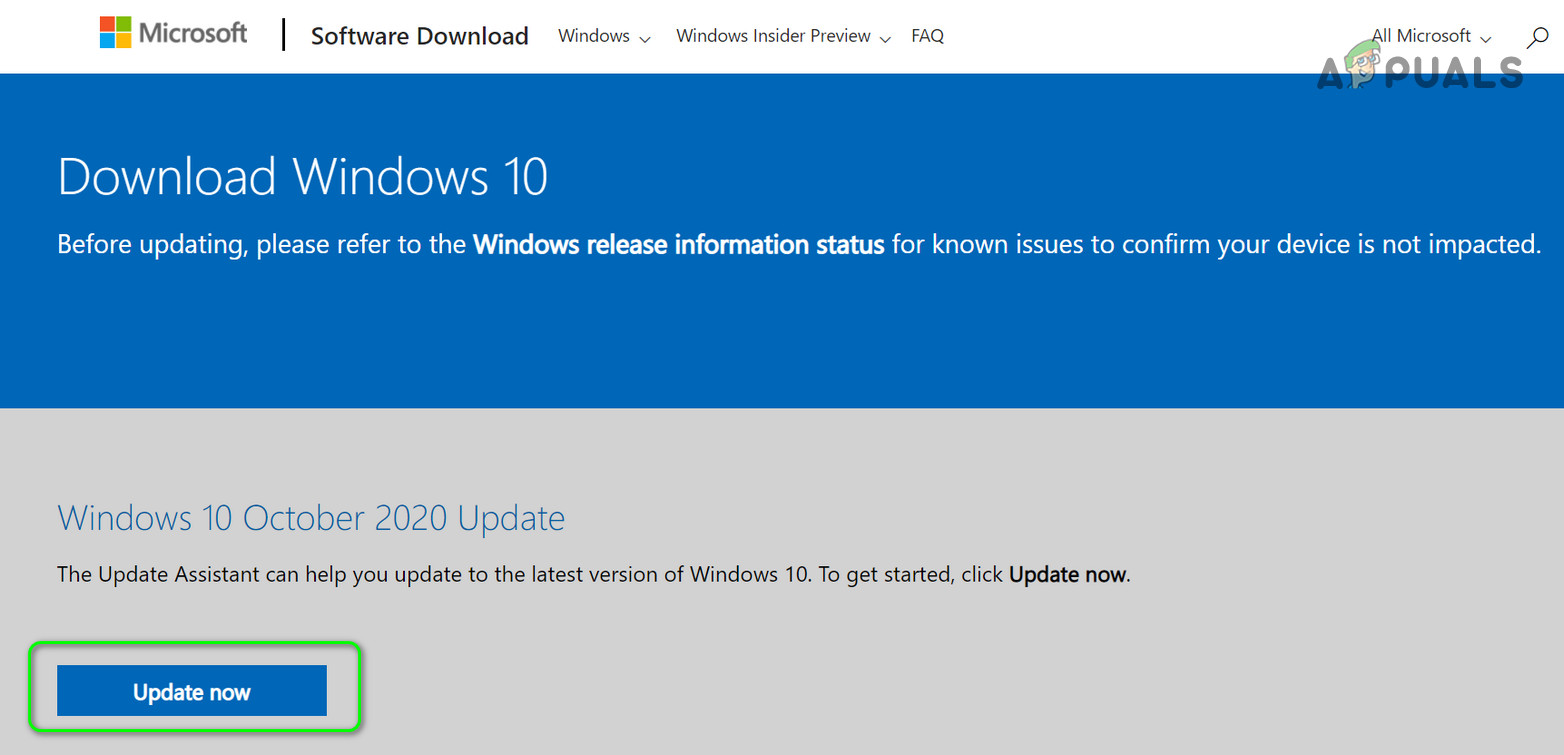
Click on the Update Now in the Windows 10 Download Page - Once the download is complete, launch the downloaded Update Assistant with administrator privileges and follow the prompts to complete its operation.
- Once completed, reboot your PC and check if the Appxmanifest issue has been resolved.
- If the issue persists, then navigate to the Microsoft Update Catalog website and search for the latest KB updates for your system (you can find information about the updates on official Microsoft/OEM websites).
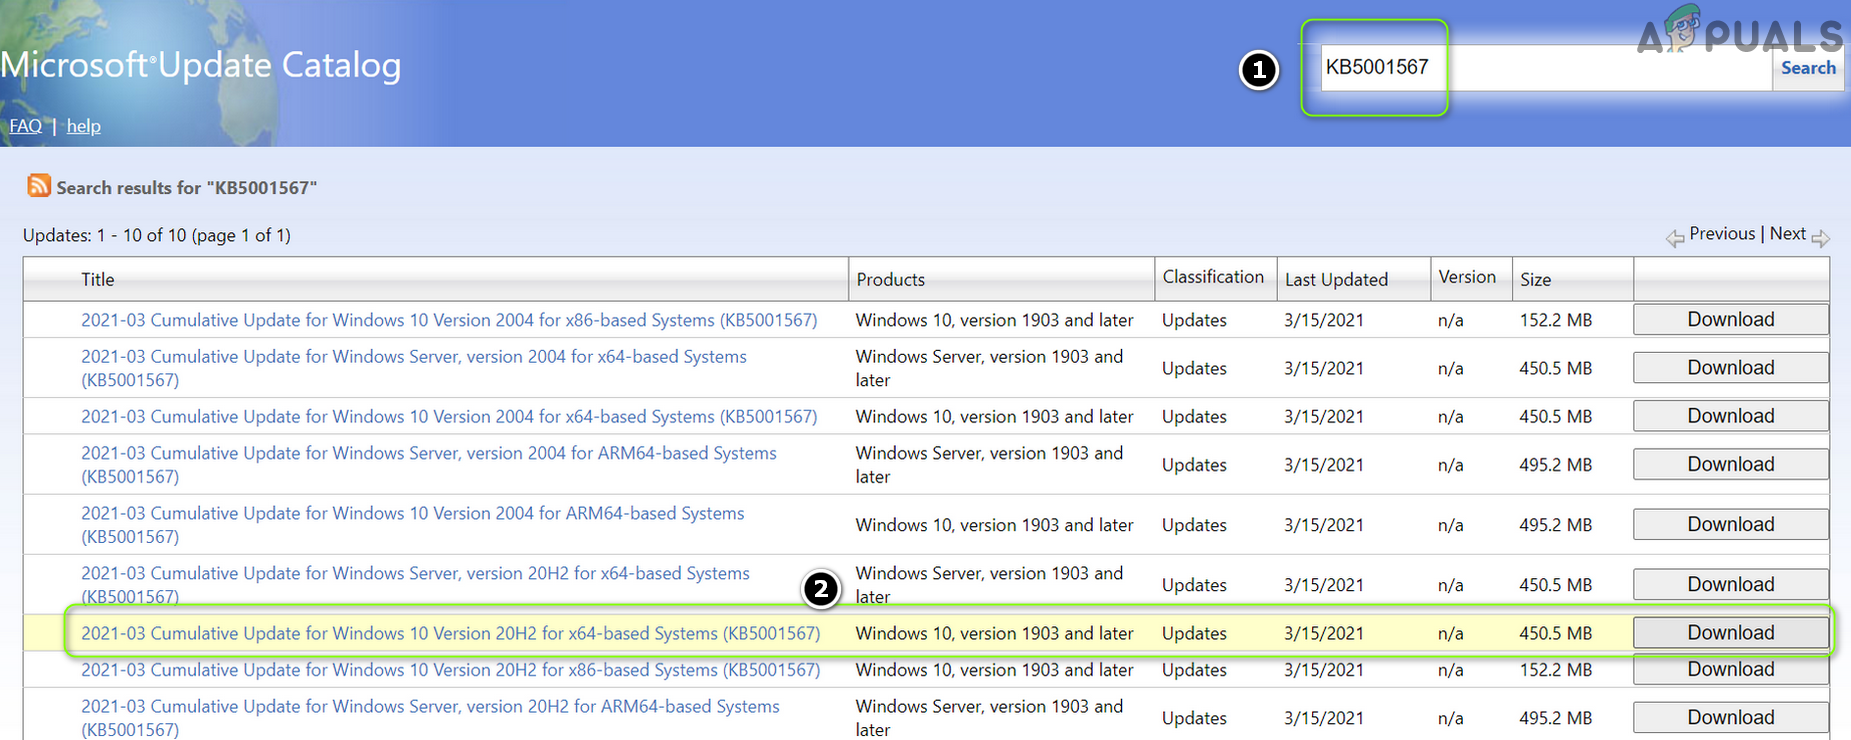
Search and Download the KB Updates from the Update Catalog Website - Now, download and install the KB updates (as an administrator) applicable to your system to check if that resolves the missing Appxmanifest issue.
3.2 Reset and Re-register the Application (For example, Microsoft Store)
You may encounter the issue at hand if the installation of an application like Microsoft Store is corrupt. In this case, resetting and re-registering the Microsoft Store may solve the problem.
- Click Windows, type ‘WSRESET,’ and right-click on it. Then, select ‘Run as Administrator.’
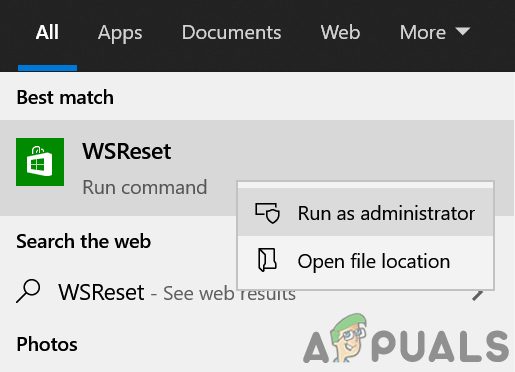
Launch WSReset as Administrator - Once the reset process is complete, check if the AppXManifest issue has been resolved.
- If not, right-click on Windows and choose PowerShell (Admin).
- Now, execute the following in PowerShell:
Set-ExecutionPolicy Unrestricted
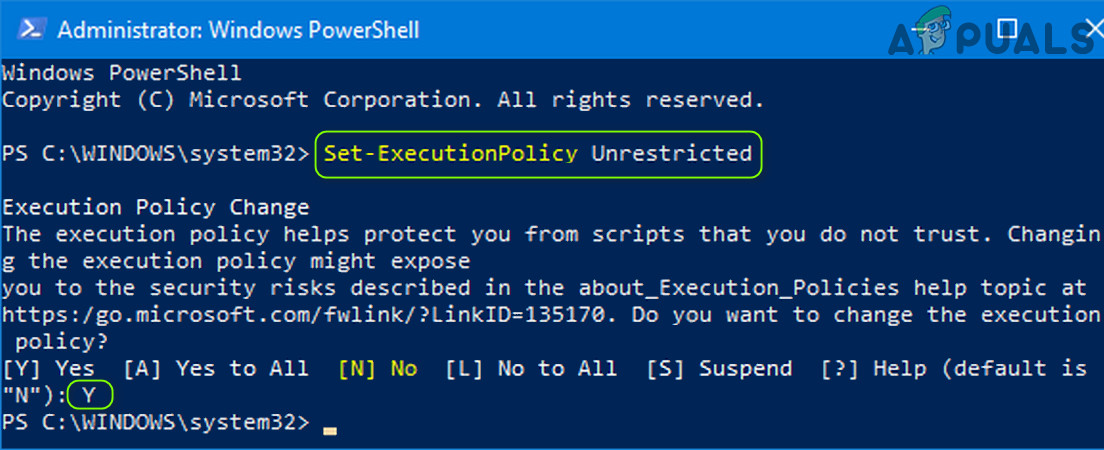
Set Execution Policy to Unrestricted in the PowerShell - When asked to, press Y, and then execute the following instructions:
Get-AppXPackage -AllUsers | Foreach {Add-AppxPackage -DisableDevelopmentMode -Register "$($_.InstallLocation)\AppXManifest.xml"} - Now, reboot your PC, and upon reboot, check if the missing AppXManifest issue is resolved.
- If not, please check whether executing the following in PowerShell (Admin) resolves the AppXManifest issue:
Get-AppXPackage -AllUsers |Where-Object {$_.InstallLocation -like "*SystemApps*"} | Foreach {Add-AppxPackage -DisableDevelopmentMode -Register "$($_.InstallLocation)\AppXManifest.xml"}
3.3 Perform the SFC and DISM scans.
You may encounter the missing AppXManifest issue if the essential system files are corrupt. In this case, performing the SFC and DISM scans may solve the AppXManifest problem.
- Perform an SFC scan of your system (this may take some time to complete, so try it when you can spare your PC for a while).
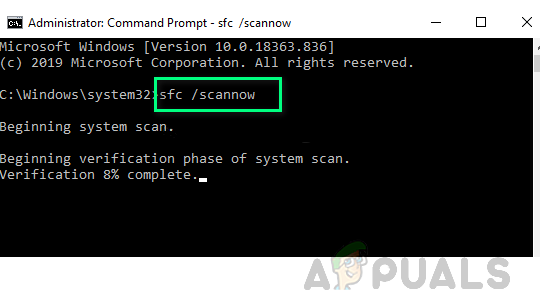
Perform an SFC Scan - If the issue persists, then check if executing the DISM scan resolves the problem. However, make sure you execute the following command in the process:
dism /online /cleanup-image /restorehealth
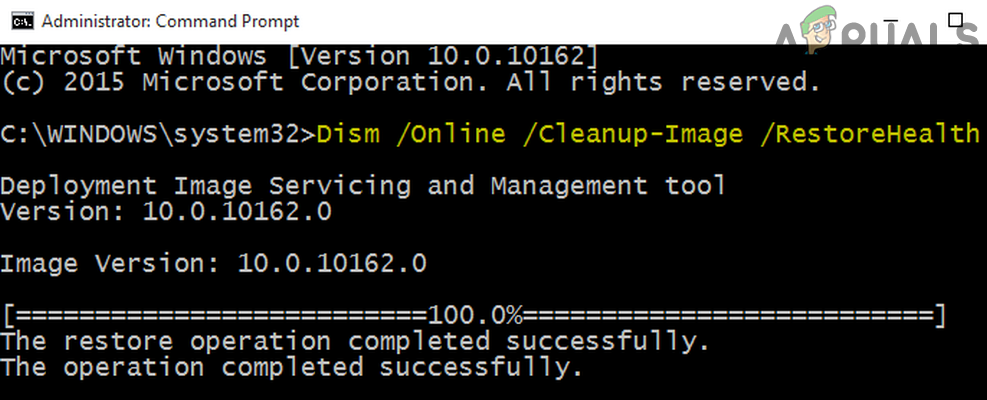
Use the DISM Command to RestoreHealth
3.4 Create a New Windows User Account.
The AppXManifest file might be missing from the Windows user account if the user profile itself is corrupted. In this scenario, creating a new Windows user account (preferably local) may solve the problem.
- Create a new user account (preferably a local administrator) on your system and check whether it is free from the AppXManifest issue.
- If so, then you may transfer the data from the corrupt user profile to the newly created profile (a tedious task).
3.5 Take Ownership of the WindowsApps Folder
You may encounter the missing AppXManifest issue if the permissions of the WindowsApps folder are not properly configured. If this is the case, taking ownership of the WindowsApps folder may solve the problem.
- Right-click on Windows and select “Run.
- Now, navigate to the Program Files directory by copying and pasting the following
%programfiles%
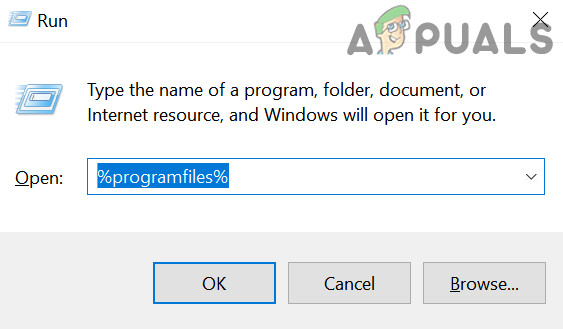
Open the Program Files from the Run Command Box - Then, right-click on the WindowsApps folder (if the folder is not shown, make sure that viewing of Hidden Files and Protected Operating System Files is enabled), and choose Properties.
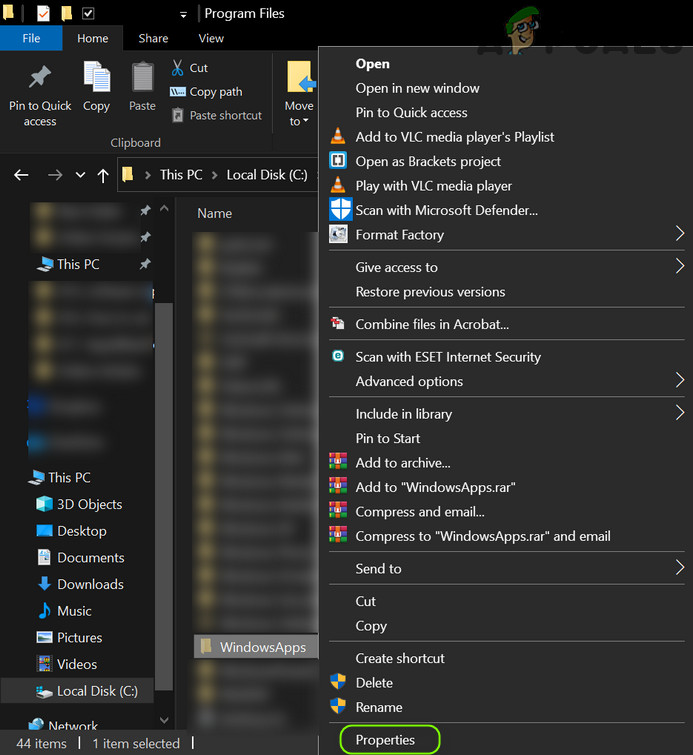
Open Properties of the WindowsApps Folder - Now, head to the Security tab, and near the bottom of the Properties window, click on the Advanced button.

Open Advanced Security Properties of the WindowsApps Folder - Then, click on “Change” (in front of “Owner”), and in the next window, click on the “Advanced” button.
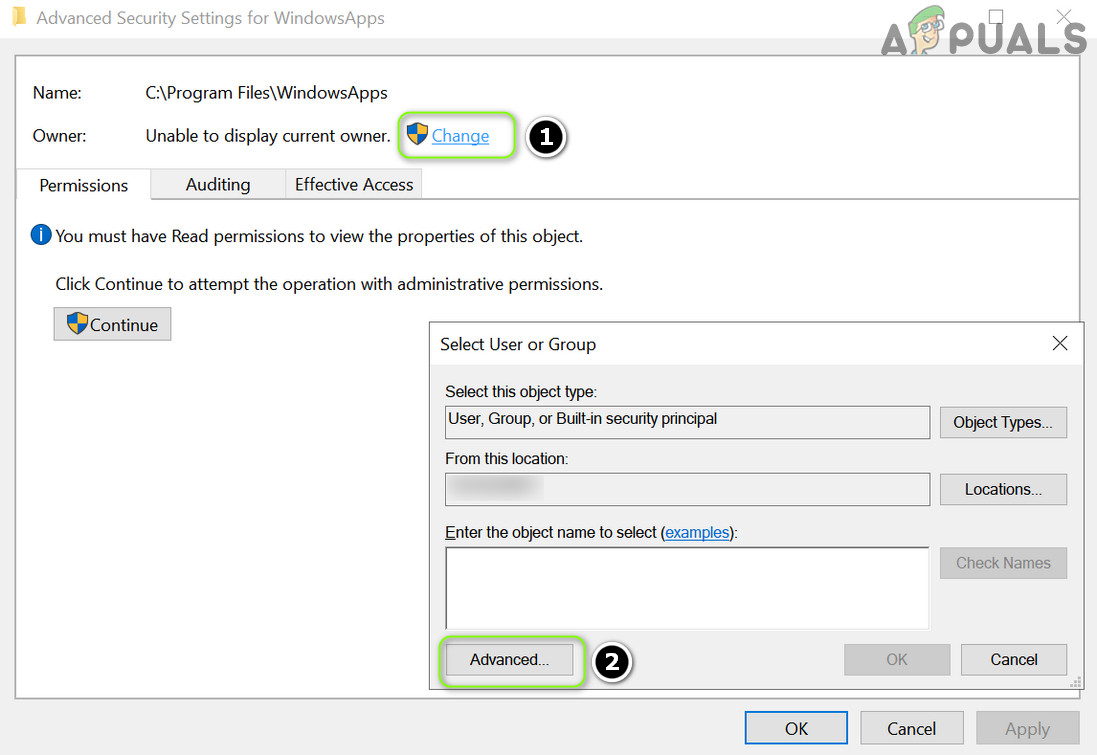
Click Change in Front of Owner and Open Advanced - Now, click on the “Find Now” button and double-click on your user’s name.
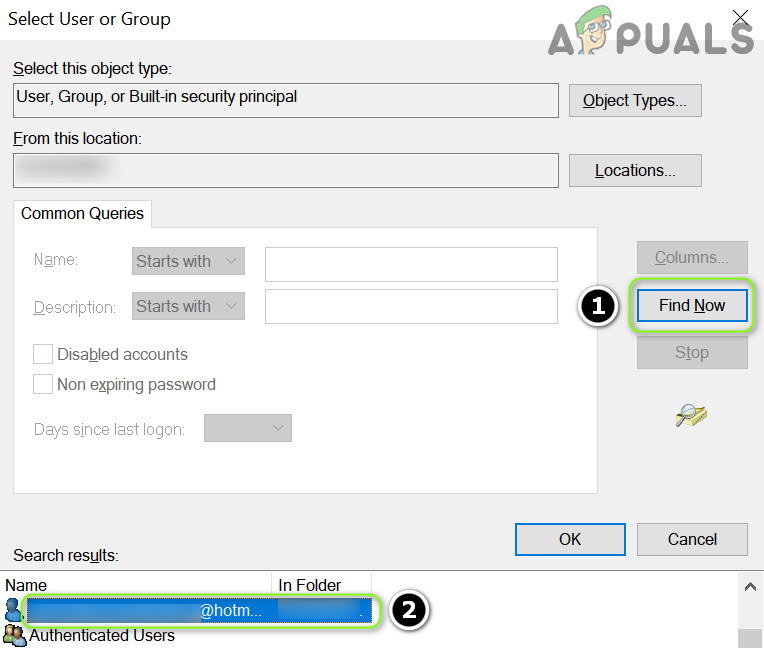
Click the Find Now Button and Double-click on Your Username - Then apply your changes and checkmark the option “Replace Owner on Sub-containers and Objects.
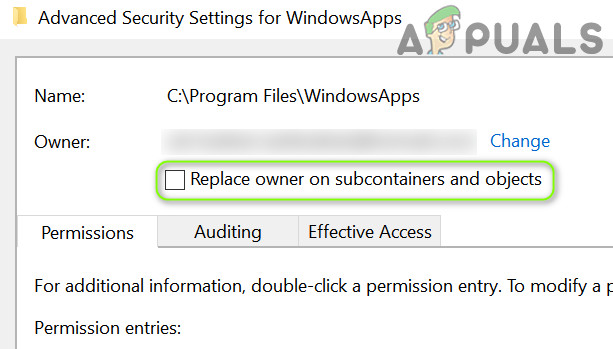
Checkmark “Replace Owner on Sub-containers and Objects” and Apply Your Changes - Now, apply your changes and right-click on the WindowsApps folder again.
- Then, select Properties, and afterwards, ensure that your user account, All Application Packages, and System accounts have full control of the WindowsApps folder.
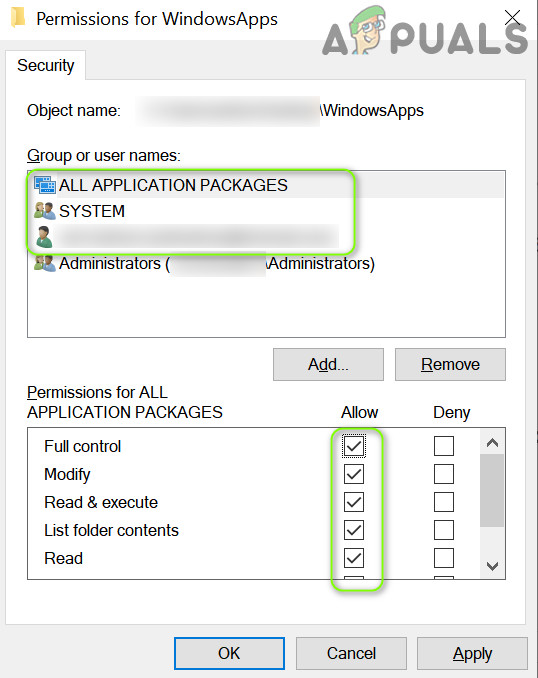
Allow your user account, All Application Packages, and System accounts Full Control on WindowsApps Folder - Now, reboot your PC and check if the missing AppXManifest issue is resolved.
3.6 Perform an In-place Upgrade.
If none of the solutions worked for you, performing an in-place upgrade may resolve the missing AppXManifest issue.
- Launch a web browser and navigate to the Windows 10 download page.
- Now scroll down and click on ‘Download Tool Now‘ (under ‘Create Windows 10 Installation Media’).
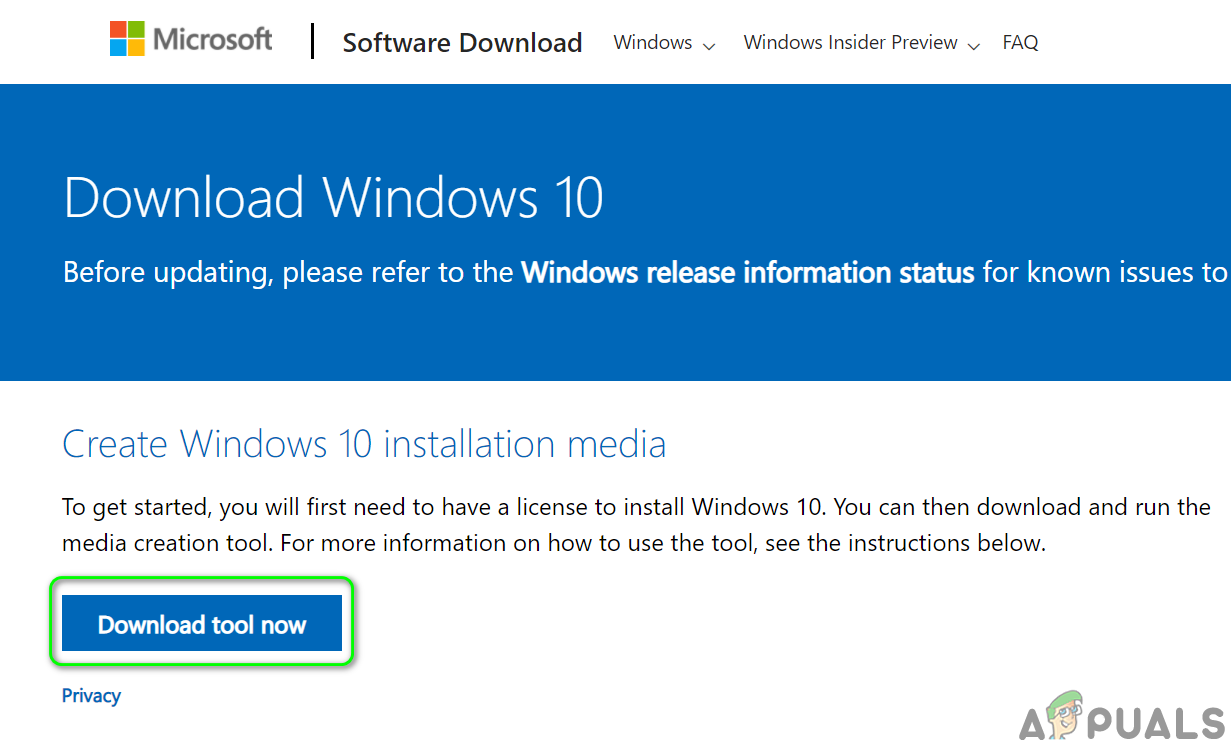
Download Media Creation Tool Now - Then, let the download complete, and once completed, launch the downloaded file as an administrator.
- Now, accept the license terms, and on the “What Do You Want to Do” page, select “Upgrade This PC Now.
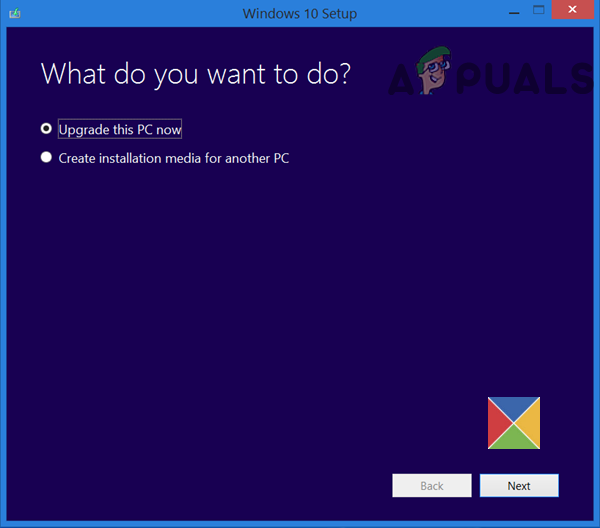
Select Upgrade This PC Now - Then, click on ‘Next‘ and follow the prompts to download the essential OS files (this may take some time to complete).
- Now, select “Keep Windows Settings, Personal Files, and Apps” and click on “Install.
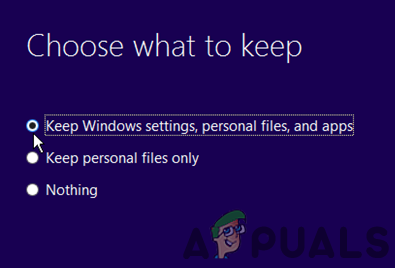
Keep Windows Settings, Personal Files, and Apps - Allow the installation process to finish (this may take some time, so make sure not to power off the system during the process).
- Now, reboot your computer, and upon reboot, hopefully, the missing AppXManifest issue will be resolved.
If the issue persists, then you may have to perform a clean installation of Windows.