What is ASGT.exe and Should I Remove It?
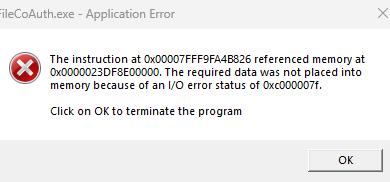
Some Windows users have been reaching us with questions regarding a suspicious process called ASGT.exe that they discovered inside Task Manager. While some users are reporting high-usage problems associated with this process, others are complaining that they constantly have to deal with random restarts and they discovered that asgt.exe is signaled out for the cause in the Reliability report of the Event associated with the system crash.
As it turns out, this executable not exclusive to a certain Windows version as it’s reported to appear on Windows 7, Windows 8.1 and Windows 10.
What is ASGT.exe?
The genuine ASGT.exe is a software component that belongs to ASUS GPU Tweak and is signed by ASUS Corp. This is by no means an essential Windows process and can be disabled specifically if it’s known to create problems.
The parent application of the ASGT.exe process (ASUS GPU Tweak) is a utility program mainly used for overclocking graphics cards included on ASUS PCs and laptops. The initial launch of this utility can be dated back to 2011, but since then it has evolved exponentially with more than 30 updates that increased the number of compatible GPUs that can be adjusted with this tool.
ASGT is an acronym that stands for ASUS Graphics Processing Unit Tweak. The default location of this process is either in C:\Windows\System32 or inside C:\Windows\SysWOW64\.
In most cases, the parent application behind the ASGT.exe process will get installed optionally or is bundled with ASUS graphic card drivers.
Is ASGT.exe Safe?
As explained above, the genuine ASGT.exe process doesn’t pose any security risk as it’s signed by a trusted publisher. In case you’re experiencing high resource-usage, you can disable the process without fear of other repercussions.
But before labeling this process as legitimate, you might need to do some investigations. Keep in mind that most succesfull malware products nowadays are designed to camouflage themselves as trusted processes in order to avoid getting picked by security suites. To ensure that you’re not dealing with a malicious process, it’s highly recommended that you first dig in to find more about the ASGT.exe process.
First, look for evidence of the parent application – If ASUS GPU Tweak is not installed on your computer, then there’s no reason why you should see this process running in your Task Manager (unless it’s a remnant file).
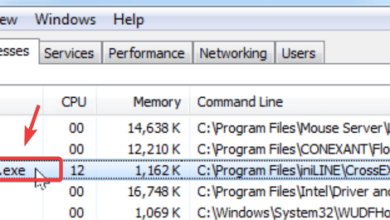
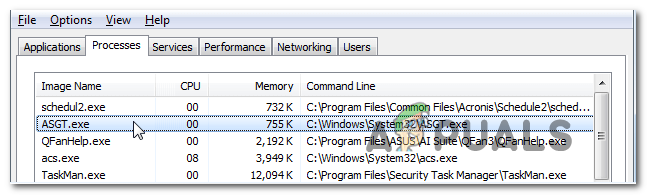
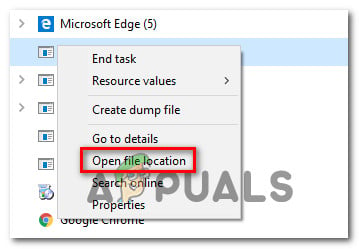
If ASUS GPU Tweak is installed, you should see if the process is located in the correct folder. To find this out, open Task Manager (Ctrl + Shift + Enter) and select the Processes tab. Once you get there, scroll down through the list of Background processes and locate ASGT.exe. Once you see it, right-click on it and choose Open File location from the newly appeared context menu.
If the revealed location is different than C:\Windows\System32 or C:\Windows\SysWOW64\ and you didn’t install ASUS GPU Tweak in a custom location, then the chances of dealing with a malicious file are high.
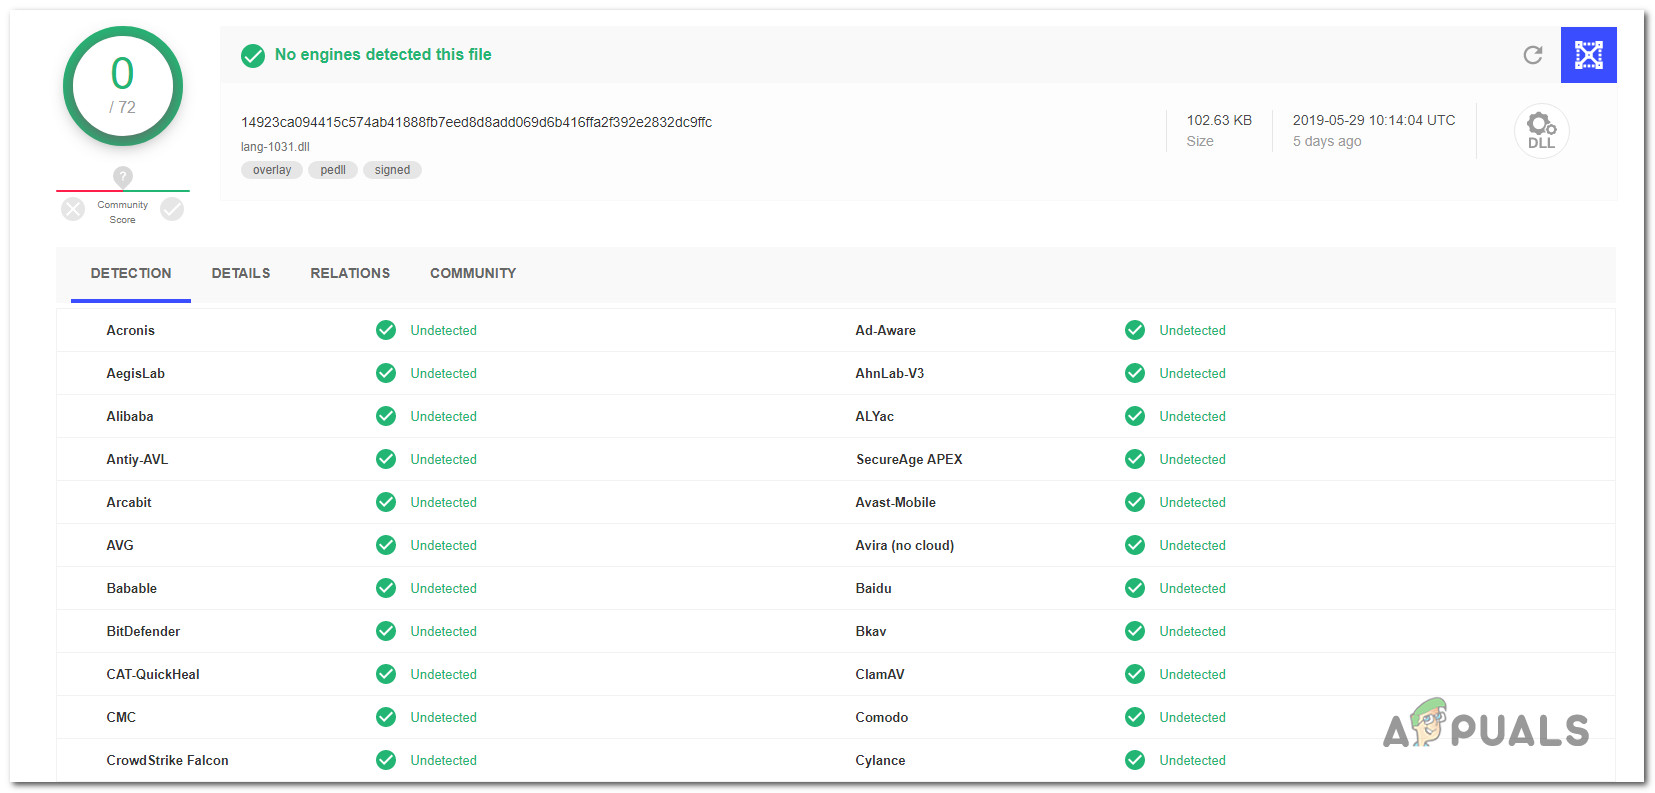
In this case, we recommend that you submit the file to a reliable virus database so it gets analyzed for any malicious evidence. There are several services that will allow you to do this, but if you’re looking for something reliable that doesn’t require a paid subscription, we recommend Virustotal.
To submit the file to VirusTotal for analysis, all you got to do is visit this link (here) from your browser, upload the file and wait for the analysis to complete.
If the analysis didn’t reveal any inconsistencies, skip the next section and move directly to the ‘How to stop crashes caused by ASGT.exe’ section.
But on the other hand, if you see evidence of a virus infection from the analysis results, move down to the next section directly below for a mitigation strategy.
Dealing with the Security threat
If the investigations you performed above raised some suspicions that you might be dealing with some type of virus infection, it’s highly recommended that you scan your system in order to get rid of any type of infection that might have affected the ASGT.exe process.
Keep in mind that in case you are actually dealing with cloaking-malware, not all security suites will be equipped to identify and quarantine them. If you already pay a monthly and premium subscription for a scanner, go ahead and initiate a scan with it.
But if you’re looking for a free alternative that doesn’t involve any other investments, we recommend doing a deep scan with the free version of Malwarebytes. Past dealings with this kind of virus have confirmed that this security scanner is great at identifying the majority of cloaking-malware that designed to pose as system resources.
In case you’re unsure of how to initiate a deep scan with Malwarebytes, follow this article (here).

In case the scan managed to identify and quarantine the selected items, go ahead and restart your computer, then move down to the next section below and see if the crashes associated with the ASGT.exe file are still happening.
How to Stop Crashes caused by ASGT.exe
If you performed the investigations above and you confirmed that you’re not dealing with a malicious process (or you eliminated the infection), use your computer normally and see if the same crashes associated with the ASGT.exe file are still occurring.
Keep in mind that since the ASGT.exe process is in no way essential to your operating system, you can safely disable the process with no repercussions to the functionality of your WIndows. In this particular case, you can disable the ASGT.exe without having to uninstall the parent application.
But before you do this, if you’re using the ASUS GPU Tweak utility to boost your GPU frequencies, consider the fact that the overclocked frequencies are actually responsible for your system crashes. Tone down your custom GPU frequencies and see if the crashes stop occurring.
If bringing down the frequencies didn’t make a difference, here’s a quick guide on stopping the crashes caused by the ASGT.exe file by disabling the process:
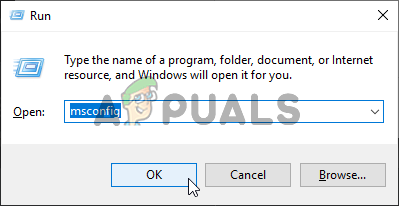
- Press Windows key + R to open up a Run dialog box. next, type ‘msconfig’ and press Enter to open up the System Configuration menu. Once you arrive inside the UAC (User Account Control) prompt, click Yes to grant administrative privileges.
Opening System Configuration - Once you’re inside the System Configuration window, select the Services tab from the list of available processes and locate the ASUS GPU Tweak (ASGT.exe) process and simply uncheck the checkbox associated with it before clicking Apply to save the changes.
- After you manage to disable the service, restart your computer and see if the unexpected system crashes have stopped at the next system startup.
If you’re looking for a permanent solution that involves deleting the ASGT.exe along with the parent application, move down to the next method below.
How to Remove ASGT.exe
If the investigations you performed above have convinced you to the conclusion that you need to delete the ASGT.exe, keep in mind that you will not be able to do it without uninstalling the parent application.
If you only delete the ASGT.exe process conventionally from its location, ASUS GPU Tweak will likely regenerate it at the next system startup in order to perform its daily chores. In the event that you’re still experiencing high-resource consumption or some unexpected application crashes associated with the ASGT.exe, follow the instructions below.
Here’s a quick guide on uninstalling ASGT.exe along with the parent application (ASUS GPU Tweak) via Programs and Features window:
- Press Windows key + R to open up a Run dialog box. Once you’re inside the run box, type ‘appwiz.cpl’ inside the text box and press Enter to open up the Programs and Features window.

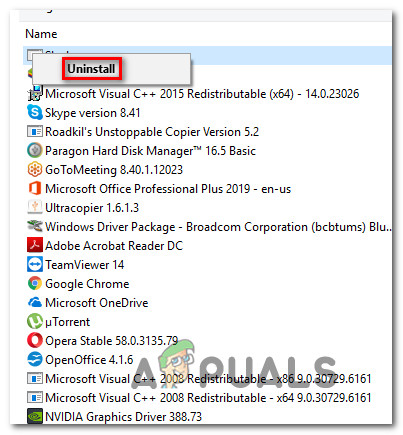
Typing in “appwiz.cpl” in the Run prompt - Once you manage to get inside the Programs and Features window, scroll down through the list of applications and locate the ASUS GPU Tweak utility.
- When you see the ASUS GPU Tweak utility, right-click on it and choose Uninstall from the newly appeared context menu.
Uninstalling ASUS GPU Tweak - Follow the on-screen prompts to complete the uninstallation, then restart your computer and see if the unexpected system crashes are resolved at the next system startup.