Creating Virtual Machines in Hyper-V 2019 using PowerShell
As we already said in one of the previous articles, the virtual machine can be created by using GUI (Graphical User Interface) or PowerShell. In most cases, where both options are available, an IT Administrator would prefer to go with GUI.
In this article, we will show you how to create a virtual machine in Hyper-V 2019 by using PowerShell. As you probably know, PowerShell is a tool integrated into Windows Clients and Windows Servers operating systems. It consists of thousands of cmdlets that are used to run specific commands.
As always, in order to explain the procedure, we will create a scenario. We are running Hyper-V 2019 as a role on Windows Server 2019. We want to create a virtual machine that will host Windows Server 2019 and which has 8 GB RAM and 50 GB of disk space. So, let’s start.
- Left click on the Start Menu and type PowerShell
- Right click on the PowerShell and then click Run as administrator
- Click Yes to confirm running PowerShell as administrator
- Type the command below into the PowerShell and press Enter to create the virtual machine. You will need to define the name of the virtual machine and location where you would like to store it. In our case, the name is WinSrv2019 and the location is on partition E:\VirtualMachines\.
New-VM -Name WinSrv2019 -MemoryStartupBytes 8GB -BootDevice VHD -NewVHDPath

E:\VirtualMachines\WinSrv2019.vhdx -Path E:\VirtualMachines -NewVHDSizeBytes 50GB -Generation 2 -Switch LAN
-

- In order to understand the commands that we executed, lets briefly describe what do they mean:
-New-VM – used to create a new virtual machine.

-Name WinSrv2019 – used o define the name of the virtual machine. In our case the name is WinSrv2019

-MemoryStartupBytes 8 GB – assigned RAM memory to the virtual machine

-BootDevice VHD -NewVHDPath E:\VirtualMachines\WinSrv2019.vhdx – used to create a new virtual hard disk (*.vhdx) on the certain location and declare it as a boot device

-Path E:\VirtualMachines -NewVHDSizeBytes 50GB – used to define the location where we will store newly created disk and what is total capacity. In this case, the capacity is 50 GB.

Generation 2 – define if we will use Generation 1 or Generation 2 VMs. Nowadays it is recommended to use Generation 2.

-Switch LAN – used to define which virtual network switch will be assigned to the virtual machine. In our case the name of the virtual switch is LAN. In the previous article, we explained what are virtual network switches and how to create them. Please check it on the link.
- To Map the ISO file to VM´s CD/DVD drive in order to install an operating system. The command is
Add-VMDvdDrive -VMName WinSrv2019 -Path E:\Software\ISO\WinSrv2019.iso

- In order to understand the commands that we executed, lets briefly describe what do they mean:
Add-VMDvdDrive – create new DVD Drive that will be used as the bootable drive

VMName WinSrv2019 – choose the virtual machine where you would like to add a new DVD drive. In our case the name of the virtual machine is WinSrv2019

-Path E:\Software\ISO\WinSrv2019.iso – choose the location where your ISO file is stored. Please note that you need to download ISO file from the official Microsoft or Linux website and then use it as installation media.
- Start the virtual machine by typing the command below:
Start-VM -Name WinSrv2019

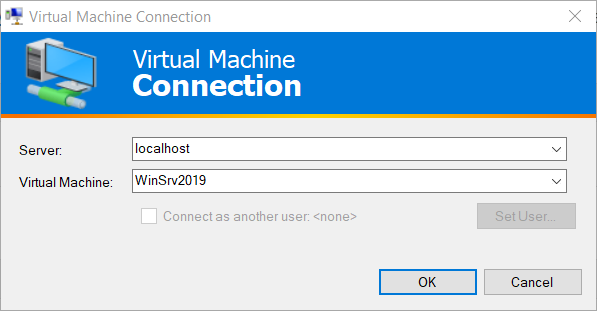
- Type the VMConnect.exe to start the Virtual Machine Connect. The VMConnect tool is used to connect to the virtual machine.
- Select the Server and Virtual Machine and then click OK. In our case Server is localhost and the virtual machine is WinSrv2019.


