How to Add a Virtual Disk to Hyper-V 2019
During the initial configuration of your virtual machine, we are also creating a virtual disk and assigning it to the virtual machine. It could happen that the virtual machine is running out of the resources or we need the second virtual disk where we want to store some data. The focus of this article is on the creation of the second virtual disk. Before we start with the procedure we will firstly create a scenario.
Scenario: We are running Windows Server 2019 on the virtual machine that has one disk of 40 GB. The software that we have just installed on the system partition requires a separate storage location to the backup configuration file, and it shouldn’t be network part, we would need to add an additional disk to the virtual machine. In order to do so, we will create a new virtual disk and prepare it for use. This procedure consists of three important steps:
1. Create a Virtual Disk
In the first step, we will create a virtual disk with a total capacity of 50 GB. Please follow the instructions.
- Login in the Windows Server 2019 or Hyper-V 2019 Core Server
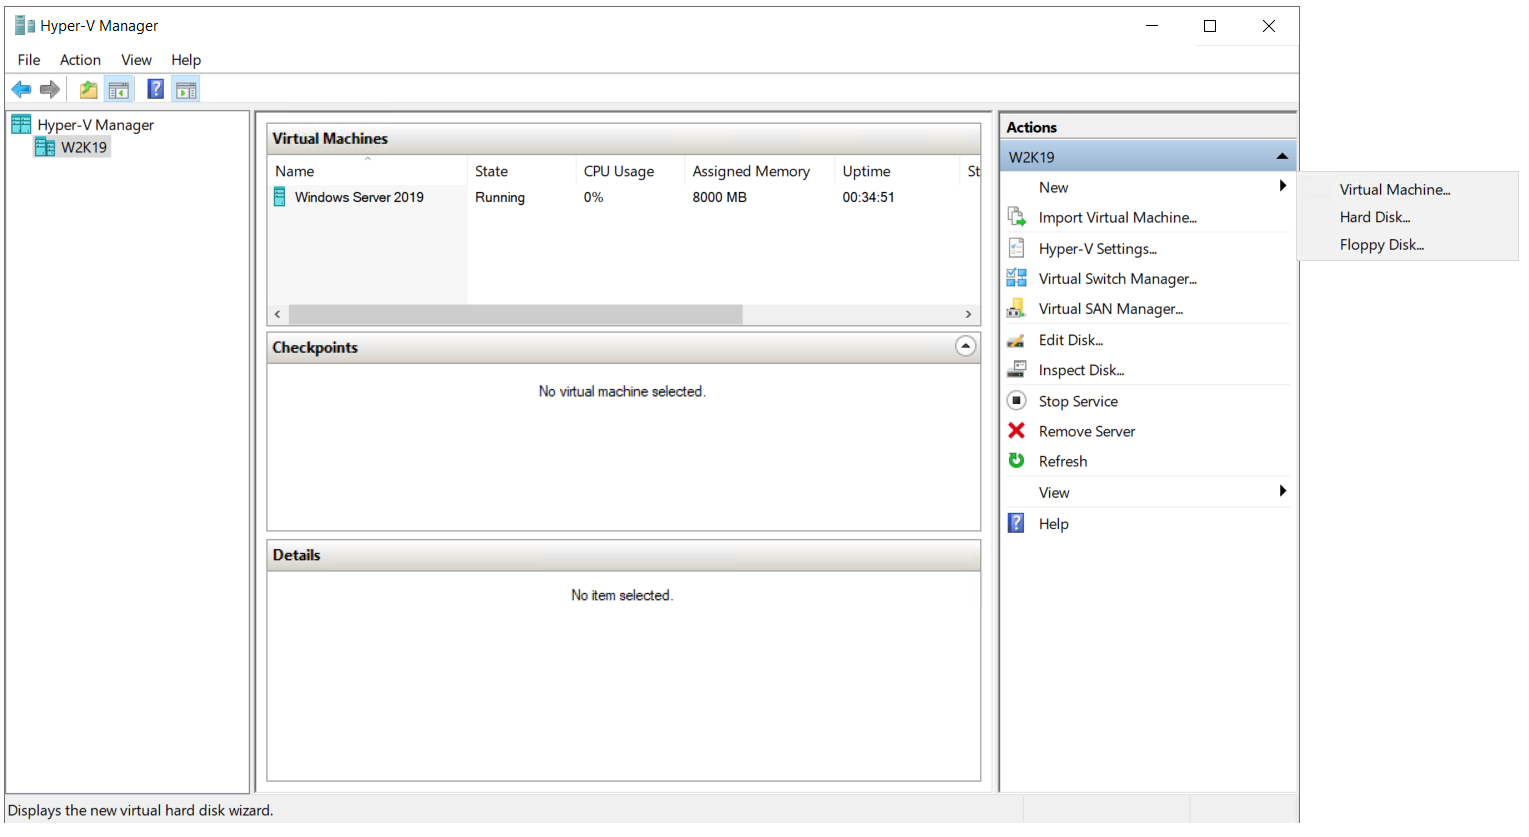
- Left-click on the Windows Menu and type Hyper-V Manager
- Open Hyper-V Manager
- Select your hypervisor
- On the left side of the window, under Action click New and then select Hard disk…
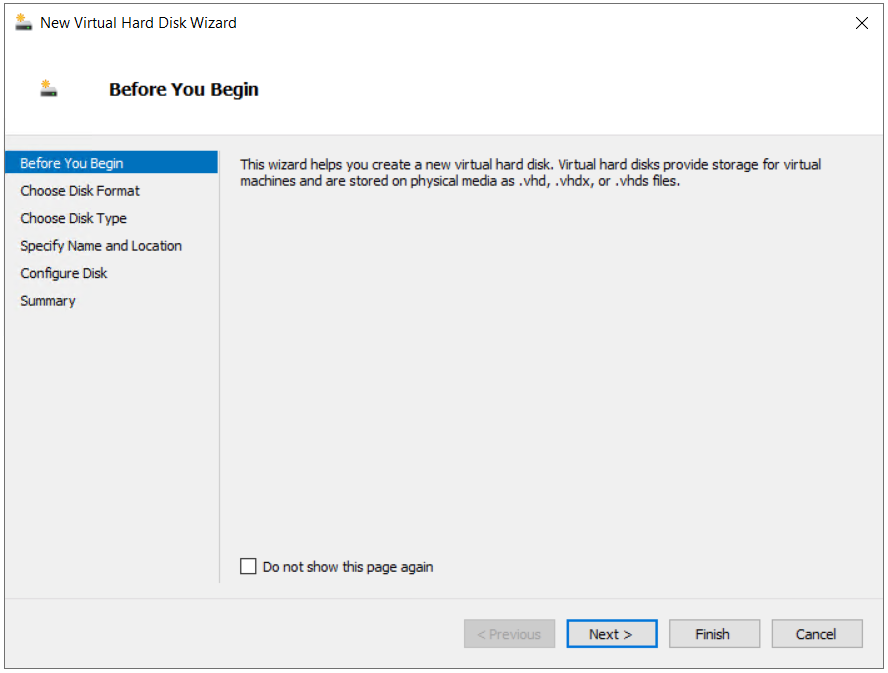
- Under Before Your Begin click Next
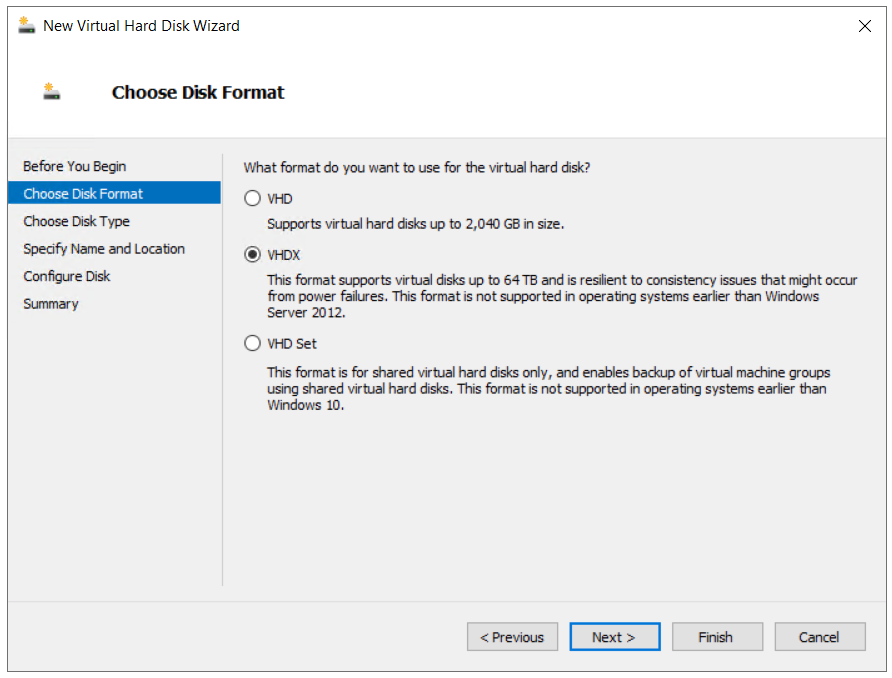
- Under Choose Disk Format, select VHDX and then click Next. As you can see there are three different types of disks including VHD, VHDX and VHD Set. The main difference between these disks is in the maximum size of the disk and their resilience in case of the issues that might occur from power failures.
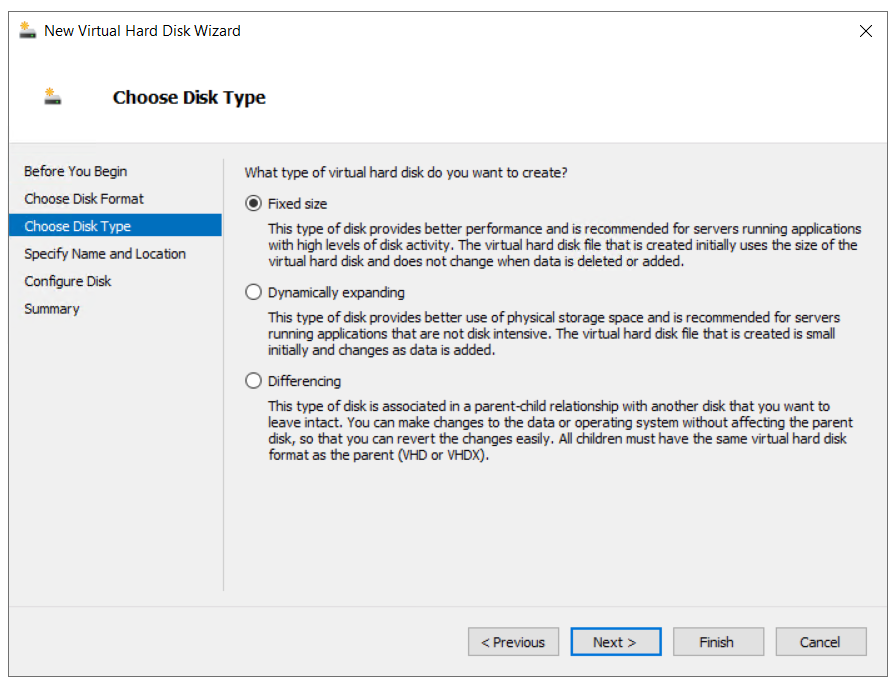
- Under Choose Disk Type select Fixed size and click Next. As you can see there are different types of disks including Fixed size, Dynamic expanding and Differencing. The main difference between these types of disks is in the performance and the way how disk space will be used on the disks.
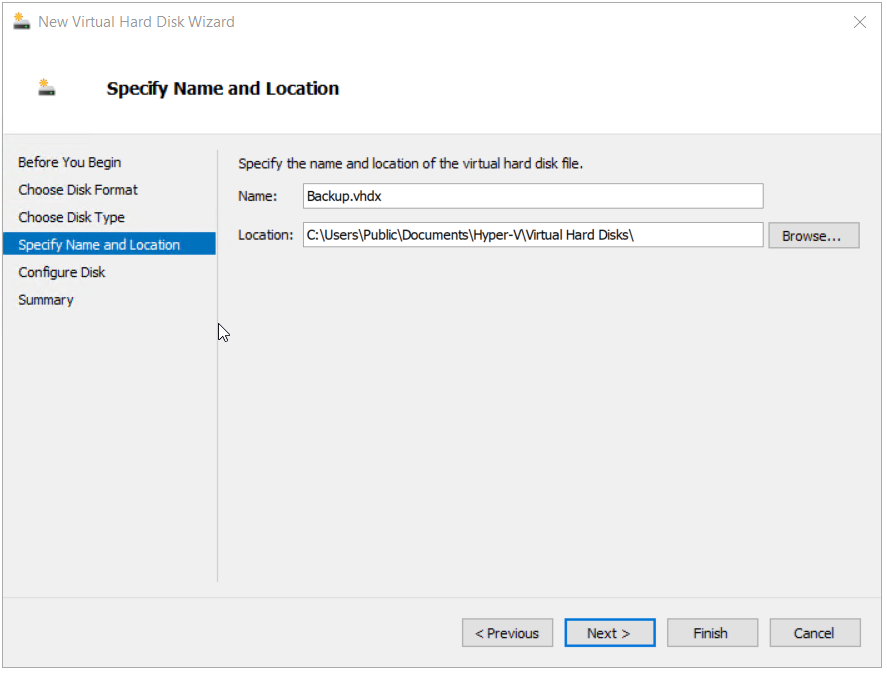
- Under the Specify Name and Location, type the name of the disk and choose the location and then click Next. In our case the name of the disk is Backup.vhds and we will keep the default location which is C:\Users\Public\Documents\Hyper-V\Virtual Hard Disks\.
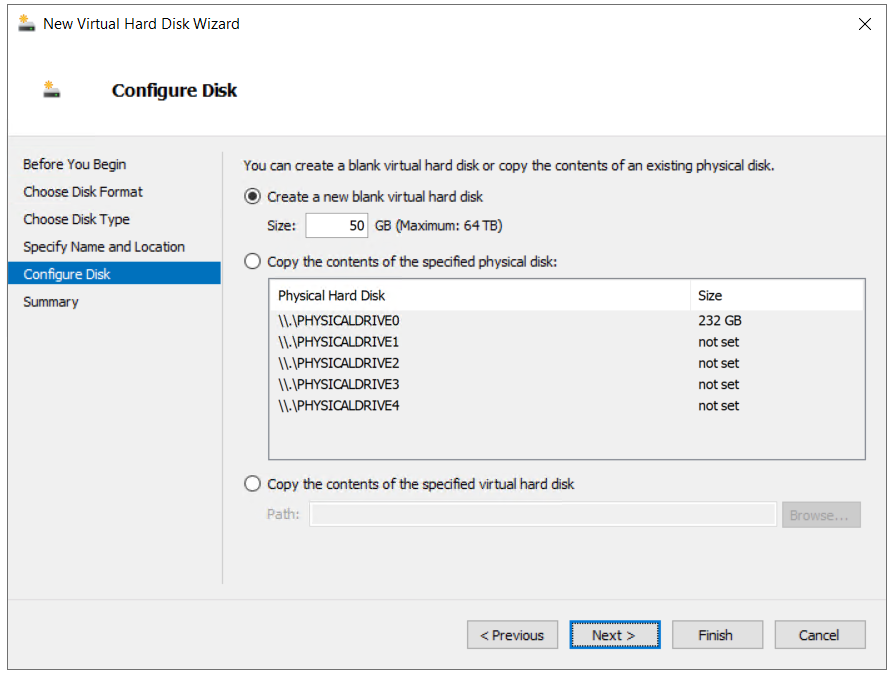
- Under Configure Disk and then under Create a new blank virtual disk type the name of the size and then click Next. The unit that is used is GB. In our case, we will create a virtual disk that has 50 GB of free space. As you can see you are also able to copy the content of the specified physical disk and copy the contents of the specified virtual hard disk.
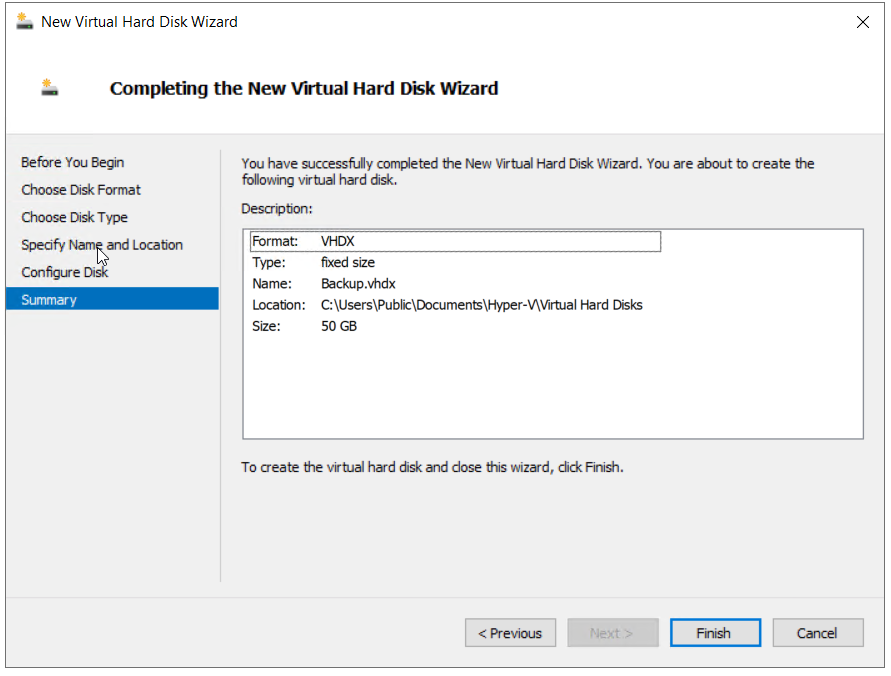
- Under Summary check if everything is configured correctly and then click Finish
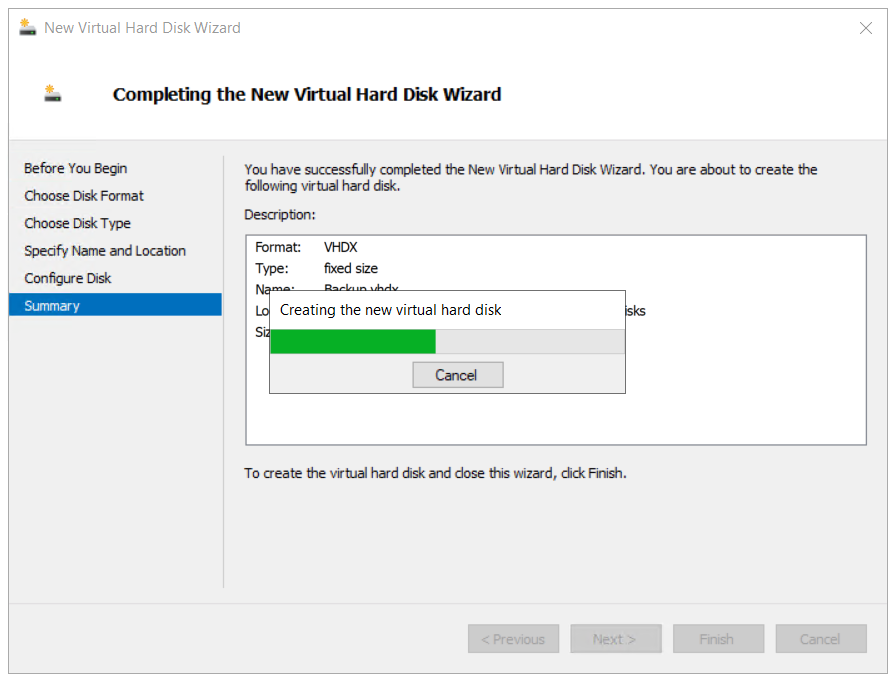
- Wait until the disk is created.
- Congratulations. You have successfully created a new virtual disk.
2. Assign Disk to the Virtual Machine
In the second step, we will assign the previously created virtual disk to the virtual machine.
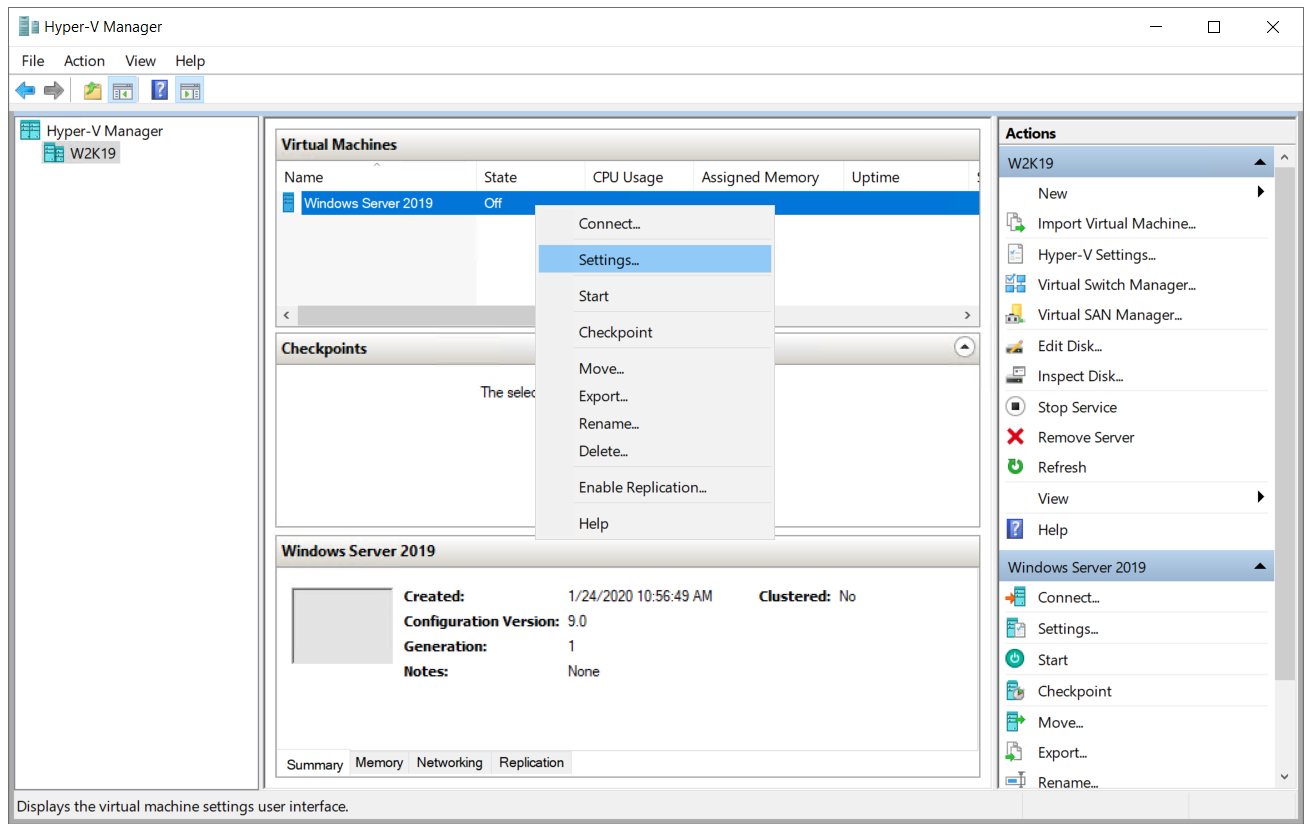
- If you have closed the Hyper-V Manager, please open it again.
- Shutdown your virtual machine
- Right click on the virtual machine and then click Settings
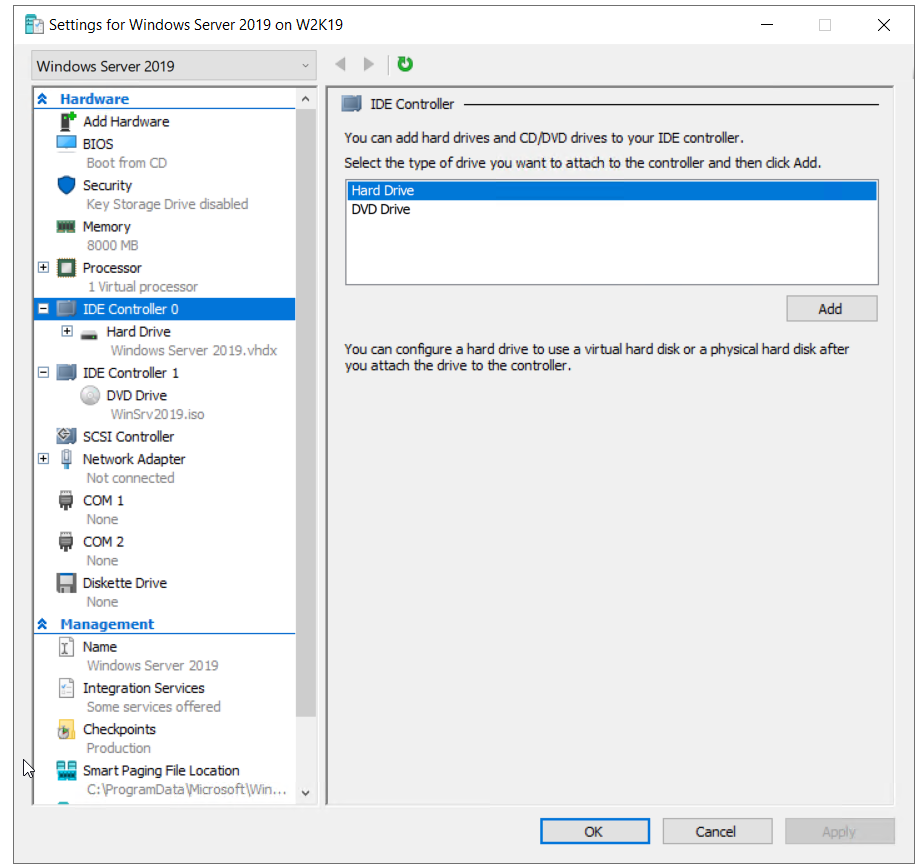
- Click on IDE Controller 0, select Hard Drive and then click Add
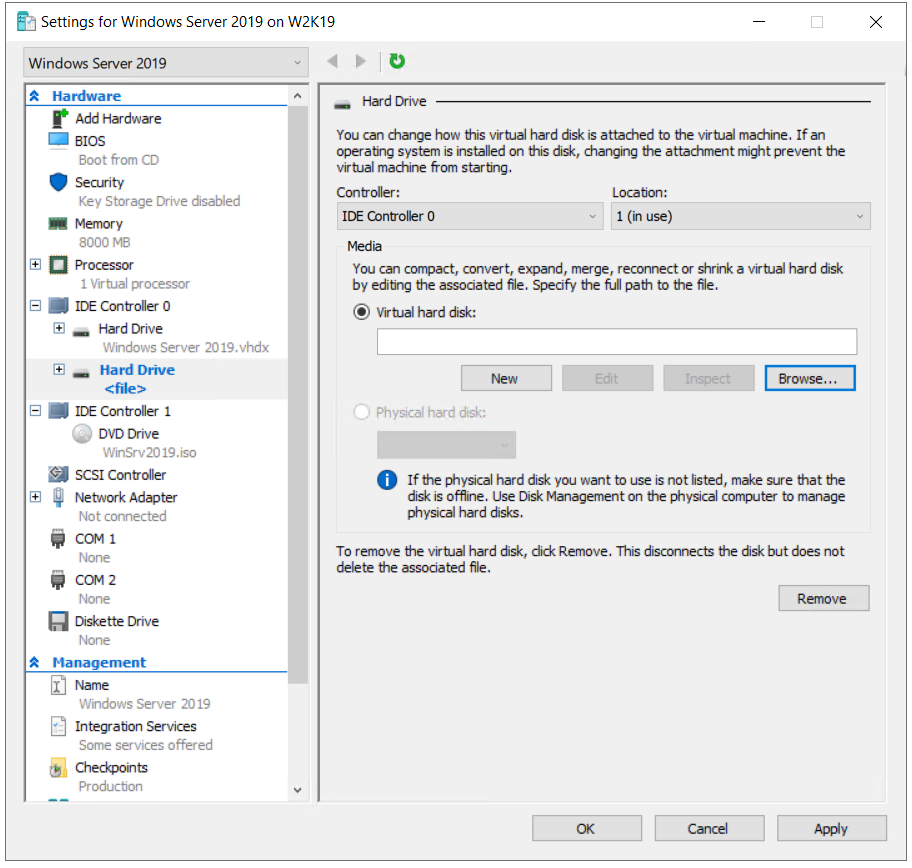
- Under Virtual hard disk click Browse
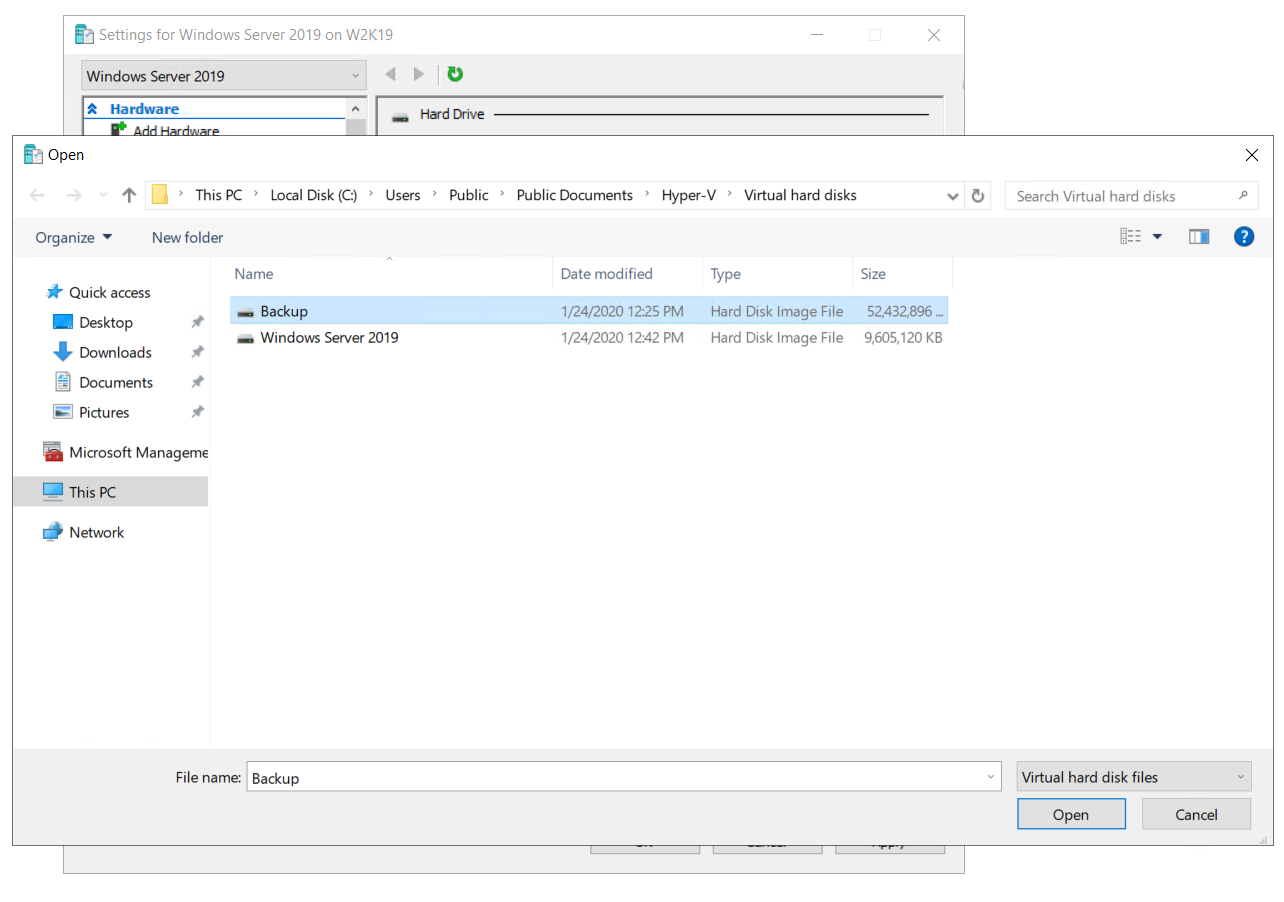
- Select the virtual disk and then click Open. In our case, we have selected disk that we have previously created. It is called Backup.
- Click Apply and then OK
- Start the virtual machine and connect by using your credentials.
3. Initialize the Disk and Prepare for use
In the third step, we will initialize the disk and prepare it for use.
- Right click on the Windows menu and then click Disk Management
- Initialize the disk by select partition type and clicking OK. In case you have more disks, please select the proper one. As you can see, there are two partition styles, MBR and GPT.

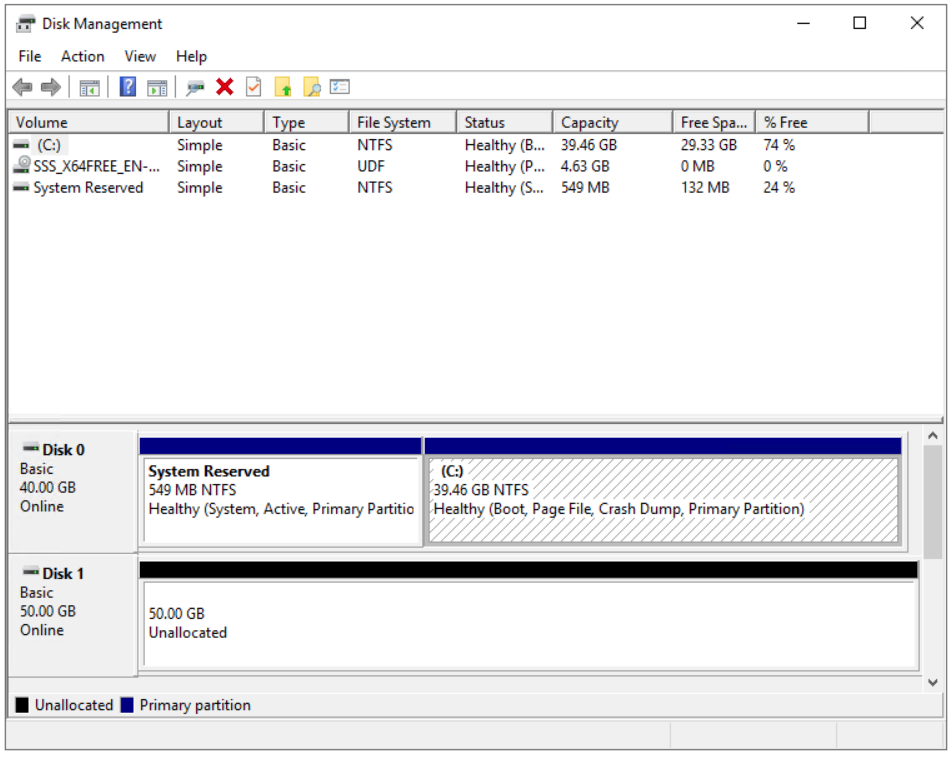
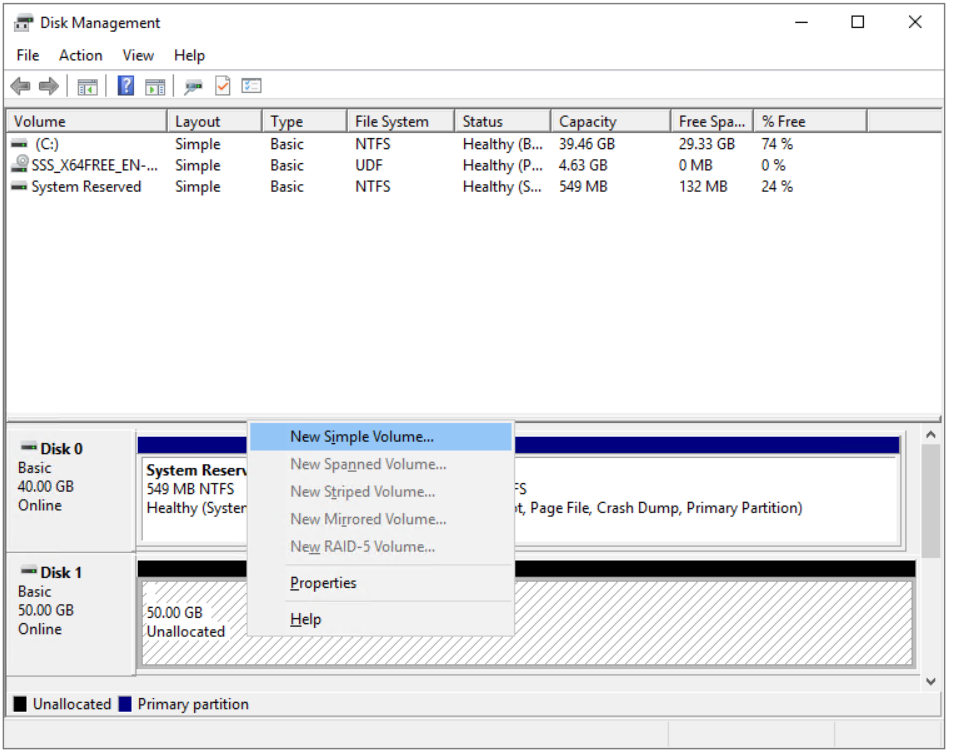
- Navigate to the Disk 1 and do right click on unallocated disk which in our case is 50.00 GB
- Click on the New Simple Volume…
- Under Welcome to the New Simple Volume Wizard click Next
- Under Specify Volume Size click Next. We will keep the all disk space (50 GB).

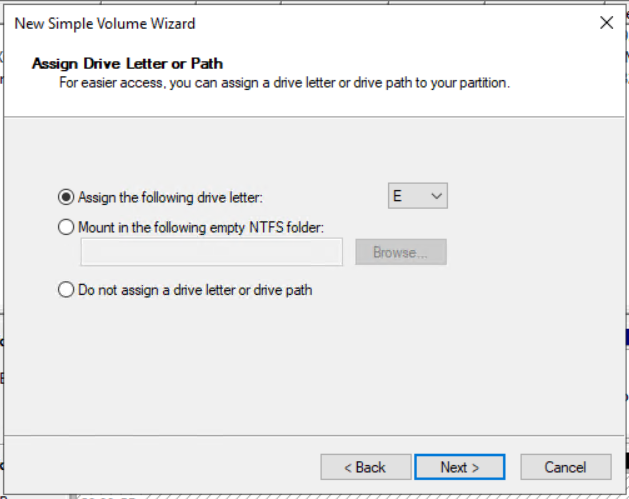
- Under Assign Drive Letter or Path, select the Assign the following drive letter and then choose the letter and click Next. We will use E.
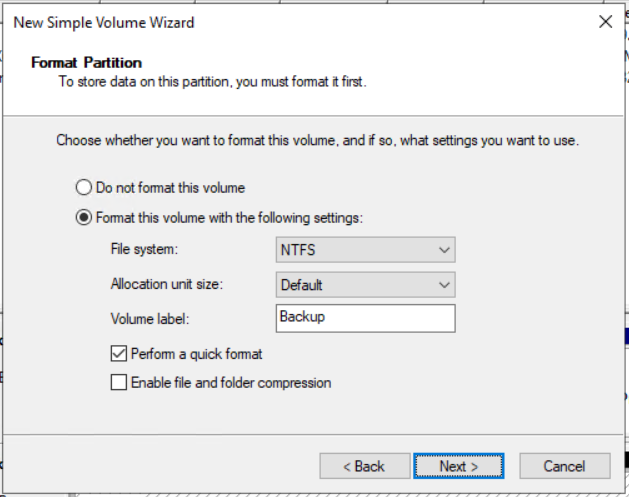
- Under Format Partition select Format this volume with the following settings and define the three different settings including the File system, allocation unit size and Volume label and then click Next. We will keep the default settings, but only change the name of the Volume label. In our case it is Backup. Select Perform a quick format.
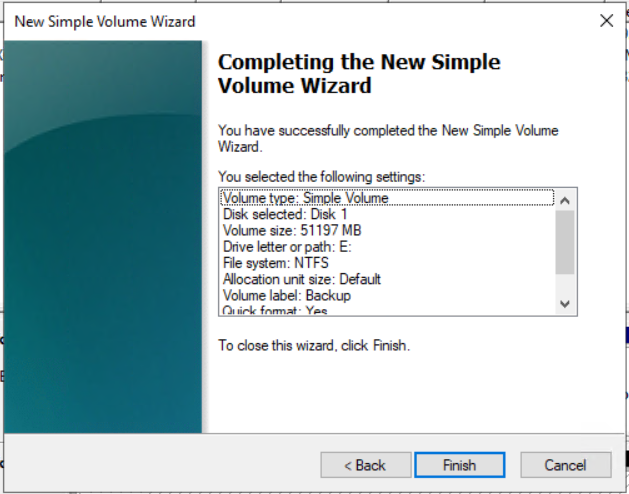
- Under Completing the New Simple Volume Wizard check if the settings are correct and then click Finish
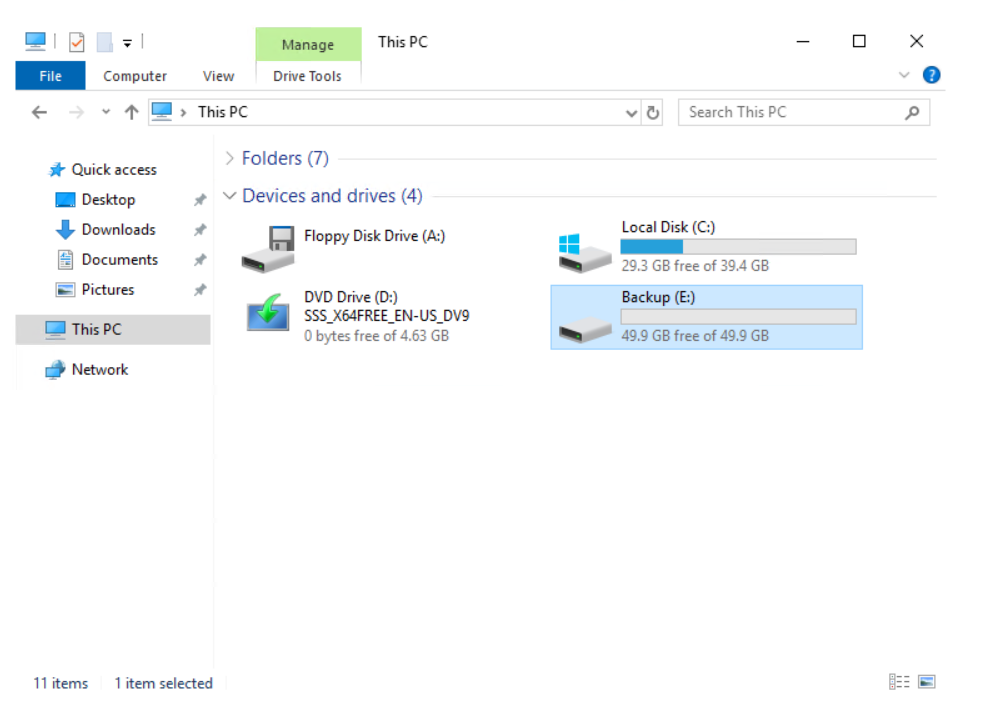
- Verify if the disk is formatted and ready for use

- Close the Disk Management
- Open the File Explorer (hold Windows logo and press E)
- Verify if the disk is available and ready for use. In our case it is ready.
- Congratulations. You have successfully assigned disk to the virtual machine.


