How to Update Jellyfin in Windows, Linux & Mac [Easy Steps]
- Jellyfin is an open-source, free media manager, allowing access and management of files across multiple platforms. It stands out from proprietary counterparts like Plex and Emby due to its open-source nature and no-cost usage.
- Updates for Jellyfin are manual and infrequent, due to its development by volunteers. Users must check their current version and follow specific steps for updating on Linux, macOS, or Windows.
- Jellyfin differs from Plex primarily in its open-source, free nature versus Plex's proprietary, subscription-based model. Jellyfin is considered more secure but has limited support on other platforms, whereas Plex offers smooth functionality and extensive cross-platform support.
Jellyfin is an open-source media manager that organizes your files and allows cross-platform sharing. Being free it is a popular alternative to its paid counterparts Plex and Emby. In this article, we are going to take a look at the process of updating Jellyfin. So, without further ado let’s jump straight into it.
Table of Contents
What Is Jellyfin?
Jellyfin is an open-source, free media manager. Let’s break these terms down so you can better understand the purpose of Jellyfin.
↪ Open Source: As the term suggests, this product is open. This means that no particular individual claims ownership over the product. Its source code is available for everyone, and anyone can customize it according to their needs/preferences. This is completely the opposite of proprietary software, which is owned and managed by a person/organization.
↪ Media Manager: A media manager is software that manages your files and data. But every device has its file manager, so why Jellyfin? Jellyfin is a media manager that you can access from multiple platforms. For example, if I upload a bunch of files from my PC (server) to Jellyfin, I can easily access them from my mobile through my Jellyfin account.
You can upload any type of file such as movies, images, music, books, etc. The size of data you can upload depends on the storage capacity of your server (main device). Just create a media library, upload the data, and enjoy access from multiple devices.
↪ Jellyfin Updates
The update aspect of Jellyfin is a bit tricky. This is due to two main reasons:
- Jellyfin does not get updated automatically. You have to manually check if your version of the software is the same as the latest version available on the Jellyfins website.
- Jellyfin does not have a large, dedicated team of developers. Most of their developers have real jobs and work on this project as a hobby. Hence, the updates are not as frequent and are released after a long time.
READ MORE: Witcher 3 Next-Gen Update – Everything You Need to Know ➜
How To Check Jellyfin Version?
Jellyfin mostly operates on your web browser, so there is no application whose version you can simply check. To check the version of Jellyfin, follow these steps:
- Launch Jellyfin on your browser and log in to your account.
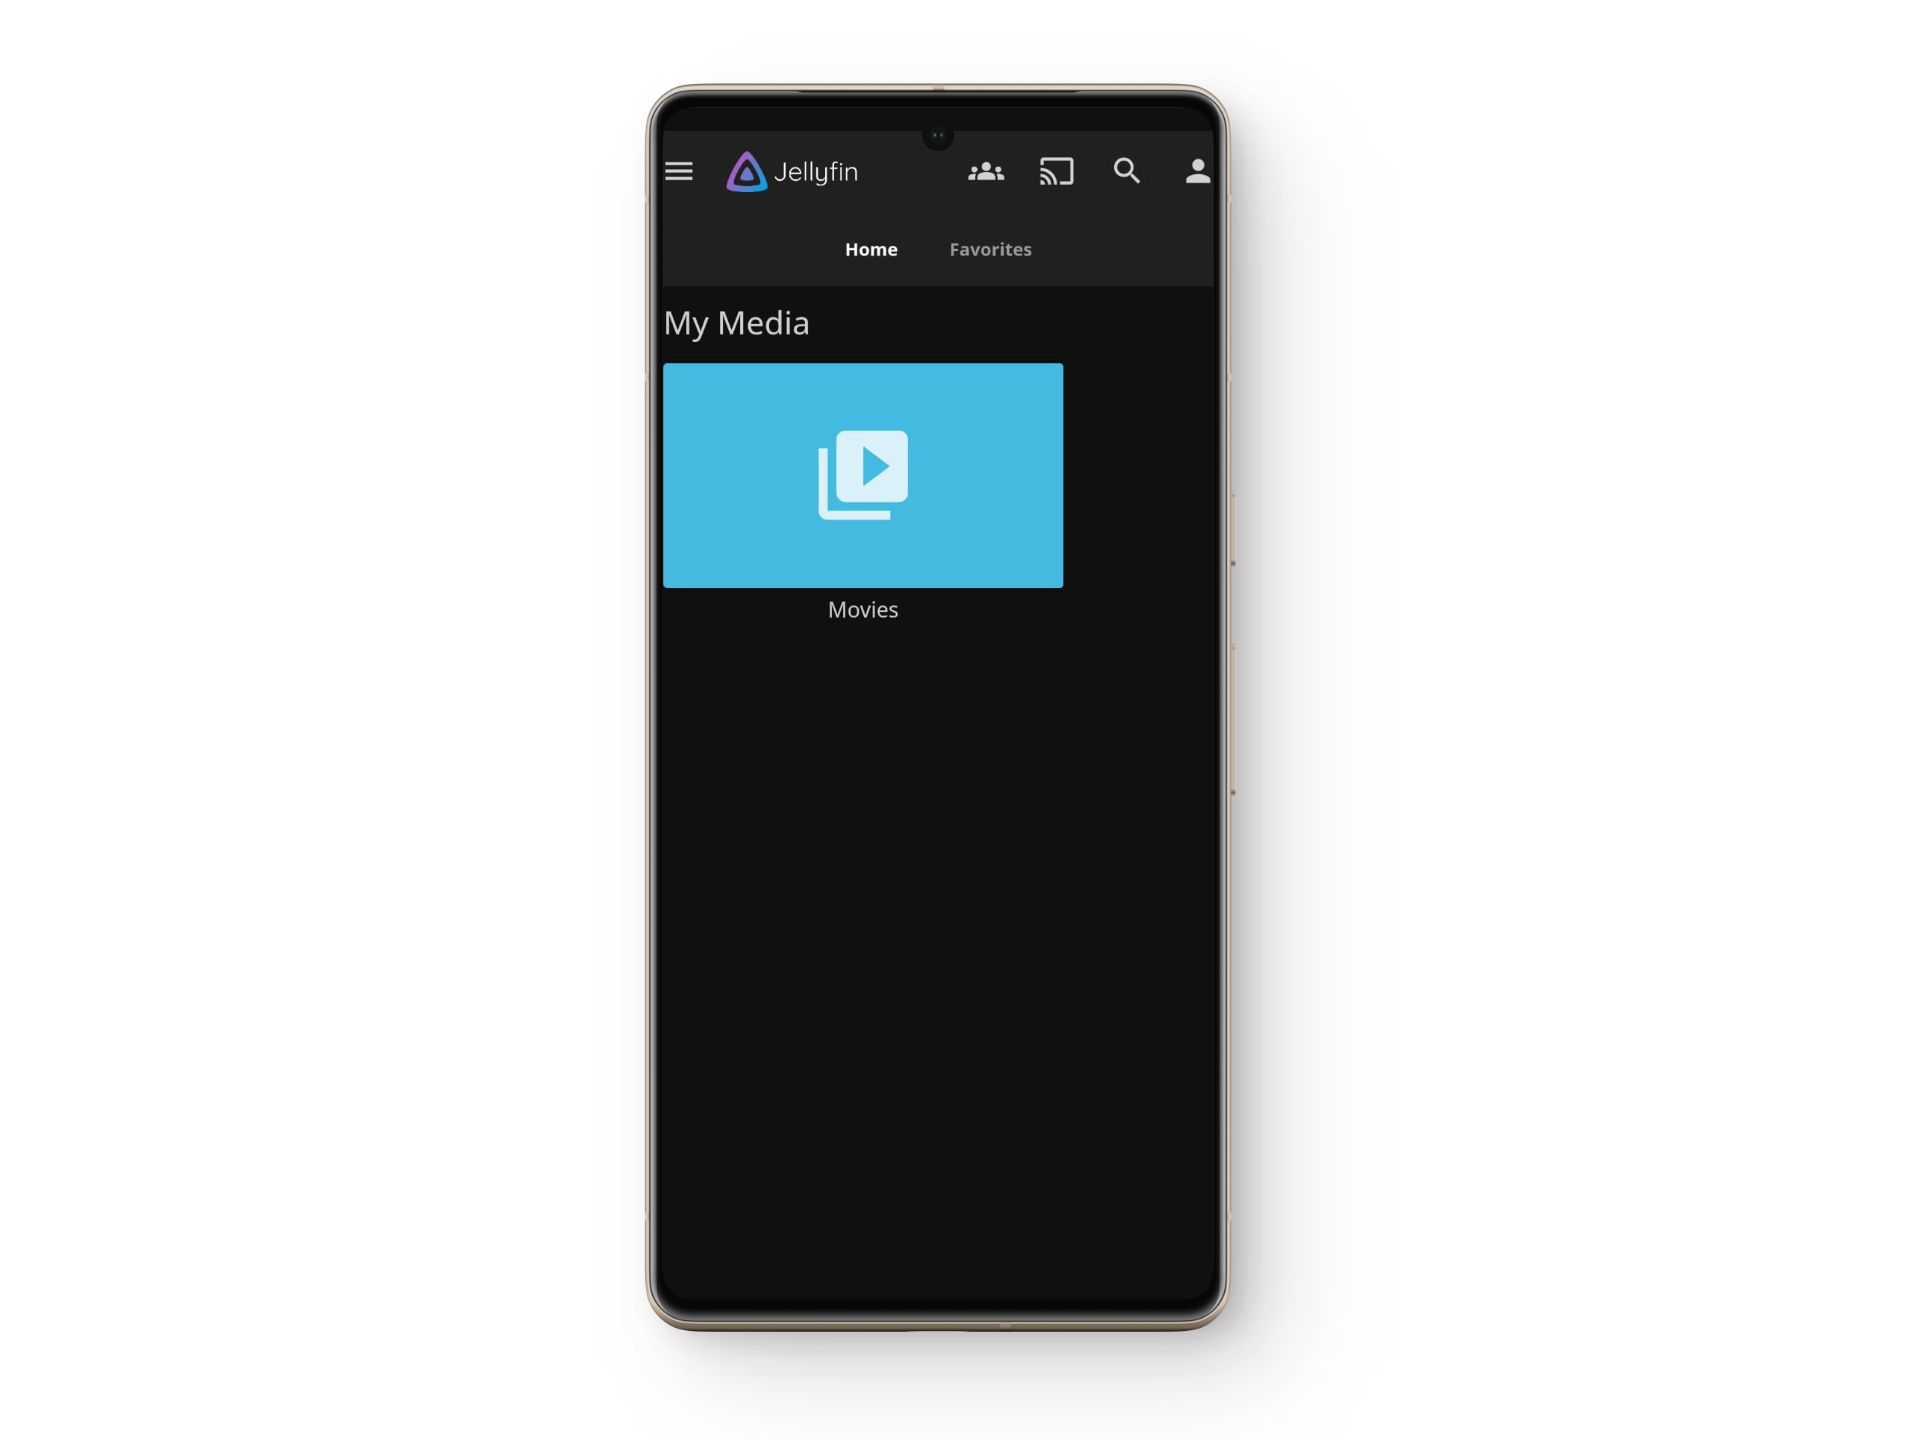
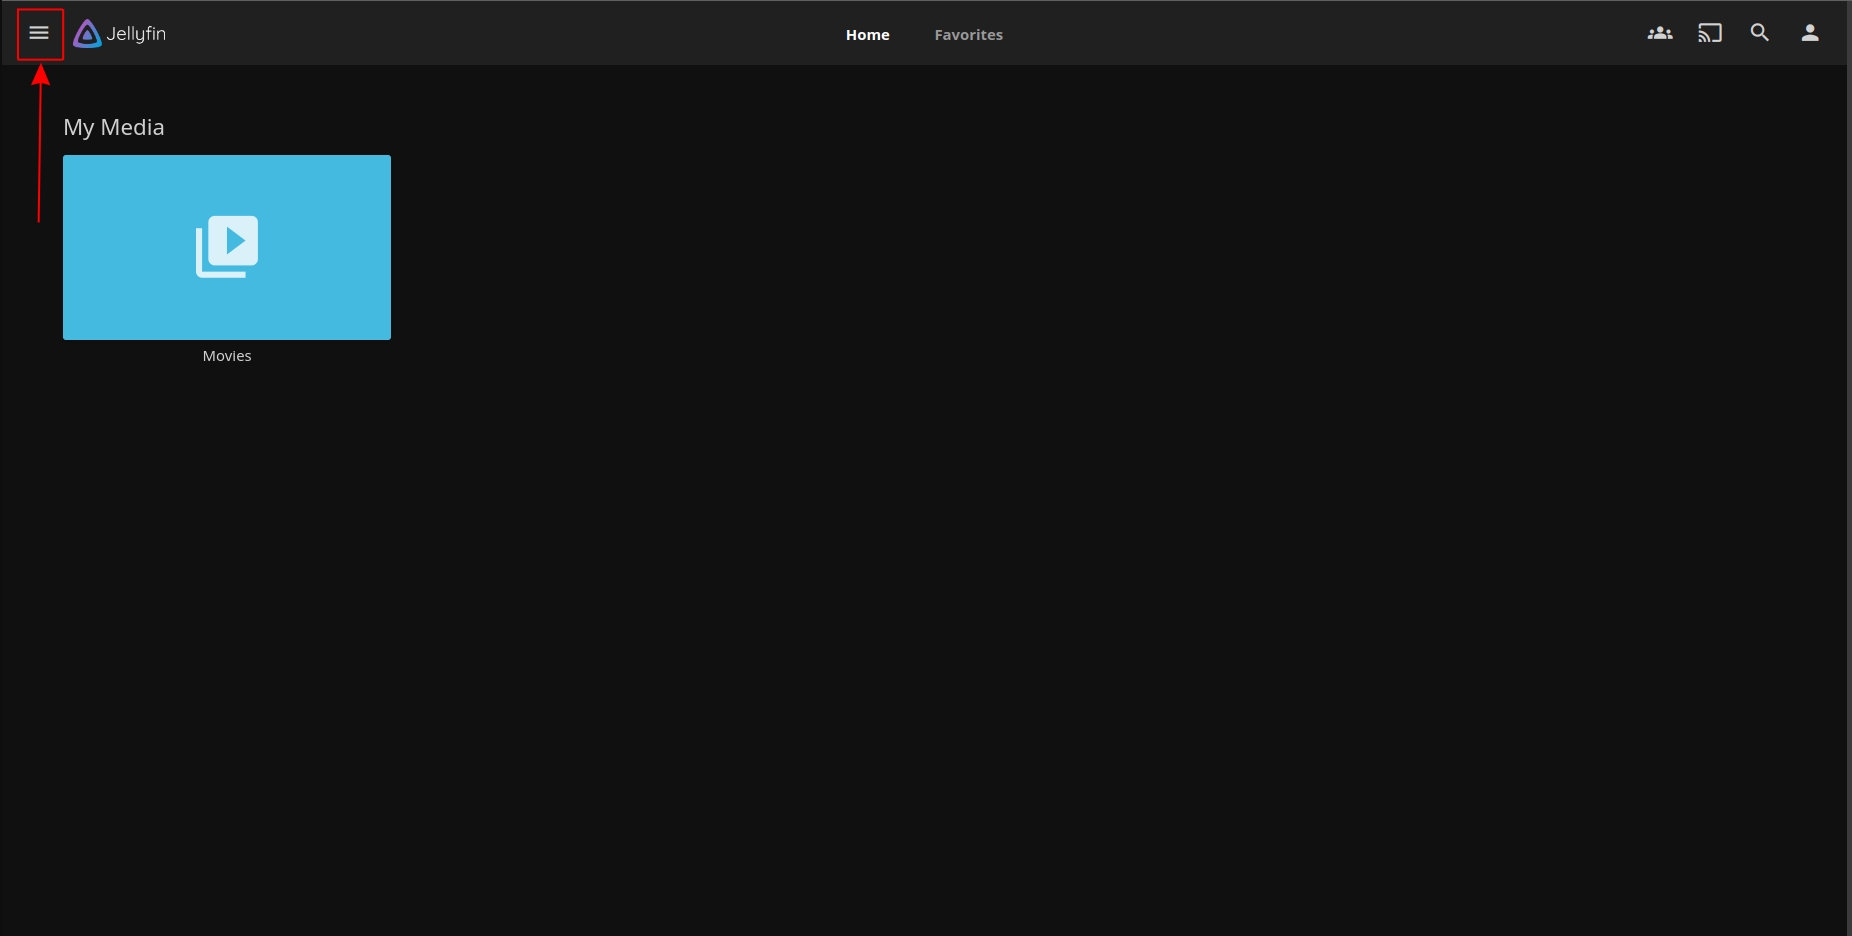
- On the homepage, click on the three horizontal lines icon situated at the top-left of the screen.
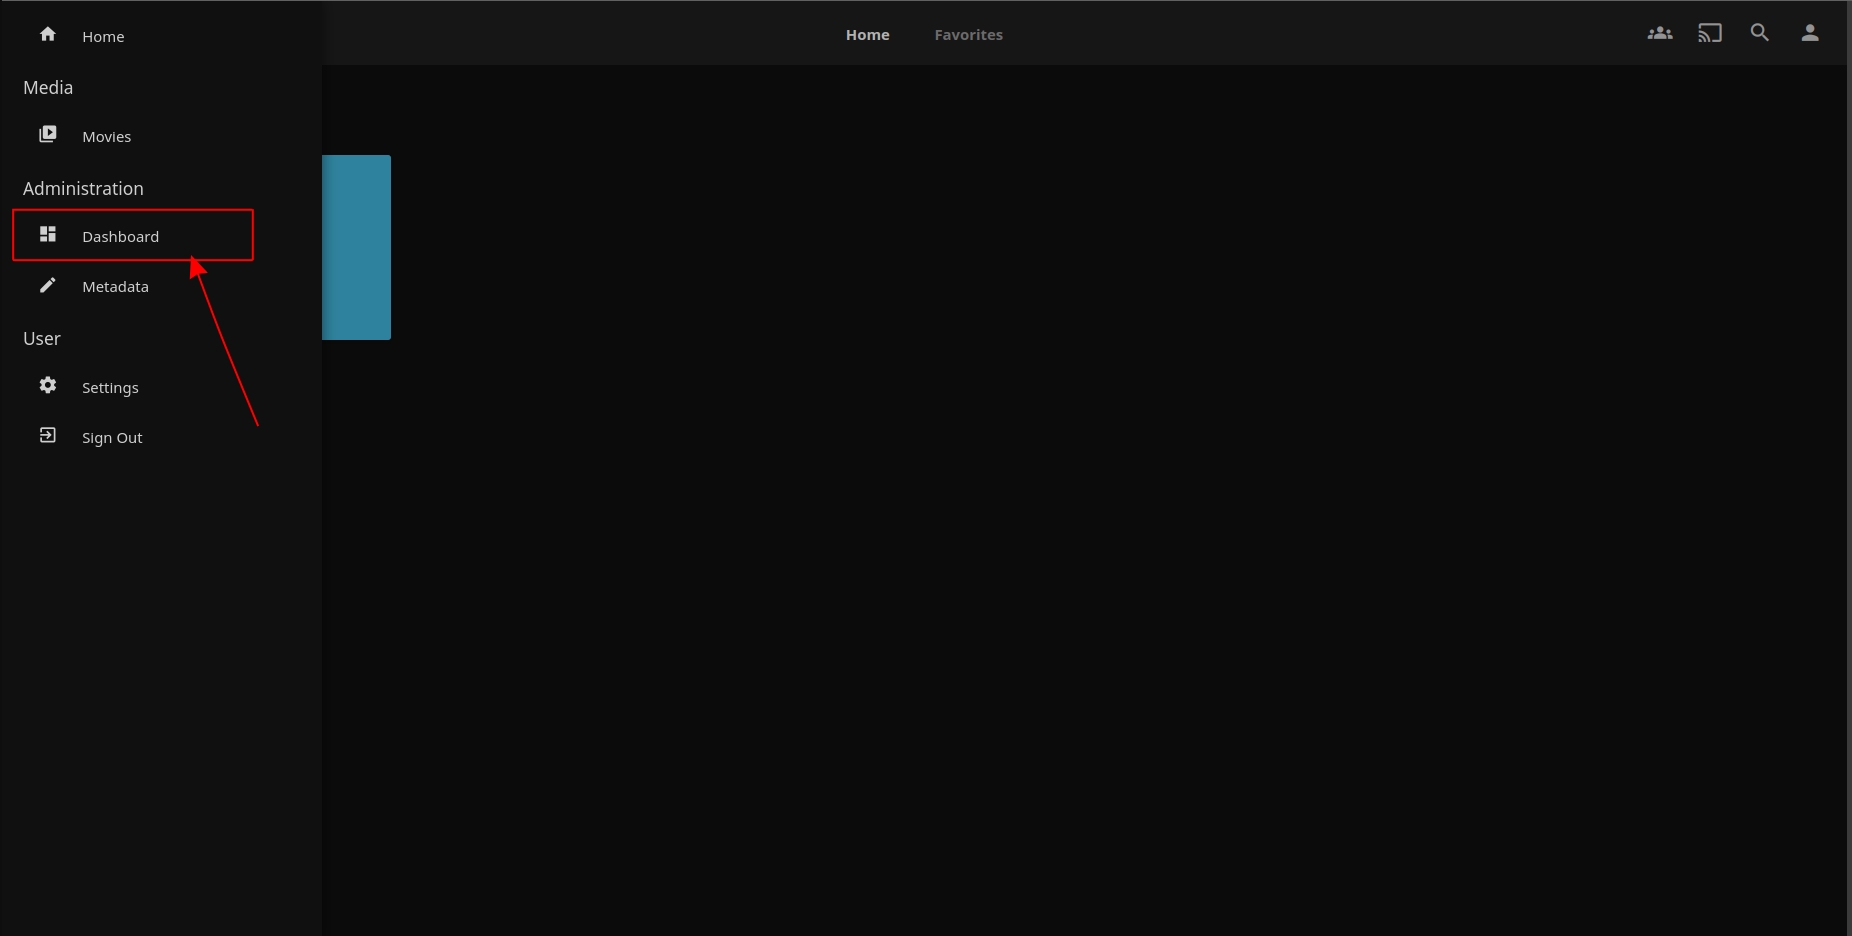
Three horizontal lines icon - In the menu box, select Dashboard.
Dashboard Option - On the Dashboard, the version will be clearly displayed.
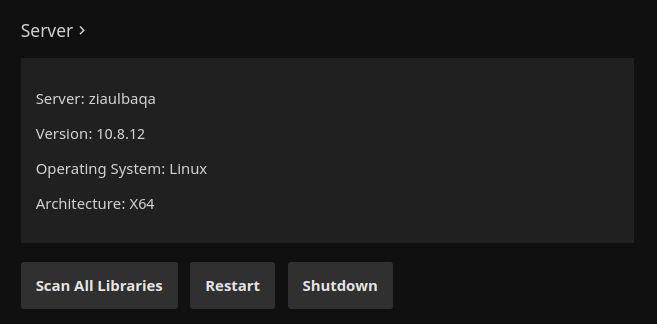
Version of Jellyfin
READ MORE:
How To Update Jellyfin
We are going to cover the updation process for macOS, Windows, and Linux. Once you have made sure that you need to update, follow the steps for the relevant one.
↪ On Linux
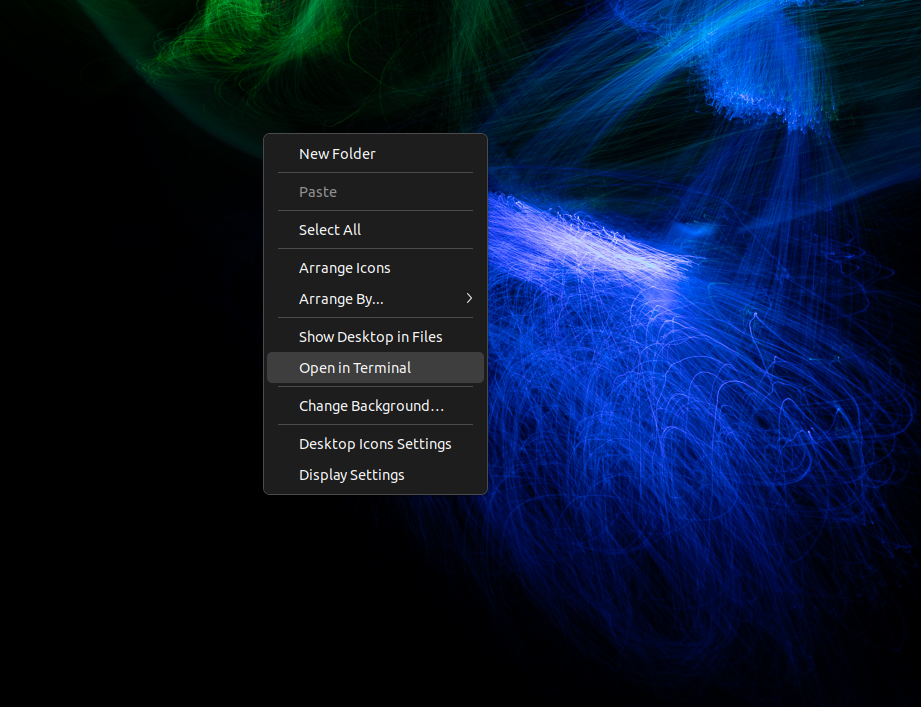
As Linux is a CLI, you can easily update Jellyfin with simple commands. The complete process is as follows:
- Right-click anywhere on your screen and then click on Open in Terminal.
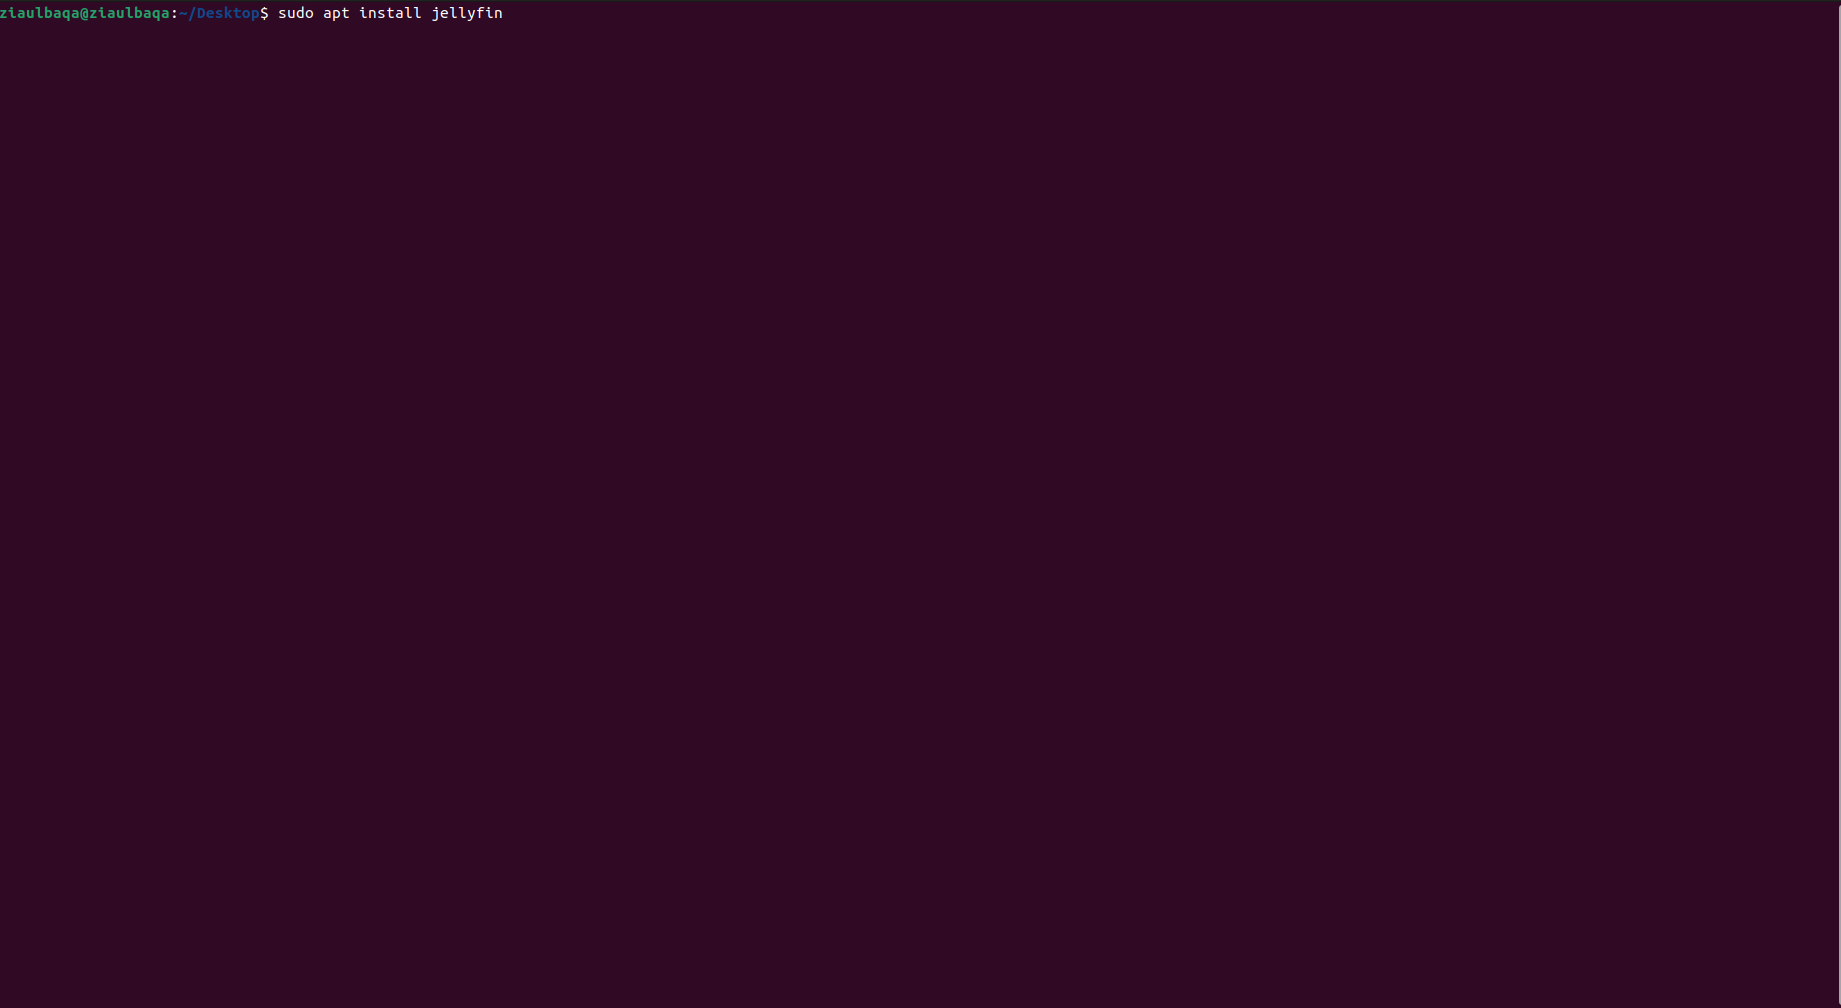
Open in Terminal option - Once in the terminal, type in the command: “sudo apt install jellyfin”.
Command typed in the terminal - You will then be prompted to enter your password to enter sudo.

Prompt for Password - Type it and then press enter ( your password won’t appear on the terminal, rather it will get stored in the keyboard buffer and get submitted once you press enter).
- If you are not running the latest version, it will get updated. Else, you will be informed that you are already running the latest version.
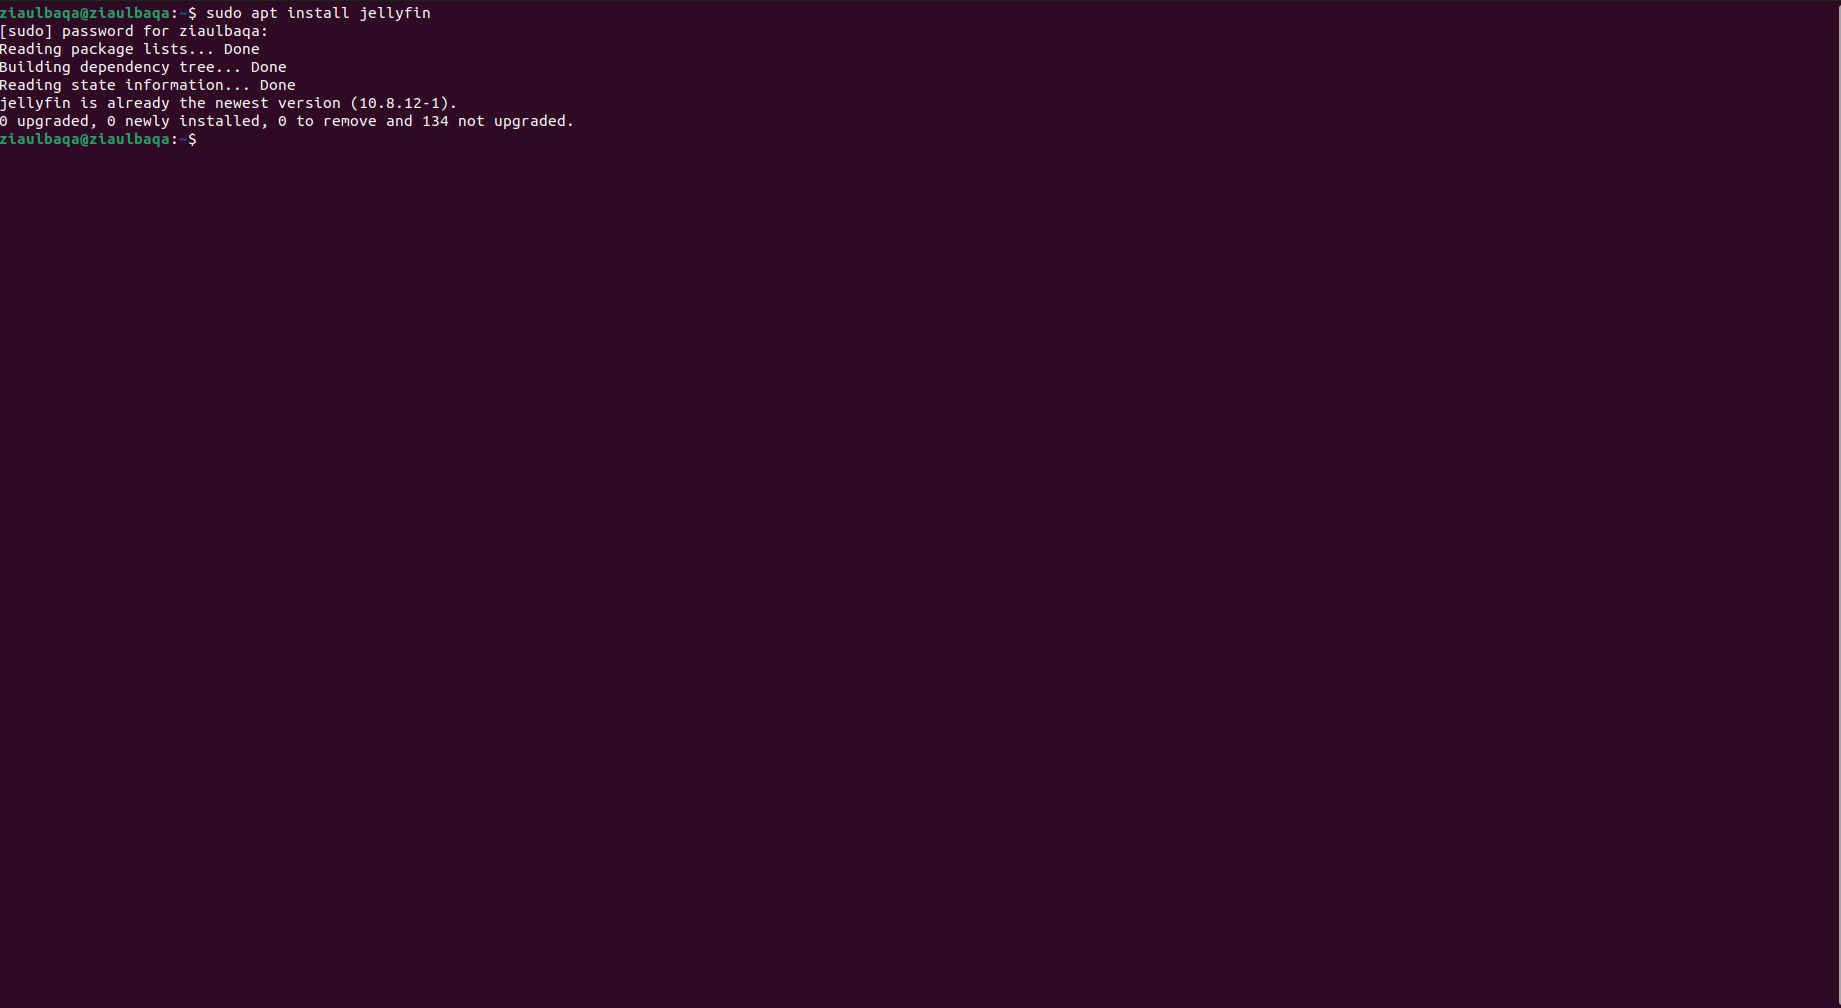
Jellyfin Updated to the latest version -
This concludes the process of updating Jellyfin on Linux.
The process on Windows and macOS is a bit different as instead of commands you now have to press buttons and go to websites.
↪ On macOS
For macOS, check your version through the process mentioned above. Then follow these steps:
- Quit the Jellyfin server running on your device. You can do this by right-clicking on the Jellyfin icon present in the menu bar.

Quit jellyfin Option - Now head on to Jellyfin Stable MacOS Archives and see if your current version is the same as the one present at the top of the list.
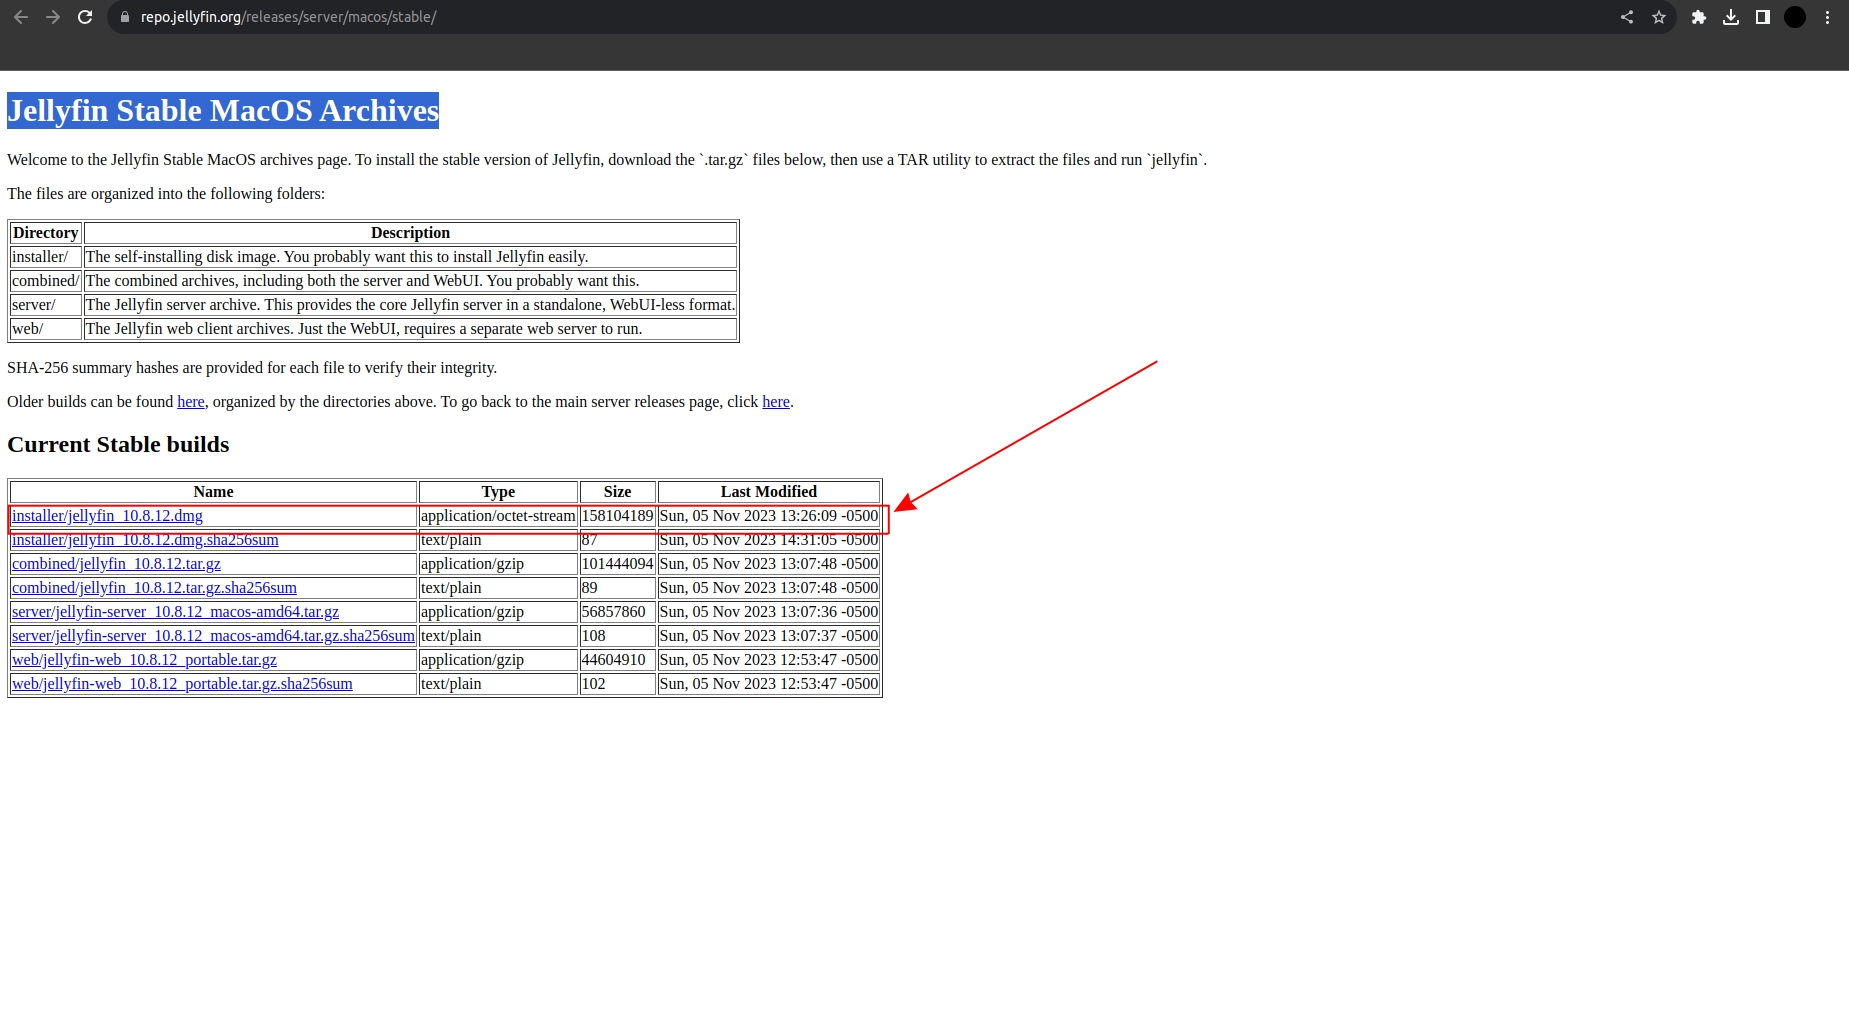
Latest macOS releases - If they do not match, install the latest version on your device.
- Once it is downloaded, drag and drop it in the applications folder.
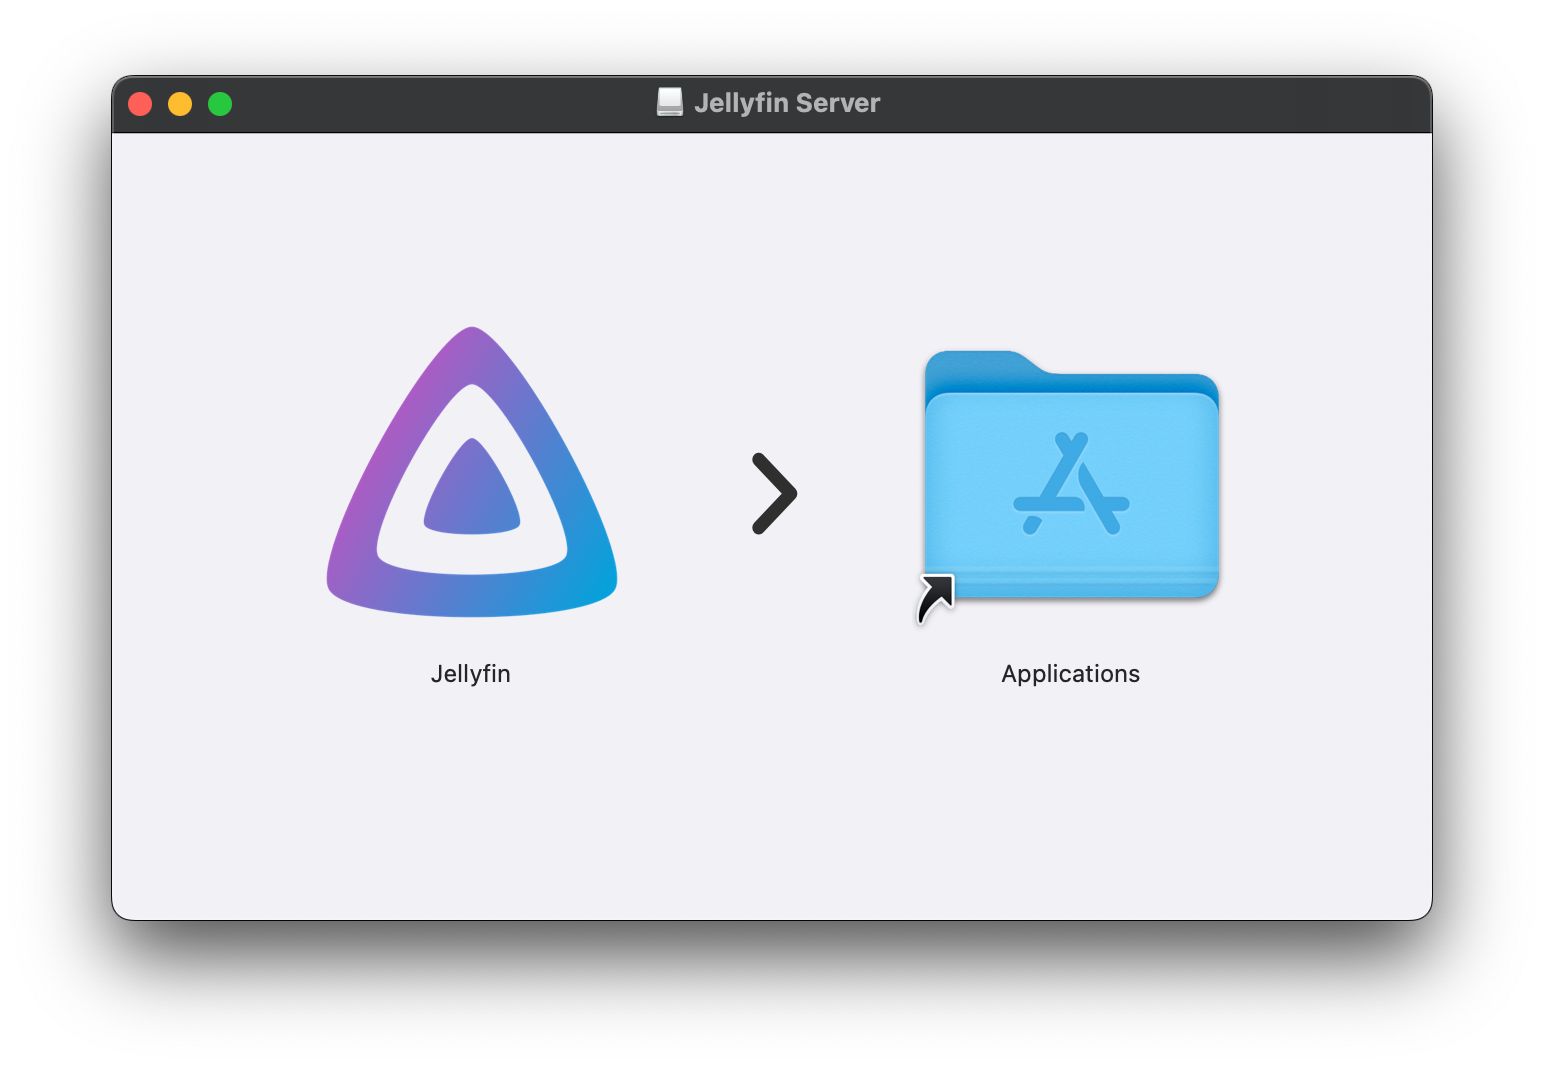
Drag and Drop Jellyfin into Applications - You will be notified that a version of this application already exists on your device, click on Replace.
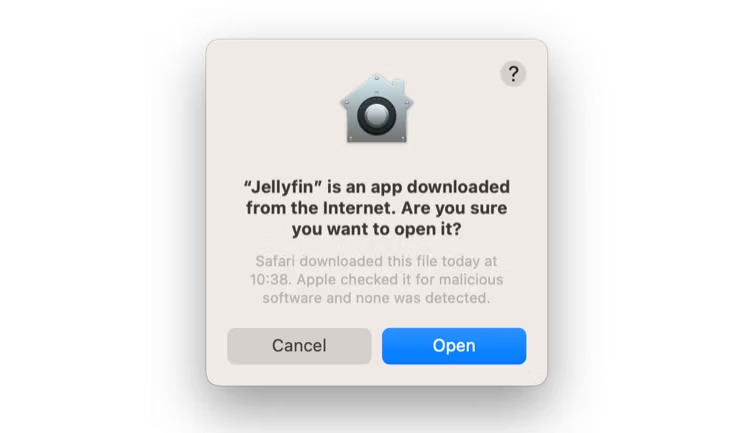
- Then select Open in the menu box asking if you want to open the Jellyfin application.
- This will update Jellyfin and transfer all your current servers onto the new version.
↪ On Windows
For Windows, the process is somewhat similar to Mac. The complete process is as follows:
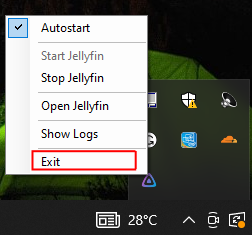
- Click on the system tray located at the bottom-right of the screen and check if Jellyfin is running.
Jellyfin running - In case it is, right-click on its icon and select Exit.
Exit option - Then visit Jellyfin Stable Windows Archives and see if the latest version there matches your current version.
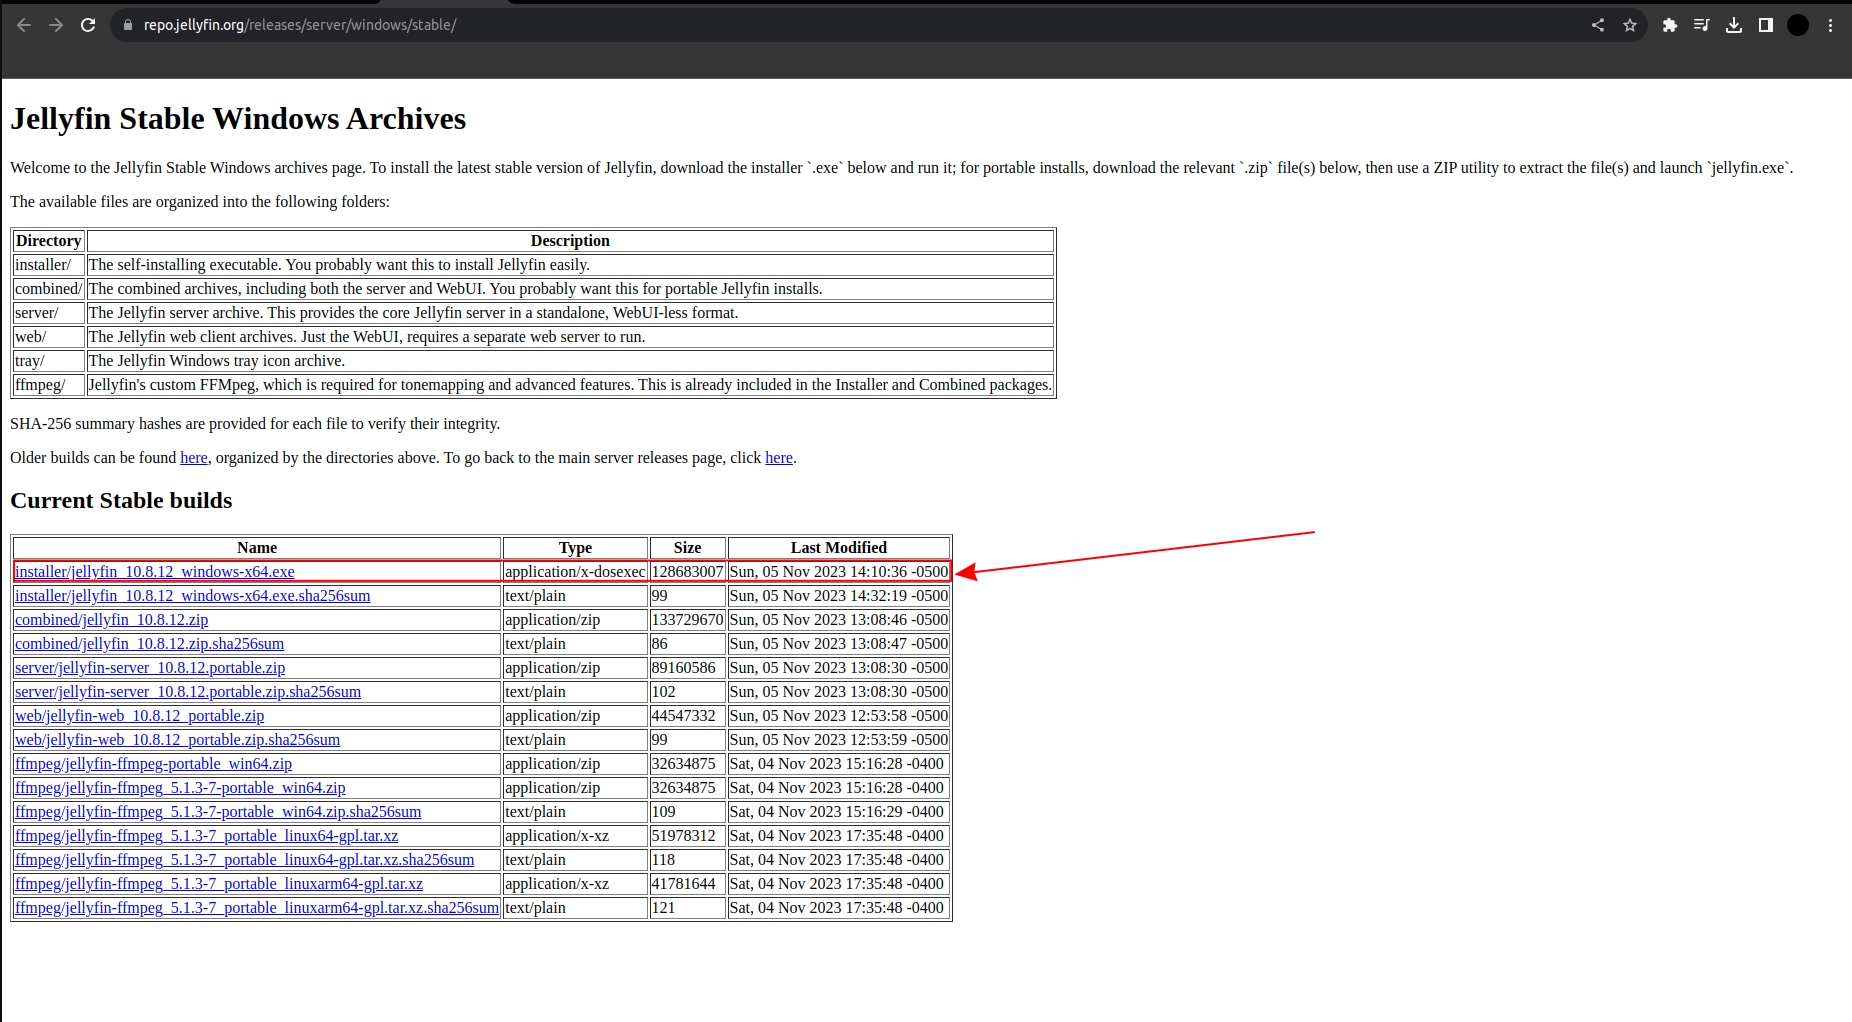
Latest Version for Windows - If it doesn’t download this version by simply clicking on it.
- Once downloaded, run the application, allow it to make changes, and allow it to replace the current version.
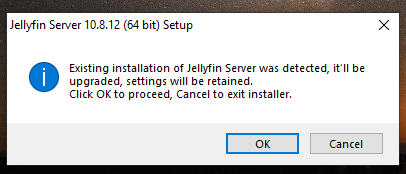
- After this process has been completed, run Jellyfin and enjoy the latest version.
Jellyfin vs. Plex
Now that you are aware of how to update Jellyfin on different operating systems, let’s talk about a competitor of Jellyfin known as Plex. Both are used as Media Managers, however, there are some important differences between them. We have summarised them below in a table for ease of readability.
| Jellyfin | Plex |
| Open-source media manager | Proprietary closed-off software |
| No charges associated | Monthly Subscription fee |
| More Secure as Open-source. | User data maybe stored and analyzed |
| User data may be stored and analyzed | More developed, functions smoothly |
| Limited support on other platforms | Extensive support across platforms such as smart TVs, streaming devices, and consoles. |
READ MORE: How to Install Popcorn Time on Android TV ➜
Conclusion
There you have it, the complete method for updating Jellyfin on multiple operating systems. In case of any queries or suggestions, feel free to drop them down below. Until next time. Ciao
FAQs
Jellyfin is an open-source, free media manager that organizes your files and enables cross-platform sharing. It serves as a popular alternative to paid counterparts like Plex and Emby.
”Open Source” means that Jellyfin’s source code is freely available for anyone to view, modify, and distribute. Unlike proprietary software, no individual or organization claims ownership over the product.
When you update Jellyfin, the newer version is pasted upon the older version without data loss.
Jellyfin is an open-source media manager with no associated charges, while Plex is proprietary software with a monthly subscription fee. Jellyfin is considered more secure due to its open-source nature, but Plex offers more developed features and extensive support across various platforms.


