Fix: Unable to establish secure connection to Zoom
The “Unable to establish secure connection to Zoom” error occurs due to various reasons, including an outdated Zoom client or browser, network connectivity issues, firewall or antivirus settings, and certificate or encryption problems.

Fortunately, there are many troubleshooting methods you can use to fix this error. In this article, we will delve deeply into each method to help get your Zoom account back up and running.
1. Delete the existing calendar and contact integration settings.
If you’re facing issues with establishing a secure connection to Zoom, deleting any existing calendar and contact integration settings can help resolve them. Here’s a step-by-step process to follow:
- Go to the Zoom website at https://zoom.us/ and sign in to your Zoom account using your credentials.
- Tap on the navigation menu at the top right of the screen.
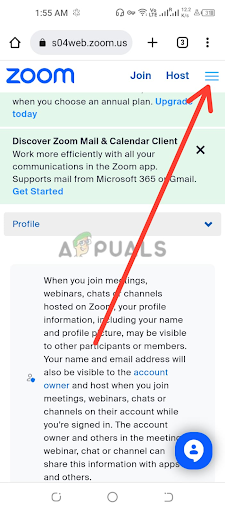
Tap on the navigation menu - Click on ‘My Profile‘ or ‘Personal,’ depending on your Zoom account type.
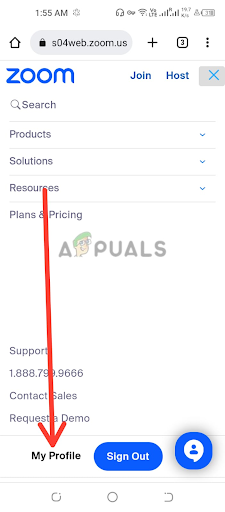
Tap on My Profile or Personal - Scroll down the Profile Settings page to find the “Others” section. Within this section, you will see the Calendar and Contact Integration settings.
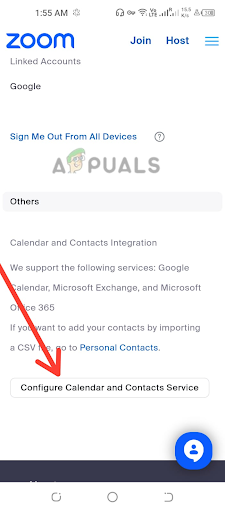
Tap on Configure Calendar and Contact service - Under the Calendar and Contact Integration section, locate the existing integration that you wish to delete. To the right of the integration, you will see a Delete button. Click on this button to initiate the deletion process. The sentence appears to be grammatically correct.
- A verification dialog box may appear to confirm whether you want to delete the integration. Click on “Delete” to confirm the deletion. Please note that this action is irreversible and will permanently delete the integration settings.
- Once the existing integration has been successfully deleted, you can now reconfigure the calendar and contact integration settings in Zoom. Follow the prompts or instructions provided by Zoom to set up a new calendar and contact integration, such as Google Calendar, Microsoft Outlook, or other supported applications.
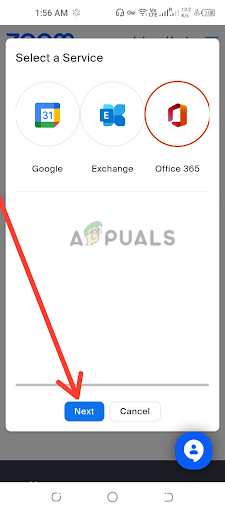
Select a service, then tap on Next
It’s important to ensure that you follow the correct steps for your specific calendar and contact integration settings provided by Zoom, as different integrations may have slightly different setup processes. After completing the configuration process, check that the error is solved; if not, move on to the next method.
2. Update the Zoom app to the latest version.
Keeping your Zoom desktop client and mobile app up to date is crucial to ensure a smooth and secure connection. Here’s how you can update to the latest version of Zoom:
Update the Zoom Desktop Client.
- Locate the Zoom desktop client application on your computer. You can typically find it in your Applications folder (Mac) or Programs folder (Windows). Double-click on the Zoom application icon to launch the Zoom desktop client.
- In the Zoom desktop client window, click on the “Sign In” button in the upper-right corner of the screen. This will open the Zoom sign-in window. Enter your Zoom account credentials, including your email address and password, then click the “Sign In” button. If you don’t have a Zoom account yet, you can click on the “Sign-Up Free” link to create a new account.
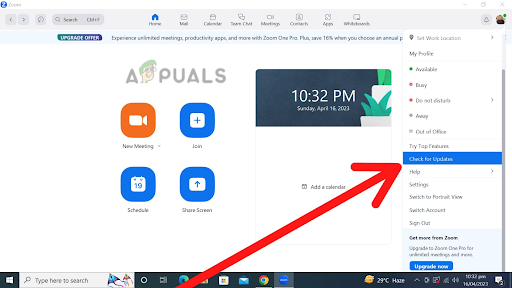
- In the top-right corner of the Zoom desktop client window, click on your profile picture or initials. This will open a dropdown menu.
Click on your profile picture or initials - In the drop-down menu, click on Check for Updates.
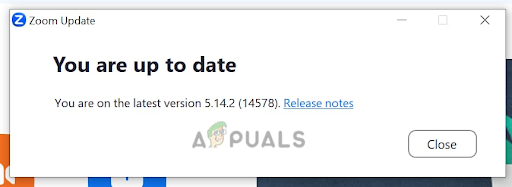
Select the Check for Updates option - If there is no latest version available, a prompt will appear with a “You are up-to-date” message.
A message for no latest version is available - Install the latest version. If a new version of Zoom is available, a pop-up window will appear with the option to install the latest version. Click on ‘Update‘ to initiate the installation process. Follow the on-screen prompts to complete the update.
- If you want to eliminate manually updating Zoom, check the box with the message, “Automatically keep Zoom desktop client up to date when installing the Zoom desktop app.
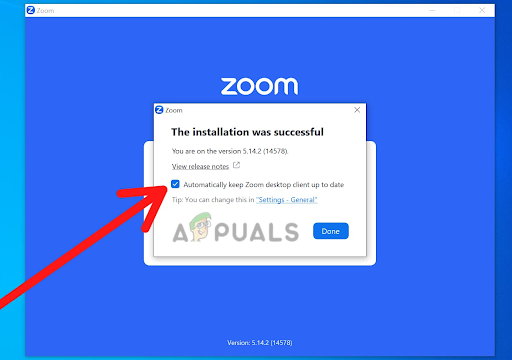
Check the box with the message Automatically keep Zoom desktop client up to date when you are installing the Zoom desktop app
Update the Zoom Mobile App.
- Open the Zoom mobile app on your smartphone or tablet.
Open the Zoom mobile app - Sign into your Zoom account using your credentials.
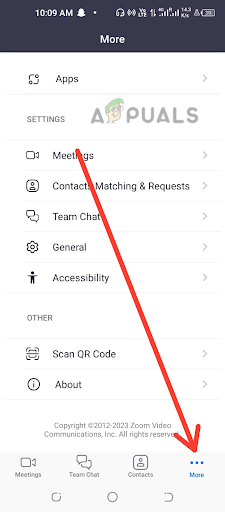
- Tap on the ‘More‘ icon, usually located in the bottom right corner of the app screen.
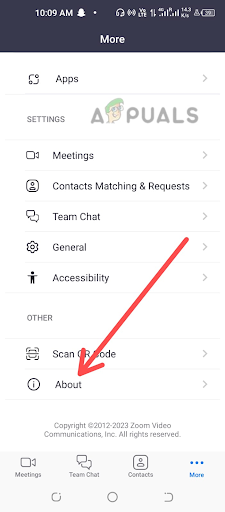
Tap on the More icon - Scroll down and tap on “About.
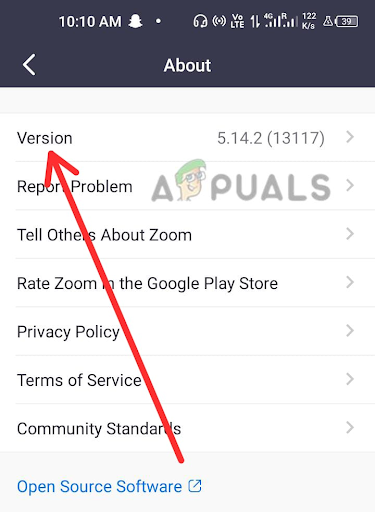
Choose the About option - Then look for the Version option and click on it.
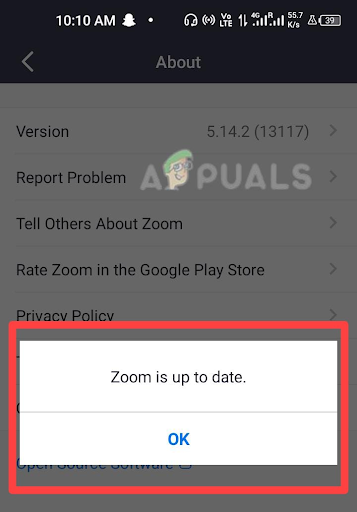
Choose the Version option from the list - If there is no latest version available, a prompt will appear with a message stating that Zoom is up-to-date.
The Zoom app has been updated - If any update is available, it will display “Check for Updates.” Click on it.
- Installing the latest version of Zoom is available. When a prompt appears with the option to install the latest version, tap on Update to initiate the installation process. Follow the on-screen prompts to complete the update.
By regularly updating to the latest version of Zoom, you can ensure that you are using the most current and secure version of the software, which may include important bug fixes and performance enhancements. Now, check again to see if the error is resolved.
3. Delete and Reinstall the Zoom App.
One of the potential solutions to resolve the ‘unable to establish a secure connection to Zoom’ error is to delete and reinstall the Zoom app. To do this, begin by locating the Zoom app on your device, whether it’s a desktop client or a mobile app. Then, follow the appropriate uninstallation process based on your operating system.
After uninstalling the Zoom app, it is advisable to delete any residual app cache to ensure a clean reinstallation. You can do this by navigating to the app’s installation directory and manually deleting any remaining Zoom app folders or files.
Once you’ve uninstalled the Zoom app and cleared the app cache, it’s important to restart your device. This helps to refresh your device’s system processes and clear any potential conflicts or errors that may have been causing the ‘unable to establish a secure connection to Zoom’ issue.
After restarting your device, visit the official Zoom website https://zoom.us/download to download and install the latest version of the Zoom app. Follow the onscreen instructions to complete the installation process. It is crucial to download the app from the official Zoom website to ensure that you are getting the latest and most secure version of the app.
Once the Zoom app is reinstalled, launch it and sign in with your Zoom account credentials. Test the app by scheduling or joining a meeting to see if the error has been resolved.
4. Check the date and time.
Incorrect date and time settings on your computer can result in connectivity issues with Zoom. To check the date and time settings, follow these steps:
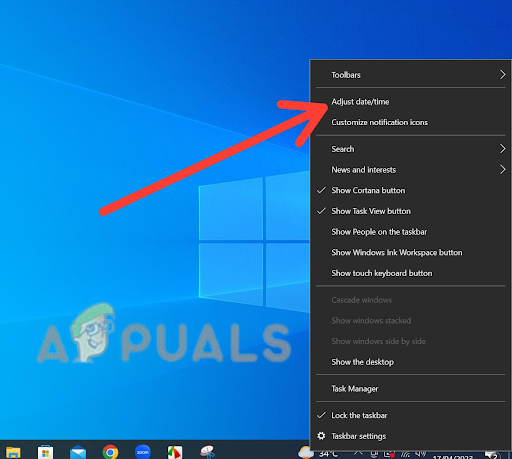
- Locate the clock or time display on your computer’s taskbar or system tray.

Locate the clock or time display - Right-click on the clock and select the “Adjust Date/Time” option, or a similar one. In the settings window, verify that the date and time are accurate.
Select Adjust date and time - If they are incorrect, toggle the switches to set them correctly.
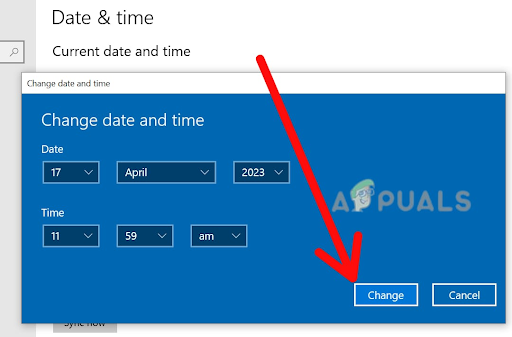
Toggle the switches to set the correct date and time - Click Change to save the changes.
It is important to ensure that your computer’s time zone is set correctly to match your actual location. Incorrect time zone settings can affect the timing of scheduled Zoom meetings and cause issues with establishing a secure connection. To check the time zone settings, follow these steps:
- In the date and time settings window, look for the Time Zone or Change Time Zone option. It may be in a separate tab or under an advanced settings option, depending on your operating system.
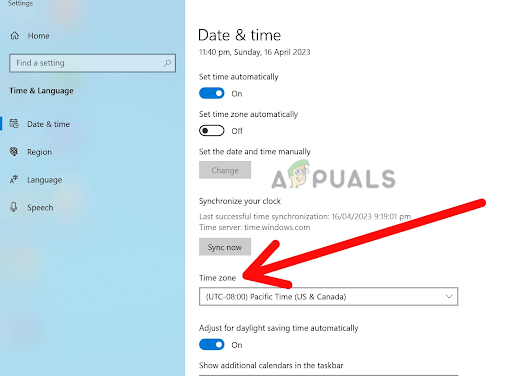
Look for the Time Zone or Change the time zone option - Click on the Time Zone or change the time zone option. This will open a drop-down list of available time zones.
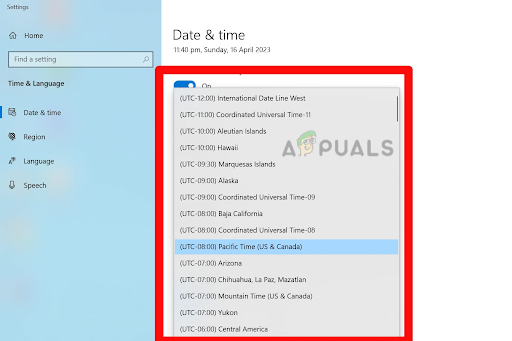
Select your available time zone - Scroll through the list and select your correct time zone from the options. Make sure to choose the time zone that corresponds to your actual location.
- After selecting the correct time zone, click Apply or OK to save the changes. This will update your computer’s time zone setting to the selected option.
- Close the date and time settings window, and restart your computer to ensure that the changes take effect.
5. Change browser settings to always use secure connections.
If you are still experiencing difficulties in establishing a secure connection to Zoom, changing your browser settings to always use secure connections may be the solution you need.
This setting can be particularly useful for resolving issues related to SSL/TLS connections, which are used to establish secure connections between your browser and Zoom servers.
If your browser is not configured to use these secure connections, it may not be able to establish a connection to the Zoom servers, resulting in the error message you are seeing. Here are the steps to change your browser settings to always use secure connections in Google Chrome:
- Open Google Chrome on your device.
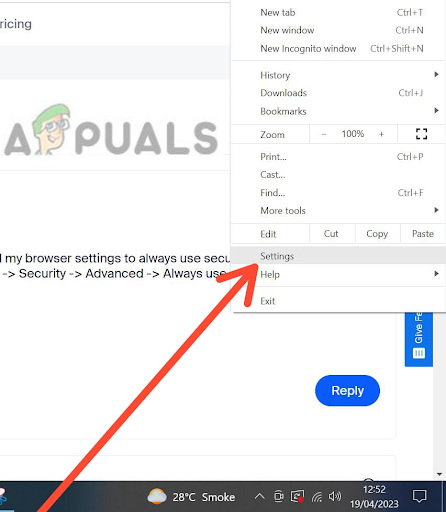
- Click on the three vertical dots in the top-right corner of the window to access the Chrome menu. This action will open a dropdown menu.
- From the dropdown menu, select Settings. This will open the Chrome Settings page in a new tab.
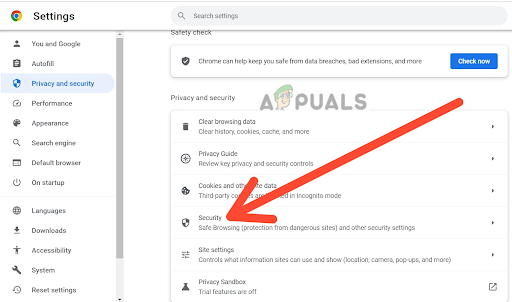
Select Settings - Scroll down to the Privacy and Security section and click on it to expand the options.

Choose the Privacy and Security section - Find the Security section and click on it to expand the options.
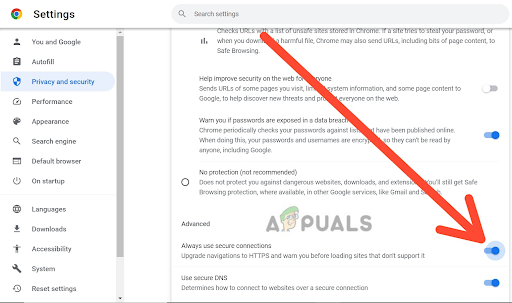
Select Security option - Under the Security section, you should see an option called Advanced. Click on it to expand the Advanced Security settings.
- Look for the option ‘Always use secure connections‘ and toggle the switch next to it to the ‘on’ position (blue). This setting ensures that Chrome always uses a secure HTTPS connection when available, which is necessary for connecting to secure websites like Zoom.
Toggle the switch for Always use secure connections - Once you’ve toggled the switch to the ‘On’ position, you can close the Settings tab and try connecting to Zoom again.
6. Contact Zoom Support.
If you are still experiencing issues after attempting to troubleshoot the problem on your own, you can contact Zoom support for additional assistance. They can help you diagnose the issue and provide guidance on resolving any technical problems.
When contacting Zoom support, it is important to provide as much detail as possible about the issue you are experiencing, including any error messages or codes you may have received. This will help their support team quickly diagnose and resolve the issue.
Keep in mind that Zoom support may experience high volumes of inquiries, particularly during peak usage times; therefore, it may take some time to receive a response. However, they are committed to providing timely and effective support to all users, so don’t hesitate to reach out if you need assistance.
After trying all these methods, you will be able to resolve the ‘unable to establish a secure connection to Zoom’ error and can create and join virtual meetings on Zoom.


