How to Configure and Use DNS-Over-HTTPS (DoH) in Windows 11
Windows 11 comes with a long-awaited privacy feature called DNS-over-HTTPS (A.K.A DoH). When configured correctly, it’s a wonderful way of encrypting your communications without the need to go for a complicated 3rd party solution.
What is DNS Over HTTPS?
DNS over HTTPS (DOH) is a newer sub-protocol that can be used when performing remote Domain Name System (DNS) resolutions via the HTTPS protocol.
The purpose of this supporting privacy feature is to increase the security of Windows 11 users by preventing any kind of eavesdropping or manipulation of DNS data by using the HTTPS protocol to encrypt the data between the DoH client and the DoH-based DNS resolver.
This new security solution implemented by Microsoft is directly aimed at limiting the recent surge in man-in-the-middle attacks that affected companies worldwide.
Once you enable DNS Over HTTPS, your internet data exchanges will flow securely through an encrypted server that will restrict access between you and the DNS resolver.
What DOH Solution should I Use?
There are tons of DOH solutions compatible with Windows 11, but our advice is to stick with a reputable provider. Here are the big 3 names that hold the biggest market share:
IPv4
- Google – 8.8.8.8 and 8.8.4.4
- Cloudflare– 1.1.1.1 and 1.0.0.1
- Quad9 – 9.9.9.9 and 149.112.112.112
IPv6
- Google – 2001:4860:4860::8888 and 2001:4860:4860::8844
- Cloudflare – 2606:4700:4700::1111 and 2606:4700:4700::1001
- Quad9 – 2620:fe::fe and 2620:fe::fe:9
Keep in mind that your data exchanges will have to pass through a DoH server before they will get encrypted. Because of this, it’s very important to choose a DoH provider that you actually trust.
Note: If you’re an IT Administrator, you also have the option to create your own DoH server by running the following commands in netsh or Powershell:
Netsh (with admin access)
netsh dns add encryption server=[resolver-IP-address] dohtemplate=[resolver-DoH-template] autoupgrade=yes udpfallback=no

Powershell (with admin access)
Add-DnsClientDohServerAddress -ServerAddress '[resolver-IP-address]' -DohTemplate '[resolver-DoH-template]' -AllowFallbackToUdp $False -AutoUpgrade $True
Note: Keep in mind that [resolver-IP-address] and [resolver-DoH-template] are simply placeholders that you’ll need to replace with the actual values in your case.
How to Enable DoH for IPv4 or IPv6 on Windows 11
Thanks to the native DoH integration available with Windows 11, enabling this advanced privacy feature is a matter of accessing the Network & Internet Settings screen.
To make things easier for you, we’ll walk you through the entire process.
There are actually two different ways that you can follow in order to enable DNS over HTTPS on Windows 11:
- You can enable DNS over HTTPS from the Network & Internet tab of the Settings app
- You can enable DNS over HTTPS by establishing a Group Policy
If you’re not that technical, you might want to stick with the Settings app.
Enable DoH via Settings app on Windows 11
Important: You must be signed with an administrator account in order to change the DNS server address and enable DoH on your Windows 11 PC.
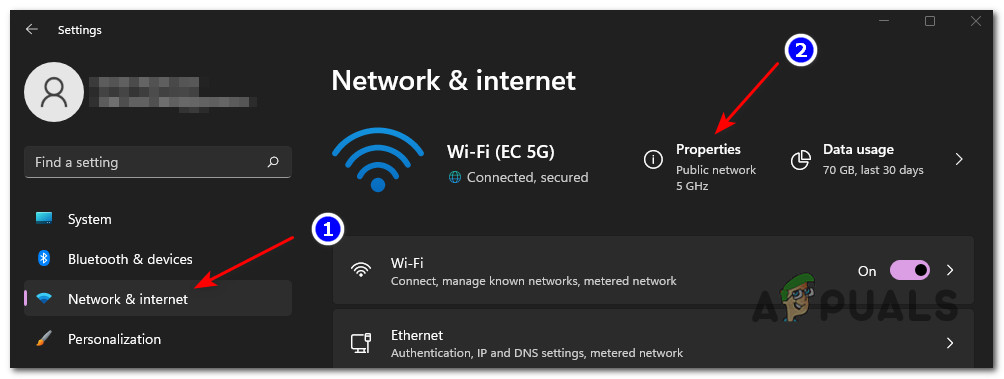
- Press Windows key + I key to open up the Settings menu.
- From the main Settings menu, use the vertical menu on the left to click or tap on Network & Internet.
- Next, move over to the menu on the right and click on the Properties box associated with the network that you’re actively connected to.
Accessing the Properties screen - Inside the dedicated Properties menu, click on the Edit menu directly under DNS server assignment on the right-hand side.
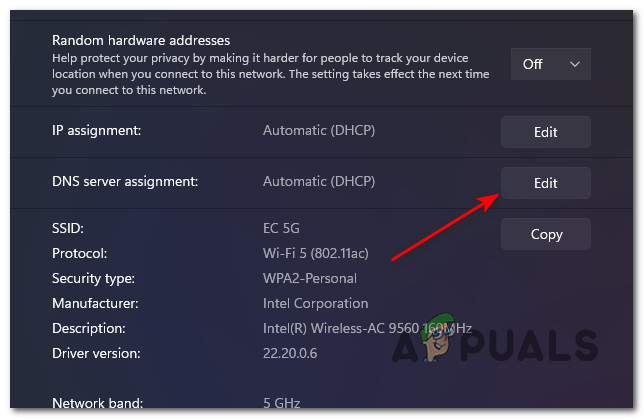
Editing the current DNS server assignment Note: If you get the “The DNS settings for all Wi-Fi networks have been set. The settings below won’t be saved.” message upon clicking on Edit, click on Change DNS settings for all Wi-Fi Networks.
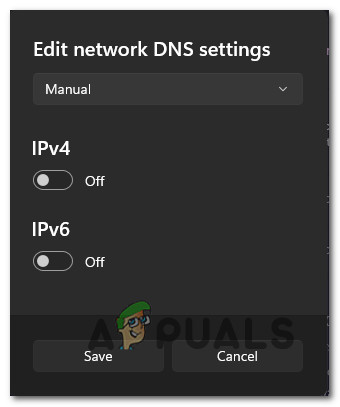
- From the next prompt that just appeared, select Manual from the drop-down menu.
- Next, follow one of the following sub-guides depending if you want to enable DoH for IPv4, IPV6, or both. If you want to enable DoH for both protocols, follow both of the guides below.
Enable DNS over HTTPS (DOH) for IPv4
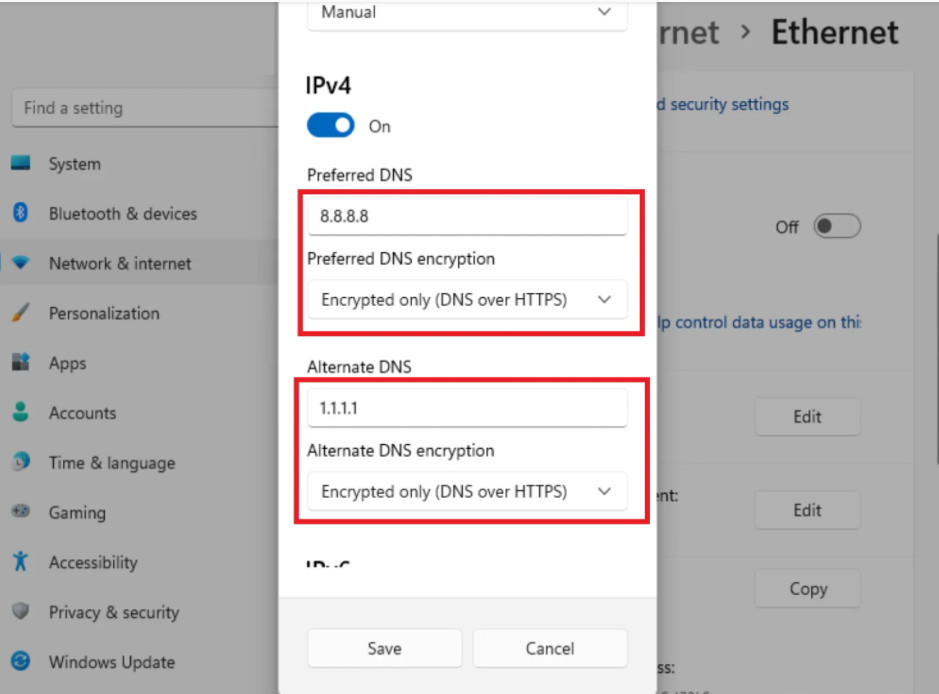
- Turn the IPv4 toggle on from the prompt that just appeared.
Enable the iPv4 toggle - Next, type the Preferred DNS you want from the safest options below:
CloudFlare - 1.1.1.1
Google - 8.8.8.8
Quad9 - 9.9.9.9
Note: If you want to use a different DOH solution or you’ve created a DOH server yourself, insert the custom Preferred DNS address instead.
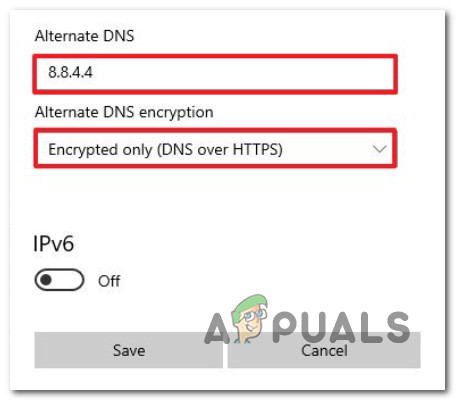
- Next, type the alternate DNS inside the correct box. Make sure to continue with the same provided that you picked at step 2:
CloudFlare - 1.0.0.1
Google - 8.8.4.4
Quad9 - 149.112.112.112
- After you’ve made sure that you’ve typed in the correct values, select Encrypted only (DNS over HTTPS) from the Alternate DNS encryption menu (under IPv4).
Set to Encrypted Only Note: Keep in mind that if you don’t have the Preferred DNS encryption option available, you’ll need to choose Encrypted only (DNS over HTTPS). But before you can do this, you’ll need to change the IPv4 DNS address for this connected network adapter and repeat the instructions from the top.
Enable DNS over HTTPS (DOH) for IPv6
- Enable the toggle named IPv6 from the active window.

Enable the IPv6 toggle - Inside the newly appeared type the Preferred DNS you want by picking one popular option for below or by inserting your own custom value if you’re using a different DoH provider or you’ve configured your own DoH server:
CloudFlare - 2606:4700:4700::1111
Google - 2001:4860:4860::8888
Quad9 - 2620:fe::fe
- After you’re finished with the Preferred DNS, move over to the Alternate DNS inside box and insert the corresponding value from the shortlist below:
CloudFlare - 2606:4700:4700::1001
Google - 2001:4860:4860::8844
Quad9 - 2620:fe::fe:9
- After you’ve made sure that you’ve typed in the correct values, select Encrypted only (DNS over HTTPS) from the Alternate DNS encryption menu (under IPv6).
Set to Encrypted Only Note: If you don’t have the Preferred DNS encryption option available, you’ll need to choose Encrypted only (DNS over HTTPS). But before you can do this, you’ll need to change the IPv4 DNS address for this connected network adapter and repeat the instructions from the top.
Enable DoH via Group Policy Editor on Windows 11
Important: The Group Policy is not available on the Home version of Windows 11. Only follow the instructions below if you have Windows 11 PRO, Windows 11 Enterprise, or Windows 11 Education.
- Press Windows key + R to open up a Run dialog box. Next, type ‘gpedit.msc’ inside the text box, then press Enter to open up the Group Policy Editor utility on Windows 11.
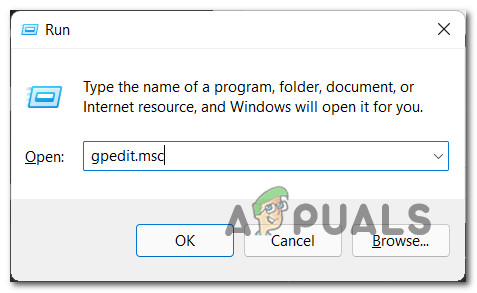
Opening the Group Policy Editor - If you are prompted by the User Account Control, click Yes to grant yourself admin access.
- Inside the Group Policy Editor, use the menu on the left to navigate to the following location:
Computer Configuration > Administrative Templates > Network > DNS Client
- Once you arrive inside the correct path, move over to the menu on the right, then double-click on the Configure DNS over HTTPS (DoH) name resolution policy.
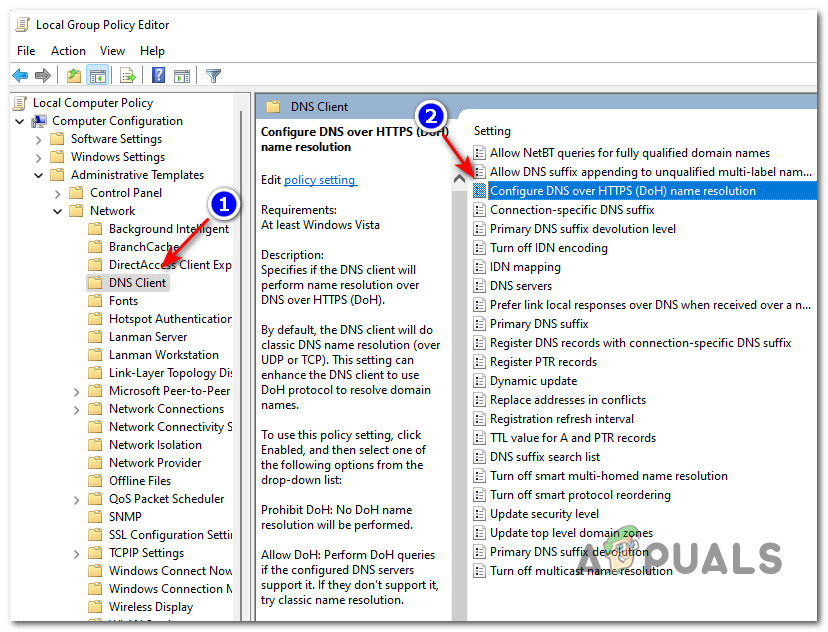
Accessing the correct DoH policy - Inside the dedicated policy window, set the status of the policy to Enable, then click on Apply to save the changes.
- Once DoH is enabled, locate the DNS servers policy from the same right pane and set the IP Address according to the provider that you want to use.


