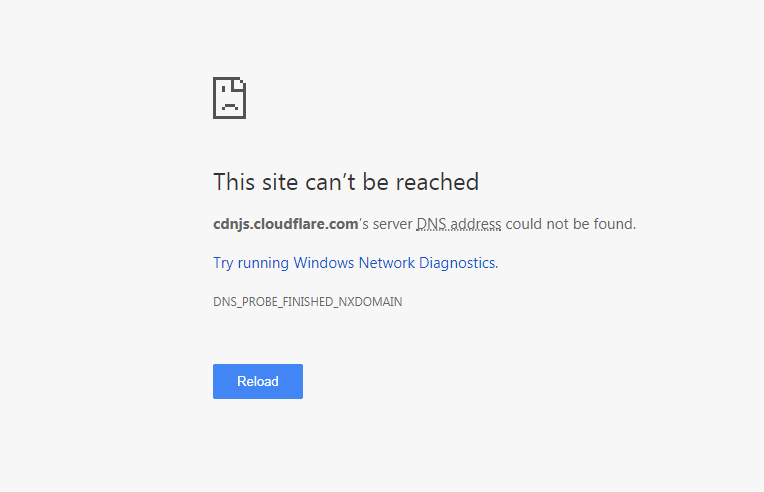
How to Fix “Server DNS Address Could Not Be Found” Error?
The “Server DNS address could not be found” stops users from opening specific websites and instead see an error message. This issue usually occurs when your DNS server can’t change the website address into an IP address, stopping you from accessing the site.
The most common cause is incorrect DNS settings, which might happen due to wrong network settings, a broken cache, or the DNS server being temporarily unavailable. Other reasons could be outdated network drivers or a wrong entry in the host file.
In this article, we will discuss different solutions to solve this error.
1. Run the Network Troubleshooter
The Network Troubleshooter automatically finds and fixes network problems. When you use it, Windows looks for common issues like DNS errors, IP conflicts, or connectivity problems. It can also reset network settings to help get everything working properly again.
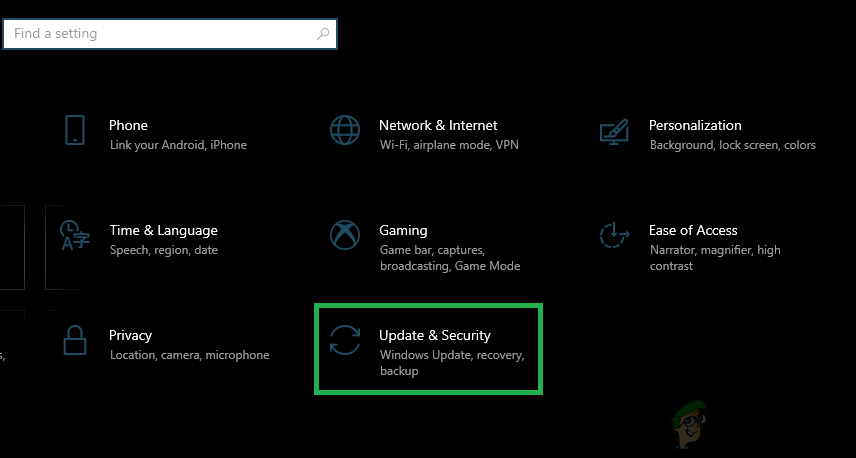
- Press Windows + I to open settings.
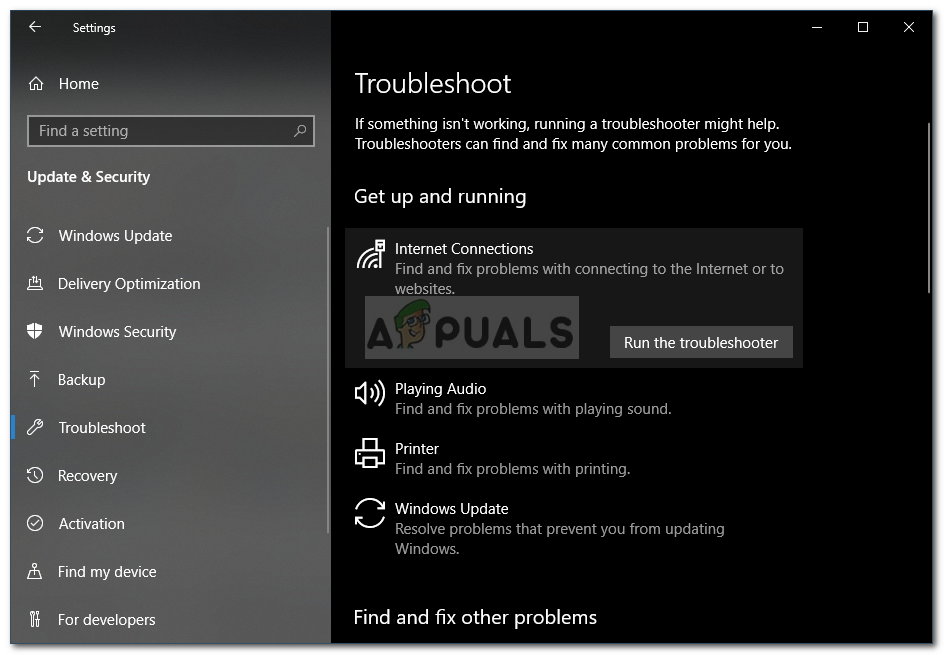
- Select Update and Security, then Troubleshoot.
Selecting “Update and Security” - Choose Internet Connections and click Run the troubleshooter.
Running the troubleshooter - Follow the on-screen prompts to complete troubleshooting.
2. Change DNS Settings
A misconfigured DNS can stop your device from converting domain names into IP addresses, leading to errors. Changing the DNS settings to a reliable option lets your system avoid possibly faulty ISP DNS servers. This simple change can improve connection stability and speed, helping your system communicate with websites correctly and fix the problem.
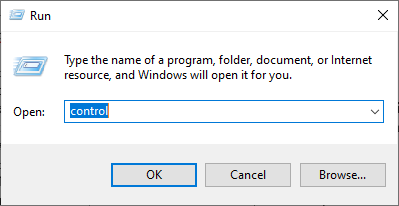
- Press the Windows + R keys simultaneously to open the run dialog box.
- Type control.exe and click OK.
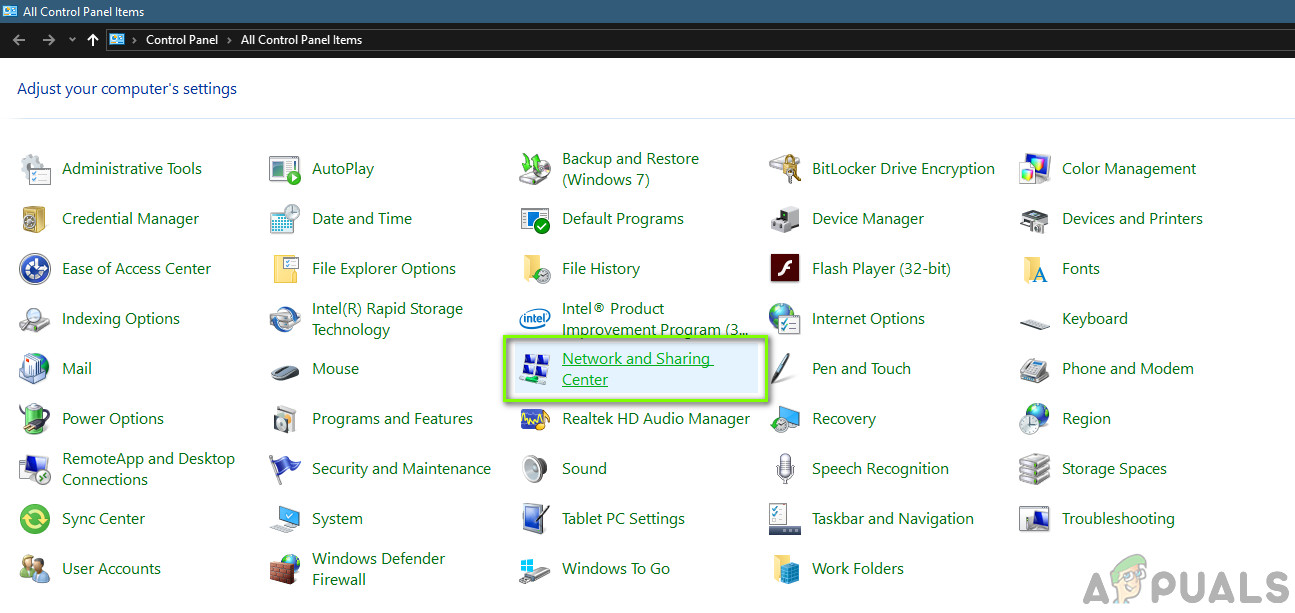
Accessing the Classic Control Panel interface - Set “View By:” to “Small Icons” and click on “Network and Sharing Center.”
Network and Sharing Center – Control Panel - Click “Change adapter settings.”
- Right-click your connection icon (Local Area or Wireless) and select “Properties.”
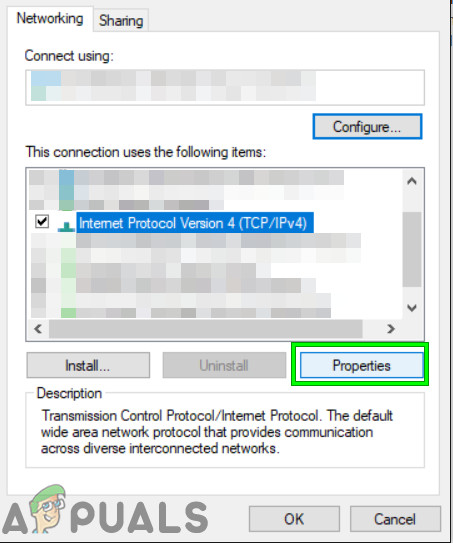
- Click “Internet Protocol Version 4 (TCP/IPv4)” and then the Properties button.
Open Properties of IPV4 - Ensure “Obtain DNS Server Address automatically” is checked, if not previously changed.
- Select “Use the Following DNS Addresses” and enter “8.8.8.8” as the primary and “8.8.4.4” as the secondary.
- Save changes and close the window.
- Check if this change fixes the error in Google Chrome.
3. Reset Network Configurations
Resetting your network settings can clear misconfigurations or corrupt data causing DNS issues. This process refreshes your TCP/IP stack, clears the DNS cache, and reinstalls network adapters, helping your device communicate correctly with the DNS server.
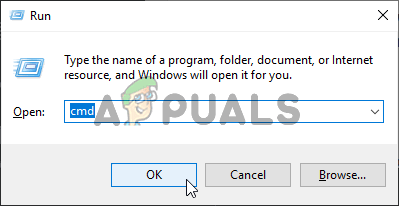
- Press Windows + R to open the run prompt and type cmd.
- Press Ctrl + Shift + Enter to open the command prompt with administrative permissions.
Opening the Command Prompt - In the command prompt, enter the following commands one by one, pressing Enter after each:
netsh int ip reset
netsh winsock reset
ipconfig /release
ipconfig /renew
ipconfig /flushdns
- Check if the error message still persists after executing all commands.
4. Restart the DNS Service
The DNS service might have glitched while using Chrome, causing the error message. This temporary failure can prevent websites from loading, but restarting the DNS service often resolves the issue.
- Press the Windows + R keys to open the Run prompt.
- Type services.msc and press Enter to open the service management window.

Running Services.msc - In the service manager, scroll to find and right-click on the DNS Client service.
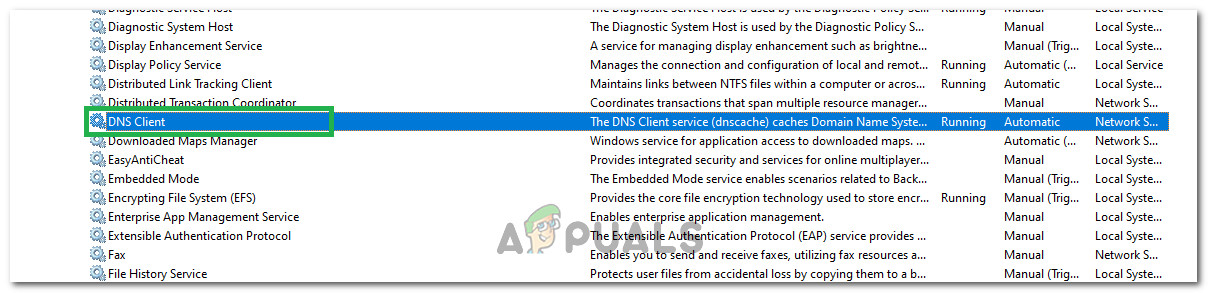
Restarting DNS Client Service - Select Restart and wait for the service to restart.
- Check if the issue persists after the service restarts.
5. Upgrade Network Adapter Drivers
Missing or outdated network drivers might be causing this issue on your computer. Updating or installing the correct drivers ensures that your device can handle network connections efficiently.
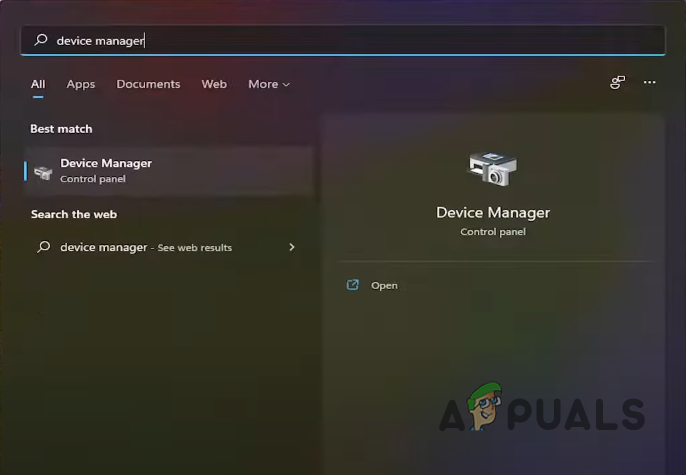
- Search for Device Manager in the search box and open it.
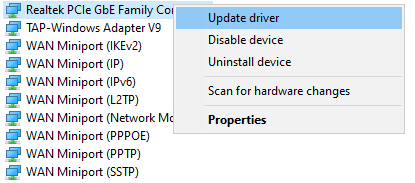
- Right-click the Network Adapter and choose “Update Drivers.”
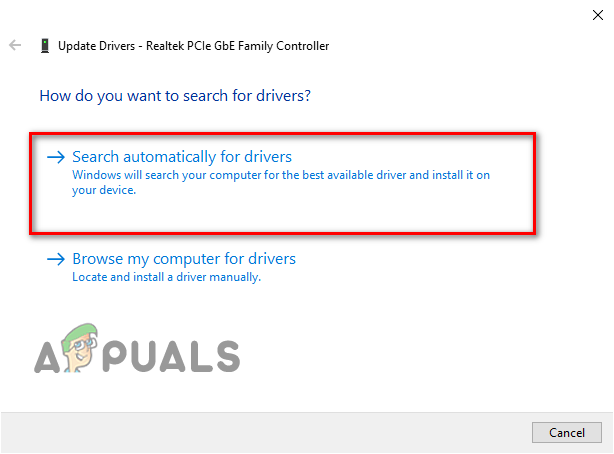
- Select “Search automatically for drivers.”
- Wait for the process to complete.
6. Clear Chrome’s DNS Host Cache
Chrome stores its own DNS cache to speed up internet browsing, but issues can arise if this cache becomes corrupted. We’ll use Chrome’s internal commands to reset this cache and see if the error message disappears.
- Open Chrome and start a new tab.
- Type “Chrome://net-internals/#dns” and press Enter.
- Click the “Clear Host Cache” button to clear the cache.

Clicking on the “Clear Host Cache” button - Check if the error persists after clearing the cache.
8. Reinstall Chrome
Reinstalling Chrome can fix DNS issues by removing corrupted files or settings that block internet access. This resets the browser to its default state, clearing any problematic configurations. It also ensures you’re using the latest version, which may include network-related bug fixes.
- Exit all Chrome tabs and windows on your computer.
- Click the Start menu and select the Settings option.
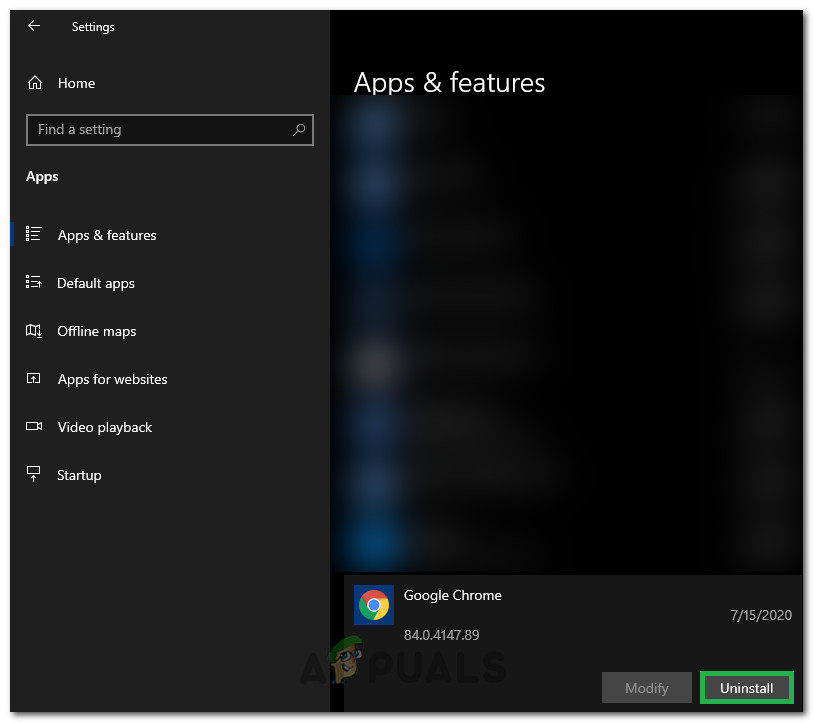
- Click “Apps.”
- Under “Apps & features”, find and click Google Chrome.
- Click the uninstall button.
Clicking on the “Uninstall” button - Confirm by clicking “Uninstall” again.
- To delete profile information like bookmarks or history, select “Also delete your browsing data.”
- Click uninstall on the final prompt to begin the process.
- Ensure Chrome is completely uninstalled before reinstalling.
Now we will be reinstalling the software by following the guidelines below.
- Download the installation file from here.
- When prompted, choose “Save” and run the executable once it’s downloaded.
- Open Chrome and set it as your default browser for optimal performance.
- Check if the issue still persists.
9. Reset Internet Settings
Internet Explorer is used by the computer to communicate with the Windows servers, and it is used for all tasks by the operating system that involves connecting to the internet. If it glitches, it can cause issues. We will solve this by resetting it completely.
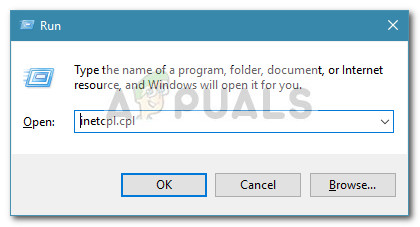
- Press Windows + R to open the Run dialog box.
- Type “inetcpl.cpl” and press Enter.
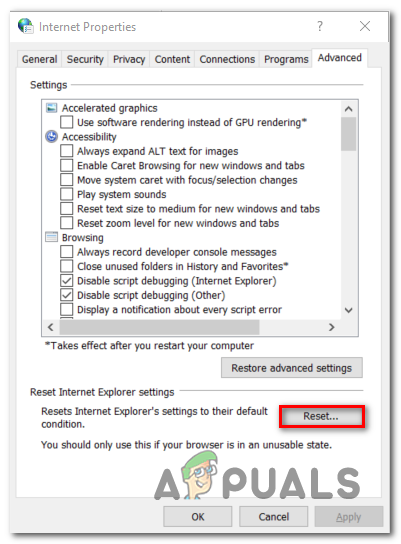
Run dialog: inetcpl.cpl - Go to the “Advanced” tab and click “Reset“.
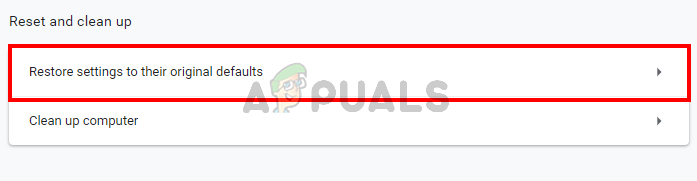
Resetting the Internet Explorer settings - Open Chrome and click the “Three Dots” in the top right corner.
- Select “Advanced,” then “Reset settings to their original defaults“.
Google Chrome Reset settings - Restart Windows and check if the error persists.
Method 1 worked like a charm