How to Fix the ‘Establishing Secure Connection’ Slow Problem in Google Chrome?
“Establishing secure connection” is a message which appears in the bottom left corner of the Google Chrome browser window after you try to visit a website. It appears when visiting websites which use the HTTPS protocol. Visiting such websites means that a secure, encrypted connection needs to be established.
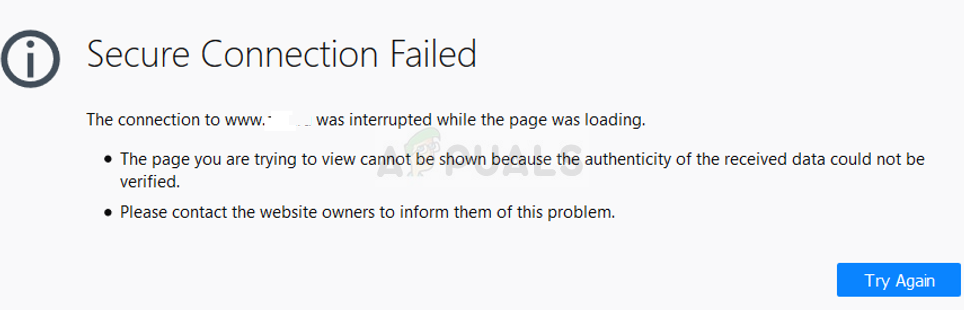
However, Google Chrome users claim that this connection takes way too long to establish on all websites, especially when compared to Edge or Firefox browsers. There are quite a few different methods people used to successfully resolve this problem and we decided to list them in this article. Check them out below!
What Causes the Establishing Secure Connection Slow Problem in Google Chrome?
There are quite a few different causes to this problem and you should check out the list below to correctly pinpoint the correct cause for your scenario. This will narrow down the troubleshooting methods you can use! Check it out below!
- Cryptographic service has malfunctioned – This service is in charge of resolving TLS handshakes which are used to establish secure connections between clients and servers. Restarting this service should resolve the problem.
- Suspicious addons – If you have added new extensions and plugins to the Chrome browser, one of them may cause connection issues and prolong the time needed to establish a secure connection. Consider removing them from Google Chrome.
- Antivirus checks – Most antivirus suites provide the HTTP scanning feature which scans the connections you are trying to establish. It will prolong the time needed to connect and you should consider disabling it to speed things up.
- TLS 1.3 – If you are using TLS 1.3 in your Google Chrome browser, certain websites may be incompatible so consider disabling it for the time being.
Solution 1: Use the Following Set of Commands
This method is quite popular for its simplicity and plenty of people use it to fix most things related to the issue at hand. The funny thing is that it works and users have commented saying that this is the only step it took to resolve the problem. Try it out now by checking out Solution 2 from our Fix: Err_Connection_Closed article. Make sure you only perform the first set of steps, with the commands in Command Prompt!
Try to open Google Chrome and check to see if the “Establishing secure connection message” still hangs for too long!
Solution 2: Perform a Network Reset
Performing a Network Reset is yet another simple method of resolving this problem. It has worked for many users and you have absolutely nothing to use if you try it out. Follow the steps below and check to see if the “Establishing secure connection” message still takes too long to disappear when visiting a website in Google Chrome!
- Open the Run utility by using the Windows Key + R key combination on your keyboard (press these keys at the same time. Type “ms-settings:” in the newly opened box without the quotation marks and click OK to open the Settings tool.
- An alternative way would be to open the Settings tool on your PC by clicking the Start menu and clicking the cog icon at the bottom left part.
Opening Settings from Start menu - Also, you can use the Windows key + I key combination for the same effect. Click to open the Network & Internet section and stay in the Status tab at the left side of the window.
- Scroll down until you reach the blue Network reset button. Click it and follow the instructions which will appear on-screen and make sure you comply with everything.
Network reset - Check to see if the same problem persists!
Solution 3: Restart Cryptographic Services and DNS Client in Services
File sharing, like any other feature in Windows 10, depends on certain services to run properly. In this case, the services are called Function Discovery Provider Host and Function Discovery Resource Publication. These services need to be started and the need to run constantly. Follow the steps below to achieve that on your computer!
- Open the Run utility by using the Windows Key + R key combination on your keyboard (press these keys at the same time. Type “services.msc” in the newly opened box without the quotation marks and click OK to open the Services tool.
Running Services - The alternative way is to open the Control Panel by locating it in the Start menu. You can also search for it using the Start menu’s search button.
- After the Control Panel window opens, change the “View by” option at the top right part of the window to “Large Icons” and scroll down until you locate the Administrative Tools entry. Click on it and locate the Services shortcut at the bottom. Click on it to open it as well.

Opening Services from Control Panel - Locate the Cryptographic Services and DNS Client services on the list, right-click on each one and select Properties from the context menu which appears.
- If the service is started (you can check that just next to the Service status message), you should stop it for now by clicking the Stop button in the middle of the window. If it is stopped, leave it stopped until we proceed.
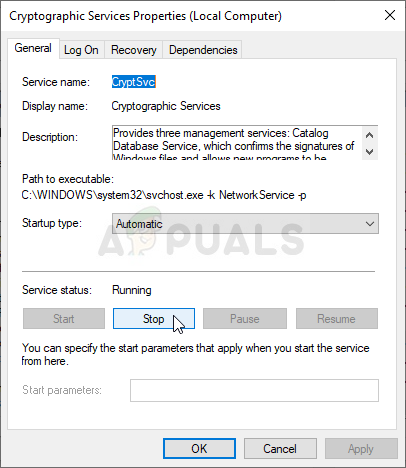
Stopping Cryptographic Services - Make sure that the option under the Startup type menu in the service’s properties window is set to Automatic before you proceed with other steps. Confirm any dialogue boxes which may appear when changing the startup type. Click on the Start button in the middle of the window before exiting. Make sure you repeat the same process for all services we mentioned.
You may receive the following error message when you click on Start:
Windows could not start the service on Local Computer. Error 1079: The account specified for this service differs from the account specified for other services running in the same process.
If this happens, follow the instructions below to fix it.
- Follow the steps 1-3 from the instructions above to open the service’s properties window. Navigate to the Log On tab and click on the Browse… button.
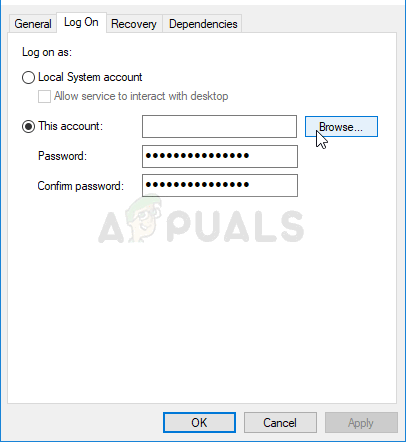
- Under the “Enter the object name to select” entry box, type in Network Service, click on Check Names and wait for the name to become available.
- Click OK when you are finished and type in the password in the Password box when you are prompted with it if you have set up a password. Windows 10 File sharing should now work properly!
Solution 4: Check for Suspicious Extensions
If the problem started to occur recently, it might be due to a newly added extension which is causing security concert. You can check that easily by opening Google Chrome, disabling extensions one by one, and checking to see which one is the culprit. Delete it afterward!
- Open Google Chrome by double-clicking its icon from the Desktop or by searching for it in the Start menu. Type in the address below in the address bar to open Extensions:
chrome://extensions
- Try to locate the extension which could cause security issues or an extension which was added recently and click the Remove button next to it to remove it from Google Chrome permanently.
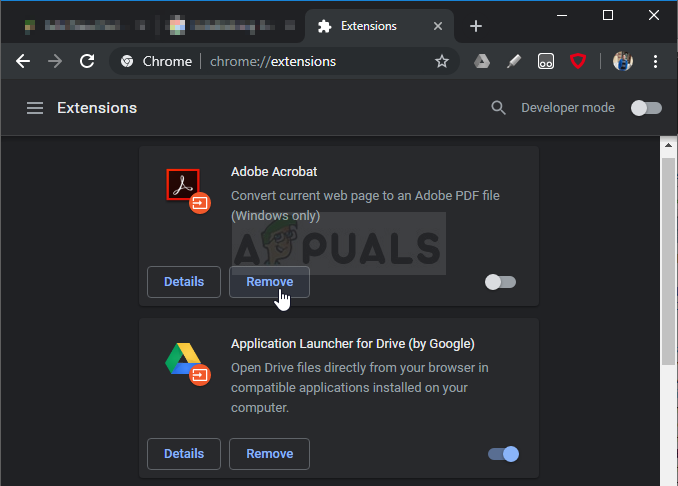
Removing the extension from Chrome - Restart Google Chrome and check to see if you still notice that the “Establishing secure connection” message hangs for too long on your computer!
Solution 5: Disable HTTP/Port Checking on Your Antivirus
The usual cause for the problem is your antivirus unnecessarily scanning the sites’ certificates which slows down the process of requesting files from the servers which, in effect, can cause the “Establishing a secure connection” message to hang for a long time in Google Chrome.
Since the error appears to users using different antivirus tools, here is how to locate the HTTP or Port scanning options on some of the most popular third-party AV tools.
- Open the antivirus user interface by double-clicking on its icon at the system tray (right part of the taskbar at the bottom of the window) or by searching for it in the Start menu.
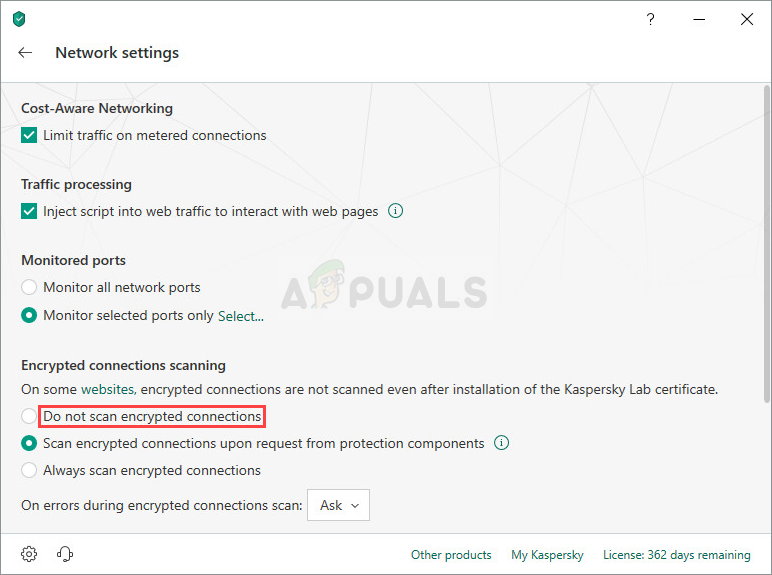
- The HTTPS scanning setting is located in different spots concerning different antivirus tools. It can often be found simply without much hassle but here are some quick guides on how to find it in the most popular antivirus tools:
Kaspersky Internet Security: Home >> Settings >> Additional >> Network >> Encrypted connections scanning >> Do not scan encrypted connections
AVG: Home >> Settings >> Components >> Online Shield >> Enable HTTPS Scanning (uncheck it)
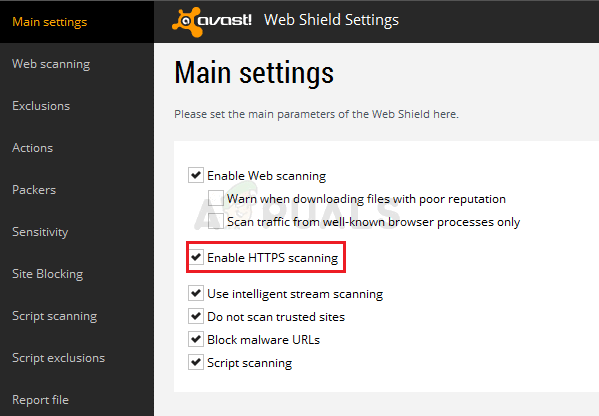
Avast: Home >> Settings >> Components >> Web Shield >> Enable HTTPS Scanning (uncheck it)
ESET: Home >> Tools >> Advanced Setup >> Web and Email >> Enable SSL/TLS protocol filtering (turn it off)
Check to see if you are now able to visit any website without receiving the “Establishing a secure connection” message for a long time! If the error still appears, you might consider using a different antivirus or firewall tool, especially if the one giving you the problems is free!
Solution 6: Disable TLS 1.3
The problem is mostly related to some of the latest version of TLS. Certain developers have discovered that the problem can be resolved easily simply by editing certain advanced Chrome settings which will disable TLS 1.3. TLS is the transport layer protocol which handles encryption and data transfer. Try using an older version. Follow the instructions below to try this method out!
- Open Google Chrome by double-clicking its icon from the Desktop or by searching for it in the Start menu. Type in the address below in the address bar to open Experiments:
chrome://flags
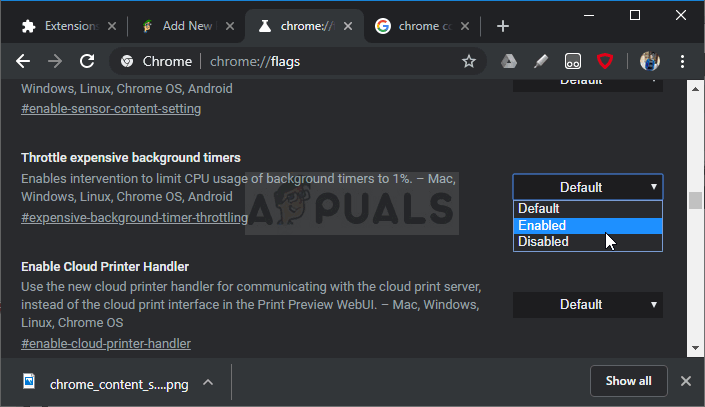
Google Chrome flags - Locate the option to disable TLS listed below inside the Experiments window, under the Available tab. You can use the search bar at the top of the window to locate it as the list is very long. Make sure you search for TLS, find the related settings, and set it to Disabled.
- Restart Google Chrome and check to see if establishing the connection is still a problem!
Solution 7: Make Sure Certain Settings are Set in Internet Options
This is one of the easiest methods used to resolve the problem. Proxy servers can cause the login process to fail and you need to disable them inside Internet Options. Make sure you try out the methods above before troubleshooting this problem!
- Open Internet Explorer on your computer by searching for it on the Desktop or the Start menu. Click on the cog icon located in the top right corner. From the menu which opens, click on Internet Options to open a list on related connection settings.

Opening Internet options in Internet Explorer - If you don’t have access to Internet Explorer, Open Control Panel by searching for it in the Start menu or by using the Windows Key + R key combination, typing “control.exe” in the Run box, and click OK to run Control Panel.
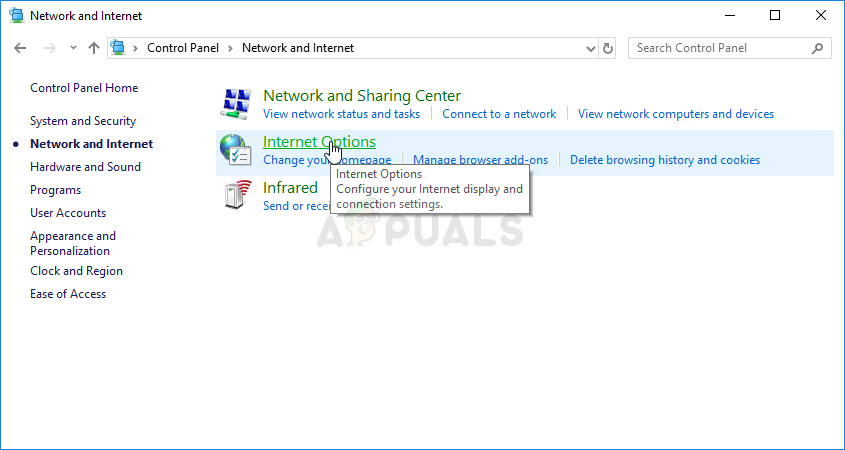
- In Control Panel, select to View as: Category at the top right corner and click on the Network and Internet button to open this section. Inside this window, click on Internet Options to navigate to the same screen as you would if you opened Internet Explorer.
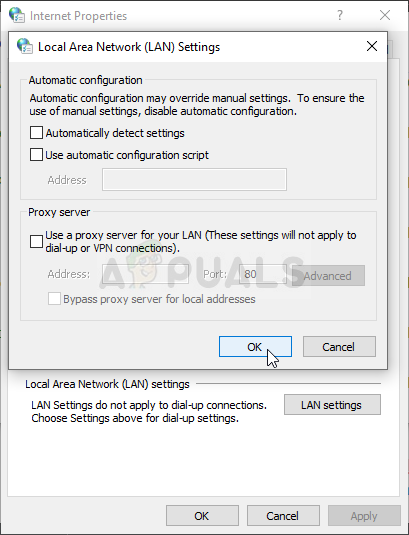
Internet options in Control panel - Navigate to the Connections tab and click on LAN Settings. Uncheck the box next to Automatically Detect Settings and make sure the Use a proxy server for your LAN option is unchecked.
Setting up LAN settings - Make sure you apply the changes you made and restart your computer before you check to see if the Origin won’t go online login error still appears.
Solution 8: Clear Browsing Data
An over-accumulation of browsing data in the form of cookies, browser cache, and history files can slow down a browser’s ability to connect and cause it to use more internet resources than necessary. This can be observed when trying to connect to a secure website. Users have reported that deleting their browsing data was able to help them get rid of the problem!
Make sure you follow the steps from the Solution 3 of our How to Fix Google Chrome High CPU Usage on Windows? article. Restart your computer again and check if the “Establishing secure connection” message keeps appearing!
Solution 9: Group Policy Fix
This is quite an easy way of resolving the problem but, unfortunately, it’s not available to Windows 10 Home users. If you are using Windows 10 Pro or Enterprise, make sure you follow the steps below to try to resolve this problem!
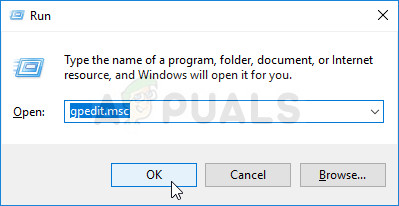
- Use the Windows Key + R key combination (tap the keys simultaneously) to open the Run dialog box. Enter “gpedit.msc” in the Run dialog box, and press the OK button to open the Local Group Policy Editor tool. On Windows 10, you can try simply type Group Policy Editor in the Start menu and click the top result.
Running the Local Policy Group Editor - On the left navigation pane of Local Group Policy Editor, under Computer Configuration, double click on Windows Settings, and navigate to Security Settings >> Public Key Policies.
- Select the Public Key Policies folder by left-clicking on it and check out its right side section.
- Double click on the “Certificate Path Validation Settings” policy and check the radio button next to the “Define Policy Settings” option. Uncheck the box next to the Allow user trusted root CAs to be used to validate certificates (recommended) option.
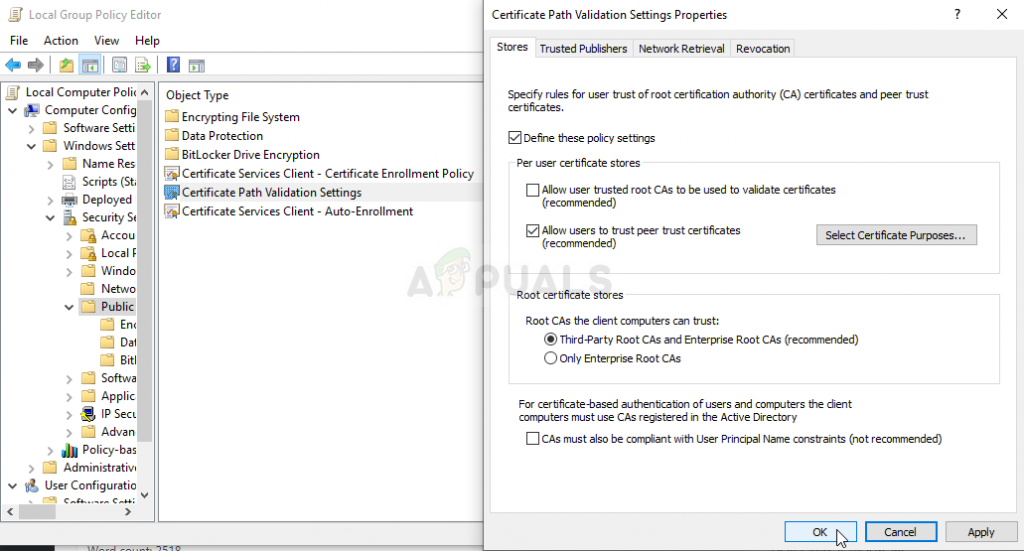
Certificate Path Validation Settings - Apply the changes you have made before exiting. The changes won’t be applied until you restart.
- Finally, reboot the computer to save the changes and check to see if you are still being targeted with the error.


In “Solution 6”, contains one error at description from the step 2, on text “disable PLS listed” would be “disable TLS listed” ?