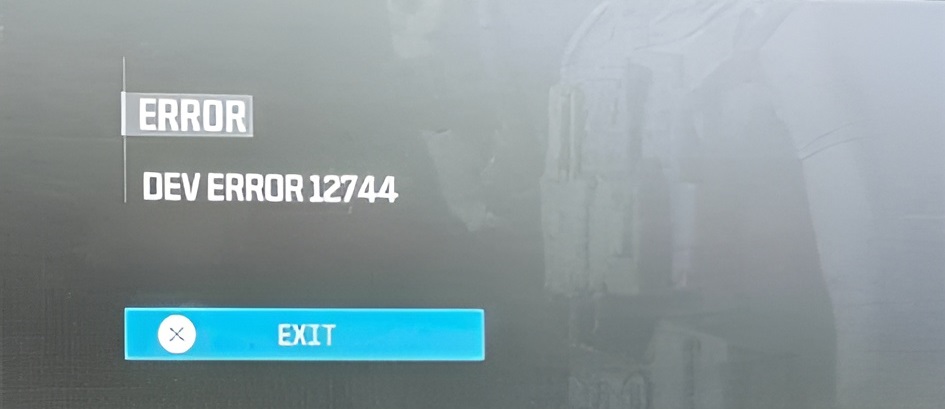
How to Fix Call Of Duty “DEV ERROR 12744” on PC?
When the dev error 12744 appears in Call of Duty, players attempting to join playlists—including those featuring the Rust and Shipment maps—are unexpectedly kicked out of the game and returned to the main screen. This error commonly occurs in split-screen mode, but it can also be due to outdated game versions, corrupted files, and network issues.
In-game glitches might also cause this error.
Although this primarily indicates an issue with the game’s playlist, there isn’t much we can do other than wait for Activision to resolve it.
However, some client-sided issues can also cause this error. This article aims to fix those client-side issues to hopefully resolve the problem.
Before you begin, it is important to maintain a consistent internet connection while playing Call of Duty, as this can prevent errors like this. Make sure that you have a strong and reliable connection to avoid this error.
- Prefer the use of an Ethernet Cable over WiFi for a more stable connection.
- Position your router in the center of your home for equal reach and minimal signal interference.
- Power cycle your router by unplugging it, waiting for about thirty seconds, then plugging it back into the power source.
- Conduct a test on your internet connection before starting the game to ensure stability and the absence of packet loss or latency issues.
- Verify that the Call of Duty servers are up and running and that no problems have been detected in the last 24 hours.
- Restarting your computer can sometimes resolve temporary issues related to an outdated cache.
1. Run The Game as an Administrator
This approach grants the game additional privileges to modify system files and settings, which it may be prevented from doing under normal user mode. This increased access can potentially bypass restrictions that were causing the error, allowing the game to operate without any issue.
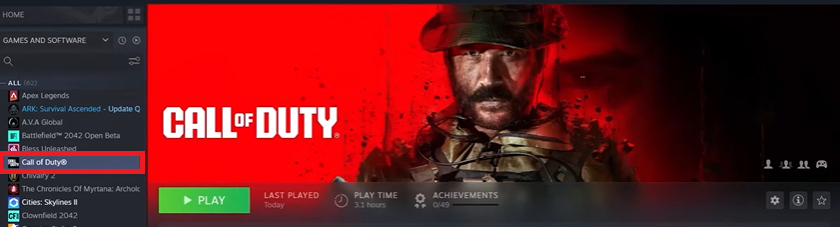
- Launch the Steam app from the desktop or search bar.
- Go to the library section.
- Locate Call of Duty: Modern Warfare.
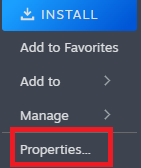
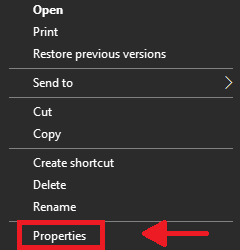
- Right-click the game and select Properties.
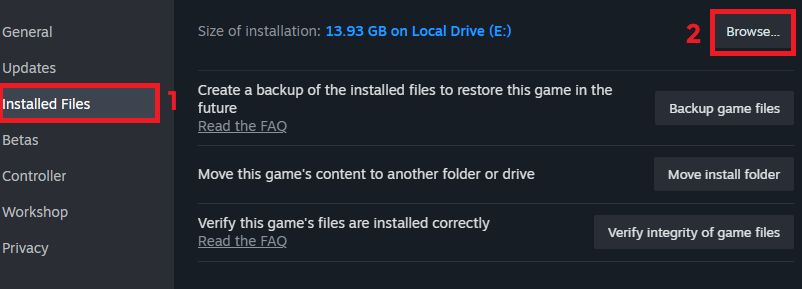
- In Properties, go to the Local Files tab and click Browse.
- Locate the Call of Duty executable file, right-click on it, and choose Properties.
- Under the Compatibility tab, check the Run this program as an administrator option.
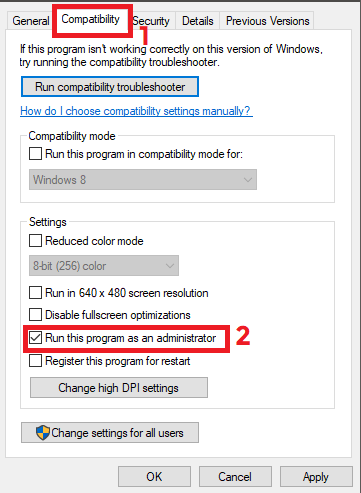
- Click Apply to save the changes.
2. Clear the Blizzard App Temp Folder
Temporary files can often become a hidden problem, leading to error messages and crashes. Clearing the Blizzard App Temp Folder removes these potentially corrupt files, effectively giving the app a fresh start and reducing the likelihood of errors in Call of Duty.
Note: Doing this will reset your graphic and control settings.
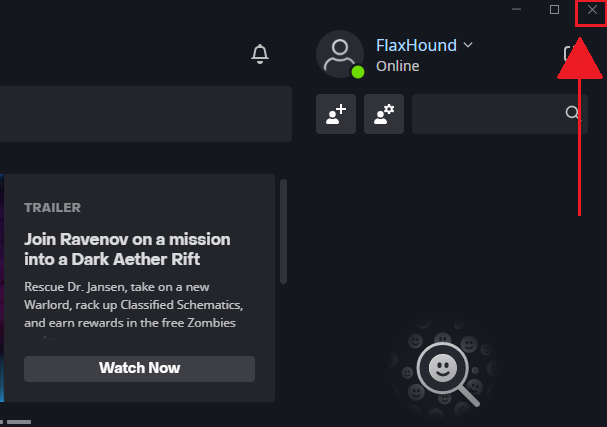
- Exit and restart the Blizzard Battle.net app.
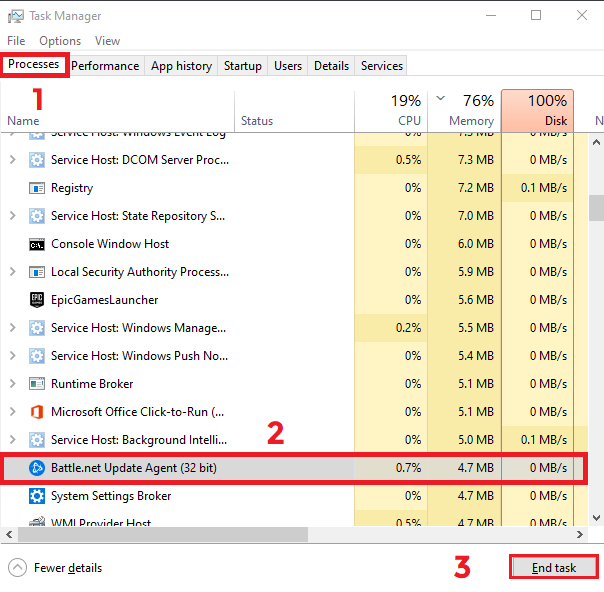
- Use the shortcut Ctrl + Shift + Esc to open the Task Manager.
- Under the Processes tab, find and terminate the Blizzard Update Agent by selecting it and clicking End Process.
- Press Windows Key + R to open the Run dialogue box.
- Enter the following path and press Enter.
%ProgramData%
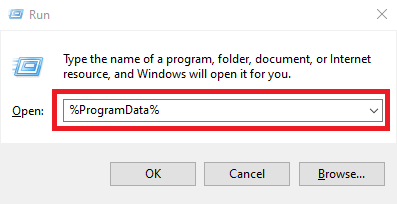
- If a Blizzard Entertainment folder is present, right-click on it and choose Delete.

- Relaunch the Battle.net desktop app and start the game again.
3. Verify Game Files
Verifying game files scans through the game’s installed data, detects any files that have become corrupt or gone missing, and replaces them with fresh, intact versions. By making sure all necessary files are in their proper state, this process can clear the glitches causing the error, paving the way for smoother gameplay.
- Open the Steam app from the desktop or search bar.
- Locate Call of Duty in the library.
- Right-click the game and select Properties.
- Under the Local Files tab, click Verify Integrity of Game Files.
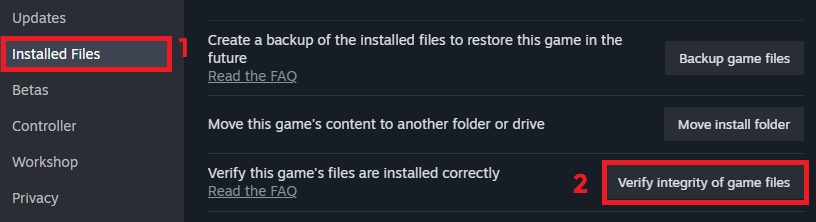
- Allow Steam to verify and, if necessary, reacquire any missing or corrupted files.
4. Run The Game in DirectX 11 Mode
At times, the latest DirectX 12 might not be fully optimized for every system setup, occasionally causing errors such as the Dev error 12744. By switching to DirectX 11—which is widely recognized for its stability and broad compatibility—you provide a more seasoned and tested environment for Call of Duty to run in, potentially resolving glitches tied to the newer version’s more advanced features that your hardware or software setup may struggle with.
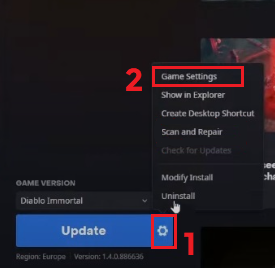
- Start the Blizzard Battle.net app from the desktop.
- Select Call of Duty from your library.
- Choose Options > Game Settings.
- Check the Additional command line arguments box.
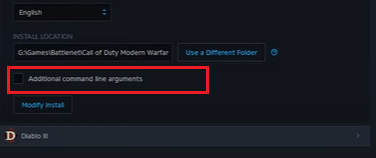
- In the provided text field, type:
-d3d11
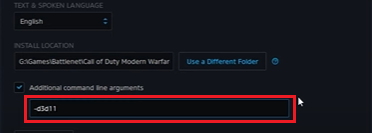
- Click Done to finalize the changes.
5. Scan and Repair The Game Via the Blizzard App
When you use the ‘Scan and Repair’ function, it thoroughly checks your game’s installed files for any inconsistency or signs of corruption. If it detects any file that’s not in its original state, it promptly replaces or repairs it, often solving issues that might be causing the dev error.
- Launch the Blizzard Battle.net launcher from your desktop.
- Select Call of Duty from the library.
- Click on Options > Scan and Repair.
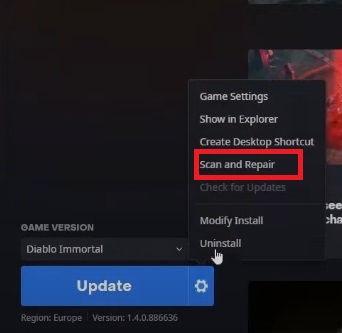
- Click Begin Scan.

- Wait for the process to complete as it scans and repairs the game.