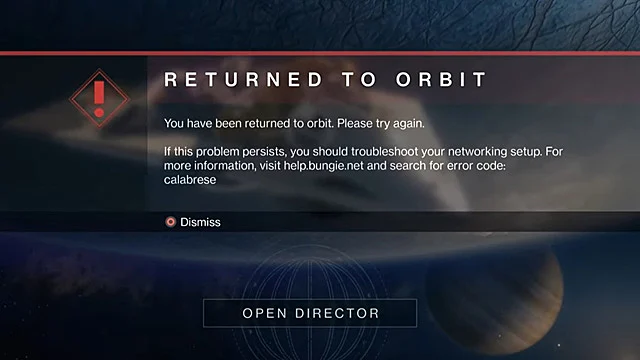
How to Fix Error Code “Calabrese” in Destiny 2?
Players trying to enter game servers on Destiny 2 might encounter the Calabrese error. This problem blocks them from getting server access. Typically, server outages or problems with network connections lead to this error. Using a VPN, mismanaged DNS settings, or heavy internet use on other devices might also play a part in causing this issue.
This post presents several methods to figure out and solve the issue.
1. Check Server Status and Internet Connection
Before heading to other steps, it’s advised to look at the server status to confirm that the servers are working. You can do this by visiting the server status page here. Also, make sure that your internet is functioning as expected by carrying out a speed test at Speedtest or Fast. If your internet isn’t fast enough, think about rebooting your router or getting in contact with your ISP.
2. Disable VPNs
VPNs are superb tools for privacy and offering access to region-specific content; however, they can sometimes break the data path between your system and the game’s servers. This disruption can show up as increased lag or connection timeouts. By turning off your VPN, you are able to directly connect to Destiny 2’s servers, thus eliminating any potential interference the VPN might generate and paving the way for more stable gaming.
- Press Windows Key + I to open Settings.
- Choose Network & Internet > VPN.
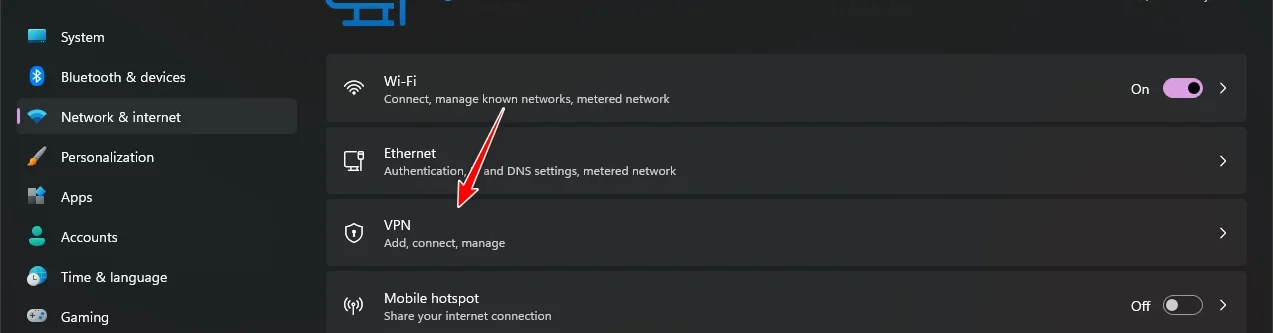
- Disconnect any existing VPN connections.
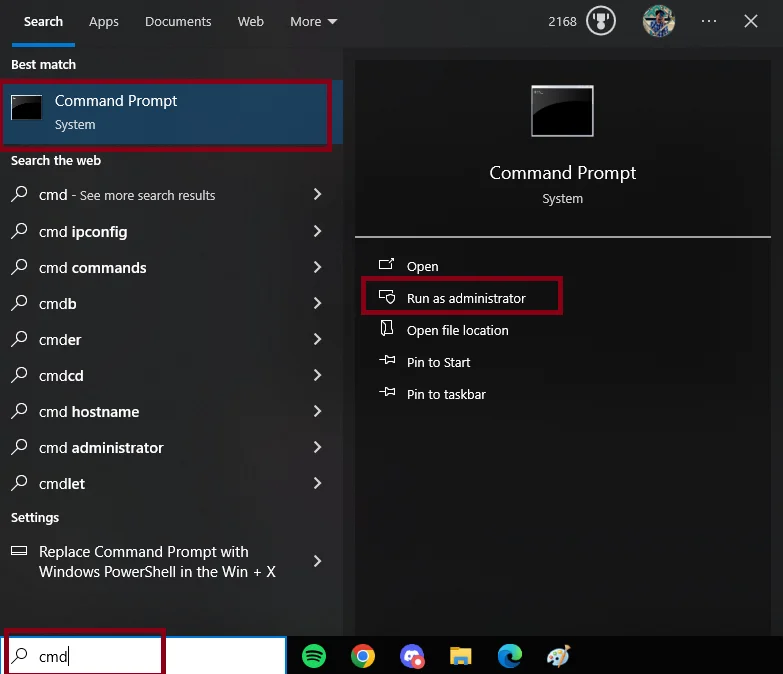
3. Flush DNS and Renew IP
Clearing out the DNS cache removes any saved IP addresses and other DNS results that may have gone stale or become corrupted. Such inconsistencies can stop your system from establishing a fresh, stable connection to game servers. Along with this, changing your IP address can resolve conflicts that may exist if your computer’s current IP address is in some way problematic or has changed without your knowledge.
- Open the Search menu, type cmd, and run the Command Prompt as an Administrator.
- Enter the following commands:
ipconfig /flushdns
ipconfig /registerdns
ipconfig /release
ipconfig /renew
netsh winsock reset
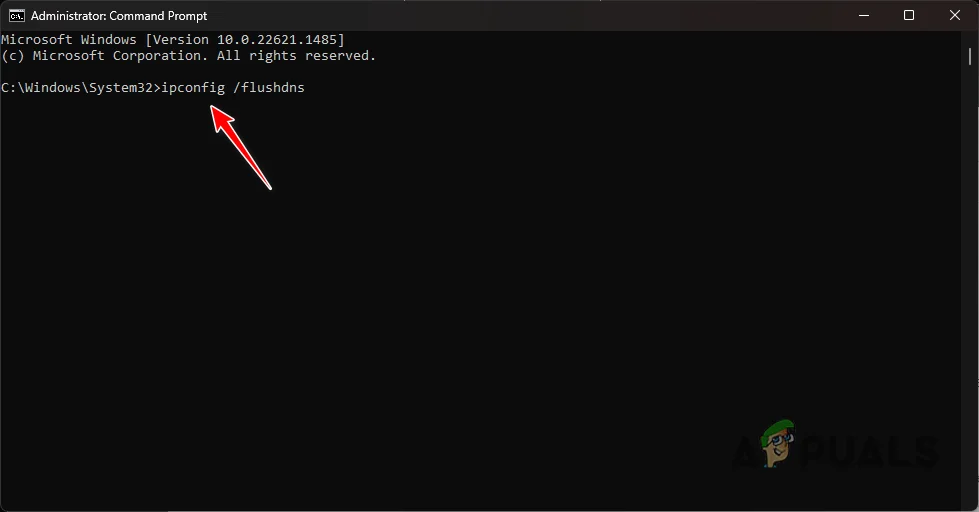
- Restart your computer.
4. Monitor Devices Connected to the Internet
Watching the number of devices connected to your Wi-Fi network is essential. Too much bandwidth used by other gadgets can slow down your internet speed considerably, leading to problems like the Calabrese error in Destiny 2. By limiting use or removing unnecessary devices, you free up bandwidth, potentially solving connection-related problems and ensuring smoother gameplay.
5. Firewall Settings for Destiny 2
The firewall acts as a safety gatekeeper, and it may block the game from accessing the network if it mistakenly identifies the game as a potential threat. By allowing Destiny 2 in the firewall settings, you’re explicitly giving the game clearance to send and receive data without being blocked by your computer’s safety protocols. This can help you get rid of connectivity problems that might be causing the error.
- In the Search box, type Control Panel and open it.
- Go to System and Security > Windows Defender Firewall.

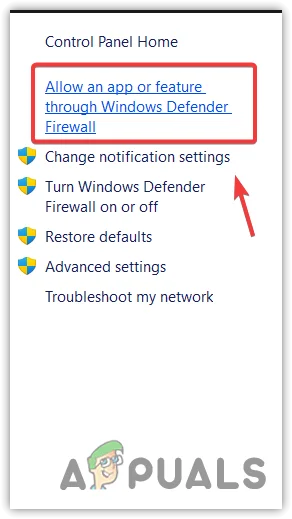
- Choose Allow an app or feature through Windows Defender Firewall from the left sidebar.
- Click Change settings > Allow another app.
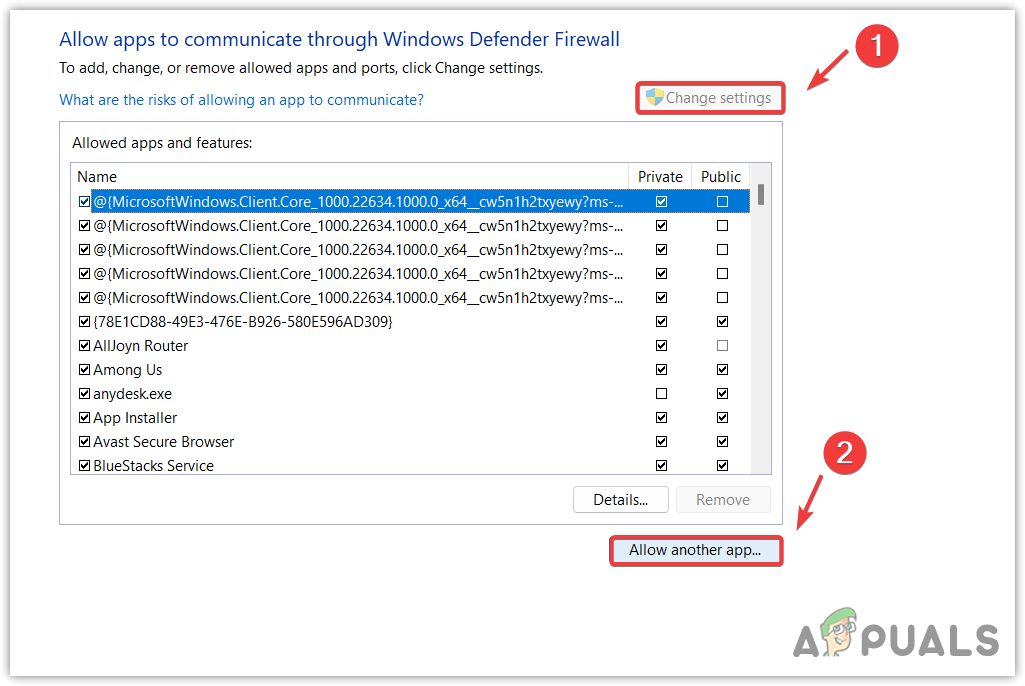
- Find and choose the installation directory of Destiny 2.
- Check both Public and Private options for Destiny 2.

- Try to play the game again.
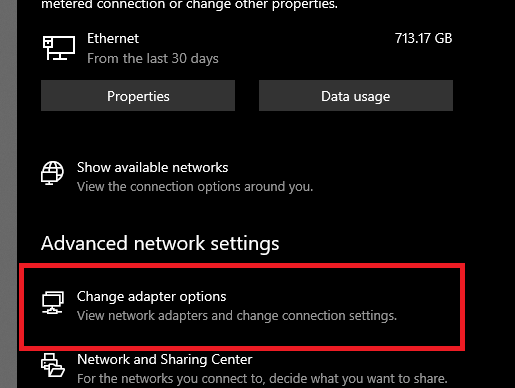
6. Change DNS Settings
By changing your DNS settings, you’re basically switching to a different address book that might offer a more reliable and convenient path to connect you to your online destinations. By using well-known DNS providers like Google or OpenDNS, you might improve connectivity stability and potentially get around the issues causing this error in Destiny 2.
- Right-click the Network icon in the system tray.
- Choose Change Adapter Settings.
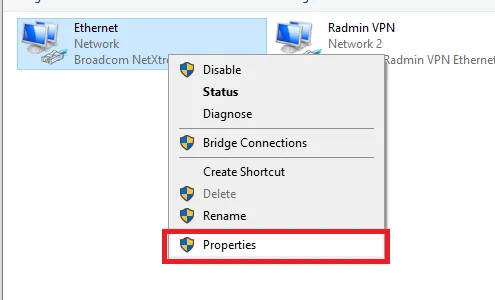
- Right-click your main internet connection and go to Properties.
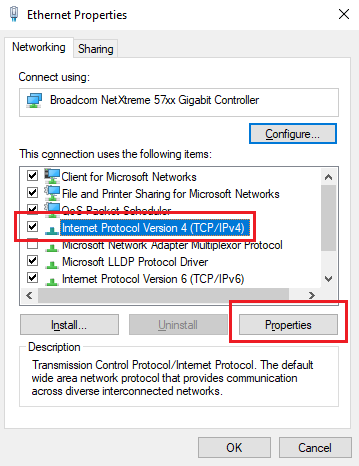
- Choose Internet Protocol Version 4 (TCP/IPv4) and click Properties.
- Turn on Use the following DNS server addresses and enter the DNS servers listed below:
Google’s Public DNS
Primary: 8.8.8.8
Secondary: 8.8.4.4

OpenDNS's Public DNS
Primary: 208.67.222.222
Secondary: 208.67.220.220
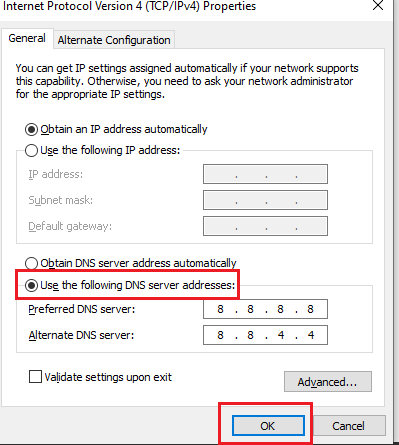
- Press OK to apply the DNS changes.
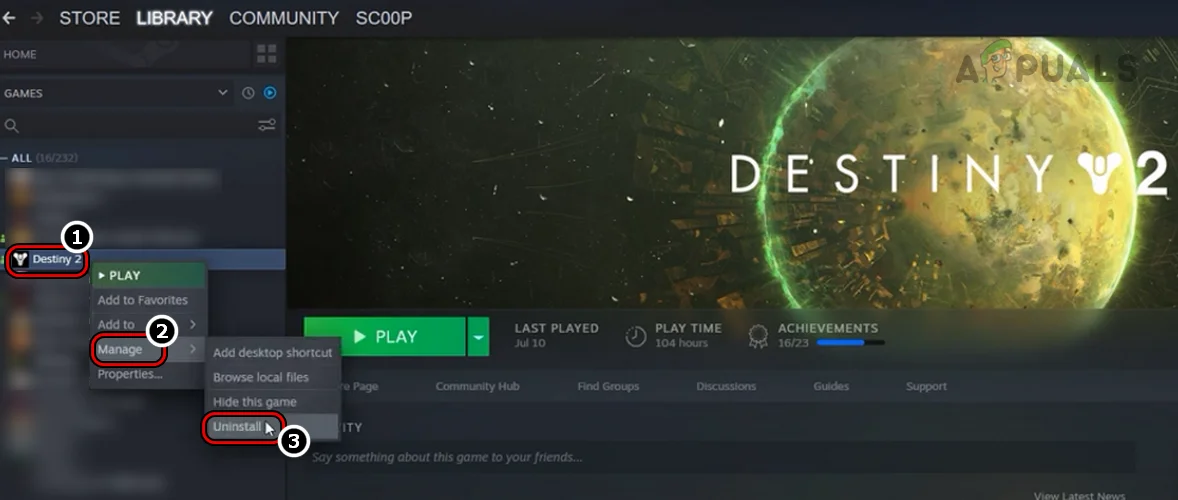
7. Reinstall the Game
Sometimes, game files become corrupted due to various reasons—such as breaks in updates or disk mistakes—which can result in ongoing errors. By uninstalling and then installing a fresh copy of the game, you will replace all the game files with new versions, potentially fixing the root of the error and making it easier for you to return to the game world.
- Start Steam and head to your Library.
- Right-click on Destiny 2 and select Manage > Uninstall.
- Install the game again.


