Zubyan is a certified PCHP and Google IT Support Professional.
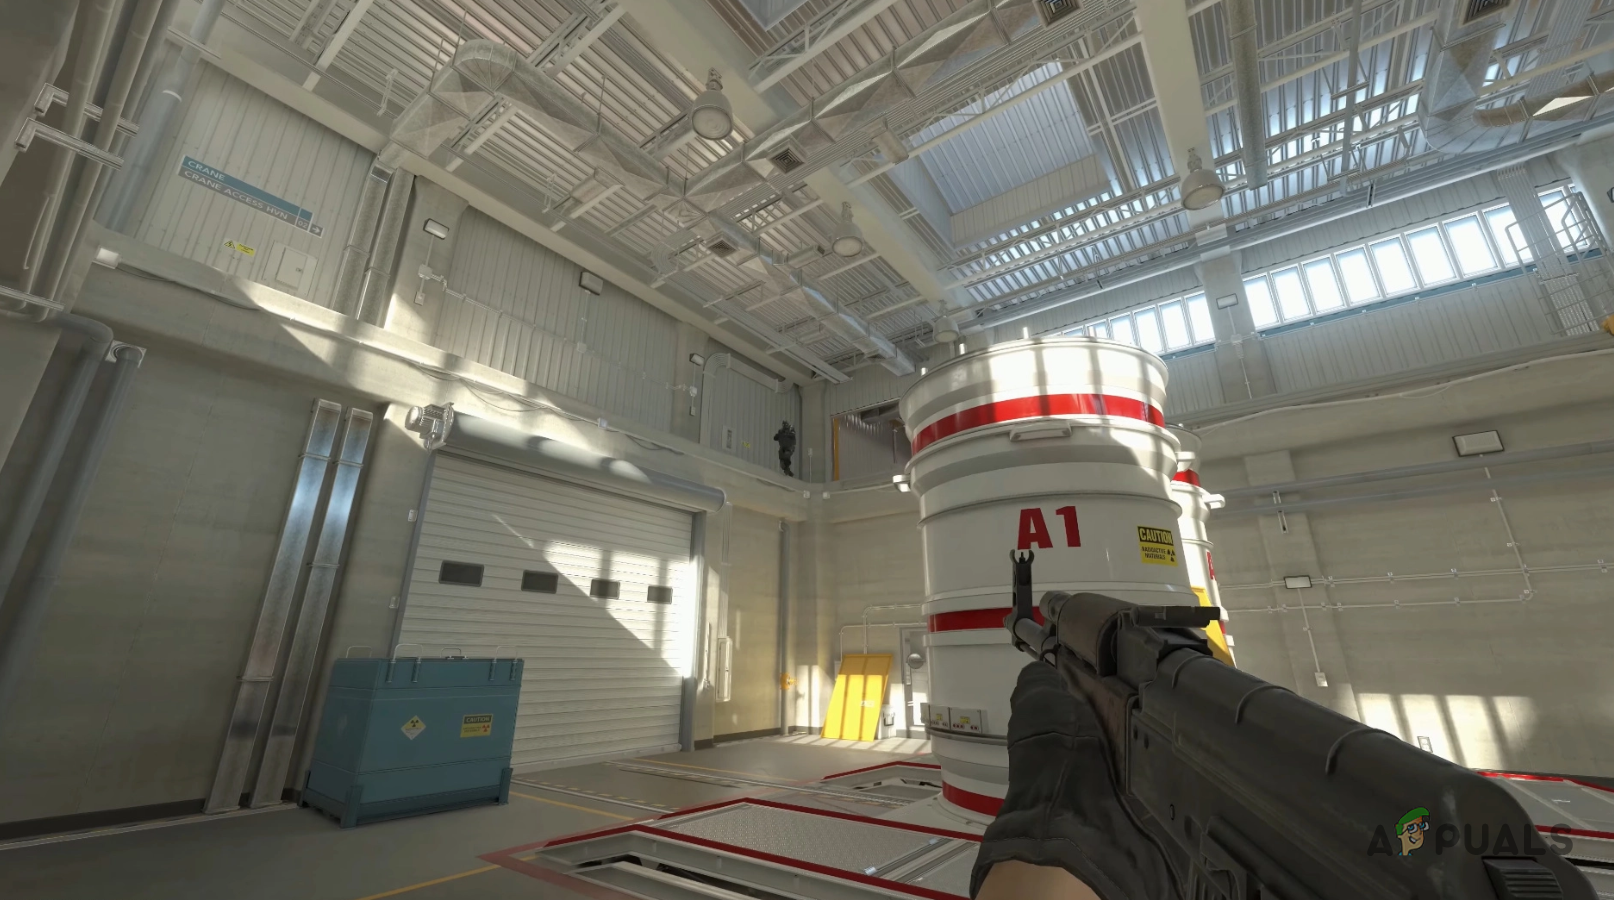
Counter-Strike 2 is not entirely optimized at the moment as it goes through its beta phase. This is quite normal since the target of the limited access is to squash any existing issues and bugs with the game. Optimization can come later once the game is ready to be shipped to the general public. Counter-Strike 2 However, running the game in the Limited Access phase can be troublesome since the performance is not on par with the standard. Lower frame rates and in-game stutters can ruin the experience of playing the game. In this article, we are going to show you a number of methods you can use to reduce the in-game stutters as well as increase your FPS, even if it is slightly.
1. Use Low Latency Mode (NVIDIA Only)
If you have an NVIDIA graphics card, the first thing you should do is enable Low Latency Mode for Counter-Strike 2. This controls the number of frames your processor prepares before they are processed by the graphics card. You will have to use the NVIDIA Control Panel to enable low latency mode. If you do not see the option in the NVIDIA Control Panel, the graphics drivers installed on your PC are obsolete and you will have to update them. You can jump to the respective section for updating your graphics drivers in the article below. Follow the instructions below to enable Low Latency Mode in the NVIDIA Control Panel:
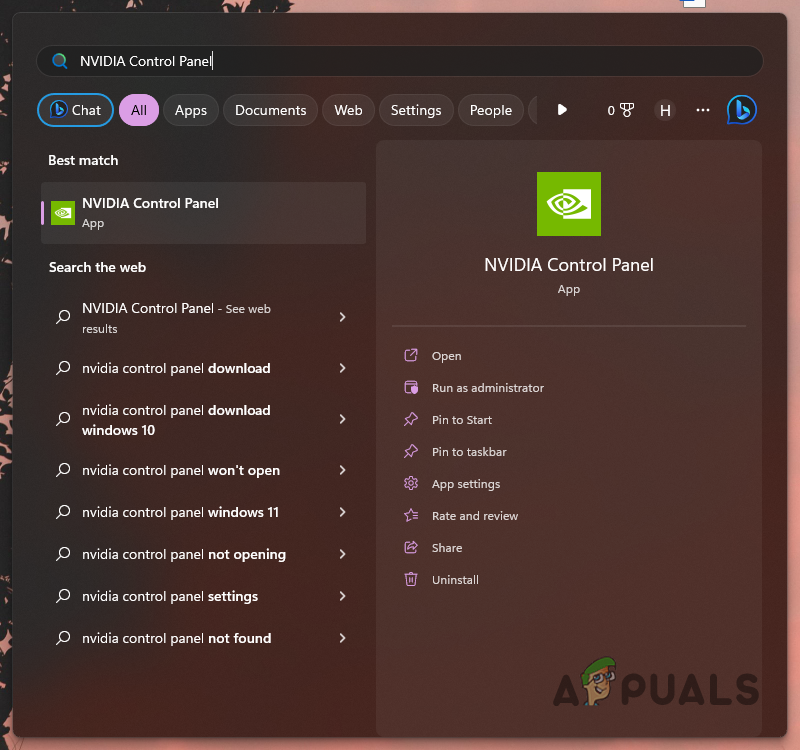
First, open the NVIDIA Control Panel. You can do this via the right-click context menu on your Desktop or searching for it in the Start Menu. Opening NVIDIA Control Panel
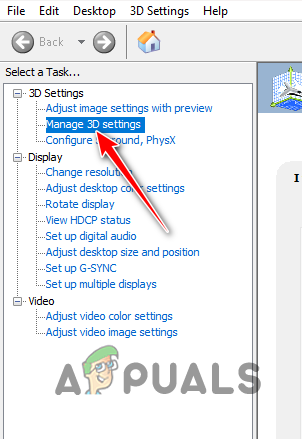
With the NVIDIA Control Panel open, navigate to the Manage 3D Settings option on the left-hand side. Navigating to 3D Settings
After that, switch to the Program Settings tab.
Choose Counter-Strike 2 from the drop-down menu.
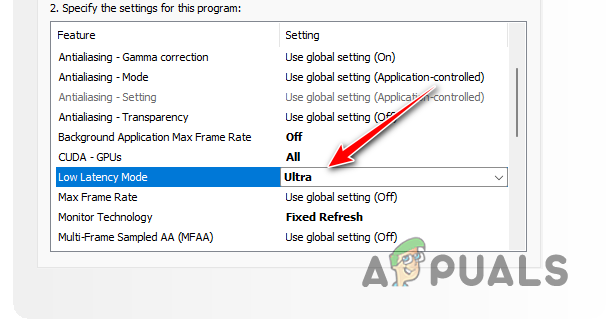
Finally, scroll down to locate Low Latency Mode. Choose Ultra from the drop-down menu. Changing Low Latency Mode
Click Apply to save your changes.
Open Counter-Strike 2 to see if that helps.
2. Disable NVIDIA Reflex
Support for NVIDIA Reflex has been added in Counter-Strike 2 for users with NVIDIA graphics cards. NVIDIA Reflex is aimed at reducing system delays and input lags in your game. However, it has been causing lower frame rates in some scenarios. If this case is applicable, you will have to turn off NVIDIA Reflex from the video settings menu. To do this, follow the instructions below:
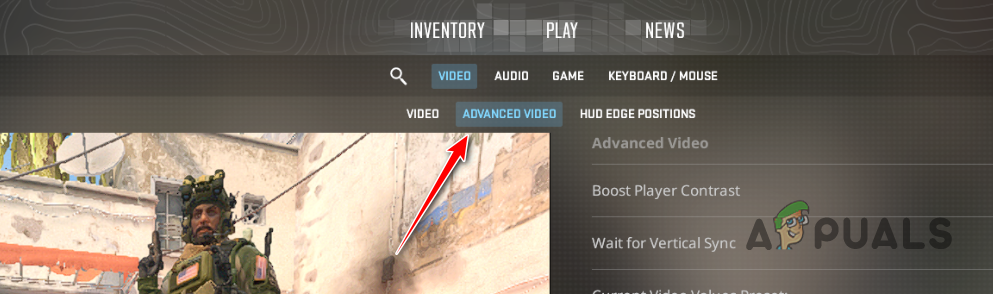
Open the Settings menu in Counter-Strike 2.
On the Video tab, navigate to Advanced Video.Navigating to Advanced Video Settings
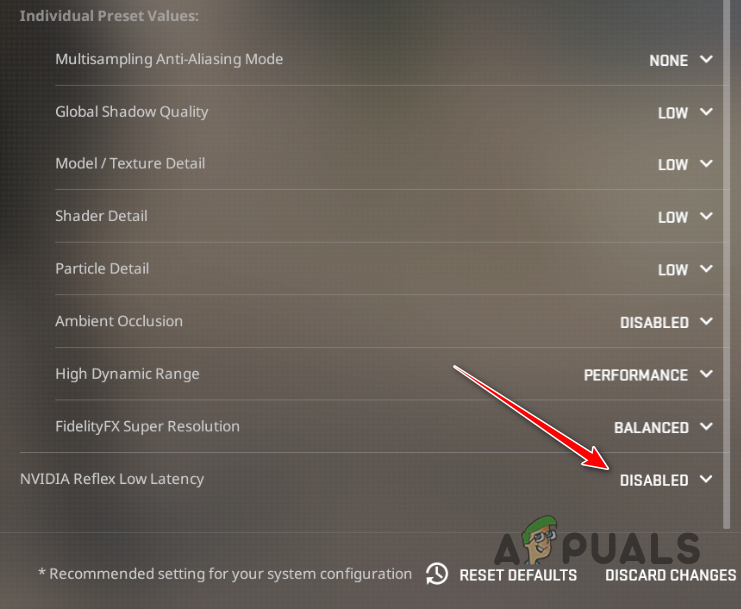
Scroll down to the bottom and disable NVIDIA Reflex via the drop-down menu provided. Disabling NVIDIA Reflex
See if that increases your in-game FPS.
3. Install Windows Updates
Counter-Strike 2 is a new game and often in the case of new games, an updated version of Windows is required for them to run smoothly. Running the game on an obsolete version of the Windows operating system is not really recommended as new games usually use specific features introduced in later versions. Therefore, if you have not installed any Windows updates for quite a while, now would be the perfect opportunity to install any pending updates. To do this, follow the instructions below:
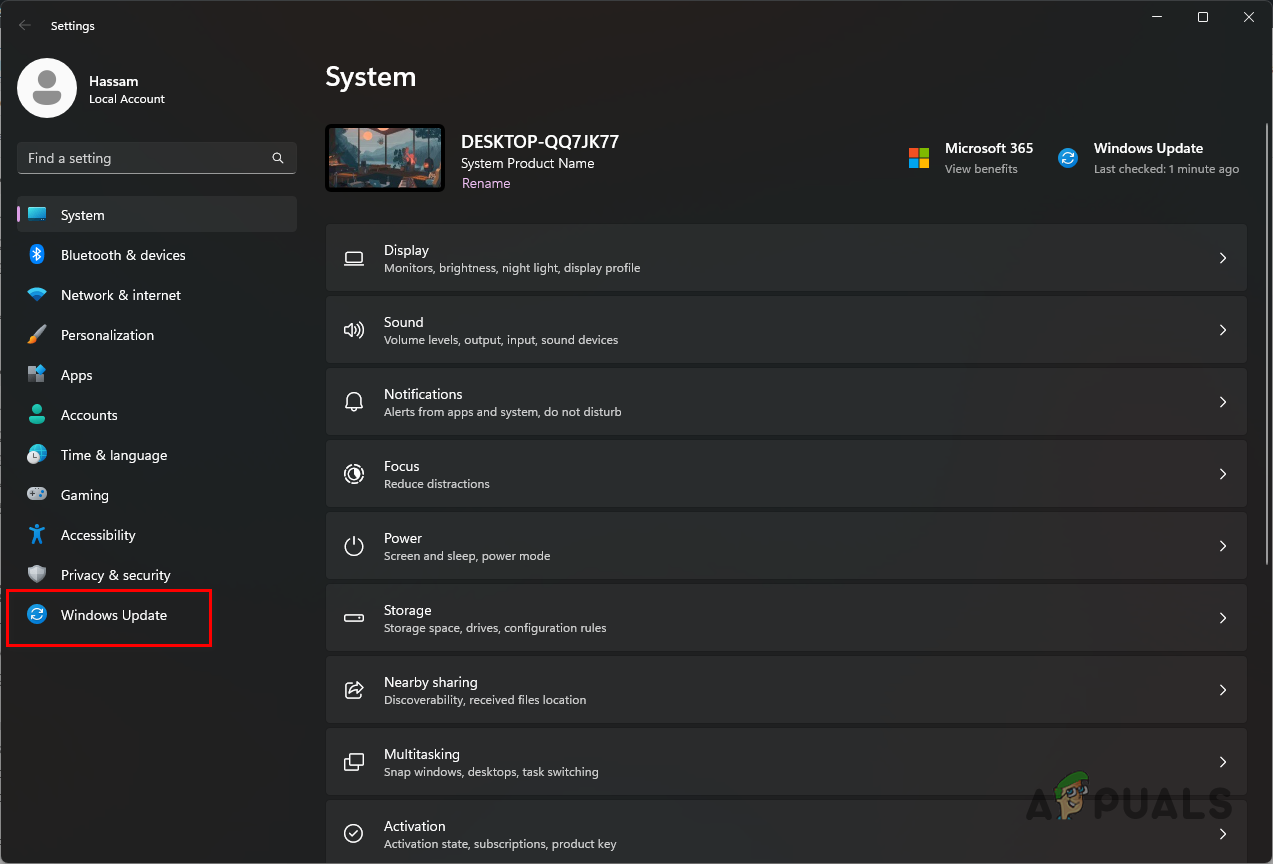
First, open the Settings app by pressing the Windows key + I on your keyboard.
On the Settings app, navigate to Windows Update.Navigating to Windows Update
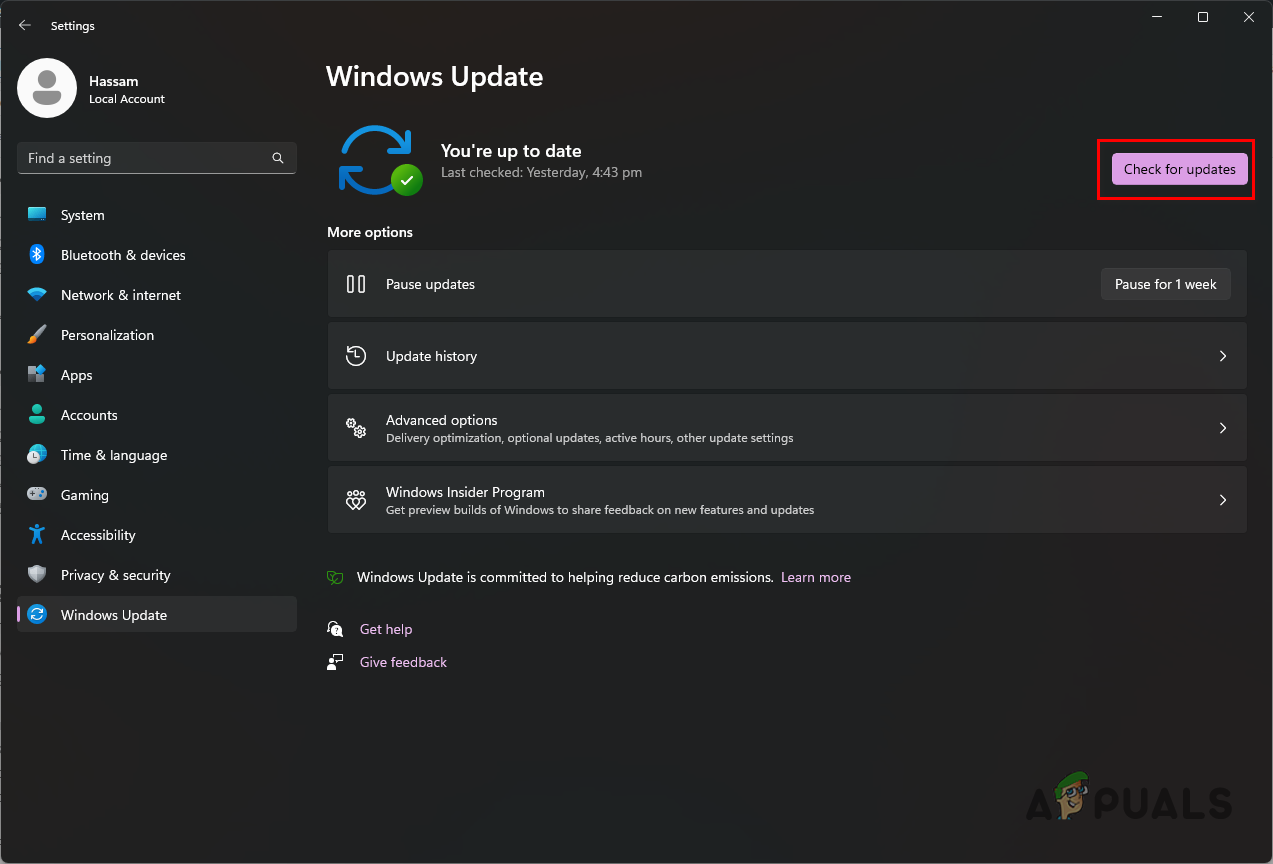
There, click on the Check for updates option to download and install any pending updates. Checking for Windows Updates
This can take a while so make sure to give it a moment. You will be prompted to restart your PC once the updates are ready to install.
After your PC boots up, open Counter-Strike 2 to see if that helped with the performance.
4. Update Graphics Drivers
Outdated drivers are never a good sign when trying to game on your computer. This is because the graphics drivers play a vital part in utilizing the potential of the graphics card installed on your system since it serves as the bridge of communication between the graphics card and system processes. Therefore, updating your graphics drivers should not be overlooked. This is also complimented by the fact that manufacturers push updates to the graphics drivers to support different new games and offer to improve the game’s performance on your system. To update your graphics drivers, you will have to completely uninstall the existing drivers from your computer using the Display Driver Uninstaller (DDU) utility. Once the drivers have been removed, you can download the latest version of drivers available and install them on your system. Follow the instructions below to do this:
First, download the Display Driver Uninstaller utility from the official website here.
Extract the downloaded file to any location on your system.
After that, navigate to the extracted directory and open the Display Driver Uninstaller.exe file.
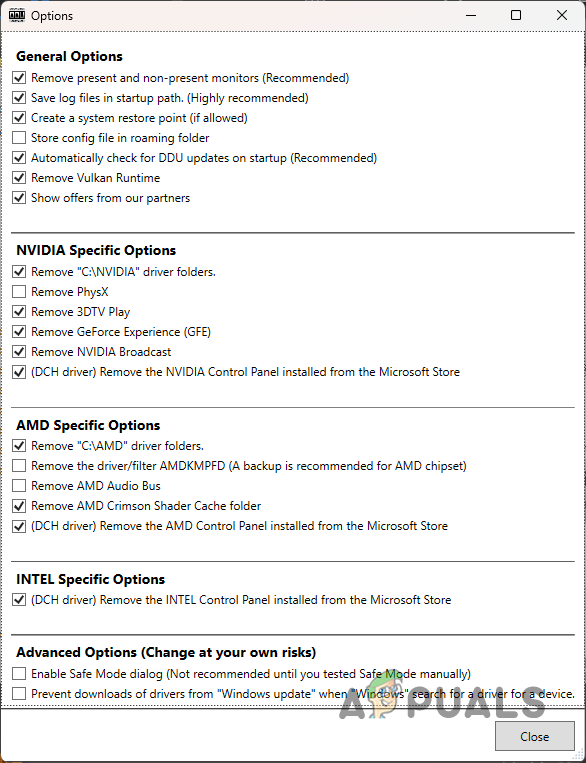
Once DDU opens, you will be shown the General Options dialog box. Click Continue to proceed. DDU General Options
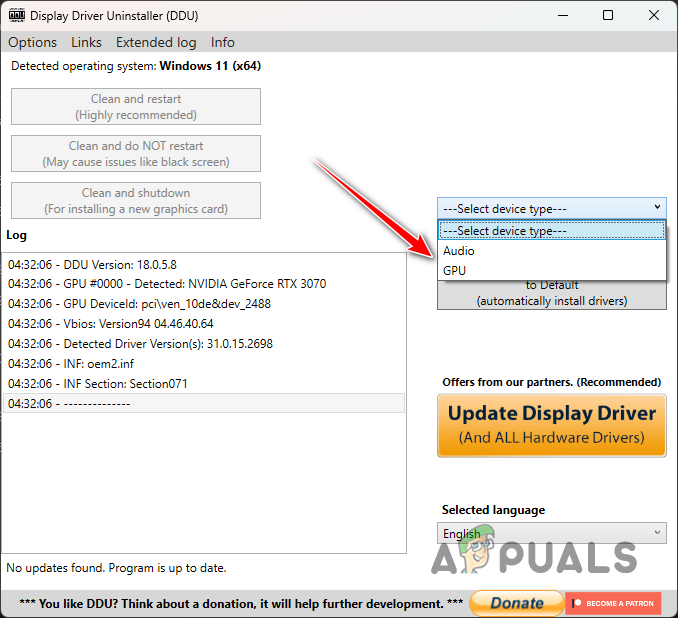
Then, choose GPU from the Select device type from the drop-down menu. Selecting Device Type
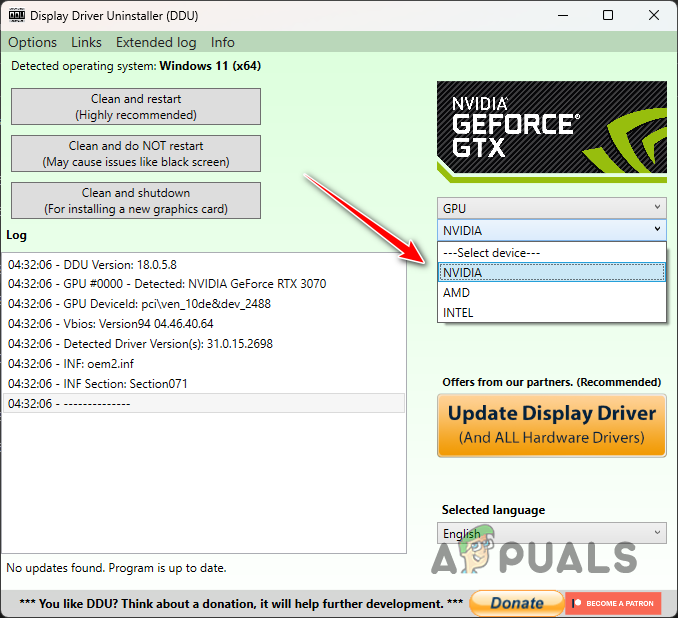
Follow this up by choosing your graphics card manufacturer from the Select device drop-down menu. Selecting Graphics Card Brand
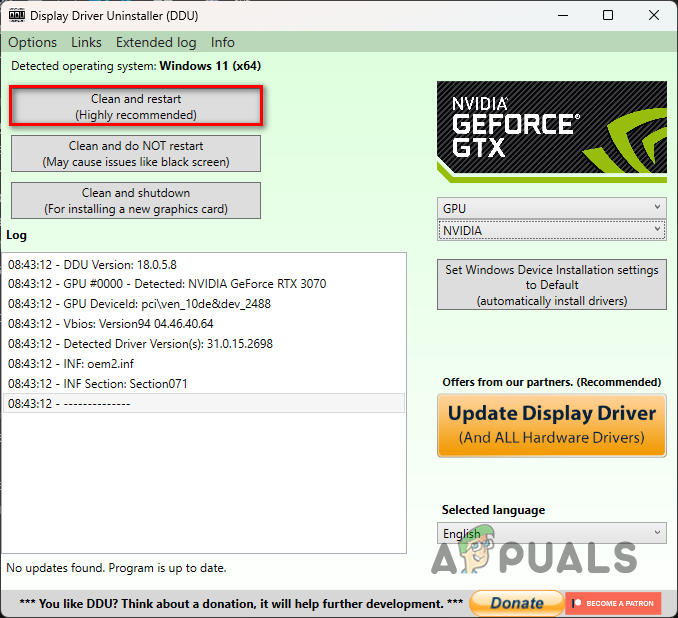
Finally, click the Clean and restart option to uninstall your graphics drivers. Uninstalling Graphics Drivers
After your PC boots up, navigate to your manufacturer’s website and download the latest drivers available for your graphics card.
Install the latest drivers on your system and see if that improves the in-game performance.
5. Use Ultimate Performance Power Plan
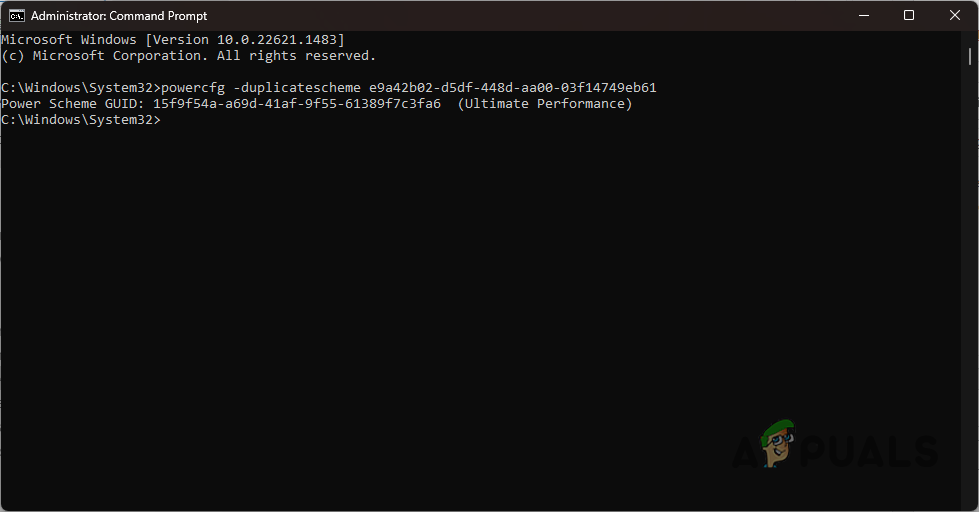
The power plan on your computer decides how the power on your system is distributed between the different components and more. This can allow you to increase the performance of your computer by using a power plan that is directed towards performance over power saving. Windows comes with a hidden ultimate performance power plan that you can use to get the maximum out of your system. However, this is hidden by default and you will have to enable it via the command prompt or the Windows Powershell. To do this, follow the instructions below:
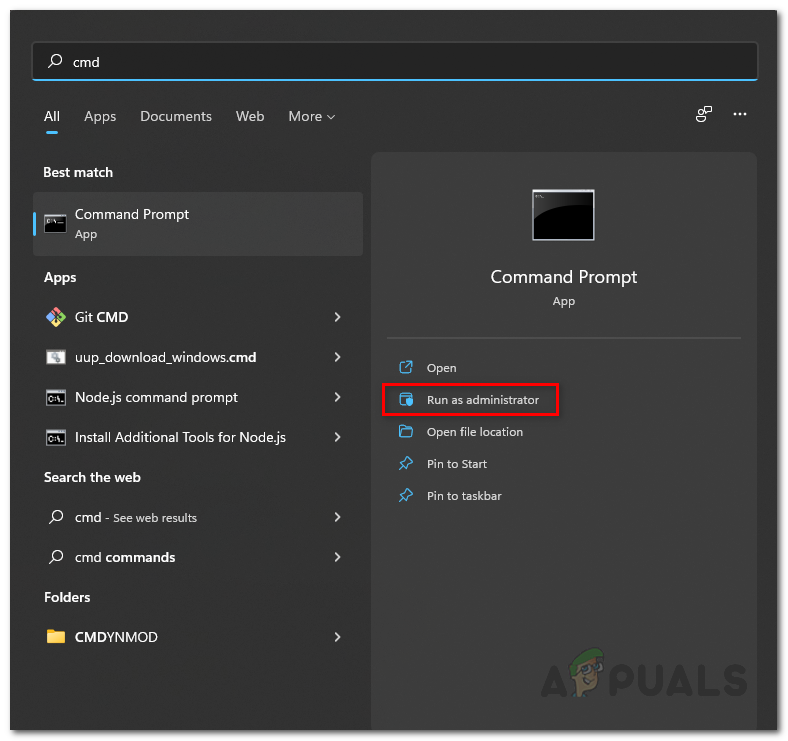
First, open the Start Menu and search for the command prompt. Click on the Run as administrator option. Opening Command Prompt as Admin
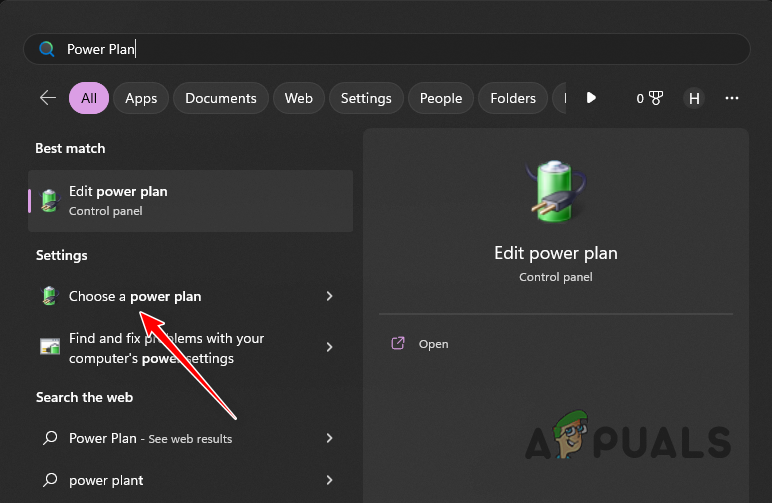
Once you do that, search for Choose a power plan in the Start Menu and open it up. Navigating to Power Options Window
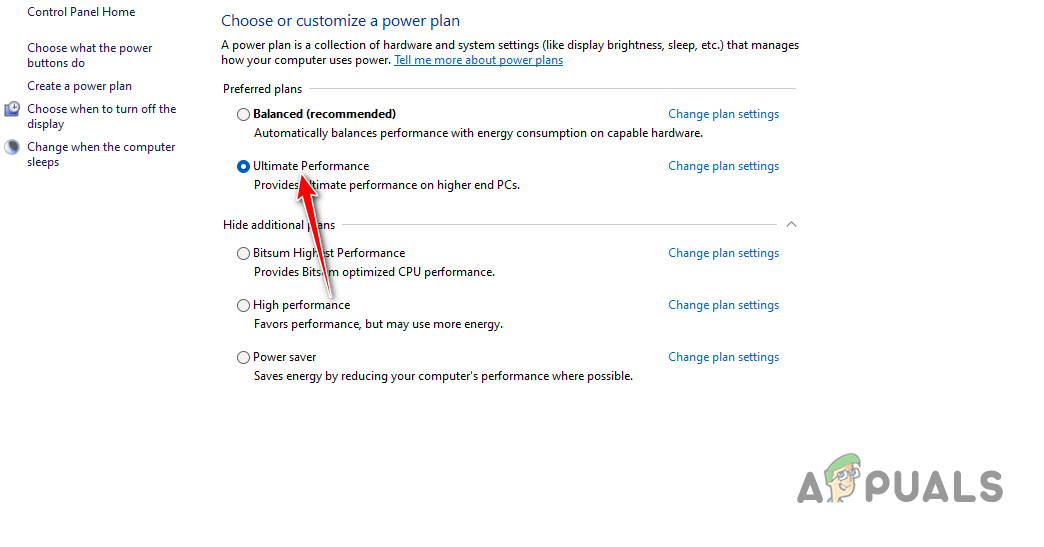
On the Power Options screen, choose the Ultimate Performance option. Choosing Ultimate Performance Plan
With that done, open Counter-Strike 2 and see if that reduces the in-game stutters.
6. Disable Background Processes
Background processes on your computer can often consume your system resources when you are trying to play the game which can result in decreased performance. This happens when your system resources are not available for the game to utilize due to the processes running in the background. Even if you do not start any third-party applications on your own, specific applications are able to start automatically on bootup and remain active in the background which allows them to use your system resources. To mitigate this issue, you can try ending any background tasks running on your computer as well as disabling third-party processes from starting on startup. To do this, follow the instructions below:
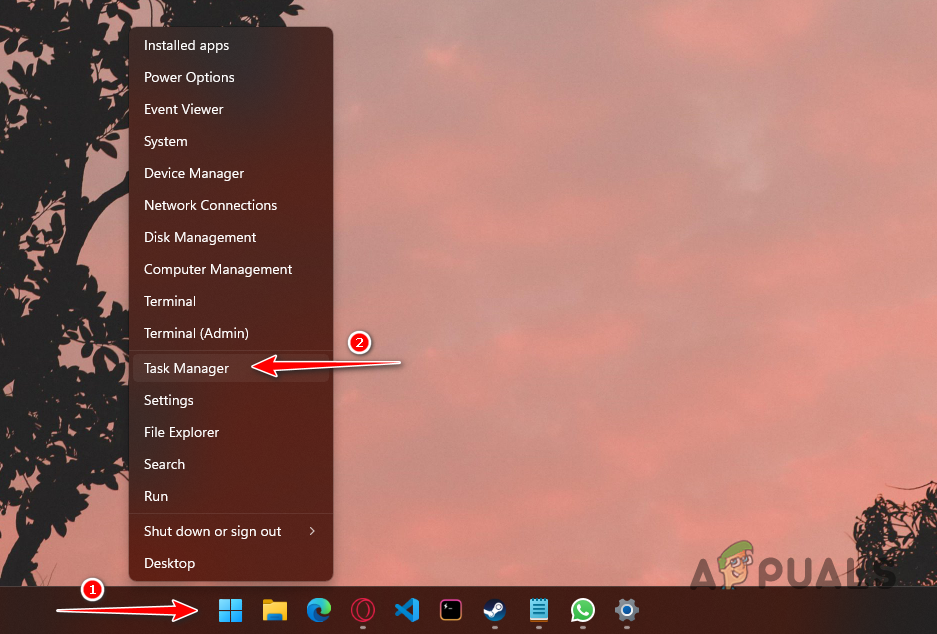
First, right-click on the Start Menu icon and choose Task Manager from the menu that appears. Opening the Task Manager
On the Task Manager window, go through your processes and end any third-party application that is running in the background. We would also recommend closing any third-party security programs that might be running in the background. To end a task, simply select it and click on the End Task option.
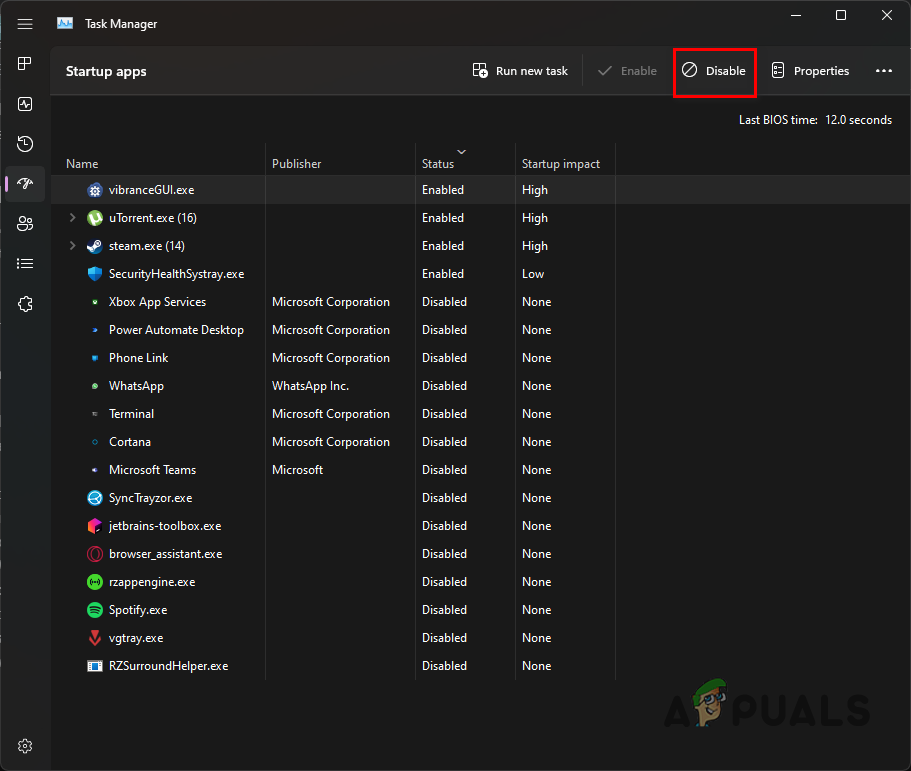
Once you do that, navigate to the Startup apps tab.
Disable the third-party applications that are enabled in this list. These applications run automatically when your PC boots up. To disable a startup application, select the app and choose Disable.Disabling Startup Apps
With that done, open Counter-Strike 2 to see if the performance has improved.
Muhammad Zubyan is a certified Google IT Support Professional with over 7 years of extensive experience. He has worked on more than 1500 computers, gaining valuable insights that enable him to detect and troubleshoot any complicated root cause of Windows-related issues and errors. In addition to managing Appuals as a Senior Editor, he is currently developing his own Game Optimization program that caters to both gamers and casual users alike.