Fix: Insufficient System Resources Exist to Complete the Requested Service
Even though this error code may lead you to a deduction that you are indeed running out of memory or processing power on your computer, sometimes the answer is quite different. Sometimes this error occurs simply when you try to open a folder which is an action which doesn’t really require plenty of system resources.
The error occurs in many different contexts and on many different architectures so make sure you follow through the entire article in order to locate the solution which will work for you the best.
Solution 1: Using Registry to Tweak Certain Memory Settings
Virtual memory is a helpful tool which can improve your computer’s performance by providing a paging file on your hard disk which Windows can use as RAM when it runs out of real, physical RAM memory. Having low virtual memory resources can cause this error to occur on various Windows OS such as Windows 10, Windows 7, and even Windows Server.
Before proceeding with this solution, it’s recommended that you close all of your running programs and it’s advisable to create a backup of your registry just in case something goes terribly wrong while you edit it. Backup your registry by following the instructions in our article.
- Open the Registry Editor by typing “regedit” in either the search bar or the Run dialog box. Navigate to the following key in Registry Editor:
HKEY_LOCAL_MACHINE\SYSTEM\CurrentControlSet\ Control\Session Manager\Memory Management
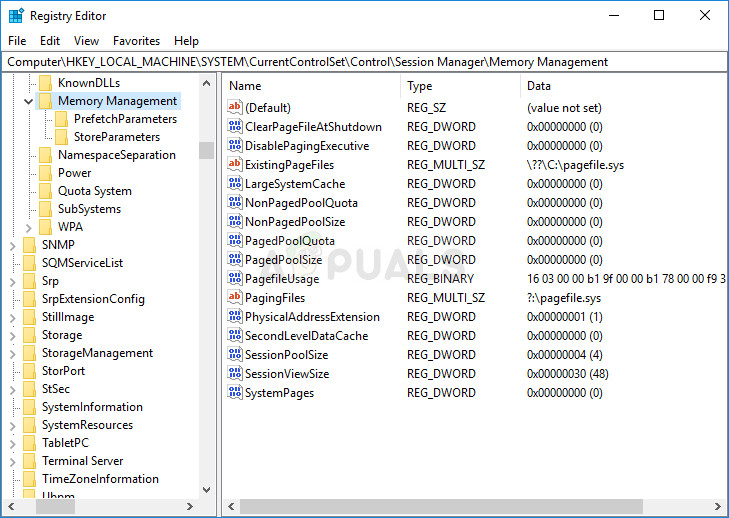
- Click on the Edit button at the top right menu and choose New >> DWORD value.
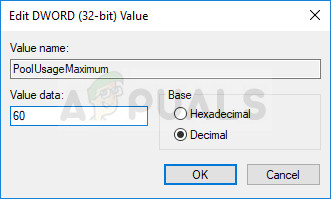
- Rename this value to “PoolUsageMaximum” without the quotation marks and press Enter to confirm. Right-click on this key, choose Modify and type the number 60 in the Value data box of the window which appears. Choose the Decimal representation. Apply the changes.
- Next, check to see if the PagedPoolSize registry entry exists. If it doesn’t, click on the Edit button at the top right menu and choose New >> DWORD value.
- Rename this value to “PagedPoolSize” without the quotation marks and press Enter to confirm. Now that you have created it, proceed with the solution. If it was already there, proceed from this point on.
- Right-click on this key, choose Modify and type “ffffffff” in the Value data box of the window which appears. Apply the changes.
- Exit Registry Editor, restart your computer, and check to see if the problem still appears.
Solution 2: Experiencing the Error on Servers
Sometimes there is a certain program or a file shared on a server and its resource consuming is way out of expectations. That is when you should consider restarting your registry completely and checking to see if the problem is solved. Sometimes the drivers for the app get corrupt or the program simply malfunctions.
First, let’s see if there is a suspicious app or a file causing the problems.
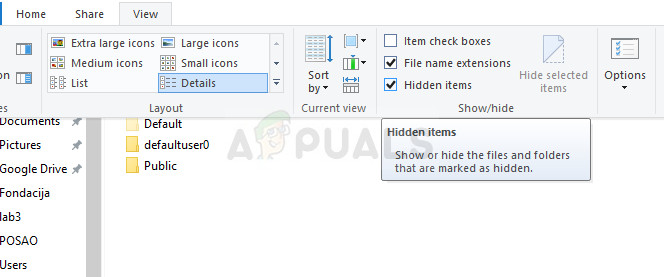
- Navigate to C >> Users and locate the Default folder. Since it’s hidden, you will have to enable the view of hidden files and folders.
- Click on the “View” tab on File Explorer’s menu and click on the “Hidden items” checkbox in the Show/hide section. File Explorer will show the hidden files and will remember this option until you change it again.
- Right-click on the Default folder and choose Properties. If the file is large in size (more than 48’640 KB) open it and look through it to see which tool or app may have taken up so much space. If the Default folder is small in size, you can skip this step. Note down which tool is taking up so much space.
- Open the Registry Editor by typing “regedit” in either the search bar or the Run dialog box. Navigate to the HKEY_USERS\.DEFAULT in registry and check to see if there is a key taking up much space.
Now it’s time to completely reset the DEFAULT hive. This will reset the .DEFAULT entry in the Users part of the registry which will hopefully bring your registry to life again. The following steps are a little advanced for casual users but simply make sure you follow everything correctly and nothing bad will happen.
- Open regedit and, in the left pane, navigate to and right-click on .DEFAULT under HKEY_USERS. Choose the Export option and select Registry Hive Files (*.*) under the Save as prompt.
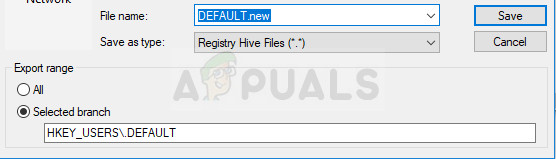
- Navigate to the C:\Windows\System32\Config folder and enter DEFAULT.new in the File name section. Click on save in order to backup the DEFAULT.new file.
- In Windows Explorer, navigate to C:\Windows\System32\Config folder and check to see that DEFAULT.new file is very small in comparison to DEFAULT. If that is the case, Enter your Windows OS DVD in the the DVD drive, restart your computer and follow the rest of the instructions in order to fix the file.
- Turn on your computer and press key to boot to DVD (if needed, depends on your BIOS) when prompted with the Press any key to boot from CD or DVD screen.
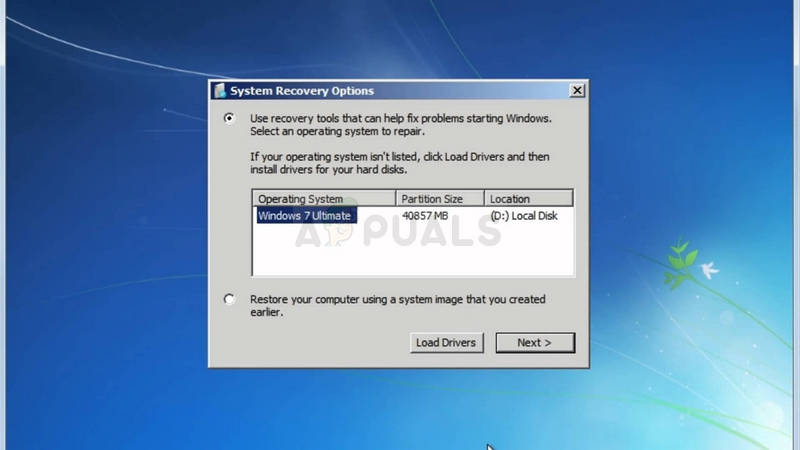
- Click Next when the Install Windows screen appears and choose the Repair your computer option. Next, select the Use Recovery Tools option from the menu and click Next.
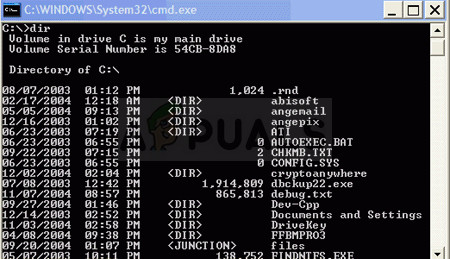
- Click on Command Prompt and change the drive letter for your default drive, for example, by typing D: and then pressing Enter. You can find the drive letter for your C: drive by trying different letters, doing a “dir”, and then seeing whether Windows, Users, Program Files, etc. folders are present.
- Change the directory to the Config folder by typing “cd\Windows\System32\Config” and then pressing the Enter key. Use the commands below in order to rename the DEFAULT and DEFAULT.new files:
- ren DEFAULT DEFAULT.bak
ren DEFAULT.new DEFAULT - Exit the recovery environment by clicking Restart and boot your computer normally. Check to see if the same error occurs again. Consider updating the drivers for the tool which took up so much space in the Registry or simply uninstall it if you can find a better alternative.
Solution 3: Change the Antivirus You Are Using
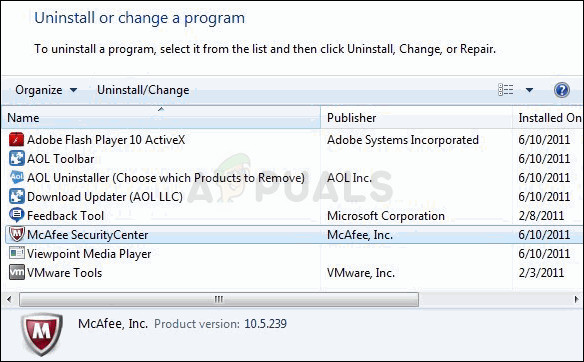
Free antivirus tools can be quite helpful and they can do their job protecting your computer but sometimes they just don’t get along well with other things on your computer. For example, some users have reported that it was the free version of McAfee which caused the same error on their computers and the only way to solve it was to uninstall McAfee.
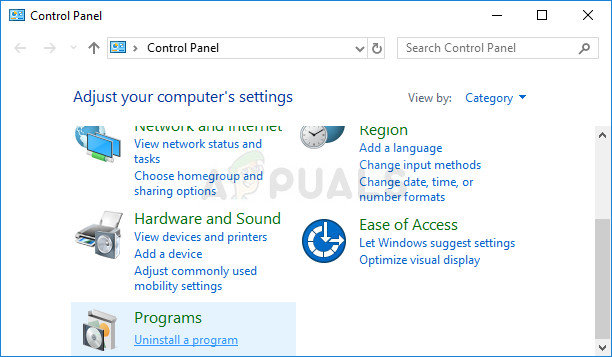
- Click on the Start menu and open Control Panel by searching for it. Alternatively, you can click on the gear icon in order to open settings if you are using Windows 10.
- In Control Panel, select to View as: Category at the top right corner and click on Uninstall a Program under the Programs section.
- If you are using the Settings app, clicking on Apps should immediately open a list of all installed programs on your PC.
- Locate McAfee in Control Panel or Settings and click on Uninstall.
- Its uninstall wizard should open with two options: Repair and Remove. Select Remove and click Next in order to uninstall the program.
- A message will pop up asking “Do you want to completely remove McAfee for Windows?” Choose Yes.
- Click Finish when the uninstalled completes the process and restart your computer to see whether errors will still appear.
Solution 4: If the Problem Occurs with a Specific File
If the problem only appears when you try to run a specific file such as a game or an application, the problem may be caused by your antivirus. People who report this problem usually experience it with a game and they think it’s because they don’t have enough resources to run it. However, adding an exception for it in their antivirus solved the problem.
Follow the steps below in order to do so:
- Open your antivirus user interface by double-clicking on its icon on the Desktop or by double-clicking on its icon in the bottom right part of your taskbar.
- The Exception setting is located in different places according to different antivirus tools. It can often be found simply without much hassle but here are some location on the most popular antivirus tools:
Kaspersky Internet Security: Home >> Settings >> Additional >> Threats and Exclusions >> Exclusions >> Specify Trusted Applications >> Add.
AVG: Home >> Settings >> Components >> Web Shield >> Exceptions.
Avast: Home >> Settings >> General >> Exclusions
In each case, make sure you choose the folder location properly. Also, don’t click the file directly because most users claimed that you actually need to select the folder and not the file you want to add to exceptions.


I found that doing an upgrade from Windows 8.x to Windows 10 will generate all sorts of issues and lead to this bug. MS recommends buying the retail version of Win10 and creating a fresh machine. They refuse to admit that their upgrade path is flawed. (seen this on dozens of machines post Win10 UG, and, yes, a fresh install works, but this costs customers hundreds of dollars and is a poor excuse for an answer from Microsoft!)