How to Fix: Winload.EFI Error / 0xc0000001
The Winload.EFI error (0xc0000001) causes your computer to halt during startup, displaying a blue screen with a message that your PC needs to be repaired. This error generally means that the Windows Boot Manager (BOOTMGR) is unable to locate the necessary boot files, particularly the Winload.EFI file, which is essential for starting the operating system.
The most common cause of this issue is a corrupted or missing boot file, often due to improper shutdowns, disk errors, or changes in the system’s boot configuration. Additionally, issues with UEFI firmware or damaged system files can also trigger this error.
On a Windows 8/8.1/10 system, the error usually appears in the following forms:
Your PC needs to be repaired. The application or operating system couldn’t be loaded because a required file is missing or contains errors. File: \windows\system32\winload.efi Error code: 0xc000***
or:
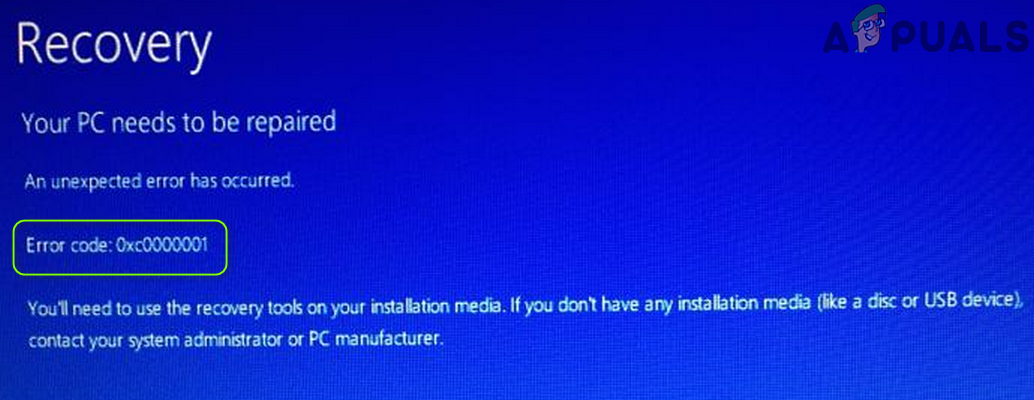
Your PC needs to be repaired. An unexpected error has occurred. Error code: 0xc0000001. You’ll need to use the recovery tools on your installation media. If you don’t have any installation media, contact your system administrator or PC manufacturer.
How to Boot into BIOS to Change Boot Order
You must know how to boot and change the boot order since this will be needed to perform the solutions below. Restart your computer. Enter your computer’s BIOS (or UEFI) settings as soon as it starts up. The key that you need to press to enter these settings depends on the manufacturer of your computer’s motherboard and can be anything from Esc, Delete, or F2 to F8, F10, or F12, with F2 being the most common. This information is displayed on the POST screen and in the manual supplied with your system. A quick Google search asking “how to enter BIOS” followed by your model number will also list the results.
Method 1: Disable Secure Boot
If you have a UEFI-based computer instead of the old traditional BIOS, the issue can be caused by a certain setting in UEFI called Secure Boot. It can stop your system from accessing the winload.efi file, causing this error to appear. Windows 8 and later versions have this feature enabled by default.
To disable Secure Boot, boot to BIOS or UEFI. The UEFI setup user interface differs by model. Generally, look for Secure Boot, which can be found in its own separate section, or under the Security tab, the Boot tab, or the Authentication tab, depending on your system model. Consult your system model’s manual to know exactly where it is. Once you find the Secure Boot option in a tab, disable it or turn it off.
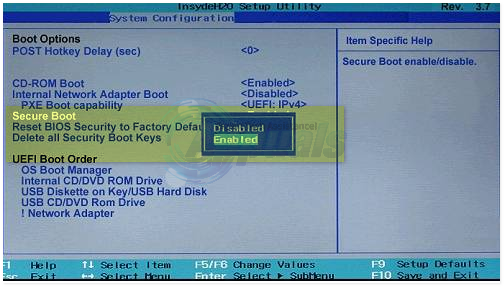
Save the UEFI settings and exit. Now boot up your system normally. If you still get the same error, move on to the next solution.
Method 2: Repair Boot Record
Restoring the Boot Record fixes the Winload.EFI error by correcting corrupted or missing boot configurations, enabling the system to locate necessary boot files. This process rewrites the Master Boot Record (MBR), Boot Configuration Data (BCD), and related structures that control startup, re-establishing the pathways the Windows Boot Manager uses to load the operating system, effectively resolving the 0xc0000001 error.
Windows 7 Users
In order to continue, you will need to start Windows in repair mode. For that, (see steps here).
Once you boot to start-up repair and see the “System Recovery Options,” choose Command Prompt. Once the command prompt’s black window appears, type the following commands and press Enter after each line.
bootrec /fixboot

bootrec /scanos

bootrec /fixmbr

bootrec /rebuildbcd
After the commands have executed successfully, restart your system and check if the issue is still there.
If the issue is still there, then repeat the above procedure and execute the commands 3 times each. Now check if the issue is resolved. If not, move on to the next solution.
Windows 8/8.1/10
To start Windows 8/8.1 and 10 in Repair Mode, see steps here.
In the advanced options, click Command Prompt.
Once the command prompt’s black window appears, type the following commands and press Enter after each line.
bootrec /fixboot

bootrec /scanos

bootrec /fixmbr

bootrec /rebuildbcd
After the commands have executed successfully, restart your system and check if the issue is still there.
If the issue persists, then repeat the above procedure and execute the commands 3 times each. Now check if the issue is resolved. If not, move on to the next solution.
Method 3: Perform a Startup Repair
You may get the error code 0XC0000001 if the startup items of your system are corrupt. In this context, performing a startup repair of the system may solve the problem. But before that, make sure the system’s boot order in the BIOS settings is properly configured (the Windows drive is first in the boot order).
- Power off your system (if it is powered on) and then power it back on.
- When the Windows logo appears (with spinning dots), press and hold the power button to forcibly shut down the system.
- Repeat the process thrice and at the third time, your system may boot into the Recovery Environment. If so, select Troubleshoot.
- Now open Advanced Options and select Startup Repair
- Once Startup Repair has completed its course, check if the system is clear of the error code 0XC0000001.
- If the issue persists, create a Windows 10 bootable USB and boot system through that USB device (if you cannot boot by using the USB, then try different USB ports on the system and also make sure Secure Boot is disabled in the system’s BIOS).
- Now select Repair Your Computer and open Troubleshoot.
- Then select Advanced Options and open Startup Repair.
- Now follow the prompts on the screen, and once the Startup Repair has completed its course, reboot your PC to check if the 0XC0000001 issue is resolved.
Method 4: Uninstall the Buggy Update
Microsoft has a very long history of releasing buggy updates, and the issue at hand can also be a result of the same. In this case, removing the buggy update (either Quality or Feature Update) may solve the problem.
- Boot your system into the Recovery Environment as discussed in solution 1 and open Troubleshoot.
- Now select Advanced Options and open Uninstall Updates.
- Then either select Uninstall Latest Quality Update or Uninstall Latest Feature Update.
- Now let the uninstallation complete, and then reboot your PC to check if the system is clear of the BSOD error.
Method 5: Perform a CHKDSK Scan
Running a CHKDSK scan can pinpoint and repair disk errors that might be causing the Winload.EFI error. Over time, bad sectors, file system corruption, or other disk-related issues can damage essential boot files, leading to the 0xc0000001 error.
CHKDSK (Check Disk) examines the integrity of your hard drive, detects these issues, and attempts to fix them.
- Boot your system in the Recovery Environment or (preferably) use Repair Your Computer by booting your system through a Windows 10 bootable USB (as discussed in solution 1) and open Troubleshoot.
- Now select Advanced Options and open Command Prompt.
- Then execute the following to find the drive letter of the system drive (the drive letter may not be the same as shown in Windows):
Diskpart
- Now list down the partitions by executing the following:
list vol
- Now check for the drive letter (e.g., E drive) of the OS drive (most probably, having Boot in the Info column, or otherwise use Dir in the Command Prompt to check the contents of the partition) and then close the Diskpart by executing the following:
Exit
- Then navigate to the system’s drive (in the Command Prompt) by entering the drive letter followed by a colon (e.g., if the system drive is C, then enter C: and hit Enter).
- Now run the Chkdsk scan by executing the following (where C is the system drive):
chkdsk C: /r
- Then wait till the Chkdsk scan is completed and, once done, boot into Windows and check if the BSOD error code 0XC0000001 is resolved.
If the above process is too technical for you, then attach the problematic system’s hard drive to another PC and perform the Chkdsk scan there to check if the BSOD issue is resolved.
Method 6: Use the BCDBoot Utility
Using the BCDBoot utility re-establishes the link between system files and the Windows Boot Manager, resolving the Winload.EFI error. It copies essential boot files to the system partition and creates a new Boot Configuration Data (BCD) store, ensuring the Windows Boot Manager can load these files correctly.
This is particularly useful when the existing BCD is corrupted or missing, allowing you to rebuild the boot environment and fix the 0xc0000001 error.
- Type diskpart and press Enter.
- Type list volume and press Enter.
- Under the label row, find the label System Reserved and note its corresponding Volume number.
- Now type select Volume=N and press Enter, where N is the Volume number you noted earlier.
- Now type assign letter=w and press Enter.
- Type exit and press Enter.
- Type bcdboot c:\Windows /s w: /f uefi and press Enter.
Now restart your system and check if the issue is resolved. If not, proceed to Method 4.
Method 7: Disable Anti-Malware Protection
- Power on your system, then forcefully shut it down when you see the Windows logo. Repeat the process a few times until you get the Recovery screen.
- Click See advanced repair options.
- Then click on Troubleshoot > Advanced Options.
- Click Startup settings in Advanced Options.
- In the startup settings screen, click on Restart.
- The Startup Settings menu will appear after the restart.
- Now press 8 on your keyboard. Your Windows will launch with anti-malware disabled only for this session.
Solution 8: Perform a System Restore
The error code 0XC0000001 could be a result of a recent (unwanted) change to the system, and restoring the system to an earlier point in time when it was operating fine may solve the problem.
- Boot your system into the Recovery Environment (as discussed in solution 1) and open Troubleshoot.
- Now open Advanced Options and select System Restore.
- Then follow the prompts to restore the system to an earlier point in time. When the process is complete, reboot your PC to check if the system is clear of the 0XC0000001 error.
You can also use the following in the Command Prompt to perform the System Restore (where C is the system drive, which you can find by following the steps mentioned in the Chkdsk solution):
rstrui.exe /OFFLINE:C:\Windows
Method 9: Rename the Corrupt Registry Files and Copy the Backup Registry Files
You may encounter the 0XC0000001 error if some of the essential files (especially those related to the system’s registry) are corrupt. In this scenario, renaming the corrupt files and placing the original OS files (from the registry backup folder) may solve the problem.
- Launch the Command Prompt in the Recovery Environment (as discussed in solution 3) and execute the following (where C is the system drive) one by one (make sure to press the Enter key afterward):
Ren C:\windows\system32\config\SAM SAM.BAK

Ren  C:\windows\system32\config\SYSTEM SYSTEM.BAK

Ren  C:\windows\system32\config\SECURITY SECURITY.BAK

Ren  C:\windows\system32\config\DEFAULT DEFAULT.BAK

Ren  C:\windows\system32\config\SOFTWARE SOFTWARE.BAK

Copy  C:\Windows\System32\config\RegBack\SAM C:\windows\system32\config

Copy  C:\Windows\System32\config\RegBack\SYSTEM C:\windows\system32\config

Copy  C:\Windows\System32\config\RegBack\SECURITY C:\windows\system32\config

Copy  C:\Windows\System32\config\RegBack\DEFAULT C:\windows\system32\config

Copy  C:\Windows\System32\config\RegBack\SOFTWARE C:\windows\system32\config
- Once the above commands are executed, reboot your PC into Windows and check if the BSOD issue is resolved.
Method 10: Perform System Operations in Command Prompt
There are different cmdlets (like Bootrec, SFC, DISM, etc.) in the Command Prompt that can be used to solve the current BSOD issue.
Perform the SFC and DISM Scans
- Execute the following in the Recovery Environment’s Command Prompt (where D is the system drive):
sfc /scannow /offbootdir=d:\ /offwindir=d:\windows
- Once the scan is complete, type Exit in the Command Prompt and boot your system into Windows to check if the system is clear of the BSOD issue.
- If the issue persists, then check if performing a DISM scan to repair Windows (preferably, after attaching your system’s hard disk to another PC) solves the problem.
Disable Hibernation
If the issue started to occur after hibernating the system, then disabling hibernation may solve the problem.
- Launch the Command Prompt in the Recovery Environment and navigate to the system partition (as discussed in solution 3).
- Now execute the following cmdlet to disable hibernation:
powercfg -h off
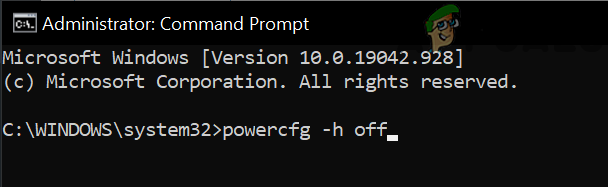
Disable Hibernation in the Command Prompt - Then reboot your PC and check if the system is clear of the BSOD issue.
Rename the EFI Folder
- Launch the Command Prompt in the Recovery Environment and navigate to the system drive.
- Now execute the following:
dir
- Then check if the EFI directory is shown. If so, then rename it by executing the following:
ren EFI oldEFI
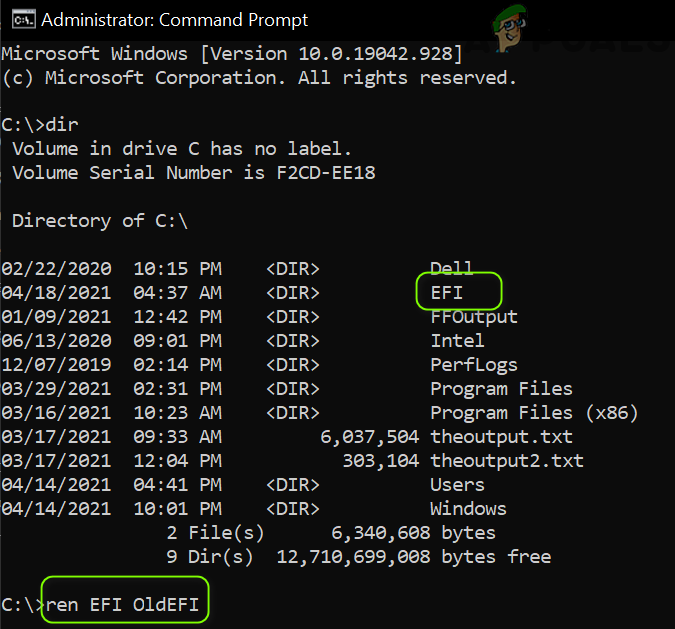
Rename the EFI Folder in the System Drive - Now reboot your PC and check if the system is clear of the 0XC0000001 issue.
- If the issue persists, then check if deleting the EFI folder by executing the following in the Command Prompt in the Recovery Environment (make sure you are executing the command in the system drive):
rd /s C:\oldEFI
If the issue persists, then you may have to perform a clean installation of Windows either on a different partition/disk or after completely repartitioning the problematic drive. If you cannot back up the system drive data in any other way, then it will be better to use the Custom Install option (the system drive data will be in the Windows.old folder) when performing the clean installation of Windows.
Thanks, saved my install that somehow got messed up by using CloneZilla and having both drives still connected when booting just now using these instructions.