How to Use Stable Diffusion to Convert Video to Video [Free]
- Stable Diffusion AI is an AI tool that turns text into realistic images and videos, suitable for creating animations and effects.
- You can convert Stable Diffusion AI videos to video free by implementing three methods. Each of them require a spedy internet, Google account, access to AUTOMATIC1111 Stable Diffusion GUI and ControlNet extension.
- Alternative Technologies like Deep Dream, Neural Style Transfer, and CycleGAN also offer distinct artistic effects, from surreal visuals to style blending and image translation.
People are buzzing about Stable Diffusion because it makes videos look awesome. Using Artificial Intelligence, it turns regular videos into cool animations and sci-fi wonders. The best part? It’s easy for anyone to use and totally free. But you can also convert the Stable Diffusion AI Video to Video Free.
Here, we’ve got a simple guide for turning videos into animations—no complicated stuff! And guess what? It’s all FREE to use on your own computer. So, give it a try and see how easy it is to make your videos awesome!
Table of Contents
What Is Stable Diffusion AI
Stable Diffusion is an advanced text-to-image diffusion model that can produce lifelike images from any given text input. It allows for autonomous creativity, enabling billions of individuals to generate stunning artwork effortlessly in a matter of seconds.
This innovative approach combines diffusion models with artificial intelligence to generate videos, controlling the content’s type and weight. The result is videos characterized by stable motion and seamless transitions.
Stable Diffusion AI also holds broad applications in social media content creation, offering versatile video generation for platforms like YouTube and films. Its usage extends to crafting animations, sci-fi sequences, special effects, and high-quality marketing and advertising videos.
READ MORE: How to Generate AI Images for Free Without MidJourney ➜
What Is Stable Video Diffusion
On Nov 21, 2023, Stability.ai announced Stable Video Diffusion, a generative video technology based on the image model Stable Diffusion. To access this text-to-video technology, people can join the waitlist. However, at this stage, the model is exclusively available for research purposes only and is not intended for real-world or commercial applications.
Prerequisites for Stable Diffusion AI Video to Video Free
Before starting, make sure you have prepared your system for the video conversion. Here’s what you need to do:
- Have an active and speedy network connection.
- A working Google account.
- Access the web UI for Stable Diffusion AI.
- Install the software on your computer or use Google Colab.
- Have a stable diffusion checkpoint file ready for video generation.
- Prepare the video file intended for conversion using Stable Diffusion AI.
- Create a dedicated folder in your Google Drive account to store stable diffusion video outputs.
- You will need AUTOMATIC1111 Stable Diffusion GUI and ControlNet extension.
READ MORE: How To Animate a Picture Easily – All Skills Levels Guide ➜
How to Convert Stable Diffusion AI Video to Video Free
Here are some ways you can use to convert Stable Diffusion AI video to video free:
1. ControlNet-M2M script
This script is ideal for those who prefer a more hands-on approach. It offers flexibility and customization, allowing users to tweak settings for unique video outcomes. However, it might be slightly more complex for beginners.
Step 1: Adjust A1111 Settings
Before utilizing the ControlNet M2M script in AUTOMATIC1111, navigate to Settings > ControlNet and Check the boxes of the following options:
- Disable saving control image to the output folder.
- Allow other scripts to control this extension.

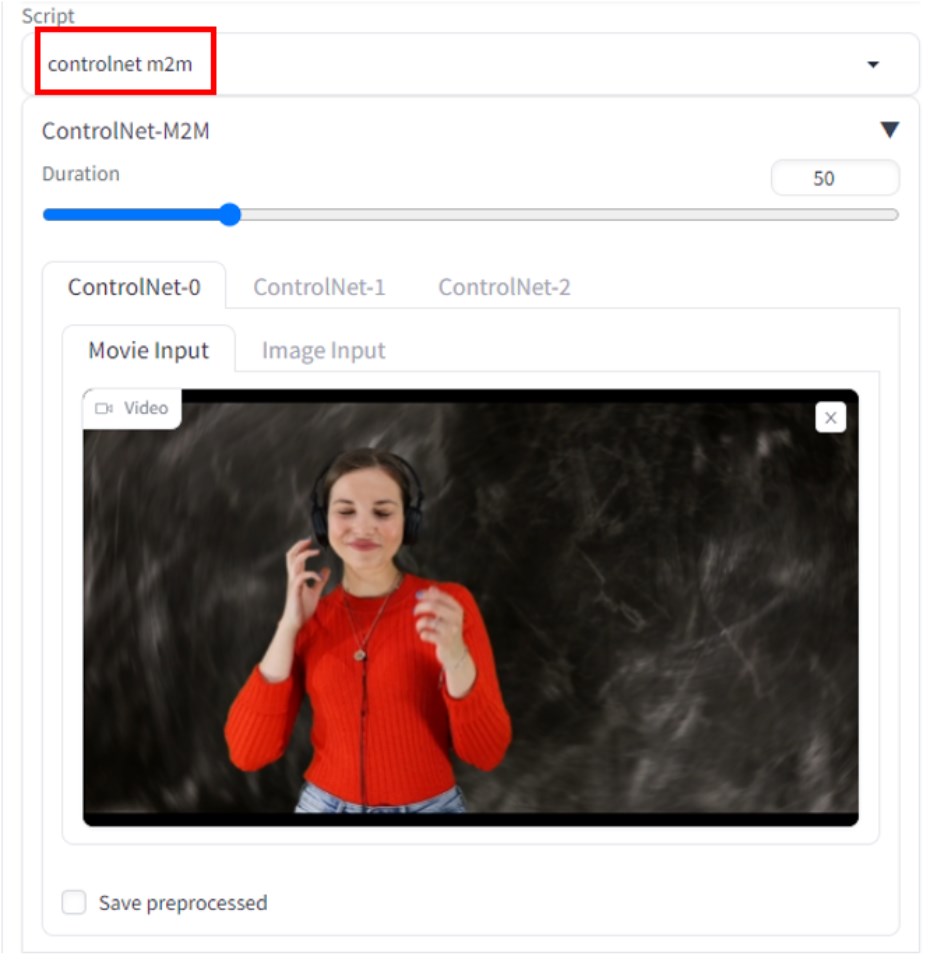
Step 2: Video Upload to ControlNet-M2M
In AUTOMATIC1111 Web-UI, visit the txt2img page. From the Script dropdown, select the ControlNet M2M script. Expand the ControlNet-M2M section and upload the mp4 video to the ControlNet-0 tab.
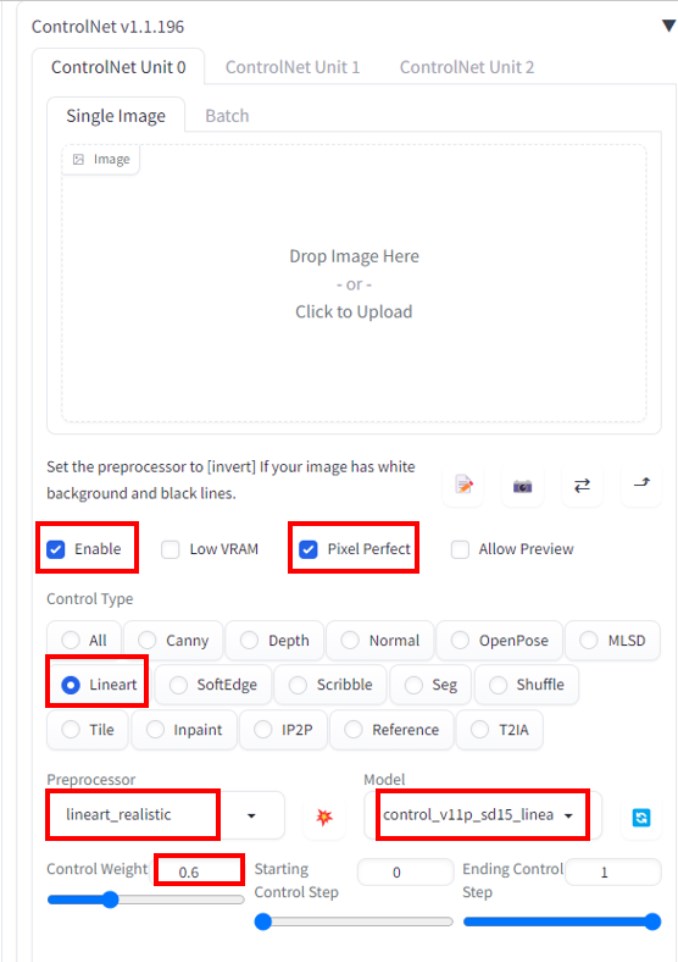
Step 3: Enter ControlNet Settings
Expand the ControlNet section and enter the following settings:
- Enable: Yes
- Pixel Perfect: Yes
- Control Type: Lineart
- Preprocessor: Lineart Realistic
- Model: control_xxxx_lineart
- Control Weight: 0.6
For personalized videos, experiment with different control types and preprocessors.
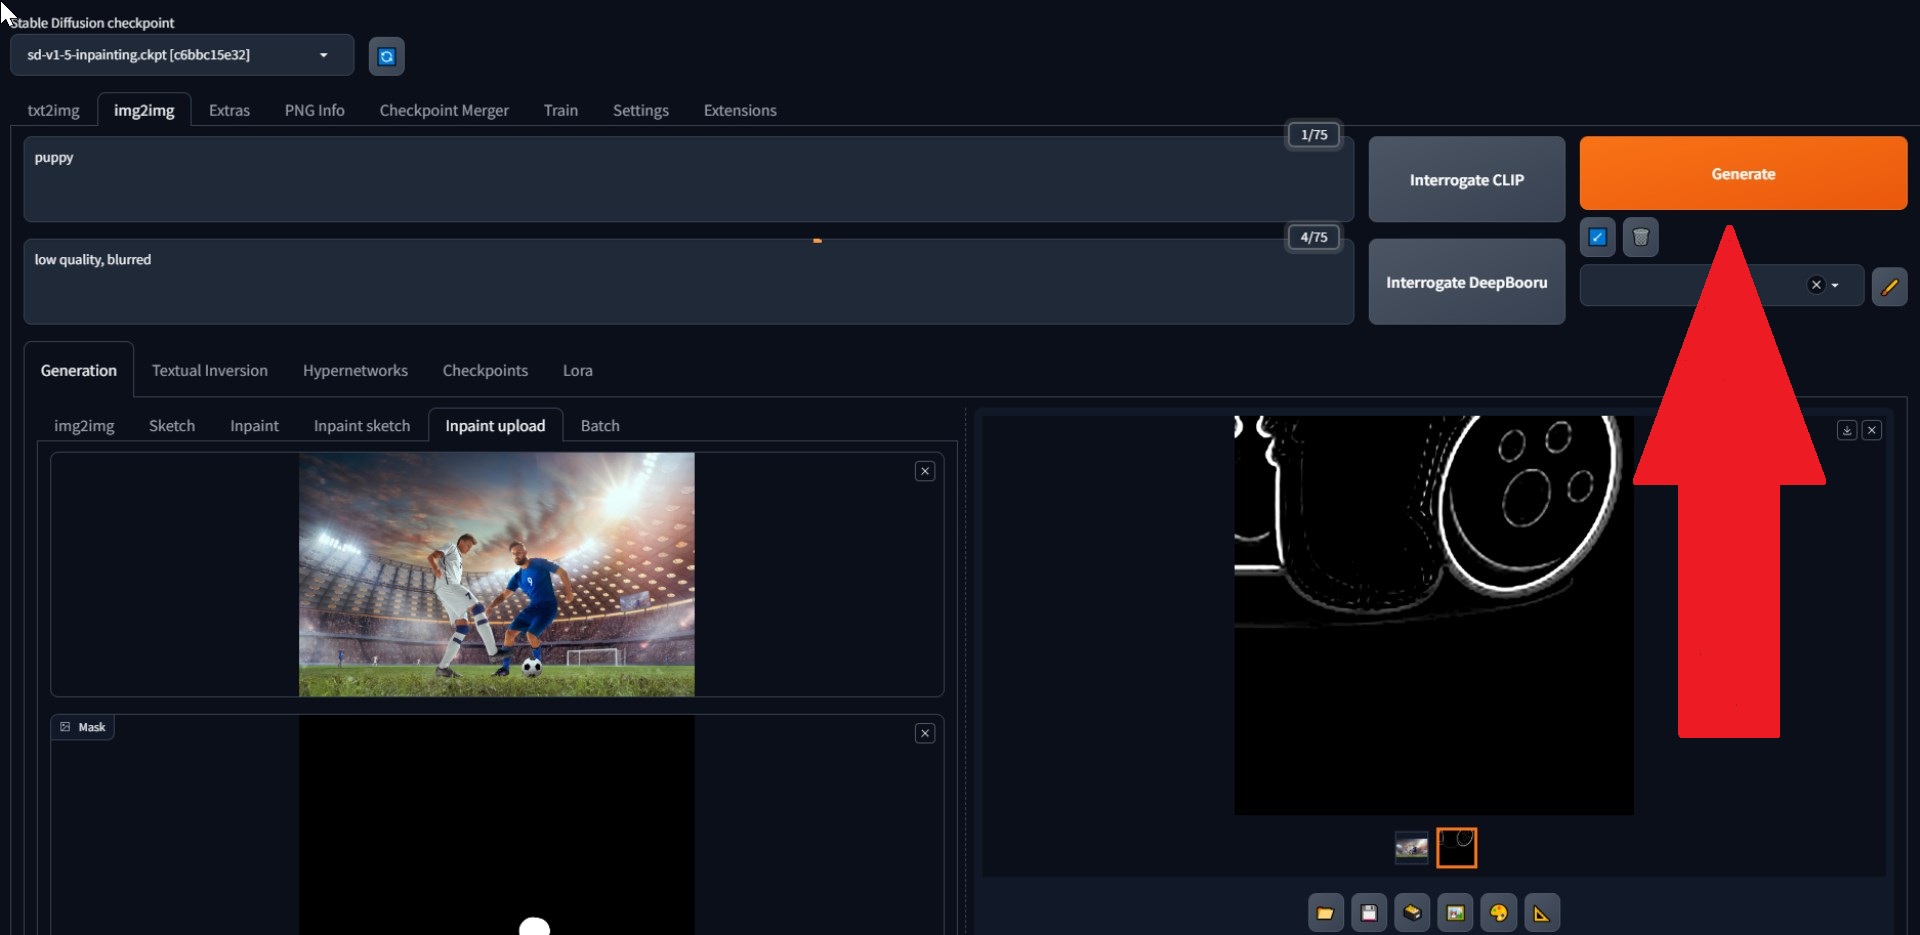
Step 4: Change txt2img Settings
Choose a model from the Stable Diffusion checkpoint. Create a prompt and a negative prompt. Enter generation parameters:
- Sampling method: Euler a
- Sampling steps: 20
- Width: 688
- Height: 423
- CFG Scale: 7
- Seed: 100 (for stability)
Click Generate.

Step 5: Create MP4 Video
The script converts images frame by frame, resulting in a series of .png files in the txt2img output folder. Options include combining PNG files into an animated GIF or creating an MP4 video. Here, we will tell you about creating an MP4 video:
Use the following ffmpeg command (ensure ffmpeg is installed):
ffmpeg -framerate 20 -pattern_type glob -i '*.png' -c:v libx264 -pix_fmt yuv420p out.mp4 For Windows users, the alternative command is:
ffmpeg -framerate 20 -pattern_type sequence -start_number 00000 -i ‘%05d-100.png’ -c:v libx264 -pix_fmt yuv420p out.mp42. Mov2mov extension
This extension is a user-friendly option, ideal for those who are new to video editing or prefer a more straightforward process. It simplifies the conversion process by automating several steps.
Step 1: Install Mov2mov Extension
- In AUTOMATIC1111 Web-UI, go to the Extension page.
- Select Install from the URL tab.
- Enter the extension’s git repository URL: https://github.com/Scholar01/sd-webui-mov2mov
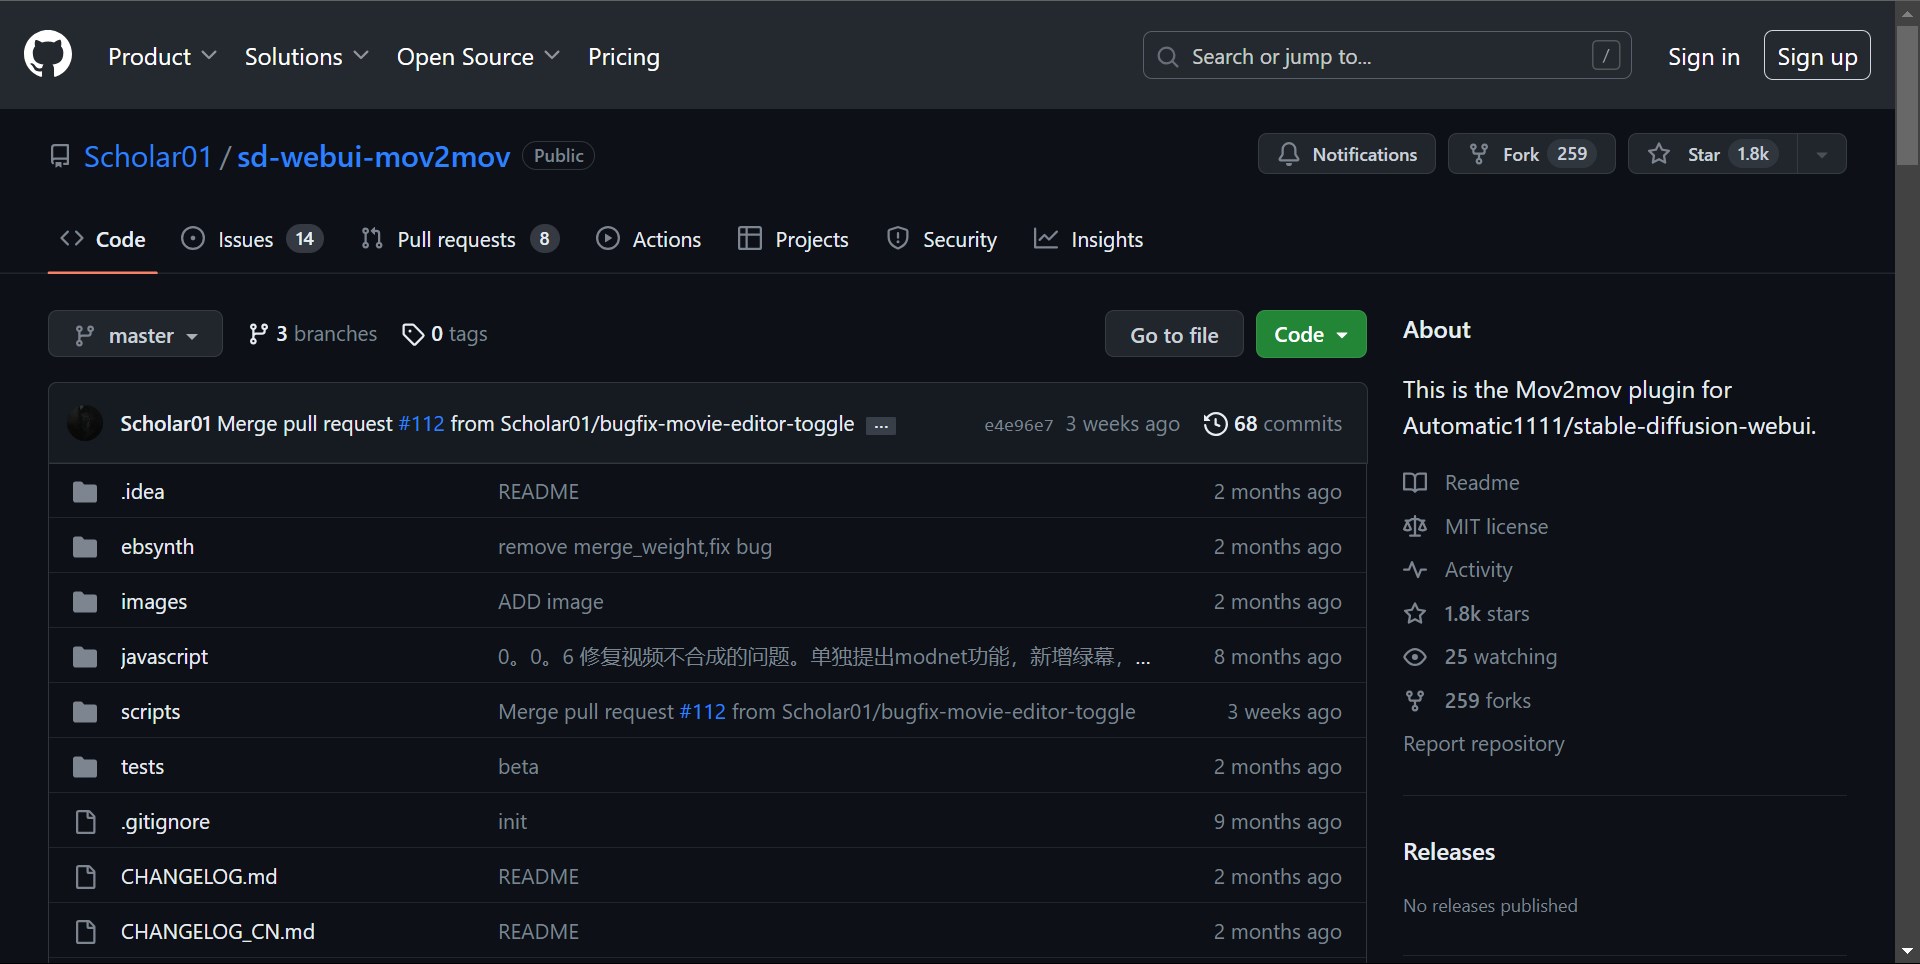
mov2mov git repository - Click Install.
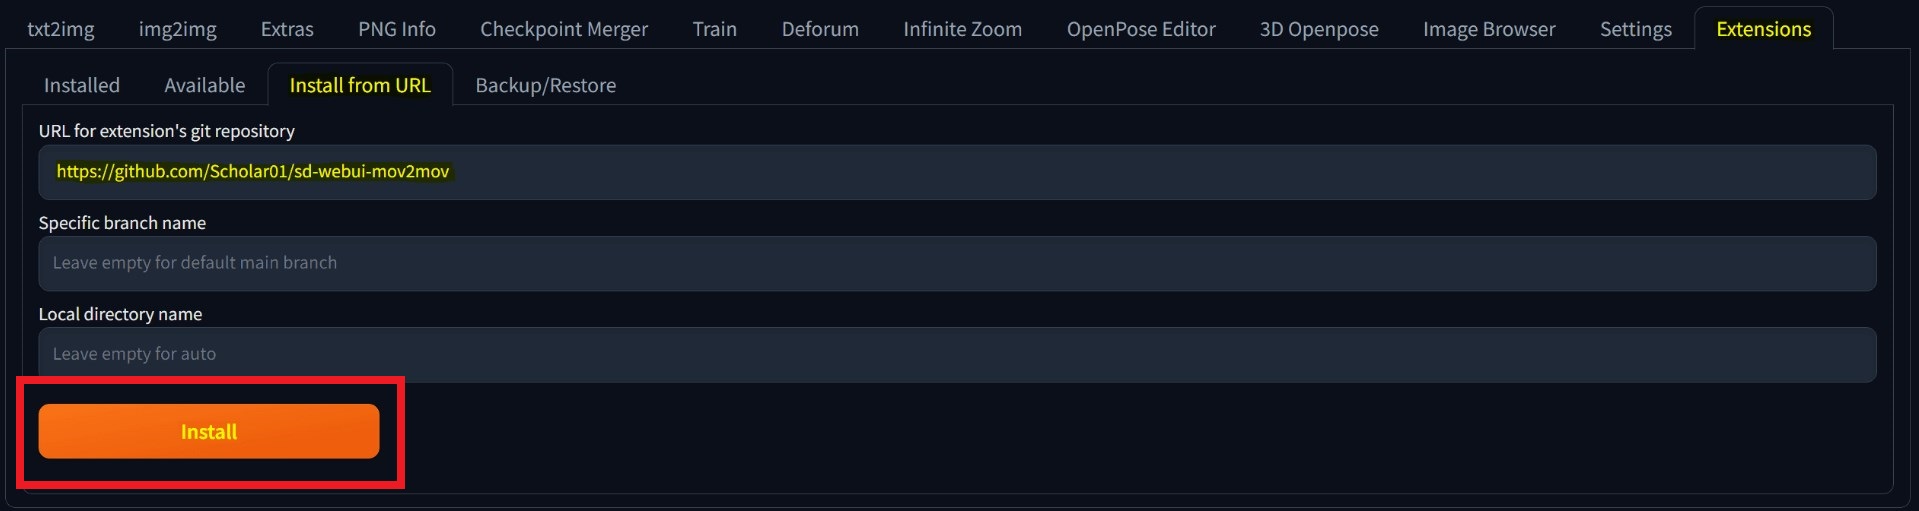
Select Install - Close and restart the Web-UI.
Step 2: Set Mov2mov Settings
- Navigate to the new mov2mov page.
- Choose a Stable Diffusion checkpoint in the dropdown menu.
- Enter positive and negative prompts.
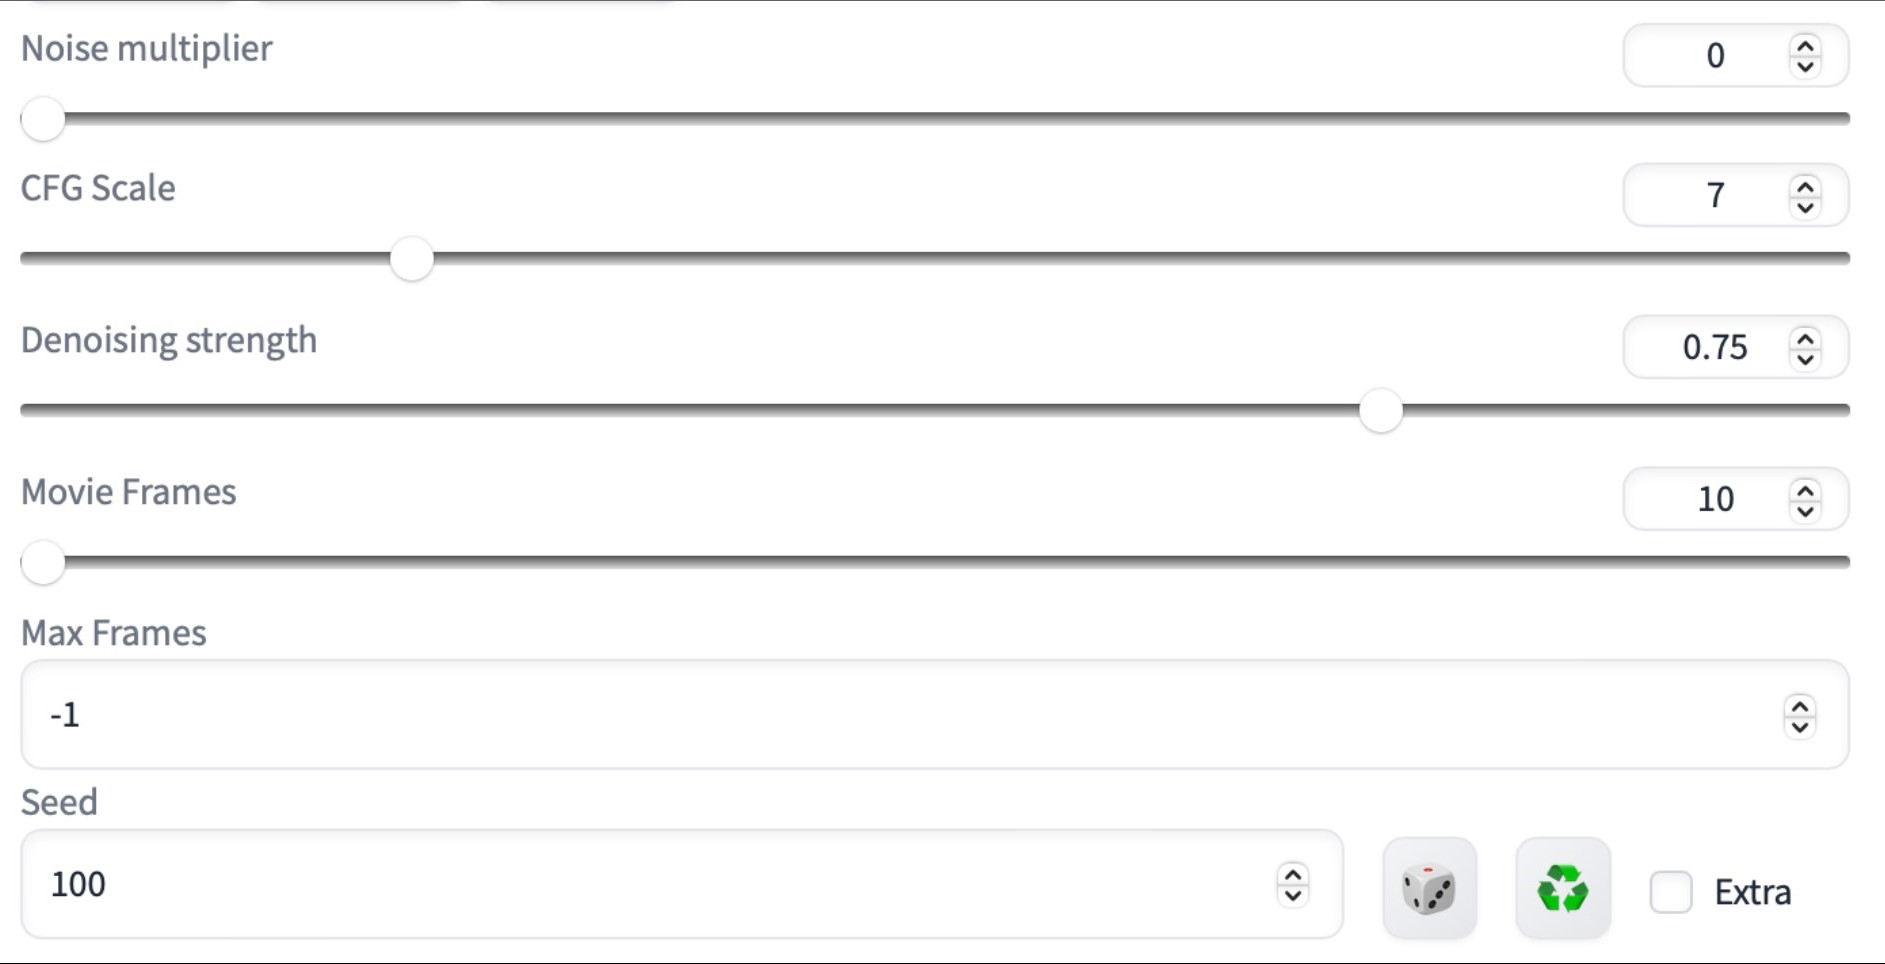
- Upload the video to the canvas with settings like Crop and Resize (width: 768, height: 512).
- Adjust noise multiplier, CFG scale, denoising strength, max frame, and seed.
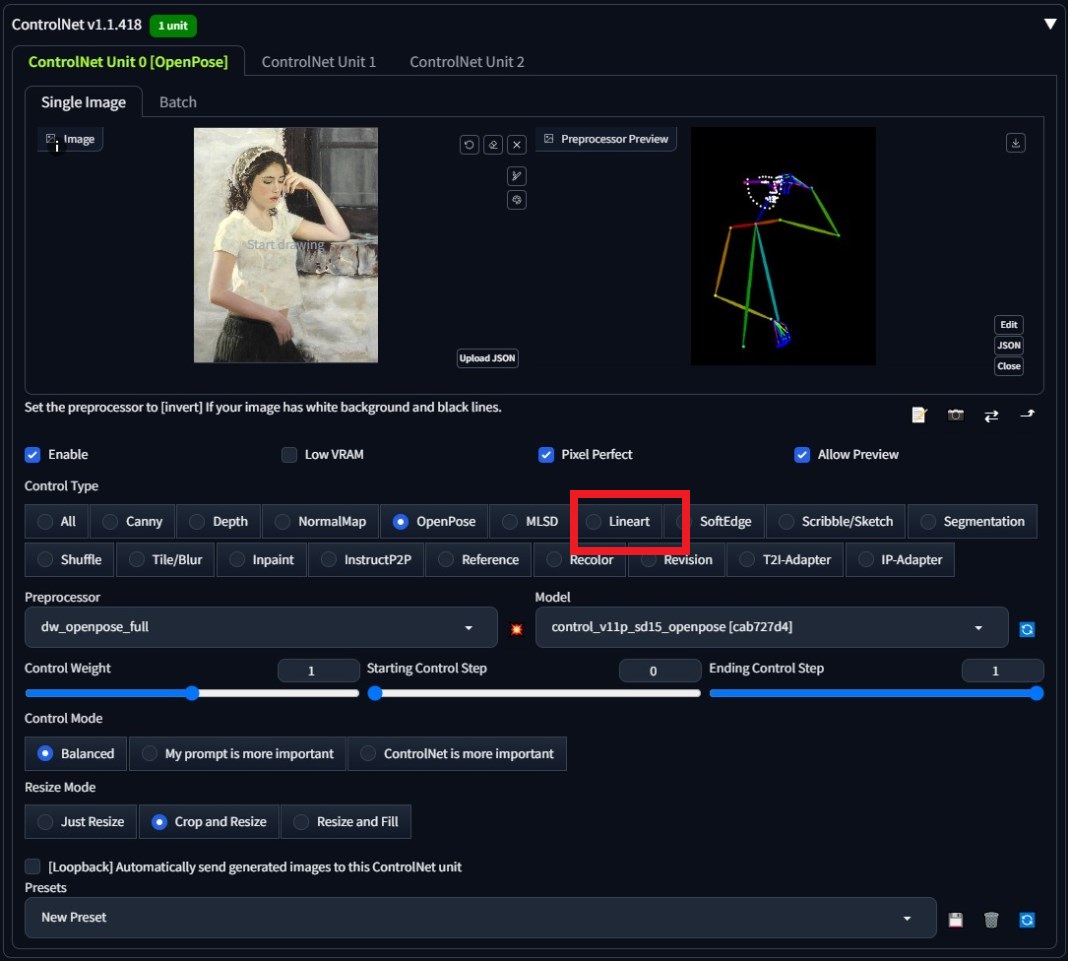
Step 3: Modify ControlNet Settings
Enable ControlNet with settings like Lineart, lineart_realistic preprocessor, and a control weight of 0.6. Avoid uploading a reference image; Mov2mov uses the current frame as the reference.
Step 4: Generate the Video
Click Generate and wait for the process to finish. Save the generated video; find it in the output/mov2mov-videos folder.
Additional Notes for Mov2mov:
- Use a different Video Mode if an error occurs.
- If video generation fails, manually create the video from the image series in the output/mov2mov-images folder.
- Deterministic samplers may not work well with this extension due to potential flickering issues.
3. Temporal Kit
Temporal Kit is suited for advanced users who require detailed control over the video conversion process. It offers a range of settings for fine-tuning the output, making it a preferred choice for professional quality results.
Step 1: Install Temporal Kit Extension
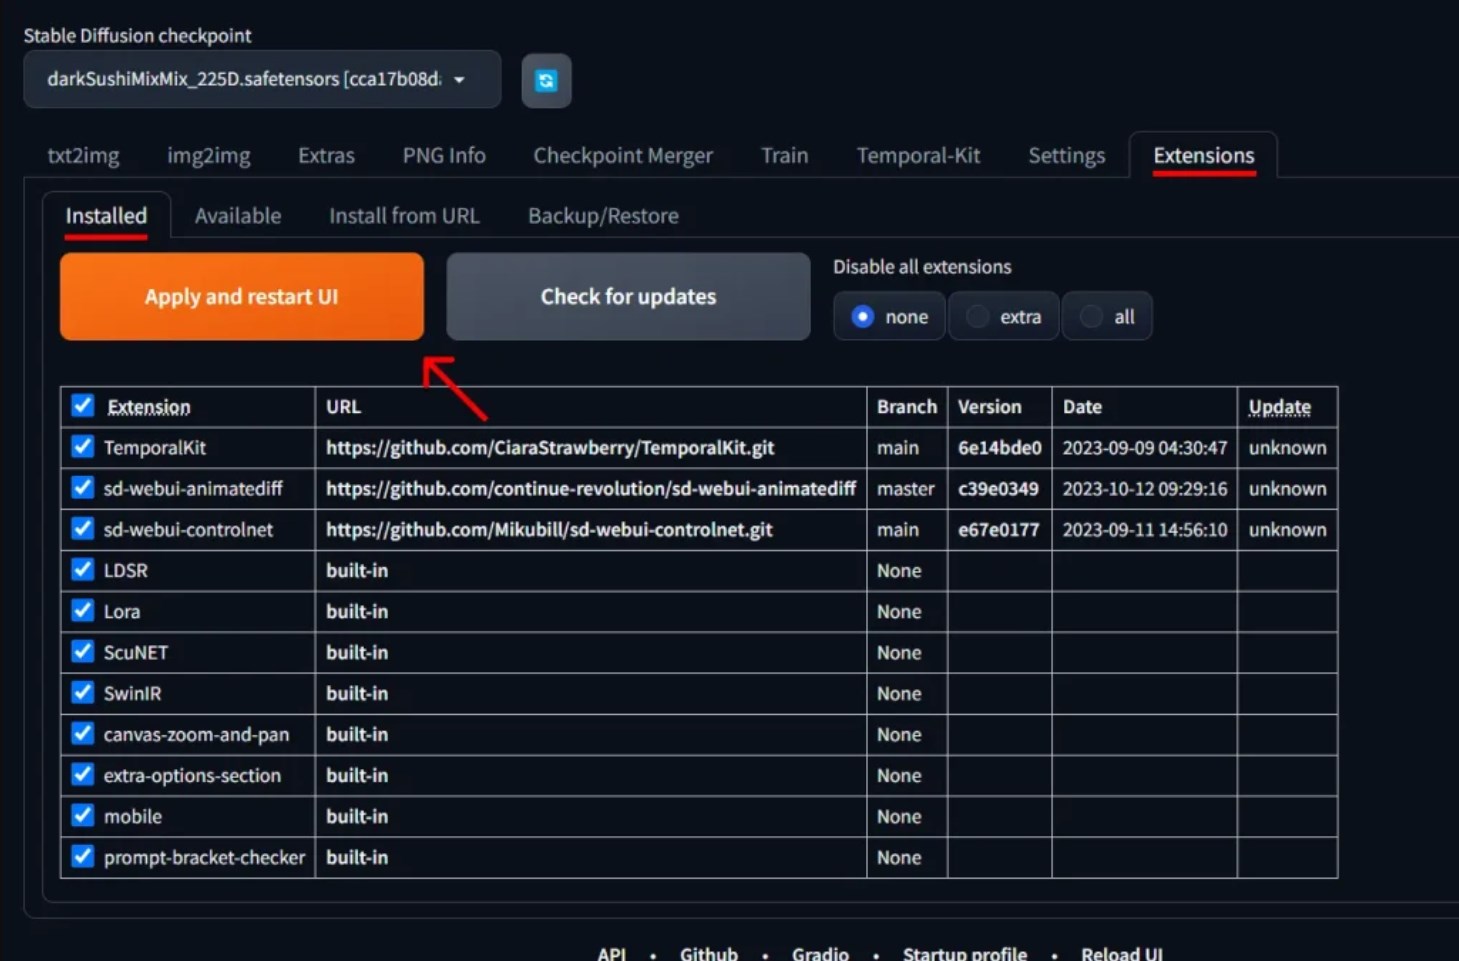
- In AUTOMATIC1111 Web-UI, go to the Extension page.
- Select Install from the URL tab.
- Enter the extension’s git repository URL: https://github.com/CiaraStrawberry/TemporalKit
- Click Install.
- Close and restart the Web-UI.
Step 2: Install FFmpeg
Download FFmpeg from the official website and unzip the file. Set up FFmpeg in the PATH for more accessibility.
For Windows:
- Press the Windows key and type “environment.”
- Select “Edit environment variables for your account.”
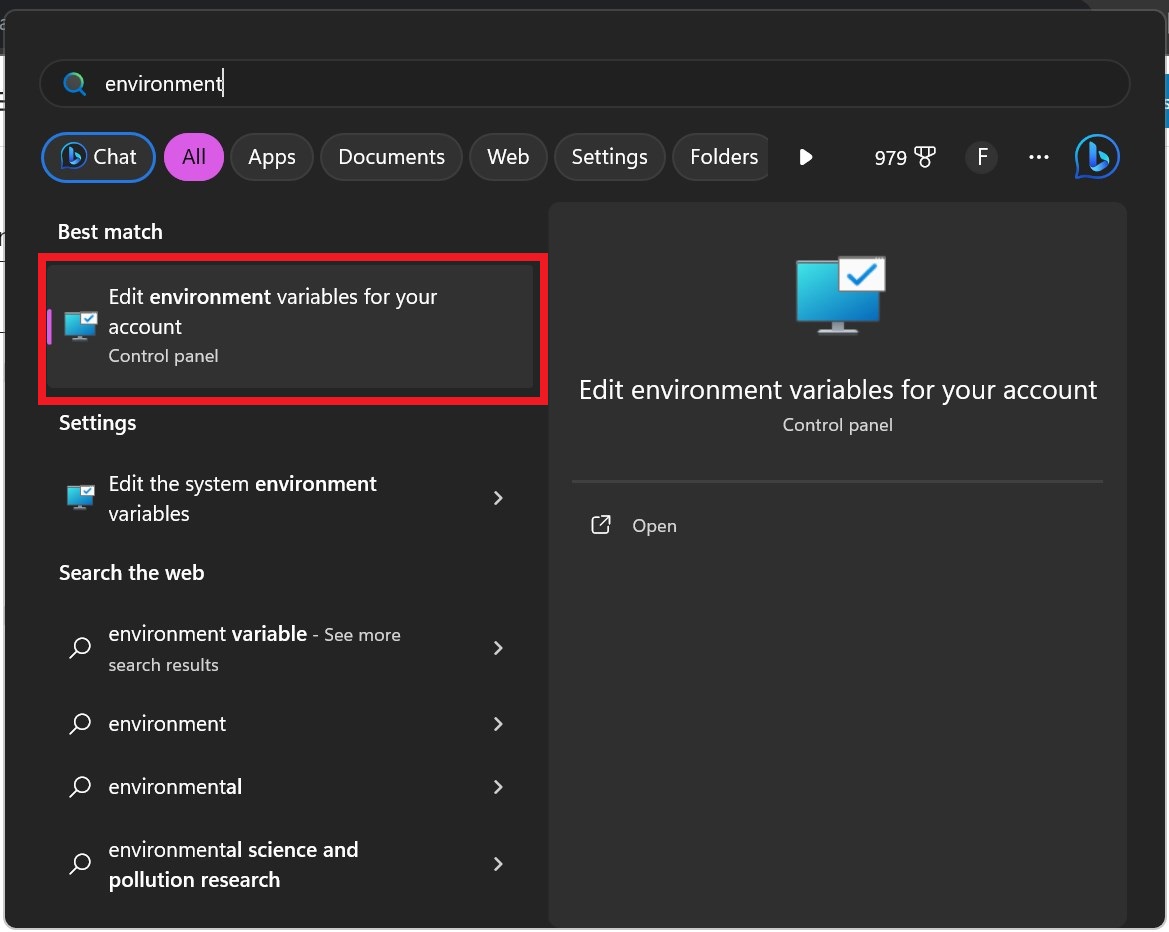
Click on “Edit environment variables for your account” - Edit the PATH by adding a new entry: %USERPROFILE%\bin
- Create a new folder named “bin” in your home directory and place ffmpeg.exe in it.
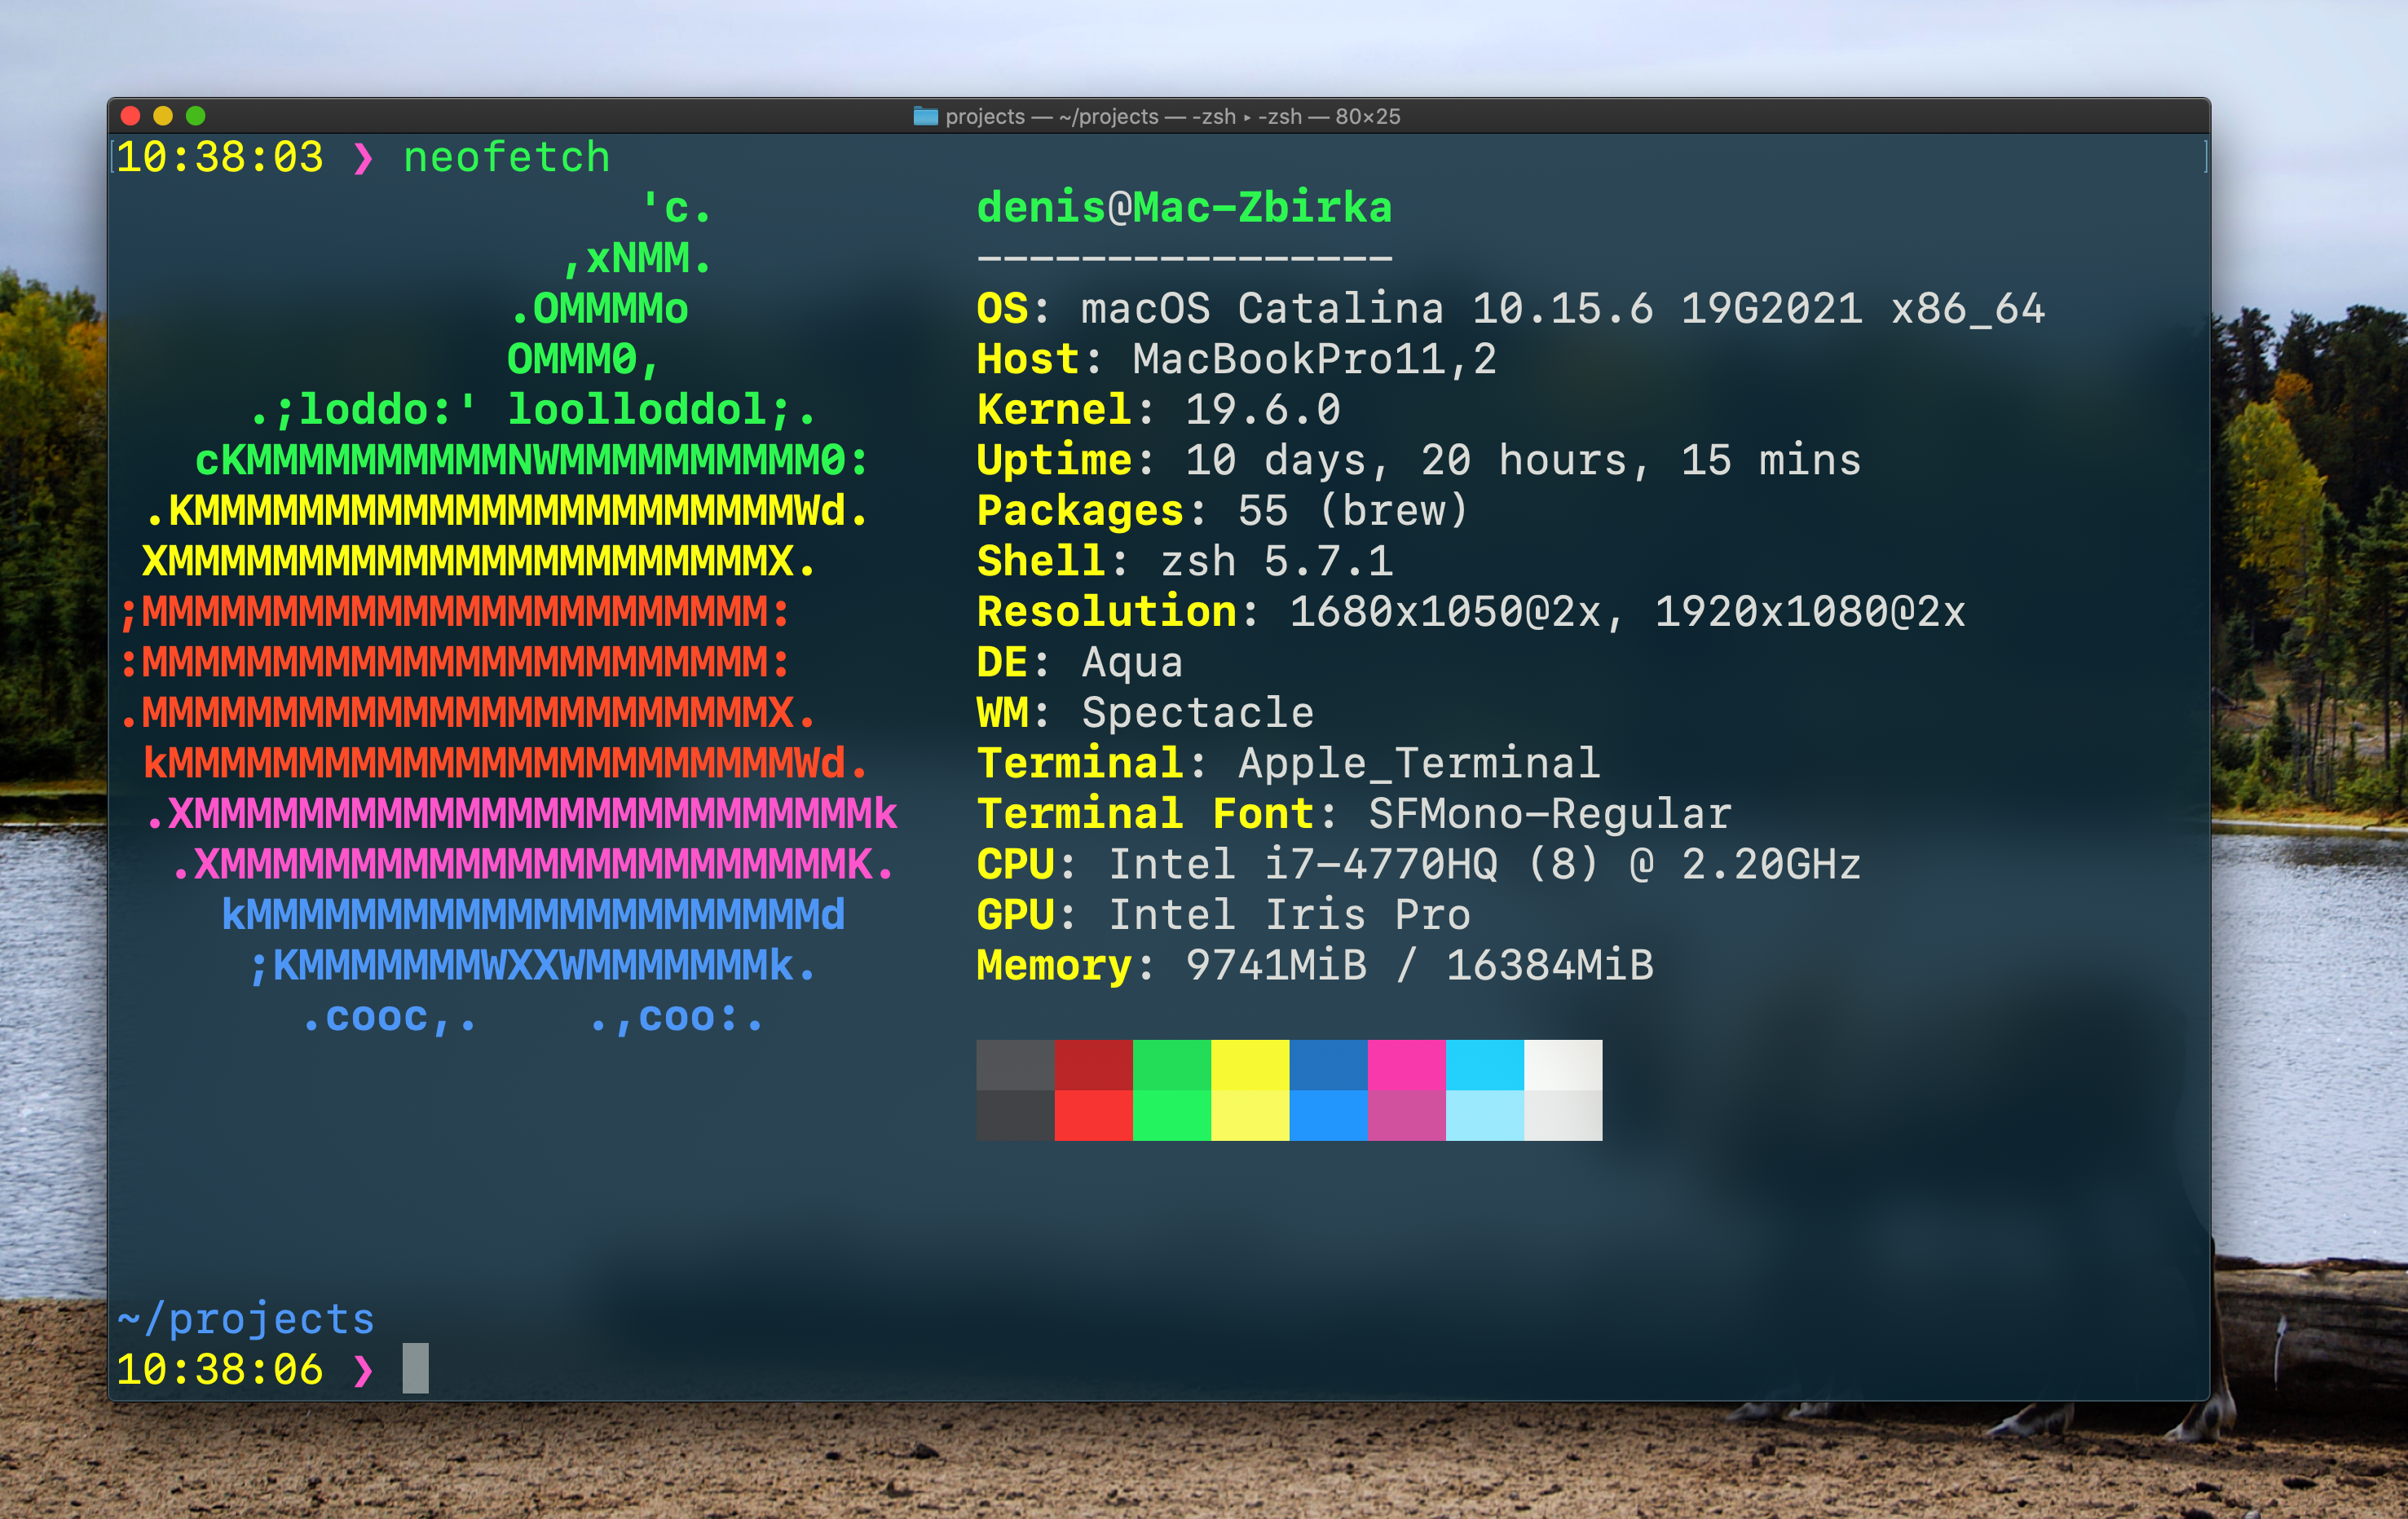
- Test by opening the command prompt and typing ffmpeg.
For Mac or Linux:
- Open the Terminal.
- Create a new folder, “bin,” in your home directory.
- Place the ffmpeg file in this folder.
- Edit .zprofile in your home directory and add export PATH=~/bin:$PATH.
- Start a new Terminal and type ffmpeg to verify.
Step 3: Enter Pre-processing Parameters
- In AUTOMATIC1111, go to the Temporal Kit page.
- Go to the Pre-Processing tab.
- Upload your video to the Input video canvas.
- Set parameters (e.g., Side: 2, Height resolution: 2048, frames per keyframe: 5, fps: 20).
- Click Run to generate a sheet of keyframes.
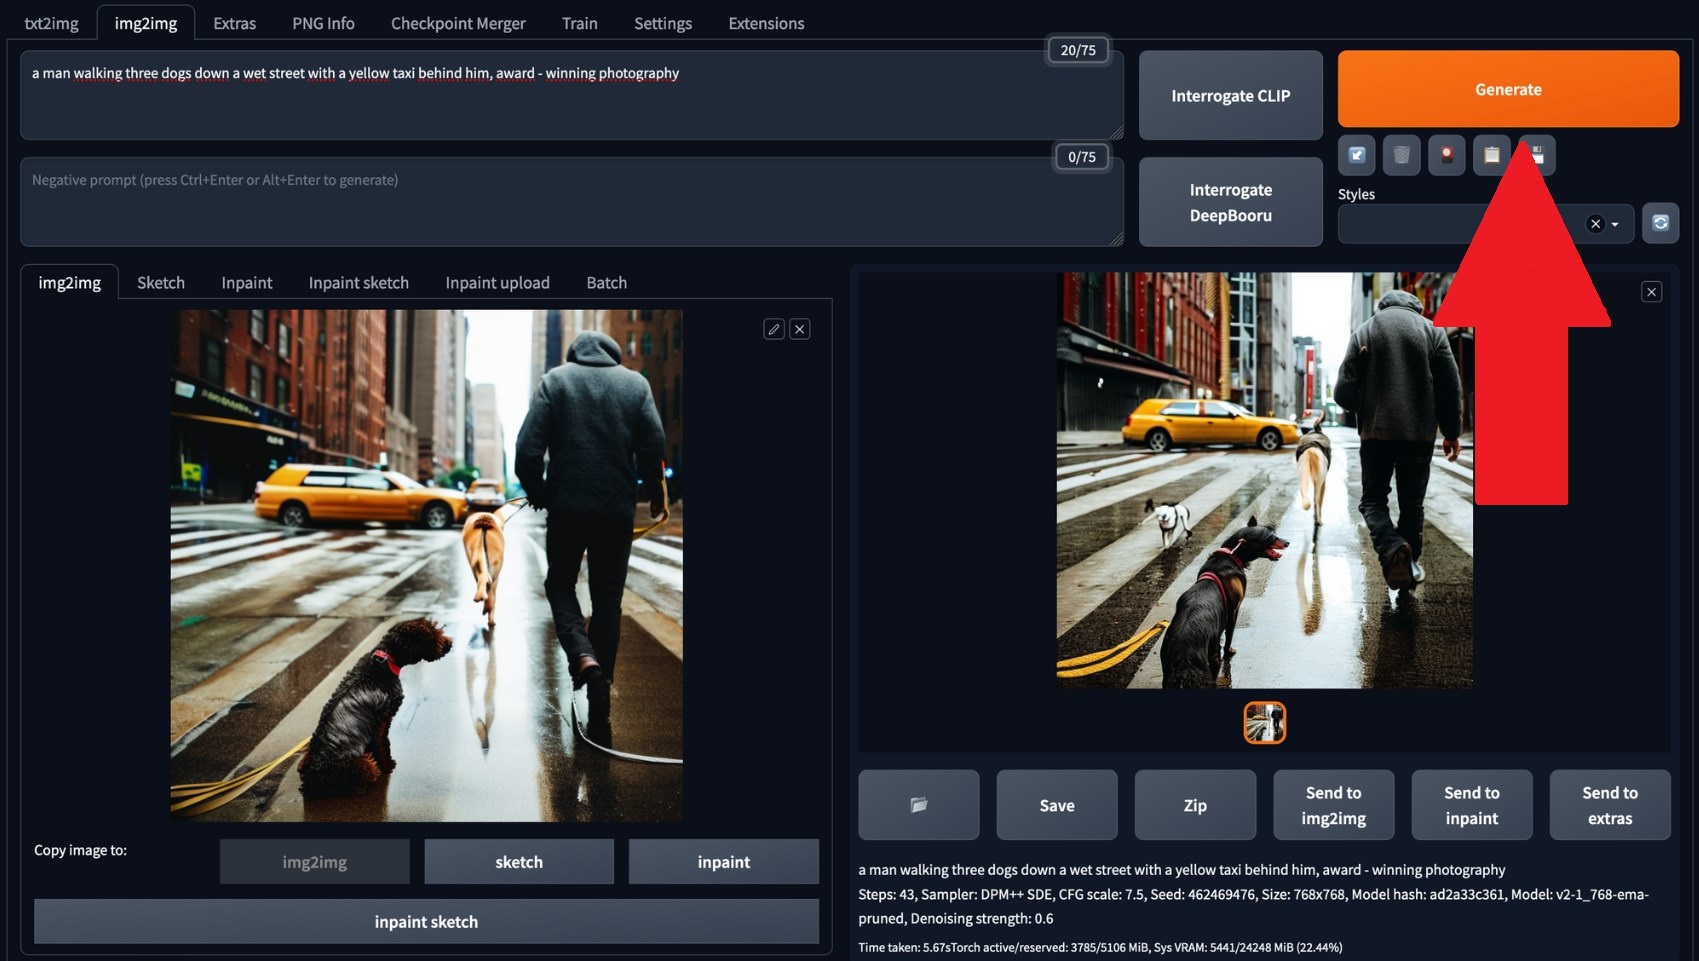
Step 4: Perform Img2img on Keyframes
- Go to the Img2img page.
- Switch to the Batch tab.
- Set Input and Output directories.
- Enter both positive and negative prompts.
- Set parameters (e.g., Sampling method: DPM++2M Karras, Denoising strength: 0.5, etc).
- In the ControlNet (Unit 0) section, enable Tile.
- Press Generate to stylize keyframes.
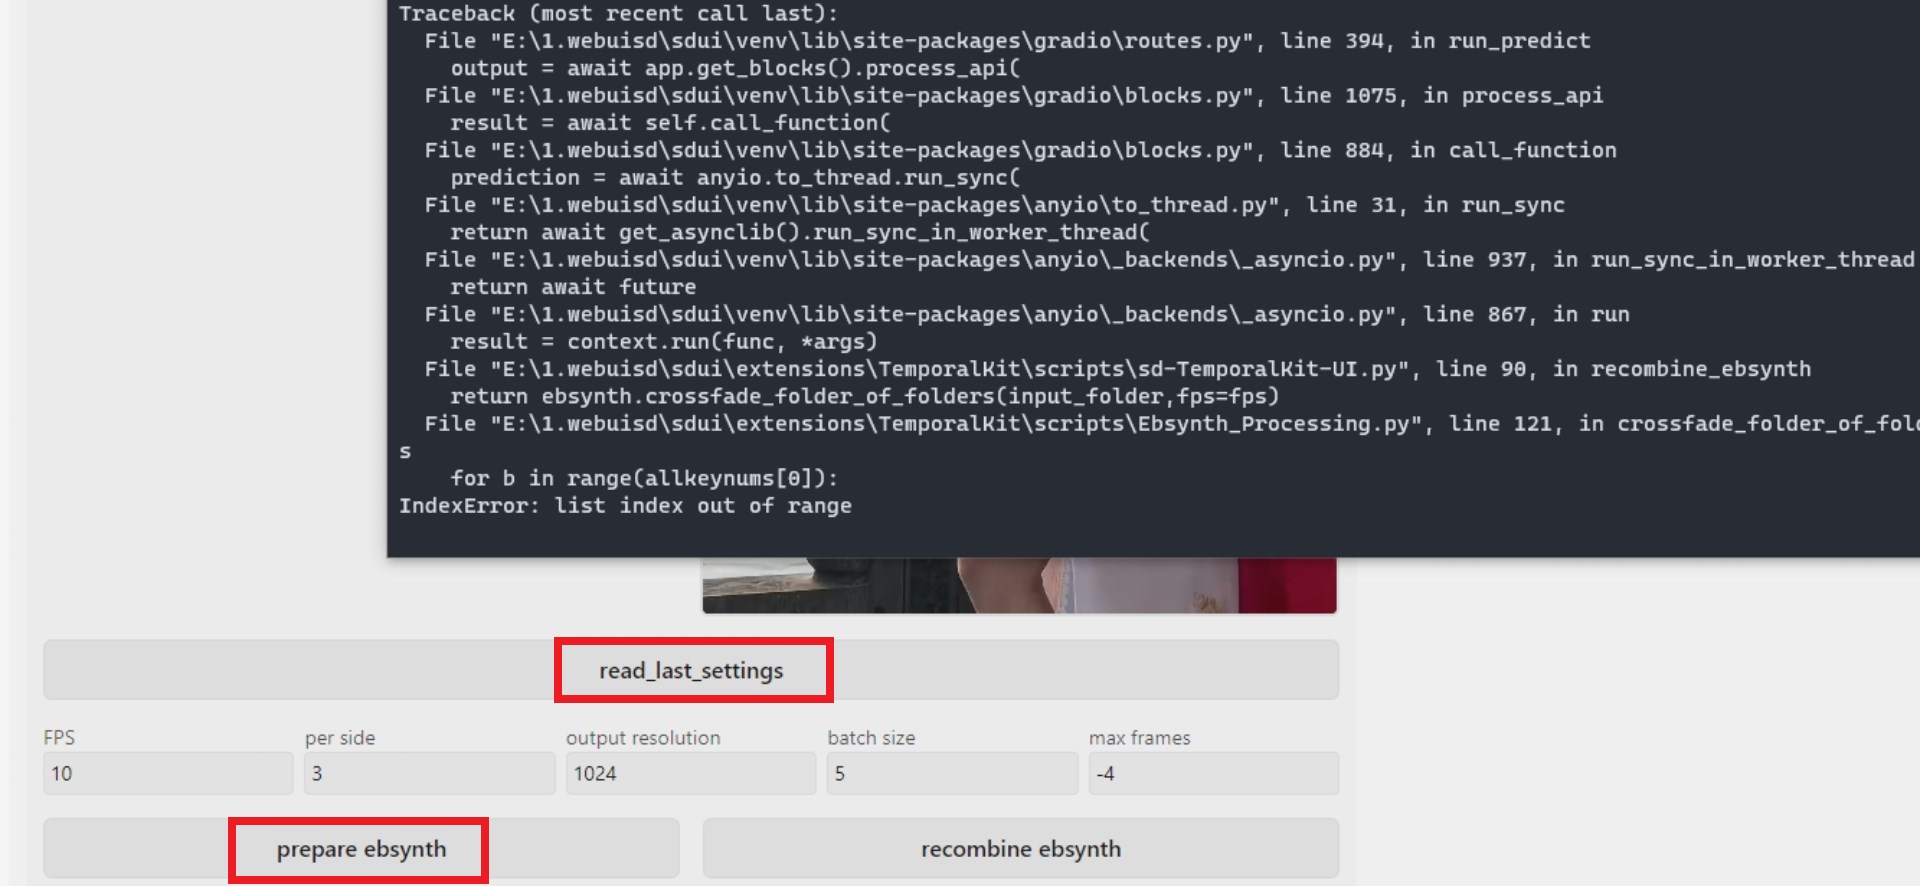
Step 5: Prepare EbSynth Data
- Go to the Temporal Kit page and switch to the Ebsynth-Process tab.
- Set the Input Folder to the target folder path.
- Navigate to read last_settings > prepare ebsynth.
Step 6: Process with EbSynth
- Open EbSynth and drag the keys and frames folders to their respective fields.
- Click Run All and wait for completion.
- out_##### directories will be displayed in the project folder once the process is completed.
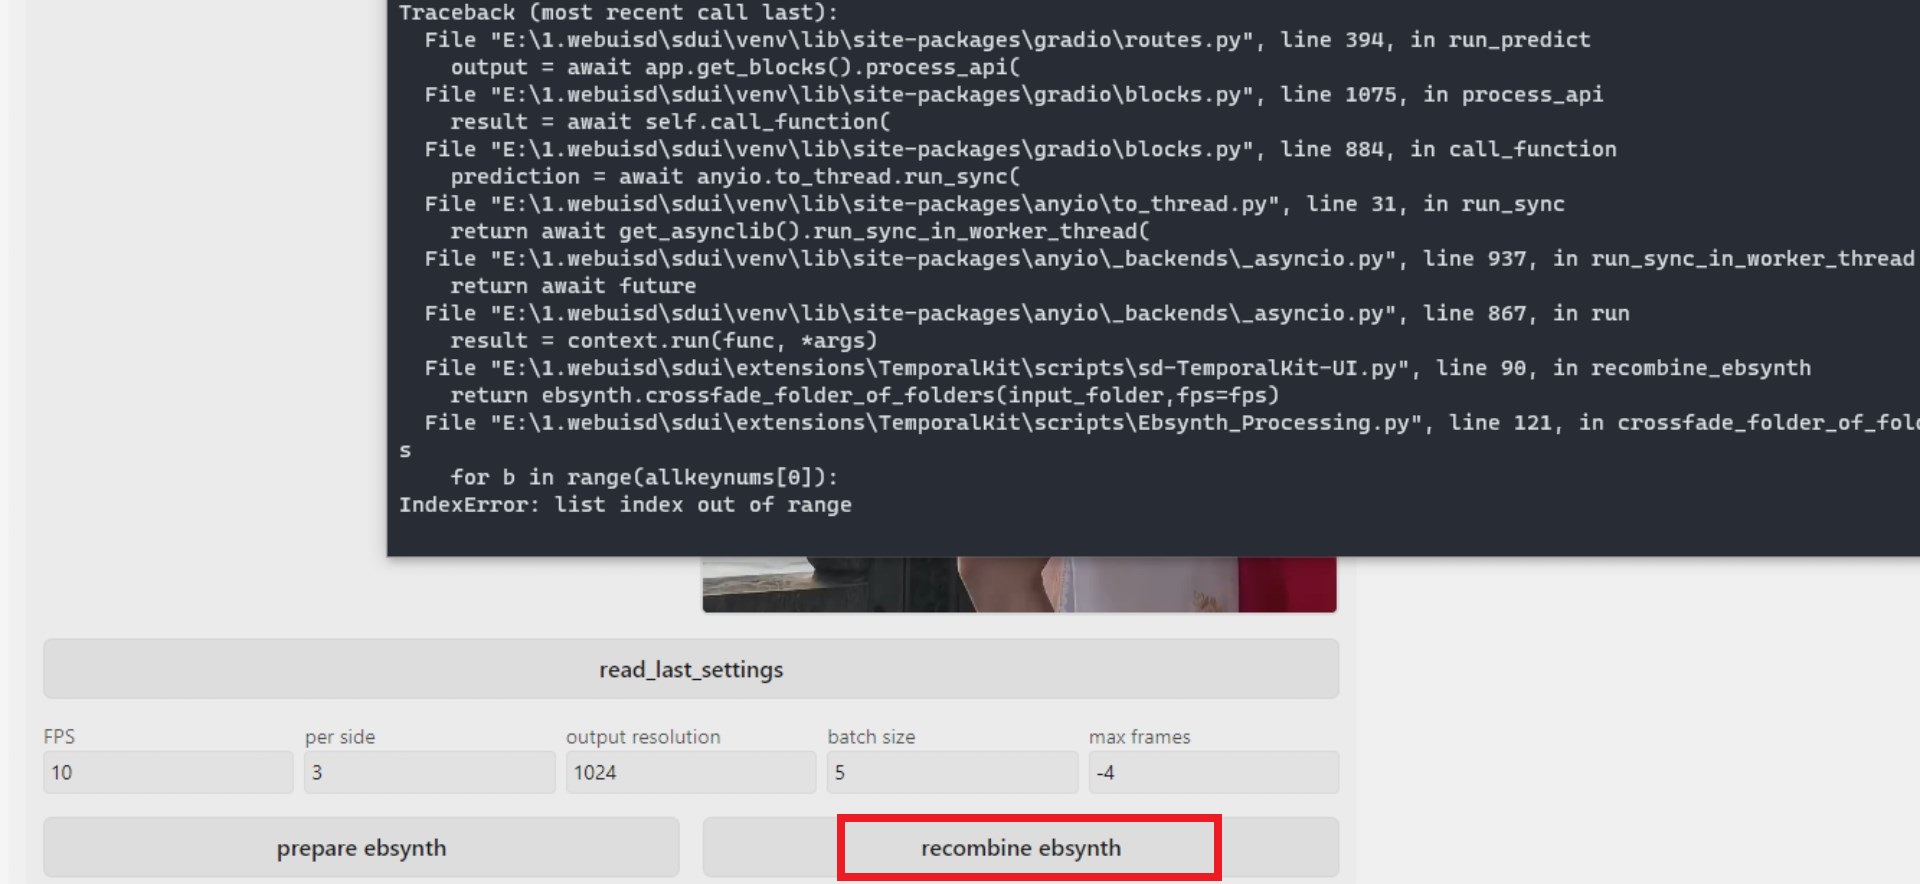
Step 7: Make the Final Video
In AUTOMATIC1111, on the Temporal Kit page and Ebsynth-Process tab, click recombine ebsynth.
Images sourced through Stable Diffusion Art & GitHub
READ MORE: 7 of the Best Open-Source & Free Photoshop Alternatives ➜
Alternatives to Stable Diffusion AI
When seeking alternatives to Stable Diffusion AI, you can look at choices such as:
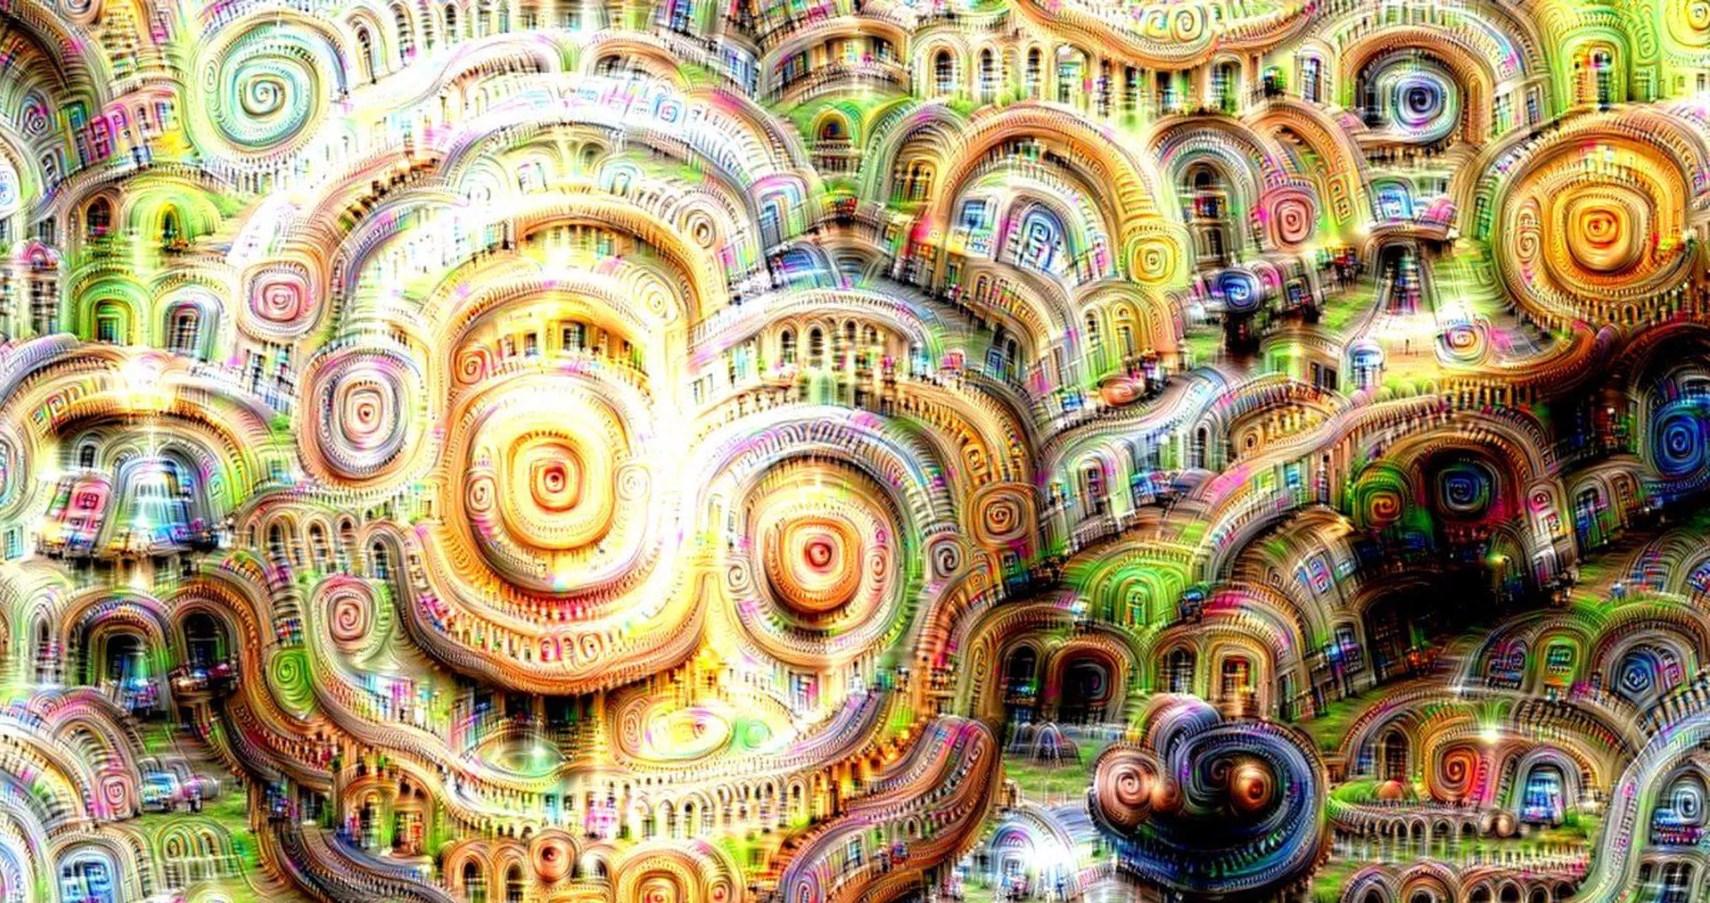
1. Deep Dream
Utilizes neural networks to enhance and manipulate images, generating dreamlike and abstract visual patterns.
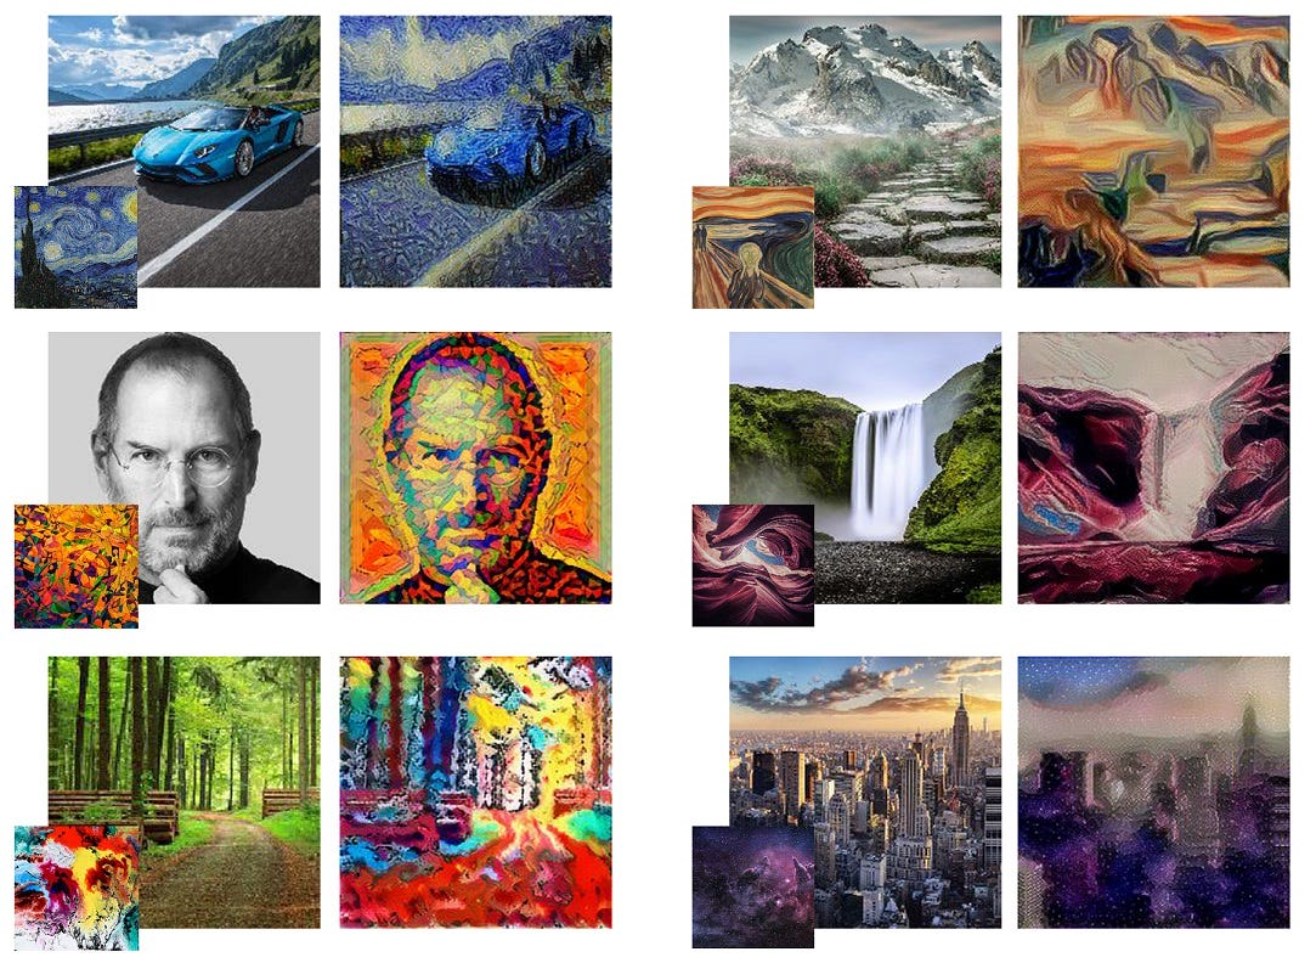
2. Neural Style Transfer
Applies the artistic style of one image to the content of another, resulting in a fusion of artistic elements.
3. CycleGAN
A type of Generative Adversarial Network (GAN) designed for image-to-image translation, allowing the transformation of images between different domains without paired training data.
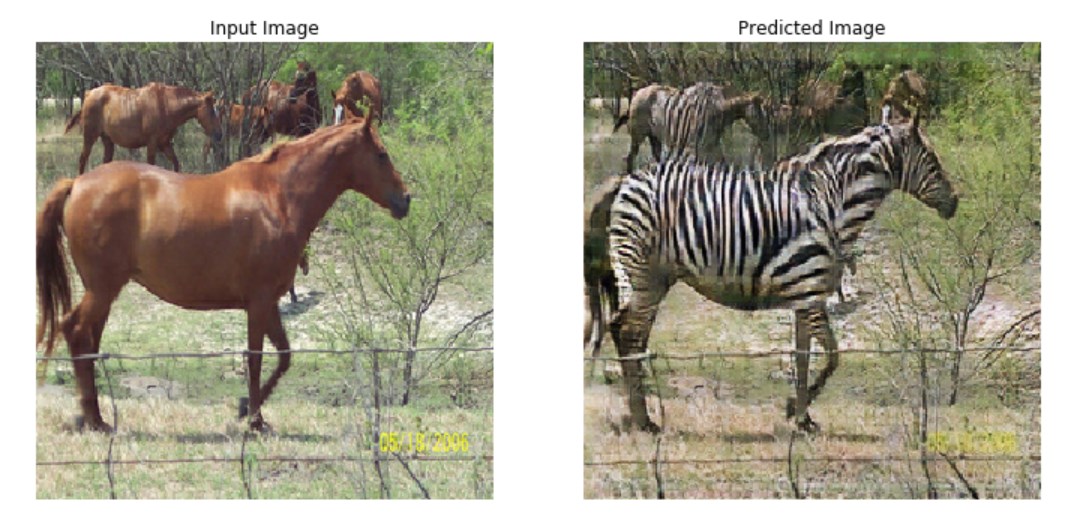
Each alternative offers unique capabilities and artistic outputs. Deep Dream is known for its surreal, dream-like visuals, while Neural Style Transfer excels in applying artistic styles to images. CycleGAN, on the other hand, is great for domain-to-domain image translation. These tools cater to different creative needs and aesthetic preferences.
READ MORE: How to Create Stunning AI Images on MidJourney [Detailed Guide] ➜
Wrapping Up
So, to sum it up, Stable Diffusion AI is a powerful tool for making realistic videos with cool sci-fi effects. The release of Stable Video Diffusion means it’s now more accessible for everyone to use and improve. But other options like Deep Dream and Neural Style Transfer bring different artistic flavors.
Choosing the right one depends on what you need and how comfortable you are with the tech stuff. The creative journey in this space is about finding a balance between what you want to do and what you know, as well as what tools you have. It’s all about making cool stuff with a mix of art and tech!
FAQs
Stable Diffusion AI stands out by leveraging advanced deep learning models, enabling the creation of realistic videos with unique sci-fi effects and seamless transitions. Its user-friendly interface makes high-quality video editing accessible to everyone.
Absolutely! Stable Diffusion AI Video to Video Free is designed with user-friendliness in mind.
To access Stable Diffusion AI, a stable internet connection and a Google account are required. The tool can be accessed through a web UI, making it convenient for users. Additionally, users are encouraged to familiarize themselves with the help page and documentation to optimize the video creation process.


