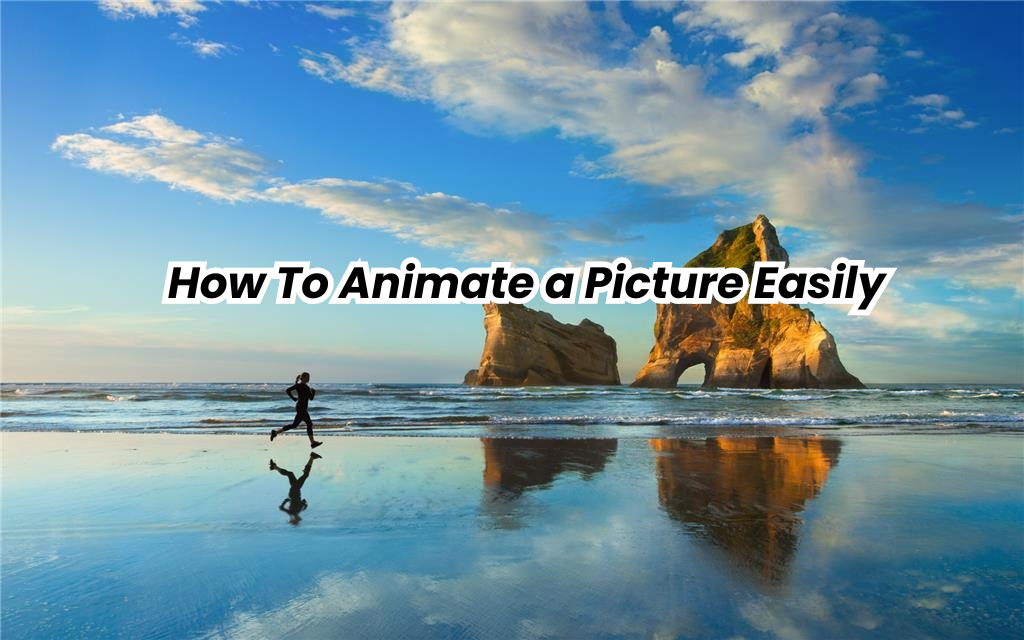
How To Animate a Picture Easily – All Skills Levels Guide
 Reviewed by Huzaifa Haroon
If you’ve been active on social media, you’ve probably come across animated photos, as they have become quite popular in the world of infographics. A video or GIF can break down complicated topics, making information much easier to understand. If traditional infographics aren’t your thing, you can even animate something like clouds in a photo to add a unique aesthetic touch to your images.
If you want to animate your photos, you’re in the right place. In this guide, we’ll walk you through three different options you can use to animate a photo, step by step.
Ways to Animate A Picture
There are several websites and software applications you can use to animate your pictures, including Adobe Photoshop, Canva, and PicsArt. Click on any of the options below to jump directly to that section, starting with the easiest one.
Animate a Picture Using Canva
Canva is one of the most popular tools for editing images, including basic photo animation. Its simple interface and user-friendly features make animating images super easy, even if you’re a complete beginner.
While Canva’s animation features are fairly basic and offer limited customization compared to the other options in this guide, it’s a great choice if you want something quick and only need simple animations. In just a few clicks, you can animate your image in Canva.
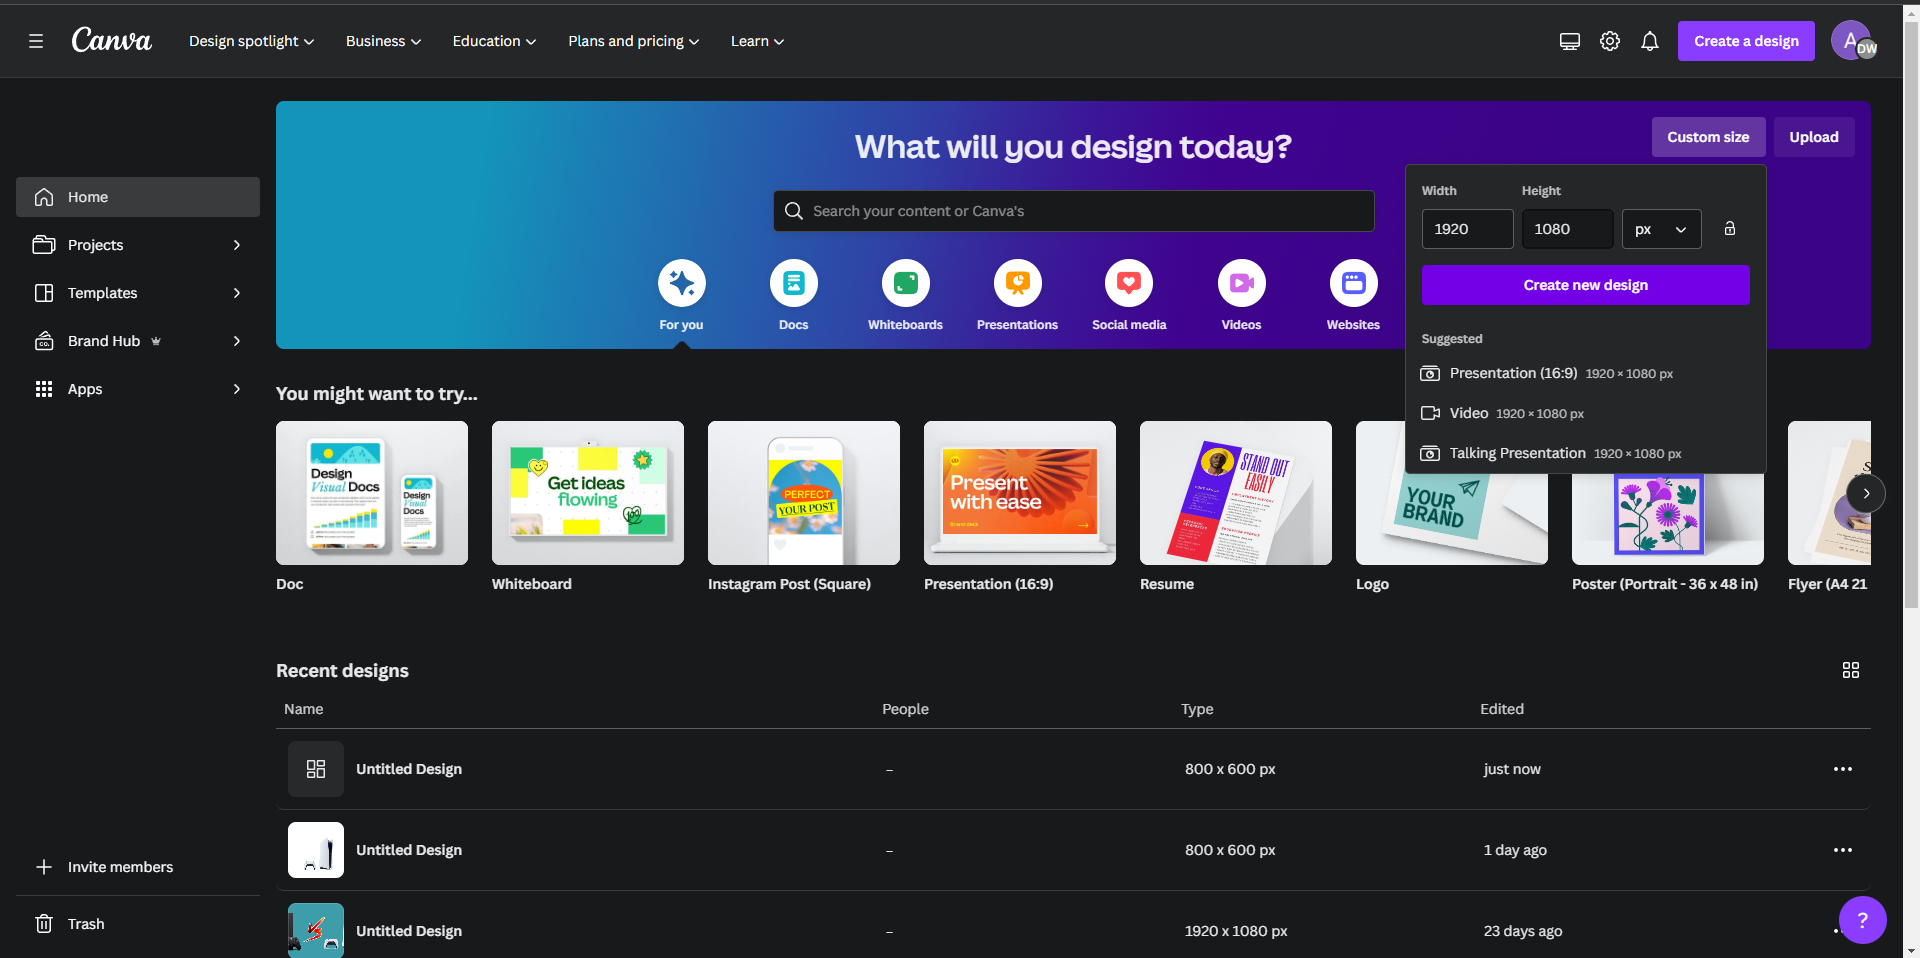
- First, go to Canva.com and log in to your account if you haven’t already.
- Click on “Create A Design” in the top right menu and choose a template. For the most flexibility, select “Custom size” and enter your preferred resolution for the animated image. For example, you can use 1920×1080.
Create A Design In Canva - Next, upload the photo you want to animate. You can drag and drop your image onto the website or click “File” then “Import File.”

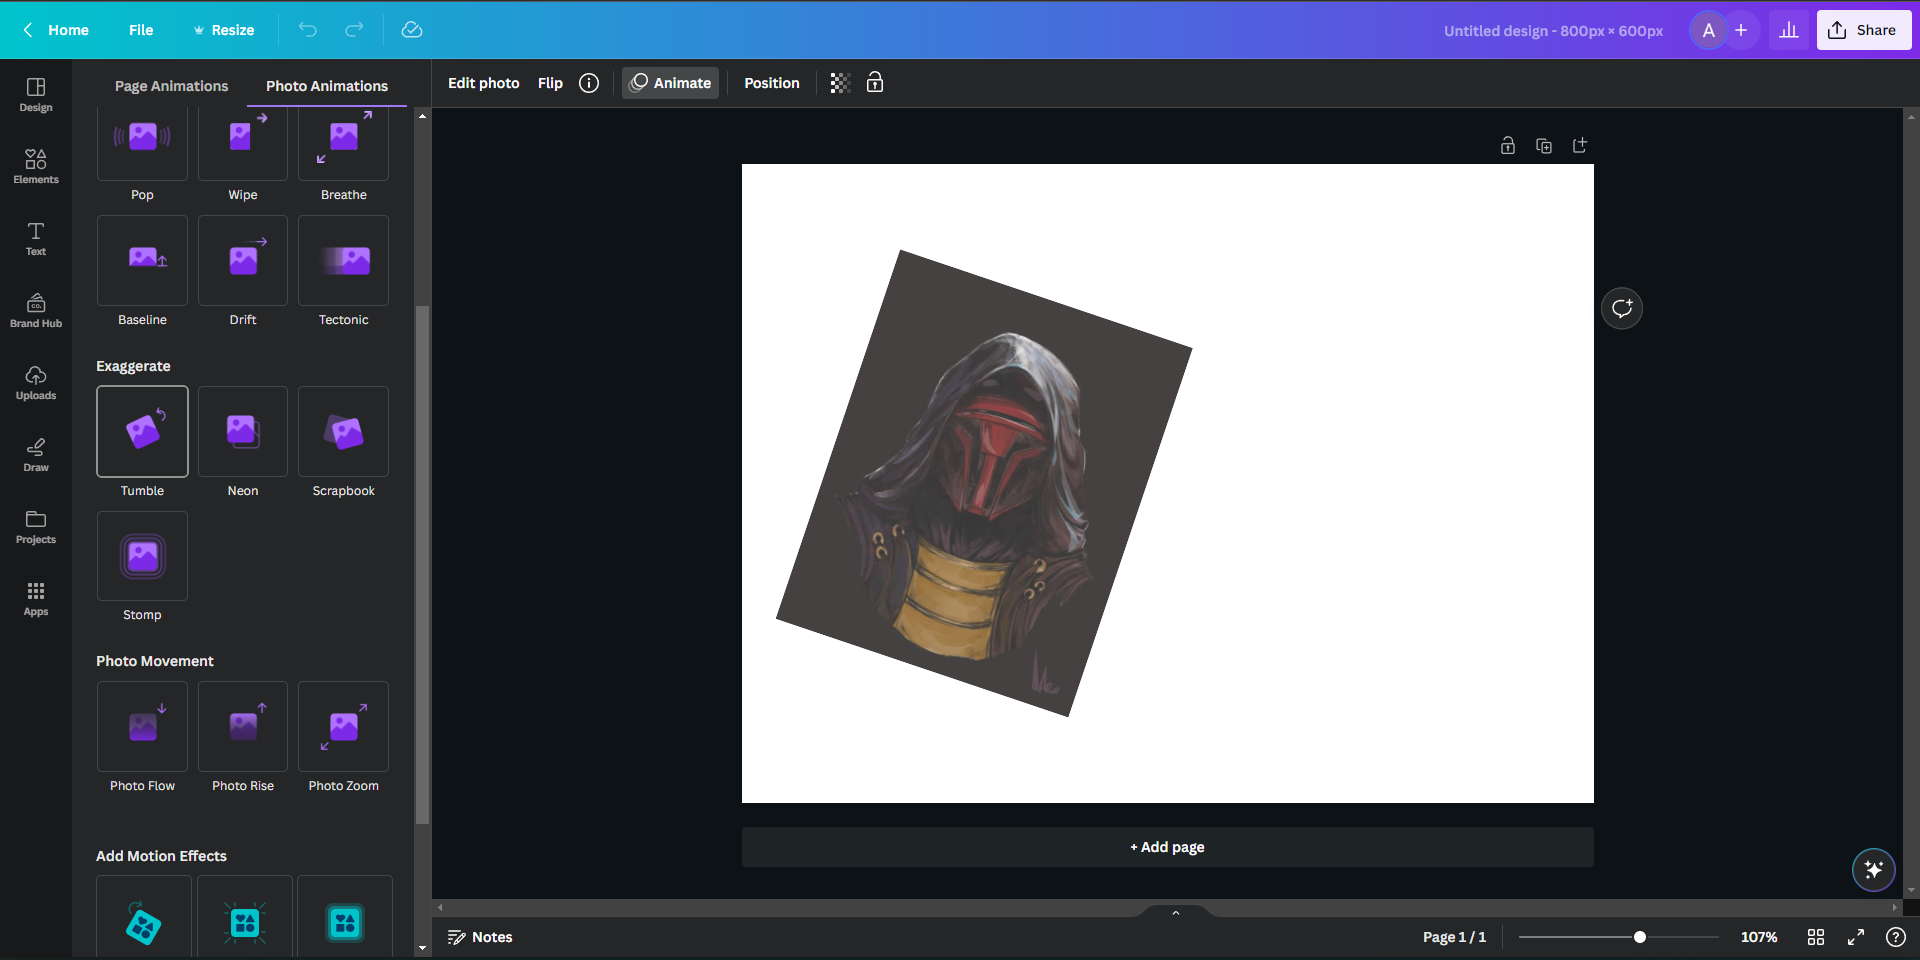
Importing File In Canva - Once your photo is uploaded, click the “Animate” button in the top menu.
-
This will open an animation section on the left side of your screen. You’ll see a variety of preset animations—just click on any one to instantly apply it to your photo. You can adjust the animation’s strength with the “Intensity” bar, and for some animations you can set the speed as well. Keep in mind, these extra options may require a premium Canva account.
Animating An Image In Canva - Once you’re happy with your animated image, export it by clicking the “Share” button in the top right corner.
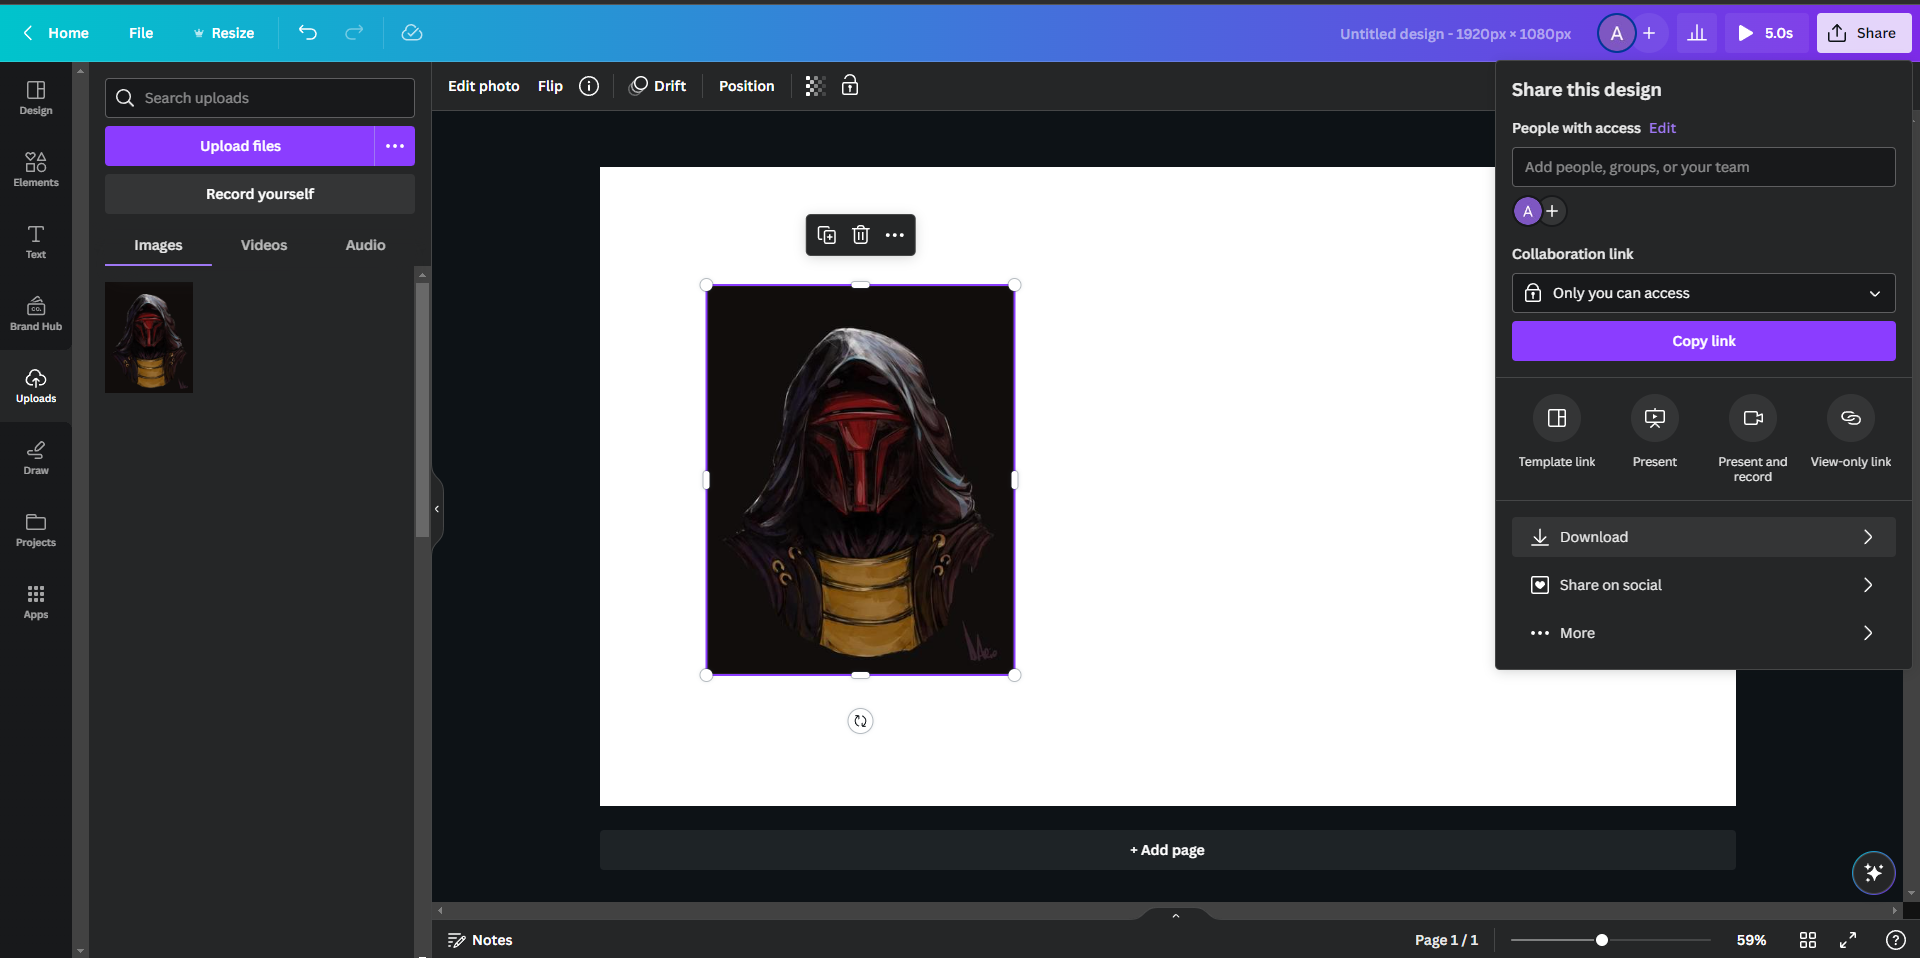
Exporting An Image In Canva - A window will appear where you can select the format (such as MP4, GIF, etc.) and resolution for exporting your animated image.

Selecting The Export Format In Canva
That’s it—just follow these steps and you’ll have your animated image ready using Canva in no time. For more help, check out our step-by-step guides.
Animate a picture using PicsArt
PicsArt is another great platform for animating your photos. It even includes AI-powered features that can help enhance your images and boost resolution, making them really stand out. In this section, we’ll focus on how to animate a photo with PicsArt.
- Start by visiting PicsArt.com/create. The PicsArt interface is fairly similar to Canva’s.
- You can choose to begin a “New Project” or select a project template, like “Instagram Story,” from the library.
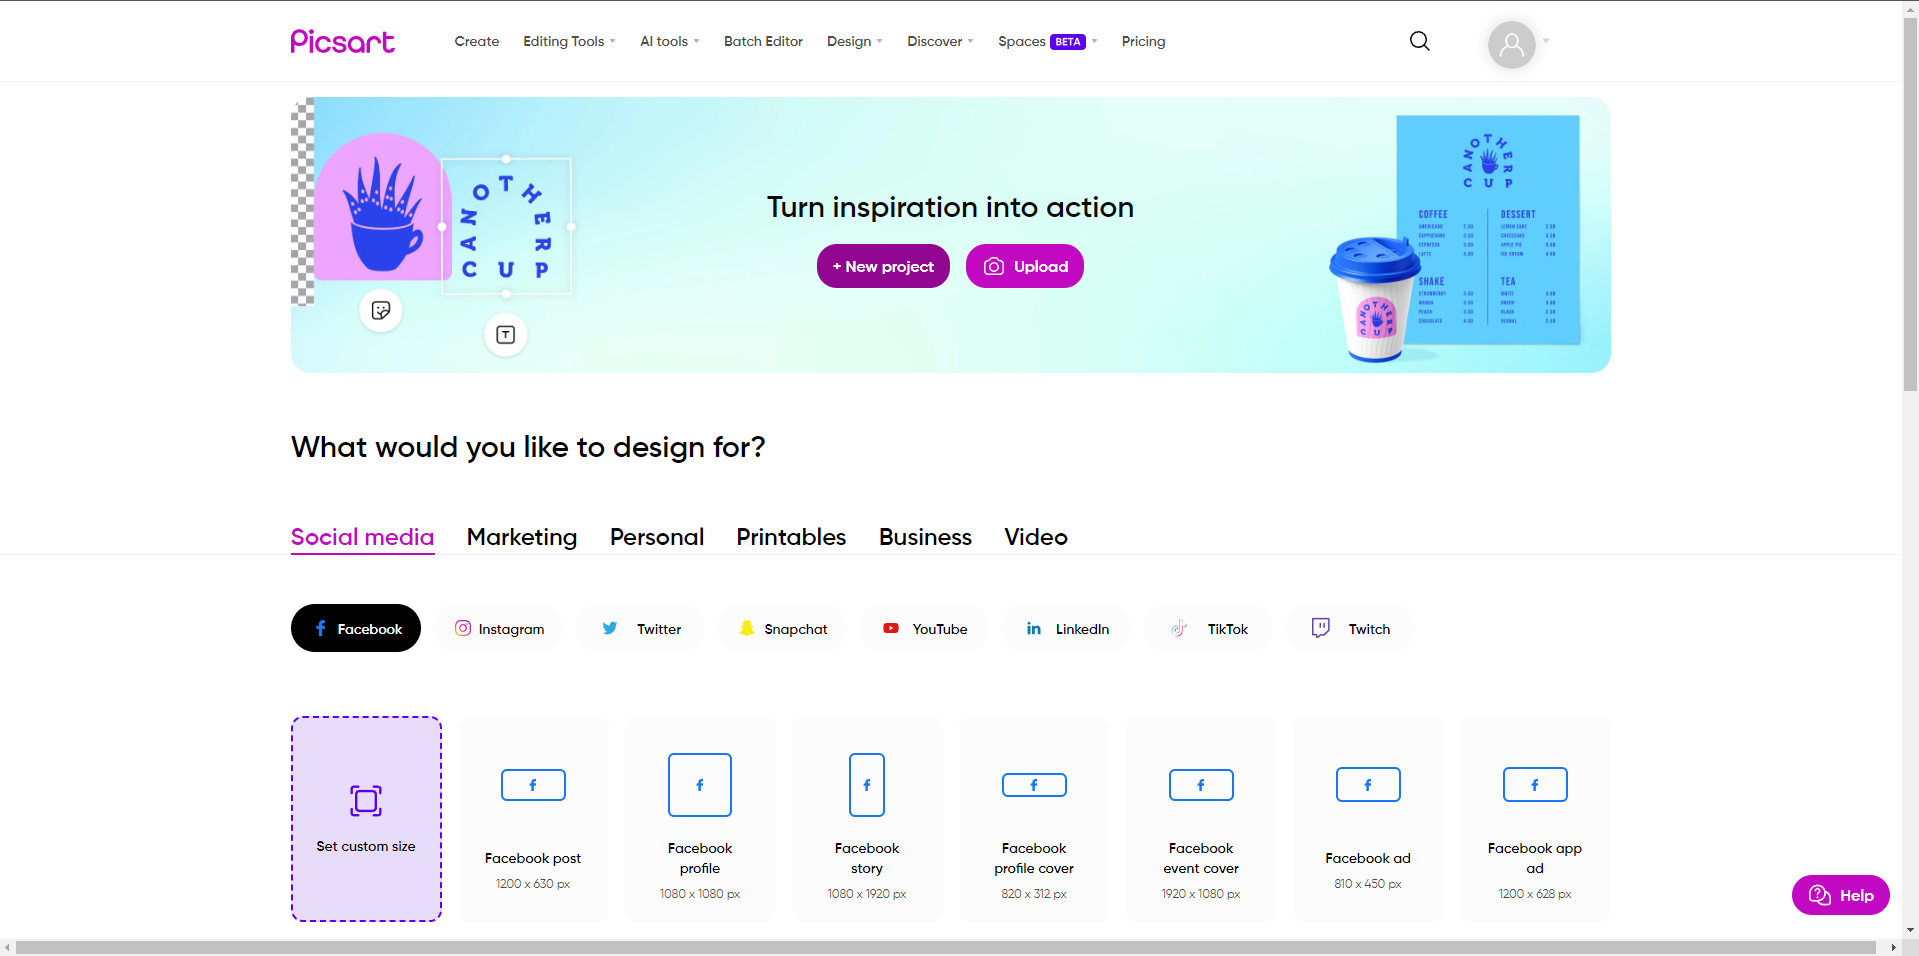
Creating A New Project In PicsArt - With your project open, import your photo by clicking “Uploads” in the left menu, then tap the purple “Upload” button at the bottom.
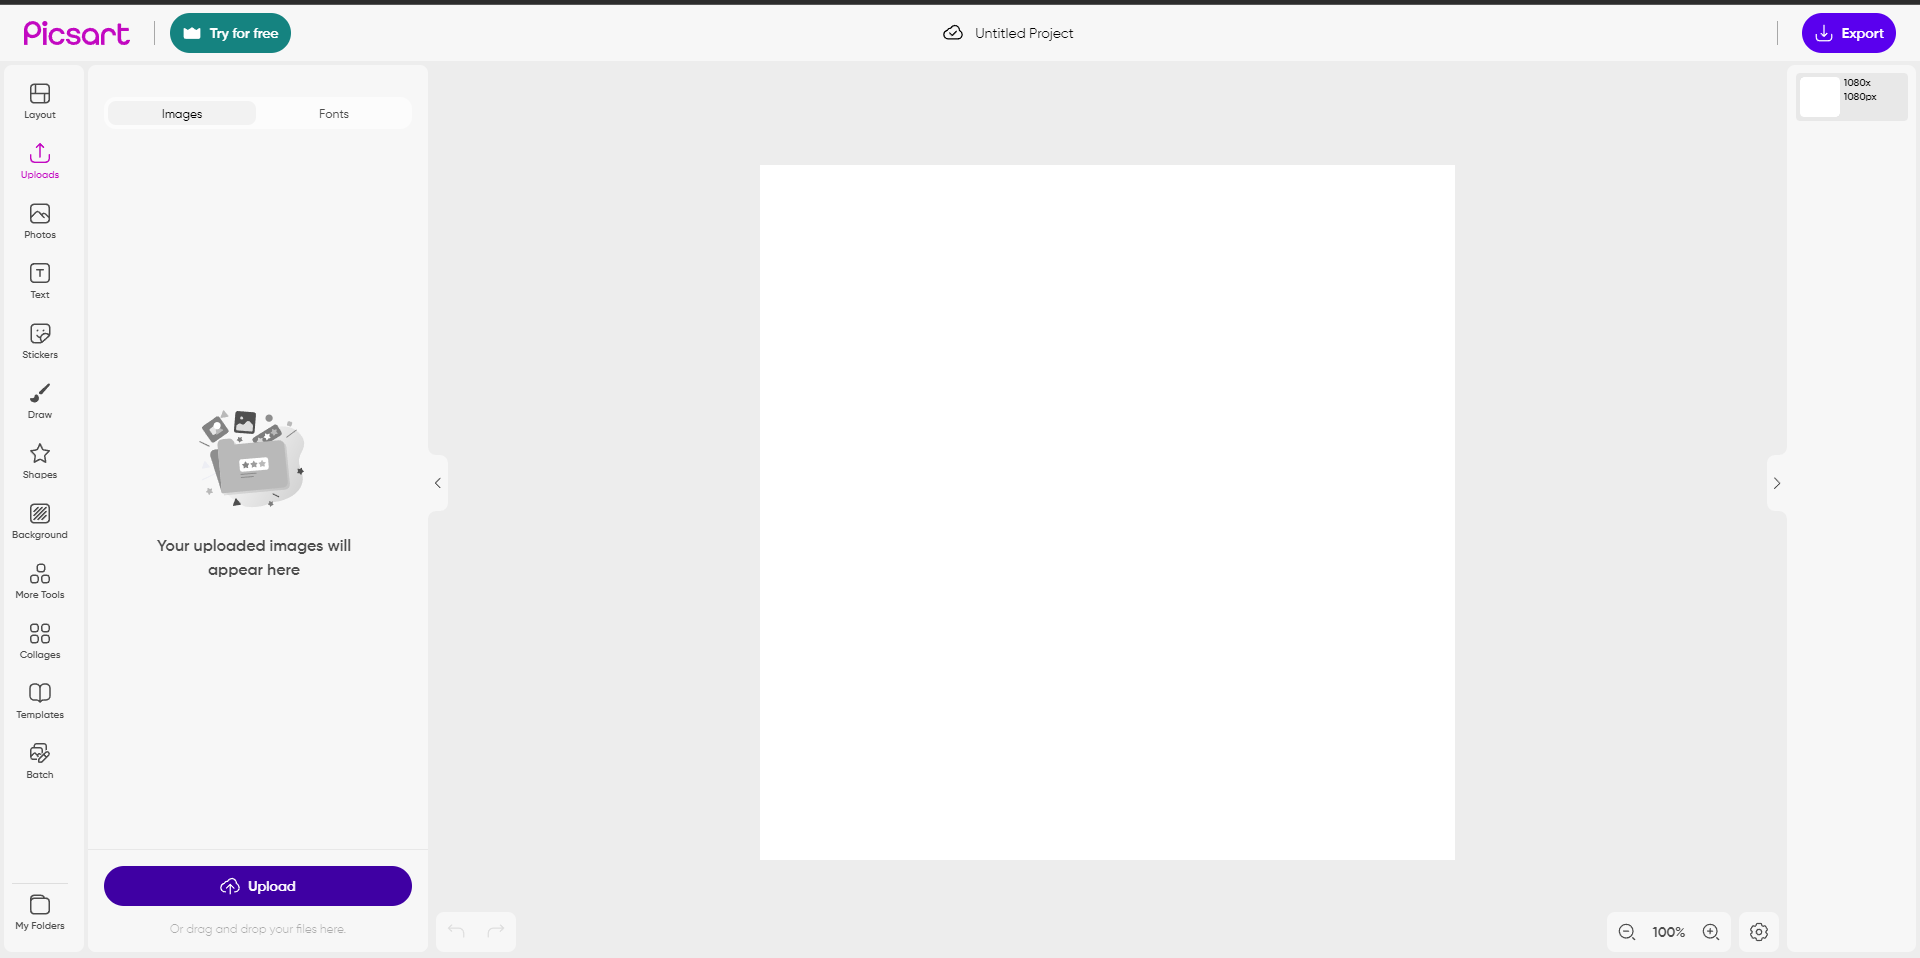
Uploading A Picture In PicsArt - After your photo uploads, click on the “Animation” button in the top menu. This will open a new panel on the left where you can select the type of animation for your image.
- Once you select an animation style, simply click on it. PicsArt will instantly apply the animation to your image.
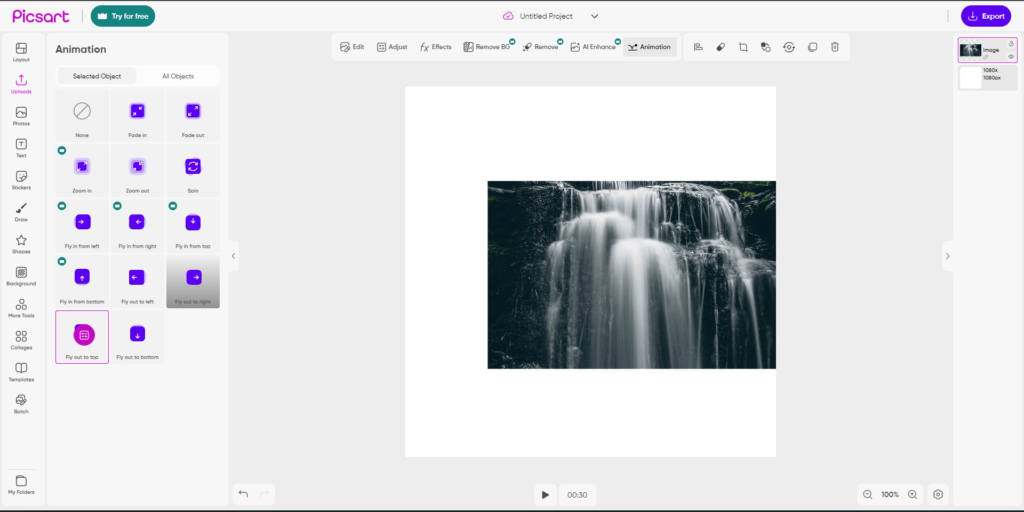
Animating A Picture In PicsArt - After you’re satisfied, click “Export” in the top right corner to save your animated image. Here you can choose the file format and resolution.
Exporting Your Animated Picture In PicsArt
And that’s it! Your photo is now animated using PicsArt.
Animate a Picture using Photoshop
Adobe Photoshop stands out as the most advanced tool for editing and transforming images. With its many powerful features, you can create detailed custom animations. Here’s an easy, step-by-step guide to animating your pictures in Photoshop:
- First, open Adobe Photoshop and upload the image you want to animate.
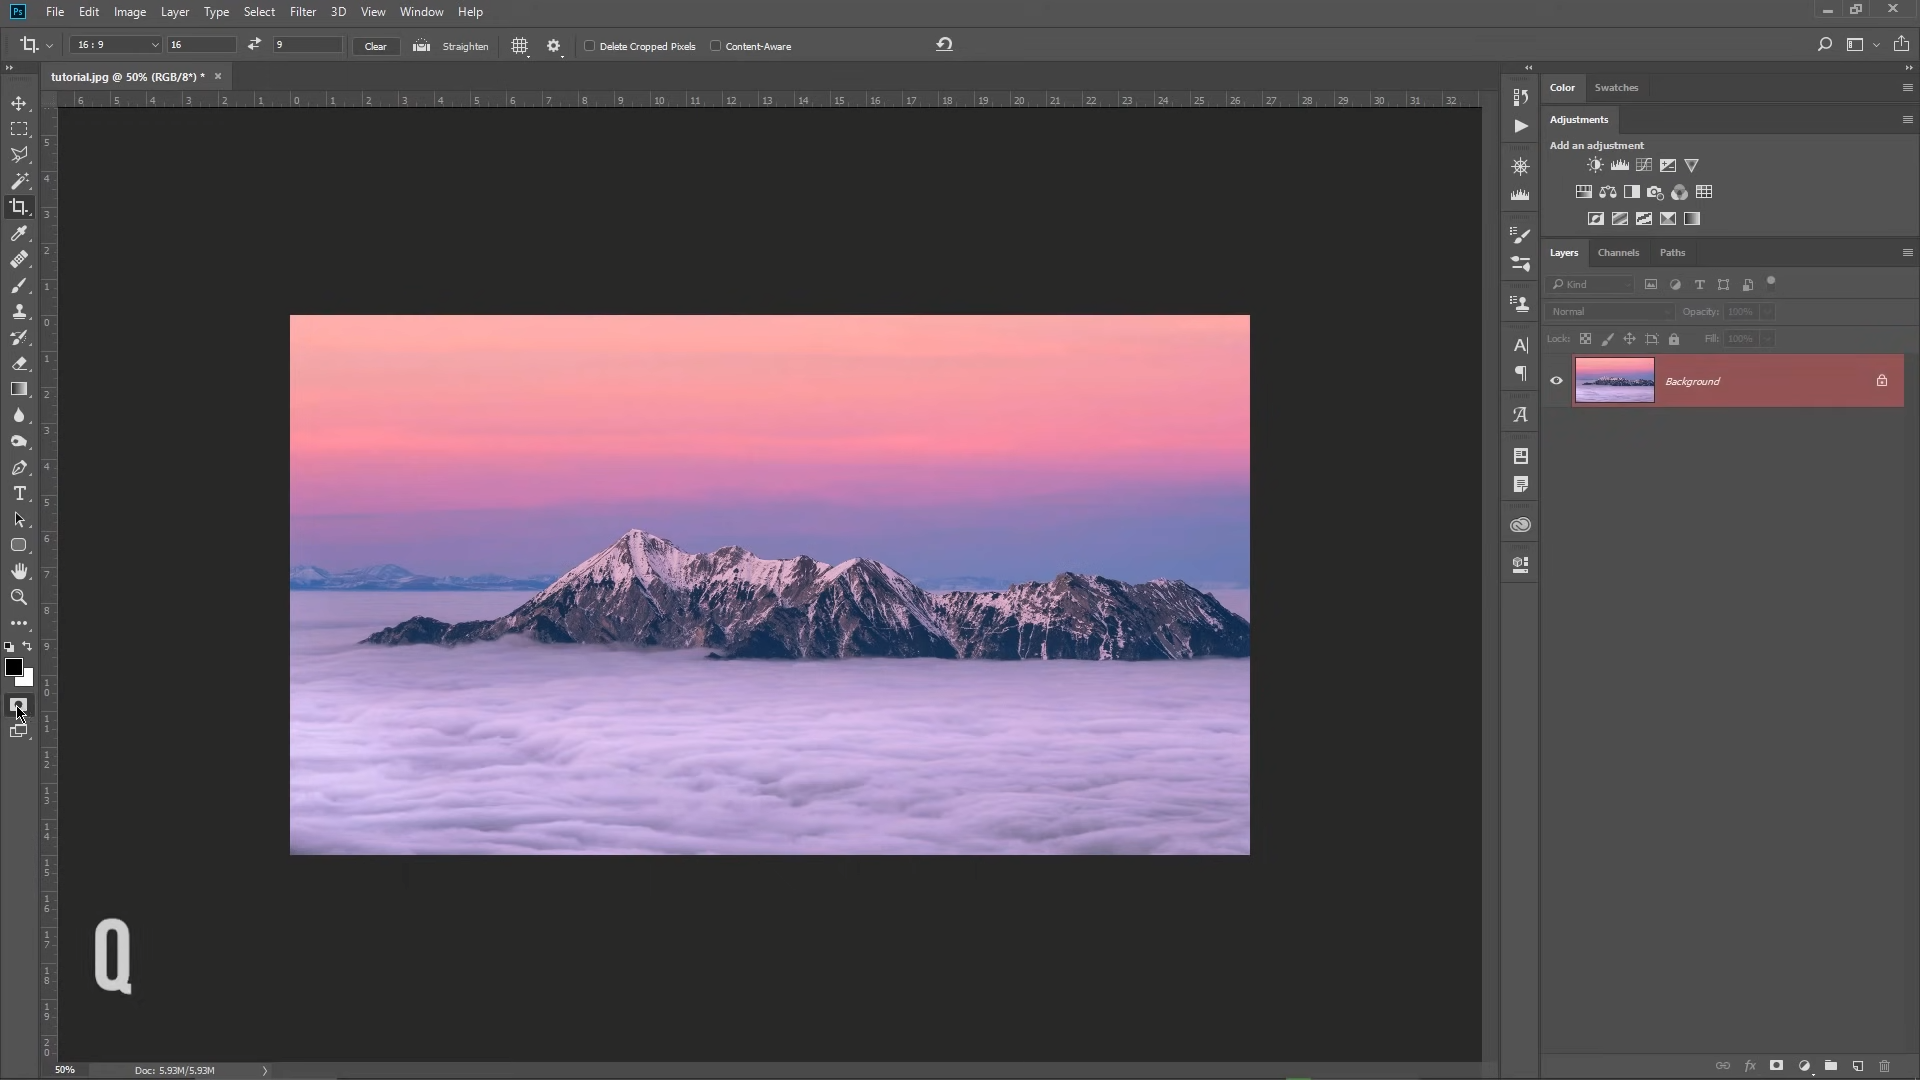
- Select the image layer you’ll be working on, then press “Q.”
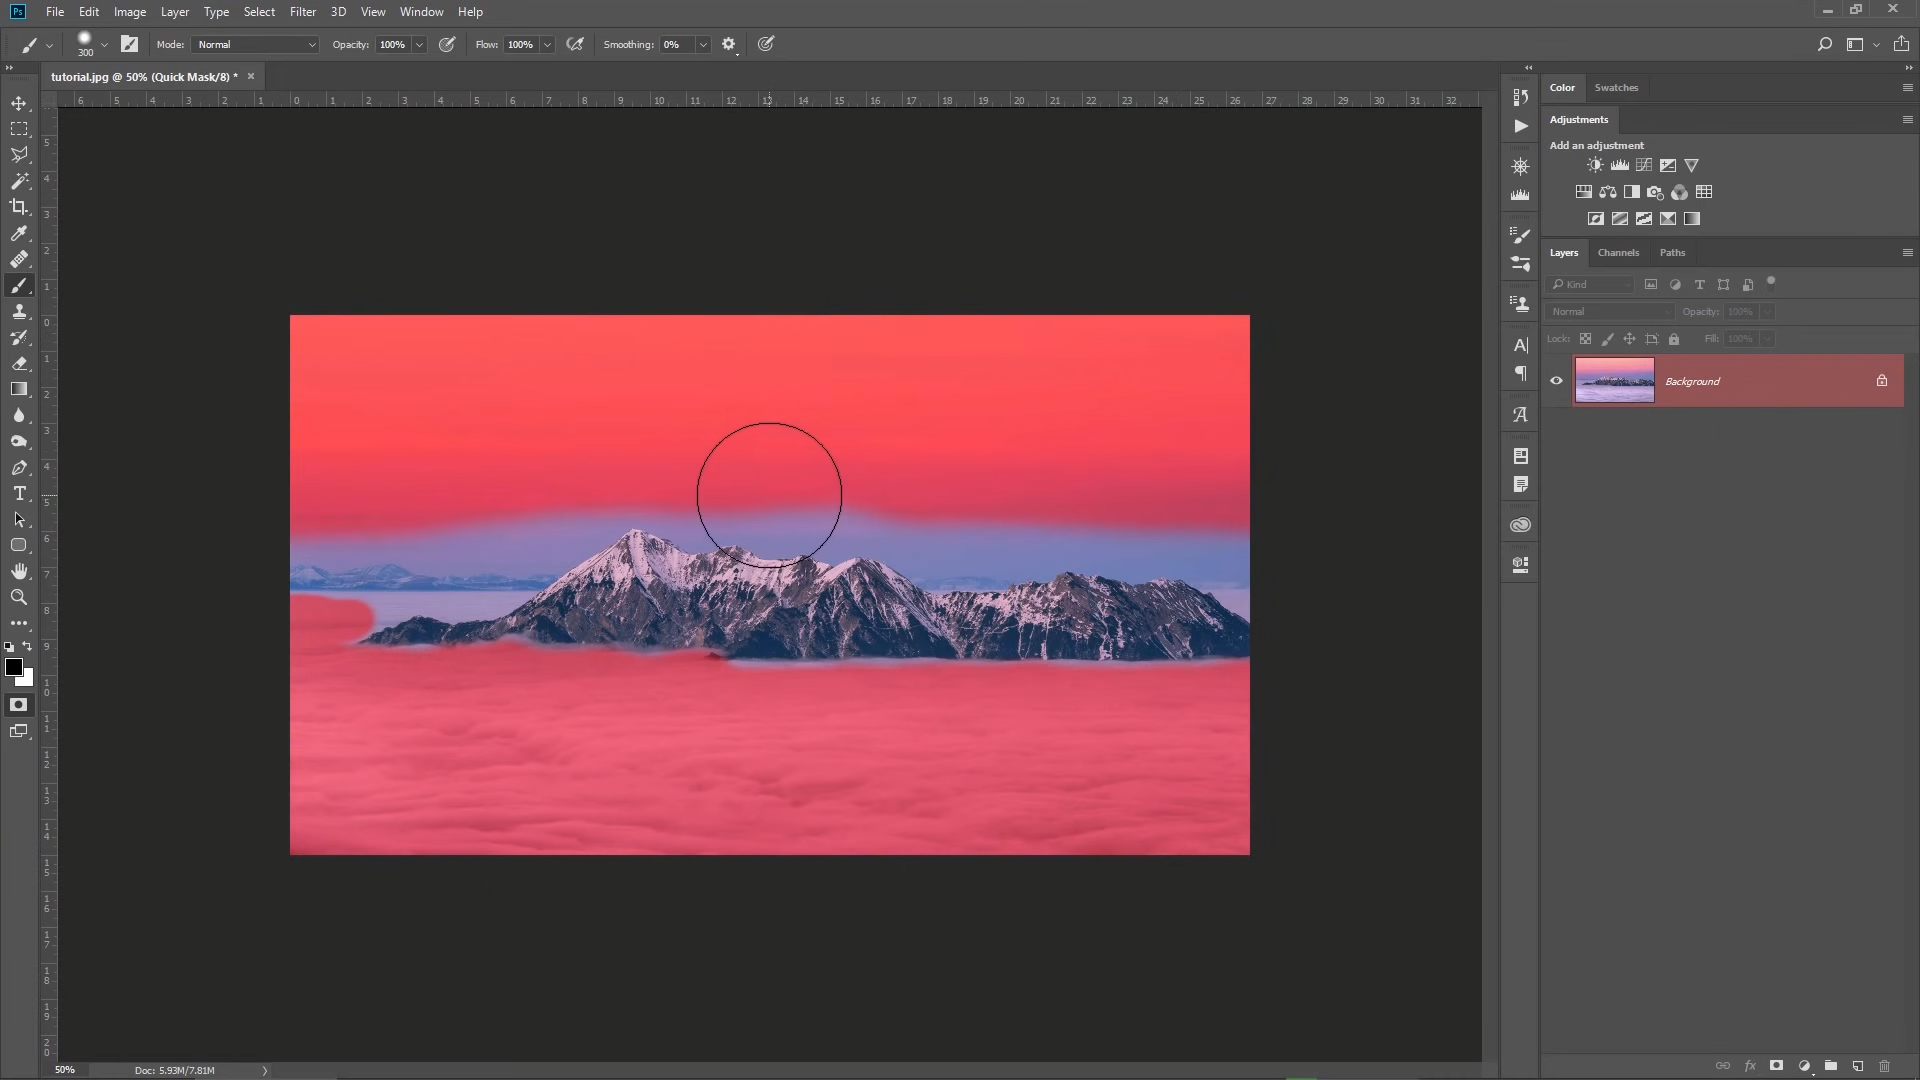
Selecting The Image In Photoshop - Choose the brush tool by pressing “B.” Use the brush to highlight the parts of the image you want to animate.
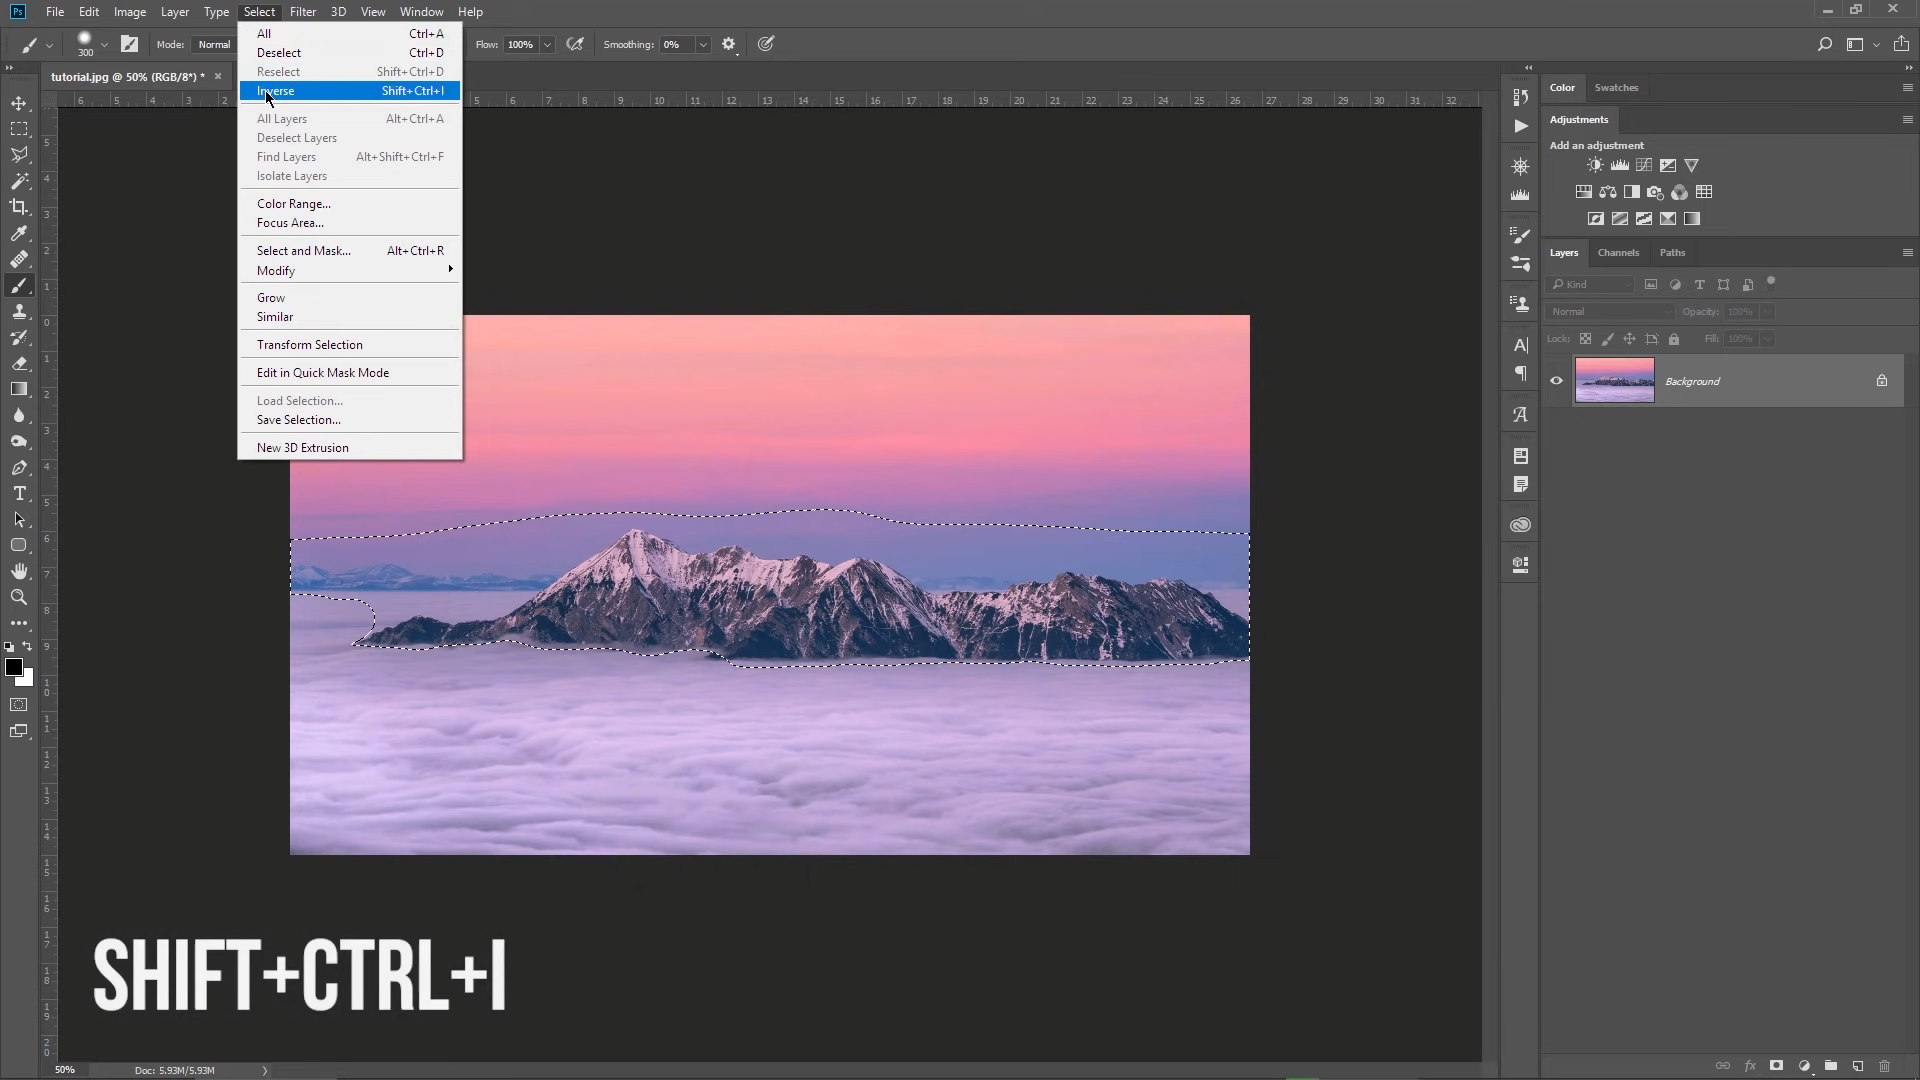
Marking The Sections Of Your Image - When finished, press “CTRL + SHIFT + I” to invert your selection. This step is important—if you skip it, the unmarked areas will be animated instead.
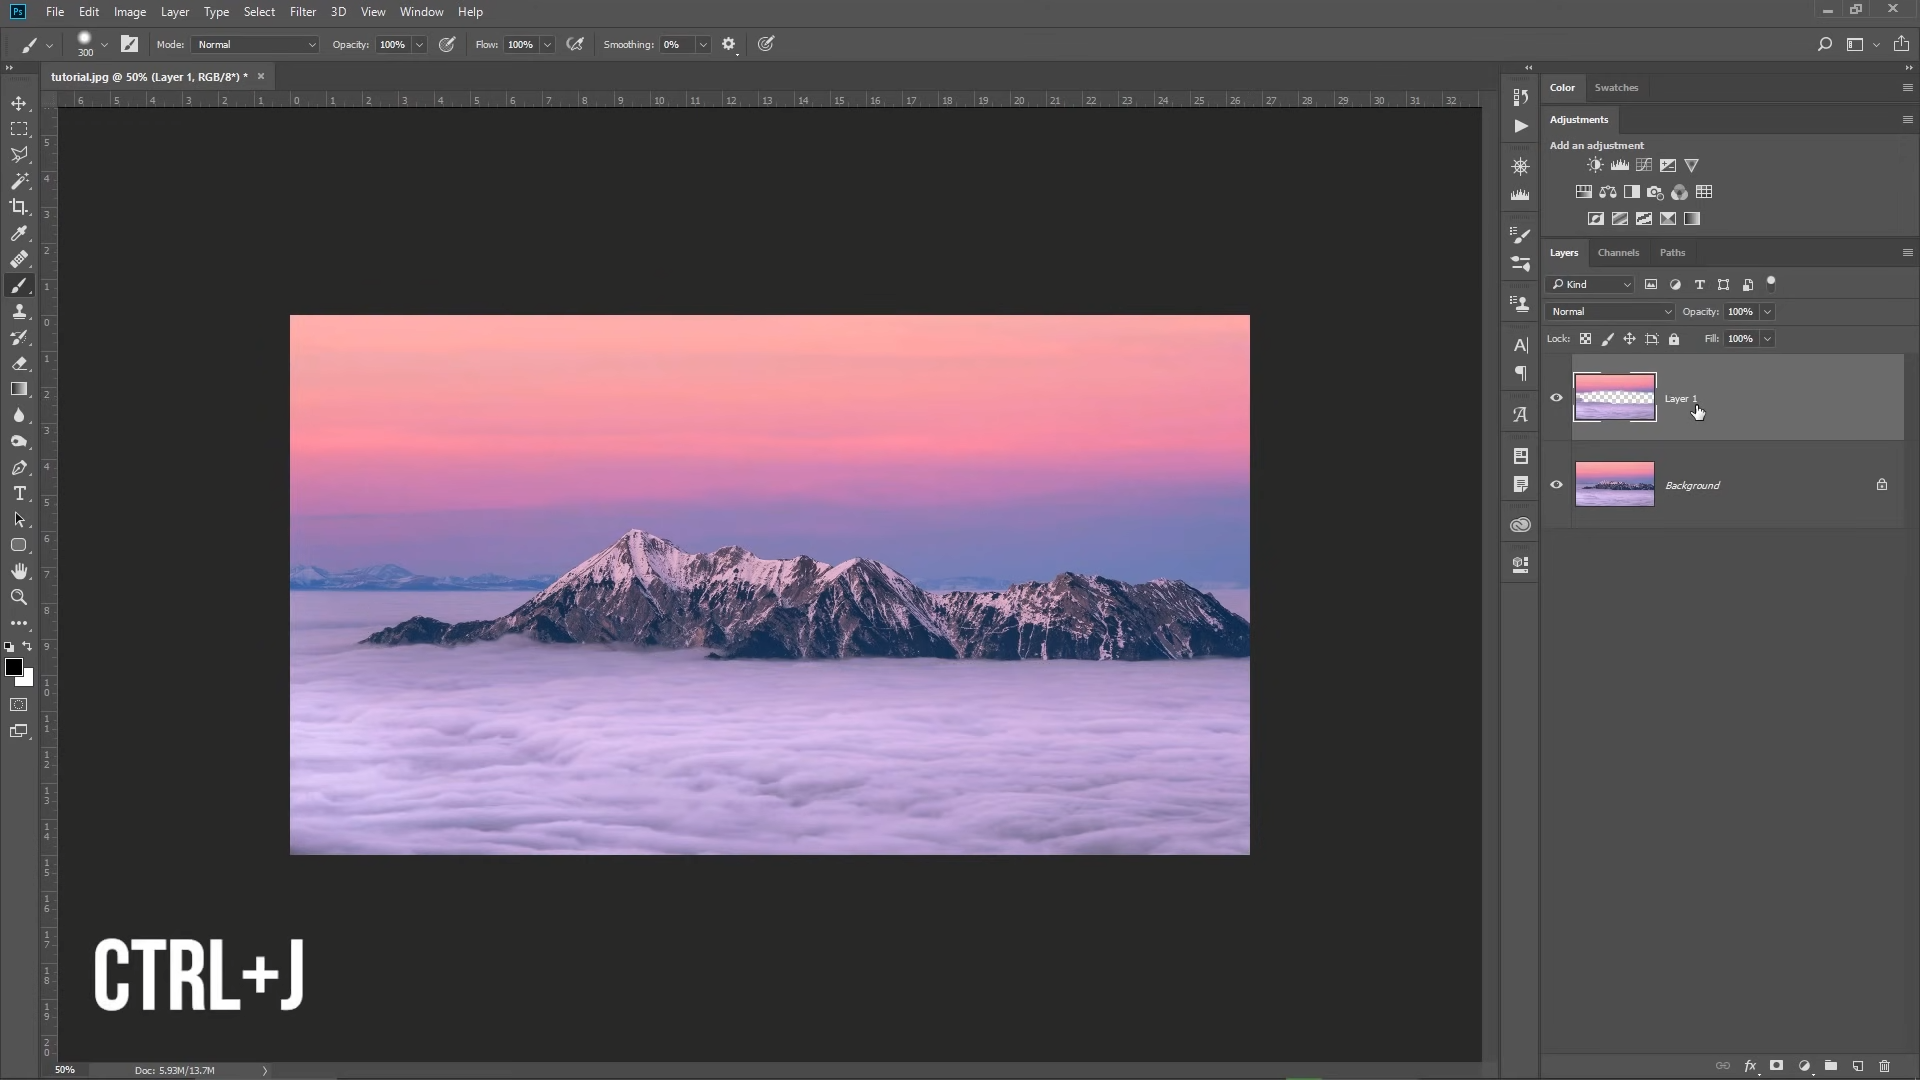
Inversing The Selection - With the correct area selected, press “CTRL + J” to copy the section you want to animate onto a new layer.
Making A New Layer - Make sure the new layer is selected, then go to the “Window” menu at the top and open the “Timeline” window.
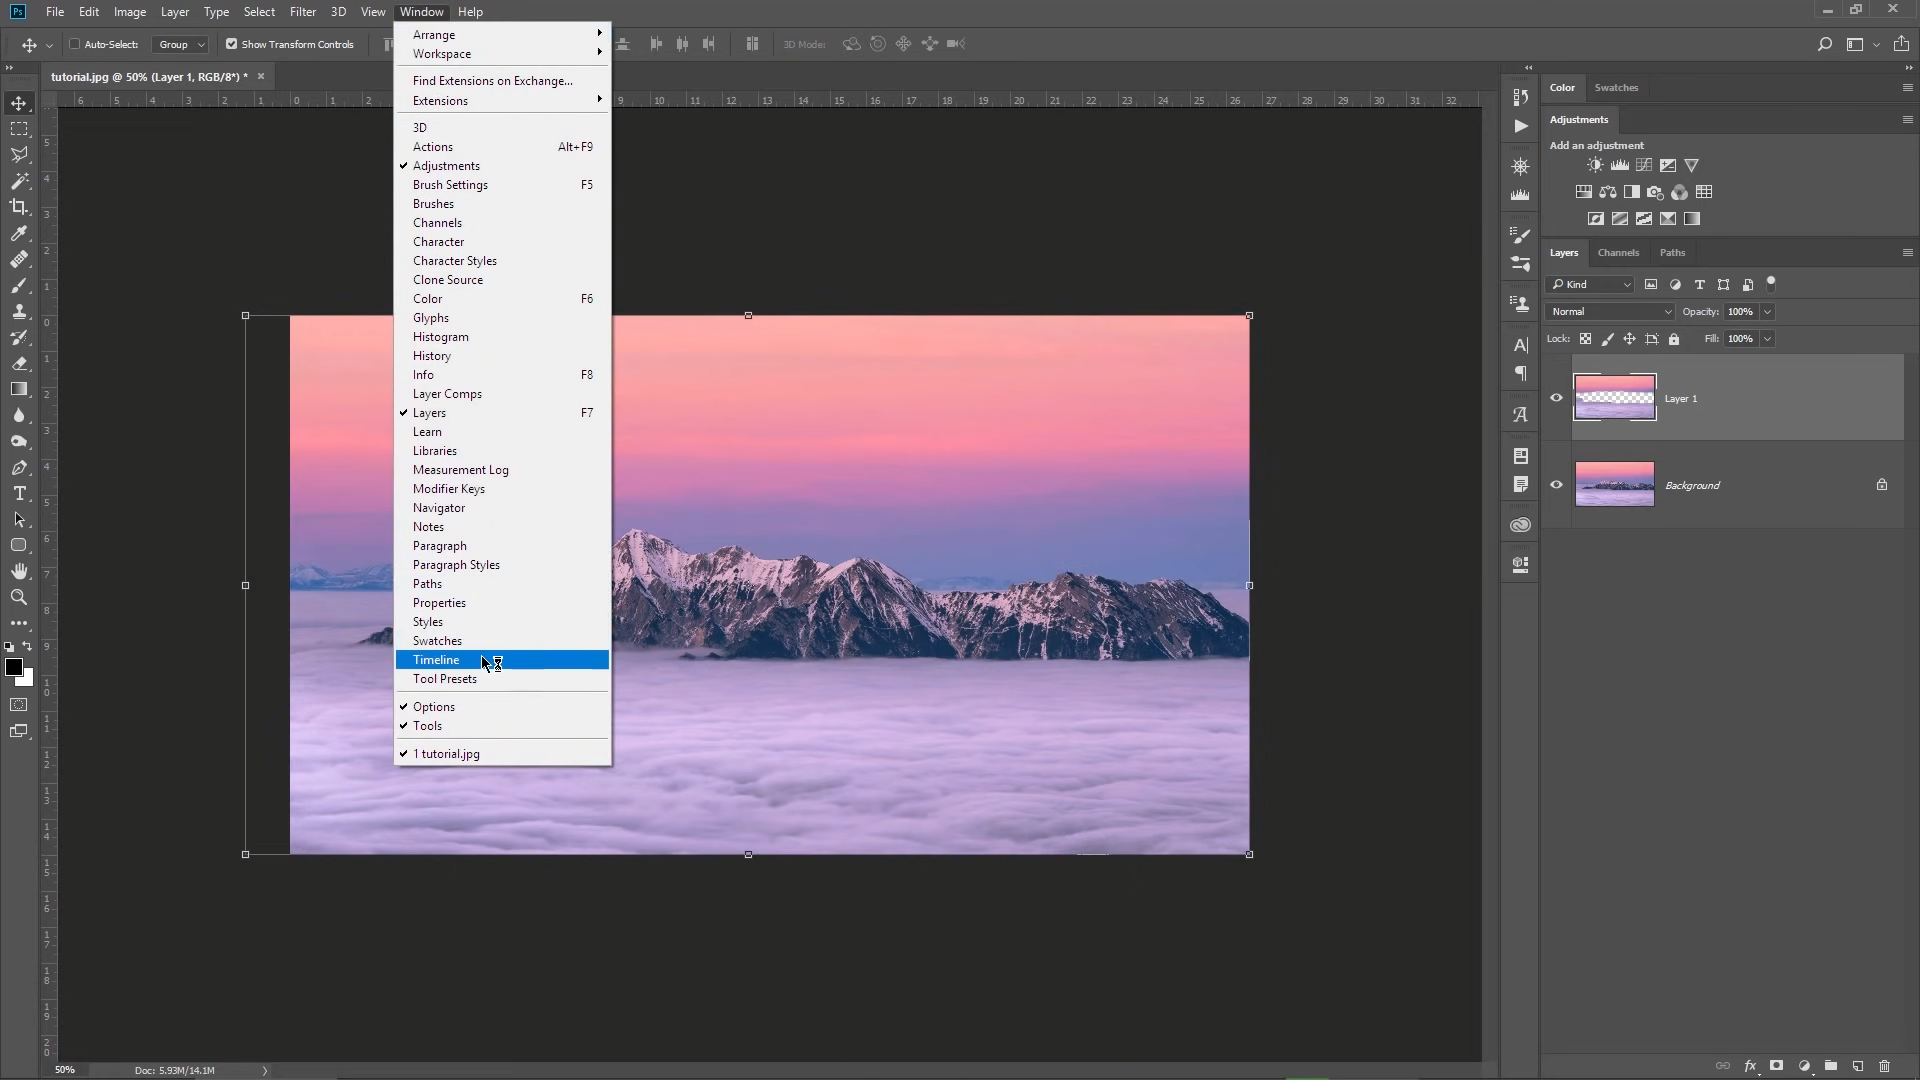
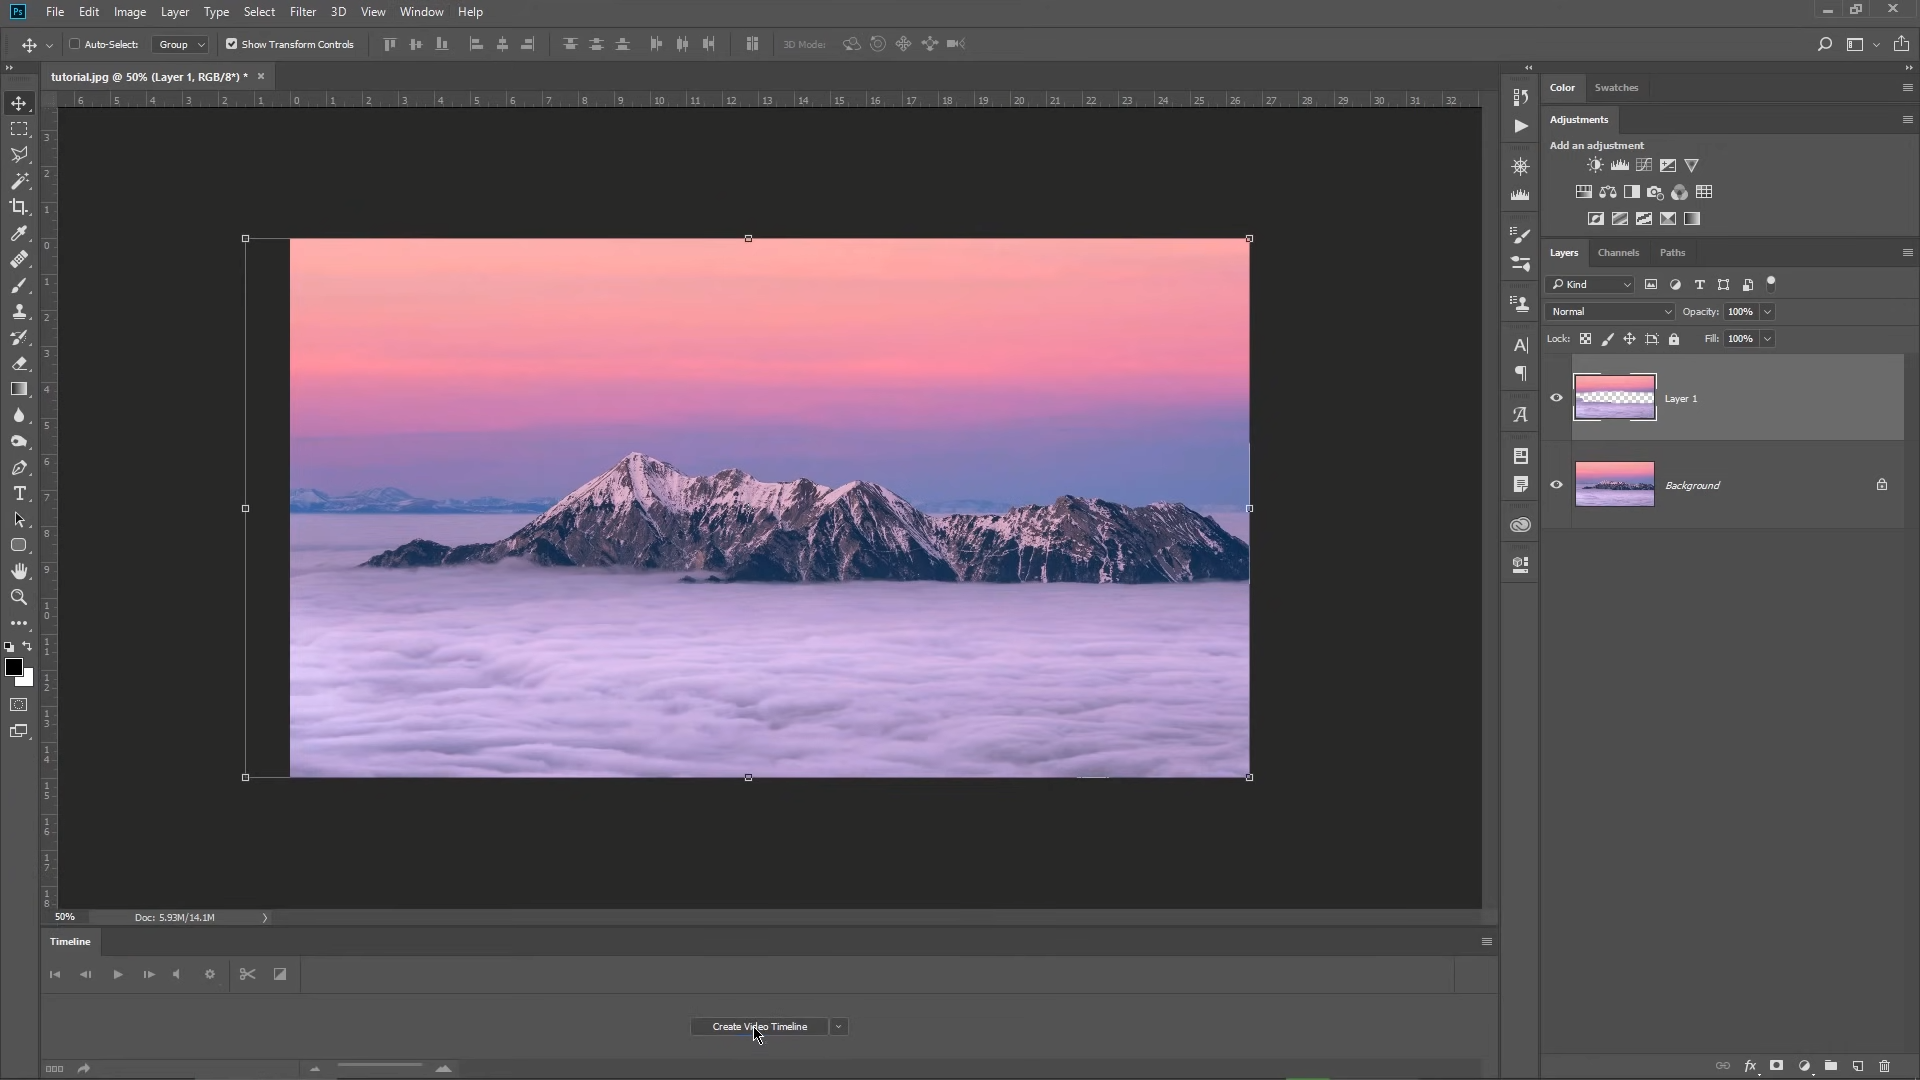
Opening The Timeline Window - In the Timeline window (at the bottom center of your screen), click “Create Video Timeline” to create a video animation, or “Create Frame Animation” to make a GIF.
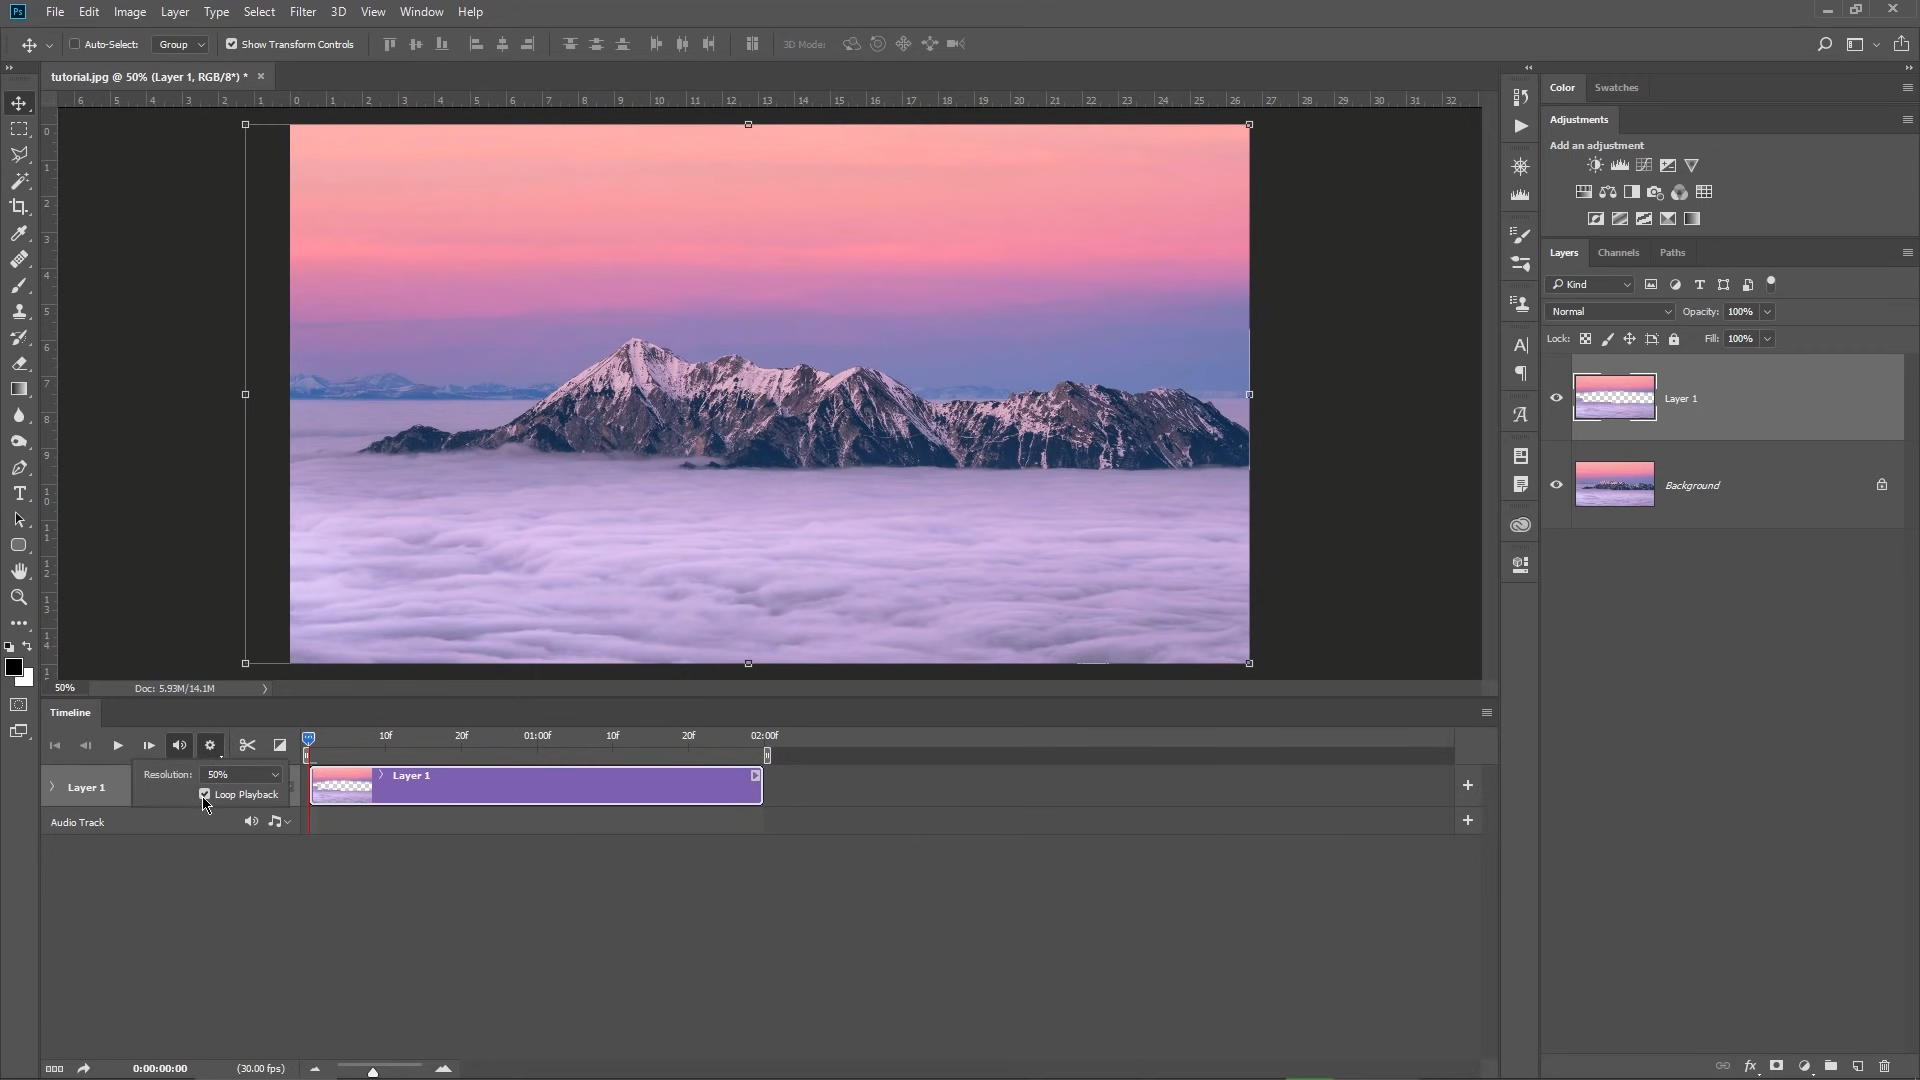
Creating Video Timeline - Use the timeline bar to set the duration of your animation.
Determining The Length Of Video - Now animate your image by moving the new layer in whatever direction you’d like to create movement—for instance, to the left or right.

Creating The Animation By Moving The Picture - With your image in place, add a “Position Keyframe” to mark the starting point of the animation on the timeline.

Placing The Starting Keyframe - Move your image back to where you want it to end, slide the timeline to that point, and click the clock button again to add the final keyframe. This sets the endpoint of your animation.

Placing The End Keyframe - Click “Play” to preview your finished animation.
- When you’re happy with the result, go to “File“, then “Export“, then select “Export As“. Choose the file type and location, name your file, and press Enter to save.
Reviewed by Huzaifa Haroon


