How to Change the DPI of an Image on Adobe Photoshop
Being a designer, you need to be very careful about the quality of your work, as if it gets printed, that is when the client will see whether your work is good or not. And to make sure that your final work looks perfect, whether it is an image in its softcopy or a printout, to make sure it is without any flaws, you need to adjust the DPI for that work. The higher the DPI, the better the quality of the work.
What Does DPI Stand For
DPI is a short form of ‘Dots Per Inch’. You set your pictures DPI, which is a way of setting the resolution for your image. To print a design, designers need to make sure that the design is in high resolution. If the DPI for an image is not set to a number good enough, then the printing outcome of your design or even the image will turn out in its worst form, and I don’t think anyone wants that. The higher the DPI, the better the printed product.
Reasons Why You Must Set Your DPI at a Good Resolution
- The foremost reason for choosing a higher DPI is that when your work gets printed, the dots per inch (dpi) is so high that the prints are clear and flawless.
- The size of your hardcopy that gets printed is also affected by the DPI that you choose. So choose wisely.
What is the Common DPI Used by Designers
For most of the designers, the work gets printed at 300 DPI. This has to be the best level of output for any sort of printing. This brings clarity to your work and makes it look professional. Look at the images below to see the difference between a 300 DPI work and 150 DPI work.
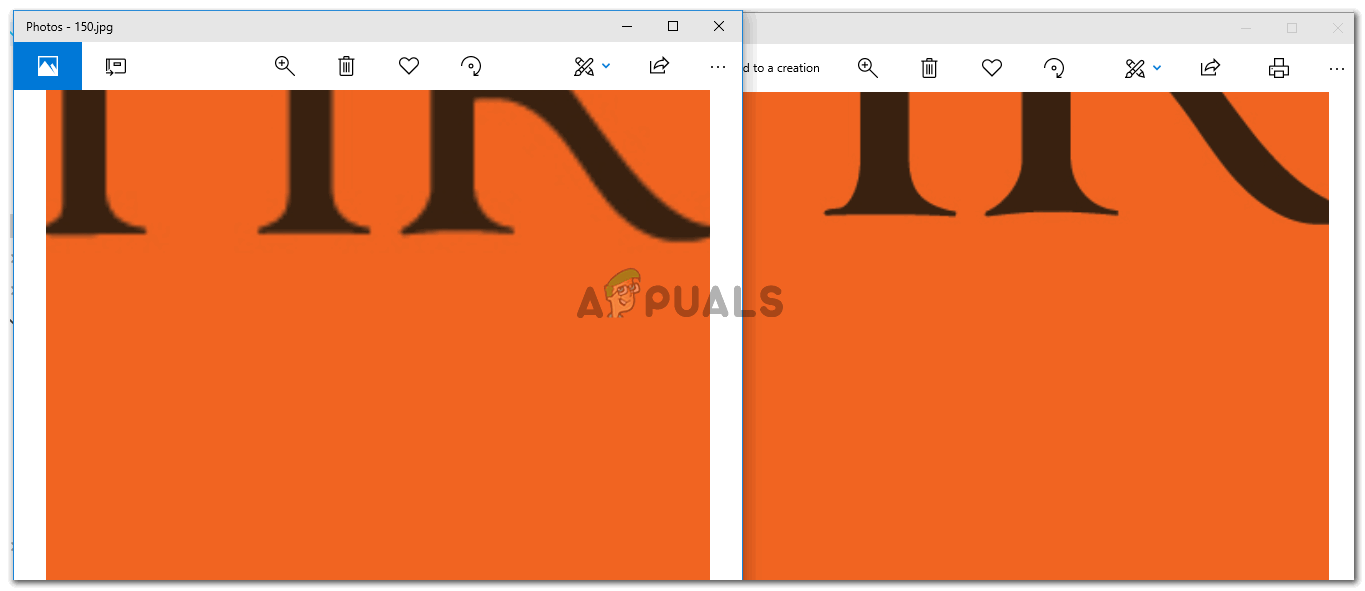
The image above shows you an example of an image made in Adobe Photoshop at 150 DPI, that is the image on the left side, and 300 DPI, which is on the right side. There is a visible difference in quality. You can notice that the one on the left is more pixellated, and does not seem to be very smooth in comparison to the right image, which is less pixellated, is smoother and looks more clear. Clients on big forums like Fiverr or elsewhere, want their work to look as smooth as the right image, or even smoother if made in a higher DPI quality. This is why using the right DPI for your image is so important.
How To Check the DPI of Any Image
To check the DPI of an image, you will have to follow the steps as mentioned below.
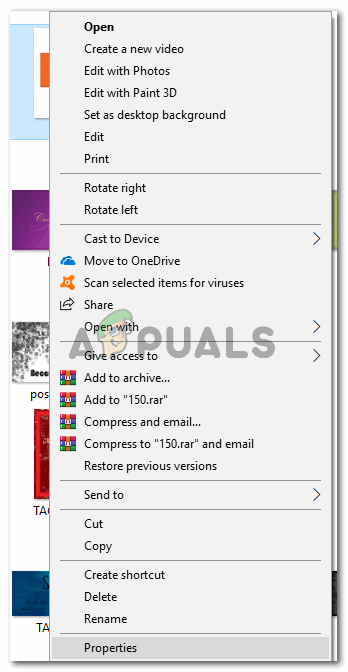
- Right click on the image you want to check the DPI for. From the dropdown list that appears, click on the last option which says ‘Properties’.
Properties: Anything you need to know about the image can be found here. All the details about the image will be present under this tab. - Now after clicking on Properties, a box for settings will open. This will show you all the information about the image. Form the headings that you see, click on the one that says ‘Details’. This is where you can see the DPI of the image. And note, here the DPI will not be under a title as ‘DPI’, but instead, you will see it in front of the heading for Horizontal and Vertical Resolution.
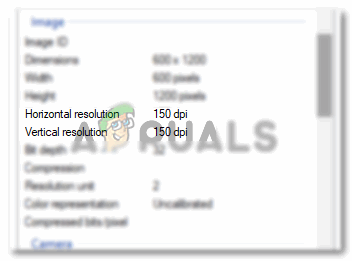
Horizontal and Vertical resolution for an image shows the DPI for that specific image.
How to Change the DPI of an Image on Adobe Photoshop
Adjusting the DPI for Adobe Photoshop is easy. It is a very simple process. You can follow the steps mentioned below.
- When you open Adobe Photoshop and press the tab for Create new, Adobe Photoshop asks you the details about your canvas. On this same page, you will find the space for Resolution. This is where you will enter the required resolution for your work, which usually is 300 DPI for most of the designers. It can be higher, but lowering the DPI will lower the quality of your final outcome.

Adjust the resolution of your image from this tab. This can be accessed right at the beginning of your work before you commence with your designing. 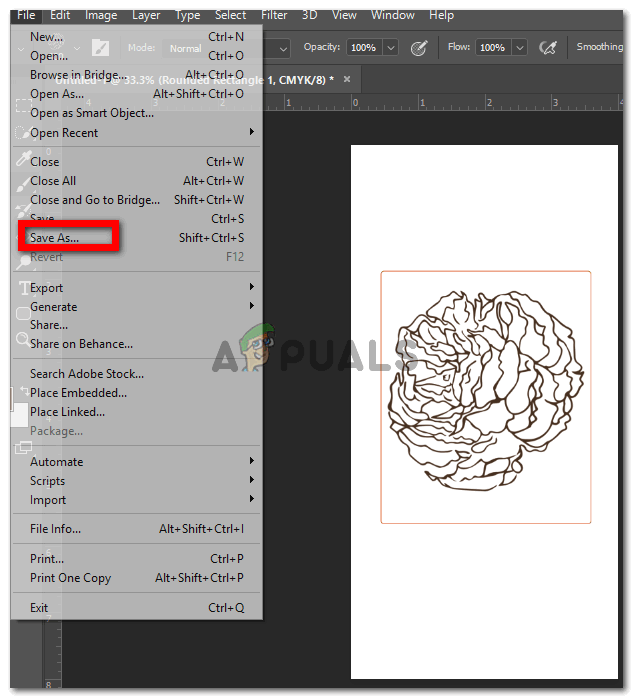
Note: Once you are done with your work, you obviously save it. But because you have to often show your client samples before you provide them the final product, you need to save this work in higher quality so that when they see the soft copy of the work, they are satisfied. 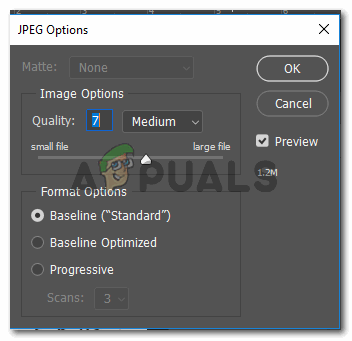
I have experienced the quality of the work looking horrendous when the quality here in this option is anything below 7 or 8. So when you have a professional Project and need to show it to your client, make sure you save the image in higher quality.


