SSH Permission denied login error (Explained and Resolved)
SSH keys (shell secure) are used within SSH protocol to authenticate the session and establish a connection between the local machine and the SSH server. In normal flow, the best way to establish this server is by using a public key, once a server connection is established SSH eliminates the password requirement at each login and automatically establishes a connection with that server.

However, while using a public key sometimes the connection request of the SSH Client is rejected by the Server which can cause SSH permission denied error.
This article will demonstrate different solutions for fixing the “SSH Permission denied” error, but before that, let’s have a look at the reason for this error.
There are a couple of reasons which can cause this Error to occur. One of the most common reasons is that password authentication is disabled on the SSH Server.
Another common reason for this error is not having access to the “ssh” folder which essentially means that the access to the Authorized_keys is disabled.
Solution 1: Allow password authentication on SSH server
As mentioned above, if the server has not enabled the SSH connection with password authentication, then the connection will most likely result in a failure.
- To avoid this, head on to the SSH Server, and from that PC \ Server, open up the configuration file using the following command:
sudo nano /etc/ssh/sshd_config
This configuration command will open up in the terminal:
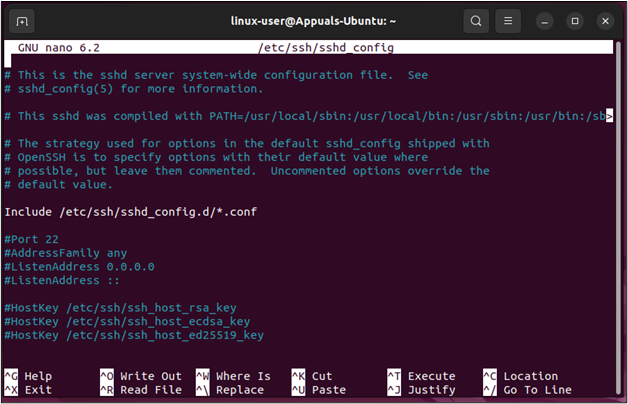
SSH configuration file - In this configuration file, find the line “Password Authentication”, and “uncomment” the line by removing the trailing “#” symbol:
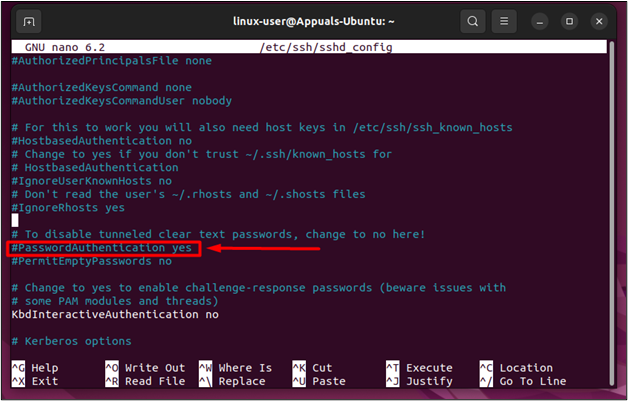
Locate PasswordAuthentication 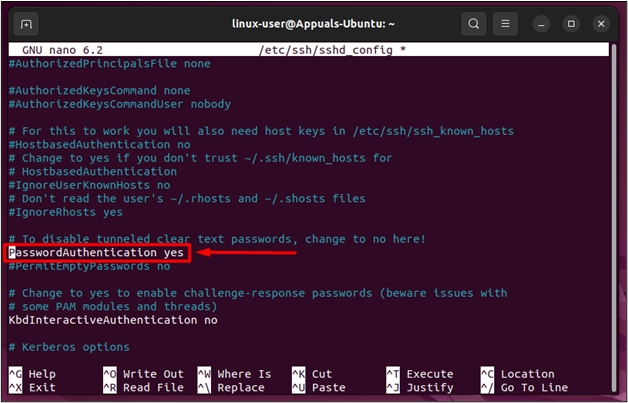
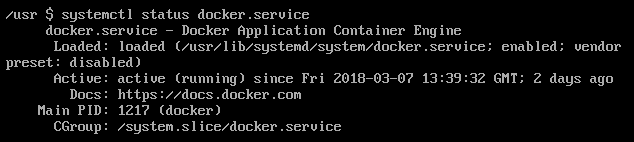
Activate PasswordAuthentication - Once that is done, save and exit from the configuration file by pressing “CTRL + O” and then “CTRL + X”. After that, the next step is to restart the service of SSH for that use the following command:
sudo systemctl restart sshd

Restarting SSH service - Once that is done, connect to the SSH server again from the client to get the following results:
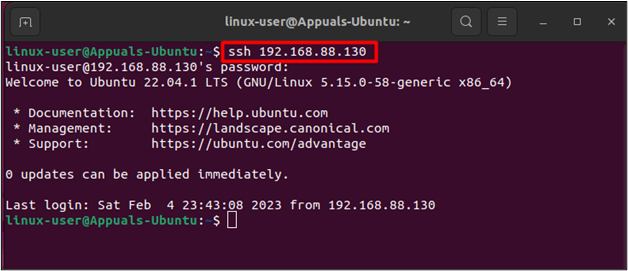
SSH server connected
You have successfully resolved the error and connected to the SSH server.
Solution 2: Enable public key authentication
Sometimes, the users can get an alteration \ variation of the error in which the error state becomes “SSH Permission Denied (public key)” this error is caused by not having public authentication enabled on the SSH server.
- For such cases, hop on to the SSH Server PC, and open up the configuration file using the following command:
sudo nano /etc/ssh/sshd_config
In the configuration file, simply disable the root login and enable the “PublicKeyAuthentication”:
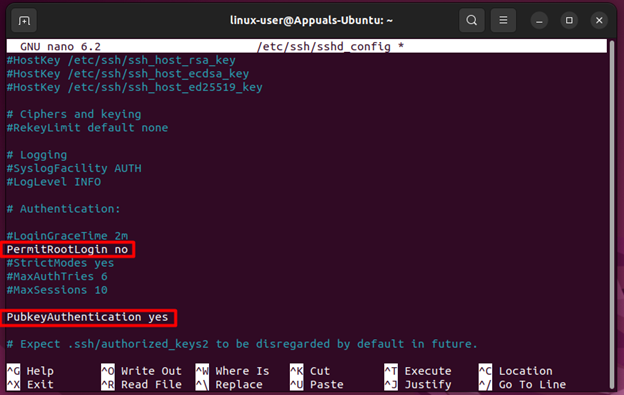
Configure RootLogin and PubkeyAuthentication - After that, ensure that the UsePAM options are also enabled in the configuration file:

Enable UsePAM configuration - Again, save and exit from the file using “CTRL + O” and then “CTRL + X” and then restart the service of SSH using the command:
sudo nano /etc/ssh/sshd_config
- Once that is done, retry the connection to get the following results:

Successful SSH server connection
You have resolved the SSH Permission Denied (Public Key) error.
Solution 3: Allow permission to SSH directory
Oftentimes, the public key is stored inside the authorized keys subdirectory inside the “ssh” directory and if the permissions of this sub-directory or the whole directory are not correct, then the SSH connection will ultimately return an error.
- In such cases, simply change the permission of the “authorized_keys” directory using the following command:
sudo chmod 600 ~/.ssh/authorized_keys
This command will enable read and write permission for the authorized keys.
- After that give execute permission to the parent directory using the command:
sudo chmod 700 ~/.ssh
After running these commands, try the SSH connection with the SSH server to get the following results:

Connected to SSH server
The outpost depicts that the error has been resolved
Bonus fix for SSH permission denied
The error “Permission Denied” can occur when the password for the SSH Server is not correct. A typo mainly causes this, or sometimes the server has changed the password, and the client is unaware of that. In such cases, when the user provides the password for the SSH connection, the following error is displayed on the terminal:
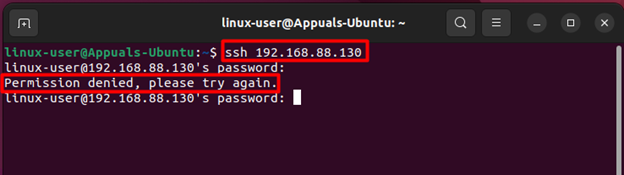
In such cases, contact SSH Server support and ask if they have changed the pass or simply recheck if you have made a typo or not. After that, you will be able to deduce the mistake and connect to the SSH Server:

The SSH Permission Denied is not a new one and is mainly caused by not having password authentication enabled, not enabling public key authentication, and also by having wrong permissions on the “ssh” or the “authroized_keys” directory. This guide has elaborated on the solutions one can use to fix the error and proceed with the connection. Additionally, this error can also be caused by a change in the password by the SSH server, or by a typo. In this case, it is best to contact the SSH Server’s support or retype the password making sure that there are no typos.