How to Fix a Sonos Speaker That Won’t Connect?

When encountering issues with a Sonos speaker that isn’t connecting, users often report the device unexpectedly disconnecting during usage. Subsequently, the speaker fails to reconnect to the network, despite there being no apparent changes to the Wi-Fi setup and other devices operating normally.
A common cause of this issue is that the speaker is positioned too far from the router or is obstructed by physical barriers, leading to a weakened signal and an unstable connection.
Basic Troubleshooting
- Restart: Switch off all devices (such as phones, systems, Sonos speakers, and routers) and disconnect their power cables. After waiting for a minute, power on the router, followed by the other devices once the router is operational.
- Update: Ensure that the device or system, Sonos speaker, and router firmware are up to date. Since the Sonos speaker is not connecting, link it to a device it was previously connected to before updating.
- Surge Protector: If a surge protector is being used with the speakers, attempt powering on the speaker directly from a power outlet.
- Multiple Speakers: If you have multiple speakers, unplug their power cables sequentially.
- Homey Pro App: If the speaker is registered in the Homey Pro app, attempt to re-pair the speaker through the app.
1. Set the Network to Private on a PC
For a Windows PC, LAN communications can be disabled when the network is set to public—a setting that’s critical for Sonos speakers to connect. Adjusting the network type on the PC to Private can resolve this issue.
- In the system tray, click on the network icon and then select the More option for the network (via the right arrow next to the network icon).
- Click on the Info icon and, in the window that appears, choose Private.
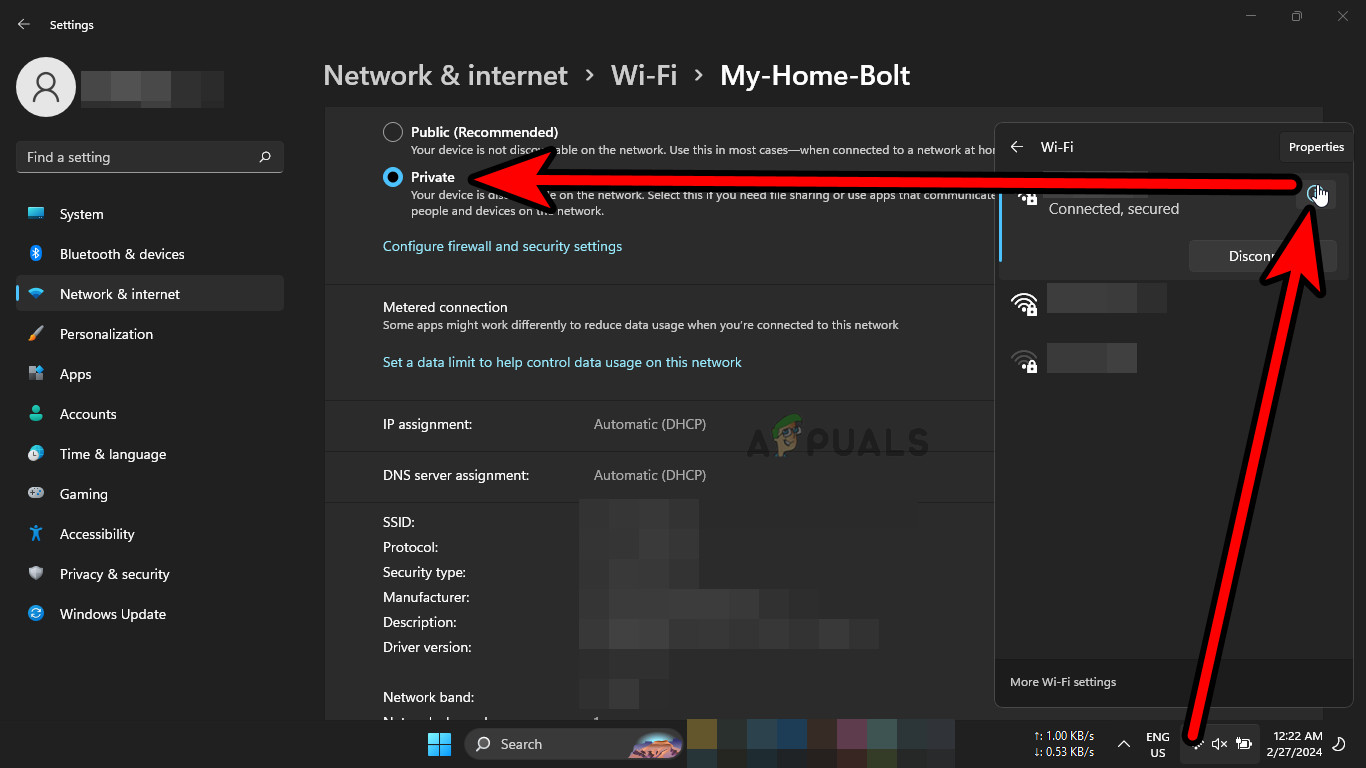
Change the PC’s Network Type to Private - Close the window and retry connecting to the Sonos speakers.
2. Enable Wi-Fi on the Sonos Speaker
If a Sonos speaker is connected to your network via an Ethernet cable, the Wi-Fi option may be disabled. However, certain network structures might require the Wi-Fi to be enabled in order to connect to the speakers.
- Open the Sonos app on your smartphone and navigate to Settings > System > Products.
- Select the pertinent room and choose Enable Wi-Fi.

Enable Wi-Fi in the Sonoso Speaker Settings - Carry out this process for all Sonos speakers and attempt again to connect the problematic speaker.
3. Reinstall the Sonos App
If the Sonos app won’t connect to the speaker due to malfunctioning components, reinstalling the app could be the solution.
Here are the steps for reinstalling the Sonos app on an Android phone. Similar procedures can be followed for iPhones.
- Access Settings > Apps > Sonos on your phone.
- Tap on Force Stop and confirm the action.
- Enter Storage and clear both cache and data to eliminate outdated references to the app in your phone’s memory.
- Press the back button and select Uninstall.
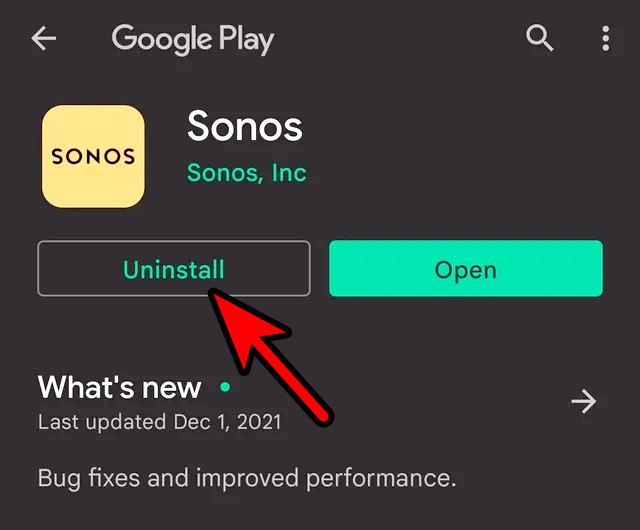
Uninstall the Sonos App from the Android Phone - Confirm the deletion of the Sonos app and then restart your phone.
- Reinstall the Sonos app and attempt to pair it with the speaker.
4. Reset the Sonos Speaker to the Defaults
If the Sonos speaker’s firmware is corrupted and malfunctioning, resulting in unsuccessful connections, resetting the Sonos speakers could be effective.
- Disconnect the power cable from the Sonos speaker.
- Hold the Bluetooth button on the speaker.
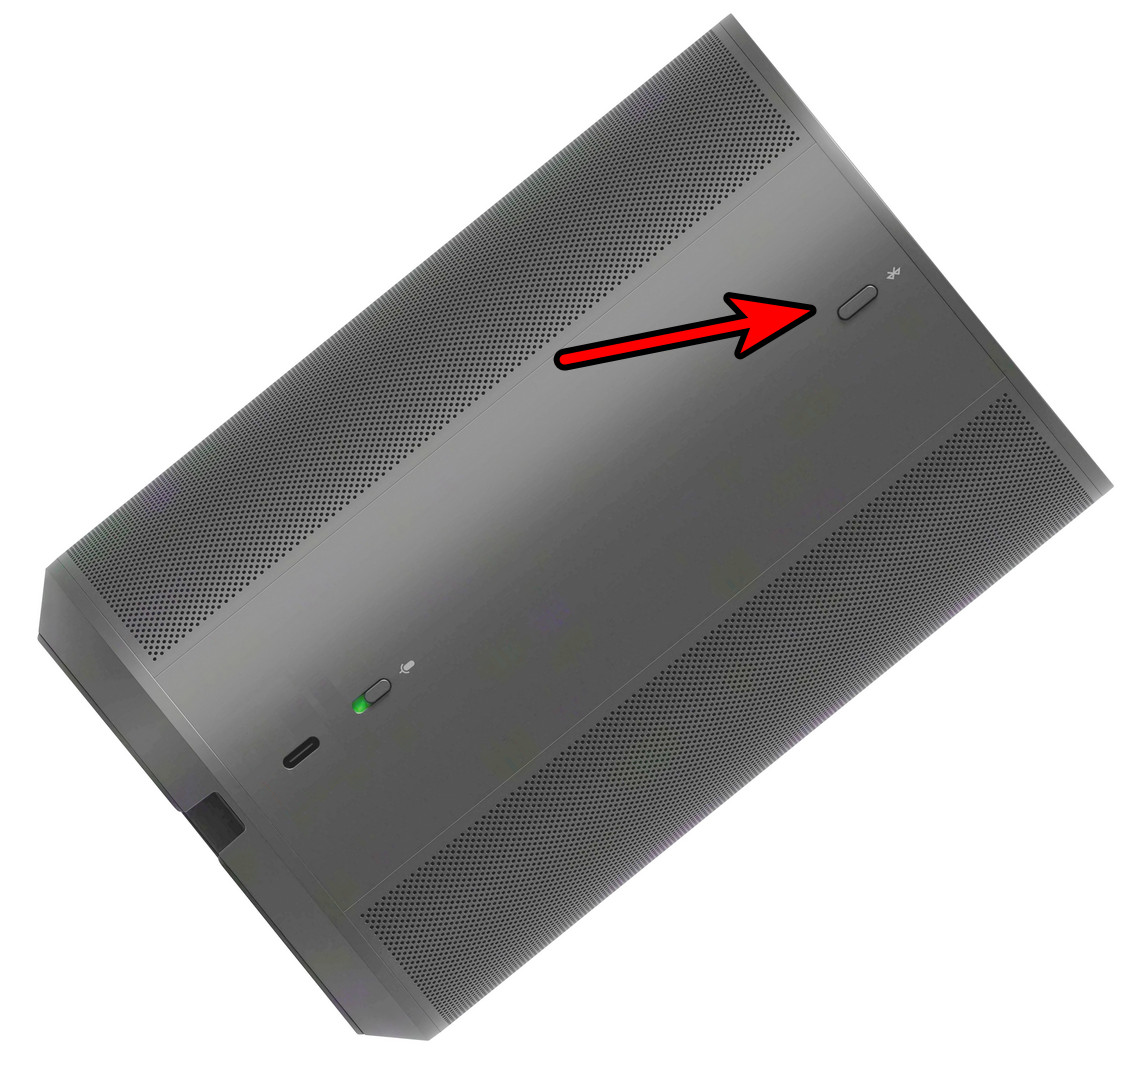
Factory Reset Sonos - While still holding the button, reinsert the power cable and continue to hold the button.
- Release the button when the light on the speaker starts flashing white and orange.
- Wait until the light turns green, then attempt to reconnect the speaker.
- If issues persist and the Sonos has been integrated with a Home assistant like Google Home, reset the Home assistant and try connecting the speaker again.
5. Edit the Router Settings
Your ability to connect to the Sonos speaker may be hindered by a router setting that restricts access to the speaker for your system or phone. Modifying the relevant router settings can address this issue.
It’s important to note that some settings mentioned here may not be visible on your router interface, or they may go by different names.
To adjust these settings, access the router’s admin portal using a web browser or an app and log in with your credentials.
5.1. Increase Maximum Client Limit
- Navigate to the router’s Settings > Wireless > WLAN.
- In the respective pane, increment the Max Client Limit by at least one and commit the changes.
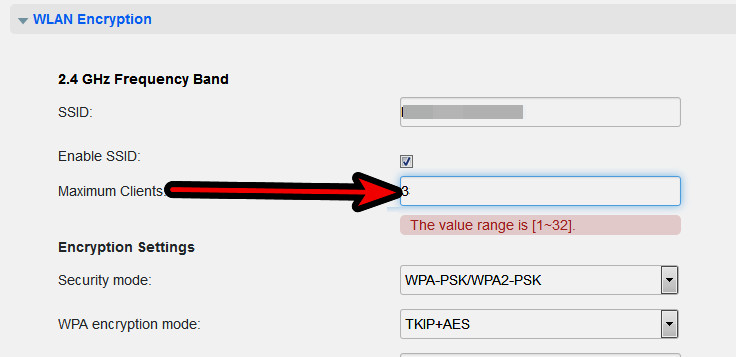
Increase Max Client Limit of the Router - Reboot the devices and try connecting to the Sonos speaker.
5.2. Enable IPv6
- Within the router’s interface, select Settings > Advanced > IPv6.
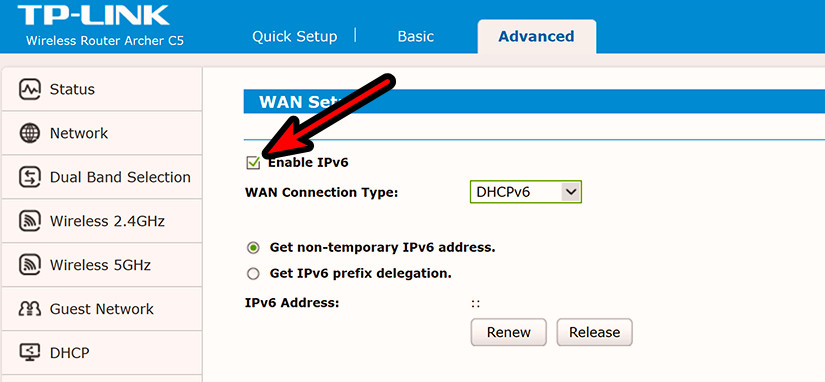
Enable IPv6 for the Router - Activate the setting and restart the devices.
5.3. Disable Band Steering
- Access Settings > Wireless > Basic Settings on the router’s platform.
- Turn off Band Steering, reboot your devices, and attempt the connection again.
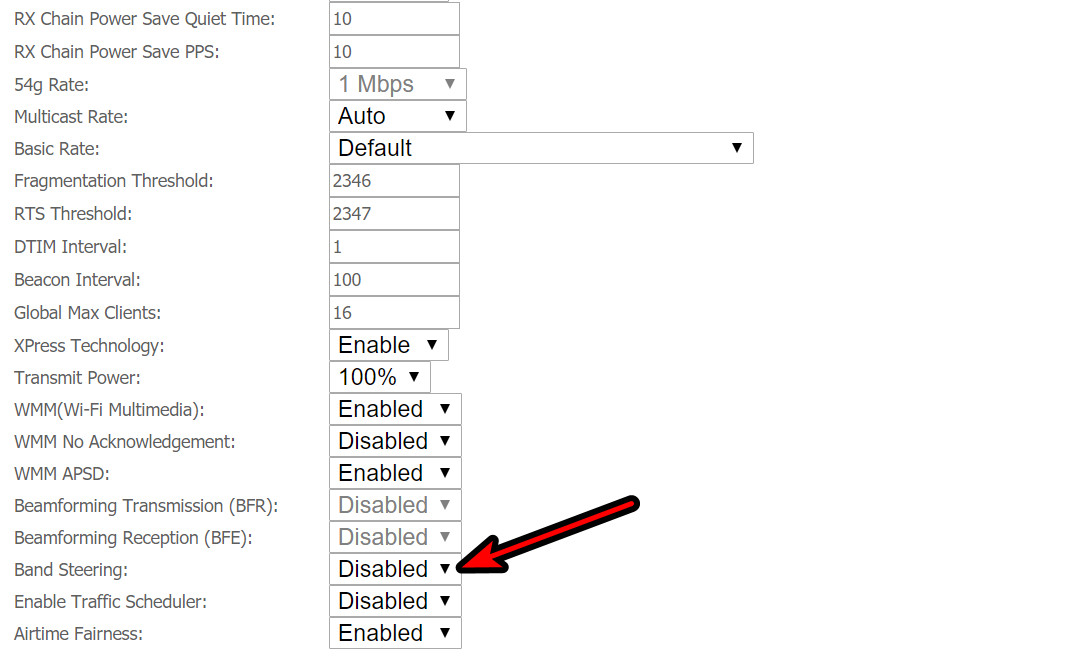
Disable Band Steering on the Router
5.4. Change the Connection Mode
- Proceed to Settings > Wi-Fi > Basic Settings on the router.
- Adjust the Connection Mode from B/G/AX to B/G and preserve the new setting.
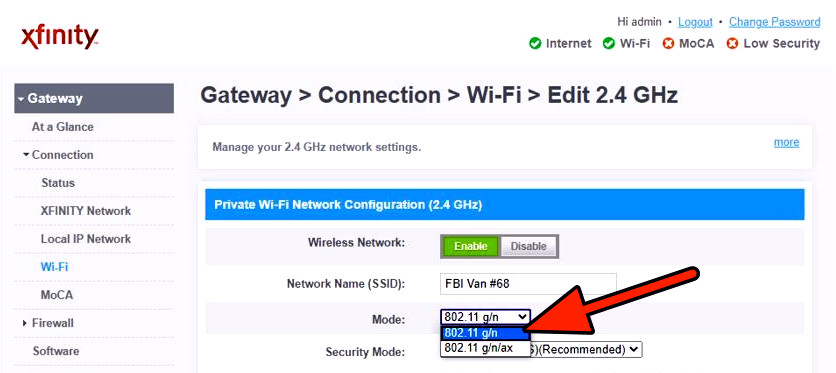
Disable the AX Connection Mode in the RouterSettings - Restart the devices and attempt to pair with the Sonos system.
5.5. Change the Wi-Fi Channel
- In the router’s interface, go to Wireless > Wireless Settings.
- Select a channel such as 1, 6, or 11 from the Channels dropdown menu.
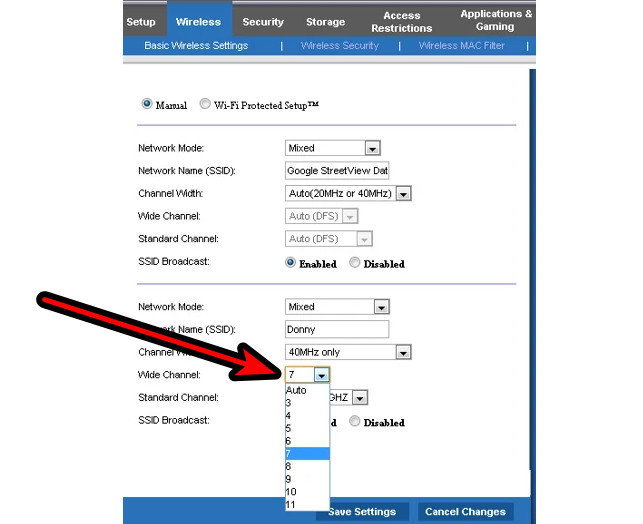
Change the Wi-Fi Channel in the Router Settings - If one of the Sonos speakers is connected via Ethernet, proceed to Settings > System > Network > SonosNet Channel.
- Adjust the wireless channel ensuring it doesn’t overlap with the router’s channel. If the router’s channel is set to 1, for example, set the Sonos channel to 6 or 11, and try to connect again.
5.6. Disable the 5 GHz Band
- In the router’s Settings, open Wireless and deactivate 5 GHz.
- Activate 2.4 GHz and commit your configuration.
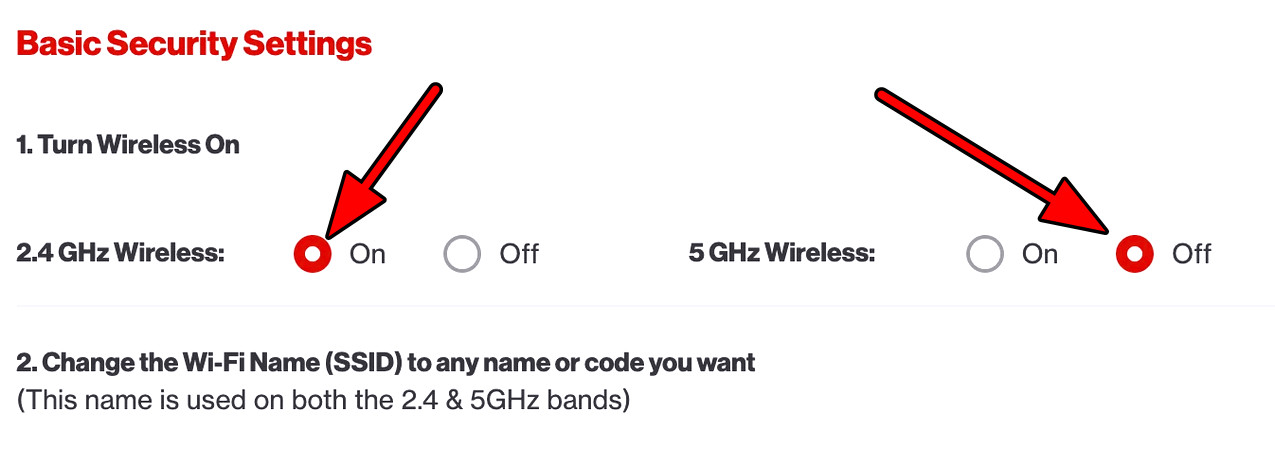
Enable 2.4 GHz Band and Disable 5 GHz Band in the Router Settings - Restart the devices and ensure all, including the Sonos speaker, are connected to the 2.4 GHz band.
5.7. Enable any IPv4 to any Local LAN Destination Port
- Navigate to the router’s Settings > Security > Firewall & Traffic Shaping.
- Modify the Outbound Rule Policy by setting Any IPv4 to Any Local LAN Destination Port to Allow.
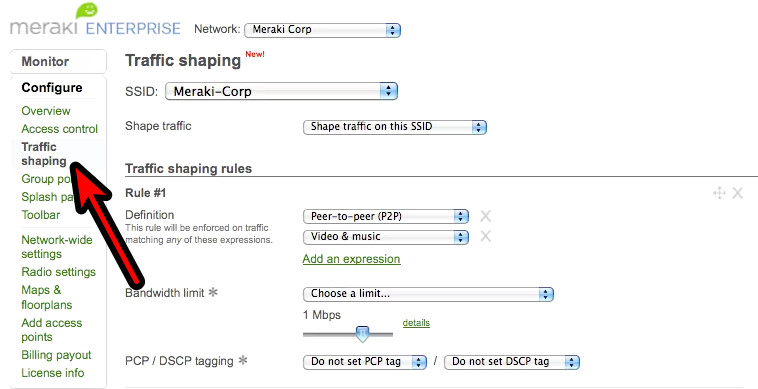
Open Traffic Shaping in the Router Settings - Save the changes and restart the devices.
- After the restart, attempt to add the Sonos speaker and check the result.
5.8. Disable Multicast Optimizations
- Go to Settings in the router interface and access Wireless > Basic Settings.
- Untick the option for Dynamic Multicast Optimizations and store the updates.
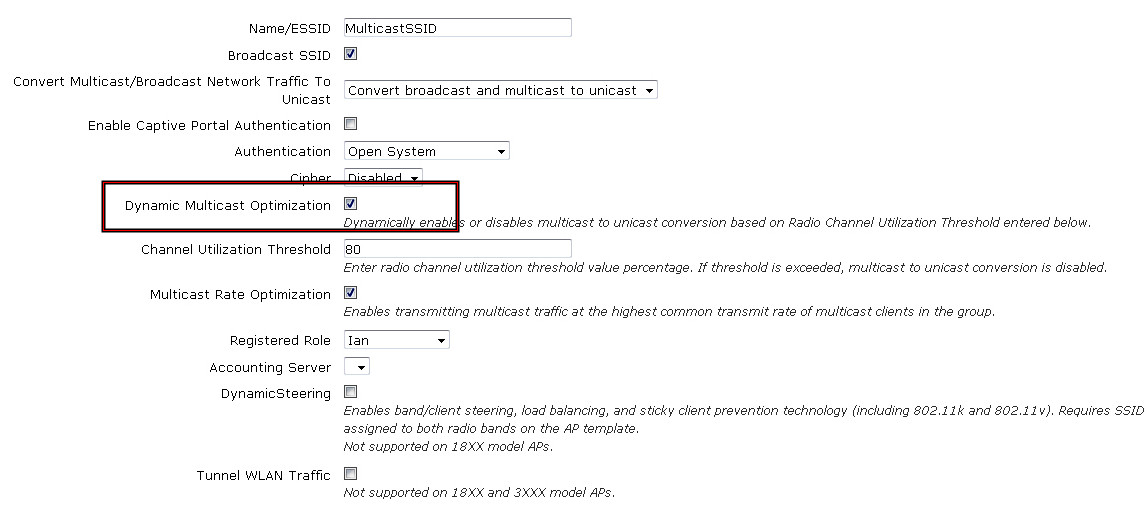
Disable Dynamic Multicast Optimization - Restart the devices and evaluate the connectivity with your Sonos speaker.
5.9. Disable Wi-Fi 6
- Access the router’s Settings > Network > Wireless > WLAN.
- Deactivate Wi-Fi 6 and remember to save the changes after doing so.
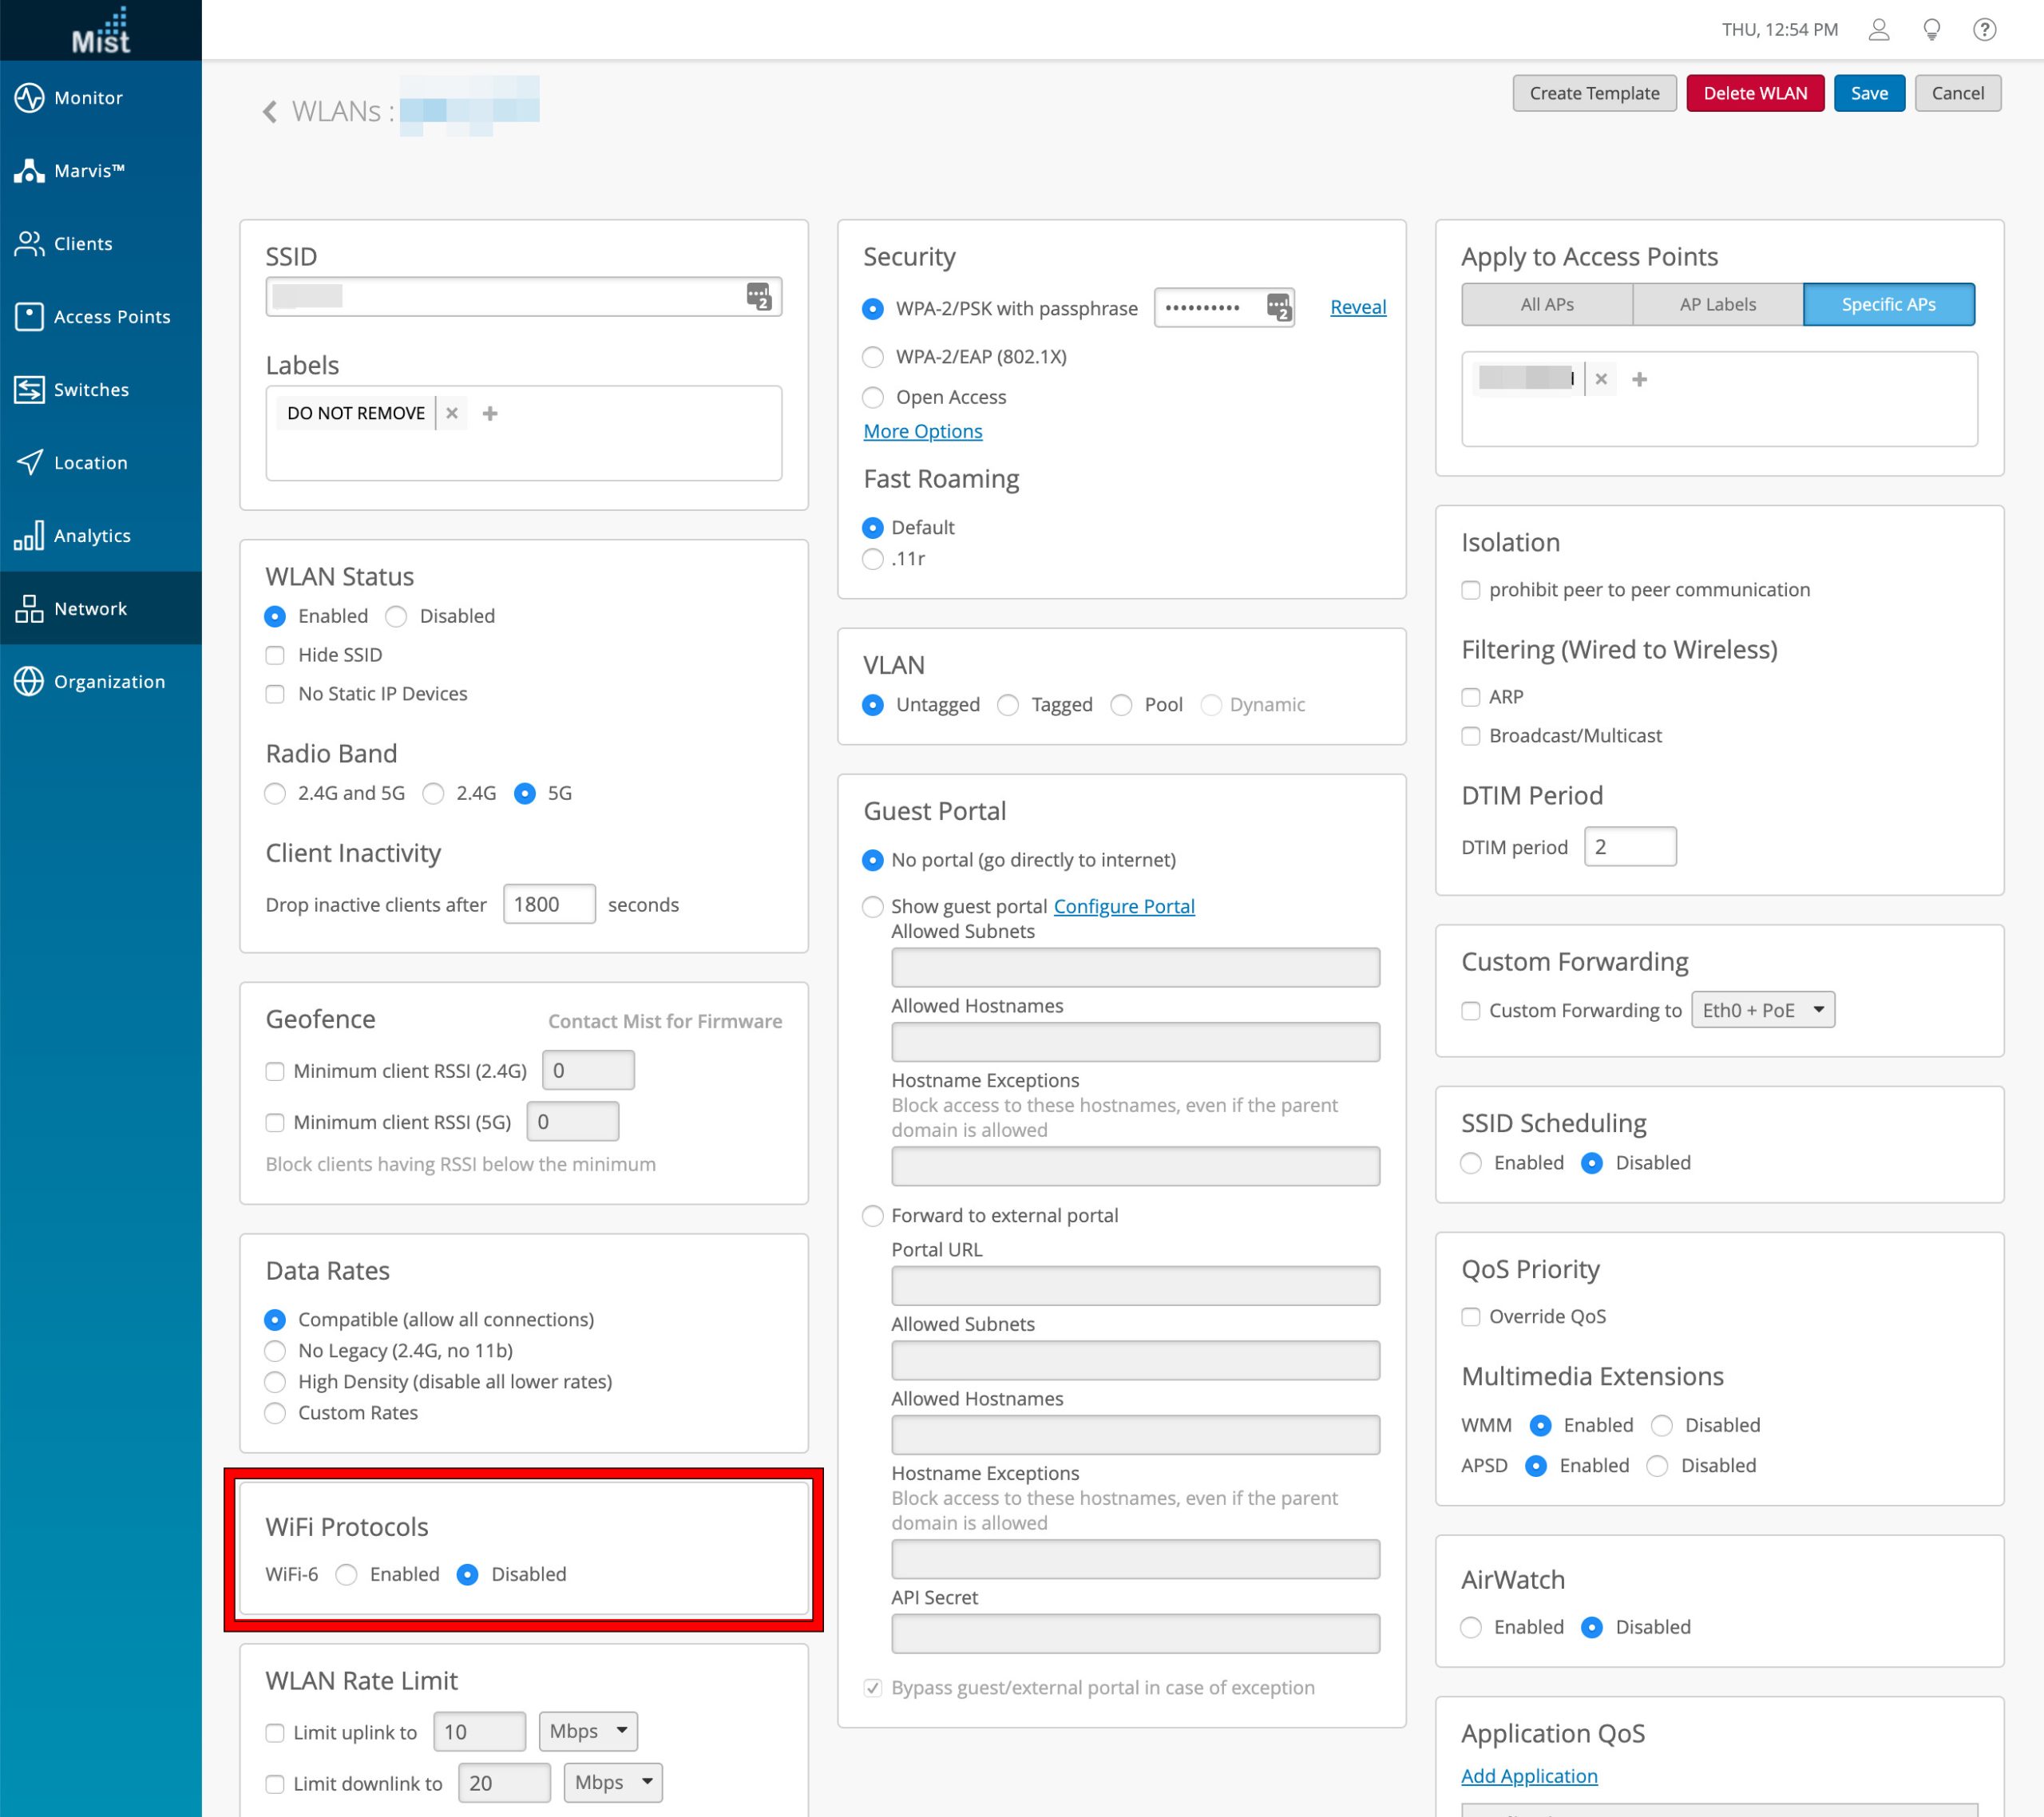
Disable Wi-Fi-6 Protocol in the Router Settings - Reboot the devices and attempt to connect with the updated settings.
5.10. Change the Wi-Fi Security Mode to WPA2
- Navigate to the router’s Settings > WLAN > WLAN Basic Settings.
- Switch the Security Mode to WPA2 and apply the new settings.
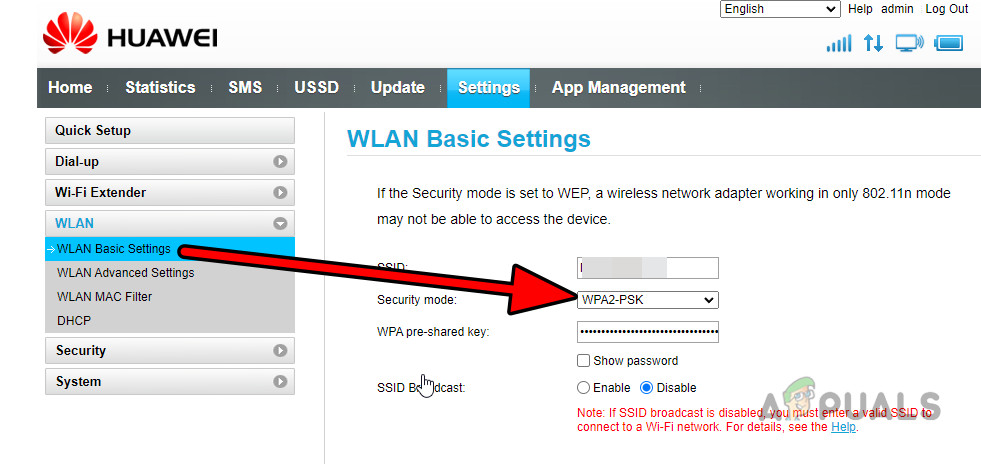
Change the Security Mode of the Wi-Fi Connection - Restart your devices and try connecting the Sonos speaker once more.
5.11. Disable the Router’s Firewall
- Enter the router’s Settings > Security > Firewall Switch.
- Deselect Enable Firewall and commit your selections.

Disable the Router’s Firewall - Initiate a reboot of the device and attempt to establish a connection to the Sonos speaker.
Remember to re-enable any critical security features such as the router’s firewall after troubleshooting to ensure your network remains secure.