How to Fix Slow Loading Time in GTA V Online? [11 Tips to Speed up your GTA V Loading Times]
The main cause of GTA V’s slow loading times is its gigantic open world. Every time you boot up GTA V and try to join a game, your system has to render that entire world from scratch.

This may make you think you need to upgrade your system to fix these slow loading times. But after countless efforts from the GTA V community, players have realized that a faster CPU and/or SSD seems to have a negligible effect on GTA V’s loading times.
That said, there are many external factors that also affect the loading times of GTA V. Below, we’ve listed the main causes of this issue:-
- Rockstar Server Issues: GTA V has hundreds of thousands of players trying to connect to their servers simultaneously. So their game servers tend to encounter issues and can even occasionally go down. Therefore, you should always check online to see if their servers are up and running or not before you try troubleshooting on your end.
- Loading Directly Into GTA V Online: If you launch GTA V and immediately go into online mode, you’re making a big mistake. If you go into the story mode first, then head into GTA Online, the game will load significantly faster.
- Minimizing GTA V While it’s Loading: If you minimize a GPU-intensive application (such as GTA V) while it’s loading, it will prevent the application from being able to use the full power of the GPU. This will end up resulting in a slower loading time.
- Missing/Corrupted Files: If GTA V gets completely stuck on the loading screen when you go into specific in-game areas or its online mode, it means that some of its game files are missing and/or corrupted. To fix this issue, you’ll need to verify the integrity of its game files.
- Low Disk Space: The disk where GTA V is installed must have free space available at all times. If this disk is very low on space, GTA V won’t be able to store its necessary temporary files within it, and you’ll have low virtual memory. This can cause many types of issues, including slow loading,
- Conflicting Programs: Some of the programs/services you have running in the background may be conflicting with GTA V, causing it to load extremely slowly.
- Antivirus/Firewall Interference: Your Antivirus software and/or the Windows Firewall might be mistakenly flagging GTA V as a potential threat, preventing it from working as intended.
- Conflicting Firmware of Peripherals: If you have many peripherals attached to your system, the different firmwares of these peripherals might be interfering with GTA V and causing issues.
- Wrong NAT Type: If you’re playing GTA V on a console, you must ensure that your NAT Type is set to Open. It is likely that it takes your game so long to load into online mode if it isn’t.
1. Check your Internet Connection
If you’re trying to load into GTA V Online and it’s just stuck on the loading screen, the first thing you should do is check your own internet connection.
Check if your internet connection isn’t slow or unstable. If it turns out that your internet connection is having problems, you should check if any downloads or streams are running in the background while you’re trying to get into GTA V Online.
After pausing all downloads and streams, check if your internet connection has regained speed and stability. If it has, you can go ahead and relaunch GTA V Online.
If it hasn’t, then it means that you’ll need to do some troubleshooting. The first step is to turn off Wifi and switch over to Ethernet.
To do so, you must use an Ethernet cable to plug your system directly into the router.
After that, you can try restarting your router. Remember that after you turn off your router, you need to wait a minute before you turn it on again.
If these methods don’t fix your internet connection, then your next step will be to check if you have another internet connection available and switch over to it. Using the Hotspot feature on your phone, you can use your mobile data to connect to GTA V Online.
2. Check Rockstar Server Status
GTA V usually has a few hundred thousand people trying to connect to its servers, all at the same time.
And as you can expect, this can sometimes overload their serves, causing them to crash.
So before you try the different solutions we’ve listed below, you should take a look online to see if the Rockstar Servers are up and running or not. If the servers are down, you’ll see many people complaining online.
And if this is the case, then all you can do is wait until the servers come back up.
3. Verify Integrity of Game Files
When playing GTA V, if your game completely freezes each time you load into a specific area/scene or into the online mode, then the cause of this issue is missing and/or corrupted game files.
During your installation of GTA V, some of its files may have been lost or corrupted, probably due to a weak/unstable internet connection.
To fix this issue, All you need to do to restore the lost/corrupted files is verify the integrity of GTA V’s game files.
If you’ve downloaded GTA V through Steam, you can verify the integrity of its game files by following the method we’ve listed below:
- Open Steam and head to the Library.
- In the list of games, right-click on GTA V.
- Click on Properties and then navigate to the Local Files tab on the left.
- Click “Verify integrity of game files…” to begin the file restoration process.
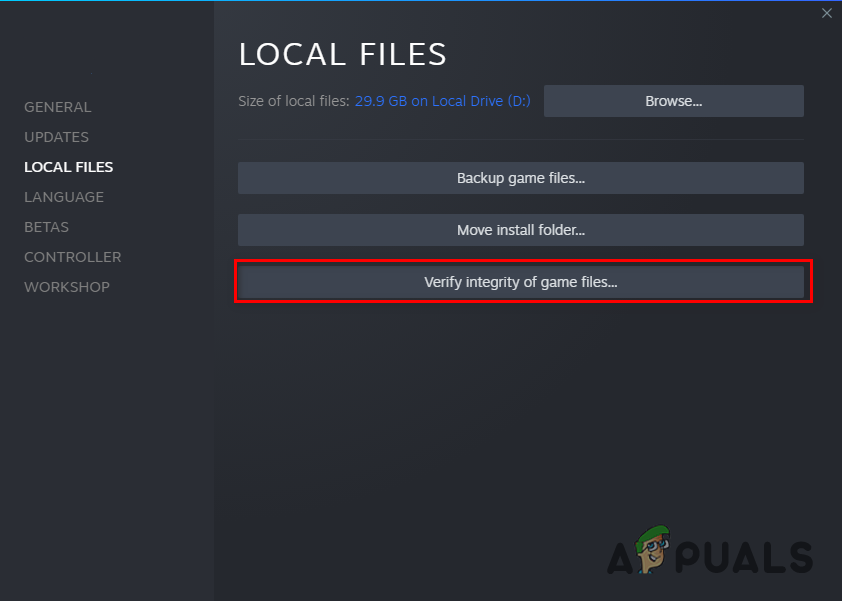
Verifying Integrity of Game Files through Steam
If you’ve downloaded GTA V through the Epic Games Launcher, you can verify the integrity of its game files by following the method we’ve listed below:
- Open up the Epic Games Launcher and head to your Library.
- Find GTA V and right-click on it.
- Click on Manage and then select Verify.
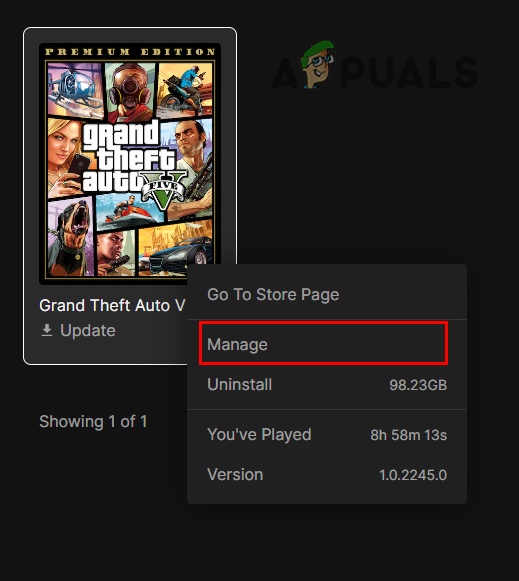
Click on Manage 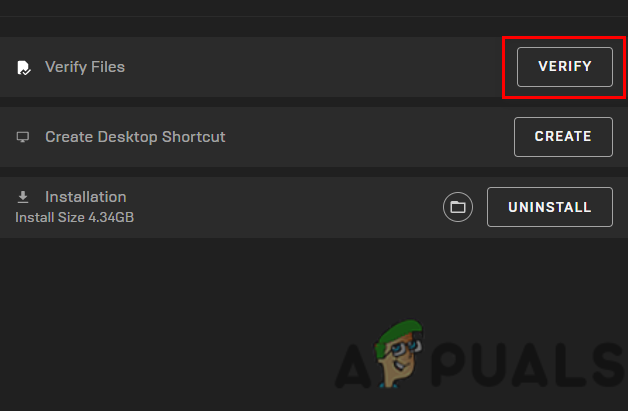
Verifying Integrity of Game Files through Epic Games Launcher
After a few minutes, your game files will be verified. And once they’re verified, Steam/Epic Games Launcher will notify you whether it found and fixed any files or not.
4. Load into Story Mode Before Going Online
This is the easiest way to fix the slow loading times of GTA V Online. If you’re directly going into GTA V Online from the start page of the game, then this is the main reason why your loading times are so slow.
To make GTA V Online load much faster, you must first head into the Story Mode from the game’s start page.
After you’ve loaded into the story mode (which should take only a few minutes), you can go into the game’s Pause Menu and navigate to the Online tab.
From there, select “Play GTA Online” and click on Go. You’ll now start loading into GTA V Online.
And instead of it taking 10 minutes or more to load, it’ll only take around 2-3 minutes. This method is the most effective way of decreasing the loading time of GTA Online.
If you’re already using this method and want to make the game load even faster, follow the solutions listed below.
5. Keep GTA V Maximized When It’s Loading
Another mistake that people commonly make is minimizing GTA V when it’s loading. Instead of staring at its loading screen, you may think you can just minimize the game and let it load in the background while you do something else.
But if you minimize the game while it’s loading, it’ll prevent the game from being able to utilize the full power of your GPU. This can cause the game to take a needlessly long time to load.
So whenever you’re launching GTA V or GTA V Online, ensure that the game is maximized.
6. Reconnect Internet Connection While Loading
You can instantly get into an empty public lobby in GTA Online if you do this one simple trick.
To instantly get into an empty public lobby in GTA V Online, follow the steps we’ve listed below:
- Launch GTA V and load it into Story Mode.
- After it’s done loading, join an Online Session.
- As soon as you’re on the GTA Online loading screen, disconnect your internet connection and instantly reconnect it.
If you reconnect your internet connection quickly enough, an alert message will pop up on your screen. Accept this alert message, and you’ll instantly load into an empty public lobby.
To perform this trick, you should use an Ethernet cable for your internet connection. If you don’t have access to one, don’t worry, as there’s another way to pull off this trick successfully. For this method, follow the steps listed below:
- Enable data on your phone and turn on its Hotspot feature.
- Connect your system to your phone’s hotspot using Wifi.
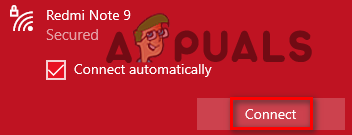
Connecting your PC to Mobile Data - Launch GTA V and load it into Story Mode.
- After it’s done loading, join an Online Session.
- As soon as you’re on the GTA Online loading screen, enable Airplane Mode on your phone, then instantly disable it.
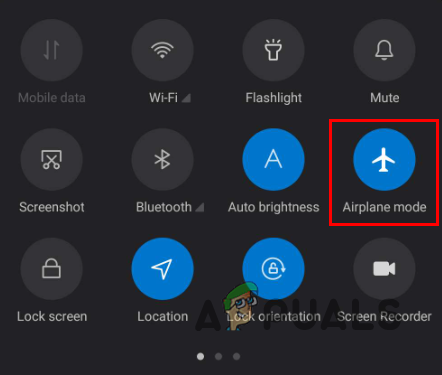
Enabling Airplane Mode
This will cause your data to disconnect and reconnect quickly, allowing you to trigger a solo public lobby in GTA Online instantly. No more wait times!
7. Free Up Disk Space
Another easy way to make GTA V load quicker is to ensure that you have a reasonable amount of free space available on the disk where you’ve installed GTA V.
While GTA V runs, it must create temporary files within the stored disk. So if the disk is critically low on space, the game won’t have the ability to create these temporary files.
Low disk space will also mean that you’ll have less virtual memory available. This virtual memory is used by your PC in the same way as your physical RAM. So unless you have a good amount of physical RAM installed on your PC, low virtual memory will significantly impact your PC’s performance. It can result in all sorts of issues with GTA V, such as lag, stutters, crashes, and slow loading times.
So to have the smoothest GTA V experience, ensure that your SSD/HDD has at least 20-25% of its total space. We have an extensive guide on deleting junk files and freeing up Hard Drive space.
8. Close Background Processes
While playing GTA V, you should open Task Manager and see what programs and services you have running in the background.
If there are many unnecessary programs and services running in the background while you’re trying to play GTA V, they can severely impact the game’s performance.
To find out what programs are eating up your PC’s resources in the background, follow the steps we’ve listed below:
- Press Window Key + X simultaneously and select Task Manager.
- Look through the Processes tab and see how much CPU/GPU power and memory each process consumes.
- Find out which process is running needlessly and close it by left-clicking on it, then clicking on End Task at the bottom.
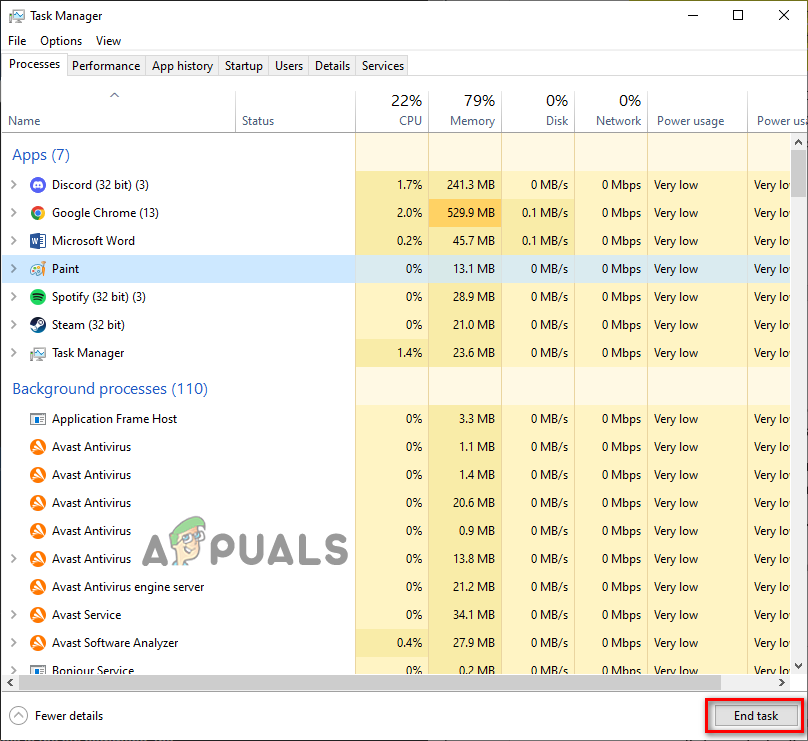
Closing Background Processes
After cleaning up the needless processes, you must move on to the services.
Services Such as Razer and NVIDIA cause the most problems with GTA V.
So head into the Services tab in Task Manager and look for the Razer and NVIDIA Services. When you find them, simply right-click on them and select Stop. You can also clean boot your Windows to minimize random services running in the background.
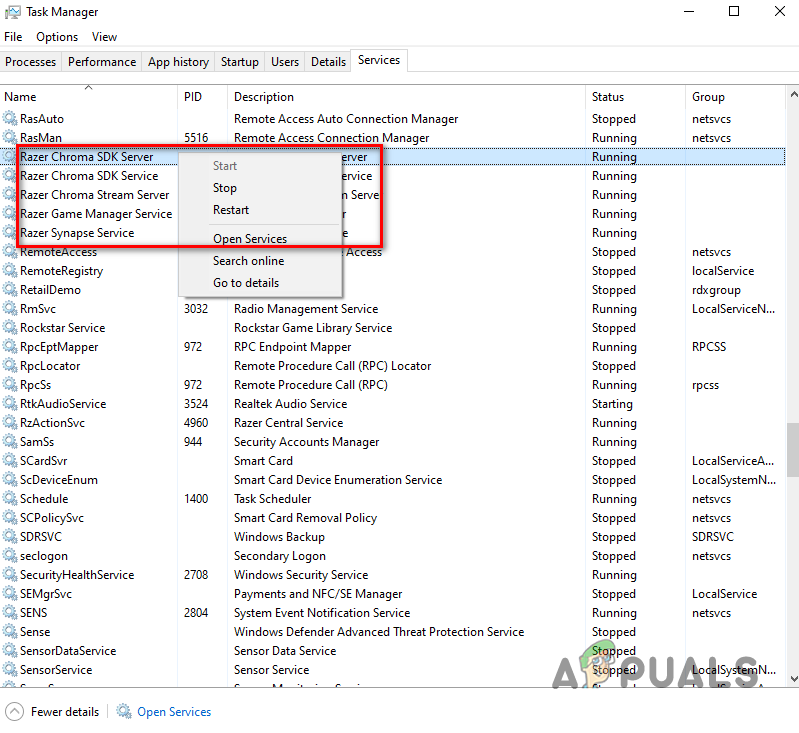
Just remember not to stop the NVIDIA Display Driver service.
9. Turn Off Your Antivirus Software and Create a Firewall Exception
Antivirus programs aren’t the most reliable when it comes to flagging down actual threats. They tend to mistakenly flag trusted programs, such as video games, as potential threats to your system.
If your Antivirus software is flagging GTA V as a threat, it will prevent the game from being able to run properly. You’ll need to turn off your Antivirus software while playing GTA V to fix this issue.
Note: If you downloaded GTA V from an untrusted source, you should skip over this solution for safety purposes.
To turn your Antivirus software, follow the steps we’ve listed below:
- Press Windows Key and type Windows Security.
- Press enter to open up the Windows Security menu.
- On the left side of the window, click on Virus & Threat Protection.
- Click on the “Open App” option to open the menu of your Antivirus software.
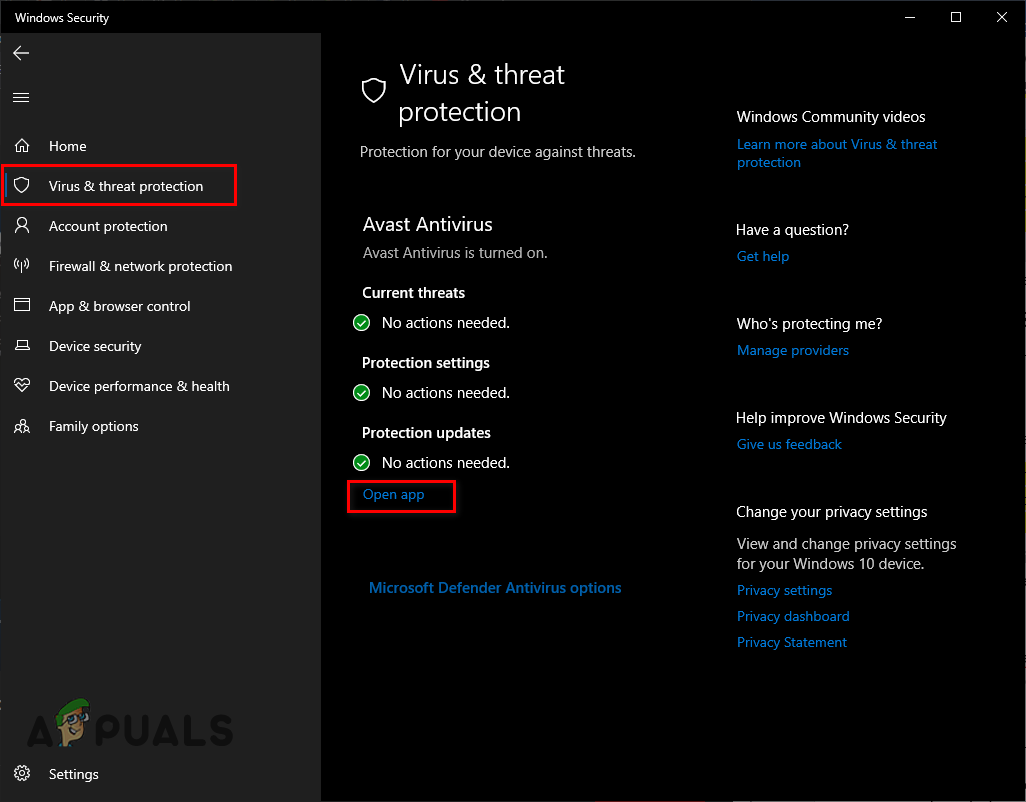
Disabling Antivirus - Disable the Antivirus from its menu.
After you’ve disabled your Antivirus, the next step is to add an exception for GTA V and Steam/Epic Games Launcher in the Windows Firewall.
To add this Firewall exception, follow these steps:
- Press Windows Key and type Windows Security.
- Press enter to open up the Windows Security menu.
- On the left side of the window, click on Firewall & Network Protection.
- Click on the “Allow an app through Firewall” option.
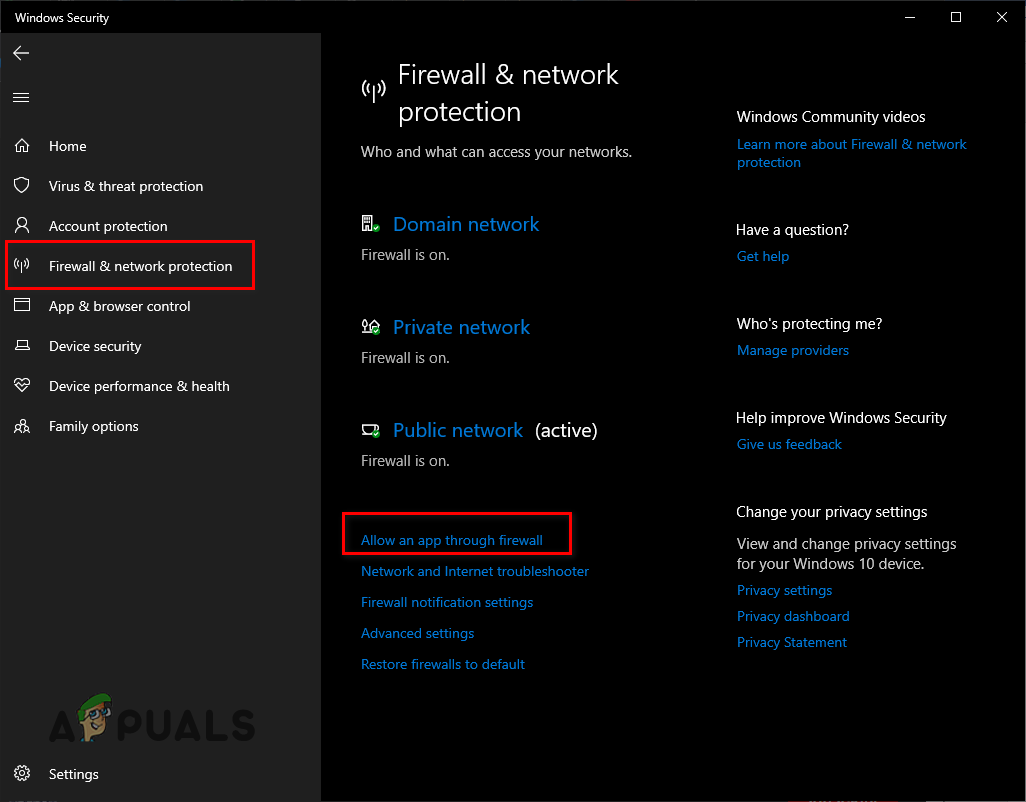
Opening Firewall Settings - From the list of apps that pops up, put a checkmark next to Steam/Epic Games Launcher and GTA V.
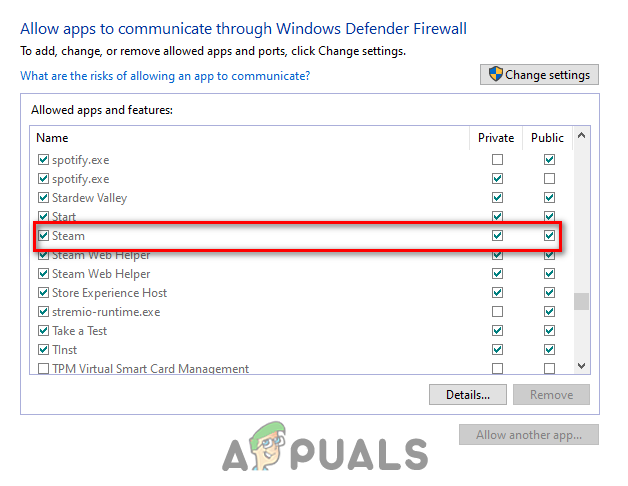
Adding Firewall Exception - Click OK.
Remember that this method is for the Windows Firewall. If you’re using a third-party firewall, you’ll need to open up its own menu and add the exceptions there.
Once you’ve done all this, your Antivirus software and Firewall will no longer cause any issues with GTA V.
Do note that once you’ve finished playing GTA V, you should turn the Antivirus back on for security reasons.
10. Disconnect Unnecessary Peripherals
Next, you should try unplugging all USB devices, excluding your mouse and keyboard.
This may seem like a strange fix, but it makes sense as each one of your USB devices has its own firmware. And sometimes, this firmware conflicts with the programs you’re running on your PC, causing errors in games such as GTA V. One of these errors can be slow loading times.
So to fix this issue, disconnect every non-essential peripheral that you have connected to your PC. This includes a USB hub, capture device, second monitor, etc.
After they’re all unplugged, relaunch GTA V and see if the game loads in quicker. If the loading times improve, start reconnecting the peripherals one by one. This will allow you to figure out which exact peripheral was causing the error.
Once you’ve figured that out, you can reinstall or update the drivers of that peripheral to fix the issue.
11. Change NAT Type to Open
If you’re playing GTA V Online on console, you should check if your NAT setting is set to Open or not.
If you don’t know already, NAT stands for Network Address Translation. This network setting allows your console to communicate with the online servers of different games.
There are three types of the NAT setting:
- Open (Type 1): This allows you to connect and host servers with people with any NAT type.
- Moderate (Type 2): This allows you to connect and host servers with people with Moderate or Open NAT types.
- Strict (Type 3): This allows you to connect and host servers with people with Open NAT Type.
As you can see from the list above, the most beneficial NAT type is Open, as it allows your console to connect to all kinds of online servers.
To check your network’s NAT type, go to your console’s home page and navigate to the network settings. This menu will have a “Test Internet Connection” option. Click on this option and wait for it to complete the test.
Once the test is completed, it will tell you your network’s NAT type. If it isn’t set to Open, you’ll have to fix that through your router’s setting page.
To open your router’s setting page, you must first find its default gateway (IP Address). To find that out, follow the steps we’ve listed below:
- Press Windows Key and type cmd in the search bar.
- Click on Run as Administrator.
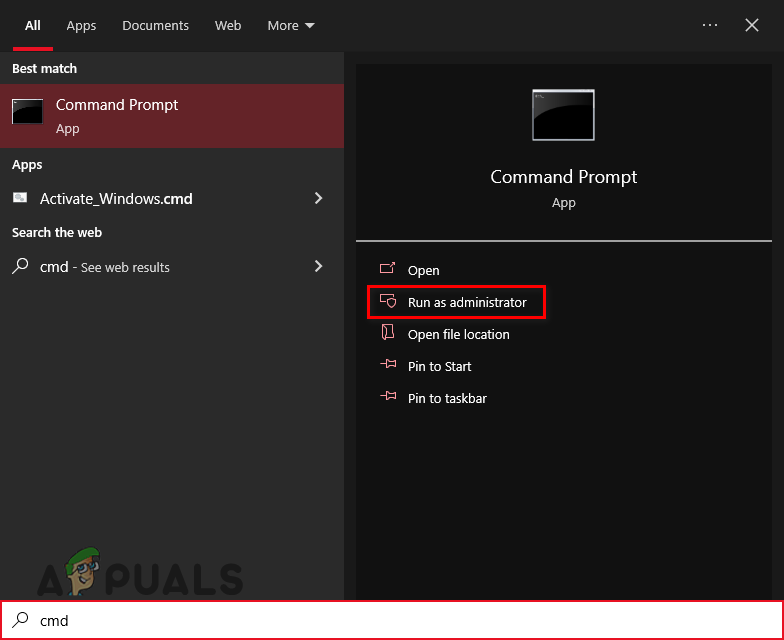
Opening Command Prompt - In Command Prompt, enter the following command:
ipconfig
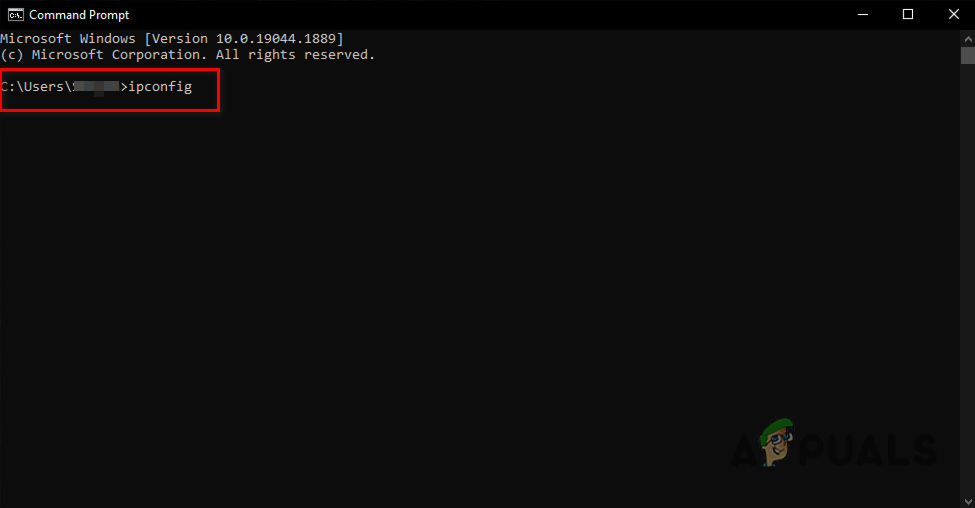
Entering ipconfig command in Command Prompt - This will show you information regarding your network. Scroll down to the Ethernet Adapter section.
- Copy the set of numbers shown next to “Default Gateway”.
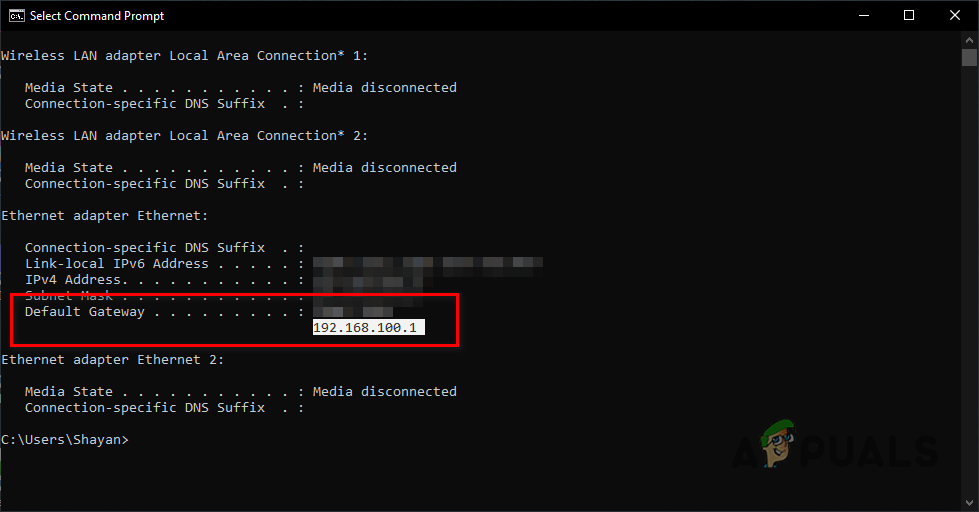
Finding your routers IP Address
Now that you have your IP Address, the next step is to open your router’s settings page. To do that, simply open your browser, paste this IP Address in the search bar, and press enter.
On the login page that opens up, you need to enter your router’s password and username.
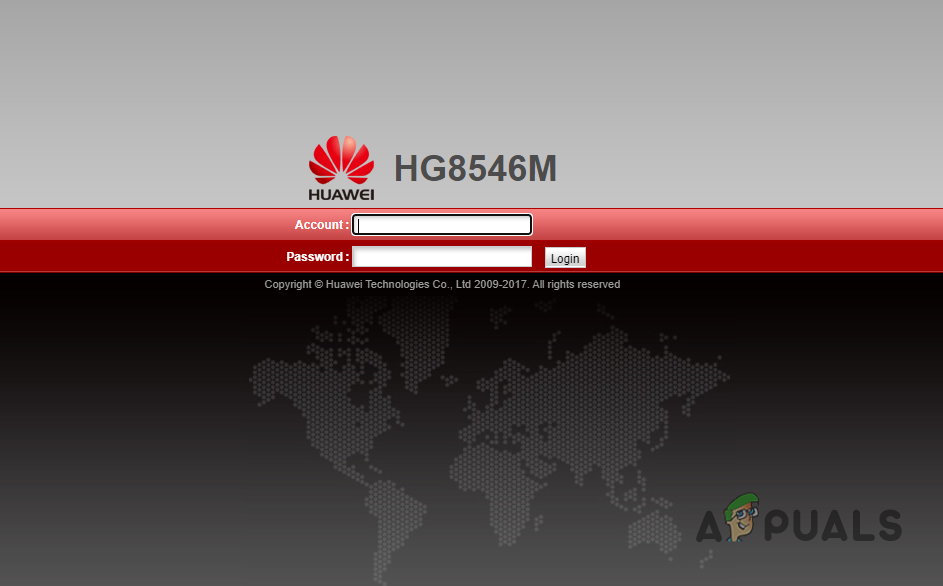
If you have no clue what your router’s username and password is, don’t worry. Most of the time, the router’s username and password are set to the default ones that are set by the manufacturer.
So to find out your router’s username and password, open a new tab on your browser and type “(router model) default Username and Password” in the search bar, and press enter.
Copy the router’s default username and password from Google and enter it into the login page.
Now that you’re logged in, you need to enable an option called “UPnP Configuration”.
Each router brand has its unique settings page, so it’s hard to say where exactly this option will be located. But it will not be that difficult to find. You can search for help on Google if you’re having trouble finding it.
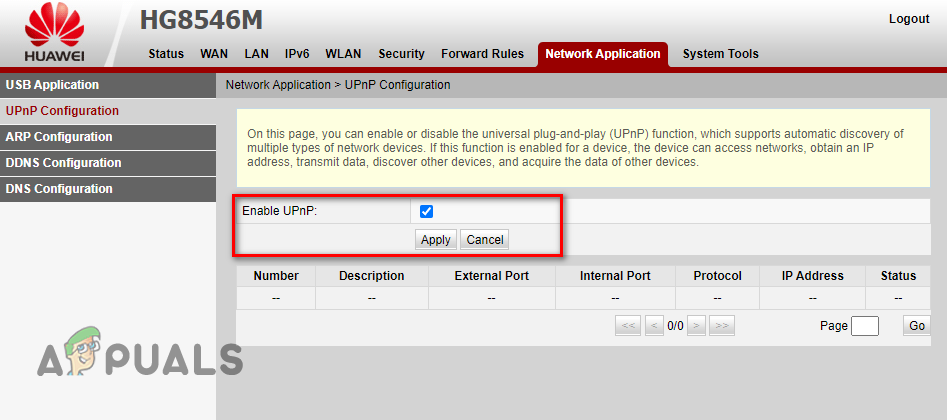
Once you’ve found the UPnP option, enable it and save settings. Afterward, go back to your console and perform the Internet Connection Test again. It will now show your NAT type as Open.


