Guide: Share Screen on FaceTime Call on iPhone, iPad or Mac
Facetime on iPhone also has an incredible feature of screen sharing. The Share Screen option is present right on the top of your screen when you are on a facetime call. To learn more about how to share screen, read this article till the end.

Many may not know that when you share your screen, other people can not see the notification pop-ups. Also, the content that requires a subscription, free trial, or purchase to view won’t be visible to others (for that SharePlay is used).
SharePlay is another great feature of Facetime that allows you to share and watch videos, listen to music, or even work out together through supported apps if all the participants have an active subscription to that content.
Pre-Requisites to Share Screen on a FaceTime Call
To share the screen on FaceTime, you and everyone else on the FaceTime call, require a supported device as described below:
- An iPhone & iPad with iOS/iPadOS 15.1 or above
- An iPad with iPadOS 15.1 or above
- A Mac with macOS Monterey 12.1 or above
If you have compatible device and you performed the prerequisites. You can follow the methods below.
Precautions
Sharing your screen can reveal personal information such as open tabs, apps, and files on your device. This can include sensitive information such as financial or medical records, or login credentials.
By taking precautions when sharing your screen, you can protect your privacy, security, and confidentiality while ensuring that the call is effective and productive.
- Be aware of your background and what is visible on your screen.
- Close any unnecessary tabs or apps that may contain sensitive information.
- Be mindful of what you are sharing on the call, and with whom.
- Make sure to lock your device when you are done with the call to prevent unauthorized access.
- Be aware of the call’s privacy settings and make sure they are set to your preference.
- If possible, use a virtual background to obscure your real background.
- Avoid sharing personal information such as credit card numbers or passwords.
- Turn off your microphone and camera when not in use.
- Use a passcode or Touch ID to lock your device, and sign out of your account when you are done with the call to prevent unauthorized access.
- Check the internet connection quality and make sure it is stable before sharing the screen.
Share screen on iPhone/iPad
By following these steps, you will be able to share your screen on FaceTime:
- Find and Open the FaceTime app on your device.
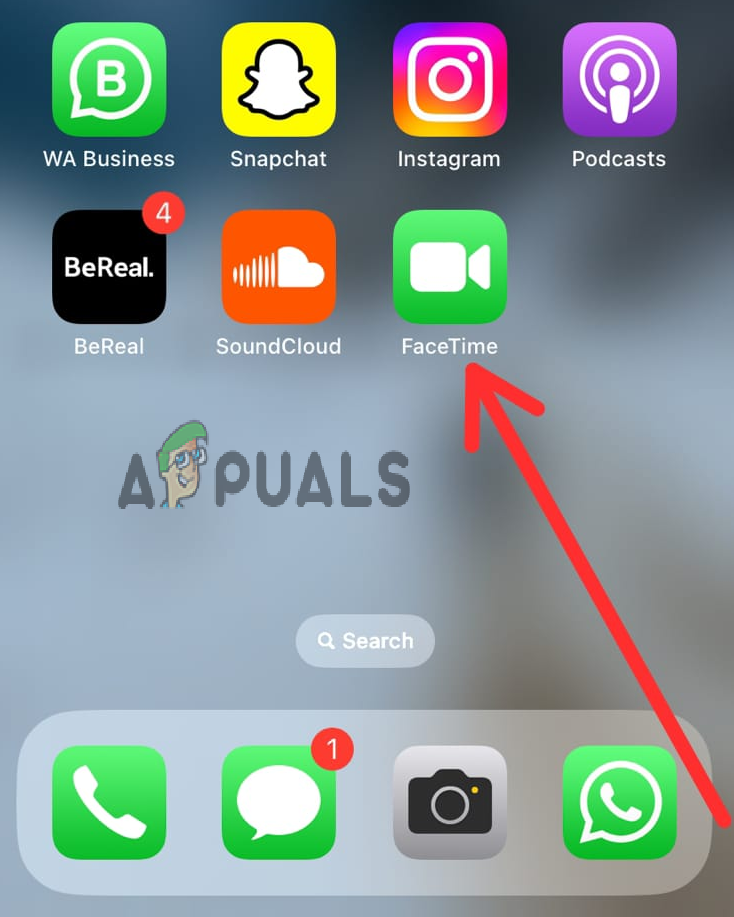
Open the FaceTime app - Make a call to the person you want to share your screen with.
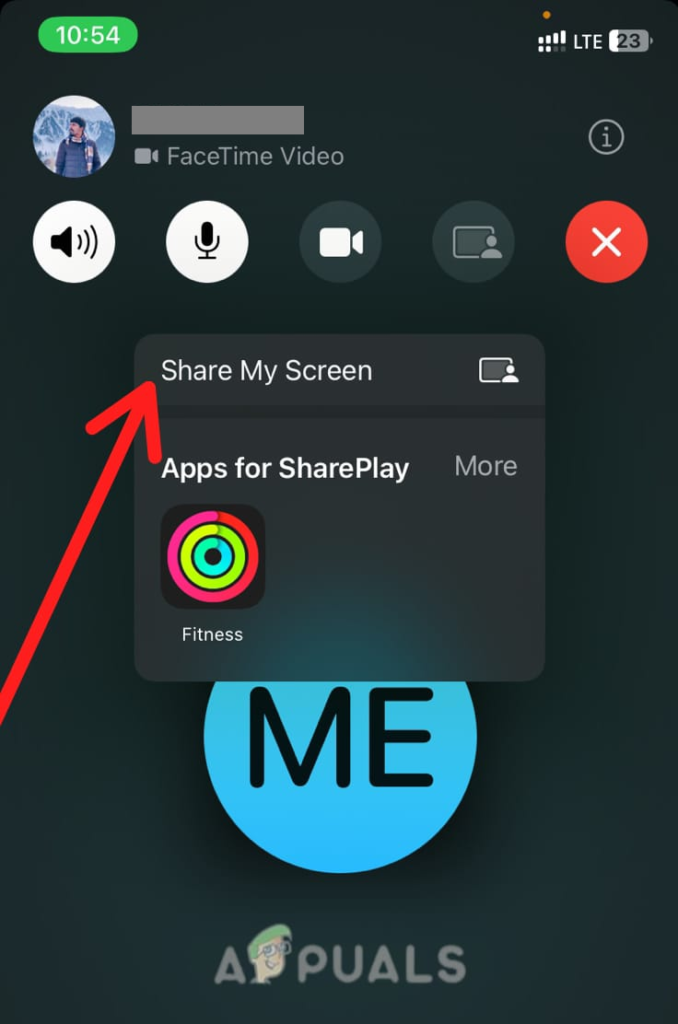
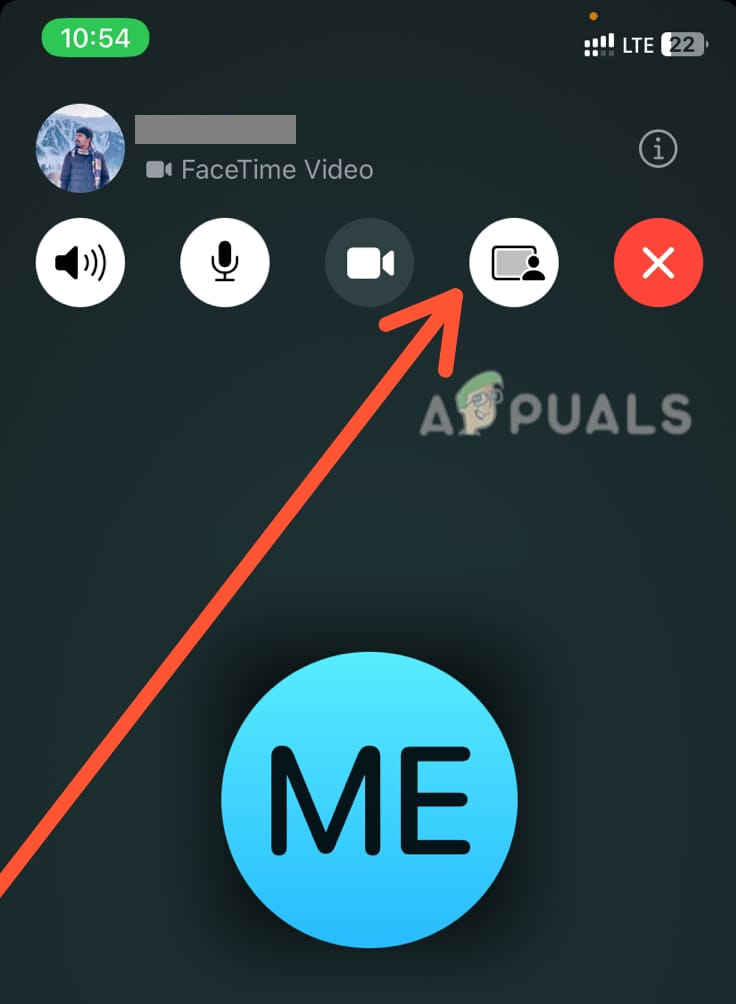
- Select Screen Sharing from the options that appear.
- Now, click on Share My Screen in the pop-up.
Tap on Share My Screen - The person on the other end of the call will receive a notification that you are requesting to share your screen with them. They have to accept the request for the screen sharing to begin.
- Once they accept the request, your screen will be shared.
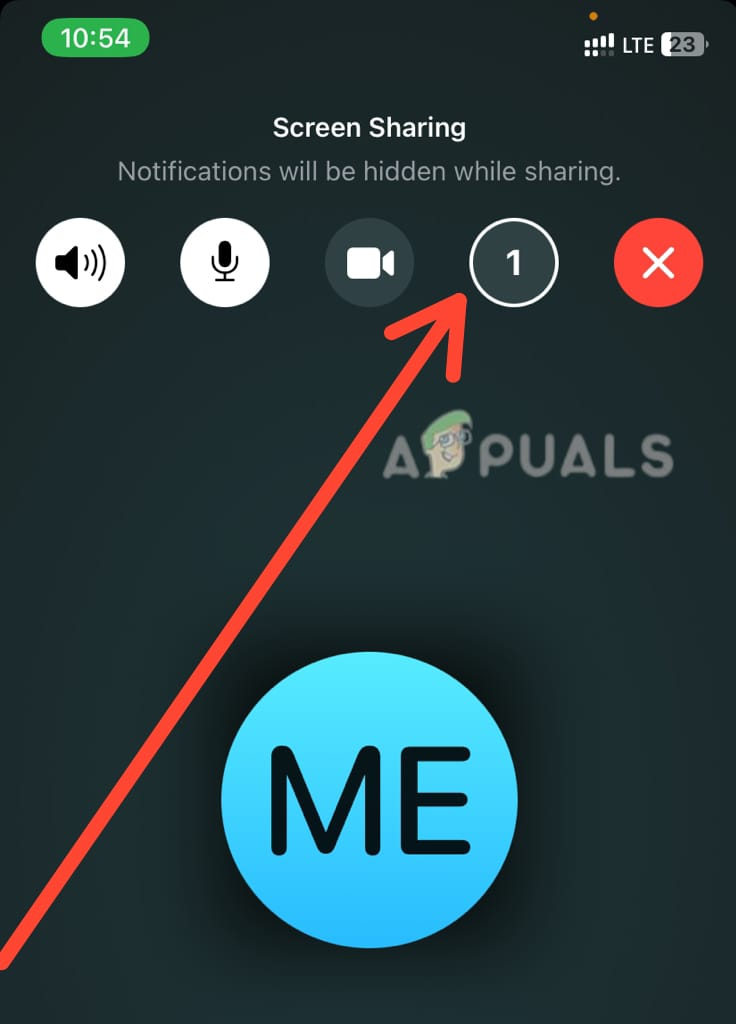
The screen will be shared when the person on the other end of the call accepts the request - To stop sharing your screen, simply tap on the Stop Screen Sharing icon.
Tap the icon to stop sharing the screen
Share Screen on Mac
One of the great things about screen sharing in FaceTime is that it’s built into the Mac operating system, so there’s no need to download any additional software. This makes it easy to use and accessible to everyone with a Mac. You can utilize the screen sharing feature by following the steps below.
- Open the FaceTime app on your Mac and select the person you want to call from your Contacts list.
- During the FaceTime call, click the Video button in the upper right corner of the screen and select Screen Sharing.
- A window will appear allowing you to choose which screen you want to share, or you can choose to share just a portion of your screen by clicking and dragging to select it.

Share Screen in a FaceTime Call on a Mac - You can also adjust the sharing options by clicking on the Options button in the upper right corner of the screen sharing window. Here you can choose to allow the other person to control your screen, as well as enable or disable microphone audio sharing.
- To end screen sharing, simply click the Stop Sharing button in the upper right corner of the screen.

Stop Sharing Screen in a FaceTime Call on a Mac
Note: When you share your screen during a Facetime call, other people will be able to see everything on your screen, but they won’t be able to interact or control anything on your device.
Open a Shared Screen in a FaceTime Call
When a participant shares their screen in a FaceTime call, it’s not automatically displayed to other participants. Here’s how to access the shared screen:
After joining the FaceTime call, locate the Join Screen Sharing option and tap Open.
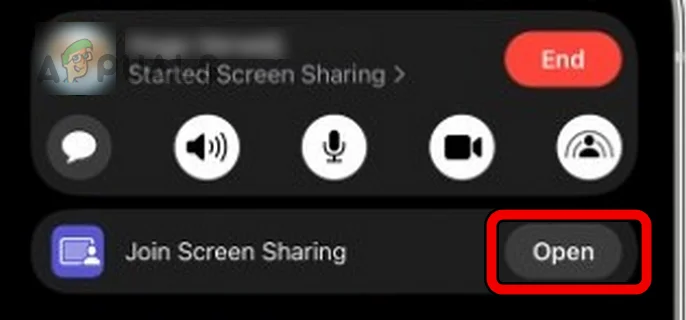
The shared screen will now be displayed on your device. During the screen sharing session, the participant’s name will be displayed near the top-left corner of the screen. You can also use the buttons there to send them a message or share your own screen.
Take Over Screen Sharing from Another Participant in a FaceTime Call
FaceTime also has a feature to enable participants to take over screen sharing. This allows you to take control of the screen sharing and display your own content to the rest of the group.
- Click the Video button in the upper right corner of the screen.
- Select Screen Sharing from the drop-down menu.
- Choose to Share My Screen.
- Now, your screen will be displayed to other participants, replacing the previously shared screen.