How to Set A Custom Xbox Gamerpic – Easiest No USB Method
There are more than 3 billion gamers in the world as of 2022 distributed across various platforms. Each gamer carries a unique identity with them in the form of their gamertag. Since the turn of the century, how we differ visually online has started to become more and more important.
That is why having the right gamerpic is important, no matter what platform you play on. Xbox, PlayStation, Nintendo, and PC, all offer a preset of choices but with the chasmic ratio of total users against total profile pictures available, are you really choosing one that truly represents you?
Microsoft lets you select custom gamerpics for your Xbox profile and in this guide, we’re going to show you how easy it to set one for yourself. This method doesn’t require plugging in any external drives to your console.
Setting up the custom Xbox Gamerpic
We will be using the Xbox app for this tutorial. Our idea behind this method is that there is a good chance you might not have a spare USB lying around to insert in your Xbox. And, even if you do, it likely doesn’t already contain the picture you want to use as your custom gamerpic.
If you’re going to use a computer or smartphone to transfer the picture to the USB anyways, why not just your phone directly? It’s much more seamless and you have the ability to harness the potential of your entire existing library for the custom gamerpic. In our opinion, this is the way.
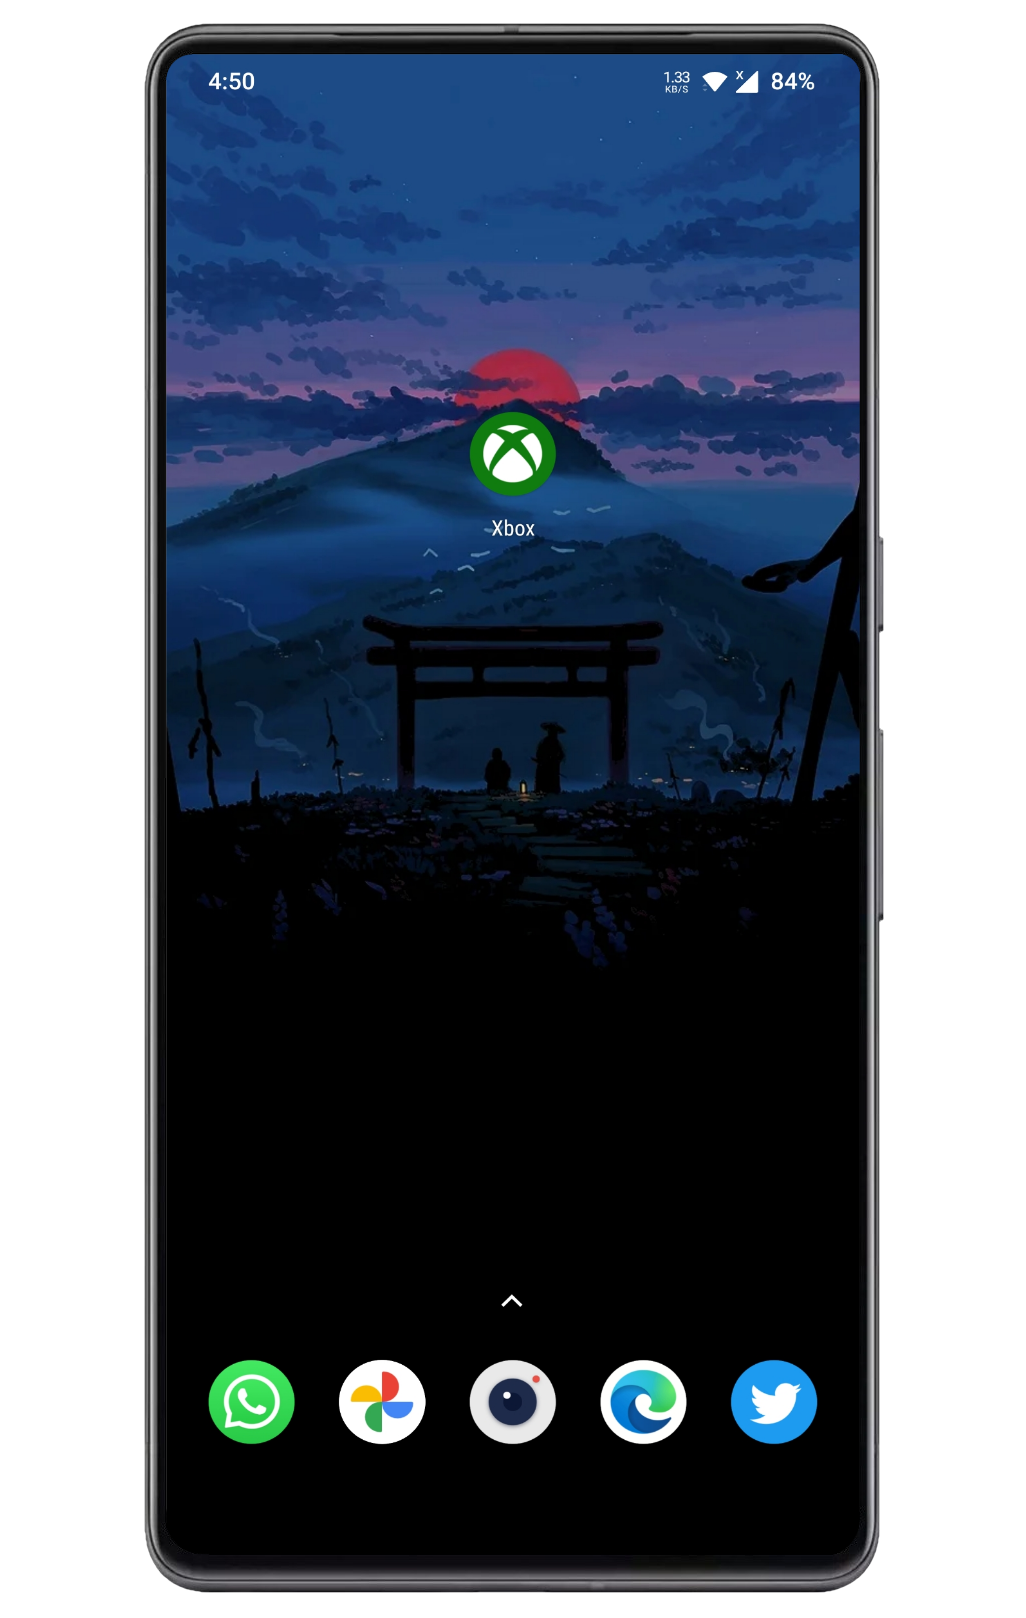
Step 1: Download the Xbox app
The Xbox app is available for both iOS and Android. It’s feature-rich and full of useful functions that take real advantage of its tether to your console. All the while making a few things more convenient, such as the topic in question. Click either button below the screenshot to download it.
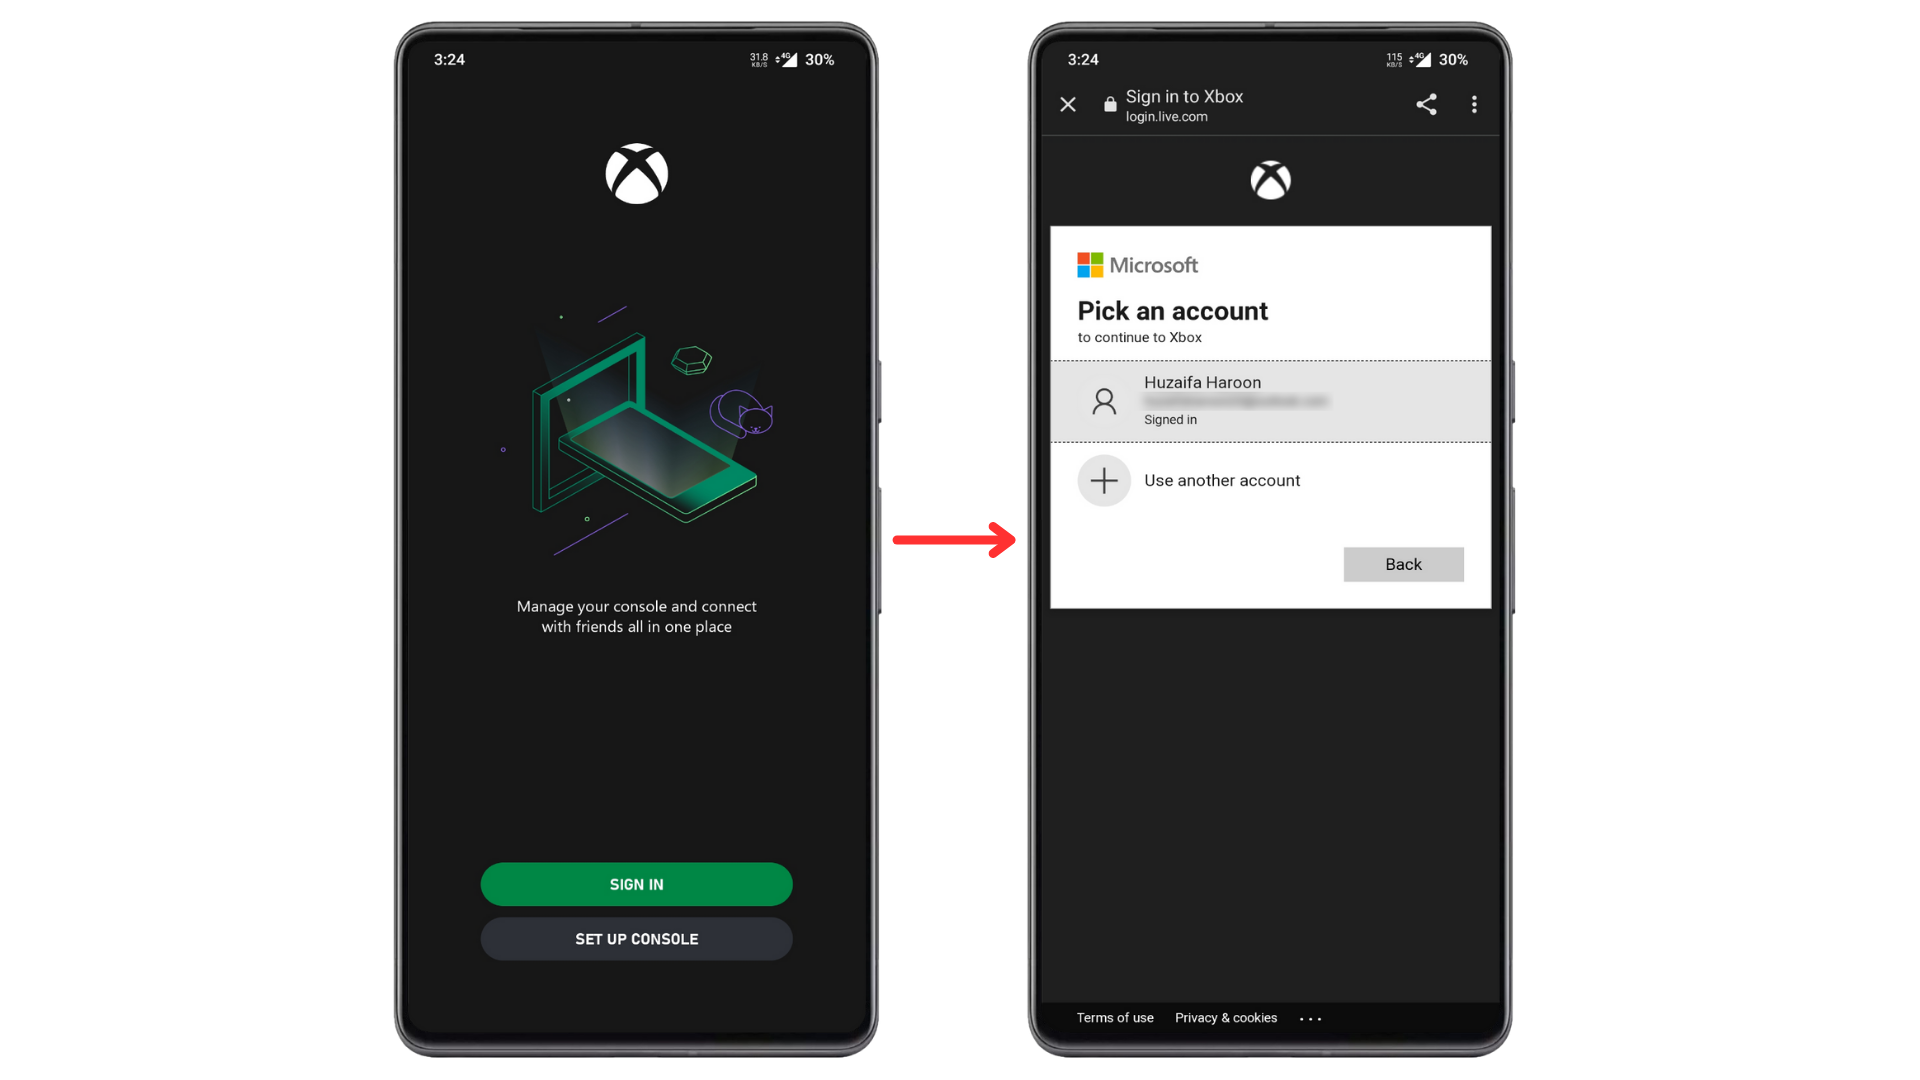
Step 2: Sign in with your Xbox account
Use your Microsoft account to sign in to the app. You can further set up the app by linking it to your console, but that is not needed for the custom gamerpic.
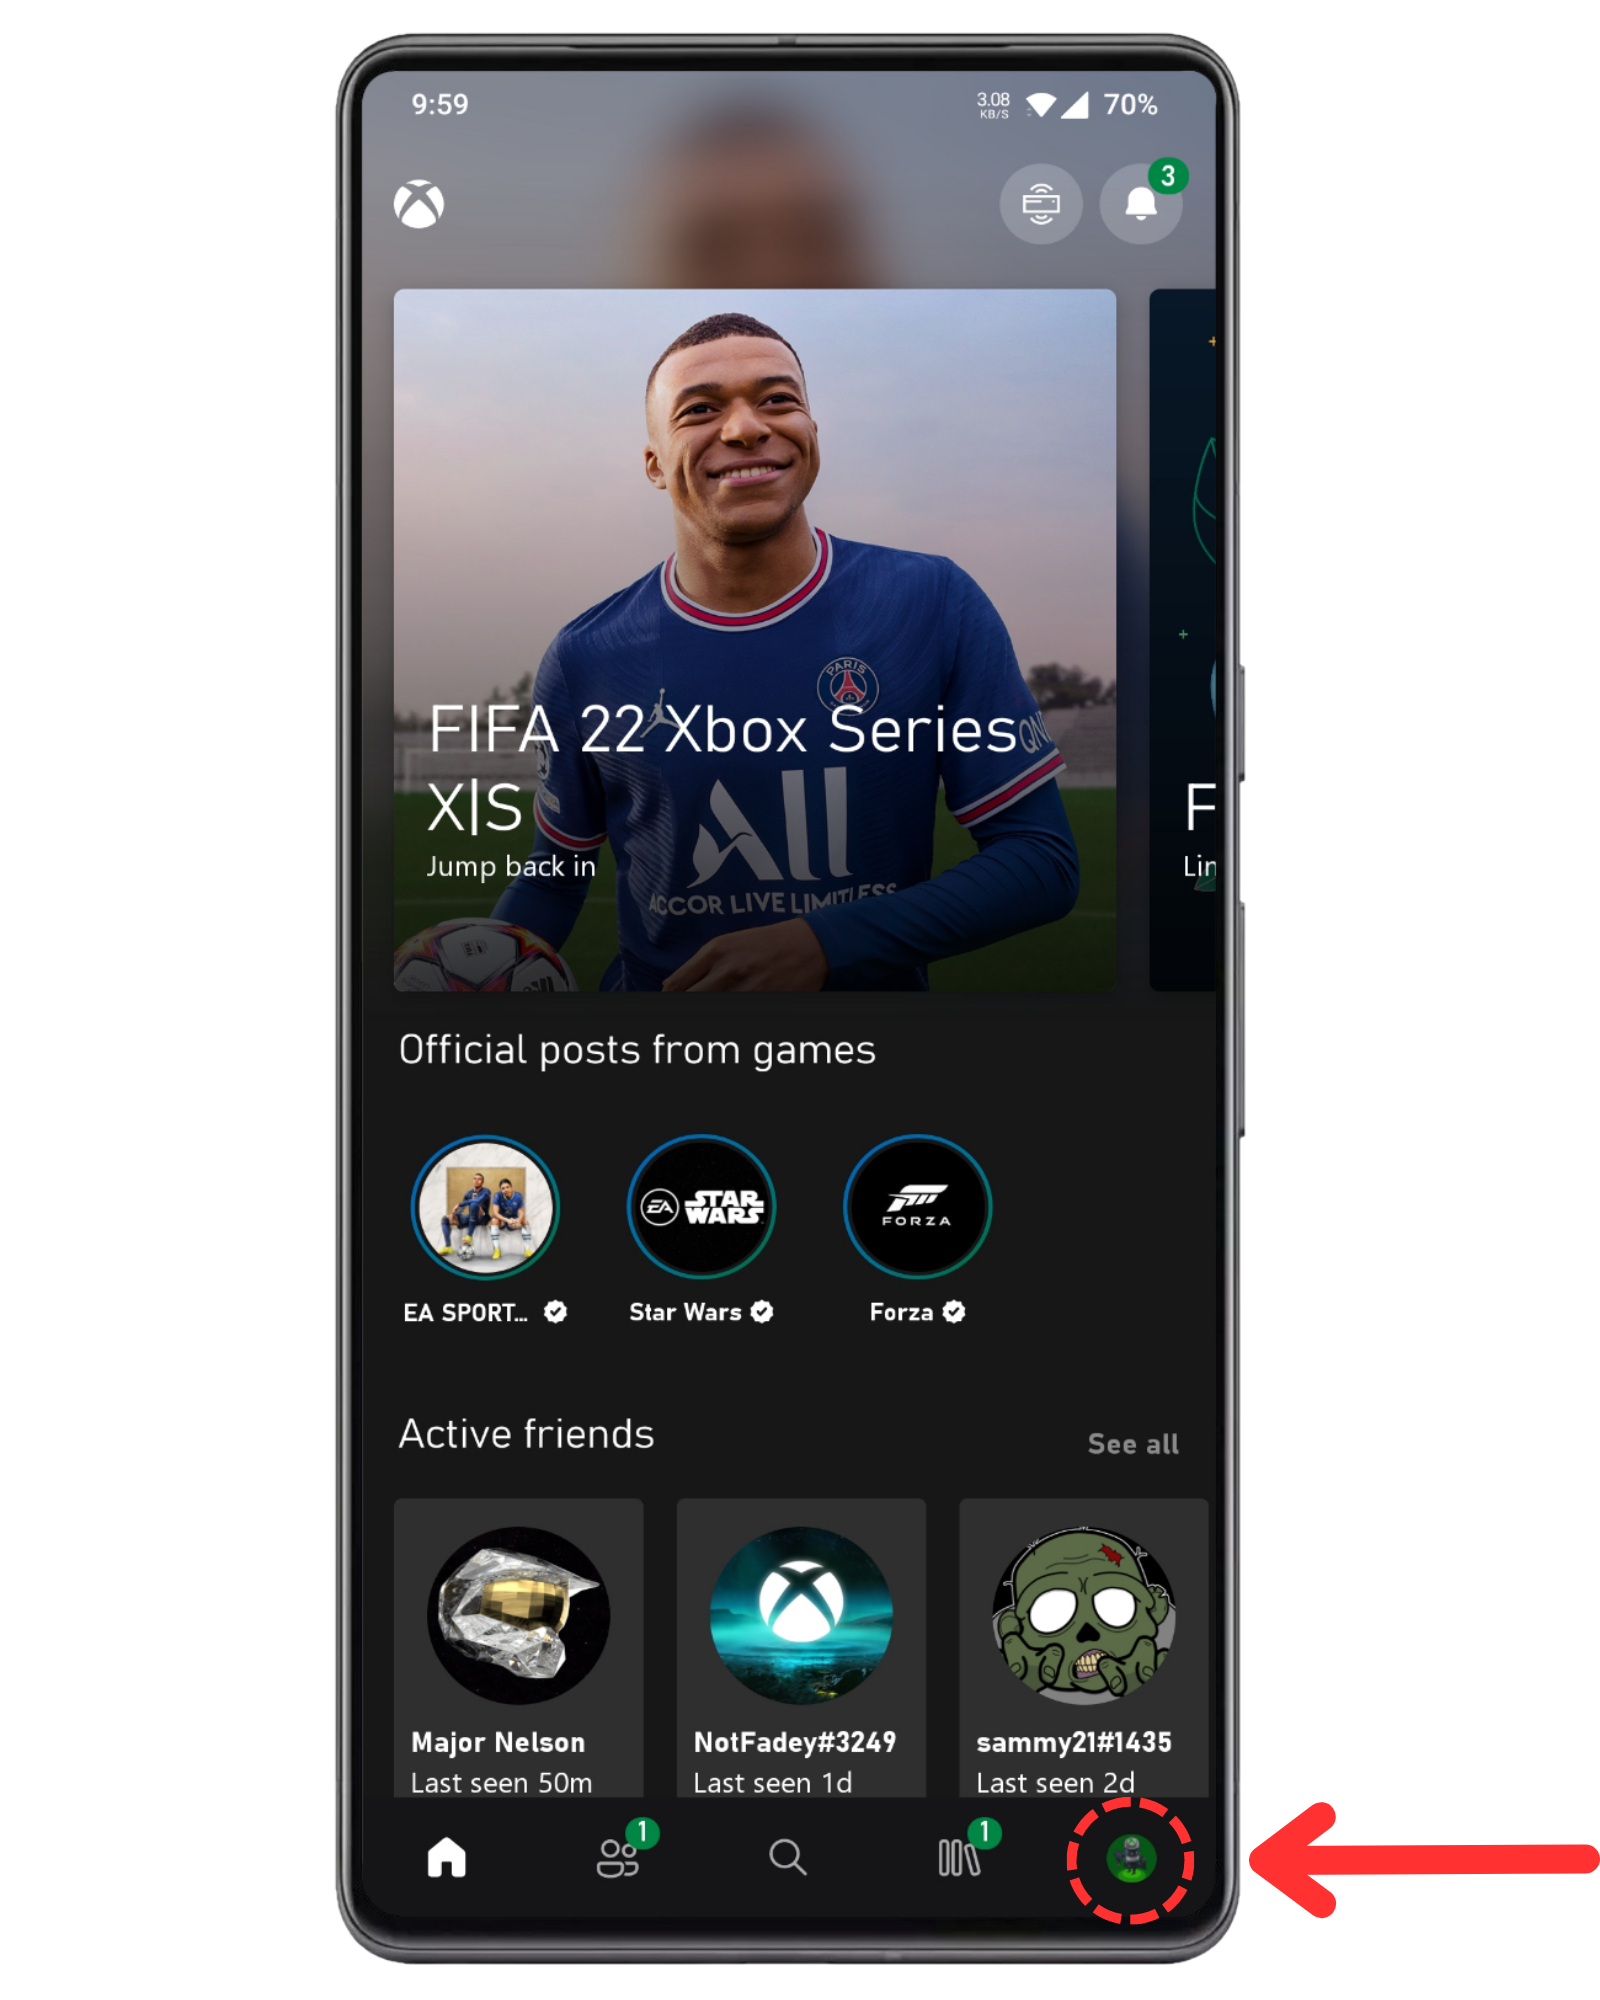
Step 3: Tap on your gamerpic icon
Once logged in, you’ll be greeted onto the homepage of the app. It can look a little cluttered for new users, but it’s easy enough to navigate. Ignore everything for now and simply tap your gamerpic icon located at the bottom-right corner of the page.
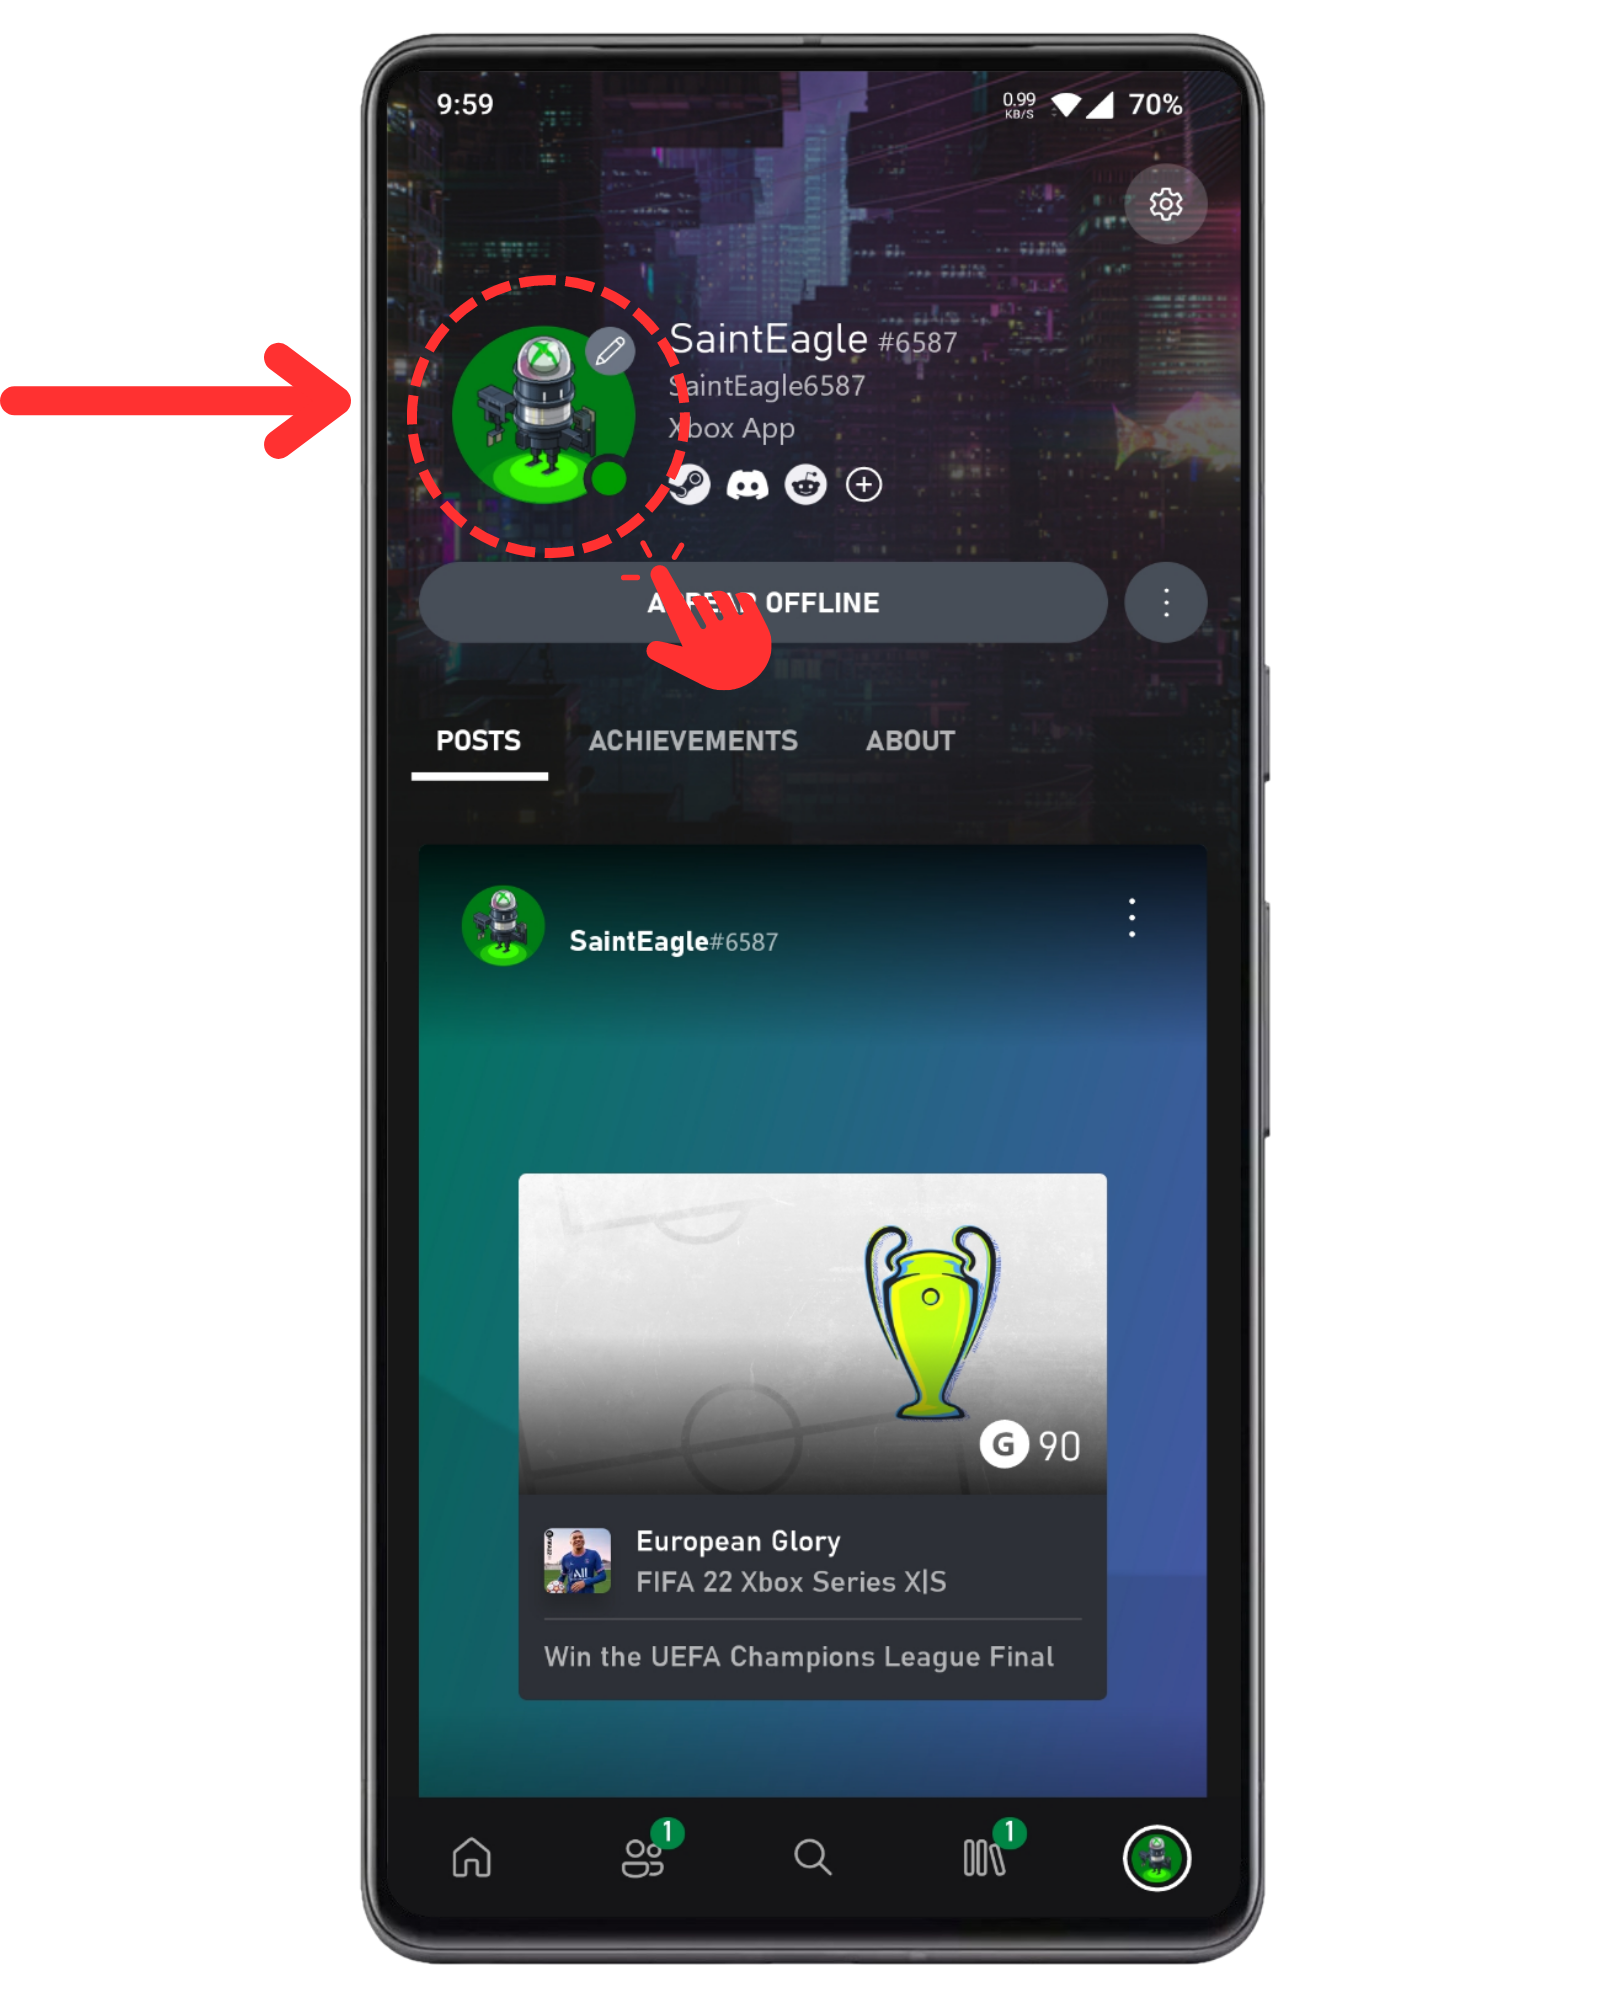
Step 4: Tap your gamerpic one more time
You will now be seeing the profile tab with your gamerpic at the top, and a small edit icon next to it. Tap your gamerpic to open the selector.
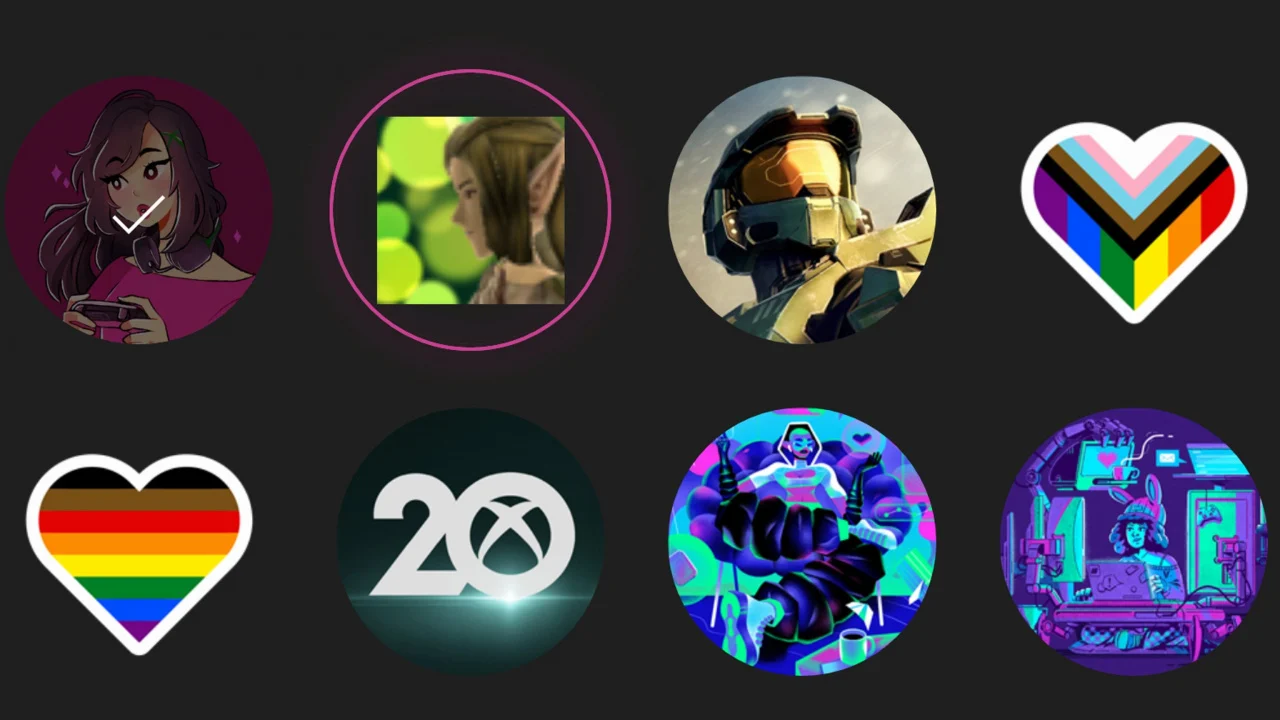
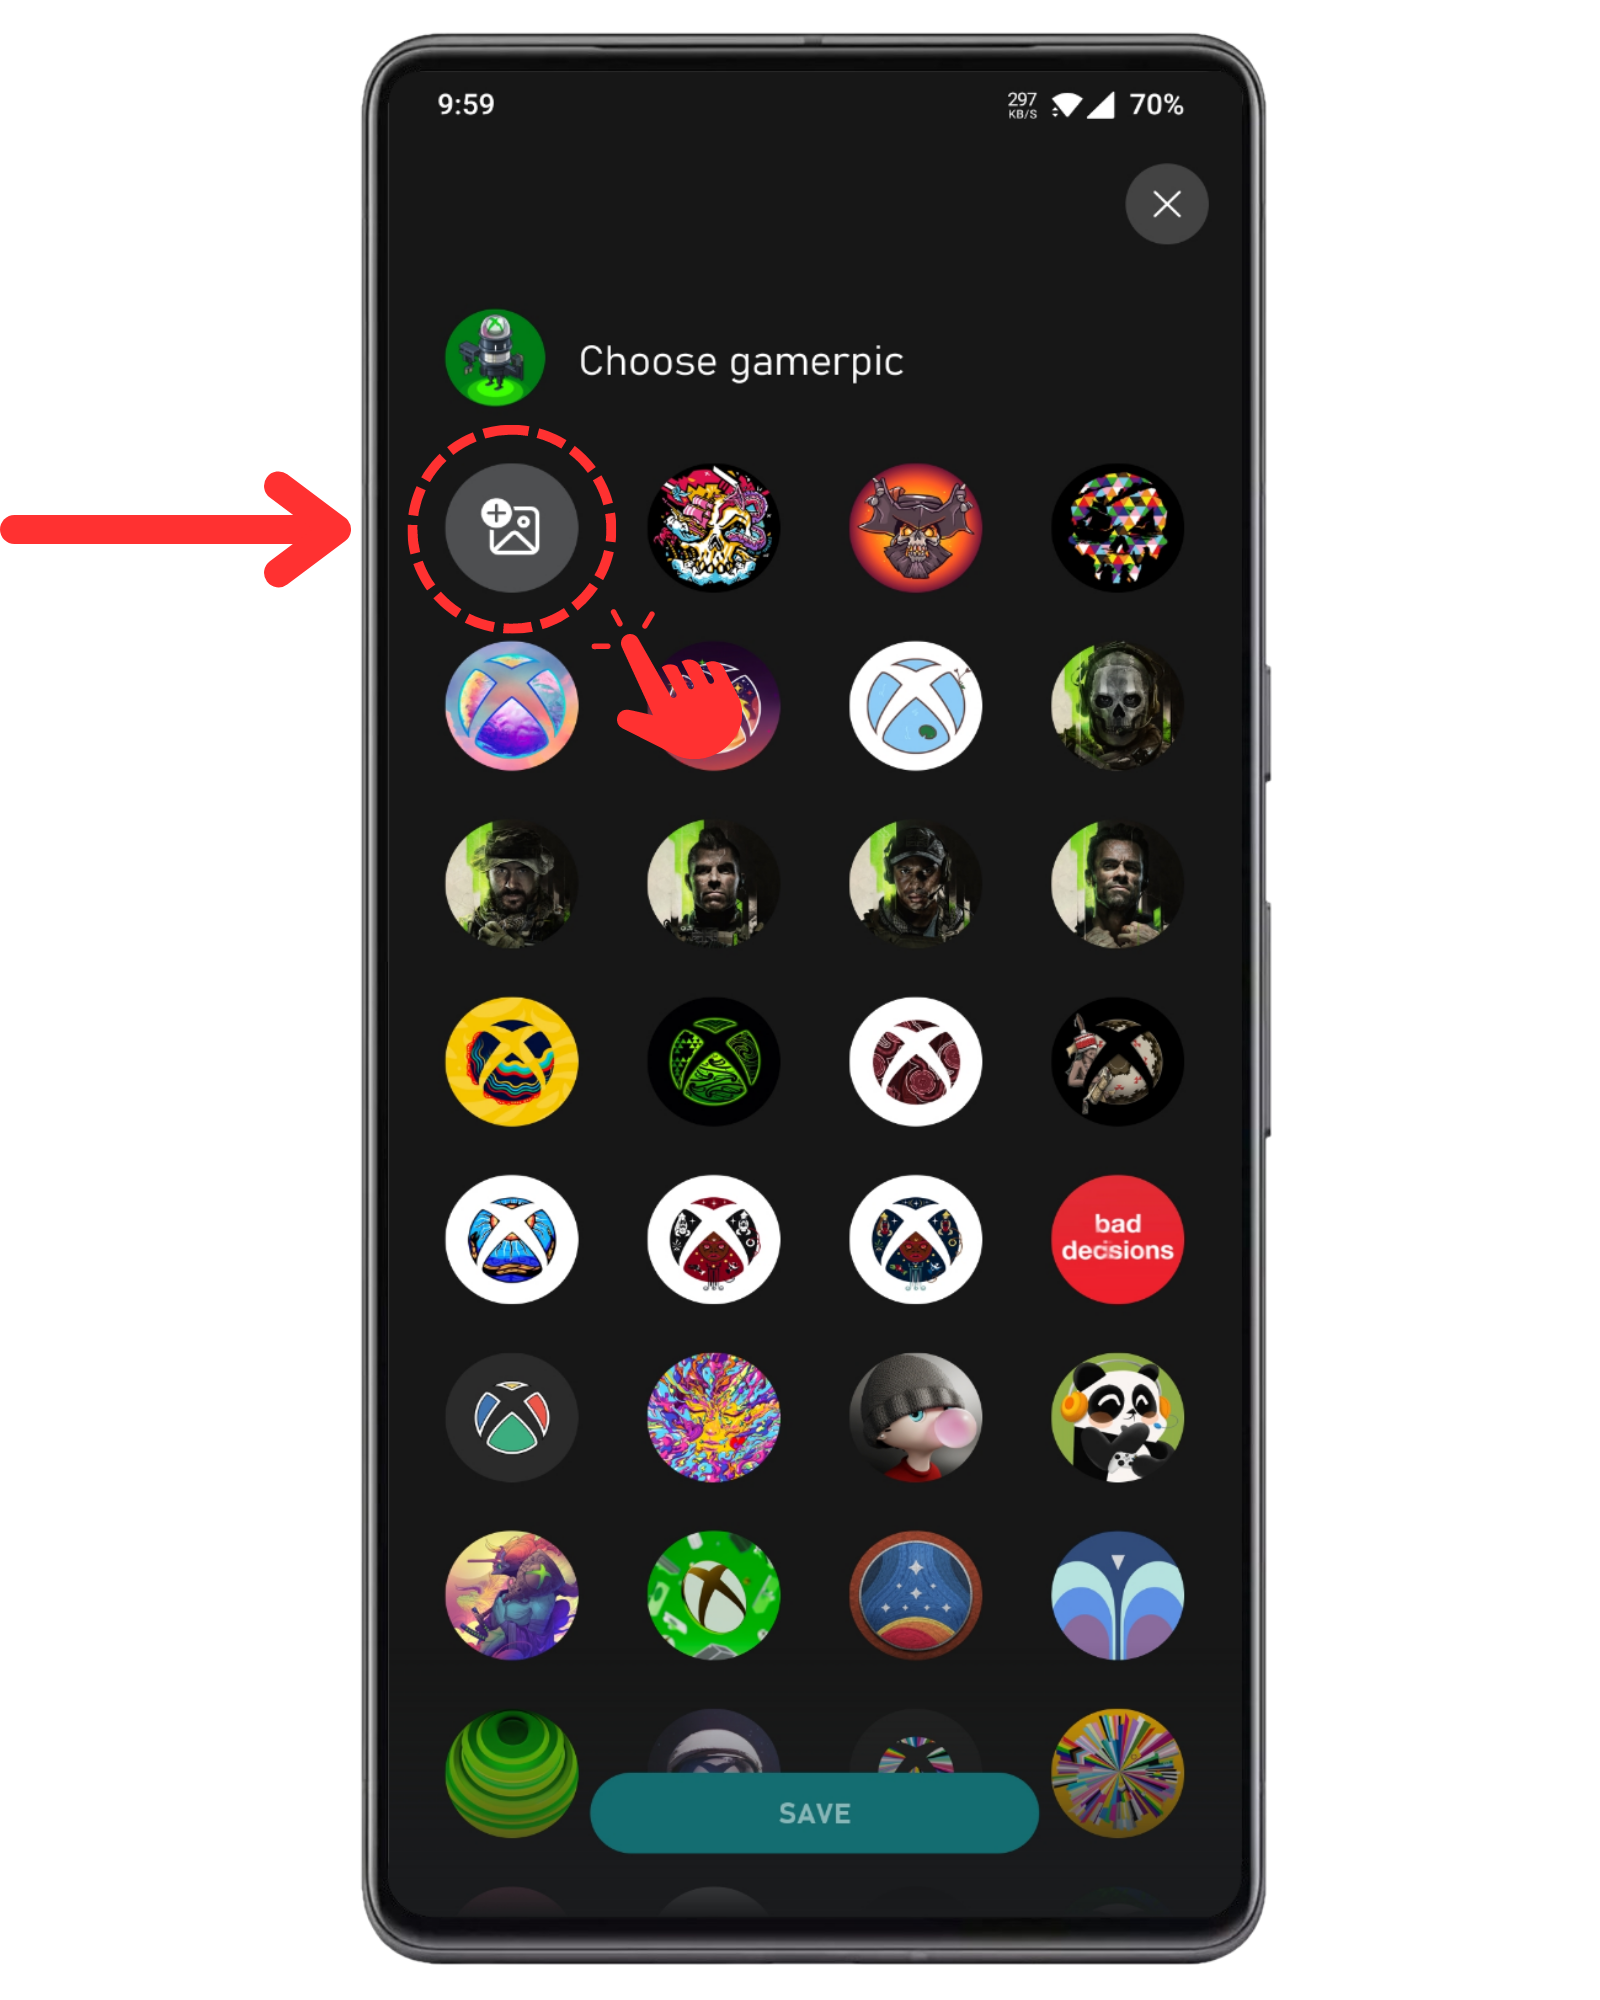
Step 5: Tap the first option for uploading custom pictures
On this page, you will see a ton of preloaded gamerpics ranging from popular mascots to diverse renditions on the Xbox logo. But you want to look past all the enticing options and tap the first icon in grey color, which is for selecting custom pictures.
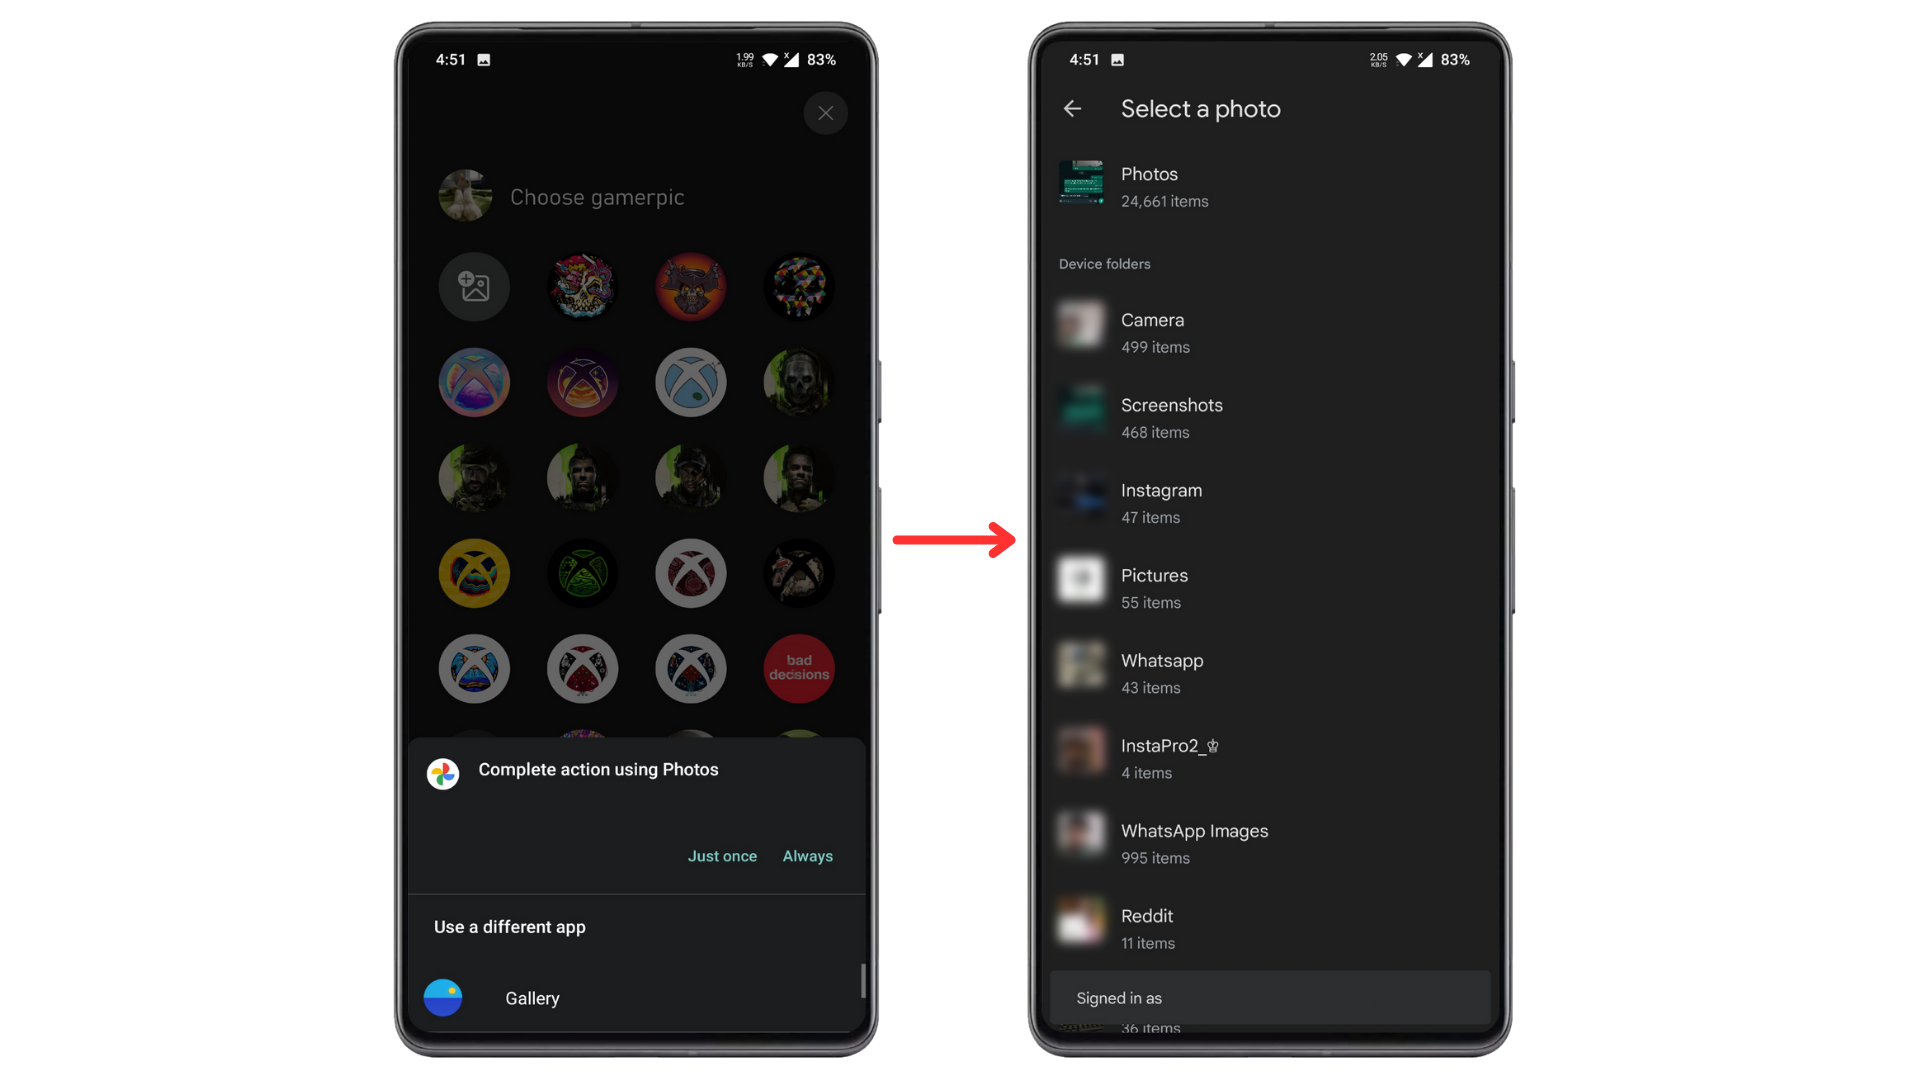
Step 6: Select the picture of your choice
If this is your first time opening this menu, or if you have multiple apps on your device for images then you might see a pop-up asking to select a preferred app. In the screenshot below, we chose Google Photos, but you can select anything else, should you need to.
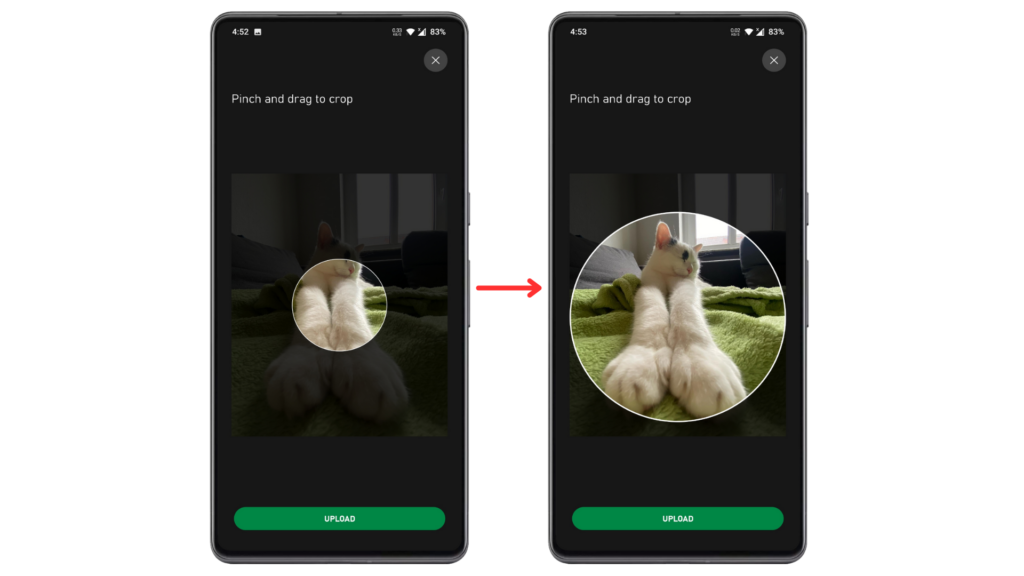
Step 7: Resize the picture
After selecting a picture, you will be asked to crop it. Make sure you get it just right so that your gamerpic looks good when it’s all zoomed out and only visible in the corner of a screen.
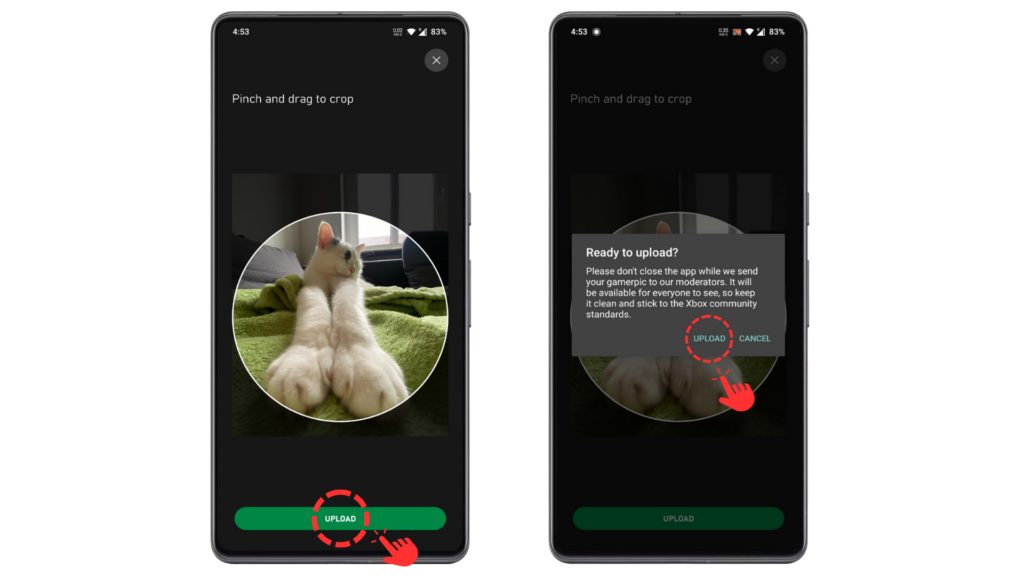
Step 8: Select “Upload”
Once you’re satisfied with the crop, just hit the big Upload button. When asked for confirmation, select Upload once again. Xbox will now send your gamerpic to be reviewed by moderators who will determine whether it’s appropriate. This process is quick and usually takes only an hour or two if you’re changing your gamerpic for the first time, otherwise it changes instantly.
Completion: Now, just wait for your new gamerpic to be approved
Congratulations! If the image you chose is SFW and deemed appropriate by Xbox’s auto-moderation system then you should see your new gamerpic within a few seconds on your profile. You won’t receive any confirmation via push notifications or email, so just wait and check to ensure it’s updated.
We’ve attached an unedited video of us updating the gamerpic with a custom option below. You can see just how fast it happens in real-time if your picture is completely harmless.
Setting up a custom gamerpic the traditional way
If you don’t want to use the Xbox app for setting a custom gamerpic and hate convenience altogether, don’t worry as the traditional method is still perfectly fine. You do pretty much the exact same thing, except directly on the console instead of a phone.
Of course, the one extra prerequisite is that you need a USB drive with the image you want as your custom gamerpic locked and loaded. We tried two different USBs with different file systems, FAT32 and NTFS, and both worked just fine. Once the drive is ready, follow these steps:
- Plug the USB drive into your Xbox.
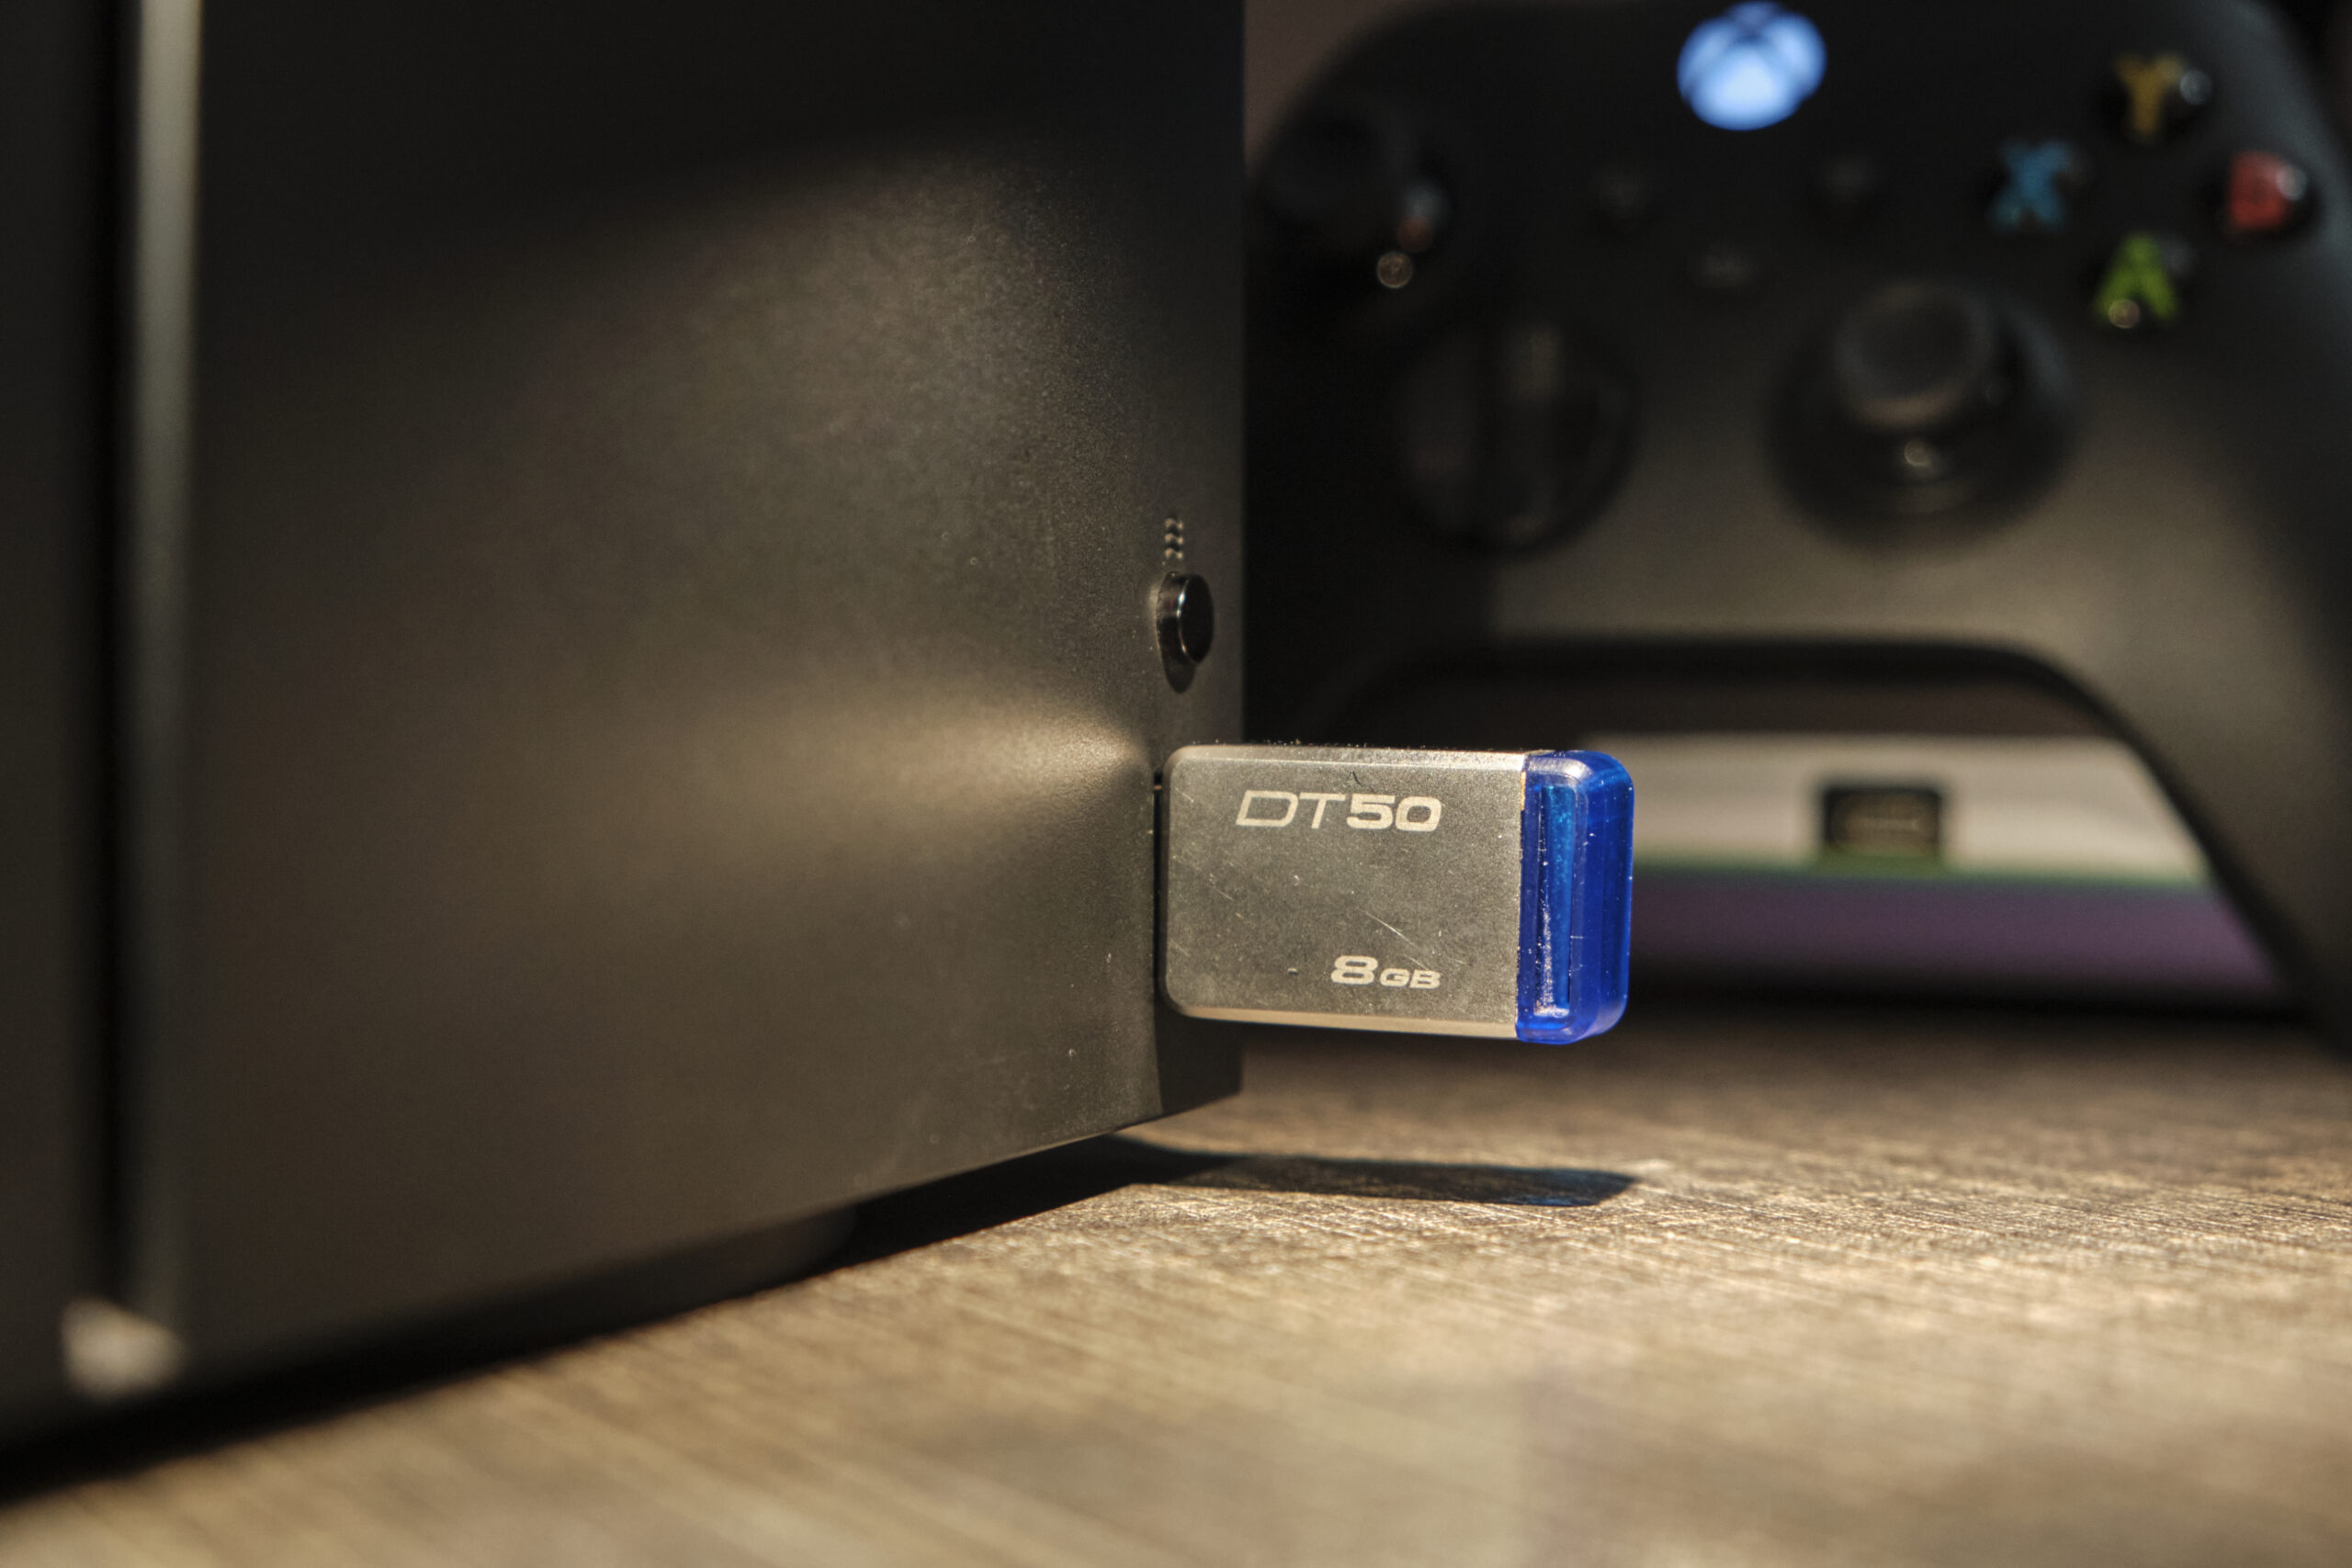
A USB drive plugged into an Xbox Series X - Wait for it to get recognized by the console, you should see a notification pop-up on your screen.
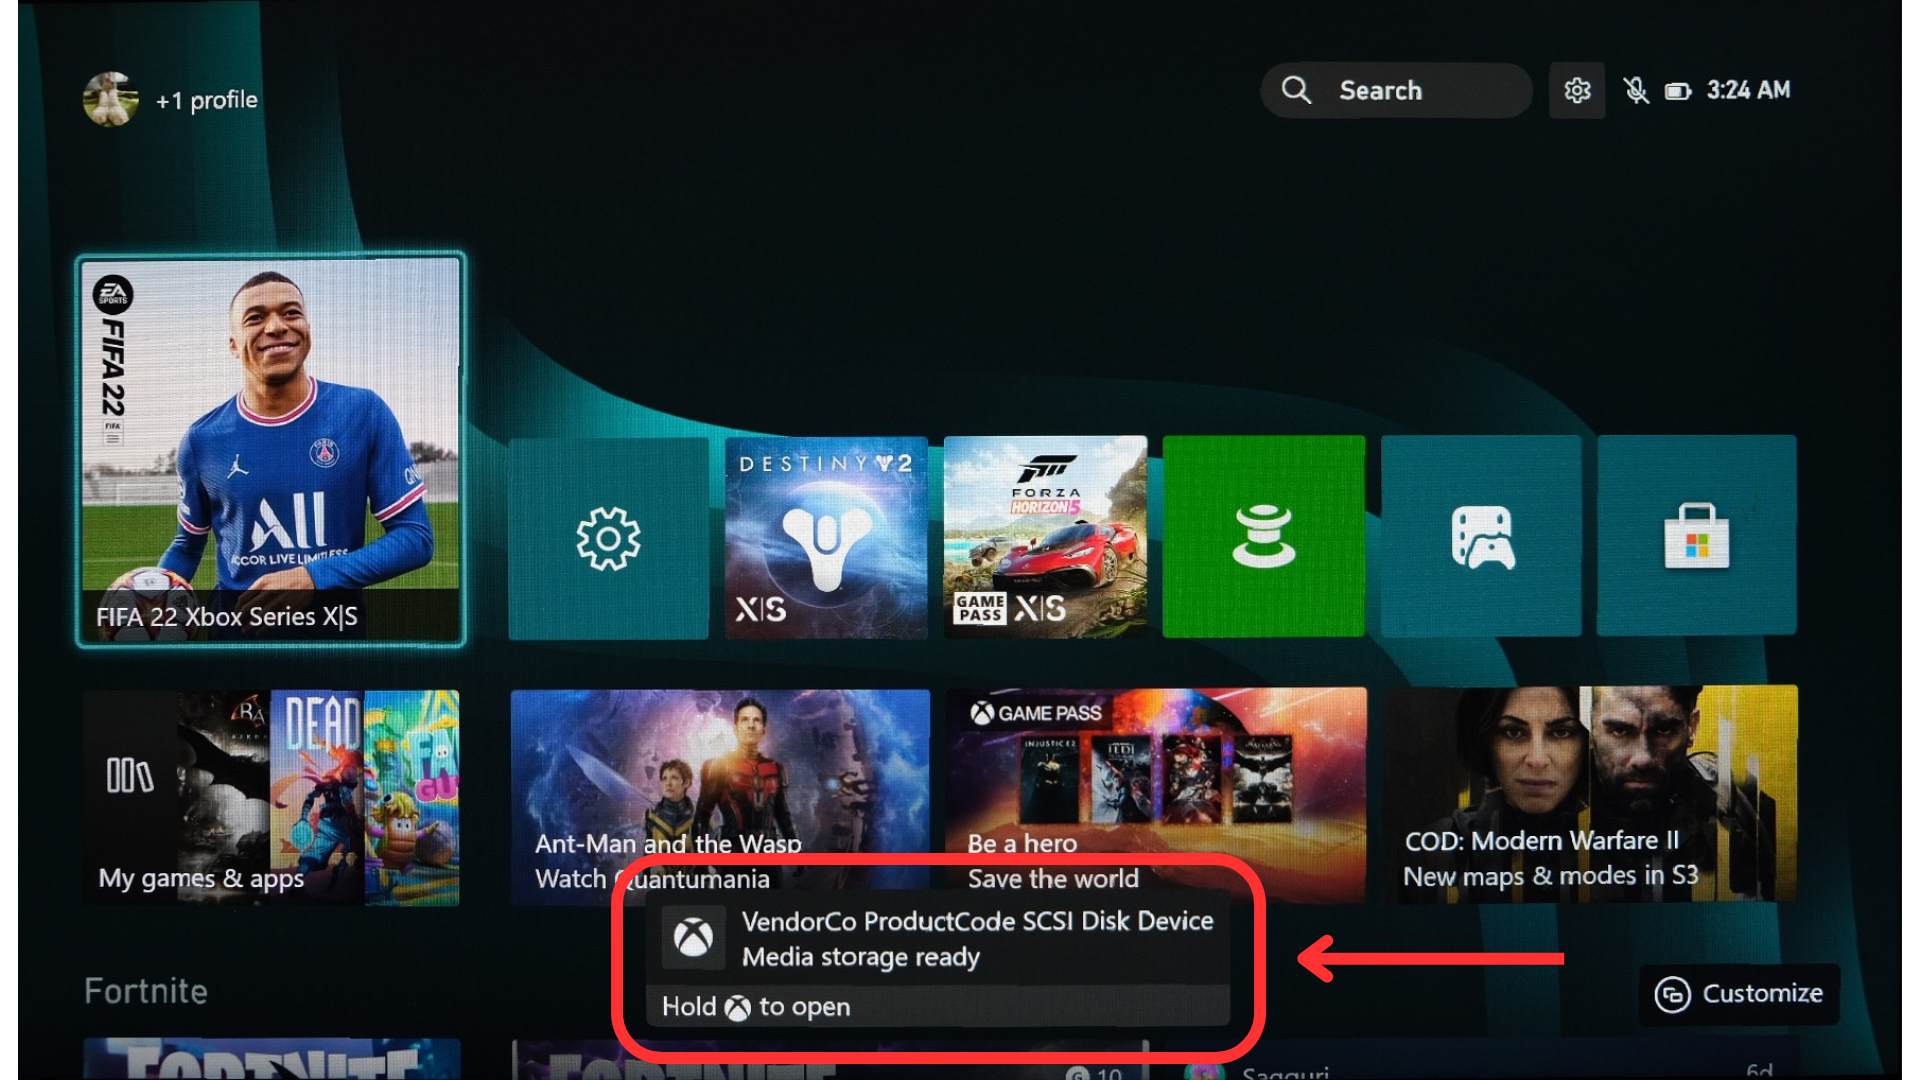
Xbox notifying you that the USB has been detected - Now, go to your profile by navigating to your gamerpic icon on the homescreen.
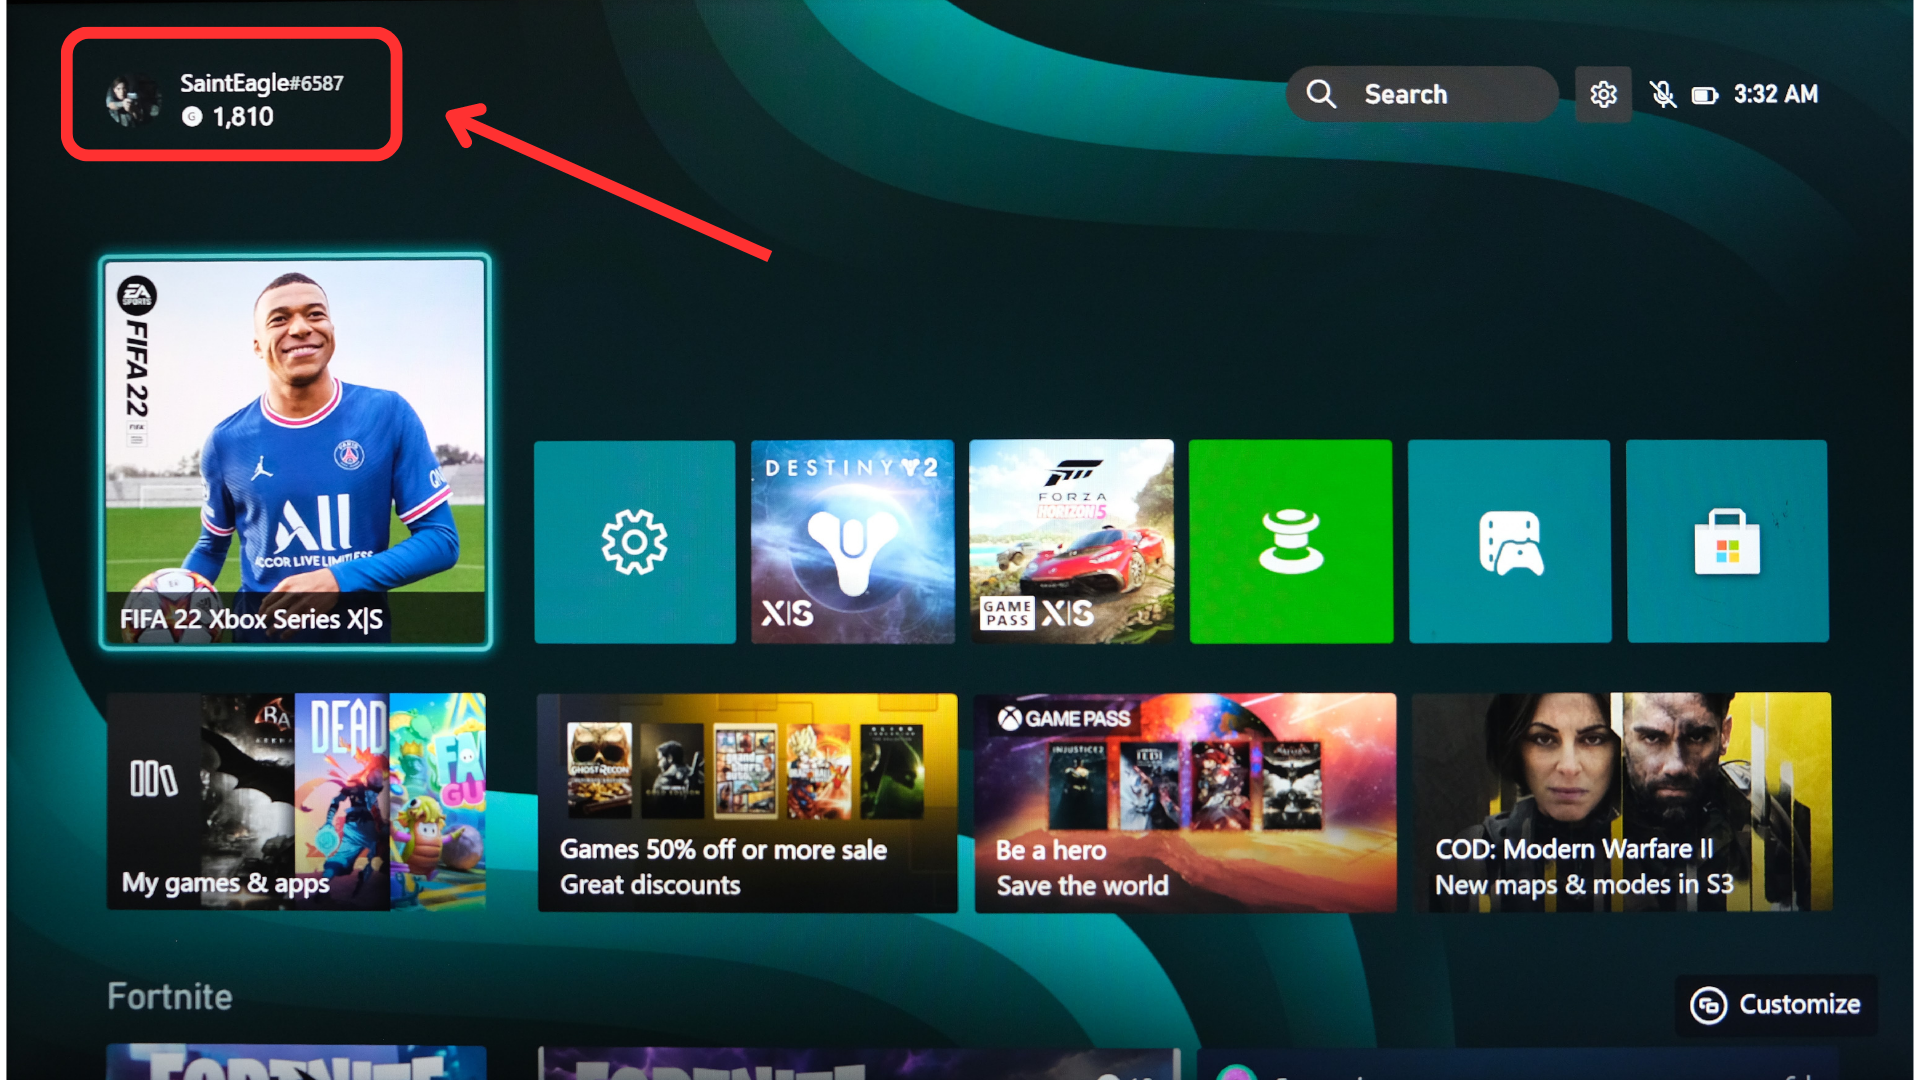
Use your controller to select your profile - Select “My profile” and press A.
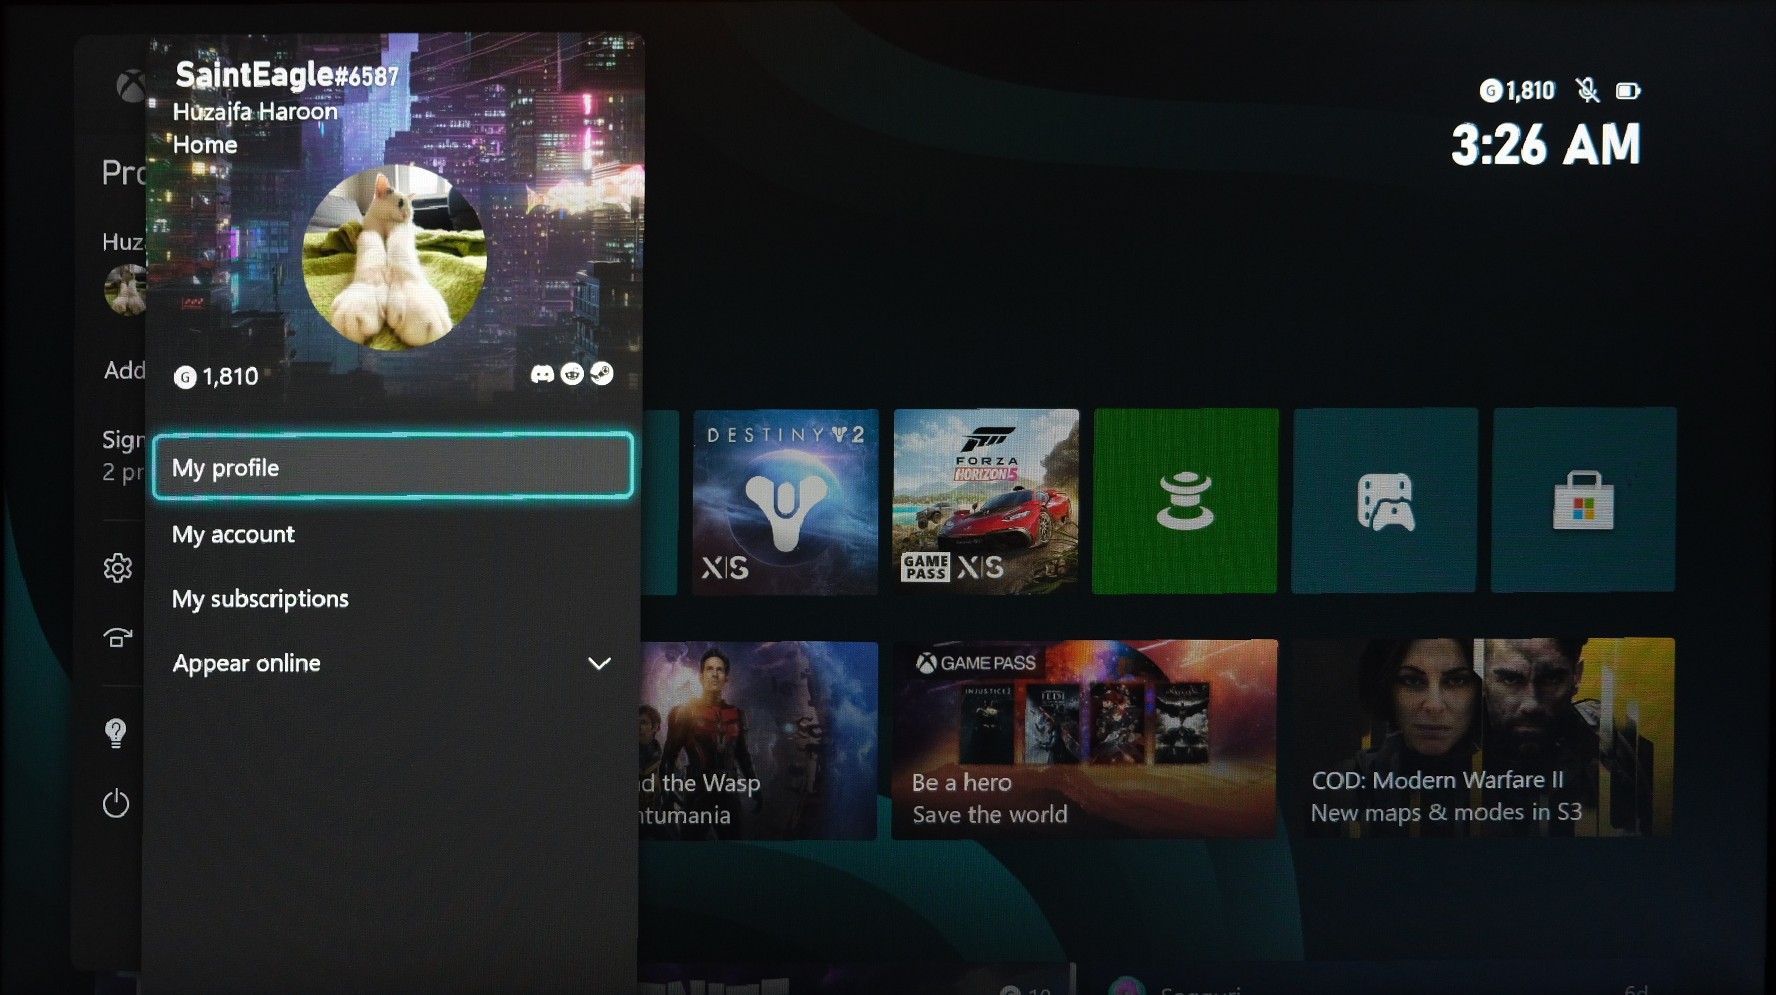
Select the option to open your profile - You will now see your profile open on the screen. Here, select the “Customize profile” option on the right.
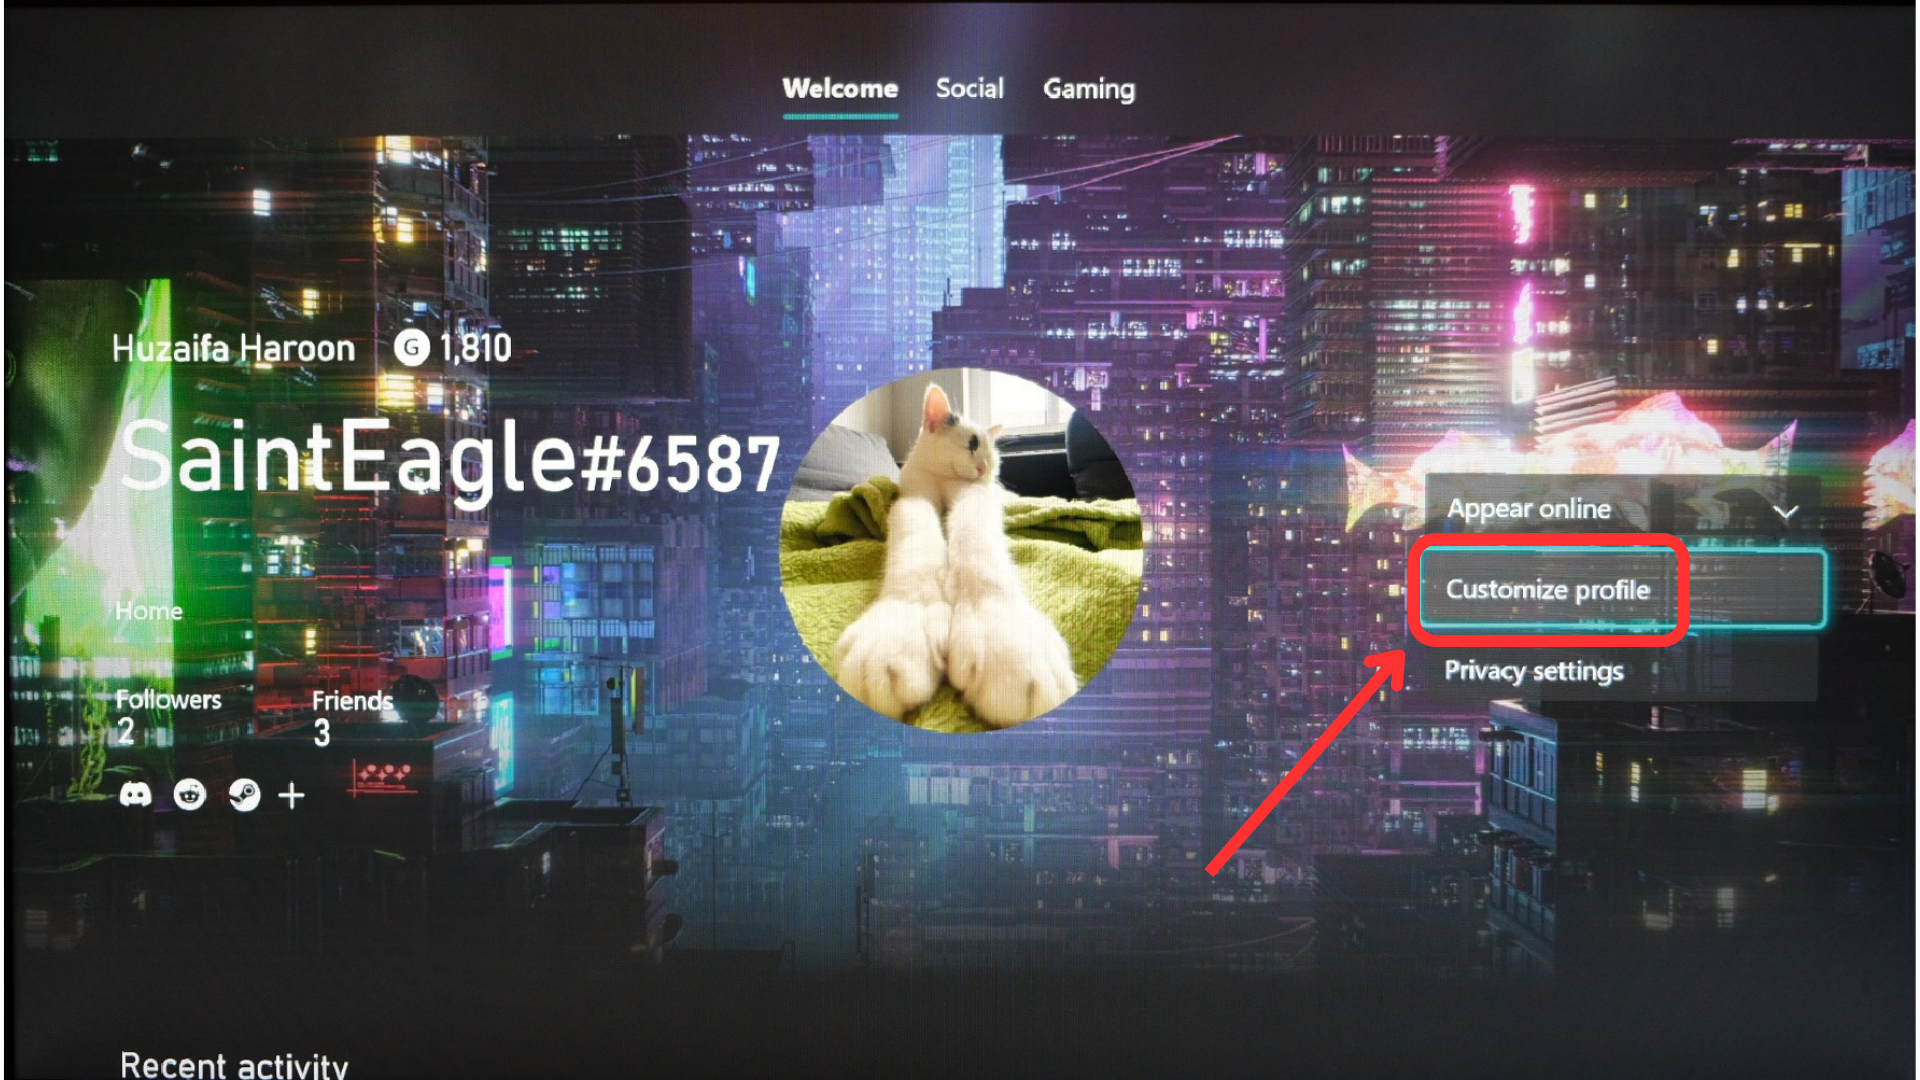
Select the option to customize your profile - Select “Change gamerpic“.

Select the option to change your gamerpic - Select the “Upload a custom image” option located at the top-right of the screen.
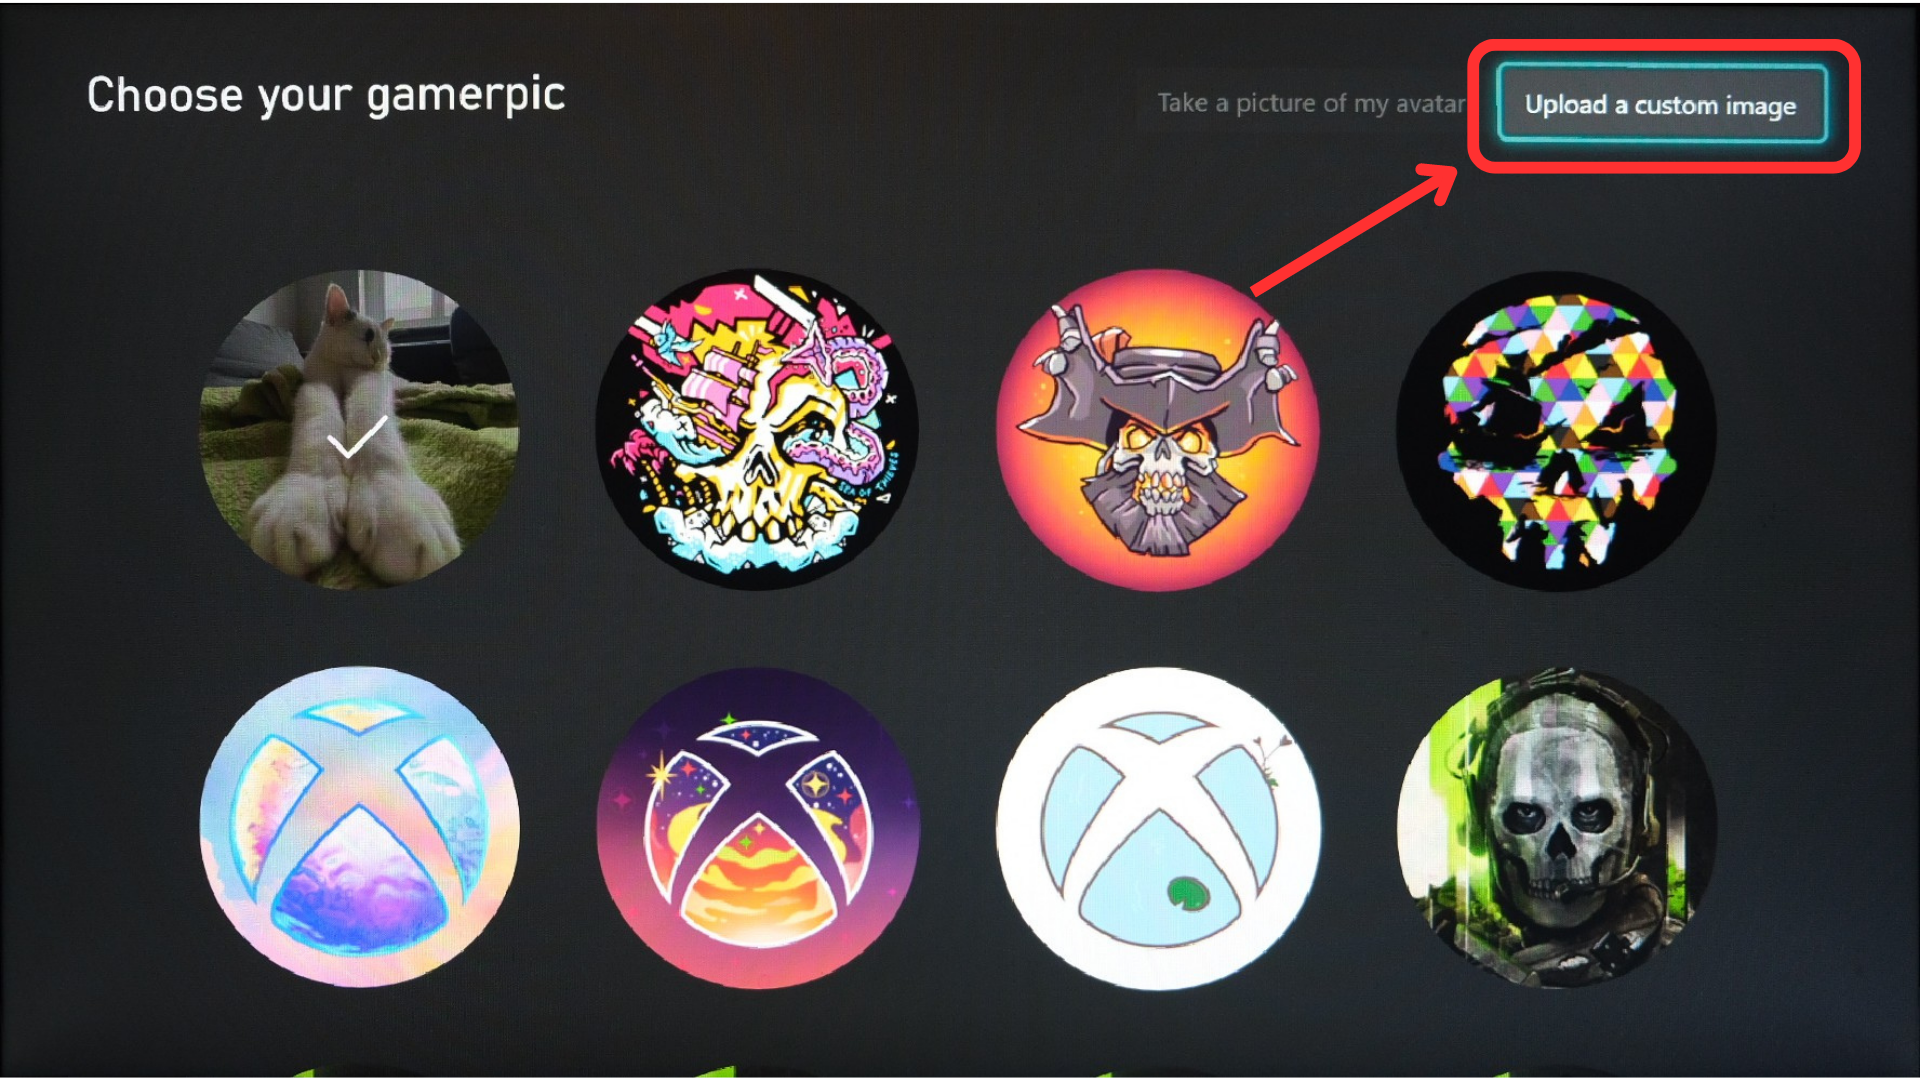
Chose to upload a custom image - At this point, a Windows-esque UI will pop up showing you a dumbed-down version of File Explorer.
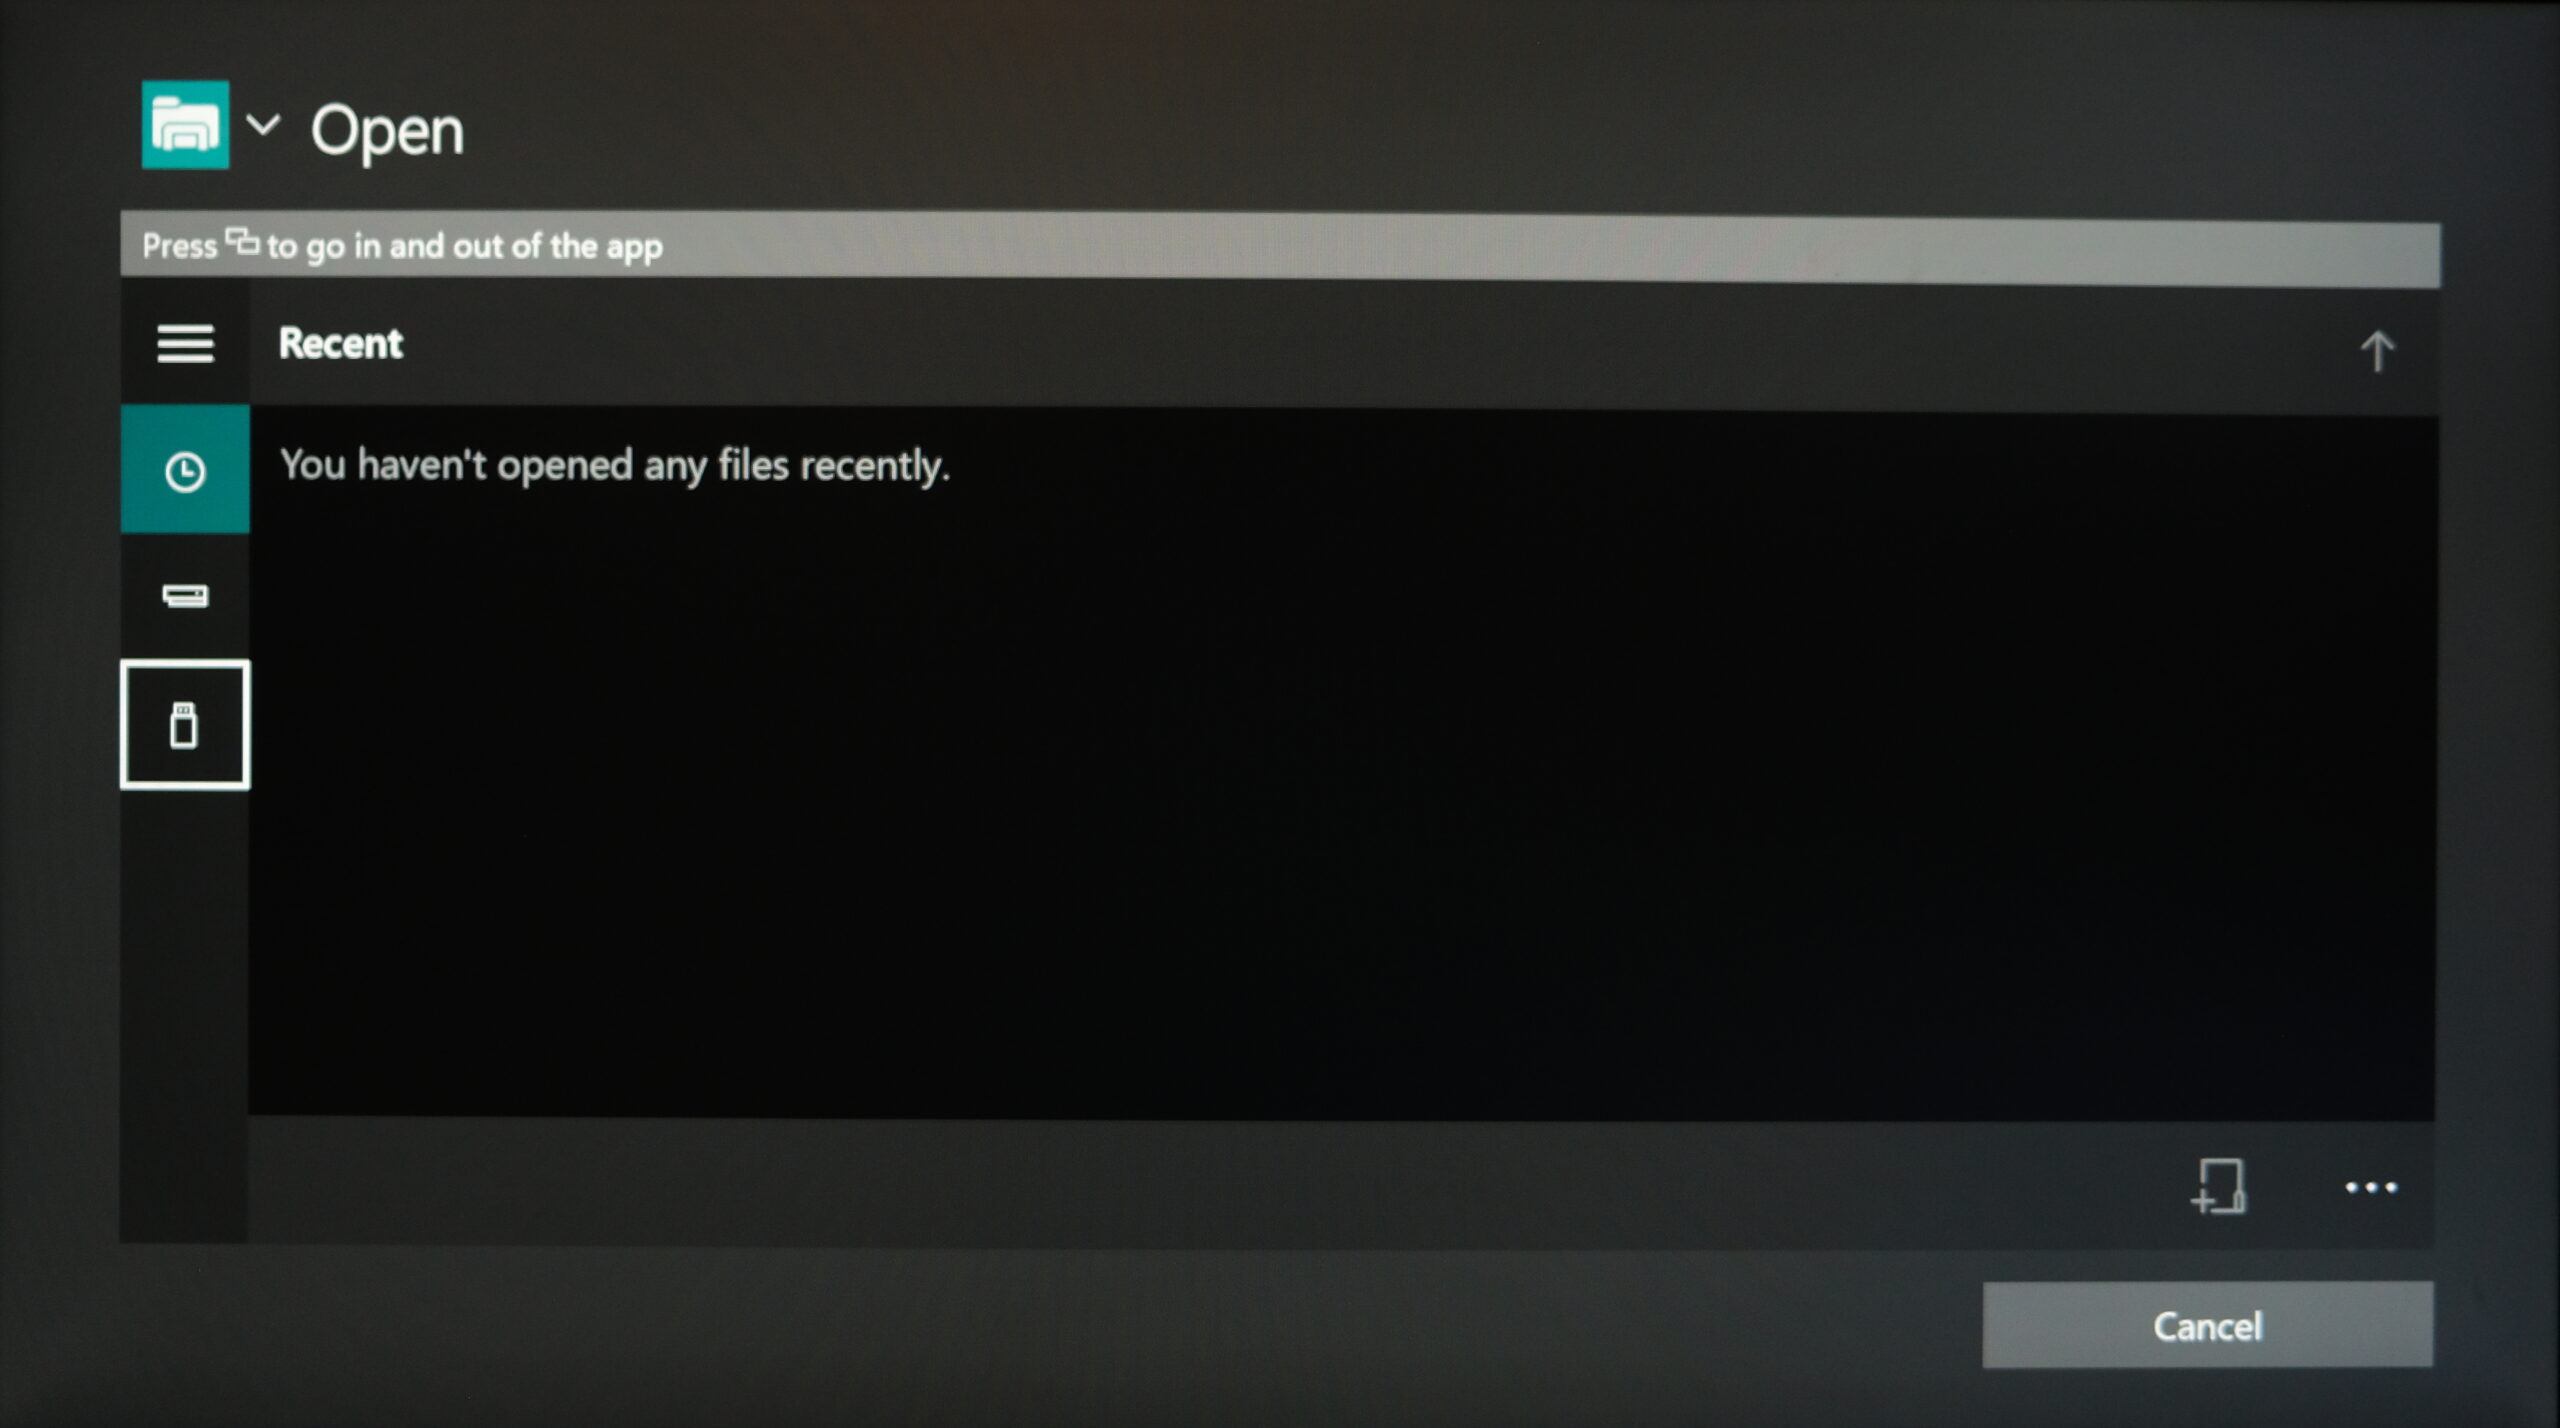
The UI for accessing pictures on an external drive for the custom gamerpic - Use your controller, or connect a keyboard/mouse, to navigate through the drive and find the picture you want to use as your gamerpic, and select it.
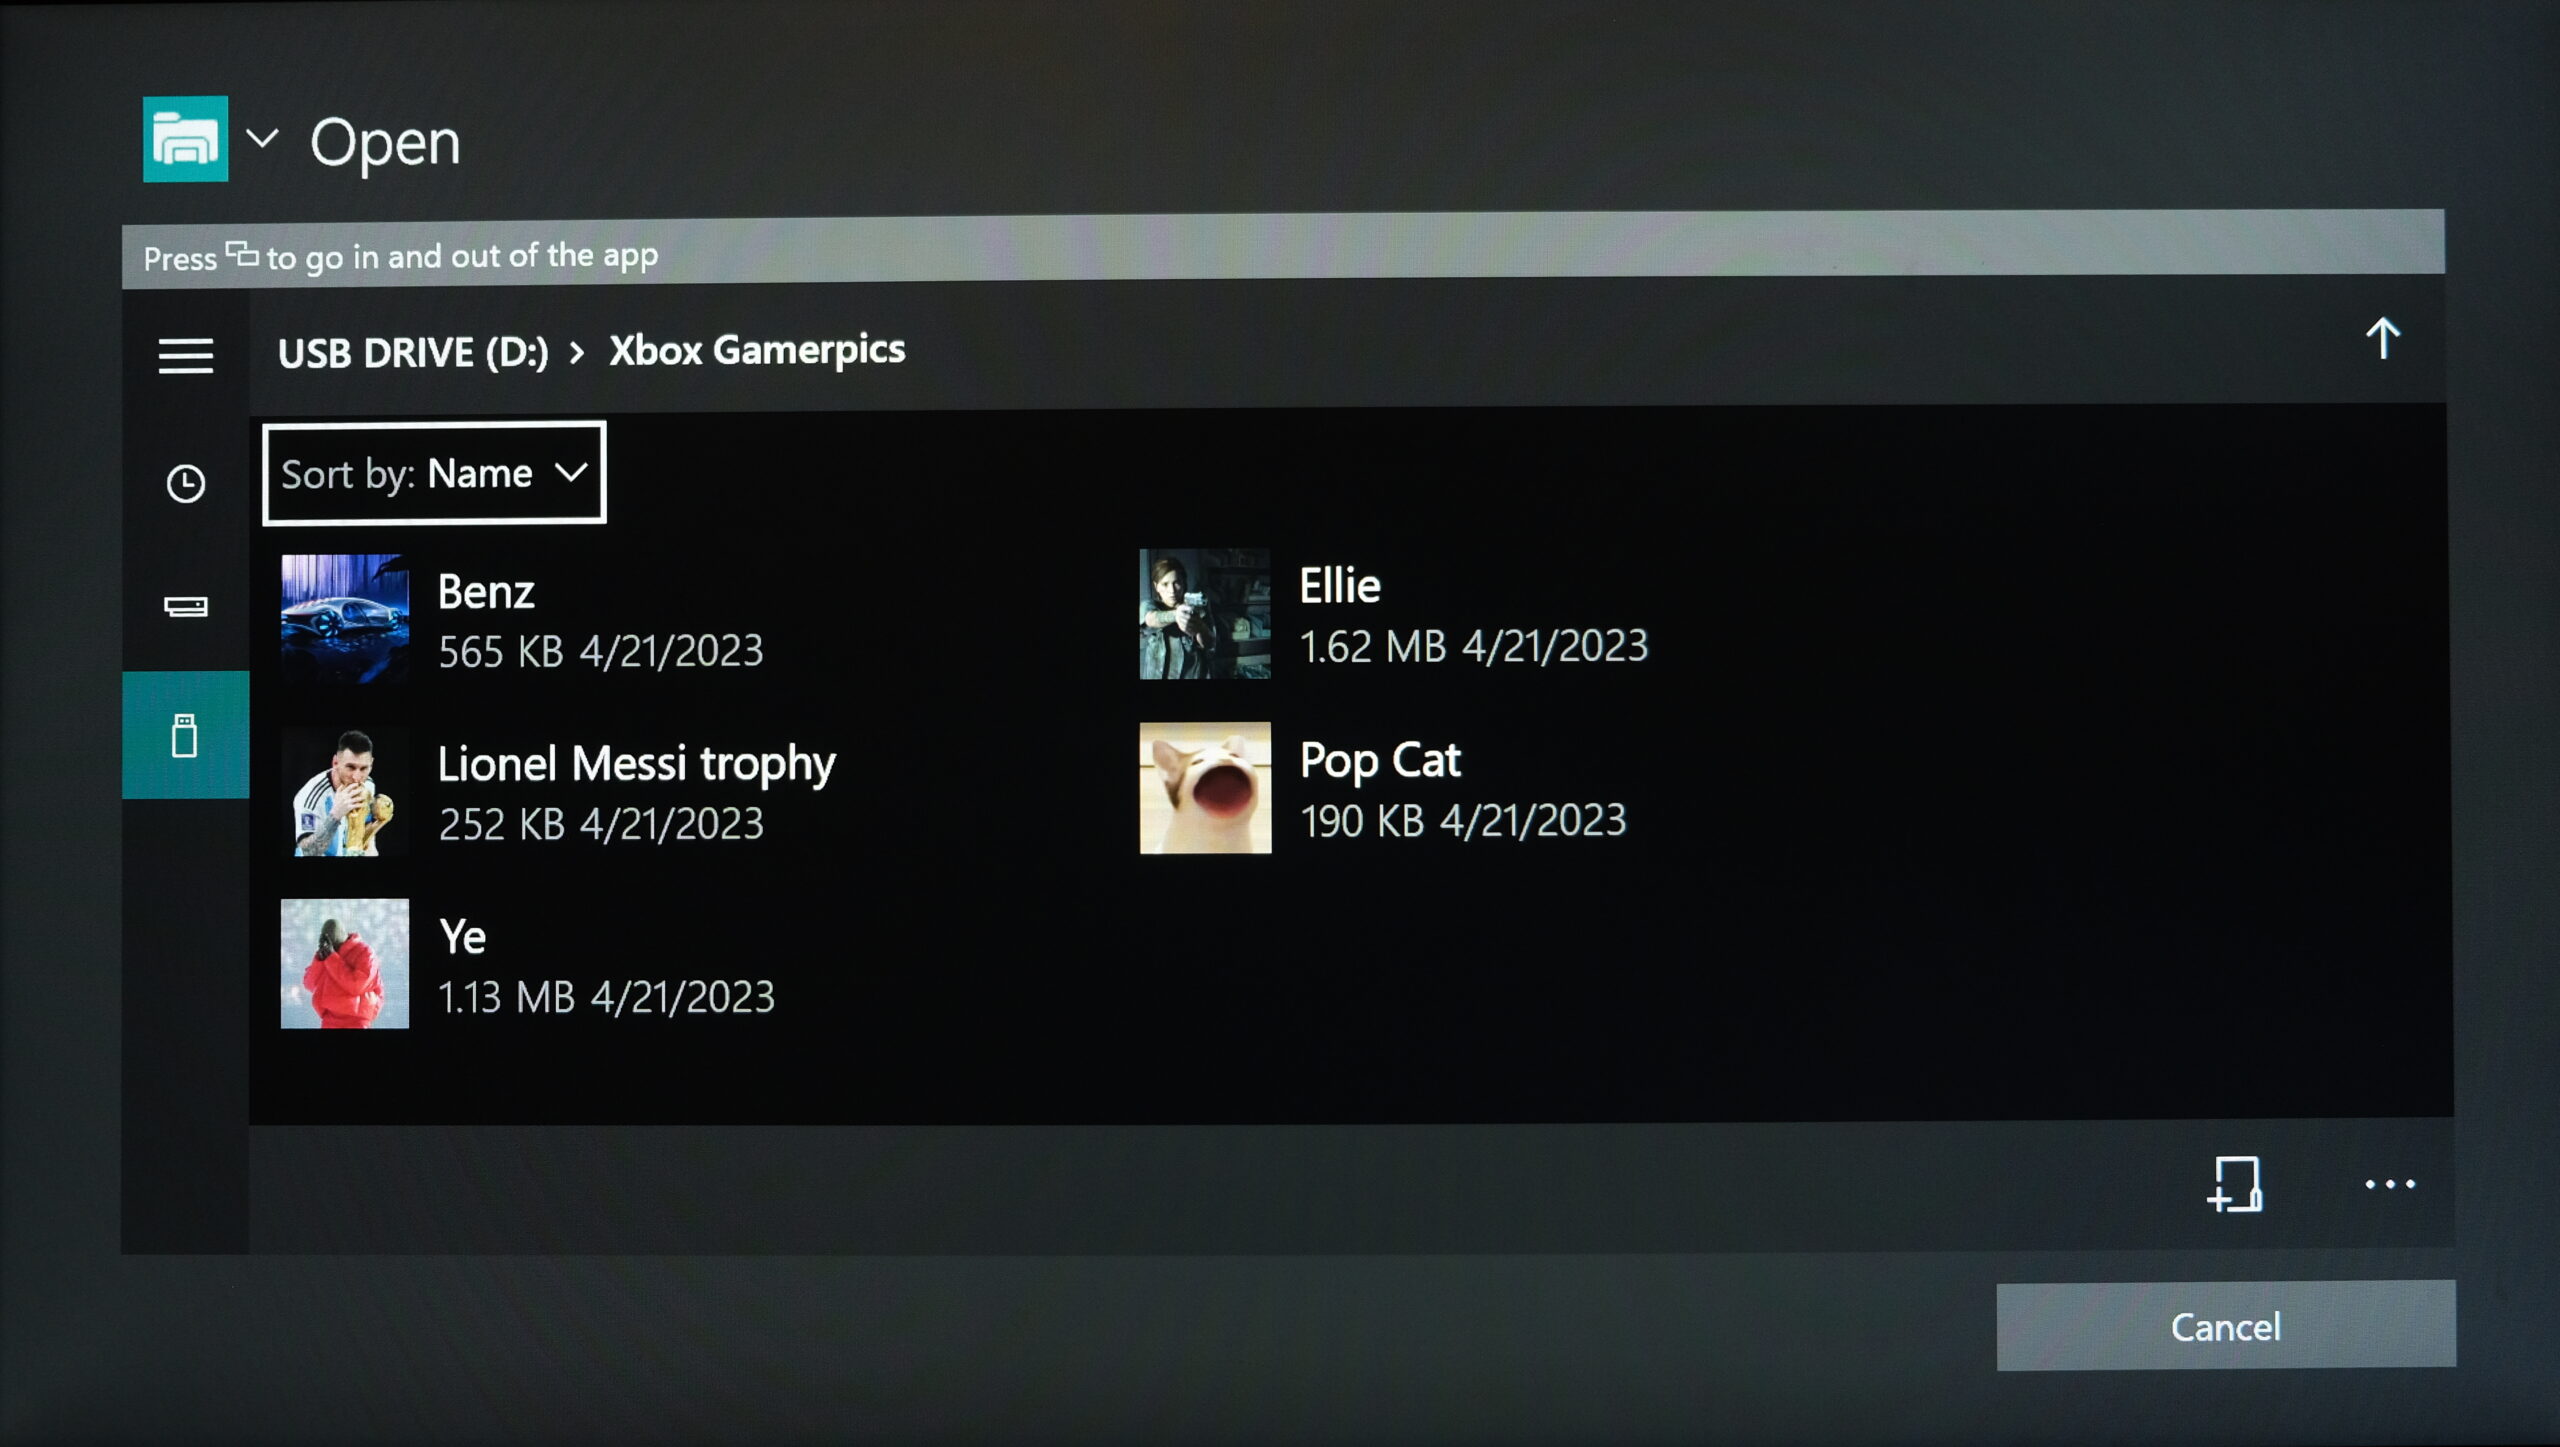
Navigate to the directory where your image of choice is stored and select it In the image above, we used one of the pictures from the “Xbox Gamerpics” folder located in the root directory of the USB. Notice how all of the pictures here are either JPEGs or PNGs, that’s because those are the only two file formats Xbox supports on console for custom gamerpics. - After selecting the image, crop it your heart’s content using the thumbsticks and the triggers.
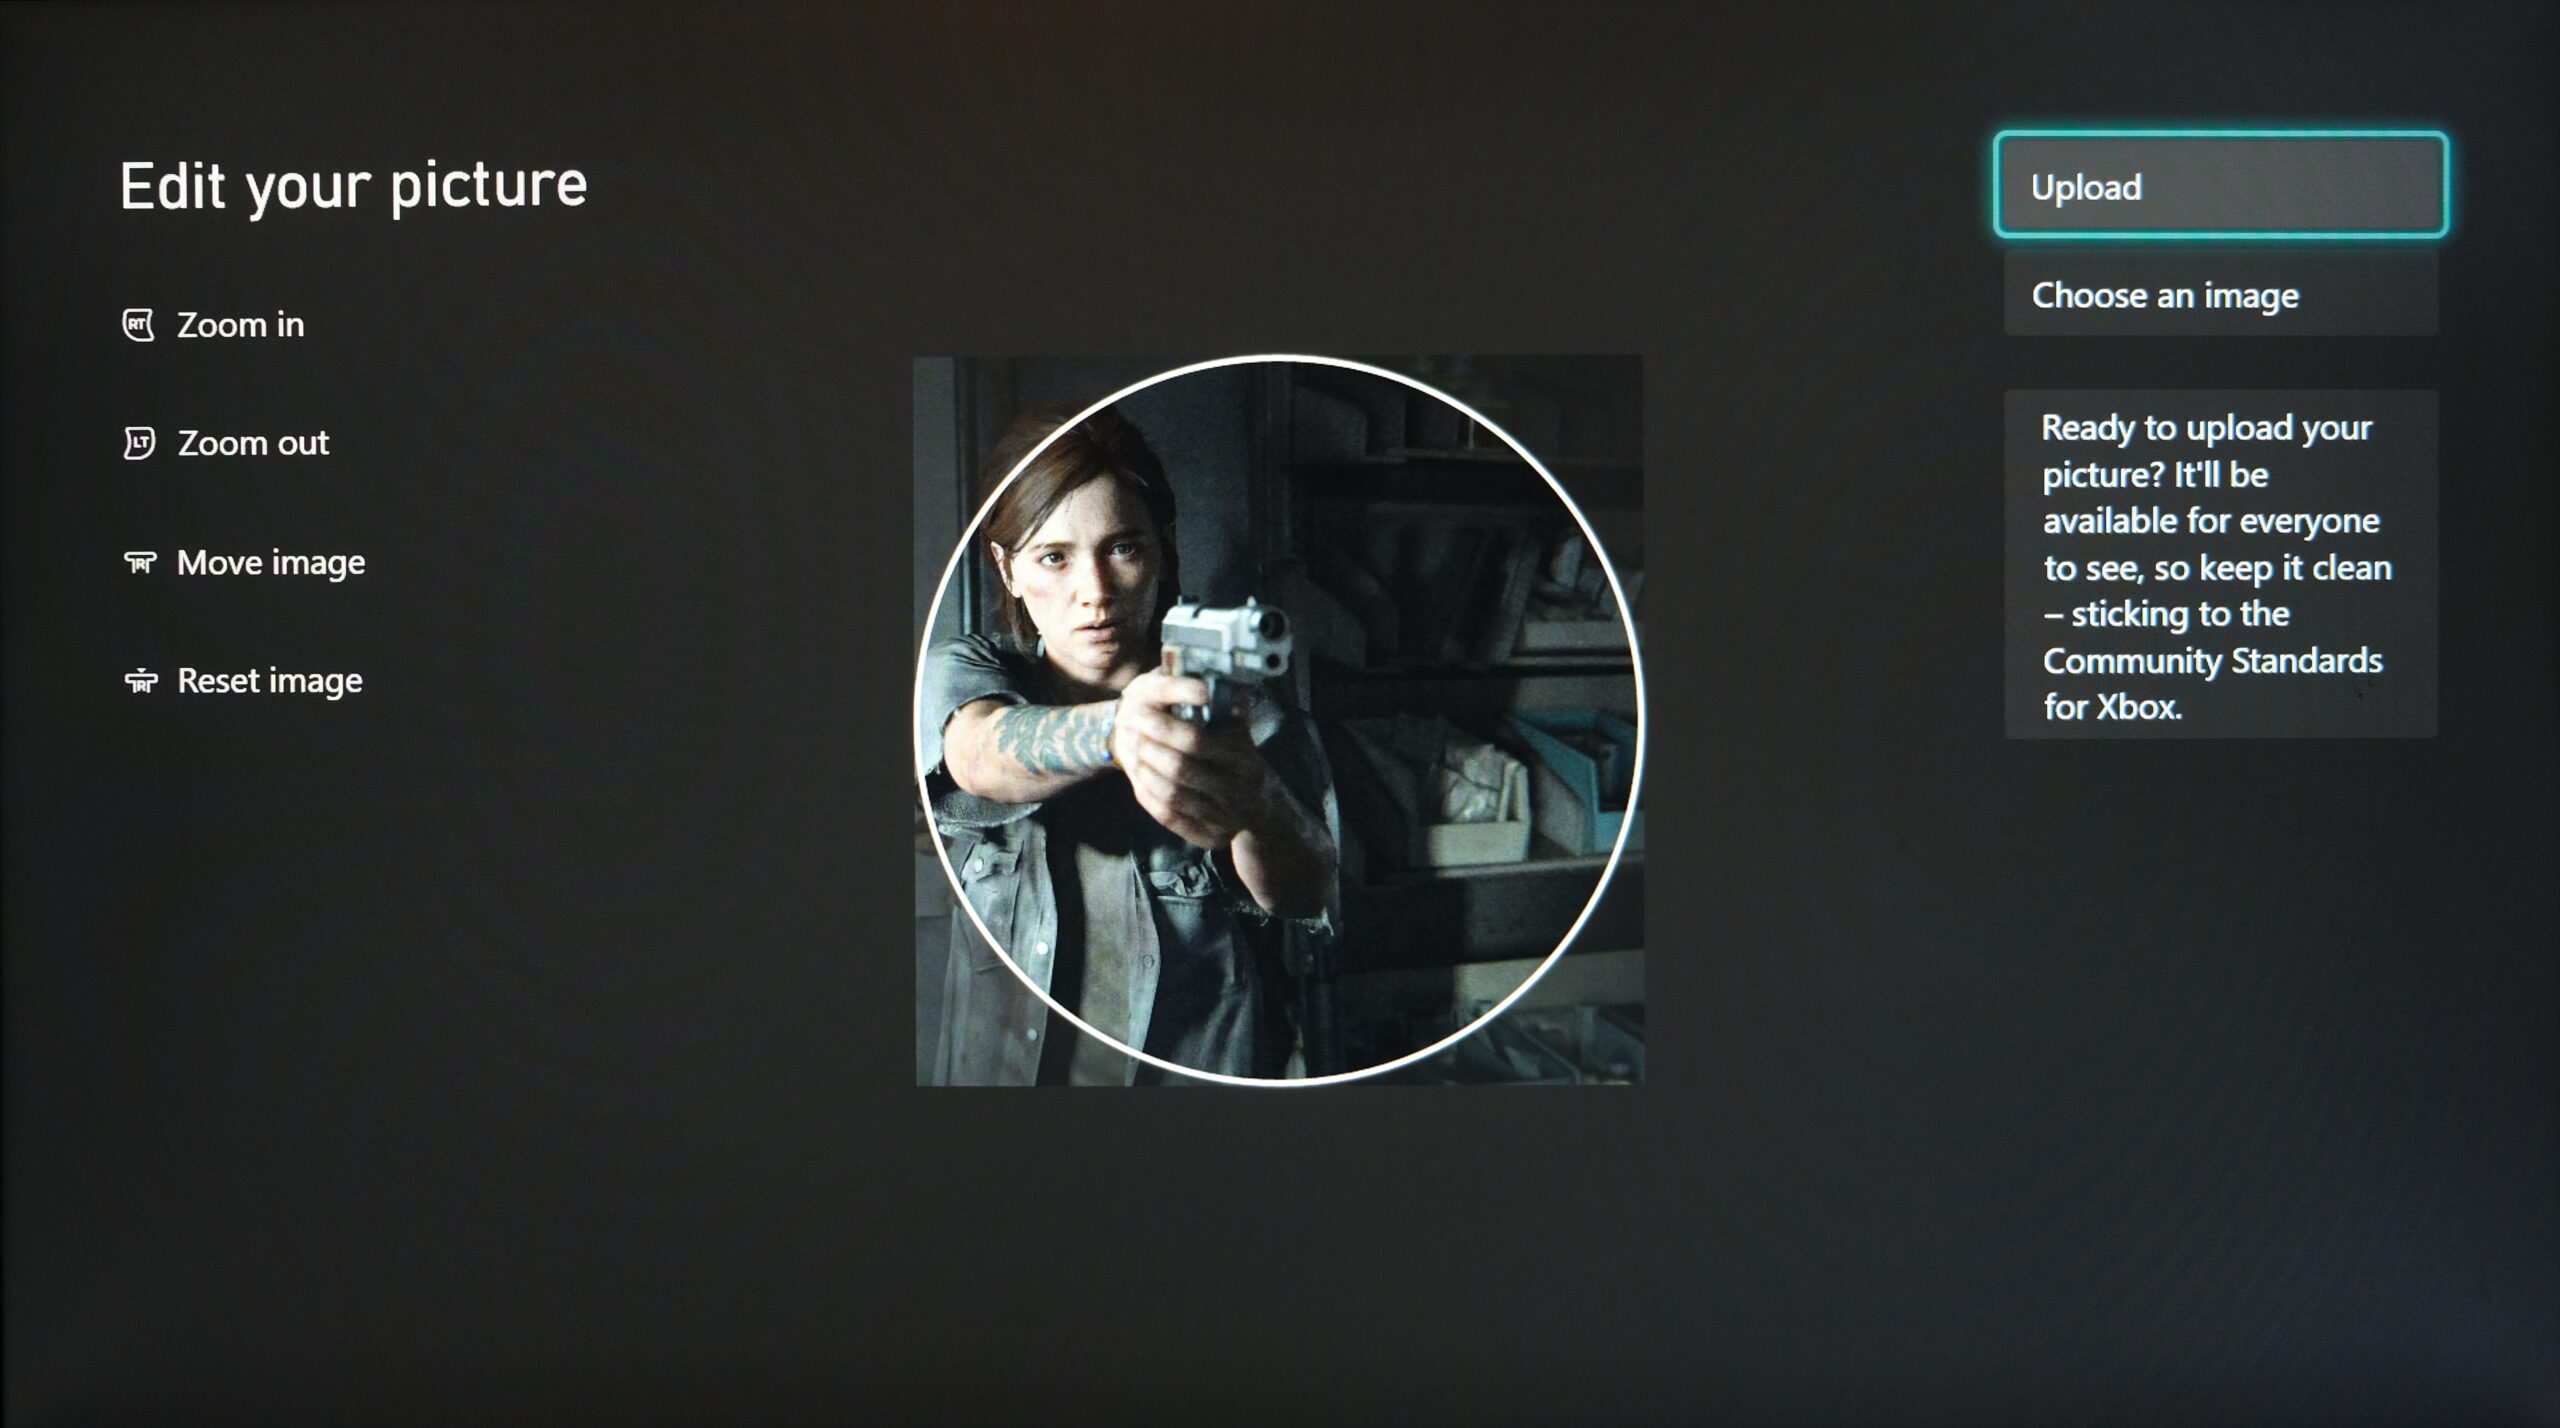
Crop the picture using the on-screen instructions on the left - Then press A to select “Upload” and that’s it! Your gamerpic should be updated within a few seconds.
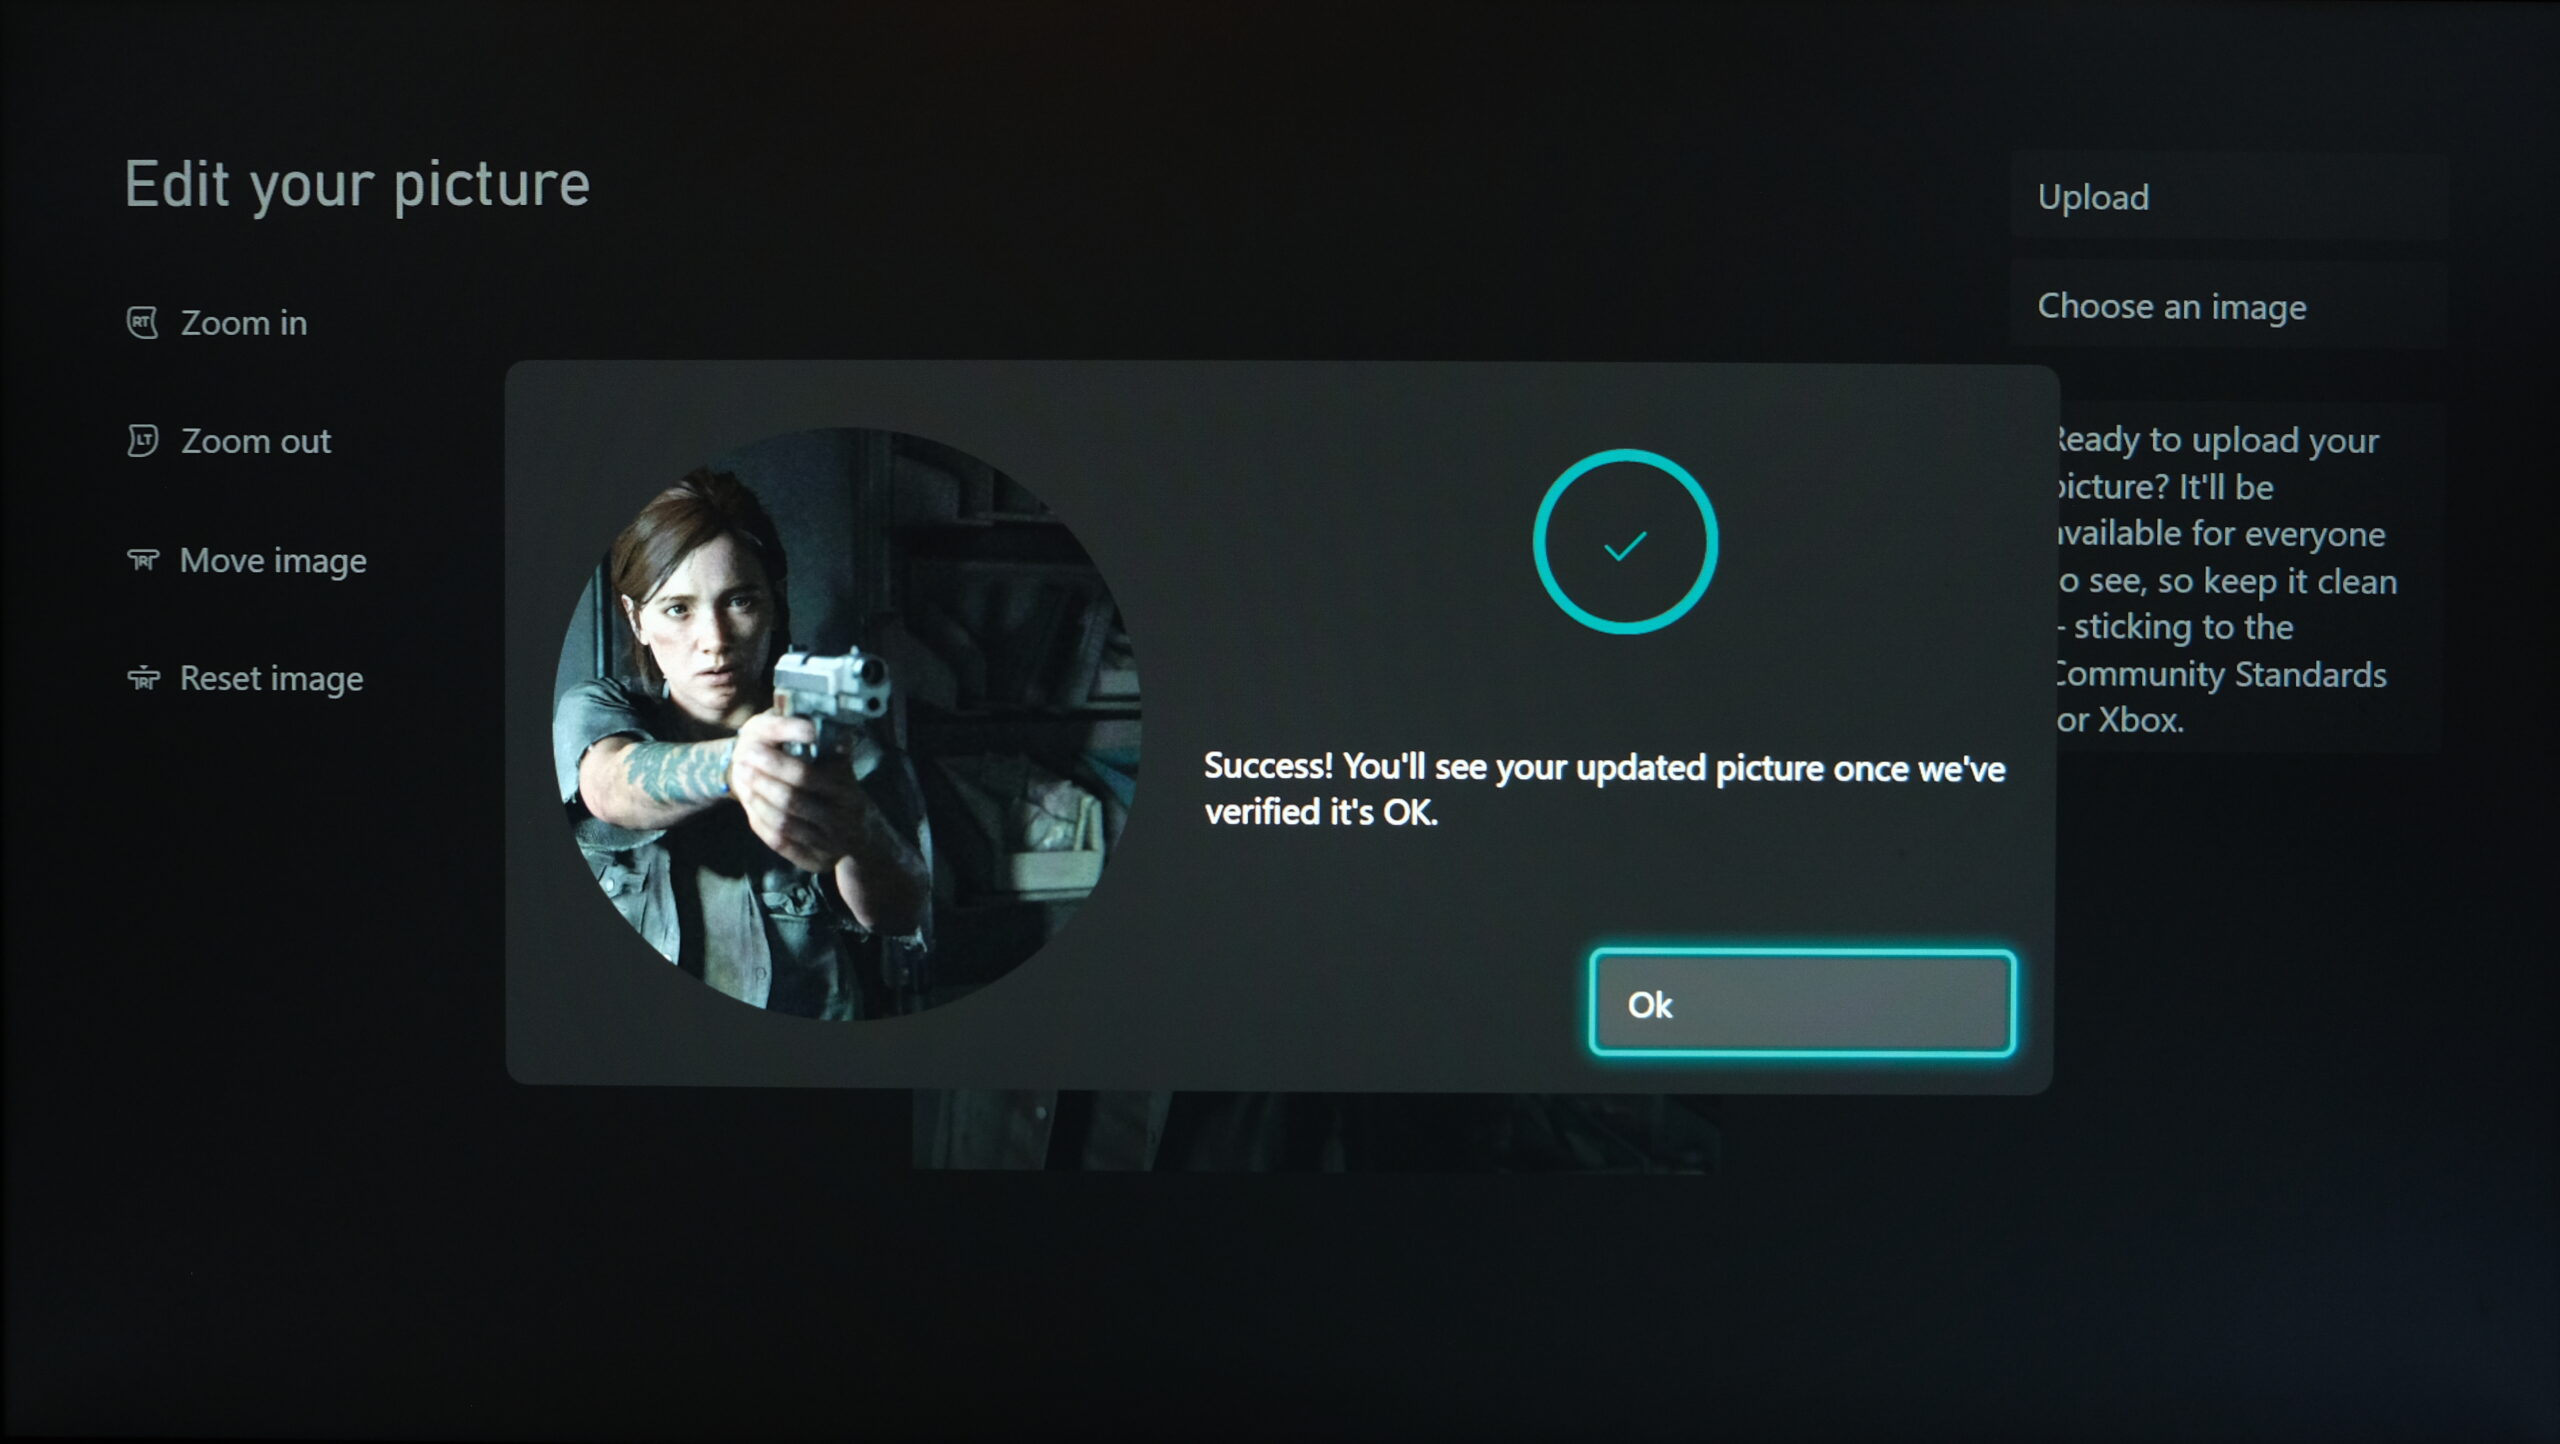
Your new custom gamerpic should be uploaded right away
Design Your Own Gamerpic!
What if you just can’t find that perfect picture you’re looking for? Maybe what you want doesn’t exist and it would be a disheartening compromise to settle for anything less. If that’s the case, then making your own design will not only give you the best gamerpic imaginable, but it would be an incredibly rewarding experience altogether.
If you want to take your gamerpic game (no pun intended) even further with a truly custom styling, then check out our guide on how to design your own custom gamerpic.
Conclusion
A custom gamerpic can help set you apart from everyone else on the battlefield, or just show off an interesting part of your personality that you want others to know. Regardless of what you choose, there is greatness in every gamerpic out there and we hope this article helped you realize how easy it to set up one for yourself.