How to Prevent Apps from Getting Account Information on Windows 10?
There are several Windows applications that will have access to your Microsoft account information. Now, this feature can be helpful sometimes because some applications need to access your account information to work as intended. Applications will be able to use your account name, your account picture, and any other information about you in order to provide a personalized Windows experience. However, some users will not want to share their account information with other applications. Users that are concerned about the privacy of their account information can disable the access of applications.

There are several methods to configure the access of account information on your system. We have included the default method that is by configuring the privacy settings. This can also be done through the Local Group Policy Editor. For those who don’t have Group Policy Editor for their Windows can try using the Registry Editor for the same setting.
Disabling Account Information Access for Apps through Windows Settings
The setting where you can disable the account information access for applications can be found in the Windows Settings. Most of the users are already familiar with the Windows Settings. This is also the most default way to configure the account information access for applications. Users can disable the access completely for all applications or just disable it for specific applications. Follow the below steps to configure it out:
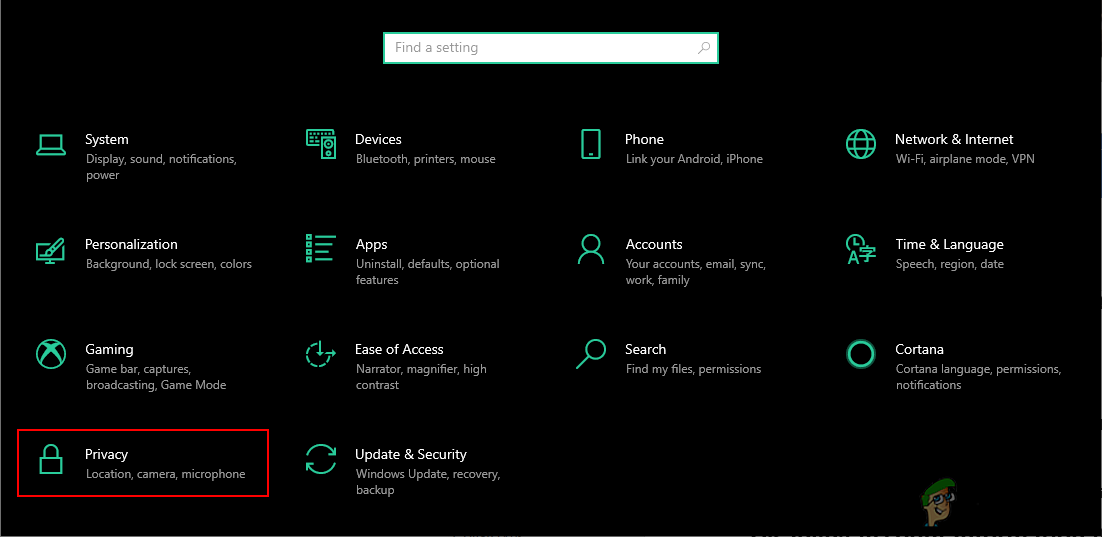
- Press the Windows + I key together to open the Windows Settings. Now click on the Privacy option.
Opening Privacy settings in Windows Settings - In the left pane, click on the Account Info option under the App permissions. Scroll down and turn Off the Allow apps to access your account info option. This will completely turn off access for all applications.
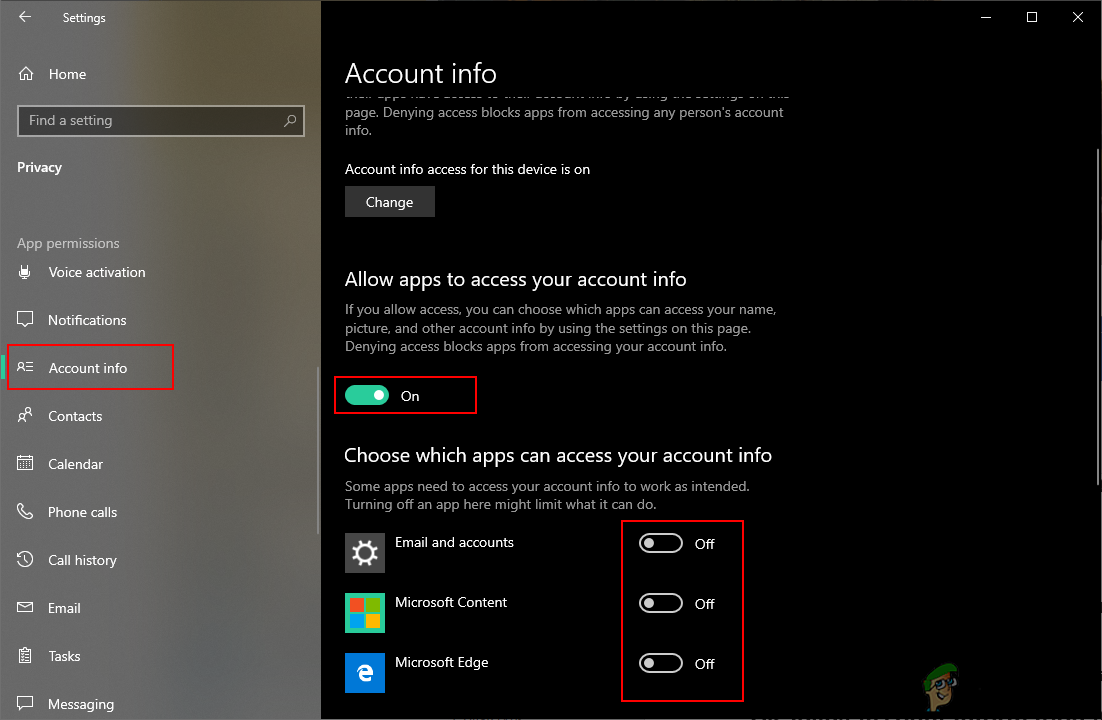
Turning off the access of account information for apps - You can also disable it for the specific application that is listed below. Once you change this setting, the account information will not be accessed by apps anymore.
Disabling Account Information Access for Apps through the Local Group Policy Editor
Another method where you can find all these options is through the Local Group Policy Editor. Almost everything can be configured for the operating system through the Group Policy. However, some options for this setting will require the Package Family Names (PFNs).
If you are using a Windows 10 Home Edition, then skip this method.
Follow the below steps If you have the Local Group Policy Editor on your system:
- Hold the Windows key and press R to open a Run dialog. Now type “gpedit.msc” and press the Enter key to open the Local Group Policy Editor.
Note: You must choose the Yes option for the User Account Control prompt.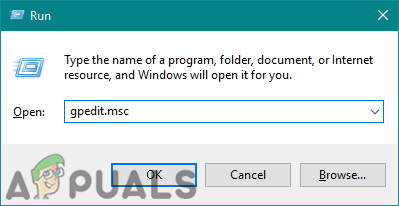
Opening Local Group Policy Editor - Next is to navigate to the following path in the Local Group Policy Editor window:
Computer Configuration\ Administrative Templates\ Windows Components\ App Privacy
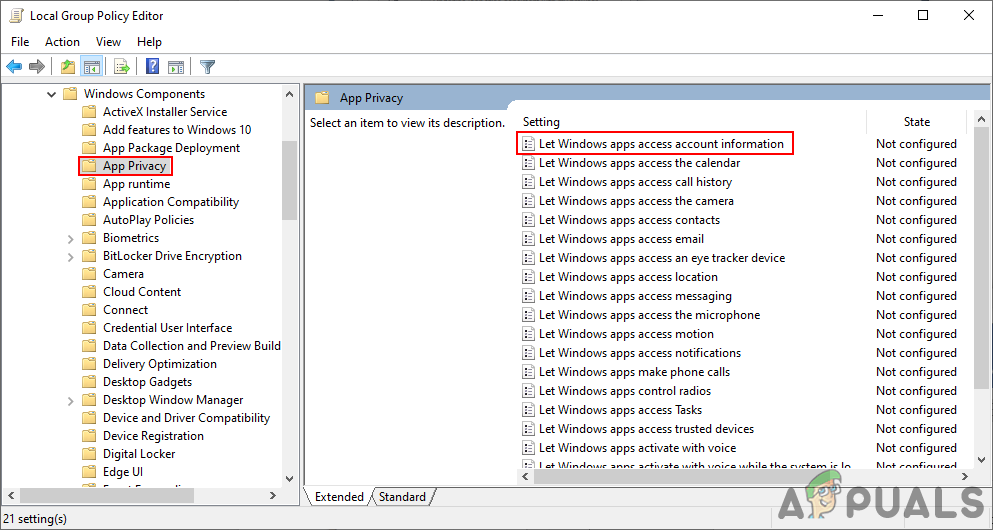
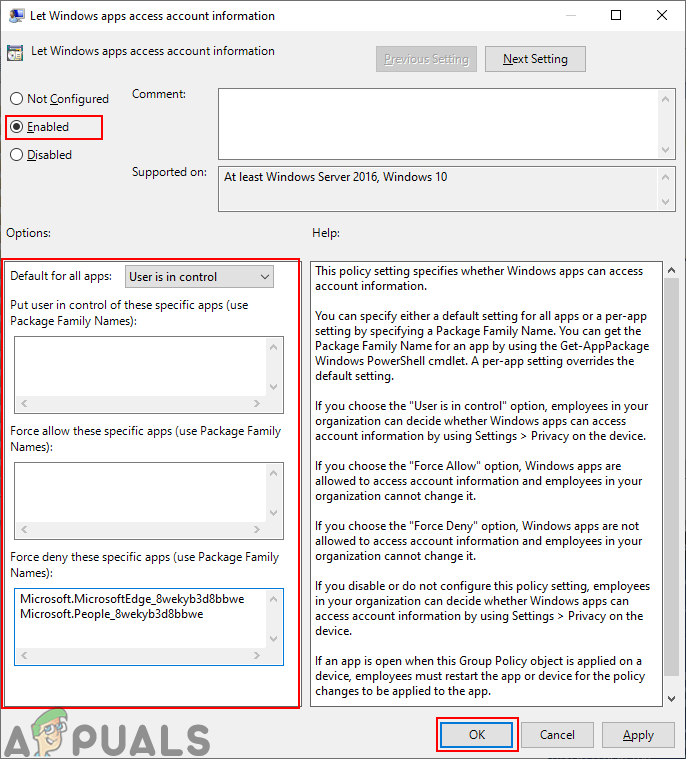
Opening setting - Double-click on the “Let Windows app access account information” setting. Change the toggle to Enabled option and then provide the Package Family Names (PFN) of apps in the following three boxes for different options as stated. Click the Apply/Ok button to apply the changes.
Changing the setting - You can find the Package Family Name (PFN) of an app in the PowerShell. Search PowerShell through the Windows search feature and open it as an administrator. Now type the following command:
Get-AppxPackage -Name "Microsoft.MicrosoftEdge"
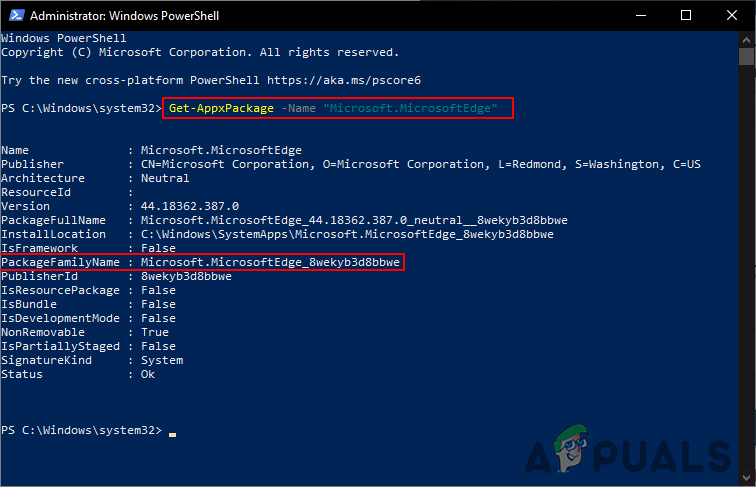
Finding the Package Family Name - Microsoft.MicrosoftEdge is a package name. To find the package name you can type the following command in PowerShell:
Get-AppxPackage -AllUsers | Select Name, PackageFullName

Finding all the package names on your system - By providing the Package Family Name (PFN) in the Force Deny box, it will disable access of account information for those apps.
Disabling Account Information Access for Apps through Registry Editor
If you do not have the Local Group Policy Editor, then you can use the Registry Editor for the same exact setting. However, some of the keys/values will be missing in the Registry Editor and users need to create them manually on their own.
Also, just to be careful you can create a backup of your registry by the export feature. Follow the below steps to check how each value works in this setting:
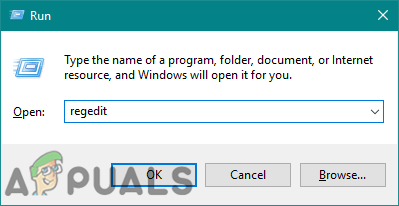
- Open a Run dialog by holding the Windows key and pressing the R key. Then, type “regedit” in the box and press Enter to open Registry Editor. Choose Yes for the User Account Control (UAC) prompt.
Opening the Registry Editor - In the Registry Editor window, navigate to the following key. If the key is missing just create it like shown:
HKEY_LOCAL_MACHINE\Software\Policies\Microsoft\Windows\AppPrivacy

Creating missing key - Right-click on the right pane and choose New > DWORD (32-bit Value) and name it as “LetAppsAccessAccountInfo“. Double-click on it and change the value data to 2.
Note: This setting in this value will be considered as a default value for all applications. The value data 0 is for the user in control, 1 is for the force allow, and 2 is for the force deny.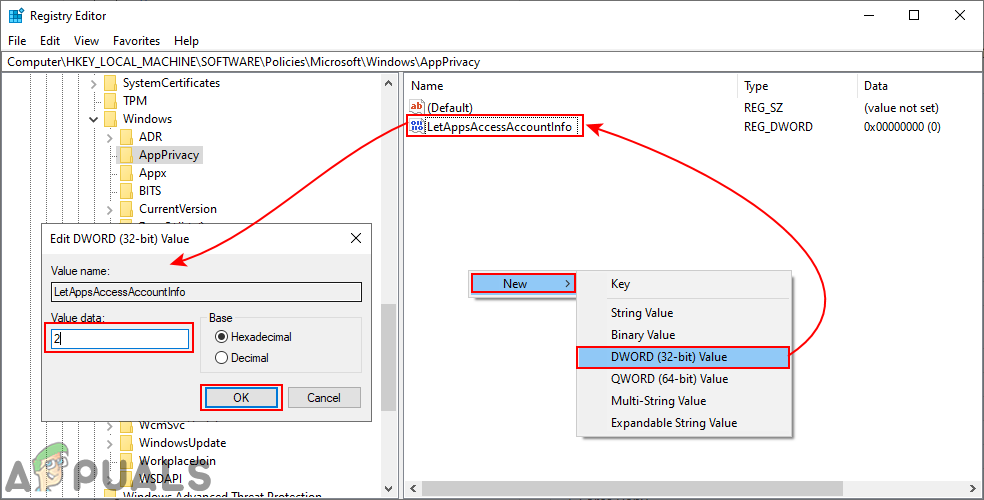
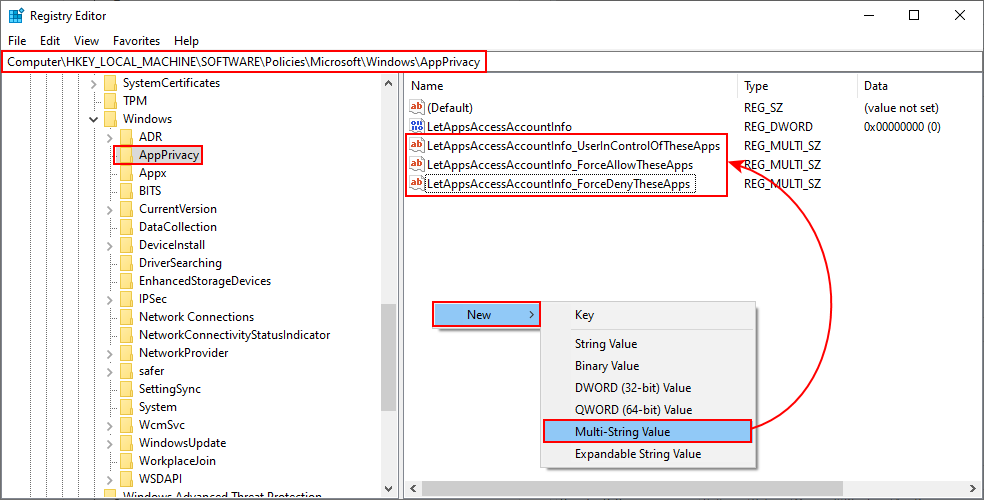
Creating a new value and changing value data - If you want to have the three options like in the Local Group Policy Editor. You can create three different values for different options. Right-click on the right pane and choose New > Multi-String Value option.
- For user in control value, name it as “LetAppsAccessAccountInfo_UserInControlOfTheseApps“. For force allow, name it as “LetAppsAccessAccountInfo_ForceAllowTheseApps“. And for the force deny, name it as “LetAppsAccessAccountInfo_ForceDenyTheseApps“.
Creating three multi-string values - Now you can open any value and put the Package Family Names (PFNs) in it. That will apply that specific setting for that specific application. Once everything is configured, make sure to restart your system to let the changes take effect.
Note: The PFNs added in the screenshot are just to give you the idea about how it will look like.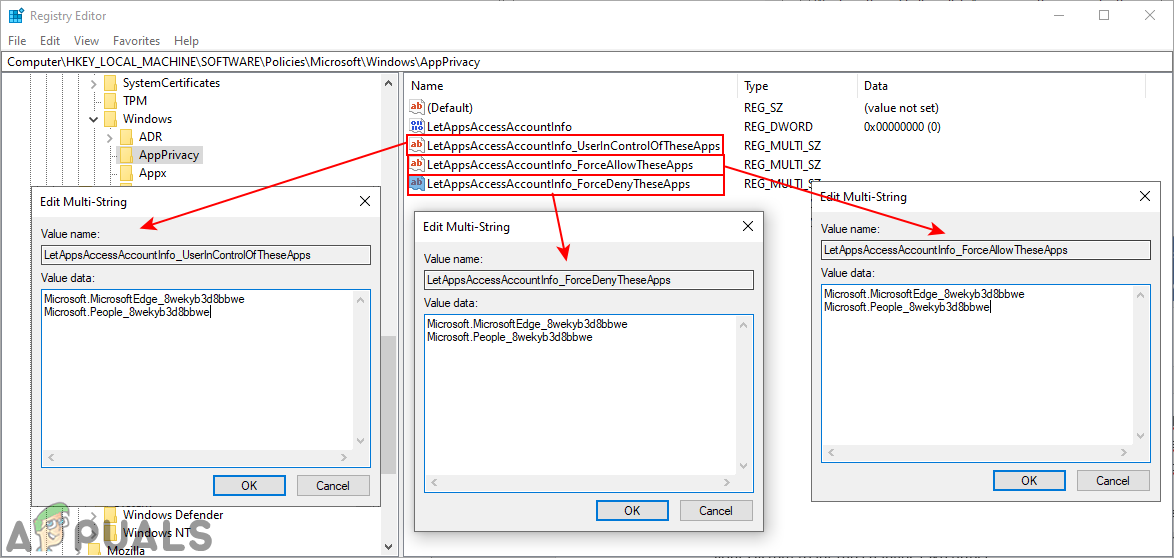
Adding PFNs in values