How to Fix “Preparing Automatic Repair” Error on Windows?
 Reviewed by Muhammad Zubyan
The “Preparing Automatic Repair” error occurs when users turn on their computer and try to boot into Windows, and this error sometimes occurs after a power loss, power outage, etc. Sometimes it can be ignored. This issue also occurs after a failed Windows Update.

When a Windows Update is failed the startup repair tries to repair the boot settings and revert the changes made to your Windows, when it fails it is stuck on the “Preparing Automatic Repair” Screen.
However, this error also occurs when Windows fails to boot, and the startup repair tries to fix the issue. This usually results in a loop that makes your Windows unusable as it will not boot.
Basic Troubleshooting
Before changing any settings or trying to resolve the issue, you should wait on this repair screen for at least 2 hours to ensure that the automatic repair is working properly.
If it is still stuck on this screen after waiting, try power-cycling your computer, press and hold the power button on it for at least 10 seconds when the computer shuts down completely, and unplug the power cord from socket. Wait for 20 Seconds, then re-plug the power cord and start your computer.
1. Perform a System Restore
If your Windows is stuck at Preparing Automatic Restore, it means that it is trying to restore corrupted Windows Settings/Files and it’s failing to do so. So, we can try to perform a system restore manually. Unfortunately, this method only works if you have created a restore point previously when your Windows was working fine. It’s still worth it to check the System Restore GUI though. Follow these steps.
2. Boot into Safe Mode
It is possible that this error is occurring due to corrupted Windows updates or drivers. To fix this, first, you need to boot into safe mode to uninstall Windows updates and drivers to check if these are the culprit causing this issue.
Safe Mode is a feature that allows the users to boot without unnecessary services, peripherals and GPU drivers. When you successfully boot into safe mode, one thing will confirm that it is not a hardware issue. You might just need to uninstall the updates and drivers to fix this issue.
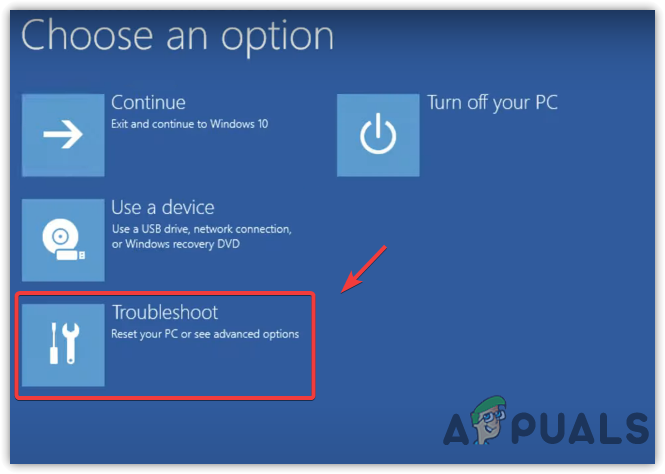
- To boot into Safe Mode, wait for the “Preparing Automatic Repair” to fail
- Then, click Advanced Options > Troubleshoot > Startup Settings
Navigate to Troubleshoot - Click Restrat from the bottom right of the screen
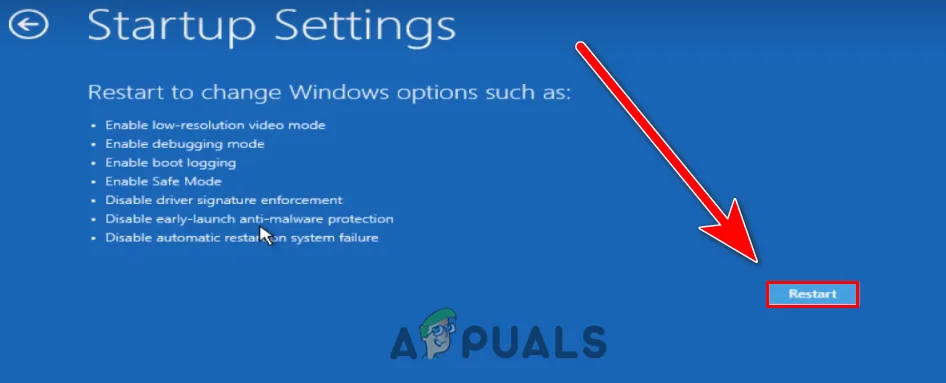
Restarting Windows to Boot into Safe Mode - Once your computer restarted, press 5 or F5 to open the Safe Mode
2.1 Uninstall Windows Updates
- Once the safe mode is opened, click Start Menu and type Control Panel to open it
- Click Uninstall A Program
- Click View Installed Updates from the left pane

Clicking View Installed Updates From the Control Panel - Right-click the Windows Update you installed recently and then click Uninstall
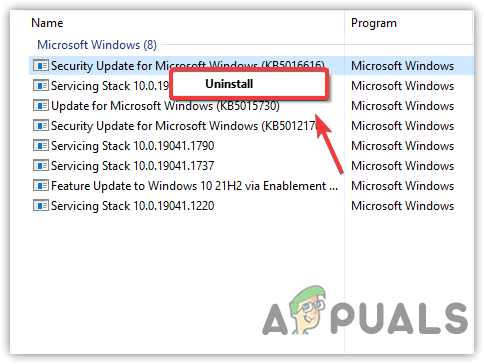
Uninstalling Corrupt Windows Updates - Click Yes when confirmation notification popups.
- Once you have uninstalled the updates, restart your computer, and if the issue is not fixed, boot your Windows to safe mode to remove the drivers; if it is, run the built-in Windows update utility to update Windows.
2.2 Uninstall Drivers
- Right-click the Start Menu and click Device Manager
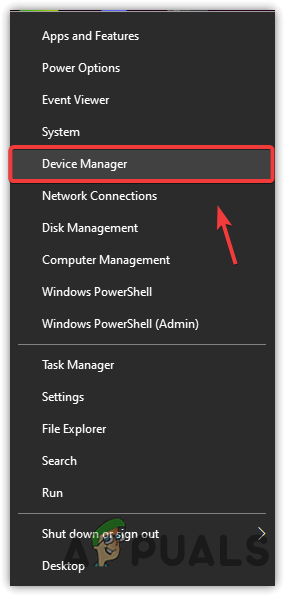
Opening Device Manager - Expand the Display Adapters, and right-click the Graphics Driver
- Click Uninstall Device

Uninstalling Graphics Driver - Tick Delete The Driver Software For This Device
- Then, click Uninstall to remove the drivers
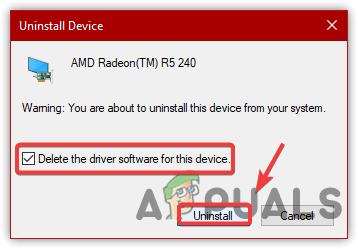
Uninstalling Graphics Driver With Its Software - Once done, restart your computer. If you have managed to boot the Windows normally, that means it was either the driver issue or the corrupt Windows update issue. However, if you restarted the computer right after uninstalling the Windows updates and the issue did not occur, then it is clear that a corrupt Windows update was causing this issue.
2.3 Install Drivers
- Go to your Graphics Card manufacturer’s site and download the latest driver from there
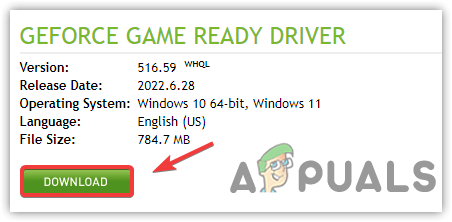
Downloading Latest Graphics Driver In Windows - Once the driver is downloaded, double-click on the installer and follow the on-screen instructions. to install driver
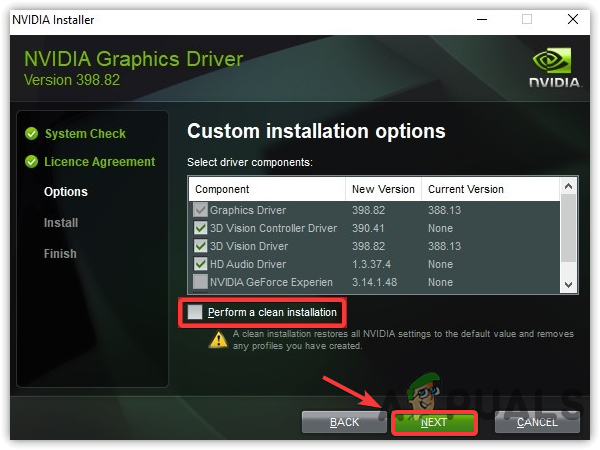
Performing A Clean Installation Of the Graphics Driver - Make sure to tick Perform a Clean Installation while installing a graphics driver.
3. Reset Your Computer
If the issue is not fixed yet, another simple solution is to reset your computer. Resetting the computer will uninstall all the drivers and applications along with resetting the settings applied on your computer. Therefore, resetting the computer will be a good option if the issue occurs due to corrupted files and drivers. Below are the instructions:
If you received the “Automatic Repair couldn’t repair your PC” error, you are able to reset your computer. Otherwise, just wait till the automatic repair fails
- Click Advanced Options and then select Troubleshoot > Reset This PC > Keep My Files

Selecting Keep My Files - Choose the account you want to reset
- After authenticating the user, click on the Reset button to reset your Windows
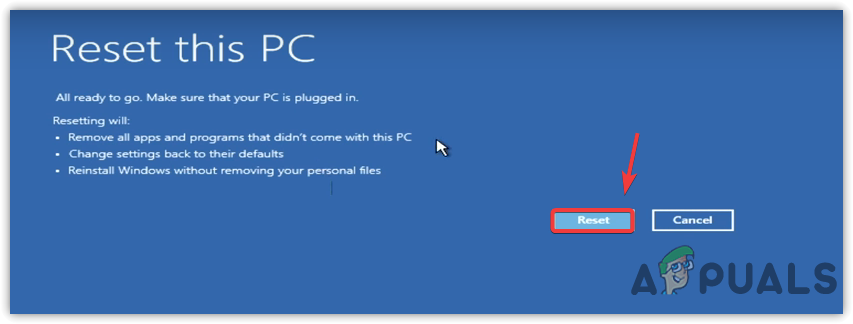
Resetting Windows Without Losing Data Note: This will take some, so don’t turn off your computer.
- Once done, the issue should be resolved.
4. Check your hardware
The issue might not be software related but related to your computer’s hardware instead. You will have to check if your Hard drive or SSD is working correctly because this issue occurs when your Windows fails to boot from your disk. Here are the steps you can follow to check if your Hard Drive/SSD is failing or not.
5. Perform a Startup Repair (if applicable)
As the automatic Windows repair isn’t working properly, we will use the Manual startup repair option from Advanced Boot Settings to try and resolve this issue. Because if the Startup Repair fixes this issue, you won’t see the “Preparing Automatic Screen.” However, this option is only for users who can get to the blue “Automatic Repair couldn’t repair your PC” screen. It should look like this:-
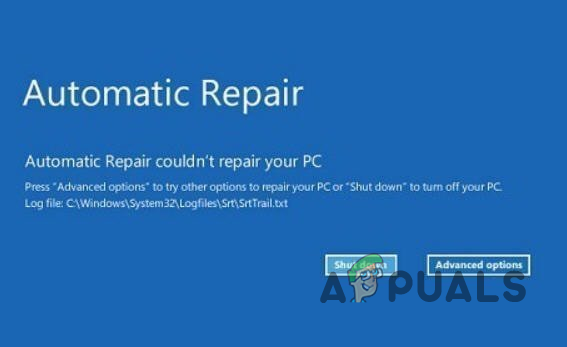
Once you are on this screen, follow these steps:-
- Click on the “Advanced Options” button.
- Select the “Troubleshoot” button and select “advanced options.”
- Click on the “Startup Repair” button and let Windows diagnose and fix your PC automatically.
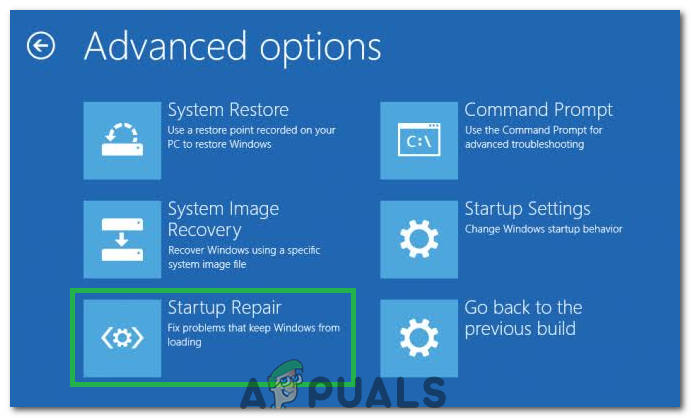
Selecting “Startup” repair - After the diagnosing process is completed, check to see if the issue persists.
6. Performing Command Prompt Fixes (if applicable)
If the Startup Repair doesn’t fix your issue, you will have to repair the registry files manually to revert the settings to their defaults; this has to be done using the same Advanced Options settings we mentioned above.
- Click on the “Advanced Options” button.
- Select the “Troubleshoot” button and select “advanced options”.
- Click on the “Command Prompt” option and type in the drive letter of your main drive.
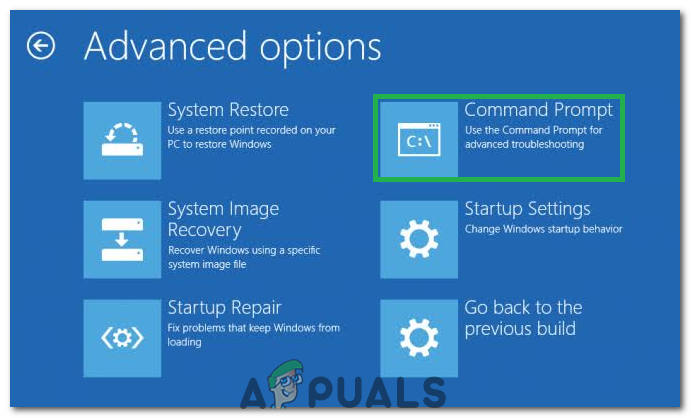
Clicking on the command prompt option Note: In most cases, the letter is “C:.”
- Press “enter” and type in the following command.
cd \windows\system32\config
- Press “Enter” and then type in the following command.
md backup
- After pressing “Enter”, type in the following command and again press “enter”.
copy *.* backup
- Now type in the following command and press “Enter” to execute it.
cd regback
- At this point, type in the command listed below and press “Enter” once more to execute this as well.
copy *.* ..
- The command prompt will now ask if you want to overwrite the files, type in “A” and press “Enter” to select the “yes” option.

Selecting the “Overwrite” option - Closeout of the command prompt and click on the “Continue” option.
7. Repairing Corrupted Data
In some cases, the issue might be related to data corruption on the hard disk. Therefore, it is recommended that you disconnect the SATA cable connecting the hard disk to your computer and remove the hard disk completely. After that, connect it to another computer and try to boot up from it, at bootup, it might give you an option to repair the HDD, if it does, select that option and check if the issue persists. Furthermore, select the normal boot drive on this new computer and try running an SFC and health scan with the HDD connected.
Note: Furthermore, you can try to downgrade your Windows.
8. Enable XD-bit (No-Execute Memory Protect) in your BIOS
It seems that until or unless XD-bit (better known as No-execute memory protect), a feature available in every computer’s BIOS settings, is turned on, a Windows 10 user remains prone to suffering from a “Preparing automatic repair” screen loop. XD-bit is disabled by default, and the following are the steps you need to go through to enable it:
- Restart your computer.
- At the first screen that your computer displays when booting up, press a specific key that will get you into its BIOS This key will be available in your computer’s user manual and on the first screen that it displays during startup. (see how to boot to bios above)
- Once in your computer’s BIOS, peruse through the tabs and locate XD-bit.
- Enable XD-bit and Save your changes.
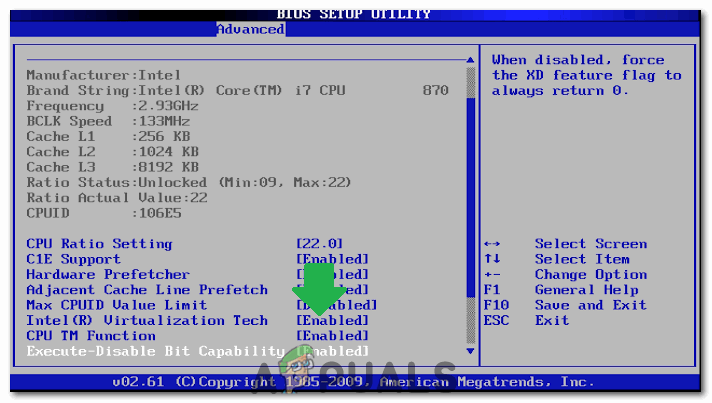
Enabling Intel virtualization technology - Restart your computer, and it should boot like it is supposed to. If it doesn’t you should try the next solution.
9. Reinstall Windows 10
If none of the solutions listed above worked for you, there is a pretty good chance that the problem is localized to your specific installation of Windows 10. If that is the case, simply reinstalling Windows 10 should be able to fix the problem. If you are a bit foggy about the steps involved in performing a clean install of Windows 10, follow this guide.
Reviewed by Muhammad Zubyan
Hi Kevin. My wife computer has been having this issue except it doesn’t loop it starts to boot and then freezes on the preparing automatic repair screen. Sometime the words actually appear sometimes they don’t but we never get the loading circle. I can’t get it to enter the setup menu or the boot menu no matter how many buttons I smash or the number of times. We also downloaded the update off of the internet so we have no disk or physical copy. If you can help at all I would greatly appreciate.