Fix: “PNP Detected Fatal Error” BSOD on Windows 10/11?
The PNP Detected Fatal Error occurs with the error message saying, “Your Device Run into a problem and needs to restart ” while booting the Windows. This error can also be called BSOD (Blue Screen Of Death), which can occur due to faulty drivers and damaged hardware.
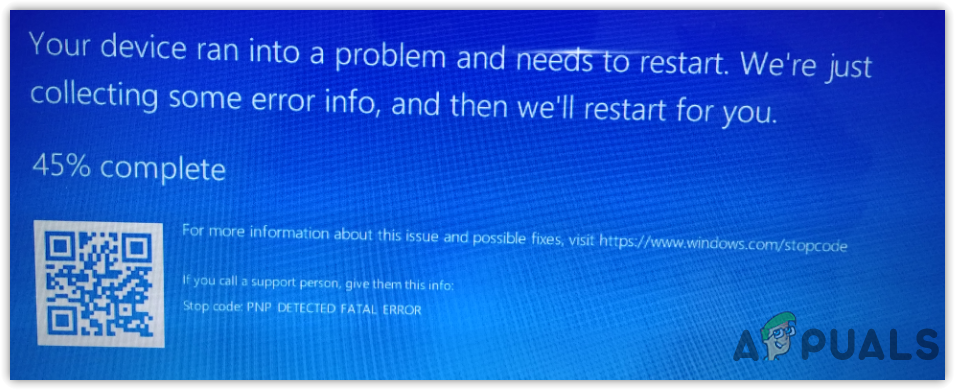
The root cause of this error is the corrupted drivers. However, disk errors, corrupted Windows updates, and system files can lead you to this error message.
BSOD errors can also be caused by the hardware issues such as faulty memory, power supply issues, and overheating of components. Therefore, it is important to understand that if this error message does not resolve, it could result from damaged hardware.
Moreover, you might be unable to boot the Windows due to this error message. In this case, you will need to start Windows in safe mode to apply the troubleshooting methods.
1. Run System Restore
If you are familiar with the system restore, you might have created a restore point to take your Windows to a previous state if something goes wrong. This utility removes all the drivers, programs, and recently installed Windows updates.
If corrupted system files, drivers, and third-party programs are behind fetching this error message, using a restore point might be a great option to start the troubleshooting. You can visit this article if you don’t know about a restore point. Follow the steps to restore the Windows to the previous system restore point:
- Turn on your computer and wait for the logo screen
- Once you see a logo screen, turn off your computer and repeat this process three times to navigate to the options screen
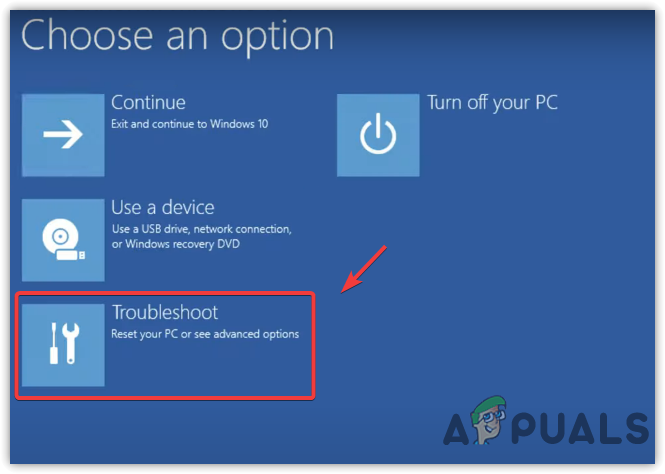
- Then click Troubleshoot > Advanced Options > System Restore
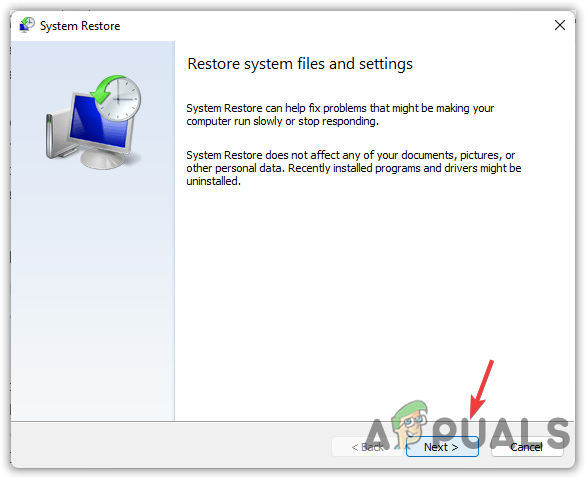
- Wait for the Windows to reboot, then click Next
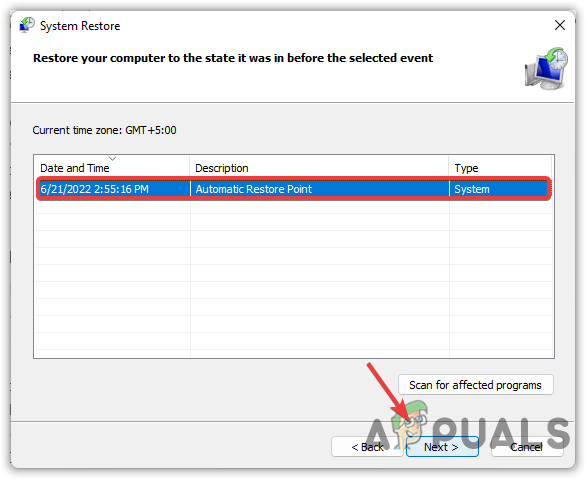
Click Next to Start - Select a restore point, then click Next
Selecting Restore Point - Click Finish to start the process.
2. Boot Windows In Safe Mode
The error can also be a result of a corrupted Windows update. If you have updated your Windows to the latest version, we recommend you uninstall the recent updates and revert all the changes you have applied to your Windows, including uninstalling third-party programs.
To uninstall the Windows updates, you will need to boot the Windows in a safe mode as you might be stuck into a reboot loop. If the error does not resolve, try performing a clean boot. Below are the steps to boot Windows in safe mode to uninstall the Windows update:
- First, turn on your computer by pressing the Power button
- Wait for the logo to appear and again turn off the computer
- Repeat the above process until the preparing Windows screen appears
- Once it appears, navigate to Troubleshoot > Advanced Options > Startup Settings
Navigate to Troubleshoot - Click Restart and wait for the boot options to appear

Restart to Access Safe Mode - Press the F5 to boot into Safe Mode
- Once you are in Safe Mode, uninstall the Windows update and do a clean boot by following the below method.
2.1 Uninstall Windows Update
- After booting Windows into Safe Mode, open the Control Panel by typing in the Windows search bar
- Navigate to the following path
Control Panel\Programs\Programs and Features
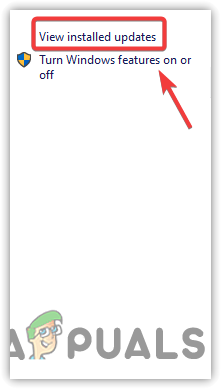
- Click View Installed Updates
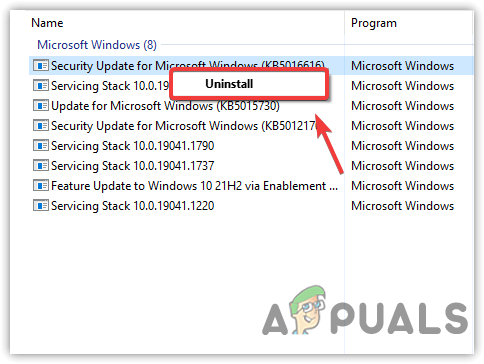
Click to View Installed Updates - Now, uninstall the recently installed Windows updates by selecting and clicking Uninstall button
Uninstalling Windows Update From Control Panel - Once done, try restarting Windows to check if the error persists.
2.2. Perform a Clean Boot
A clean boot is a process that disables irrelevant services, third-party applications, and unnecessary drivers at the startup to determine the source of a problem. Hence, if the error occurs due to third-party applications, conflict of services, and drivers, then performing a clean boot will help fix this error. Here are the steps:
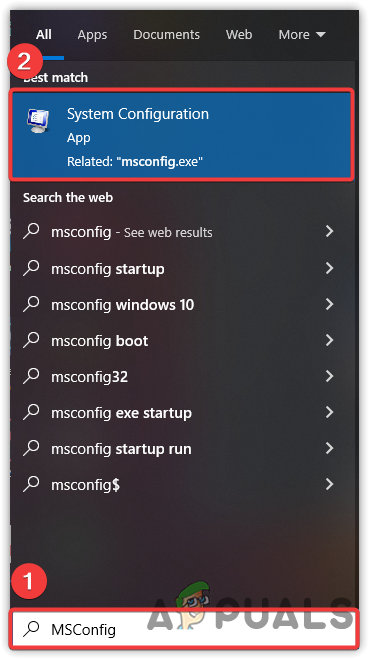
- Press the Windows key and type MSConfig
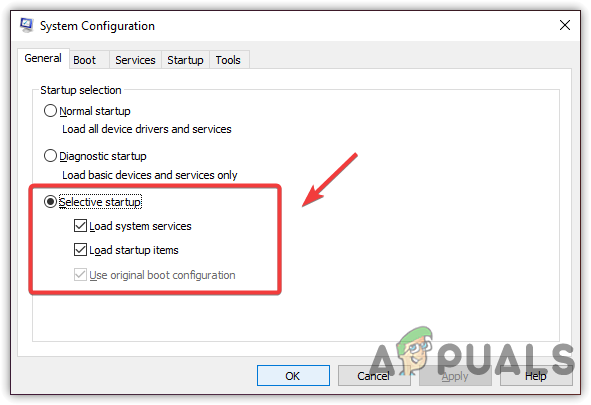
Launching System Configuration Settings - Open System Configuration and choose the Selective Startup
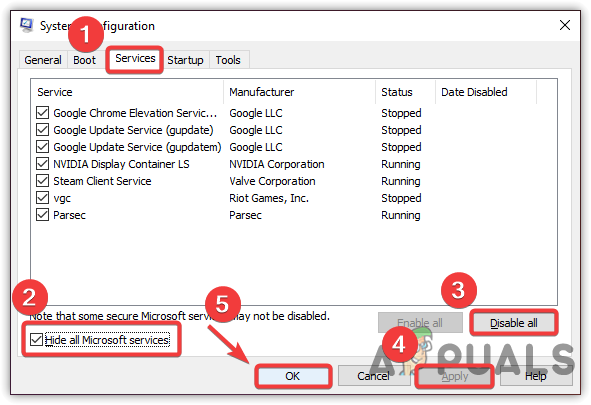
Enabling Selective Startup - Click the Services tab from the top bar
- Select Hide All Microsoft Service, then click Disable All
- Click Apply and click OK
Restarting Computer in a Clean Boot - Restart your computer and check if this method fixed the error.
3. Use Startup Repair
Startup repair is an inbuilt troubleshooting utility provided by Microsoft for the recent version of the Windows operating system. The utility fixes the common problems that can prevent Windows from booting correctly. Follow the steps to use the startup repair:
- Press the power button to turn on your computer
- Once the logo screen appears, turn off your computer
- Repeat this process three times to trigger the Advanced Troubleshooting
- Navigate to Troubleshoot > Advanced Options
- Click the Startup Repair and wait for the Windows to diagnose properly
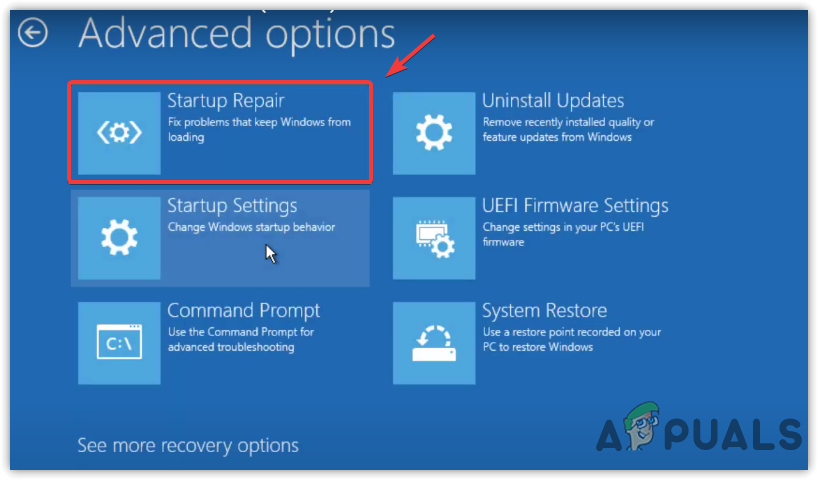
Running Startup Repair - Once done, check if the issue is resolved.
4. Run CHKDSK
CHKDSK is an inbuilt utility that allows users to scan and fix disk errors. CHKDSK command displays the status of a volume as an output while the chkdsk /f /r command fixes the disk errors found in the volume. Therefore, if the error occurs due to any disk error, running CHKDSK will help fix this issue. Below are the steps to executing the CHKDSK command:
- Follow the three steps mentioned in the above method to bring the options screen
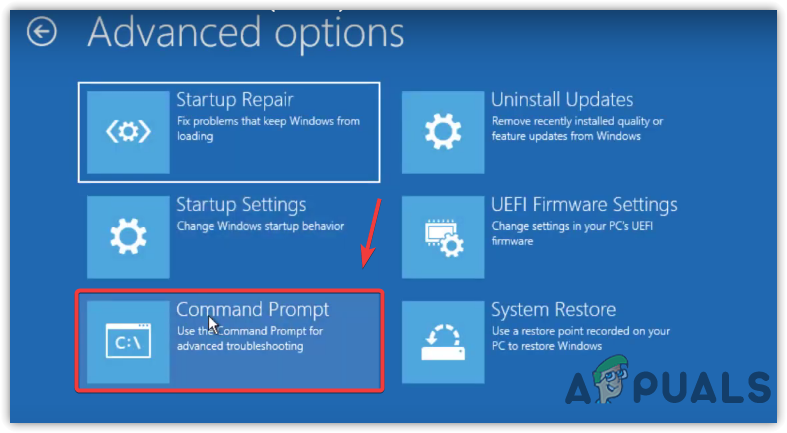
- Go to Troubleshoot > Advanced Options
- Click the Command Prompt
Launching Command Prompt - Type the following command and wait for it to complete
chkdsk C: /F /X
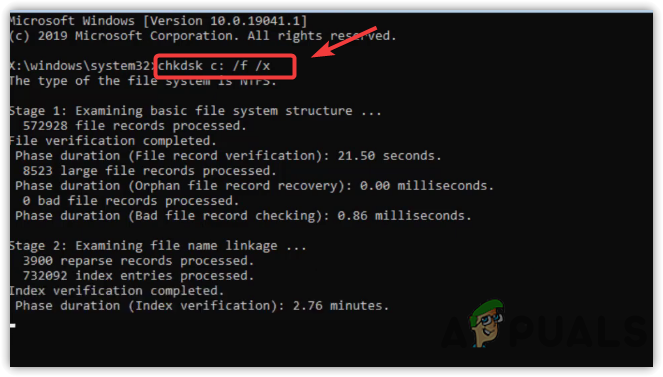
Running CHKDSK - Once done, restart your computer to check if the error is fixed.
5. Run SFC And DSIM Commands
SFC or System File Checker is a command line utility used to restore corrupted system files. In comparison, the DISM or Deployment Image Servicing and Management allows the user to repair the corrupted Windows images. If you have corrupted Windows images or files in the system disk, the error will likely appear, and to avoid this, you have to execute the SFC and DSIM commands via the command prompt. To do so:
- Go to the Advanced Troubleshooting options by following the method
- Click Troubleshoot > Advanced Options > Command Prompt
Navigating to Command Prompt - Type the following commands in the terminal
DISM /Online /Cleanup-Image /RestoreHealth
sfc /scannow
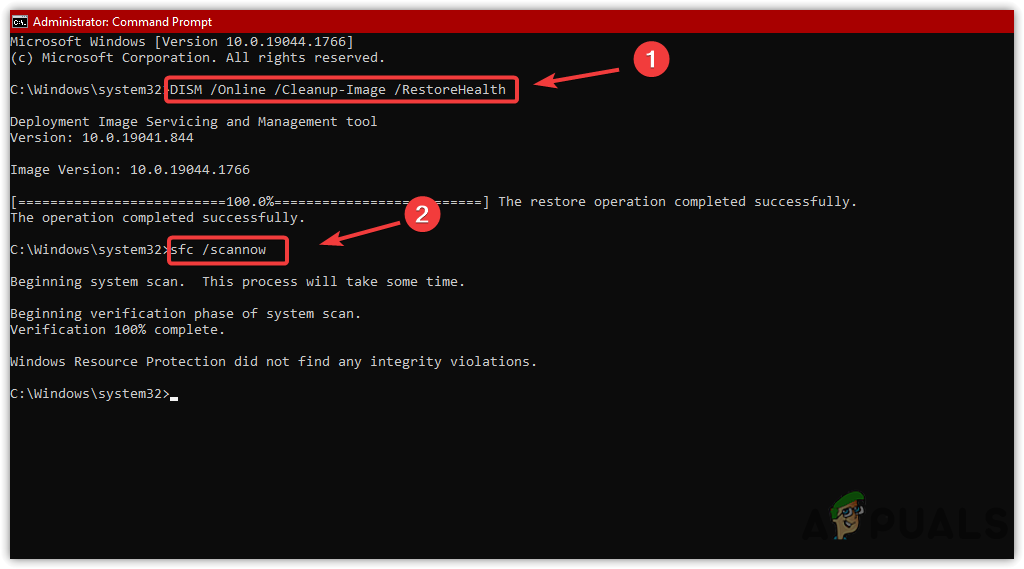
Repairing System Files - Then wait for the process to be completed
- Restart your computer to check if the error is fixed.
6. Reinstall Display Driver
As we mentioned above, the error can either be caused by faulty Graphics drivers. If you have any corrupted driver that might be preventing you from booting the Windows, reinstalling Graphics drivers will help to fix this error.
6.1 Uninstall Graphics Driver Via Display Driver Uninstaller
A display driver uninstaller is an application that is used to uninstall the device drivers from the computer. This application allows the users to remove the drivers entirely along with the registry files, which prevents conflict between drivers. This is why we recommend DDU over the device manager. Follow the steps:
- Access the Safe Mode by following the 2nd method
- Then go to the following link to download Display Driver Uninstaller
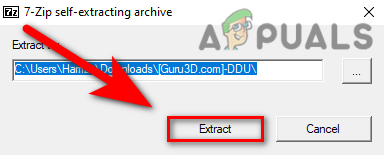
- Once the downloading is done, extract the DDU ZIP folder
Note: We recommend using WinRar for this process. - Right-click the DDU ZIP folder and click Extract to DDU

Click to Extract DDU ZIP Folder - Open the extracted folder, and double click the Display Driver Uninstaller
- Again, click the Extract button to navigate to the folder
Clicking Extract - Run the Display Driver Uninstaller
- Select the device type and its vendor, then click Clean And Restart
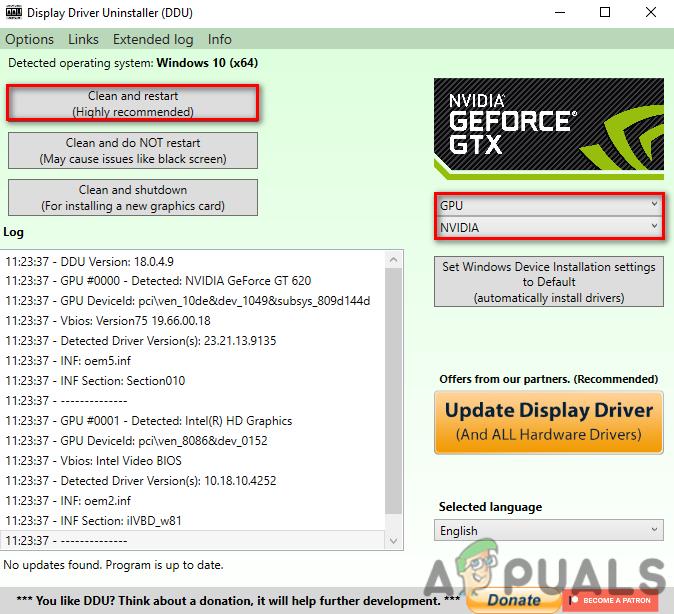
Selecting Device Type and GPU Vendor - Once done, proceed to the next step.
6.2 Install Graphics Driver
- To install the latest driver, go to your Graphics Card manufacturer’s website
- Select your Graphics Card to find the latest driver for your GPU
- Click the Download button, then install the driver by following the on-screen instructions.
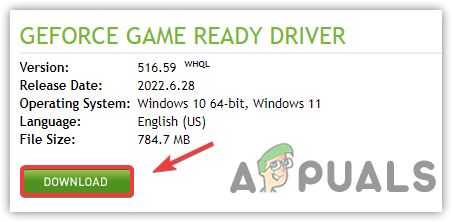
Downloading Latest Graphics Driver - After installing the driver, check if the error is fixed.


