How to Fix No Sound Problem in Windows 11?
No sound in Windows 11 is becoming a common issue for users who recently switched to Windows 11. We have seen a lot of users suffering from this issue through various forums.
Usually, when we install Windows 10 or a lower version, we don’t need to change the motherboard’s bios settings, but before installing Windows 11, we need to enable the Secure Boot and TPM. During this process, we could disable the audio by mistake. However, this is not a leading cause as several affected users have managed to fix this issue by disabling the audio enhancement and reinstalling or updating the driver.
It might be possible that Windows installed the audio driver, which is incompatible with your motherboard, or if you use a third-party driver, then make sure to download a driver from the manufacturer’s website. We have outlined some of the common causes below. Let’s have a look at them as one of the following might be a leading cause in your scenario:
- Enabled Audio Enhancement- Audio enhancement is designed to improve audio. However, in most cases, it can cause no sound in Windows.
- Outdated or Corrupted Driver- Another leading cause is the outdated or corrupted driver, which is why some users have managed to fix this issue by updating their driver to the latest version.
- Conflict of Audio Driver- If you do not have enough knowledge about the drivers, it might be possible that you installed a couple of audio drivers for a single device by mistake, and as a result, your Windows is trying to use all of them at the same time. Thus, the issue is occurring; to fix this, do a clean installation of your audio driver.
- Disabled Windows Audio service- Windows audio service manages all the audio devices connected to your computer. If this service is disabled, you cannot use any of your audio devices in Windows. Usually, the service automatically starts when Windows boots up. However, in some cases, it gets disabled. Hence, make sure that the audio service is running correctly.
- Faulty Audio Ports- If you use front audio jacks, it may be possible that the front ports cannot receive power from the motherboard for some reason, which is why the audio is not working on your Windows. To ensure that the audio jacks are working fine, use the back audio jacks rather than the front.
- Unsupported Sample Rate- The issue can also be caused by using the unsupported sample rate. In my case, the issue was the unsupported sample rate, which was fixed by changing the sample rate to a lower or compatible one.
- Incompatible Audio Driver- No sound in Windows can also occur due to having an incompatible driver, which Windows can install. Therefore, ensuring that you have a compatible driver with a motherboard is important. You can check the compatibility of your driver by following the below method.
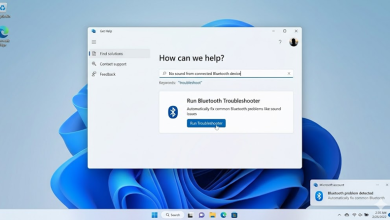
If you encounter this issue with Bluetooth headphones, you can refer to this article on How to Fix “Bluetooth Issues” in Windows 11 22H2. Because if you have Bluetooth headsets, it’s possible that your Windows’ Bluetooth Services/Drivers aren’t enabled/working correctly; we have recently seen many users complaining about Bluetooth issues in Windows 11 22H2 Edition. If your Bluetooth drivers are working as intended, you can follow the steps below to rule out any other audio issues you might be facing.
1. Disable Audio Enhancement
Audio Enhancement utility allows users to clarify the sound coming from the computer by reducing unnecessary sounds.
Despite this, enabling the audio enhancement from the audio settings can also lead you to this issue. Therefore, it is recommended to uninstall third-party vendors and disable the enhancement from the sound settings. Below are the instructions:
- Right-click on the sound icon from the right pane
- Click Sound Settings
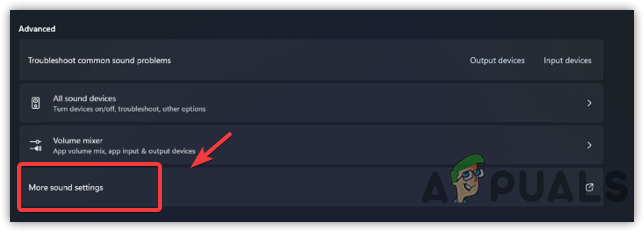
- Scroll down to the bottom
- Then, click More Sound Settings
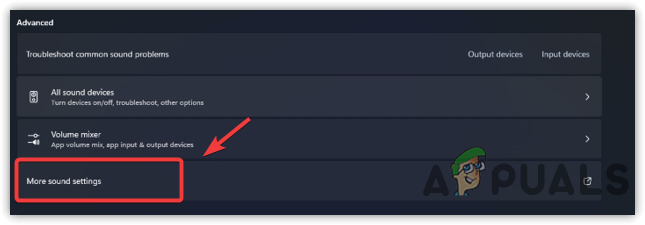
Opening Sound Settings - Right-click the Speakers icon and click Properties
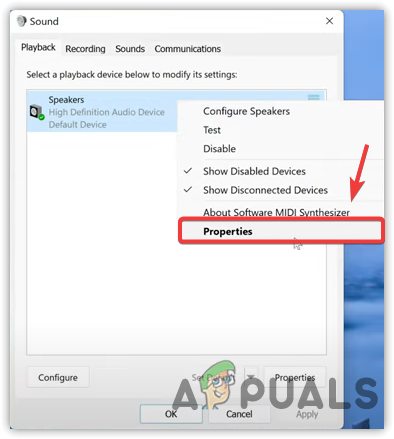
Opening Speaker Properties - Go to Enhancements from the top
- Check Disable All Enhancement
- After that, click Apply and click OK
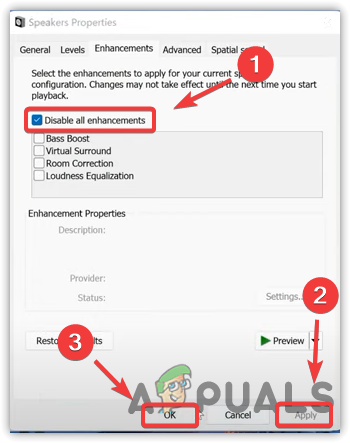
Disabling Audio Enhancement - Now check if the issue is resolved.
2. Update Sound Drivers Via Device Manager
The corrupted or outdated driver can also be the leading cause in this case, as the issue has been fixed by updating the driver through several affected users. There are different methods to update your audio drivers, but in this case, the effective one is to update the drivers via the device manager.
Moreover, if you use any third-party driver, go to your device manufacturer’s website and download the latest driver.
- To update the audio drivers, right-click the Start Menu
- Then click the Device Manager from the list of options
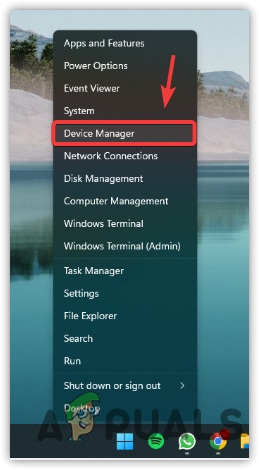
Opening Device Manager - Expand the Sound, Video And Game Controllers
- Right-click the audio driver and select Update Driver

Clicking Update Driver - Choose Search Automatically For Drivers and complete the remaining steps to download and install the latest audio driver
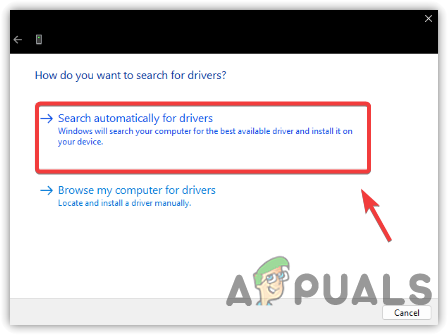
Searching For Drivers - Once done, check if the no sound issue is fixed.
3. Reinstall Audio Driver
If updating the drivers from the device manager does not help to fix this issue, it is possible that there is a conflict between the audio drivers causing this issue. Usually, when Windows think you have an outdated driver, it downloads the same or an older one, and due to that reason, the conflict of the audio driver issue occurs.
Moreover, when there are multiple drivers for a single device, you might notice that the device starts misbehaving. Hence, to fix this, you will need to uninstall all the drivers first.
3.1 Uninstall Audio Driver
Before uninstalling the audio driver, check if multiple drivers are installed for your headphone or speaker. If only one driver is installed for your sound device, you are not suffering from the conflict of the driver. You can move to the other method. To ensure that, follow the steps:
- Press the Windows key and type Device Manager

Head to the Device Manager - Open the Device Manager and find the Sound, Video and Game Controllers
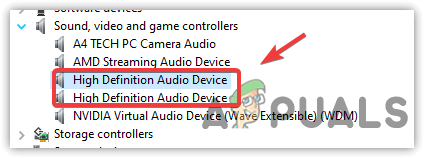
Checking Audio Drivers - Click the right arrow button to expand the sound drivers.
Here, if you find multiple drivers for your single device except for the speaker or your headphone, you are encountering this issue due to a conflict of drivers.
You will need to uninstall all of the audio drivers quickly. Even though you can use device manager for this process, we recommend DDU over device manager as it uninstalls the device drivers and clears the registry files. Below are the steps you can follow to uninstall drivers:
- Download the Display Driver Uninstaller, and wait for the downloading to finish
- Once it is finished, right-click the DDU ZIP folder and click Extract to DDU
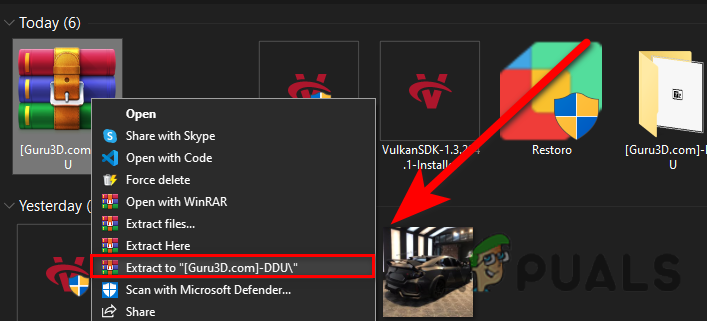
Extracting DDU ZIP Folder Note: We recommend using WinRar for this process
- After extracting, navigate to the folder
- Double-click the DDU application and click Extract
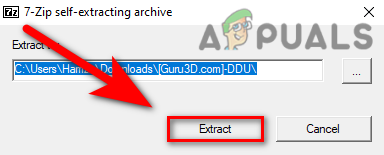
Extracting DDU Application - Now again, navigate to the DDU folder and run the Display Driver Uninstaller
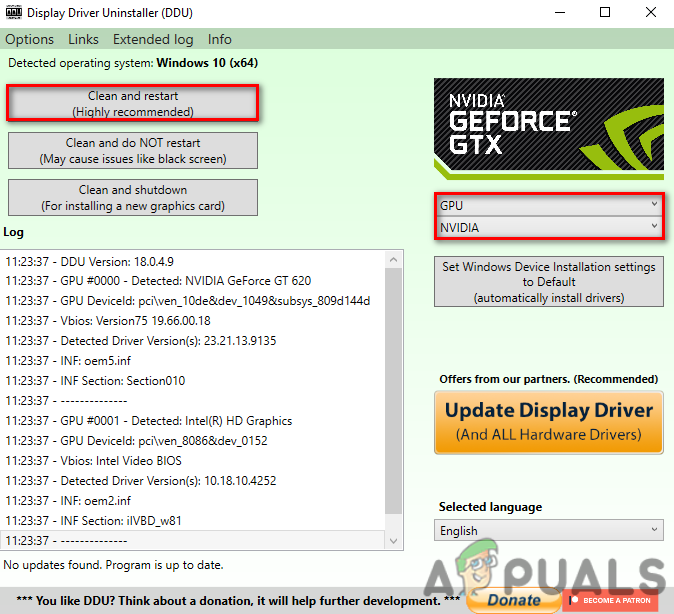
Note: You can also remove the drivers in Safe Mode as DDU recommends it. For that, visit this on How to Enable Safe Mode. - Select the Device Type and its vendor from the right side
- Then, click Clean And Restart to start the process.
3.2 Install Audio Driver
After uninstalling the audio driver, you now need to download the latest audio driver. Although you can use Device Manager for this process, we recommend downloading the driver from the manufacturer’s website. We also prefer downloading a motherboard-compatible audio driver as it is recommended by the manufacturers. If you use To do so:
- Press the Windows + R keys together to launch Run Window
- Type msinfo32 and click OK to launch the System Information Window
- Once the Window is opened, note down the motherboards model number
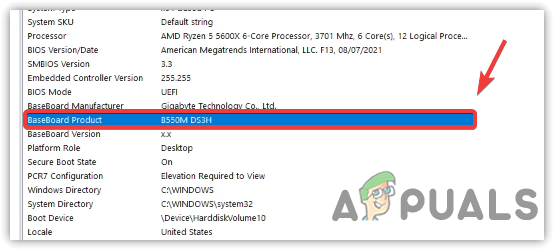
Checking Motherboard Model Number - Now open your favourite browser and search for your motherboard with the model number
- Open the first link or directly go to your manufacturer’s website
- Click the Download icon to download the compatible driver from there
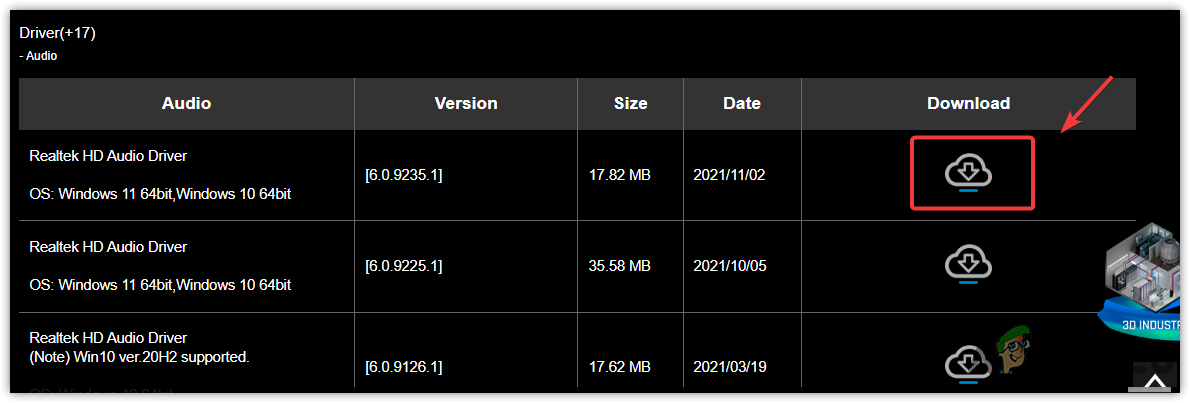
Downloading Audio Driver - Once the driver is downloaded, install it on your computer.
4. Run Audio Troubleshooter
The audio troubleshooter is used to fix the problems related to Playing Audio. To run the audio troubleshooter, follow the steps:
- Launch Settings by pressing the Window + I together
- Now under System, scroll down to the bottom and navigate to the Troubleshooters
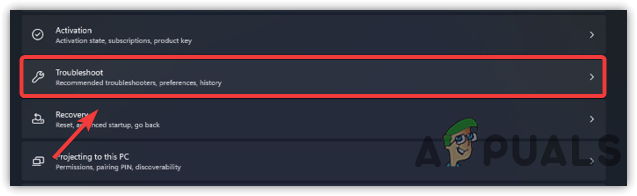
Head to the Troubleshoot - Click Other Troubleshooters

Navigating to Other Troubleshooters - Click on Run on the Playing Audio and select the current audio driver
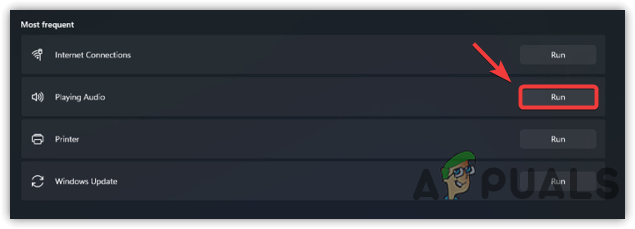
Running Audio Troubleshooter - Then, click Next
Note: If it recommends enabling the Audio Enhancements - Don’t do that, just close the troubleshooter and check if the issue is fixed.
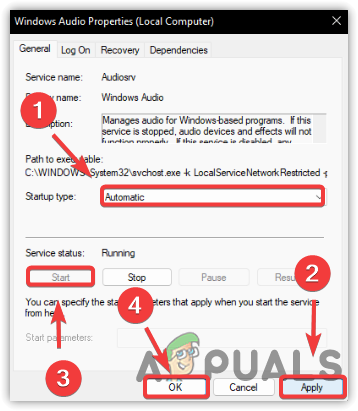
5. Restart the Windows Audio service
Windows audio service is used to control all the connected devices. It is an important service as it is responsible for enabling sound on Windows. If this service is stopped or not working, you will not be able to hear audio from your computer until you enable the service. Here are the steps:
- Click Start Menu and type Services
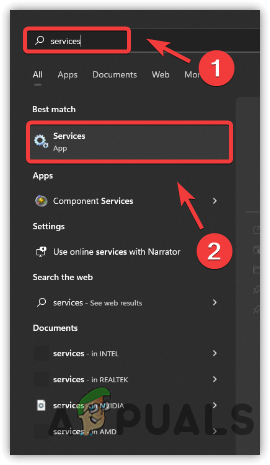
Opening Services Window - Open the Services Window and right-click the Windows Audio service
- Select Properties and change the startup type from Manual to Automatic

Opening Windows Audio Properties - Click Apply and click the Start button, then click to close the Window
Restarting Windows Audio Service - Once done, check if the no sound problem is resolved.
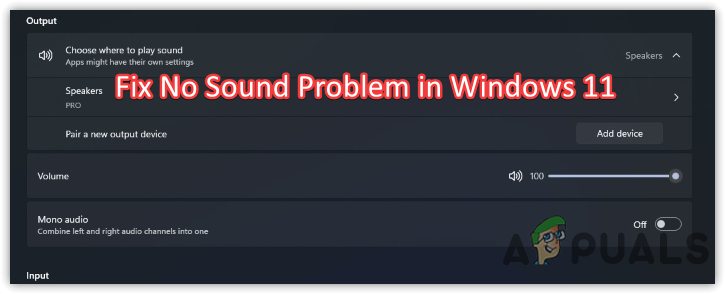
6. Select Correct Output Device
The incorrect output device can also cause this issue because sometimes, we select the wrong output device by mistake, or Windows might automatically detect the wrong output device. Thus, this issue can occur, and to fix this, just select the right output device from the sound settings.
- To do that, click on the speaker icon from the bottom right
- A short panel will open; click the right arrow button to view the list of audio devices
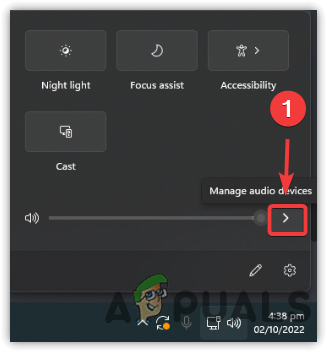
Opening Manage Audio Devices Settings - Make sure the correct output device is selected. If it’s not, select the right device to fix the no sound issue.
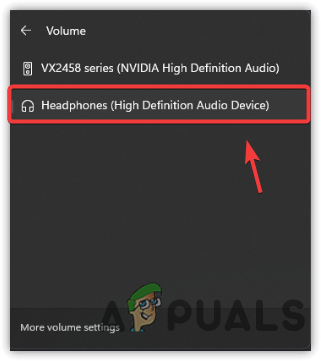
Selecting Correct Output Device
7. Enable Audio Jacks From Motherboard’s Bios Settings
You can enable or disable the audio jacks from the bios settings. It might be possible that your audio jack panel is disabled, so you are facing no sound issues on Windows. If that’s the case, you can easily enable audio jacks by navigating to the bios settings.
However, If you are a sound card user, changing the bios setting will make no difference because the sound card is a separate component with nothing to do with the motherboard’s bios settings.
Despite this, It is possible that your sound card is not working, which is why you cannot hear any sound from your audio device.
- Press the power button to open the computer
- Press the F9, F11 or DEL keys when you see a manufacturer’s logo
Note: If you are not sure which key you should press to enter the motherboard’s bios, go to your manufacturer’s website to learn how you can enter into bios settings. - Once you are in the bios settings, look for the Advanced option to navigate
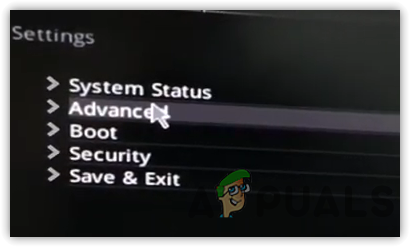
Navigating to Advanced - Then, go to Integrated Peripherals or Chipset Configurations
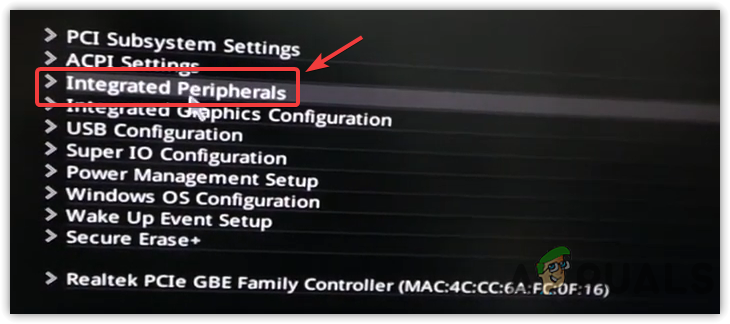
Go to Integrated Peripherals - Here find the option related to audio, such as HD Audio Controller
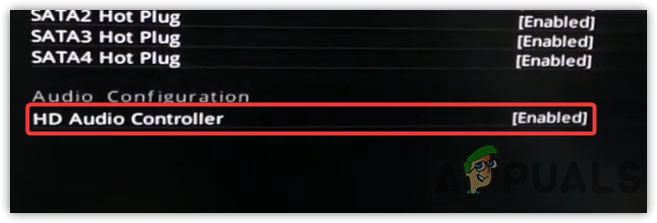
Enabling HD Audio Controller - Once you find it, if the option is disabled, enable it, then save the setting and exit the bios settings
- Now boot your Windows and check if the issue persists.
8. Change Audio Ports
Another possible reason for this issue can be a faulty jack port as sometimes the motherboard stops giving power to the front panel ports due to many factors. Hence, try using back panel audio jacks to ensure the ports work. If the issue does not resolve, keep in mind that the issue might be due to a hardware problem with your headphones or speaker. Before considering buying new headphones, follow the remaining steps.
9. Change Sample Rate
You will likely run into this issue if you use an unsupported sample rate for your headphones or speaker. The common sample rate is between 44 kHz to 48 kHz, you can use these sample rates for your headphone or speaker. In my case, when I selected a high sample rate, I could not hear any sound from my computer. Hence, try lowering the sample rate to the compatible one. Follow the below steps:
- Click Start Menu and type Settings
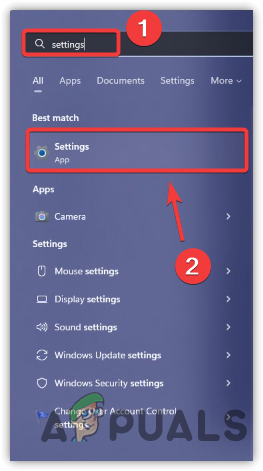
Opening Settings - Launch Settings and navigate to Sounds
Navigating to More Sound Settings - Click All Sound Devices under Advanced
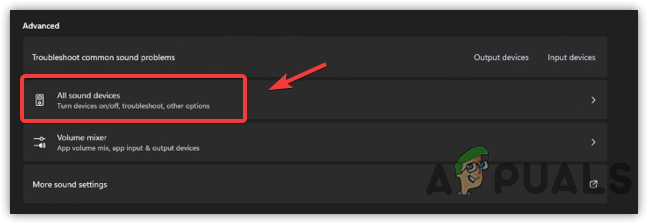
Opening All Sound Devices Settings - Click Speaker under output devices
- Now change the sample rate to lower or between 44 kHz to 48 kHz
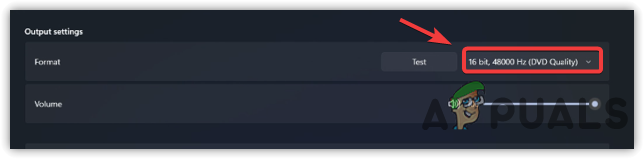
Changing Sound Format - Once done, click on Test and check if the no sound issue is fixed.
10. Try Generic or Old Audio Drivers
After doing all the above methods, and you still face this issue, try switching to the generic audio drivers. Sometimes, even the latest driver installed from the vendors does not work perfectly, and due to that reason, the issue could occur. You can switch to the generic audio driver to fix this issue. Here are the steps:
- Right-click the Start Menu and click Device Manager

Launching Device Manager - Once the device manager is opened, right-click the audio driver, then click Update Driver

Clicking Update Driver - Choose the Browse My Computer For Drivers and then click Let Me Pick From A List Of Available Drivers On My Computer
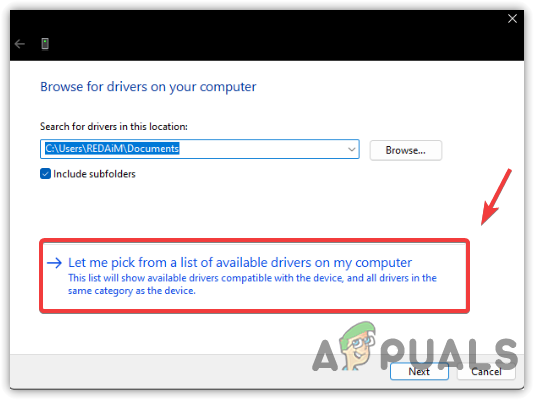
Clicking Let Me Pick From A List Of Available Drivers On My Computer - Now select the generic driver and click Next
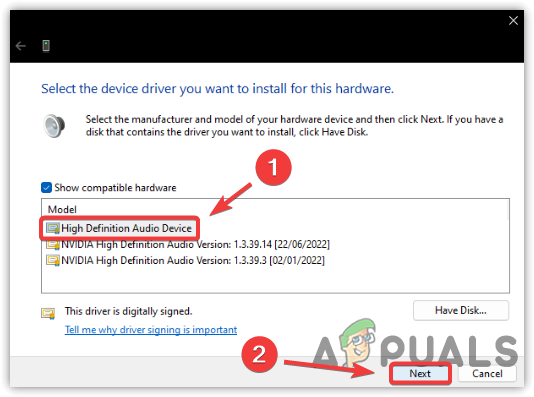
Selecting A Correct Driver - Click Yes when warning message popups
- Once done, check if the issue is resolved
11. Set Speaker As a Default Communication
If you have multiple speaker devices, it is possible that your primary device is not selected as a default communication. You can follow the instructions below to make your primary audio device a default communication. Below are the steps:
- Right-click the Start Menu button and click Settings
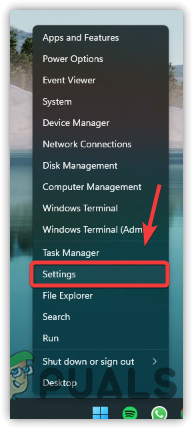
Launching Settings - Go to Sounds and scroll down to the bottom
- Click More Sound Settings

Navigating to More Sound Settings - Right-click the primary audio device and select Set As Default Communication Device
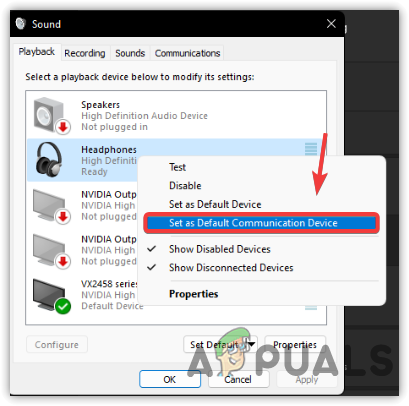
Setting As Default Communication Device - Once done, click Apply and click OK to check if the issue is resolved.
12. Uninstall Third-party Audio Modification Applications/Services
Some third-party applications, such as Voicemod and Equalizers, can install their own custom drivers, and when these applications aren’t working correctly, they can interfere with your main driver causing no audio output issue on Windows.
To counter this, it is recommended to check these applications if you have accidentally disabled your audio from these applications if you can’t able to find any option that is disabling your audio. It is suggested to back up these programs’ settings and uninstall them to check if this resolves the conflict between drivers. If uninstalling these software work for you, try re-installing them and check if the audio is working fine. Here are the steps:
- Press the Win + R to open the Run Window
- Type Appwiz.CPL and click OK
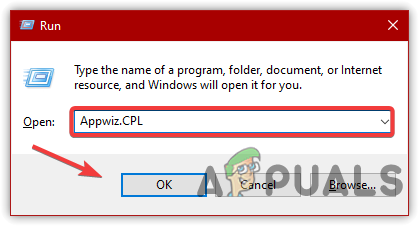
Launching Programs & Features Window - Now right-click the audio modification application and click Uninstall
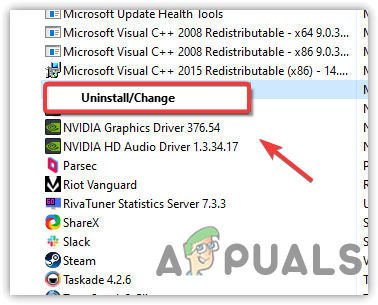
Uninstalling Application - Once done, check if the no audio issue is fixed.
If all else fails to fix this issue, you can try more methods by visiting this article on No Speakers or Headphones are Plugged In.