How to Fix Minecraft Error ‘Failed to Write Core Dump’ on Windows 10
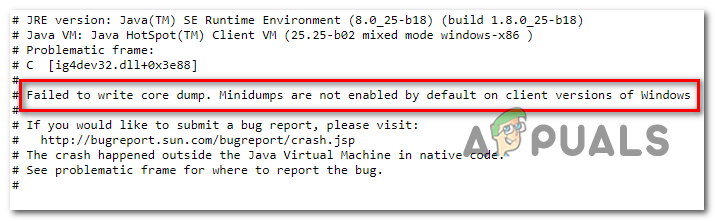
Some Windows 10 users are encountering the ‘Failed to write core dump. Minidumps are not enabled by default on client versions of Windows‘ error when attempting to join or create a server. This error is occurring with various different Minecraft builds.
If you’re running the game with an integrated Intel graphics card, it’s likely that the error is triggered by a Dynamic Link Library file (ig9icd64.dll). In this case, you should be able to fix the issue by using the Intel Update Assistant utility to install the latest drivers compatible with the integrated GPU.
On the other hand, if you’re using a high-end Nvidia GPU, you might need to force Vsync and Triple buffering directly on javaw.exe in order to make the game run in a stable matter.
In case you’re using an AMD card, try reinstalling the Catalyst or AMD Software. A partially corrupted installation might be facilitating the apparition of this issue.
Updating to the latest Intel Graphics Card Driver (if applicable)
If you’re using an integrated Graphics card supplied by Intel, chances are you’re dealing with an issue originating from the ig9icd64.dll. This file belongs to the OpenGL Driver for Intel Graphics Accelerator.
In case this scenario is applicable to your current situation, you will be able to fix the issue by updating the entire set of Graphics drivers using the Intel Update Assistant utility.
A lot of affected users that were previously unable to join and create Minecraft servers have confirmed that this operation finally made the game stable.
Here’s a quick guide on updating your Intel Graphics drivers to the latest version:
- Visit this link (here) and click on the Get Started button.

Starting the Intel Auto-Update utility - After you do this, wait until the initial scan is complete. Once the process is finished, click on the Download All button and wait for the download to complete.
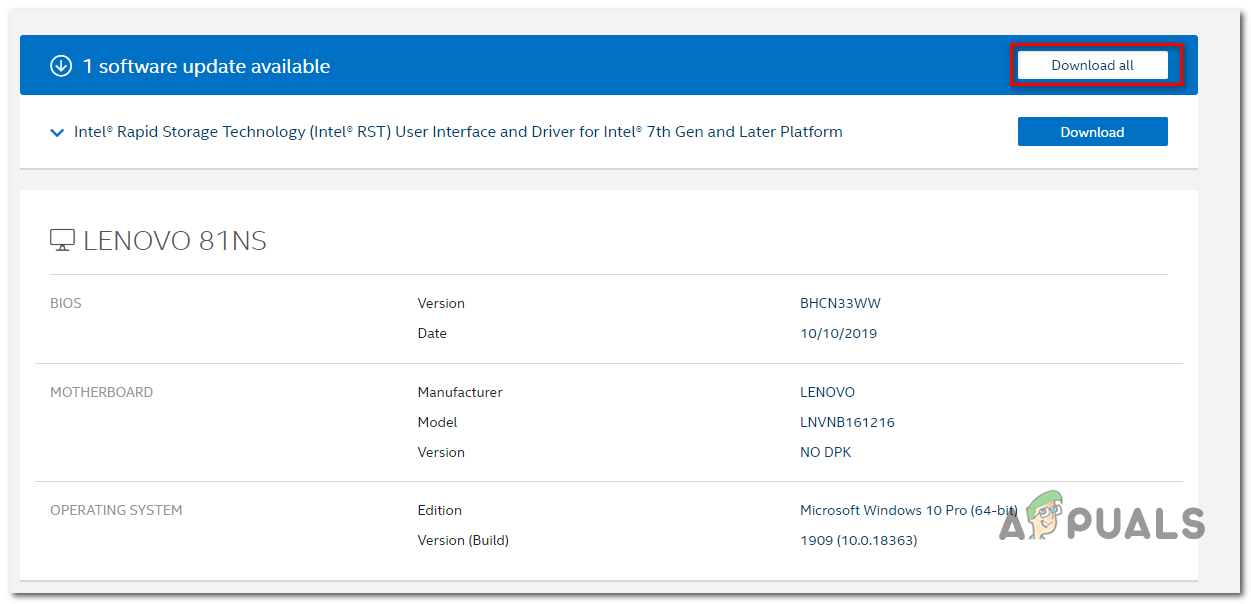
Downloading every compatible Intel driver update - Once every download is complete, double-click on each installation executable and follow the on-screen prompts to complete the driver installation.
- After you manage to install every new update, restart your computer and see if the ‘Failed to Write Core Dump’ is resolved by trying to join or create a Minecraft server.
Forcing Vsync & Triple Buffering on Minecraft (Nvidia Only)
If you’re using a medium to high-end Nvidia GPU, it’s very likely that you’re seeing the ‘Failed to Write Core Dump’ error due to the fact that your current graphics card settings are not enforcing VSync when you’re playing Minecraft.
This setting can also be enforced from the Game settings, but the ideal way to do it is from the Nvidia Control Panel. In order to fix the issue, you will need to navigate to your Java path and add Javaw.exe to the list of managed items.
After you do this, you can force the two settings to be used by every program that makes use of Javaw.exe (including Minecraft).
Here’s a quick step-by-step guide on enabling VSync and Triple Buffering from the Manage 3D Settings menu of Nvidia Control Panel:
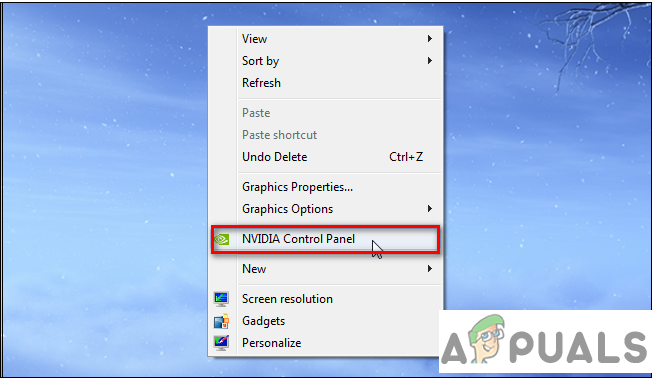
- Right-click on an empty space on your desktop and click on Nvidia Control Panel from the newly appeared context menu.
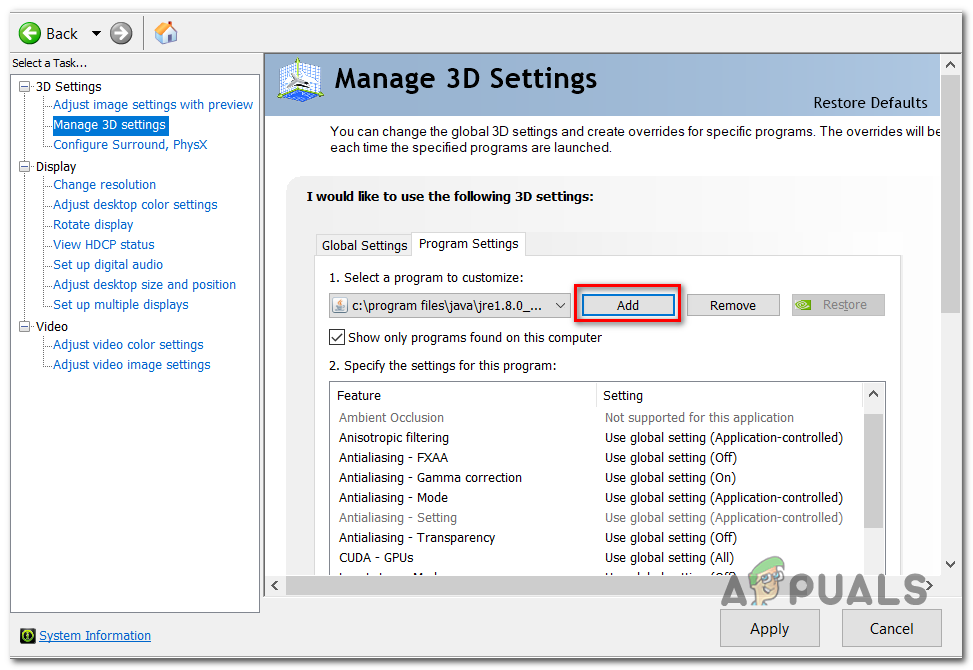
Access Nvidia Control Panel. - Once you’re inside Nvidia Control Panel, use the left-hand menu to select Manage 3D settings (under 3D Settings).
- Next, move over to the right-hand side menu and select the Program Settings menu. Inside, click on Add > Browse and navigate to the location of your Java installation, select the javaw.exe file and click on Open.
Leading up javaw.exe in Nvidia Control Panel Note: Here’s a list of default locations depending on which Java version you’re using:
Java 7
- C:/Program Files/Java/jre7/bin/
OR
- C:/Program Files (x86)/Java/jre7/bin/

Java 6
- C:/Program Files/Java/jre6/bin/
OR
- C:/Program Files (x86)/Java/jre6/bin/
- Next, once the executable is loaded, scroll down through the list of program settings and locate Vertical Sync and Triple Buffering. Once you see them, use the drop-down menu associated with each one to change the default setting to ON for both.
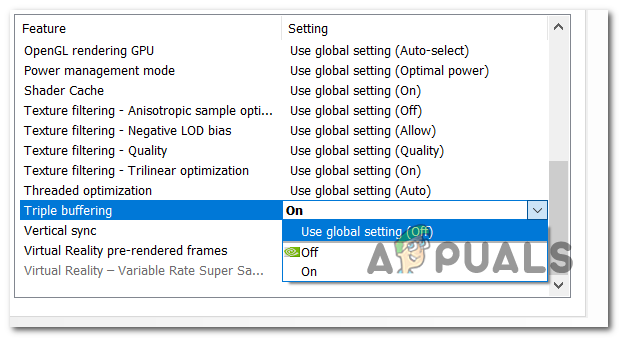
Changing the default Program Settings for both - Once the two settings are enforced, hit the Apply button to make the changes permanent.
- Attempt to join or create a Minecraft server once again and see if the issue is now resolved.
Reinstalling the AMD Catalyst Utility (AMD Only)
If you’re using an AMD GPU, it’s possible that you’re seeing the ‘Failed to write core dump. Minidumps are not enabled by default on client versions of Windows‘ error due to a partially corrupted AMD Software installation.
In case these same circumstances apply to you, you should be able to get the issue fixed by uninstalling your current AMD Software or AMD Catalyst installation and reinstalling the latest version again through the official channels.
Here’s a quick step by step guide that will show you how to do this:
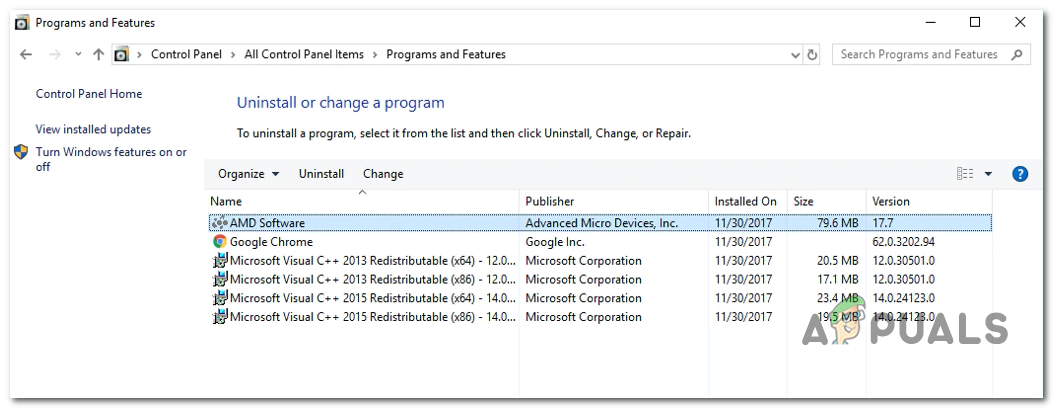
- Press Windows key + R to open up a Run dialog box. Next, type ‘appwiz.cpl’ and press Enter to open up the Programs and Features menu.

Typing in “appwiz.cpl” in the Run prompt - Once you’re inside the Programs and Features screen, scroll down through the list of installed applications and locate the AMD installation that you wish to uninstall. When you locate your AMD installation, right-click on it and choose Uninstall from the context menu.
Uninstalling the AMD Software - At the confirmation prompt, click Ok and follow the on-screen prompts to complete the uninstallation process.
- Restart your computer and wait for the next startup to complete.
- Visit this link (here) and download the latest version of AMD Catalyst. Once the download is complete, open the installation executable and follow the on-screen prompts to complete the installation.
- Once the new version is installed, reboot again and see if the issue is resolved at the next startup by attempting to join or create a Minecraft server.
Try making the Dump File Manually
Sometimes you can try to force Windows to make a dump file through task manager which can potentially fix this issue. You have to follow these steps in order to create a dump file:-
1. Open Minecraft or Minecraft Launcher.
2. Right-click on your Taskbar and then click “Task Manager” (Alternatively you can press and hold Ctrl+Shift+Esc keys together)
3. Once the Task Manager is opened Right-click on “Java(TM) Platform SE Binary” (If you can’t find it simply right click on your “Minecraft Launcher“)
4. Now press the “Create Dump File” Option.
5. Wait till Windows is creating the Dump file for the selected process.
Now restart your computer and try to play Minecraft again.


Thanks Kevin, your a baller. Hope you get mad bobs and vagene 🙂